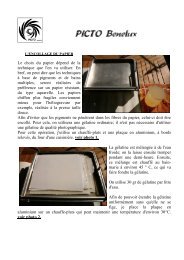
Jean-Claude Mougin (pdf) - Picto Benelux
Jean-Claude Mougin (pdf) - Picto Benelux
Jean-Claude Mougin (pdf) - Picto Benelux

You also want an ePaper? Increase the reach of your titles
YUMPU automatically turns print PDFs into web optimized ePapers that Google loves.
<strong>Jean</strong> - <strong>Claude</strong> <strong>Mougin</strong><br />
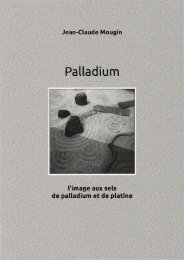
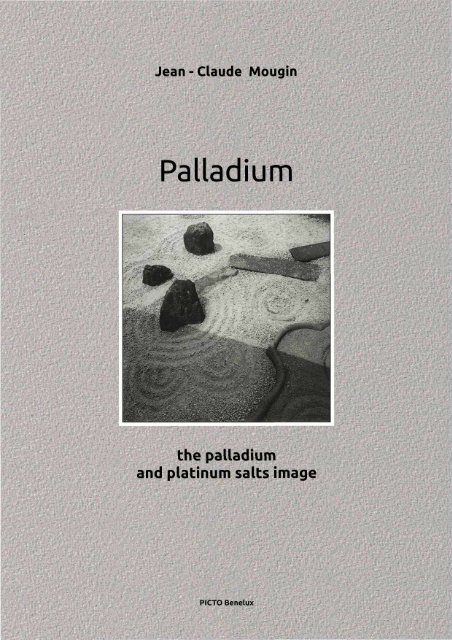
Palladium<br />
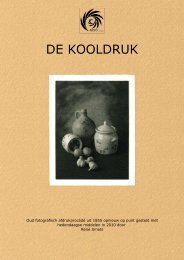
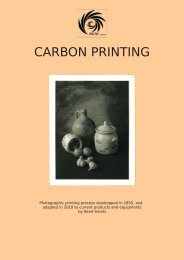
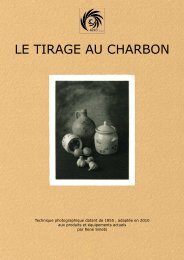
the palladium and platinum salts image<br />
© <strong>Mougin</strong> <strong>Jean</strong>-<strong>Claude</strong><br />
37, rue du Dr Griveaud<br />
71600 Paray-le-Monial<br />
0385816474<br />
jcm.mougin@wanadoo.fr<br />
www.platine-palladium.com<br />
www.platine-palladium.fr<br />
October 2012<br />
<strong>Picto</strong> <strong>Benelux</strong> - Beau Site, Première Avenue 7 - B-1330 Rixensart (Belgique)
The substance of art is not substance<br />
The matter of art is not matter<br />
The subject of art is not the subject<br />
The object of art is not the object<br />
The manner of art is not the manner<br />
Technique in art is technique<br />
Qualities in art are qualities<br />
Ad Reinhardt: Art as Art<br />
2
I - THE OBJECT<br />
3
1. The Words<br />
palladium / pal-la-di-om’ ; also pronounced as pal-la-di-on /.<br />
1. Statue of Pallas considered as a pawn for Troy's conservation. The palladium,<br />
although fallen from heaven, was nothing else than the sacred pawn of Pallas'<br />
protection; through the palladium, it was the goddess that was worshipped.<br />
By extension, name given to various objects which were representing their life<br />
expectancy for some cities or empires. The sacred shield, fallen from the sky<br />
during Numa's reign, was the palladium of Rome and its empire.<br />
In its figurative sense: guarantee, protection. "Civil law is the palladium of<br />
property", Montesq. Espr. XXVI, 15.<br />
2. palladium / pal-la-di-om’ / .<br />
Chemistry term. It designates a rare and lustrous silvery-white metal, very<br />
difficult to melt and quite malleable, discovered by Wollaston in crude platinum<br />
ore, and named with reference to the goddess Pallas.<br />
pallas / pal-lâs /.<br />
1. Term from the Greco-Latin religion, equivalent to Minerva.<br />
Pallas' or Minerva's bird: the owl<br />
Pallas' or Minerva's tree: olive tree created by this goddess<br />
Pallas' or Minerva's fruit: the olive.<br />
2. Planet discovered by Olbers. Its distance from the sun is about 49 million<br />
myriameters, and its orbit completed in 1682 days. It belongs to the telescopic<br />
planets.<br />
3. Variety of tulips. 1<br />
1 : Littré dictionary (French)<br />
4
2. Athena Pallas and the Origin of Art<br />
Homer calls Athena "polymetis", the goddess of many counsels.<br />
What is the meaning of counseling? It means premeditating something, providing<br />
for it in advance and making sure it will succeed. For this reason, Athena reigns<br />
wherever men are producing, updating, implementing or completing something,<br />
wherever they are acting and doing...<br />
Everyone who excels in producing, who is capable, skilled and has an expertise<br />
in its profession is "technites". The way we understand this word when we<br />
translate it by "craftsman" is much too restrictive. Even those who erect<br />
monuments are called "technitaï". This because their action is directed by a<br />
comprehension which bears the name "techne".<br />
The word designates a form of knowledge, not the work or production itself.<br />
Knowledge means: having a clear view from the beginning of what is at stake in<br />
the production of an image or a work of art. The work may as well be a creation of<br />
science , philosophy, poetry or eloquence.<br />
Art is "techne", but not technique.<br />
The artist is "technites", but neither technician, nor craftsman.<br />
Because art as "techne" relies on knowledge, because such a knowledge is a<br />
preliminary beholding of what shows the shape and gives the measure, but still is<br />
invisible and has first to be brought to the visibility and perceptibility of the work<br />
– for these reasons, looking into what hasn't been given yet to be seen singularly<br />
requires a vision and clarity.<br />
This prior vision borne by art needs illumination. By whom could this be given<br />
to art, if not by a goddess who, while being "polymetis" – of many counsels – is also<br />
"glaukopis"? The adjective "glaukos" means the radiant glow of the sea, the stars<br />
and the moon, but also the shimmer of olive trees. The eye of Athena is the eye<br />
which lights and glows. Therefore the owl, "glaux" is attributed to her , as a sign of<br />
her capacity: the owl's eye has not only the intensity of fire, it also crosses the<br />
night and makes visible what would otherwise be "invisible" 1 .<br />
1- Martin Heidegger: La provenance de l’Art et la destination de la Pensée. in “ Les Cahiers de l’Herne “.<br />
(english title: On the Origin of Art and the Destination of Thinking)<br />
5
3. The Idol, the Icon, the Image<br />
Palladium, Pallas, these words remind us that originally, the image is an idol. In<br />
greek, ” eidôlon” means image, but above all form, figure, face; in brief “what<br />
looks at us”. Such is the palladium, the antique “xoana” fallen from heaven, and<br />
hidden in the “cella”, the secret of the temple, which cannot be approached<br />
without being paralysed with fear and caught by the sacred. In what is revealed, in<br />
the presence of the invisible, it is the goddess herself who appears,<br />
simultaneously showing up and standing behind. With the idol, the image is the<br />
thing itself.<br />
With Christianity and the Incarnation mystery, the idol becomes icon. The<br />
sacred image is internalized and offered to contemplation. It becomes anagogical,<br />
a way for the soul to go back from the image to its model. "The honor paid to the<br />
icon is transferred to the prototype," said St. Basil. Also, as stated the iconophile<br />
Nicephorus, the icon is "chora tôn achoretôn" an otherness that "gives place" for<br />
being but that cannot contain, an emptiness that can only be filled with light and<br />
divine grace. The image has lost its material reality. It becomes ecstatic. Its reality<br />
lies elsewhere, in a "beyond the visible".<br />
And then the image becomes effect of art, a product of human freedom, as<br />
stated by Kant. This leads to aesthetics judging the artwork, not by itself any<br />
more, but according to its effect on the sensitivity of the beholder, of those who<br />
enjoy it. The next step is the emergence of the figure of the genius, of the creative<br />
artist, "the beloved child of nature"; a full individuality assumed in an ego: "this is<br />
how I see the world." Henceforth the subject, idol or icon, doesn't matter. This is<br />
the beginning of the reign of representation, of the idea, of the concept. Hegel<br />
can announce the death of art.<br />
Evidence of the image's dissolution in representation and concepts, and of art's<br />
death announced over and over again, is given by the reign of pretences and of<br />
the Virtual on the walls of our contemporary art museums as well as on our<br />
screens .<br />
"Everything is art", this slogan which could have been from Duchamp and was<br />
illustrated so well by his "Fountain", finds its counterpoint in the "Merda d'artista"<br />
by Piero Manzoni. Art is nothing, or better "anything". Only remains the genius of<br />
the artist, the idea, the "we could have thought of it before! ". Art has become<br />
empty, empty of objects, and aesthetics a discourse running idle on tasteless<br />
objects devoid of any substance.<br />
Result is that scanned and computerized images pass everywhere on our<br />
screens, making up our images' emptiness with a constant stream of video<br />
recordings. The vacuum's aesthetics meet the vacuousness of our fiction;<br />
constantly duplicated images like mass consumption objects; ready-to-use, predigested,<br />
used forever, obsolete images.<br />
6
4. The Aura<br />
Walter Benjamin was a perfect witness of this disenchanted world, a world of<br />
desolation where the gods have fled, and of the collapse of the sacred. His slogan<br />
is well known: facing the increasing risk of politics aestheticization, it is urgent to<br />
politicize art. Faced with the danger of an imaginary serving the established<br />
authorities, it is important to return to the images their power of changing the<br />
world.<br />
Hence the importance of Benjamin's symptomatic reading of the history of<br />
photography which repeated, in the time span of a century (we are in 1936) and in<br />
a surprising shortcut, several millennia of pictures' history.<br />
This history has three key moments:<br />
1. a golden age, that of the photography primitives, such as the first calotypists<br />
Hill, Bayard, Hugo, and the great portrait painters that were Nadar and Julia<br />
Margaret Cameron. The photographic image shows all the characteristics of the<br />
idol, and the strangeness of its appearance, its "aura".<br />
2. an age of popularisation and industrialization. The image becomes a<br />
commodity (Disdéri) dedicated to a middle class, hungry for "trivial images," in the<br />
words of Baudelaire.<br />
For Benjamin, the return to art for the sake of art advocated by the pictorialists in<br />
response to this popularisation, is only leading to a stalemate . The aura becomes<br />
nothing more than a pretense.<br />
3. Arrives the redeeming moment, the end of the bourgeois illusions. Exits the<br />
picturesque, Atget invents the aesthetics of vacuum, "the crime scene." Exits the<br />
portrait, the "trivial image"; Sanders doesn't create a picture book, but an "atlas of<br />
exercises." Exits photography as art, making room for "art as photography."<br />
4. Finally, the line is clear for the project to politicize art. "Art must unmask and<br />
build." This will be the programme of Moholy-Nagy, Rodchenko or Eisenstein.<br />
Thereby the history of photography at the age of mechanical reproductibleness<br />
actually is the symptom of the world's uniformization and standardization<br />
process, which is a property inherent to all mercantile societies. Its terminus is the<br />
"liquidation of the aura".<br />
The aura of a work is what happens "here" to the work in its beauty. But this<br />
"here" remains inaccessible, because as said by Goethe, "the beautiful is what, in<br />
essence, only remains similar to itself provided it stays veiled". Such is the<br />
weirdness of the work of art, summarized by Benjamin as follows: "What is the<br />
aura, strictly speaking ? A singular frame of space and time: a unique appearance<br />
of the distant, as close as it might be".<br />
Therefore the artwork exists, in its authenticity, in what's giving it the<br />
"authority of the thing" and yet "reality does not allow itself to be reached "<br />
through it. Its dimension is the sacred.<br />
7
"By defining the aura as the unique appearance of the distant, as close as it<br />
might be, we simply transposed into space and time categories a formula<br />
referring to the worship value of the work of art. Distant as opposed to near.<br />
Distance is essentially the unapproachable. As a matter of fact, the main quality of<br />
a worship image is to be unapproachable. By its very nature it is "always far away,<br />
as close as it might be. " it is possible to approach its material reality, but without<br />
prejudice to the remoteness it keeps once appeared".<br />
The aura might eventually be wound up with the "age of mechanical<br />
reproductibility", when objects lose their character of things and become<br />
merchandise. Without mystery and uniqueness, they are exposed and moved<br />
around, as they are designed to be appropriated and consumed. "In front of a<br />
painting, the onlooker never gets satiated, while photography is rather like food<br />
that soothes the hunger, like beverage that quenches thirst".<br />
So, what else remains from the earlier world, if not the image of a world that<br />
Baudelaire describes as "veiled by nostalgia's tears".<br />
This yearning for pictures was experienced by Benjamin when looking at<br />
Octavius Hill's photography of New Haven's Fisherwomen, where he felt "that<br />
something impossible to silence, requesting insistently the name of whom lived<br />
there".<br />
But this aura would not have existed without the specific technical approach of<br />
the calotypist. As Brentano, quoted by Benjamin, said: "an 1850's photographer<br />
rises to the challenge of his instrument". He still considered photography as a<br />
"big mysterious experience". Qualified, skillfull and experienced, the<br />
photographer excelled in discovering the secrets of texture, revealing the images<br />
and fixing them forever in the grainy thickness of the paper. The paper negative<br />
was then like a score available to all sorts of interpretations. The image was a<br />
single object, enigmatic in its extreme softness, and in the depth of a third<br />
dimension, that of its presence amongst the fibers of the paper.<br />
Walter Benjamin:<br />
- Short History of Photography<br />
- The Work of Art in the Age of Mechanical Reproduction<br />
- On Some Motifs in Baudelaire<br />
8
5. The World and the Earth<br />
Athena's palladium as well as the "aura" of Benjamin put us on the path of the<br />
origin of art; its roots in the sacred which is the limit of our mortal condition, in a<br />
world that is our residency.<br />
The world, as demonstrated by Heidegger, is the framework gathering those<br />
worldly things: stones, trees, houses, temples, sacred places of worship, herds and<br />
men busy about their business. The setting is the world in which things unfold in<br />
their being of things. It gives the world its image.<br />
In it sings the quartet, the harmony that brings together four in simplicity.<br />
– Land and its free stretch of rocks, sand and water, offering itself as plant<br />
and animal, stay and transhumance for mortals<br />
– The sky and the measurement of the sun, the path of the moon, light and<br />
dusk, the accumulation of clouds and depth of the azure<br />
– The divine and the signs of divinity, their sacred power<br />
– The mortals who in the quartet are those who live and have the custody of<br />
the site: saving the earth and taking care of it, giving free rein to the sky,<br />
and to a fair appreciation of the happy days and seasons, being alert to the<br />
gods' signs, "keeping the mind open for the secret"<br />
In this harmony of the quartet, comes the work of art as object. Quite as the<br />
antique idol, the work of art represents nothing. " The work of art never presents<br />
anything, and this for the simple reason that it has nothing to present, being itself<br />
what initially creates what enters the open for the first time thanks to it". Such is<br />
indeed the mystery of appearing that, in the open, what shows itself stands back<br />
quite at the same time. This conflict is called by Heidegger the "fight of the world<br />
and the earth".<br />
The world in the work of art is what joins, gathers and unifies people in their<br />
history, in their fate. It is what gives its meaning to the work, makes it accessible<br />
to our intelligence, in our desire to understand and to subject it. Because of the<br />
world, the work of art seems bright, obvious to us . It is close.<br />
"Settling a world, the work calls for the earth". The earth is at first the dark<br />
influence of the beginning when the possibilities of the work to come are still<br />
hidden .<br />
It is thereafter the material itself, the marble of the temple, the pigments of<br />
the painting, the metallic thickness of the palladium. The earth is what reaches<br />
the brightness of its appearance in a work, while keeping veiled its secret, because<br />
in the earth something holds on and withdraws and, in its strangeness, remains<br />
inaccessible.<br />
But above this, the earth is the home, the close friend, the regular visitor of our<br />
house. It is the nature where all comes to life, the "phusis" where every thing<br />
9
grows, blossoms and comes to die. But such is the power of Eros, that in a single<br />
day he grows, dies and is reborn. In his desire to procreate in the beautiful, the<br />
artist participates of this " regrowth of the being" for a long time , as for a long<br />
time the alive aspires to the divine, and longs to overcome the death.<br />
" Isn't indeed the initial appearance of man heavy of what is in his own eyes the<br />
initial mystery of birth? Isn't it connecting at the same time this mystery to<br />
eroticism and death?"<br />
Martin Heidegger : Building Dwelling Thinking<br />
The Origin of the Work of Art<br />
Plato : The banquet<br />
Georges Bataille : The Tears of Eros<br />
10
6. The Offshoot<br />
In presence of a devastated world, what is left to us after this progress<br />
through the words, ideas and images, apart from the nostalgia for the origins, the<br />
nostalgia for the aura that knew how to say the nearness of the gods, and finally<br />
this truth, that the work of art is like the living, an object rooted in the darkness<br />
and the withdrawal of the earth?<br />
Can we then hope for a return to the origins? Certainly not, and there will<br />
be no question here to redo images in the old fashion. We know too well the<br />
misguided ways of pictorialism and its impasses.<br />
We should rather be rethinking here the modernity, as a "new twig from<br />
the root", as "rejection" 1 . Rejection of what became worn out, but also offshoot,<br />
in the sense of "regrowth of the being".<br />
The following presentation is not merely technical. Let us remember that<br />
"art is techné but not technique", and that art rests on a knowledge that requires<br />
preliminary looking, like Athena Pallas whose eye shines and glitters.<br />
.<br />
“ And bright-eyed Pallas' self their hands endowed<br />
With more than mortal skill her rarest<br />
works to mould „ 2<br />
1- term borrowed from Hubert Damisch in Art minimal II<br />
(note by translator: in French, "offshoot" and "rejection" translate in one same word "rejet")<br />
2- Pindar: 7th Olympian<br />
11
II - THE TECHNIQUE<br />
Note of the author: the ✌ sign refers to a personal interpretation of the technique discussed<br />
12
1. Historical Background<br />
1803. Wollaston discovers palladium.<br />
1886. Döbereiner realizes the reduction of platinum chloride by light.<br />
1831. The same chemist discovers the light sensitivity of ferric oxalate.<br />
1844. Robert Hunt, in his work " Researches on Light " reports on his experiments<br />
with platinum.<br />
Hunt covered a sheet of paper with a mixture of ferric oxalate and platinum<br />
chloride which were darkening when exposed to light. But he was not able<br />
to discover the principle of its processing for permanency.<br />
1873. William Willis, son of a famous English engraver, works out the process.<br />
Three patents for a platinotype process were successively granted to him:<br />
British Patents of June 5th, 1873; August 20th, 1878 and August 15th, 1880.<br />
1880. Willis founded the Platinotype Company marketing his platinum paper in<br />
England. The Willis & Clements company from Philadelphia distributes it in<br />
the United States. From 1911 onwards, those two companies are selling up<br />
to 15 types of papers.<br />
1882. Giuseppe Pizzighelli and Arthur Baron Hübl, two Austrian Army officers,<br />
describe a manual method enabling photographers to prepare their own<br />
paper. Their dissertation incurred the wrath of the Platinotype Company<br />
which will try to disconsider their formulae. Il will be translated<br />
successively into English and French and even today, it is still considered<br />
a reference.<br />
1883. Creation of the Platino-Union in Austria. Platinum papers platinums are<br />
subsequently marketed by Ilford Company and Hesekiel in England, Gevaert<br />
in Belgium, Hesekiel Jacoby in Germany, American Aristotype Co., Ansco<br />
and Kodak in the United States.<br />
Nevertheless the platinotype wasn't quite successful in France where the<br />
photographers used to prefer the carbon, Artigue and Fresson processes.<br />
Famous photographers adopted the platinotype process, such as: Frederik<br />
Evans, Emerson, Stieglitz, Steichen, Coburn, Strand, Weston, Tina Modetti,<br />
and Manuel Álvarez-Bravo.<br />
1914. From this date, the platinum rates are skyrocketing, until reaching five<br />
times the value of gold, which results in a gradually decreasing demand for<br />
these papers.<br />
1916. The Platinotype Company introduces a cheaper palladium paper, the<br />
"palladiotype", as well as a silver-platinum based paper.<br />
1916. Kodak stops the manufacturing platinum paper.<br />
1937. No platinum paper is imported in the United States any more.<br />
1941. Production is stopped in Great Britain.<br />
1990. Creation of the Palladio Company in the United States, marketing a paper<br />
sensitized with platinum related metals.<br />
13
2. The Revival of the Process<br />
Over recent years, the platinum and palladium processes are reviving, for<br />
following reasons:<br />
1. The disappearing of quality bromide and chlorobromide papers, replaced<br />
by resin coated papers of questionable aesthetic quality<br />
2. The arrival of photography on the art market. Due to its permanence<br />
qualities, its matt appearance similar to that of engravings, its unrivaled<br />
physical presence, its "tactile" aspect, its rendering of an extremely broad<br />
range of shades, and a big variety of colors, the platinum-palladium image<br />
increasingly becomes essential as the process of reference and is<br />
considered a significant bonus by galleries and collectors.<br />
3. The simplicity and the flexibility of the process. It is accessible to any<br />
photographer having good darkroom skills. It suits an important range of<br />
supports, of papers with various textures. It allows to produce images in a<br />
broad range of contrasts and colors.<br />
Luis Nadeau: History and Pratice of Platinum Printing<br />
14
3. Summary Description<br />
Palladium and platinum salts are not photosensitive, and therefore have to be<br />
combined with ferric oxalate which is light sensitive.<br />
The mixture is coated with a brush on a good quality paper. This can be done<br />
under tungsten light without any problem, as the ferric oxalate is sensitive only to<br />
ultraviolet rays.<br />
After drying, the negative is contact printed on paper under the sun or under a<br />
U.V. lamp.<br />
The action of the light transforms the ferric oxalate in ferrous oxalate.<br />
After exposure, the image is developed in a bath of ammonium citrate or<br />
potassium oxalate. These substances dissolve the ferrous salts and reduce<br />
palladium or platinum salts to a metallic state. The image, hardly visible after<br />
exposure, appears almost immediately when immersed into the developing bath.<br />
The ferrous salts remaining in the paper and giving it a yellow stain are<br />
dissolved in a bath of diluted hydrochloric, oxalic or citric acid.<br />
The image is finally washed in order to eliminate all acid substances, and dried.<br />
It is now entirely formed by palladium or by platinum which are stable metals. The<br />
permanence of such an image therefore equals that of its support.<br />
The process has nevertheless a limitation. It is not possible to print an enlarged<br />
image. Unless using large format negatives, negatives at the size of the final print<br />
have to be made in the darkroom.<br />
The formulae<br />
U.V.<br />
Ferric oxalate ----------------------------> ferrous oxalate<br />
Fe2 (C204)3 ----------------------------> Fe (C204)<br />
Ferric oxalate<br />
+Sodium Chloropalladite } { --------><br />
Ferrous oxalate<br />
+Iron chloride<br />
+Potassium chloride<br />
+Palladium metal<br />
6Fe(C2O4)<br />
+ 3Na2PdCl4<br />
} { 2Fe 2(C2O4)3<br />
--------><br />
+ 2(FeCl3)<br />
+ 6KCl<br />
+ 3Pd<br />
15
4. The Negative<br />
4.1. Large format negatives<br />
For platinum - palladium printing, it is necessary to start from a negative<br />
having the size of the final positive print. It would therefore be ideal to use a large<br />
format camera, providing 4"x5", 5"x7" or 8"x10" negatives for instance.<br />
When doing so, it is advisable to process the film in order to get a contrasty<br />
negative, necessary to provide details in the highlights, and dense enough to<br />
preserve details in the shadows. For an optimal rendering of the tonal range in a<br />
subject, the negative density range from shadows to highlights should be<br />
somewhere between 1.3 and 1.5. This corresponds in the Zone System to N+1 or<br />
N+2 negatives. A N+1 negative has a density of about 1.3 and is printed on grade<br />
1 paper. A N+2 negative has a density of 1.5 and is printed on grade 0 paper.<br />
4.2. Measuring the contrast of a negative<br />
Normally, a densitometer should be used, but this unfortunately is an<br />
extremely expensive device. A more affordable means is to use a step wedge such<br />
as the "Kodak Step Tablet #2" or the "Agfatrans", the latter being much less<br />
expensive.<br />
The Agfatrans, Kodak, or Stouffer step wedges are film strips having a<br />
series (usually 21) of progressively and uniformly darker steps, the difference of<br />
density between two steps being 0.15. Their size usually is around 1"or 1/2" x 5"<br />
(13 or 25 x 125 mm); Stouffer also proposes different sizes, such as 4"x5".<br />
AGFATRANS / KODAK TABLET / STOUFFER<br />
N° Density<br />
1 0.05<br />
2 0.20<br />
3 0.35<br />
4 0.50<br />
5 0.65<br />
6 0.80<br />
7 0.95<br />
8 1.10<br />
9 1.25<br />
10 1.40<br />
11 1.55<br />
12 1.70<br />
13 1.85<br />
14 2.00<br />
15 2.15<br />
16 2.30<br />
17 2.45<br />
18 2.60<br />
19 2.75<br />
20 2.90<br />
21 3.05<br />
16
In order to determine the density range that a negative should have for a<br />
specific type of emulsion, the step wedge has to be contact printed on this<br />
emulsion. After the processing and drying of the sample, the density of the first<br />
black step which cannot be differenciated from the previous one is noted. Next,<br />
the density of the last step showing a difference with pure white is noted also.<br />
The difference between both densities indicates the actual density range.<br />
To determine the contrast of a given negative, it has to be contact printed<br />
on a sheet of multigrade paper, side by side with the step wedge, adapting the<br />
exposure until a well-balanced print of the negative is obtained. Its density range<br />
can then be estimated from the step wedge, using the same method as above.<br />
4.3. Various methods for making an enlarged negative<br />
4.3.1 Inversion during the processing of the enlarged positive<br />
• Don Pardoe in “Lumen IV” 1984<br />
• Roger Kockaerts: Procédés Nobles En Photographie<br />
4.3.2. Enlarging the negative to obtain a positive, and finally get a negative<br />
of the required size by contact or enlargement<br />
• Roger Kockaerts: op. cit.<br />
The author gives directions for the processing of three emulsions:<br />
• Gevatone N31p<br />
• Ilford Ortho<br />
• Kodak Commercial Film<br />
Those films do not exist any more. It is possible to use Ilford FP4 sheet film in<br />
complete darkness . The same film has an ortho version that can be handled under<br />
red safelight. Maco Genius Print Film is a continuous tone film, which is also<br />
marketed under various brands, such as Bergger or Freestyle.<br />
5. The Negative: My Method ✌<br />
5.1. Equipment & materials used<br />
• Beseler 45V-XL enlarger w/ dichro 45S color head , Nikon 5,6 /135 mm lens<br />
• Ilford Multigrade IV RC MGD 25 M satin paper<br />
• Ilford FP4 sheet film<br />
• Ilford PQ Universal developer<br />
• a rotary paper processor<br />
• N+1 developed 2.4"x2.4" negatives, for printing on grade 2 paper (or<br />
without filter for multigrade) under a diffuser enlarger<br />
17
5.2. The making of a reference print<br />
Make a print from a chosen negative as usual, with all the corrections you<br />
consider useful.<br />
Process in PQ 1+9, 1 mn 15, at 20°C. This print will be used as a reference. Keep<br />
notes on the opening of the f-stop and time of exposure, for instance 10 seconds<br />
at f16.<br />
5.3. The making of a 4"x5" positive<br />
The positive should be dense and low contrast; more specifically, it should<br />
not have any fully transparent area.<br />
On no account it has to look like a normal slide. The highlights, last clear zone<br />
showing some texture, should have a density of approximately 0.95 (step 7 of the<br />
Stouffer wedge). And the shadows, the darkest zone, a density of 2.15 (step 15 of<br />
the Stouffer wedge).<br />
5.3.1. Exposure<br />
Put in the easel under the enlarger, instead of a variable contrast paper but<br />
under same conditions, a 4"x5" FP4 sheet film, the clearest part above. This has to<br />
be done in total darkness.<br />
Reduce exposure to 1 /4th of the one used for the paper print, for instance 5<br />
seconds at f11 for the example above. Add 200 CY and 200 YE filters, and apply<br />
the same reduction to all correction exposures, if there were any.<br />
5.3.2. Processing<br />
Process the 4"x5" sheet film in a rotary processor, such as the Jobo.<br />
• Pour the developer in the tank and start rotation.<br />
• stop the development after 12 mn by a water rinse<br />
• fix 1 min. in Hypam 1+4 with continuous agitation<br />
• wash, drain, dry<br />
5.4. The making of the final 8"x8" or 8"x10" negative<br />
Set the height of the enlarger so that the negative carrier is at H 303 on the<br />
scale. Enlarge the 4"x5" negative , using T /2 time. The negative should look rather<br />
dense with details in the shadows and a density range between 1.7 and 1.9.<br />
☞ This protocol is given as a rough guide, and should be adapted according to<br />
your own experiments, to take into account possible equipment differences.<br />
18
6. The Paper<br />
6.1. Handmade, machine made<br />
The appearance and the archival qualities of a palladium print depend<br />
heavily on the choice of the paper used as emulsion support.<br />
There are two paper types: handmade or machine made.<br />
The first usually is 100 % rag, made from a pulp (often cotton rags), using a frame,<br />
or mould. The mould is dipped into the wet pulp, shaken to distribute the fibers<br />
and drained of its excess water. The newly formed sheet may be hot pressed or<br />
cold pressed, to obtain a smooth or more or less rough surface. It finally is dried<br />
against blankets or (hot) air dried<br />
The second is made on very rapid running machines producing consistent<br />
quantities of sheets or rolls. It usually is made from sulphite pulp, containing<br />
bleached wood cellulose. It may contain a variable proportion of cotton rags. A<br />
paper with high cotton content has a more or less pronounced ivory tint. An<br />
extrawhite paper is generally of low quality.<br />
6.2. Sides<br />
There is a difference between the two sides of a sheet of art paper. The<br />
reverse side sometimes keeps a slight texture from the felt or cylinder against<br />
which it was pressed. The front side has a smoother surface and a more homogeneous<br />
structure. This difference can be noticed visually, and is even more<br />
recognizeable when the sheet is held to the light.<br />
Some papers have watermarks. Its design is imprinted on the back side of the<br />
sheet, which explains that the trademark appears inverted, when the sheet is held<br />
to the light. Other papers have an embossed mark which allows to identify the<br />
front side.<br />
6.3. Sizing<br />
Sizing a paper improves its surface; substances are added to provide<br />
resistance to the absorption of moisture or to eliminate ink feathering and bleed<br />
through. These substances can be gelatin, starch or synthetic.<br />
Calendered paper were glazed or smoothed by passing between rollers to get an<br />
extremely glossy and smooth surface. This is the case for bristol papers for<br />
instance, which are not adequate for platinum-palladium printing.<br />
6.4. pH – can be measured with a pH pen (Atlantis)<br />
The current preservation standards for papers as well as environment<br />
protection requirements induced changes in paper manufacturing. Basal binders<br />
were substituted for the acid ones, and sometimes papers are buffered with<br />
alkaline substances such as sodium carbonate.<br />
19
These changes are a source of almost insoluble problems. The sensitizing<br />
substances being acid react with the basal support and lead to disastrous results,<br />
in particular with platinum salts which became practically unusable with modern<br />
papers. It is possible to acidify the paper by soaking it for 10 to 20 minutes in a 5%<br />
oxalic acid solution, and finally rinsing and drying it. (Dick Arentz gives more<br />
detailed information for specific papers). A double sizing layer can help also.<br />
6.5. Which paper?<br />
Preference should be given to a paper having good physical qualities and a<br />
high rag content as well as a neutral or slightly acid pH. The paper has indeed to<br />
resist the treatments as well as the repeated or long soakings inherent to the<br />
process, and to guarantee a long life span to the print.<br />
The choice can be influenced by aesthetic criteria. The tint of the paper influences<br />
the final color of the print. Its sizing also: starch gives warmer tones, gelatin<br />
colder.<br />
The smoother papers give sharper images, while textured papers, especially<br />
watercolor papers with "torchon" surfaces rather enhance a pictorialist character.<br />
Usually, rag papers for engraving do not suit. Their sizing is not sufficient and their<br />
alkalinity is too high.<br />
Watercolor papers generally work well, at least when their chemical characteristics<br />
are adequate. Contrast and sharpness might be low; but the "tactile"<br />
aspect of the prints made on such papers is sometimes looked for.<br />
The so-called technical papers, when they are of good quality, give generally very<br />
good results when maximum contrast is what you are looking for. The blacks are<br />
deeper and the sharpness of the image is good. Today however, either they have<br />
disappeared, or they are unusable because of their alkalinity.<br />
6.6. Usable papers<br />
➢ distributed by Bostick & Sullivan<br />
• Cranes Kid Finish has become unusable<br />
• Weston Diploma<br />
• Stonehenge (not tested)<br />
➢ watercolor papers<br />
• Arches satin grain - pads or sheets (has to be acidified)<br />
• Arches Platine, currently the best paper<br />
• Bergger COT-320, very similar to Arches Platine<br />
• Rives BFK, has to be sized and acidified<br />
• Fabriano Artistico, has to be acidified<br />
➢ japanese papers<br />
• japanese papers usually have an acid pH, but are unfortunately quite<br />
absorbent and have therefore to be sized.<br />
20
➢writing papers<br />
• Currently, all writing papers are alkaline. It is possible to find adequate<br />
old papers on Ebay – ream papers or correspondence papers.<br />
➢papers from the Ruscombe Mill, made in accordance with Mike Ware's advice<br />
• Buxton paper, excellent but with a rough texture.<br />
• A new Herschel paper is proposed, which is a linen paper instead of<br />
cotton rag; it is said to be smoother.<br />
7. The Sensitizing Solutions<br />
WARNING :<br />
7.1. Required equipment/products<br />
• a scale with 0,1gr resolution<br />
• 3 brown bottles of 125 cc or more<br />
• ferric oxalate from Bostick and Sullivan<br />
or the ferric oxalate made according to the technique given in my "small<br />
treatise on iron salts" (recipe 3, see further)<br />
• potassium chlorate<br />
and/or a 3 % solution of hydrogen peroxide (10-volume)<br />
and/or a 4 % solution of potassium dichromate<br />
• sodium chloropalladite<br />
or palladium chloride + sodium chloride<br />
• potassium chloroplatinite<br />
7.2. The classic method<br />
The sensitizing solution is prepared from three primary solutions:<br />
1. A solution of ferric oxalate.<br />
2. A solution of ferric oxalate supplemented with an oxidizing<br />
substance the purpose of which is to increase the emulsion's<br />
contrast. The classic formulae use potassium chlorate.<br />
3. A palladium or platinum salt solution.<br />
These solutions have to be prepared with the usual precautions.<br />
Use only glass or plastic containers. Any contact with metal must be banned.<br />
Label the solutions and keep them in a cool, dark place.<br />
21
7.2.1. Preparation of solution #1<br />
• distilled water at 50°C ......................... 55cc<br />
• oxalic acid .............................................. 1gr<br />
• ferric oxalate ......................................... 15gr<br />
This is a 27 % solution of ferric oxalate. This percentage is not critical. Literature<br />
mentions dilutions ranging from 20 to 27 %. These differences have no influence<br />
on the quality of the image.<br />
Dissolving is not easy; it requires constant agitation and patience. Raising the<br />
temperature beyond 50 °C, but below boiling point, will help.<br />
7.2.2. Preparation of #2 palladium solution<br />
• distilled water at 38°C ......................... 55,0cc<br />
• oxalic acid ............................................... 1,0gr<br />
• ferric oxalate ........................................ 15,0gr<br />
• potassium chlorate ............................. 0,3gr<br />
7.2.3. Preparation of #3 platinum solution<br />
• distilled water at 38°C ......................... 50cc<br />
• potassium chloroplatinite .................. 10gr<br />
7.2.4. Preparation of #3a palladium solution<br />
• distilled water at 38°C ......................... 60cc<br />
• sodium chloropalladite ....................... 9gr<br />
7.2.5. Preparation of #3b palladium solution<br />
• distilled water at 38°C ......................... 40,0cc<br />
• sodium chloride ..................................... 3,5gr<br />
• palladium chloride ............................... 5,0gr<br />
22
7.2.6. Fine-tuning for contrast<br />
The print contrast is controlled by adapting the proportions of #1 and #2<br />
solutions according to following formulae:<br />
very contrasty negative: density range 1.8<br />
solution #1 .............................. 24 drops<br />
solution #2 .............................. 0 drops<br />
solution #3 .............................. 24 drops<br />
contrasty negative: density range 1.5<br />
solution #1 .............................. 20 drops<br />
solution #2 .............................. 4 drops<br />
solution #3 .............................. 24 drops<br />
medium contrast negative: density range 1.35<br />
solution #1 .............................. 16 drops<br />
solution #2 .............................. 8 drops<br />
solution #3 .............................. 24 drops<br />
moderate contrast negative: density range 1.2<br />
solution #1 .............................. 12 drops<br />
solution #2 .............................. 12 drops<br />
solution #3 .............................. 24 drops<br />
low contrast negative: density range 1.05<br />
solution #1 .............................. 0 drops<br />
solution #2 .............................. 24 drops<br />
solution #3 .............................. 24 drops<br />
23
7.3. Other methods<br />
7.3.1. Personal method #1 ✌<br />
While solution #1 keeps its qualities for several months, this is not the case<br />
for solution #2. The latter should be discarded after a few days, unless you are<br />
prepared to accept a significant loss in quality, with decreasing contrast and an<br />
indelible yellow veil.<br />
It therefore is preferable to prepare this solution in small quantities and to<br />
increase its potassium chlorate concentration.<br />
Solution #1<br />
• distilled water at 50°C ......................... 55cc<br />
• oxalic acid .............................................. 1gr<br />
• ferric oxalate (*) ......................................... 15gr<br />
(*): use homemade, following recipe 3 in my "small treatise on iron salts"<br />
Solution #2<br />
• solution #1 (see above) ......................... 2,5cc<br />
• potassium chlorate ................................ 0,1gr<br />
Prepare solution #2 the day before use; discard after 2-3 days<br />
For a maximal tone range, it is advised to avoid too soft or contrasty negatives.<br />
This allows to restrict ourselves to only the three following formulae:<br />
contrasty negative: density range 1.5<br />
solution #1 .............................. 23 drops<br />
solution #2 .............................. 1 drops<br />
solution #3 .............................. 24 drops<br />
medium contrast negative: density range 1.35<br />
solution #1 .............................. 22 drops<br />
solution #2 .............................. 2 drops<br />
solution #3 .............................. 24 drops<br />
moderate contrast negative: density range 1.2<br />
solution #1 .............................. 21 drops<br />
solution #2 .............................. 3 drops<br />
solution #3 .............................. 24 drops<br />
24
7.3.1. Personal method #2 ✌<br />
With this more convenient method the oxidizer is introduced in the<br />
developer – and not, as previously, in the emulsion.<br />
This allows to save some potassium chlorate which is an unstable product,<br />
dangerous to manipulate, and difficult to weigh.<br />
Two oxidizers were tested: a 3% hydrogen peroxide solution, and a 4 % potassium<br />
dichromate solution.<br />
Tests completed on Arches Platine paper<br />
very contrasty negative: density range 1.95<br />
potassium oxalate ................. 24 cc<br />
oxidizer .................................... 0 cc<br />
contrasty negative: density range 1.8<br />
ammonium citrate ............... 100cc<br />
oxidizer .................................. 0 cc<br />
potassium oxalate ............... 100 cc<br />
oxidizer .................................. 1 cc<br />
medium contrast negative: density range 1.35<br />
ammonium citrate ............... 100,0cc<br />
oxidizer .................................. 0,5 cc<br />
potassium oxalate ............... 100,0 cc<br />
oxidizer .................................. 1,0 cc<br />
moderate contrast negative: density range 1.20<br />
ammonium citrate ............... 100cc<br />
oxidizer .................................. 1cc<br />
potassium oxalate ............... 100cc<br />
oxidizer .................................. 2cc<br />
low contrast negative: density range 1.05<br />
ammonium citrate ............... 100cc<br />
oxidizer .................................. 2cc<br />
potassium oxalate ............... 100cc<br />
oxidizer .................................. 4cc<br />
For warm tones, process in citrate developer (see below).<br />
Sodium citrate, which is my preferred developer, can be used at t° as low as 7°C.<br />
Contrast increases and tones are colder.<br />
25
8. Sensitizing the Paper<br />
8.1. Required equipment<br />
• one of the papers selected under 6.6<br />
• the prepared ferric oxalate, palladium & oxidizer solutions<br />
• in each 125cc bottle, a 1ml syringe without its tip : 1 ml BD PLASTIPAK or<br />
similar – they will be used as measuring instrument or dropper and stay<br />
permanently with their respective bottles<br />
• cover the syringe's graduations with tape to avoid them to be dissolved<br />
in the solutions<br />
• a graduated set square and a fine pencil ( 0.5)<br />
• various types of tape: Scotch, Tesa Post-it, microporous bandages<br />
• 1 brush similar to Pébéo Orion brush series 9451 (flat brushes made of<br />
yellow polyamide fibre with very fine tips, stainless steel furrule and a<br />
long handle.)<br />
• cover metallic furrule with tape to avoid every metal-emulsion contact<br />
• a plastic or porcelain cup<br />
• a lab wash bottle filled with distilled or mineral (Volvic..) water<br />
• kitchen roll<br />
8.2. Define the borders of the area to be sensitized<br />
Determine an area to be sensitized corresponding to the size of the<br />
negative. If you wish to have straight edges, mark them with pressuresensitive<br />
adhesive tape:<br />
• with Scotch Tape for the "technical" papers<br />
• with Scotch or Tesa tape, without excessive pressure, for Arches or<br />
watercolor papers<br />
8.3. Prepare the iron-palladium mixture<br />
• measure the surface<br />
• multiply this surface expressed in cm² by 4, and divide the result by<br />
1000. The result corresponds to the quantity of emulsion (in cc)<br />
sufficient to cover the delimitated surface :<br />
For instance, in case of a 150 cm² area<br />
150 x 4 = 600 : 1000 = 0,6<br />
corresponding to 0,3 cc of ferric oxalate and 0,3 cc of palladium<br />
• Syringes should be preferred to droppers for measuring those<br />
quantities, as droppers give rather unpredictable results.<br />
• A drop usually is equivalent to 0,05 cc, which means that about 10 drops<br />
are needed for 150 cm2.<br />
26
• Take the ferric oxalate and the palladium from their bottles, mix both<br />
liquids in the cup and replace the syringes, without rinsing, in their<br />
respective bottles. (It is possible to keep the iron-palladium mixture in<br />
one same bottle for one or two weeks).<br />
8.4. Sensitizing the paper<br />
• this stage can be completed under dim tungsten light<br />
• moisten toroughly the brush with the wash bottle<br />
• wipe it toroughly with kitchen roll to get it hardly damp<br />
• dip the tip of the brush in the emulsion<br />
• spread the emulsion from an edge of the paper, without hurry, crossing<br />
the strokes<br />
• holding the brush flat, equalize very delicately<br />
• when finished, rinse the brush and cup with the washing bottle<br />
8.5. Sensitizing timing<br />
• This time is extremely important, especially with technical papers, and<br />
has to be controlled precisely.<br />
• Technical papers are very hard, and the emulsion penetrates the paper<br />
quite slowly. This is in fact a quality; the emulsion remains on the surface<br />
and does not "sink" too much into the paper, which is why these papers<br />
give deep blacks and a high resolution. The risk, however, is that the<br />
emulsion doesn't go at all into the paper and could be washed away by the<br />
developer during the processing. We can then see black streaks coming off<br />
the image.<br />
• Arches Platine requires to be sensitized for 3 minutes. After being<br />
sensitized, the paper shouldn't show any shine. Leaving it for 5 minutes in<br />
the dark allows the emulsion to sink into the paper.<br />
9. Drying the Paper<br />
9.1. Required equipment<br />
• A hair dryer of the 1000w type, with an intermediate heat setting. Avoid<br />
too powerful dryers.<br />
9.2. Drying procedure<br />
This is an important stage, which has to be completed very carefully.<br />
The drying has to be done from the backside, holding the hairdryer a few cm.<br />
away, moving it smoothly, with the heat set on the intermediate position.<br />
27
If the coating comes off in the developer, the procedure has to be adapted. In that<br />
case, after the sensitizing, the paper should be left for 5 minutes, face up and in<br />
the dark (an empty box can be used for this purpose). After this, the print can be<br />
dried from the backside.<br />
• The heat should not exceed 40°C<br />
• 2 min. drying for the front side, 1 min. for the backside<br />
• Dick Arentz recommends to use a damp paper, as for Ziatypes. The<br />
humidity fosters the printing out of the blacks, and shortens the necessary<br />
exposure; this will however cause a self-masking and might prevent from<br />
reaching maximum blacks. I therefore recommend the "dry" method which<br />
allows to obtain maximum Dmax, with darkening continuing deep into the<br />
paper fibers for as long as 2 hours of exposure. Longer exposures would<br />
cause solarization; this might have an aesthetic effect, which would<br />
however hardly be reproducible.<br />
10. Exposure<br />
10.1. required equipment<br />
• Ultraviolet printing light:<br />
✔ HID lamps (metal halide / mercury vapor), such as HPR 125 w Philips<br />
✔ a light box with U.V. tubes<br />
• The HID lamps are twice as actinic at 32cm, than the U.V. tubes at 5cm.<br />
But the light box is more convenient as it produces less heat and easily<br />
allows for even illumination of negatives larger than 5"x7".<br />
• Printing frame, Paterson or other<br />
• Sunglasses, to protect your eyes from ultraviolet rays<br />
• Timing device<br />
10.2. Exposure<br />
The palladium emulsion is sensitive only to ultraviolet light. The print could<br />
be exposed to the sun, but using U.V. printing lights is more convenient.<br />
• position the printing frame with a negative/palladium paper sandwich:<br />
✔<br />
✔<br />
at 5cm from the U.V. tubes<br />
at 30cm from the HID lamp; the lamp requires 5 minutes to reach full<br />
intensity<br />
• Exposure may vary from 10 to 30 min.<br />
• Light sensitivity depends also on the type of paper.<br />
It has to be noted that the exposure is influenced by the type of paper and sizing.<br />
"Cold", gelatin-sized papers, such as Arches, need exposures twice as long as for<br />
starch-sized papers. (see also paragraph 6.6).<br />
28
10.3. Exposure timing<br />
Proceed as usual, making test strips and after processing and drying of the<br />
sample, determining the exposure time and possible corrections.<br />
Those using a densitometer and the Zone System, might have a look at my "Z/S"<br />
document (in French), downloadable for free from www.platine-palladium.com<br />
• First test: unexposed but processed negative; find Standard Print Time (PST)<br />
giving visually maximum black (usually between 15 and 30 minutes).<br />
• Make a test with a 4"x5" Stouffer step wedge; find zone1, film speed and tonal<br />
range for a given processing.<br />
• Measuring with a densitometer a given negative, find how much it is over- or<br />
underexposed, comparing it to the Stouffer step wedge (avoid underexposed<br />
negatives if possible); it is possible to find the printing time without further<br />
testing by adapting the SPT according to the indications of the table below.<br />
H.D. + - H.D. + -<br />
0.05 1.12 0.89 0.32 2.09 0.48<br />
0.06 1.15 0.87 0.33 2.14 0.49<br />
0.07 1.17 0.85 0.34 2.19 0.46<br />
0.08 1.20 0.83 0.35 2.24 0.45<br />
0.09 1.23 0.81 0.36 2.29 0.44<br />
0.10 1.26 0.79 0.37 2.34 0.43<br />
0.11 1.29 0.78 0.38 2.40 0.42<br />
0.12 1.32 0.76 0.39 2.45 0.41<br />
0.13 1.35 0.74 0.40 2.51 0.40<br />
0.14 1.38 0.72 0.41 2.57 0.39<br />
0.15 1.41 0.71 0.42 2.63 0.38<br />
0.16 1.44 0.69 0.43 2.69 0.37<br />
0.17 1.48 0.68 0.44 2.75 0.36<br />
0.18 1.51 0.66 0.45 2.82 0.35<br />
0.19 1.55 0.64 0.46 2.88 0.35<br />
0.20 1.58 0.63 0.47 2.95 0.34<br />
0.21 1.62 0.61 0.48 3.02 0.33<br />
0.22 1.66 0.60 0.49 3.09 0.32<br />
0.23 1.70 0.58 0.50 3.16 0.32<br />
0.24 1.74 0.57 0.51 3.24 0.31<br />
0.25 1.78 0.56 0.52 3.31 0.30<br />
0.26 1.82 0.55 0.53 3.39 0.29<br />
0.27 1.86 0.54 0.54 3.47 0.29<br />
0.28 1.90 0.52 0.55 3.55 0.28<br />
0.29 1.95 0.51 0.56 3.63 0.27<br />
0.30 2.00 0.50 0.57 3.71 0.27<br />
0.31 2.04 0.49<br />
In the table above, the value given in the HD column expresses, in logarithmic values, the density gap<br />
between two negatives, one being the reference; if this difference is positive (your negative is denser<br />
than the reference), the column "+" shows the factor to be applied to the reference's exposure in order<br />
to find the exposure giving a final print with similar values to those of the reference print. If the gap is<br />
smaller (your negative is clearer), the factor of the column "-" has to be used.<br />
29
Example: Reference negative = a Stouffer step wedge, from which the best possible print was made,<br />
based on the necessary test strips. Let's suppose that the final print required an exposure of 15<br />
minutes. Considering a specific step – step 9 for example – we see that this step has a certain density,<br />
say 1.33. In the print made from the step wedge, this density corresponds to a given grey value , close<br />
to the neutral grey of the "Kodak Gray Card".<br />
Take now your negative.<br />
Identify a part of the negative which you would like to see in neutral grey on your final print.<br />
Measuring this part of the negative, you get a density value – let's say 1.63. The difference of your<br />
negative's density with the one of the step wedge is thus: 1.63 - 1.33 = 0.3 (denser) which corresponds<br />
to a correction factor of 2. You will have to expose your print for 15minx2=30min. The same kind of<br />
calculation can be made if you want to get a denser/lighter print.<br />
10.4. Corrections<br />
It is possible to apply some corrections by increasing or reducing the<br />
exposure on certain areas of the print, but these actions can sometimes be quite<br />
time consuming.<br />
It is easier to modify the exposure when using HID lamps instead of a light box, as<br />
exposure time can be reduced significantly by bringing the lamp closer to the<br />
printing frame (the tubes banks being already very close leave less leeway).<br />
Remember that the light intensity is inversely proportional to the square of the<br />
distance from the light source.<br />
11. Processing<br />
The process consists in precipitating metallic palladium with appropriate salts,<br />
mainly potassium oxalate, ammonium citrate, sodium citrate, and sodium acetate.<br />
11.1. The traditional method<br />
With this method, the palladium print is immersed after exposure in a<br />
slightly acidified solution of potassium oxalate. The image appears almost<br />
immediately. Agitate for one or two minutes.<br />
11.2. Developer formulae<br />
potassium oxalate ............................. 500 gr<br />
water, at 50°C or more ............................. 1500 cc<br />
maintain pH at ............................. 5.5 / 6<br />
cold bath (not tested)<br />
potassium oxalate ............................. 500 gr<br />
monobasic potassium phosphate .......... 60 gr<br />
water, at 50°C or more ............................. 1500 cc<br />
maintain pH at ............................. 5.5 / 6<br />
30
Baths to be used at temperatures between 15°C and 20°C<br />
ammonium citrate ............................. 500 gr<br />
water, at 50°C or more ............................. 1500 cc<br />
maintain pH at ............................. 5.5 / 6<br />
sodium citrate ............................. 500 gr<br />
water, at 50°C or more ............................. 1500 cc<br />
maintain pH at ............................. 5.5 / 6<br />
Homebrewers: see chapter III Recipes, §3, 4 and 5<br />
The literature insists on the fact that the developer is considered inexhaustible<br />
and can be used infinitely; it is even said that he would improve in time provided<br />
the pH is maintained at 5.5.<br />
11.3. My personal method ✌<br />
My experience contradicts these facts. Indeed the developer gets loaded with<br />
particles of palladium, but also of ferrous oxalate which in strong concentration<br />
eventually veils the print in an indelible way. It therefore is preferable to use oneshot<br />
baths, which certainly is more expensive, but has the merit to give quality<br />
results. The inconvenience of the price is reduced when you homebrew your<br />
developers. Homebrewers: see chapter III Recipes, §4, 5 and 6<br />
Processing procedure<br />
• use trays with a flat bottom, slightly larger than the print to be processed<br />
• prepare 50 cc of developer for a print up to 8"X10". Check the pH, if<br />
necessary; it should be kept between 5 and 6.<br />
• when working at high temperature, add the oxidizer necessary for contrast<br />
at the last moment, and agitate well to homogenize the solution<br />
• place the print on the bottom of the tray<br />
• pour rapidly the developer on the print, agitate regularly for 1 min. Timing<br />
is not critical, and doesn't cause any increase of contrast<br />
• clarify<br />
11.4. Temperature & contrast<br />
Palladium prints usually are processed at room temperature. Platinum<br />
prints require high temperatures, between 50°C and 100°C, otherwise they will be<br />
grainy.<br />
31
Contrast varies with temperature – increasing at lower temperatures, decreasing<br />
when temperatures get higher. A palladium print can be processed from as low as<br />
7°C up to 100°C with sodium citrate.<br />
11.5. Temperature & color<br />
Temperature influences significantly the color of palladium prints – the<br />
colder the developer (to as low as 7°C), the colder the tone of the print; the<br />
warmer the developer (up to 100°C), the warmer the print tone.<br />
This is less true for platinum prints, which are naturally cold-toned and actually<br />
appreciated for that very reason.<br />
On the other hand, platinum prints require a high temperature, well over 50°C and<br />
up to 100°C, if order to avoid grainy prints. If a very warm developer is used, the<br />
oxidizer has to be added at the last moment, as he will be neutralized by the heat.<br />
11.6. Oxidizer & color: Palladium prints on Arches Platine<br />
• The coldest developer is sodium citrate at 7°C with potassium<br />
dichromate.<br />
• Ammonium citrate with hydrogen peroxide is warmer.<br />
• Potassium oxalate with potassium dichromate gives warm tones, and<br />
even more so hydrogen peroxide.<br />
• It is important to note that color changes can vary significantly,<br />
depending on the brand – and even the batch – of the paper being used.<br />
11.7. pH of the developers<br />
For platinum as well as for palladium prints, it is imperative to have an acid<br />
pH (pH 5-6); with a basal pH, the clearing of the paper will indeed be impossible.<br />
11.8. Platinum or Palladium prints?<br />
• It becomes increasingly difficult to make platinum prints, due to the<br />
excessive alkalinity of modern papers.<br />
• Platinum prints are 2 to 4 times more expensive than palladium prints.<br />
• Platinum prints demand high processing temperatures – 50+°C – if<br />
maximum quality is the objective.<br />
• Platinum prints have problems with oxidizer concentrations above 2%;<br />
at that point, they become quite grainy.<br />
• Platinum prints have less trouble to stand the clearing process.<br />
• Platinum prints are appreciated for their cold tones.<br />
11.9. Platinum tones with palladium salts?<br />
• Typical platinum print tones can be reached when using palladium salts;<br />
you will even get better blacks and contrast.<br />
32
• All paper types can be used provided they are sized with one or two<br />
layers of warm gelatin. Use about same volume as for the emulsion, coat<br />
with brush and heat dry. Gelatin preparation: recipe 2, chapter III.<br />
• It is advised to use Arches Platine paper, processed in sodium citrate<br />
with dichromate at the lowest possible temperature – 7°C or less.<br />
12. Clearing<br />
This manipulation aims at eliminating the ferrous oxalate remaining in the print<br />
after development by means of a very diluted acid: hydrochloric acid, oxalic acid,<br />
citric acid , phosphoric acid or E.D.T.A.<br />
E.D.T.A. (Ethylene diamine tetracetic acid) is the acid recommended and marketed<br />
by Bostick and Sullivan. It is not easy to find it in France, and it is quite expensive.<br />
(Not tested)<br />
12.1. Classic method<br />
• For platinum prints, prepare three baths of diluted hydrochloric acid,<br />
from 0,5 % to 1% , i.e. 5-10 cc of acid by liter<br />
• after development, put the print for 5 minutes in the first bath, agitate<br />
continuously during the first minute, and then 3 or 4 times per minute<br />
• repeat this twice, 5 minutes each time, in 2 fresh baths<br />
12.2. My method ✌<br />
• Prefer oxalic acid to other acids. It is effective, less dangerous than<br />
hydrochloric acid, and it has no effect on the palladium metal<br />
• The concentration is about a coffee spoon or more oxalic acid for 500 ml<br />
of water. Precise weighings are unnecessary<br />
• use water at roughly 50°C. Warm tap water will do<br />
• For Arches Platine, when acid baths stop clearing any further the print<br />
from its ferrous oxalate, use a sodium sulphite bath until clearing is<br />
complete. Concentration is not critical<br />
• Examine the clearing progress by transparence, in front of a window by<br />
daylight. Do not use the acid baths more than necessary, as they might<br />
eventually weaken the image<br />
• A persisting yellow stain might indicate that the paper or developer are<br />
too alkaline, or that the ferric oxalate is too old or polluted<br />
It has to be noted however that this yellow stain was sometimes looked for by the<br />
early platinum printers for its aesthetic qualities, to the detriment of<br />
preservation.<br />
13. Washing, Drying, Finishing – My Method ✌<br />
33
• neutralizing the acids for one or two minutes with some diluted sodium<br />
bicarbonate will be sufficient. For washing, agitate and go through 10<br />
water changes. The mechanical effect of washing too long in the tray<br />
would weaken the image<br />
• Drying can be done at room temperature or with heat<br />
• The prints can be flattened with a dry-mount press, or with the<br />
following technique, which produces superb results: after having<br />
carefully blotted it with a kitchen roll, put the damp print on a glass<br />
sheet. This has to be done carefully, as the damp surface is still fragile.<br />
Make sure it adheres. Fix the edges with Kraft paper tape. Let dry and<br />
finally use a cutter to remove the print. It will be perfectly flat and have<br />
a really nice velvety aspect.<br />
• Retouching can be done as usual, and more specifically with watercolor.<br />
A particularly elegant solution is to rub a still wet test strip in order to<br />
have palladium particles getting off it, and to prepare a mixture with<br />
them for retouching the print while it still is wet.<br />
34
III - THE RECIPES<br />
35
WARNING<br />
The Platino-Palladiotype process involves chemicals which<br />
should be regarded as potentially harmful. It is the<br />
responsibility of everyone who decides to work with these<br />
processes to take all necessary precautions to safeguard<br />
themselves, others, and the environment – and particularly to<br />
keep all the products involved out of reach of children.<br />
• Be careful not to mix incompatible chemicals<br />
• Take all necessary precautions to safeguard the<br />
environment<br />
• Do not discard acids before having neutralized them<br />
• Palladium & platine salts are poisonous, avoid<br />
swallowing or inhalation<br />
• Ferric oxalate is highly toxic by ingestion. Wear a mask to<br />
avoid inhalation<br />
• Oxalic acid is highly toxic<br />
• Potassium oxalate is toxic<br />
• Ammonium & sodium citrates are moderately toxic<br />
• Potassium chlorate is dangerous to manipulate;<br />
explosive when in contact with combustible materials<br />
• Dichromates are poisonous<br />
• Hydrochloric acid is highly toxic and irritating by<br />
inhalation<br />
• Selenium is highly toxic and can be slowly poisining by<br />
accumulation<br />
36
1. Contrast Intensification for Negatives<br />
The following formula, inspired from Ansel Adams' “The Negative” is quite<br />
convenient and allows for a significant increase of contrast.<br />
Agitate a thoroughly washed and fixed negative for one or several minutes in a<br />
solution of Kodak Rapid Selenium Toner diluted 1+3.<br />
Finally, the negative is fixed, washed and dried.<br />
2. Paper Sizing<br />
• Dissolve 20 grams of gelatin in 500cc of water. Let it soak for 10 minutes;<br />
then the mixture is warmed to 45°C and the gelatin starts to melt.<br />
• With a soft pencil, mark the upper edge of the sheet to be sized, and soak it<br />
for 1 min. in the warm solution. Take it out and remove the excess gelatin, if<br />
necessary, by pulling it over the edge of the tray for instance. Hang the sheet<br />
to dry with a clothes peg, pencil mark above. Repeat the procedure, but this<br />
time hang the sheet upside down. If you want to harden the sizing, put the<br />
dried sheet for one minute in a 2.5% solution of formaldehyde (irritating!)<br />
• Sizing always is a tedious activity. It is easier to use a brush to coat the<br />
paper with a warm 2% gelatin solution, or a 1% arrowroot starch mixture<br />
brought to the boil for one minute ✌<br />
3. Making your own Ferric Oxalate<br />
3.1. Making iron hydrate<br />
(based on the works of Pizzighelli and Hübl -1883)<br />
✌ for a complete and detailed description, see my "Short Treatise on Iron<br />
Salts" downloadable from www.platine-palladium.com<br />
3.1.1 Equipment:<br />
• a 0.1gr precision scale<br />
• Iron chloride (Joop Stoop, or suppliers to engraving businesses - 10€ / kg)<br />
• Sodium hydroxide pearls (drugstores, hardware stores)<br />
• a 10 liter bucket<br />
• 3 nylon coffee filters (super markets. replace Melitta-like paper filters)<br />
• 3 one-liter containers to hold the nylon coffee filters<br />
• highly recommended, a Büchner vacuum pump ( about 50$ on Ebay;<br />
search for «buchner pump»<br />
• 10 test tubes (10cc) and their rack<br />
• a hydrometer<br />
37
3.1.2 Procedure<br />
• Heat 500cc of mineral (Volvic) or distilled water to 100°C (212°F).<br />
• Dissolve 50 gr of iron chloride, add slowly (wear protective glasses).<br />
• Add slowly 25 gr of sodium hydroxide (caustic soda); caution: this may<br />
boil & splatter (wear protective glasses).<br />
• Put this mixture in a bucket filled with 10 liter of hot tap water and<br />
leave it to rest for 15 min. (pH14). After 15 min. one can see the iron<br />
hydrate having settled on the bottom.<br />
• Siphon off as much clear water as possible without sucking up the iron<br />
hydrate from the bottom of the bucket: leave 2 or 3 cm of clear water.<br />
• Repeat this operation 5 times until the water has a neutral pH (pH7).<br />
• After a last siphoning off, distribute evenly the brown mass of iron<br />
hydrate between the three coffee filters.<br />
• At the beginning, stir from time to time to accelerate the water draining<br />
from the iron hydrate. Let it drain for at least four hours, but you can<br />
leave it also overnight.<br />
• It is important to eliminate as much water as possible, otherwise the<br />
ferric oxalate solution will be much too diluted. It is easier anyway, if<br />
necessary, to add water than having to remove it.<br />
• A maximum of liquid will be eliminated when using a filtration set<br />
including a Büchner funnel, a filter and a vacuum pump. This kind of<br />
equipment can be found on eBay ( with 250 ml filtration flask) for about<br />
US$50.<br />
• The 7 cm paper filters usually supplied with these sets will need to be<br />
cut down to 5cm in order to fit properly ; a double layer of paper<br />
Melitta-like coffee filters can be used instead. Moisten the filter and<br />
put it on the bottom of the porcelain funnel to block up its holes. Fill the<br />
funnel with iron hydrate mixture and pump to reach the 600 mark on<br />
the pressure gauge. Wait till the gauge returns to zero. Repeat this<br />
twice, or even 3 times. Then start the same cycle with the remaining of<br />
the iron hydrate mixture.<br />
• Take the remaining iron hydrate from the filter; it should have the<br />
consistency of a pasta similar to a rather thick chocolate cream.<br />
3.2 Making ferric oxalate<br />
• Weigh 42 gr of oxalic acid for 100 gr of iron hydrate.<br />
• Mix both ingredients under tungsten light, avoid natural / fluorescent light<br />
• Stir the mixture until it gets liquid.<br />
• Warm to no more than 30° C (86 F), using a bain-marie (double boiler); a<br />
higher temperature would transform the ferric into ferrous oxalate.<br />
• Let stand for one hour in the dark.<br />
• Fill the clarification test-tubes. At the bottom of the bowl there will be<br />
some oxalic acid left: throw it away.<br />
38
• Allow the mixture to settle for at least 4 hours in the tubes. The ferric<br />
oxalate starts to decant as an emerald green liquid, clearly separated from<br />
the iron that wasn’t reduced by the acid.<br />
• Filter the iron oxalate through a funnel having its tip filled with cotton<br />
wool. The Büchner vacuum pump can be reused here to speed up filtering.<br />
• Repeat the filtering several times if necessary, until you get a perfectly<br />
clear liquid.<br />
3.3 Determining the ferric oxalate concentration<br />
The percentage can be read on the specific gravity chart printed below.<br />
This chart shows for example that a gravity coefficient of 1.17 corresponds to a<br />
27 % concentration. The simplest way of measuring this concentration is to use an<br />
hydrometer. A 24 % instead of a 27% concentration will not show any real<br />
difference in the resulting print.<br />
Another way of proceeding is to weigh the same volumes of water and of ferric<br />
oxalate: the ratio between both results has to be 1.174.<br />
When getting a density higher than 1.17, add water. When getting a density lower<br />
than 1.15, as the ferric oxalate cannot be heated without damage, the whole<br />
procedure has to be started over again, and more water has to be extracted in<br />
order to get a less humid iron hydrate.<br />
39
4. Making Potassium Oxalate<br />
• dissolve 220 gr of sodium carbonate in 500 cc of hot water<br />
• dissolve 200 gr of oxalic acid in 500cc of hot water<br />
• Mix both liquids very gradually, as there is a very important gaseous<br />
release – pH 5 to 6<br />
5. Making Ammonium Citrate<br />
• dissolve 120 g of citric acid in 280 cc of water; the container should be in<br />
glass or porcelain. Heat until complete dissolving and add 120 cc of 20%<br />
ammonia. The ammonia sold in drugstores can be used.<br />
• Heat until boiling<br />
• Regulate pH between 5 and 6 through adding either citric acid or<br />
ammonia, as necessary<br />
Richard S. Sullivan: Labnotes<br />
6. Making Sodium Citrate<br />
• dissolve 140 gr of citric acid in 200 cc of hot water<br />
• dissolve 78 gr of sodium carbonate in 200 cc of hot water<br />
• mix together and complete up to 450 cc – pH 5 to 6<br />
Richard S.Sullivan: Labnotes<br />
7. Making a U.V. light box ✌<br />
7.1. Required equipment<br />
• 7 U.V. light bulbs such as Philips TL 20W/ 05<br />
• 14 sockets<br />
• 7 ballasts et 7 corresponding starters<br />
• marine plywood of 3 cm thickness<br />
• colored electrical wire<br />
• drill, screws .....<br />
7.2. Mounting procedure<br />
• On one side of a plywood plate the size of which is adapted to the<br />
length and the width of the light bulbs, screw the 14 sockets in such a way<br />
that the tubes, when mounted, will be side by side and nearly in contact<br />
• Drill the necessary holes to allow the wiring to get trough to the other<br />
side of the plate<br />
• On the opposite side of the plate, screw the ballasts and starters in<br />
staggered rows, so that the ballasts will not be immediately side by side.<br />
• Connect the tubes in parallel.<br />
40
• Follow the sketch below for the wiring.<br />
• Connect respectively all "+" and all "-" wires to a terminal block first, and<br />
then to a switch and a power socket.<br />
• Make a fitting system allowing to modify the printing frame/light bulb<br />
distance from 5 to 10 cm .<br />
• Allow for adequate ventilation of the "electrical side".<br />
8. Resources<br />
<br />
Pharmacies<br />
your pharmacist can provide you with most raw chemicals & other<br />
materials, such as:<br />
• oxalic and citric acid<br />
• sodium and potassium carbonate<br />
• sodium sulphite<br />
• microporous bandages<br />
• 0.5 or 1 ml syringes<br />
Drugstores or chemical dealers/distributors<br />
• oxalic acid<br />
• ammonia<br />
• sodium sulphite, ...<br />
41
Bostick & Sullivan – P.O. Box 2155 - Van Nuys, Ca. 91404 - USA<br />
http://www.bostick-sullivan.com/<br />
• ferric oxalate<br />
• platinum and palladium salts, 3-4 times cheaper than in France<br />
• Stonehenge paper, japanese Kozo paper<br />
• technical books<br />
Payment with credit card. Overseas shipments: ask for USPS International<br />
Airmail; chances are that you will not have to pay for customs duties. Avoid<br />
USPS Express Mail, UPS, Fedex, as you will have to pay for VAT and customs<br />
duties, and to provide an invoice to customes services as well.<br />
Artcraft Chimical<br />
http://www.artcraftchemicals.com<br />
• All chemicals<br />
• The cheapest for palladium chloride. Ships USPS International<br />
Airmail. Quite helpful and knowledgeable – an excellent address!<br />
Stouffer industries<br />
http://www.stouffer.net<br />
• Step wedges & tablets<br />
• Ask for the 4"x5" TP4x5-21 model, ideal for reference tests<br />
<br />
Prophot – 37-39, rue Condorcet - 75009 Paris, France<br />
http://www.materiel-photo-pro.com/<br />
• all photography products<br />
• raw chemicals<br />
<br />
Artista-photo<br />
http://www.artista.fr<br />
• Canson Arches Platine paper<br />
42
Ruscombe Paper Mill<br />
http://www.ruscombepaper.com/<br />
• Buxton and Herschel papers, developed with Mike Ware<br />
El Museu Molí Paperer de Capellades<br />
http://mmp-capellades.net/<br />
• Handmade paper of very good quality, with a slight texture<br />
<br />
Atlantis France<br />
http://www.atlantis-france.com/<br />
• PH pen<br />
43
IV - BIBLIOGRAPHY<br />
44
ABNEY, William Wiveleslie de<br />
ALVAREZ BRAVO, Manuel<br />
ARENTZ, Dick<br />
ARENTZ, Dick<br />
ARNOW, Jan<br />
BOSTICK & SULLIVAN<br />
BOSTICK & SULLIVAN<br />
CHRISTOPHER, James<br />
CLERC, L.P.<br />
CRAWFORD, William<br />
MATHIAS, Jeffrey D.<br />
Platinotype: its preparation and manipulation<br />
Scovill & Adams N.Y. 1896<br />
in Nude: Theory<br />
Lustrum Press, NY, 1979<br />
An Outline For Platinum Palladium Printing<br />
The author, Flagstaff AZ 1990<br />
Platinum & Palladium Printing<br />
Focal Press, 1999<br />
Handbook Of Alternative Photographic Processes<br />
Van Nostrand Reinhold Co, N.Y., 1982.<br />
Platinum Printing Materials<br />
Van Nuys CA,1992.<br />
LUMEN - vol. I to V<br />
A Journal Of Handcoated Photography<br />
Van Nuys, CA<br />
The Book of Alternative Photographic Processes<br />
Delmar Thomson Learning, Albany, NY<br />
La Photographie Pratique<br />
Charles Mendel Paris, 1942.<br />
The Keepers Of Light<br />
Morgan & Morgan, N.Y., 1979.<br />
Guide To Platinum Palladium Photographic<br />
Printmaking<br />
Downloaded from internet 1993<br />
KODAK Encyclopédie de la Photographie, Volume 7<br />
Alpha éditions, 1979.<br />
ENFIELD, JILL<br />
GALINDO, Julio<br />
GLAFKIDES, P.<br />
KOCKAERTS, Roger<br />
Procédés Photo Alternatifs<br />
Eyrolles 2004<br />
Manual de Impresion Para Procesos Antiguos:<br />
Paladio y Platino<br />
Mexico1995<br />
Chimie et Physique Photographique<br />
Paul Montel Paris, 1976.<br />
Procédés Nobles En Photographie<br />
pH7 Bruxelles, 1998.<br />
NADEAU, Luis<br />
The History and Practice of Platinum Printing<br />
Atelier Nadeau, Fredericton, CDN 1986.<br />
45
PARDOE, Don<br />
PIZZIGHELLI, G.& HÜBL, A.<br />
REXROTH, Nancy<br />
RICHARDSON, Carlos<br />
RICE, Ted<br />
SANDERSON, Andrew<br />
SULLIVAN, Richard<br />
Reversal Process, in Lumen IV,<br />
Bostick& Sullivan Van Nuys, 1984.<br />
La Platinotypie<br />
Gauthier-Villars Paris, 1883.<br />
Reprint, <strong>Jean</strong>-Michel Place Paris, 1986.<br />
The Platinotype<br />
Violet Press, Yellow Springs, 1977.<br />
Palladium Printing<br />
Camera Lucerne, 2-1979.<br />
Palladium Printing, Made Easy<br />
Eagle Eye Santa Fe 1994.<br />
Procédés Alternatifs en Photographie<br />
La Compagnie du livre, Paris 2002<br />
Labnotes<br />
Bostick&Sullivan Van Nuys CA, 1982.<br />
SULLIVAN, Richard<br />
The New Platinum Print<br />
& WEESE, Carl Working Pictures Press 1998<br />
TICE, Georges<br />
in Les Joies de la Photographie<br />
Time Life International, 1979.<br />
TICE, Georges Platinum Printing, in Darkroom - volume 1<br />
Lustrum Press N.Y., 1977.<br />
TRUTAT, E.<br />
Les Tirages Photographiques aux Sels de Fer<br />
Gauthier-Villars Paris, 1904.<br />
46
V - TABLE OF CONTENTS<br />
I. THE OBJECT<br />
1. The Words 4<br />
2. Athena Pallas and the Origin of Art 5<br />
3. The Idol, the Icon, the Image 6<br />
4. The Aura 7<br />
5. The World and the Earth 9<br />
6. The Offshoot 11<br />
II. THE TECHNIQUE<br />
1. Historical Background 13<br />
2. The Revival of the Process 14<br />
3. Summary Description 15<br />
4. The Negative 16<br />
5. The Negative: My Method 17<br />
6. The Paper 19<br />
7. The Sensitizing Solutions 21<br />
8. Sensitizing the Paper 26<br />
9. Drying the Paper 27<br />
10. Exposure 28<br />
11. Processing 30<br />
12. Clearing 33<br />
13. Washing, Drying, Finishing – My Method 34<br />
III. THE RECIPES<br />
1. Contrast Intensification for Negatives 37<br />
2. Paper Sizing 37<br />
3. Making your own Ferric Oxalate 37<br />
4. Making Potassium Oxalate 40<br />
5. Making Ammonium Citrate 40<br />
6. Making Sodium Citrate 40<br />
7. Making a U.V. Light Box 40<br />
8. Resources 41<br />
IV. BIBLIOGRAPHY 44<br />
V. TABLE OF CONTENTS 47<br />
47
We would like to thank Mr <strong>Jean</strong>-<strong>Claude</strong> Moulin, who accepted to have his original document<br />
translated and distributed by <strong>Picto</strong> <strong>Benelux</strong>. The general and technical information included really<br />
deserves the widest possible publication.<br />
<strong>Picto</strong> <strong>Benelux</strong> is an informal group, open to everybody in the <strong>Benelux</strong> countries having an active<br />
interest in photographic processes developed from the very beginning of Photography. The aim is to<br />
revisit them, while respecting anyone's creative approach.<br />
http://www.picto.info/<br />
Translation: Jacques Kevers - Oct. 2012 - jacques@kevers.org