108 ON-THE-CAR KWIK-LATHE - Kwik-Way
108 ON-THE-CAR KWIK-LATHE - Kwik-Way
108 ON-THE-CAR KWIK-LATHE - Kwik-Way

You also want an ePaper? Increase the reach of your titles
YUMPU automatically turns print PDFs into web optimized ePapers that Google loves.
SET-UP <strong>ON</strong> <strong>CAR</strong> (continued)<br />
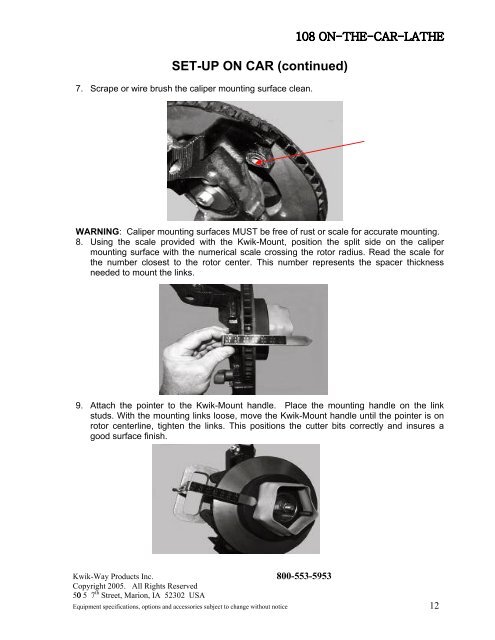
7. Scrape or wire brush the caliper mounting surface clean.<br />
<br />
WARNING: Caliper mounting surfaces MUST be free of rust or scale for accurate mounting.<br />
8. Using the scale provided with the <strong>Kwik</strong>-Mount, position the split side on the caliper<br />
mounting surface with the numerical scale crossing the rotor radius. Read the scale for<br />
the number closest to the rotor center. This number represents the spacer thickness<br />
needed to mount the links.<br />
9. Attach the pointer to the <strong>Kwik</strong>-Mount handle. Place the mounting handle on the link<br />
studs. With the mounting links loose, move the <strong>Kwik</strong>-Mount handle until the pointer is on<br />
rotor centerline, tighten the links. This positions the cutter bits correctly and insures a<br />
good surface finish.<br />
<strong>Kwik</strong>-<strong>Way</strong> Products Inc. 800-553-5953<br />
Copyright 2005. AllRights Reserved<br />
50 5 7 th Street, Marion, IA 52302 USA<br />
Equipment specifications, options and accessories subject to change without notice 12