BAM251TK 25 Litre built in microwave oven with grill - Appliances ...
BAM251TK 25 Litre built in microwave oven with grill - Appliances ...
BAM251TK 25 Litre built in microwave oven with grill - Appliances ...

Create successful ePaper yourself
Turn your PDF publications into a flip-book with our unique Google optimized e-Paper software.
<strong>BAM<strong>25</strong>1TK</strong> <strong>25</strong> <strong>Litre</strong><br />
<strong>built</strong> <strong>in</strong> <strong>microwave</strong><br />
<strong>oven</strong> <strong>with</strong> <strong>grill</strong><br />
<strong>in</strong>g e<br />
1
Welcome to Th<strong>in</strong>k <strong>Appliances</strong><br />
Thank you for select<strong>in</strong>g a quality product from Th<strong>in</strong>k <strong>Appliances</strong>. We have taken the time to<br />
ensure that your appliance is of the highest possible standard and will give you years of use <strong>in</strong><br />
your home.<br />
Please take the time to call our Customer Care centre on our free call number<br />
1800 444 357<br />
To register your 12 months parts and labour warranty (some conditions apply – please refer<br />
to your warranty card for more details).<br />
Our Customer Care centre is there to ensure you get the most out of your appliance. For<br />
example, should you want to learn more about recommended cook<strong>in</strong>g temperatures, the<br />
various cook<strong>in</strong>g functions available, how to set and program your LED clock, and importantly<br />
tak<strong>in</strong>g care of your appliance when clean<strong>in</strong>g, please call us because we are here to help you.<br />
It is important that you read through the follow<strong>in</strong>g use and care manual thoroughly to<br />
familiarise yourself <strong>with</strong> the <strong>in</strong>stallation and operation requirements of your appliance to<br />
ensure optimum performance. Should you have any queries regard<strong>in</strong>g this <strong>in</strong>formation,<br />
please don’t hesitate to contact our Customer Care centre.<br />
We also carry a complete range of spare parts for all Th<strong>in</strong>k products. Please contact our team<br />
at Pronto Parts on 1300 306 973 for all your spare parts requirements.<br />
Aga<strong>in</strong>, thank you for choos<strong>in</strong>g an appliance brought to you by Th<strong>in</strong>k <strong>Appliances</strong> and we look<br />
forward to be<strong>in</strong>g of service to you.<br />
K<strong>in</strong>d regards,<br />
Ruud Jona<br />
Manag<strong>in</strong>g Director<br />
Th<strong>in</strong>k <strong>Appliances</strong>
This appliance is not <strong>in</strong>tended for use by persons (<strong>in</strong>clud<strong>in</strong>g children) <strong>with</strong> reduced physical,<br />
sensory or mental capabilities, or lack of experience and knowledge, unless they have been<br />
given supervision or <strong>in</strong>struction concern<strong>in</strong>g use of the appliance by a person responsible for<br />
their safety.<br />
Children should be supervised to ensure that they do not play <strong>with</strong> the appliance.<br />
IMPORTANT SAFETY INSTRUCTIONS READ CAREFULLY AND KEEP FOR FUTURE<br />
REFERENCE<br />
– WARNING: If the door or door seals are damaged, the <strong>oven</strong> must not be operated until it<br />
has been repaired by a competent person;<br />
– WARNING: It is hazardous for anyone other than a competent person to carry out any<br />
service or repair operation that <strong>in</strong>volves the removal of a cover which gives protection<br />
aga<strong>in</strong>st exposure to <strong>microwave</strong> energy;<br />
– WARNING: Liquids and other foods must not be heated <strong>in</strong> sealed conta<strong>in</strong>ers s<strong>in</strong>ce they are<br />
liable to explode;<br />
– WARNING When the appliance is operated <strong>in</strong> the comb<strong>in</strong>ation mode, children should only<br />
use the <strong>oven</strong> under adult supervision due to the temperatures generated.<br />
– WARNING: Only allow children to use the <strong>oven</strong> <strong>with</strong>out supervision when adequate<br />
<strong>in</strong>structions have been given so that the child is able to use the <strong>oven</strong> <strong>in</strong> a safe way and<br />
understands the hazards of improper use;<br />
– only use utensils that are suitable for use <strong>in</strong> <strong>microwave</strong> <strong>oven</strong>s;<br />
– when heat<strong>in</strong>g food <strong>in</strong> plastic or paper conta<strong>in</strong>ers, keep an eye on the <strong>oven</strong> due to the<br />
possibility of ignition;<br />
– if smoke is observed, switch off or unplug the appliance and keep the door closed <strong>in</strong> order<br />
to stifle any flames;<br />
– <strong>microwave</strong> heat<strong>in</strong>g of beverages can result <strong>in</strong> delayed eruptive boil<strong>in</strong>g, therefore care must<br />
be taken when handl<strong>in</strong>g the conta<strong>in</strong>er;<br />
– the contents of feed<strong>in</strong>g bottles and baby food jars shall be stirred or shaken and the<br />
temperature checked before consumption, <strong>in</strong> order to avoid burns;<br />
– eggs <strong>in</strong> their shell and whole hard-boiled eggs should not be heated <strong>in</strong> <strong>microwave</strong> <strong>oven</strong>s<br />
s<strong>in</strong>ce they may explode, even after <strong>microwave</strong> heat<strong>in</strong>g has ended;<br />
– refer to “Clean<strong>in</strong>g and ma<strong>in</strong>tenance” details for clean<strong>in</strong>g door seals, cavities and adjacent<br />
parts;<br />
– the <strong>oven</strong> should be cleaned regularly and any food deposits removed;<br />
– failure to ma<strong>in</strong>ta<strong>in</strong> the <strong>oven</strong> <strong>in</strong> a clean condition could lead to deterioration of the surface<br />
that could adversely affect the life of the appliance and possibly result <strong>in</strong> a hazardous<br />
situation;<br />
– only use the temperature probe recommended for this <strong>oven</strong> (for appliances hav<strong>in</strong>g a facility<br />
to use a temperature-sens<strong>in</strong>g probe);
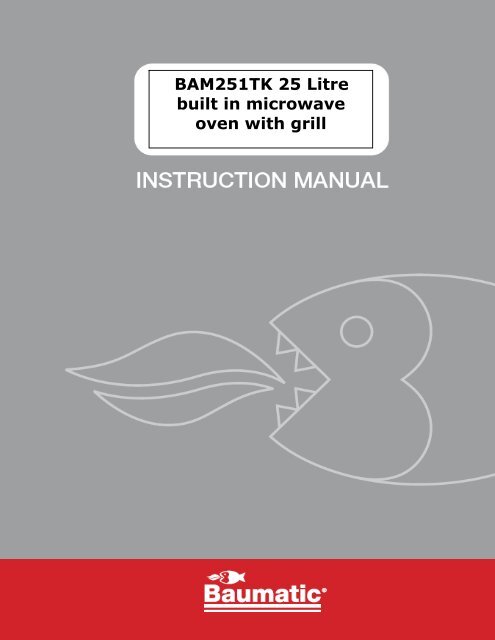
User Manual for your Baumatic<br />
<strong>BAM<strong>25</strong>1TK</strong><br />
<strong>25</strong> <strong>Litre</strong> <strong>built</strong> <strong>in</strong> <strong>microwave</strong> <strong>oven</strong><br />
<strong>with</strong> <strong>grill</strong><br />
NOTE: This User Instruction Manual conta<strong>in</strong>s important<br />
<strong>in</strong>formation, <strong>in</strong>clud<strong>in</strong>g safety & <strong>in</strong>stallation po<strong>in</strong>ts, which will<br />
enable you to get the most out of your appliance. Please keep it<br />
<strong>in</strong> a safe place so that it is easily available for future reference; for<br />
you or any person not familiar <strong>with</strong> the operation of the appliance.<br />
DD <strong>25</strong>/09/09<br />
2
Contents<br />
Environmental note 4<br />
Important safety <strong>in</strong>formation 5 – 9<br />
Specifications 9 - 12<br />
Product dimensions 9<br />
Aperture dimensions 9<br />
Product specifications 9<br />
Description of the appliance 10 - 11<br />
Control panel 11<br />
The turntable 11 - 12<br />
Us<strong>in</strong>g your <strong>microwave</strong> 12 - <strong>25</strong><br />
Sett<strong>in</strong>g the clock 12<br />
Before first use 13<br />
Cook<strong>in</strong>g food (<strong>microwave</strong> mode) 13 - 14<br />
Dur<strong>in</strong>g operation 14<br />
Cook<strong>in</strong>g food (<strong>grill</strong>/<strong>grill</strong> combi mode) 15<br />
Automatic defrost programmes 16<br />
Automatic cook<strong>in</strong>g programmes 17<br />
Sett<strong>in</strong>g multiple cook<strong>in</strong>g phases 18<br />
Sett<strong>in</strong>g a delay start 19<br />
Safety lock 20<br />
Microwave cook<strong>in</strong>g guidel<strong>in</strong>es 21<br />
Materials you can use <strong>in</strong> a <strong>microwave</strong> <strong>oven</strong> 22<br />
Materials not to be placed <strong>in</strong> a <strong>microwave</strong> <strong>oven</strong> 23<br />
Utensils table 23<br />
Defrost<strong>in</strong>g guidel<strong>in</strong>es 24<br />
Defrost<strong>in</strong>g table <strong>25</strong><br />
Clean<strong>in</strong>g and ma<strong>in</strong>tenance 26 - 27<br />
The appliance exterior 26<br />
The appliance <strong>in</strong>terior 26<br />
Rotat<strong>in</strong>g plate and rotat<strong>in</strong>g base 26<br />
General clean<strong>in</strong>g advice 26 - 27<br />
Installation 27 – 31<br />
Electrical connection 28<br />
Aperture and ventilation requirements 29<br />
Install<strong>in</strong>g the <strong>microwave</strong> <strong>in</strong>to the hous<strong>in</strong>g unit 30 - 31<br />
Troubleshoot<strong>in</strong>g 31 - 32<br />
Contact details 33<br />
3
Environmental note<br />
o The packag<strong>in</strong>g materials that Baumatic uses are environmentally<br />
friendly and can be recycled.<br />
o Please discard<br />
environment.<br />
all packag<strong>in</strong>g material <strong>with</strong> due regard for the<br />
4
IMPORTANT SAFETY INFORMATION<br />
Your safety is of the utmost importance to Baumatic.<br />
Please make sure that you read this <strong>in</strong>struction booklet<br />
before attempt<strong>in</strong>g to <strong>in</strong>stall or use the appliance. If you<br />
are unsure of any of the <strong>in</strong>formation conta<strong>in</strong>ed <strong>in</strong> this<br />
booklet, please contact the Th<strong>in</strong>k <strong>Appliances</strong> Advice L<strong>in</strong>e.<br />
General Information<br />
o This appliance is designed for domestic household use. It can<br />
NOT be used as a freestand<strong>in</strong>g <strong>microwave</strong> and must be <strong>built</strong> <strong>in</strong><br />
to a standard kitchen cab<strong>in</strong>et or hous<strong>in</strong>g unit (see the section<br />
entitled “Installation” below).<br />
o You should only operate the appliance when the turntable and<br />
turntable support are <strong>in</strong> position.<br />
o You should only use <strong>oven</strong>ware that is suitable for be<strong>in</strong>g used <strong>in</strong> a<br />
<strong>microwave</strong>.<br />
o To prevent corrosion occurr<strong>in</strong>g due to moisture/condensation,<br />
the cavity and the door of the <strong>microwave</strong> should be wiped dry<br />
after each use of the appliance.<br />
o The appliance must not be left unattended if you are heat<strong>in</strong>g or<br />
cook<strong>in</strong>g food <strong>in</strong> conta<strong>in</strong>ers that are made of paper, plastic or<br />
other flammable materials. If left unattended, they could pose a<br />
fire hazard.<br />
o If you notice smoke com<strong>in</strong>g from the appliance, you should keep<br />
the door of the <strong>microwave</strong> closed and then disconnect it from<br />
your ma<strong>in</strong>s supply. DO NOT use your <strong>microwave</strong> <strong>oven</strong>, if you<br />
th<strong>in</strong>k it is not operat<strong>in</strong>g correctly.<br />
Installation<br />
o<br />
IMPORTANT: Only the <strong>built</strong> <strong>in</strong> <strong>in</strong>stallation sanctioned by<br />
Baumatic and outl<strong>in</strong>ed <strong>in</strong> this manual should be followed.<br />
o<br />
A separate build<strong>in</strong>g <strong>in</strong> kit will be supplied <strong>with</strong><br />
allow you to complete a <strong>built</strong> <strong>in</strong> <strong>in</strong>stallation.<br />
the <strong>microwave</strong>, to<br />
o IMPORTANT: The adjacent furniture or hous<strong>in</strong>g and all<br />
materials used <strong>in</strong> the <strong>in</strong>stallation must be able to <strong>with</strong>stand a<br />
m<strong>in</strong>imum temperature of 85°C above the ambient temperature<br />
of the room it is located <strong>in</strong>, whilst <strong>in</strong> use.<br />
5
o Certa<strong>in</strong> types of v<strong>in</strong>yl or lam<strong>in</strong>ate kitchen furniture are<br />
particularly prone to heat damage or discolouration at<br />
temperatures below the guidel<strong>in</strong>es given above.<br />
o Any damage caused by the appliance be<strong>in</strong>g <strong>in</strong>stalled <strong>in</strong><br />
contravention of this temperature limit, or by plac<strong>in</strong>g adjacent<br />
cab<strong>in</strong>et materials closer than 4mm to the appliance, will be the<br />
liability of the owner.<br />
o For use <strong>in</strong> leisure accommodation vehicles, please refer to<br />
the appropriate <strong>in</strong>formation given <strong>in</strong> the <strong>in</strong>stallation <strong>in</strong>structions<br />
for this appliance.<br />
o The use of this appliance for any other purpose or <strong>in</strong> any other<br />
environment <strong>with</strong>out the express agreement of Baumatic Ltd.<br />
will <strong>in</strong>validate any warranty or liability claim.<br />
o Your new appliance is guaranteed aga<strong>in</strong>st electrical or<br />
mechanical defects, subject to certa<strong>in</strong> exclusions that are noted<br />
<strong>in</strong> Th<strong>in</strong>k <strong>Appliances</strong>’s Conditions Of Guarantee. The forego<strong>in</strong>g<br />
does not affect your statutory rights.<br />
Service<br />
o Your <strong>microwave</strong> complies <strong>with</strong> all relevant safety standards. In<br />
order for it to cont<strong>in</strong>ue to operate safely, only an eng<strong>in</strong>eer that<br />
is approved by the Th<strong>in</strong>k <strong>Appliances</strong> Customer Care<br />
Department should work on the appliance.<br />
o IMPORTANT: It is dangerous for a non qualified person to work<br />
on the appliance, <strong>in</strong> particular if they remove the cover that<br />
provides protection aga<strong>in</strong>st exposure to <strong>microwave</strong> energy.<br />
o If you notice that the door seal, door surfaces, power cord and<br />
plug are damaged. You should stop us<strong>in</strong>g the appliance,<br />
disconnect it from the ma<strong>in</strong>s supply and contact the Th<strong>in</strong>k Ap<br />
pliances Customer Care Department.<br />
o Only genu<strong>in</strong>e Th<strong>in</strong>k <strong>Appliances</strong> spare parts should be fitted to<br />
your appliance. These can be obta<strong>in</strong>ed from the Th<strong>in</strong>k Applian<br />
ces Spares Department.<br />
Warn<strong>in</strong>g and safety <strong>in</strong>structions<br />
o This appliance complies <strong>with</strong> all current European safety<br />
legislation. Th<strong>in</strong>k <strong>Appliances</strong> do wish to emphasise that this com<br />
pliance does not remove the fact that the appliance surfaces<br />
will become hot dur<strong>in</strong>g use and reta<strong>in</strong> heat after operation.<br />
6
o DO NOT place anyth<strong>in</strong>g between the door and the door frame.<br />
o DO NOT store anyth<strong>in</strong>g that is flammable <strong>in</strong>side of the<br />
<strong>microwave</strong>. When it is switched on, the items could catch fire.<br />
o DO NOT switch the appliance on if there is no food or liquid<br />
<strong>in</strong>side of the <strong>microwave</strong>. If you run the <strong>microwave</strong> whilst it is<br />
empty, there is a chance that it will overload.<br />
o The door seals and the door surfaces should ALWAYS be kept<br />
clean and free from debris.<br />
Child Safety<br />
o Baumatic strongly recommend that babies and young children<br />
are prevented from be<strong>in</strong>g near to the appliance and not allowed<br />
to touch the appliance at any time.<br />
o If it is necessary for younger family members to be <strong>in</strong> the<br />
kitchen, please ensure that they are kept under close supervision<br />
at all times.<br />
o IMPORTANT: This appliance should only be operated by adults.<br />
You SHOULD NOT allow young children to use the <strong>microwave</strong><br />
<strong>with</strong>out supervision. Older children should only operate the<br />
appliance if they have been thoroughly <strong>in</strong>structed on how to use<br />
the <strong>microwave</strong> and the consequences of improper usage.<br />
General Safety<br />
o Do not allow electrical fitt<strong>in</strong>gs or cables to come <strong>in</strong>to contact<br />
<strong>with</strong> areas on the appliance that get hot.<br />
o Do not use the appliance to heat the room it is located <strong>in</strong>.<br />
o Do not use the appliance to dry paper, textiles or animals.<br />
o Do not <strong>in</strong>stall the appliance next to curta<strong>in</strong>s or soft furnish<strong>in</strong>gs.<br />
o Do not use the appliance to heat unopened bottles or cans etc.<br />
o Do not heat cook<strong>in</strong>g oil or liquid conta<strong>in</strong><strong>in</strong>g alcohol, as there is<br />
the chance of spontaneous combustion.<br />
o Do not boil eggs or similar foods <strong>in</strong> their shells, otherwise they<br />
may burst. It is possible to poach eggs <strong>in</strong> your <strong>microwave</strong>,<br />
provid<strong>in</strong>g you prick the yolks first.<br />
7
o Do not attempt to lift or move cook<strong>in</strong>g appliances by us<strong>in</strong>g the<br />
<strong>oven</strong> door, as this may cause damage to the appliance or result<br />
<strong>in</strong> <strong>in</strong>jury to the person lift<strong>in</strong>g the appliance.<br />
Clean<strong>in</strong>g<br />
o Clean<strong>in</strong>g of the <strong>oven</strong> should be carried out on a regular basis.<br />
o Great care should be taken whilst us<strong>in</strong>g this appliance and when<br />
follow<strong>in</strong>g the clean<strong>in</strong>g procedure.<br />
o IMPORTANT: The appliance must be disconnected from the<br />
ma<strong>in</strong>s before follow<strong>in</strong>g the clean<strong>in</strong>g procedure.<br />
Installation<br />
This appliance must be correctly <strong>in</strong>stalled by a<br />
suitably qualified person, strictly <strong>in</strong> accordance<br />
<strong>with</strong> the manufacturer’s <strong>in</strong>structions.<br />
o Baumatic Ltd. decl<strong>in</strong>es any responsibility for <strong>in</strong>jury or<br />
damage, to person or property, as a result of improper<br />
use or <strong>in</strong>stallation of this appliance.<br />
o Heat, steam and moisture will be created dur<strong>in</strong>g use of the<br />
appliance, take care to avoid <strong>in</strong>jury and ensure that the room is<br />
adequately ventilated. If the appliance is go<strong>in</strong>g to be used for<br />
prolonged periods of time, then additional ventilation may be<br />
required.<br />
o Please consult <strong>with</strong> your qualified <strong>in</strong>staller if you are <strong>in</strong> any doubt<br />
about the amount of ventilation that you will require.<br />
8
Declaration of conformity<br />
o CE: Appliance conform<strong>in</strong>g to the European directives<br />
89/336/EEC, 93/68/EEC, 73/23/EEC and subsequent revisions<br />
and “RoHS” directive 2002/95/CE.*<br />
o The manufacturer declares that the <strong>oven</strong> is <strong>built</strong> us<strong>in</strong>g certified<br />
materials and requires the appliance to be <strong>in</strong>stalled <strong>in</strong><br />
accordance <strong>with</strong> the standards currently <strong>in</strong> force. This appliance<br />
must be used by a tra<strong>in</strong>ed person for domestic purposes only.<br />
* The RoHS directive stands for “the restriction of the use of<br />
certa<strong>in</strong> hazardous substances <strong>in</strong> electrical and electronic<br />
equipment”. This directive bans the plac<strong>in</strong>g on the EU market of<br />
new electrical and electronic equipment conta<strong>in</strong><strong>in</strong>g more than<br />
the agreed levels of lead, cadmium, mercury, hexavalent<br />
chromium, polybrom<strong>in</strong>ated biphenyl (PBB) and polybrom<strong>in</strong>ated<br />
diphenyl ether (PBDE) flame retardants.<br />
Specifications<br />
Product dimensions<br />
Height:<br />
Width:<br />
Depth:<br />
303 mm<br />
509 mm<br />
392 mm<br />
Aperture dimensions<br />
Height:<br />
Width:<br />
Depth:<br />
360 mm<br />
560 mm<br />
600 mm<br />
Product specifications<br />
o 5 power levels<br />
o Push button control operation<br />
o Safety lock<br />
o Interior light<br />
o LED display<br />
o LED full programmer<br />
o Defrost<strong>in</strong>g by weight mode<br />
o Grill mode<br />
o Sta<strong>in</strong>less steel exterior and <strong>in</strong>terior<br />
o Sta<strong>in</strong>less steel frame<br />
o View<strong>in</strong>g w<strong>in</strong>dow<br />
o Capacity:<br />
<strong>25</strong> litres<br />
o Microwave output:<br />
800 W<br />
9
For future reference please record the follow<strong>in</strong>g <strong>in</strong>formation which can<br />
be found on the rat<strong>in</strong>g plate and the date of purchase which can be<br />
found on your sales <strong>in</strong>voice. The rat<strong>in</strong>g plate for your <strong>oven</strong> can be<br />
located by open<strong>in</strong>g the <strong>microwave</strong> <strong>oven</strong> door and look<strong>in</strong>g on the right<br />
hand side of the chassis and/or on the rear of the appliance.<br />
Model Number<br />
Serial Number<br />
……………………………….<br />
……………………………….<br />
Date of Purchase ……………………………….<br />
Description of the appliance<br />
1) Microwave door<br />
2) Door catches<br />
3) Cavity<br />
4) Slot for rotat<strong>in</strong>g base<br />
5) Rotat<strong>in</strong>g plate<br />
6) Rotat<strong>in</strong>g base<br />
7) Door open button<br />
8) Control buttons<br />
9) LED display<br />
10) Microwave hous<strong>in</strong>g<br />
11) Wave guide cover (see opposite)<br />
10
Control panel<br />
A) Micro power button<br />
(power level button)<br />
B) Grill combi button<br />
C) Preset clock button<br />
(delayed start button)<br />
D) LED display<br />
E) Stop clear button<br />
F) Instant start button<br />
(start button)<br />
G) Auto defrost button<br />
H) Auto cook<strong>in</strong>g<br />
button<br />
I) Time weight button<br />
The turntable<br />
o Never place the rotat<strong>in</strong>g<br />
plate upside down.<br />
o The rotat<strong>in</strong>g plate and<br />
rotat<strong>in</strong>g base MUST always<br />
be used dur<strong>in</strong>g cook<strong>in</strong>g.<br />
11
o All food and food conta<strong>in</strong>ers must ALWAYS be placed on the<br />
rotat<strong>in</strong>g plate dur<strong>in</strong>g cook<strong>in</strong>g.<br />
o If the rotat<strong>in</strong>g plate or rotat<strong>in</strong>g base cracks or breaks, it must be<br />
replaced immediately. Genu<strong>in</strong>e Baumatic parts can be obta<strong>in</strong>ed<br />
from Th<strong>in</strong>k <strong>Appliances</strong>.<br />
Us<strong>in</strong>g your <strong>microwave</strong><br />
Sett<strong>in</strong>g the clock<br />
o When your <strong>microwave</strong> is connected to the power supply, you can<br />
set the clock to the correct time of day.<br />
o The entire LED display will flash and then the “:” symbol on its<br />
own. You should press the preset clock button (C) to set the<br />
time of day. The appliance has a 24 hour clock.<br />
o Press the time weight button (I) and the hour digits will start to<br />
flash. Cont<strong>in</strong>ue to press the time weight button until the correct<br />
hour digit is displayed.<br />
o Press the preset clock button aga<strong>in</strong> to confirm the hour time. The<br />
m<strong>in</strong>ute digits will start to flash. Cont<strong>in</strong>ue to press the time<br />
weight button until the correct m<strong>in</strong>ute digit is displayed.<br />
o Press the preset clock button for a third time to confirm the<br />
m<strong>in</strong>ute time. The digits on the LED display will stop flash<strong>in</strong>g and<br />
the time of day is set.<br />
o If you do not set the time of day, every time you connect your<br />
<strong>microwave</strong> to the power supply, you will need to press the stop<br />
clear button (E) once before you can use the <strong>microwave</strong>.<br />
12
Before first use<br />
o To remove any residue from the <strong>oven</strong> that may have been left<br />
from the manufactur<strong>in</strong>g process, you should place a cup that is<br />
half filled <strong>with</strong> water <strong>in</strong> the <strong>microwave</strong>.<br />
o Set the <strong>microwave</strong> on its highest power level for 2 m<strong>in</strong>utes.<br />
o The <strong>oven</strong> cavity and outside of the appliance should be cleaned<br />
<strong>with</strong> warm soapy water, us<strong>in</strong>g either a sponge or soft cloth. No<br />
abrasive cleaners should be used. The appliance should be<br />
thoroughly dried afterwards.<br />
o We would recommend that an appropriate sta<strong>in</strong>less steel cleaner<br />
and polish is regularly used on the sta<strong>in</strong>less steel surfaces of this<br />
appliance.<br />
Cook<strong>in</strong>g food (<strong>microwave</strong> mode)<br />
o Once the clock has been set, your <strong>microwave</strong> is then ready to<br />
use.<br />
o Use the door open button (7) to open the door of the<br />
<strong>microwave</strong>.<br />
o Check that the rotat<strong>in</strong>g plate and rotat<strong>in</strong>g base are correctly<br />
assembled <strong>in</strong> the cavity.<br />
o Place whatever you are cook<strong>in</strong>g <strong>in</strong> the centre of the <strong>microwave</strong><br />
cavity and then close the <strong>microwave</strong> door. IMPORTANT: You<br />
should make sure that the door of the <strong>microwave</strong> is shut<br />
securely.<br />
o Press the micro power button (A) to set the required power<br />
level, 100P, 80P, 60P, 40P, 20P will appear on the LED display.<br />
LED<br />
Display<br />
Microwave<br />
power<br />
level<br />
Power level<br />
suitable for…<br />
100P Full power (100%) Meat and vegetables<br />
80P Medium/high power<br />
(80%)<br />
Eggs, fish, congee, rice,<br />
soup<br />
60P Medium power (60%) Steam<strong>in</strong>g food<br />
40P Medium/low power (40%) Defrost<strong>in</strong>g food<br />
20P Low power (20%) Keep<strong>in</strong>g food warm<br />
o Once the correct power level is displayed, press the time weight<br />
button (I) to set the cook<strong>in</strong>g time. The maximum cook<strong>in</strong>g time<br />
that can be set is 60 m<strong>in</strong>utes.<br />
13
o Press the <strong>in</strong>stant start button (F) and the <strong>microwave</strong> will start to<br />
heat.<br />
o At the end of the cook<strong>in</strong>g time, your <strong>microwave</strong> will give an<br />
audible signal and the LED display will show the word “END”.<br />
o The audible signal will be repeated every 3 m<strong>in</strong>utes, until the<br />
stop clear button is pressed or the door is opened by press<strong>in</strong>g<br />
the door open button.<br />
o IMPORTANT: The <strong>in</strong>side of the <strong>microwave</strong> and the food that<br />
you have been cook<strong>in</strong>g may be extremely hot. So care should be<br />
taken when remov<strong>in</strong>g items from the <strong>microwave</strong>. We would<br />
recommend that you use an <strong>oven</strong> glove.<br />
o After the food has been removed from the <strong>microwave</strong>, you<br />
should make sure that the door is closed.<br />
Dur<strong>in</strong>g operation<br />
o To <strong>in</strong>terrupt the cook<strong>in</strong>g process to turn or stir the food, press<br />
the stop clear button (E) once.<br />
o Press the door open button (7) to open the door of the<br />
<strong>microwave</strong>.<br />
o Whilst the door is open, it is possible to stir the food stuffs that<br />
you are cook<strong>in</strong>g or adjust its position on the rotat<strong>in</strong>g plate.<br />
o To restart the cook<strong>in</strong>g process, close the door and then press the<br />
<strong>in</strong>stant start button once.<br />
o If you wish to remove the food before the cook<strong>in</strong>g time has<br />
completed, then press the stop clear button twice to cancel the<br />
cook<strong>in</strong>g operation.<br />
14
Cook<strong>in</strong>g food (<strong>grill</strong>/<strong>grill</strong> combi mode)<br />
IMPORTANT: When us<strong>in</strong>g the <strong>grill</strong> and/or <strong>grill</strong> combi<br />
mode, the <strong>in</strong>side of the <strong>oven</strong>, <strong>grill</strong> rack and cook<strong>in</strong>g<br />
conta<strong>in</strong>ers may become extremely hot. YOU MUST use<br />
an <strong>oven</strong> glove when remov<strong>in</strong>g items from the cavity.<br />
o Use the door open button (7) to open the door of the<br />
<strong>microwave</strong>.<br />
o Check that the rotat<strong>in</strong>g plate and rotat<strong>in</strong>g base are correctly<br />
assembled <strong>in</strong> the cavity.<br />
o Place whatever you are <strong>grill</strong><strong>in</strong>g <strong>in</strong> the centre of the <strong>microwave</strong><br />
cavity on the <strong>grill</strong> rack and then close the <strong>microwave</strong> door.<br />
IMPORTANT: You should make sure that the door of the<br />
<strong>microwave</strong> is shut securely.<br />
o There is no need to preheat the cavity when us<strong>in</strong>g any of the<br />
<strong>grill</strong> modes.<br />
o Press the <strong>grill</strong> combi button (B) and the LED display will show G,<br />
C1, C2.<br />
LED<br />
display<br />
G<br />
C1<br />
C2<br />
Description<br />
Grill cook<strong>in</strong>g<br />
only<br />
Grill and<br />
<strong>microwave</strong><br />
cook<strong>in</strong>g<br />
Grill and<br />
<strong>microwave</strong><br />
cook<strong>in</strong>g<br />
Suitable for…<br />
Grill<strong>in</strong>g and brown<strong>in</strong>g th<strong>in</strong> meats, pork,<br />
sausage and chicken w<strong>in</strong>gs.<br />
The <strong>microwave</strong>s will penetrate thicker<br />
food, alternat<strong>in</strong>g <strong>with</strong> the <strong>grill</strong> element,<br />
which will brown and crisp off the food.<br />
As C1, but the <strong>grill</strong> element rema<strong>in</strong>s on<br />
for longer periods of time.<br />
o Once the correct <strong>grill</strong><strong>in</strong>g programme is displayed, press the time<br />
weight button (I) to set the cook<strong>in</strong>g time. The maximum<br />
cook<strong>in</strong>g time that can be set is 60 m<strong>in</strong>utes.<br />
o Press the <strong>in</strong>stant start button (F) and the <strong>microwave</strong> will start to<br />
heat.<br />
o At the end of the cook<strong>in</strong>g time, your <strong>microwave</strong> will give an<br />
audible signal and the LED display will show the word “END”.<br />
o The audible signal will be repeated every 3 m<strong>in</strong>utes, until the<br />
stop clear button is pressed or the door is opened by press<strong>in</strong>g<br />
the door open button.<br />
15
Automatic defrost programmes<br />
o Use the door open button (7) to open the door of the<br />
<strong>microwave</strong>.<br />
o Check that the rotat<strong>in</strong>g plate and rotat<strong>in</strong>g base are correctly<br />
assembled <strong>in</strong> the cavity.<br />
o Place whatever you are defrost<strong>in</strong>g <strong>in</strong> the centre of the <strong>microwave</strong><br />
cavity and then close the <strong>microwave</strong> door. IMPORTANT: You<br />
should make sure that the door of the <strong>microwave</strong> is shut<br />
securely.<br />
o Press the auto defrost button (G) and the LED display will show<br />
d.1, d.2, d.3.<br />
LED display Defrost level<br />
suitable for…<br />
Weight range<br />
(kg)<br />
d.1 Defrost<strong>in</strong>g meat 0.1 – 2.0<br />
d.2 Defrost<strong>in</strong>g poultry 0.2 – 3.0<br />
d.3 Defrost<strong>in</strong>g seafood 0.1 – 0.9<br />
o Once the correct defrost programme is displayed, press the time<br />
weight button (I) to set the weight of the food that you are<br />
defrost<strong>in</strong>g.<br />
o Press the <strong>in</strong>stant start button (F) and the <strong>microwave</strong> will start to<br />
defrost.<br />
o At certa<strong>in</strong> po<strong>in</strong>ts <strong>in</strong> the defrost<strong>in</strong>g process, the <strong>microwave</strong> will<br />
give an audible signal. When this occurs, you should open the<br />
door of the <strong>microwave</strong> and turn the food over.<br />
o To restart the cook<strong>in</strong>g process, close the door and then press the<br />
<strong>in</strong>stant start button once.<br />
o At the end of the defrost<strong>in</strong>g time, your <strong>microwave</strong> will give an<br />
audible signal and the LED display will show the word “END”.<br />
o The audible signal will be repeated every 3 m<strong>in</strong>utes, until the<br />
stop clear button is pressed or the door is opened by press<strong>in</strong>g<br />
the door open button.<br />
16
Automatic cook<strong>in</strong>g programmes<br />
o Use the door open button (7) to open the door of the<br />
<strong>microwave</strong>.<br />
o Check that the rotat<strong>in</strong>g plate and rotat<strong>in</strong>g base are correctly<br />
assembled <strong>in</strong> the cavity.<br />
o Place whatever you are cook<strong>in</strong>g <strong>in</strong> the centre of the <strong>microwave</strong><br />
cavity and then close the <strong>microwave</strong> door. IMPORTANT: You<br />
should make sure that the door of the <strong>microwave</strong> is shut<br />
securely.<br />
o Press the auto cook<strong>in</strong>g button (H) and the LED display will show<br />
A.1 – A.8.<br />
LED<br />
display<br />
Food<br />
group<br />
Cook<strong>in</strong>g guidance<br />
Maximum<br />
weight<br />
A.1 Popcorn Suitable for popp<strong>in</strong>g a bag of corn, 85 g<br />
which are available at supermarkets.<br />
If dur<strong>in</strong>g cook<strong>in</strong>g the popp<strong>in</strong>g speed<br />
slows to once every 1 – 2 seconds,<br />
press the stop clear button to end the<br />
process.<br />
A.2 Popcorn As A.1 100 g<br />
A.3 Pizza Suitable for warm<strong>in</strong>g a piece of<br />
150 g<br />
chilled pizza.<br />
A.4 Beverage Use a cup <strong>with</strong> a large open<strong>in</strong>g and <strong>25</strong>0 ml<br />
DO NOT cover it.<br />
A.5 Beverage As A.4 500 ml<br />
A.6 Potato Cut the potatoes <strong>in</strong>to 5 cm³ pieces. 450 g<br />
Place them <strong>in</strong>to a large dish and put<br />
a suitable <strong>microwave</strong> cover over the<br />
dish.<br />
A.7 Potato As A.6 650 g<br />
A.8 Fish Wash the fish, remove the scales and<br />
make slits <strong>in</strong>to the sk<strong>in</strong>. Place the fish<br />
<strong>in</strong> a shallow dish and then season as<br />
required. Put a suitable <strong>microwave</strong><br />
cover over the dish. After cook<strong>in</strong>g,<br />
stand for 2 m<strong>in</strong>utes.<br />
450 g<br />
o The automatic cook<strong>in</strong>g times are suitable for food that is stored<br />
at room temperature.<br />
o The temperature, weight and shape of the food will all <strong>in</strong>fluence<br />
the f<strong>in</strong>al cook<strong>in</strong>g results. It is possible to adjust the cook<strong>in</strong>g<br />
times to suit personal preference.<br />
17
Sett<strong>in</strong>g multiple cook<strong>in</strong>g phases<br />
It is possible to set the <strong>microwave</strong> to cook at different power levels<br />
<strong>with</strong><strong>in</strong> a s<strong>in</strong>gle cook<strong>in</strong>g time. A maximum number of 4 cook<strong>in</strong>g phases<br />
can be set at once.<br />
o Press the micro power button (A) to set the required power level<br />
for the first cook<strong>in</strong>g phase. 100P, 80P, 60P, 40P, 20P will appear<br />
on the LED display.<br />
o Press the time weight button (I) to set the cook<strong>in</strong>g time for the<br />
first cook<strong>in</strong>g phase.<br />
o It is possible to program a further 3 cook<strong>in</strong>g phases by follow<strong>in</strong>g<br />
the above two steps.<br />
o When you have set the f<strong>in</strong>al cook<strong>in</strong>g phase, press the <strong>in</strong>stant<br />
start button (F) and the <strong>microwave</strong> will start the first cook<strong>in</strong>g<br />
phase.<br />
o When the first cook<strong>in</strong>g phase has completed, it will automatically<br />
move onto the next cook<strong>in</strong>g phase.<br />
o At the end of all of the cook<strong>in</strong>g phases, your <strong>microwave</strong> will give<br />
an audible signal and the LED display will show the word “END”.<br />
o The audible signal will be repeated every 3 m<strong>in</strong>utes, until the<br />
stop clear button is pressed or the door is opened by press<strong>in</strong>g<br />
the door open button.<br />
o After the food has been removed from the <strong>microwave</strong>, you<br />
should make sure that the door is closed.<br />
18
Sett<strong>in</strong>g a delay start<br />
This function will allow you to set a time <strong>in</strong> the future that the<br />
<strong>microwave</strong> will switch on at.<br />
o IMPORTANT: You must make sure that the clock is set to the<br />
correct time before us<strong>in</strong>g this feature.<br />
o IMPORTANT: It is not possible to set a delay start when us<strong>in</strong>g<br />
automatic cook<strong>in</strong>g, automatic defrost or quick start.<br />
o Set the power level and cook<strong>in</strong>g time (as described previously <strong>in</strong><br />
this <strong>in</strong>struction manual).<br />
o DO NOT press the <strong>in</strong>stant start button (F) at this po<strong>in</strong>t,<br />
otherwise the <strong>microwave</strong> will start cook<strong>in</strong>g immediately.<br />
o Press and hold down the preset clock button (C) until you hear a<br />
brief audible signal.<br />
o Press the time weight button (I) and the hour digits will start to<br />
flash. Cont<strong>in</strong>ue to press the time weight button until the hour<br />
digit that you want the cook<strong>in</strong>g to start at is displayed.<br />
o Press the preset clock button aga<strong>in</strong> to confirm the hour time. The<br />
m<strong>in</strong>ute digits will start to flash. Cont<strong>in</strong>ue to press the time<br />
weight button until the m<strong>in</strong>ute digit that you want the cook<strong>in</strong>g to<br />
start at is displayed.<br />
o Press the preset clock button for a third time to confirm the time<br />
of day that the <strong>microwave</strong> will start cook<strong>in</strong>g at.<br />
o When the time of day that you have programmed is reached, the<br />
<strong>microwave</strong> will bleep twice and then the <strong>microwave</strong> will start<br />
cook<strong>in</strong>g automatically.<br />
o IMPORTANT: If the <strong>microwave</strong> door is not shut when the time<br />
of day that you have programmed is reached, then cook<strong>in</strong>g will<br />
not commence.<br />
IMPORTANT: Although your <strong>microwave</strong> has a<br />
delay start feature, we do not recommend that the<br />
<strong>microwave</strong> is EVER programmed to switch on<br />
when it is unattended.<br />
19
Safety lock<br />
o When the <strong>microwave</strong> is not heat<strong>in</strong>g, it is possible to switch on<br />
the safety lock.<br />
o Press and hold down the stop clear button (E) until the word<br />
“OFF” appears on the LED display.<br />
o Until the safety lock is switched off, all control buttons on the<br />
<strong>microwave</strong> will be disabled.<br />
o To switch off the safety lock, press and hold down the stop clear<br />
button until a “:” appears on the LED display.<br />
20
Microwave cook<strong>in</strong>g guidel<strong>in</strong>es<br />
o If you are heat<strong>in</strong>g liquid <strong>in</strong> the <strong>microwave</strong>, then you must also<br />
place a teaspoon <strong>in</strong> the conta<strong>in</strong>er. This will ensure that the liquid<br />
does not boil suddenly after be<strong>in</strong>g removed from the <strong>microwave</strong><br />
cavity.<br />
o This phenomenon is called “delayed boil<strong>in</strong>g”, this means that a<br />
liquid can be close to boil<strong>in</strong>g po<strong>in</strong>t, even if there is no steam<br />
com<strong>in</strong>g off the liquid or the liquid is not bubbl<strong>in</strong>g. If the liquid<br />
conta<strong>in</strong>er is even gently shaken, then the liquid can <strong>with</strong>out<br />
warn<strong>in</strong>g boil over or even spurt. This could scald the end user.<br />
o If the food you are cook<strong>in</strong>g has a sk<strong>in</strong> or peel (e.g. sausages,<br />
tomatoes, potatoes etc), then you should pierce the sk<strong>in</strong> or peel<br />
<strong>with</strong> a fork. This will ensure that if steam is created dur<strong>in</strong>g the<br />
heat<strong>in</strong>g process, it can escape and the food will not burst.<br />
o When heat<strong>in</strong>g baby food, the bottle or jar conta<strong>in</strong><strong>in</strong>g the food<br />
should NEVER have a top or lid on. After cook<strong>in</strong>g, to ensure that<br />
the food has been heated uniformly, you should stir or shake the<br />
food. IMPORTANT: You must check the temperature of the food<br />
before feed<strong>in</strong>g it to a child.<br />
o When heat<strong>in</strong>g food <strong>in</strong> a <strong>microwave</strong>, it will transmit the heat to<br />
the conta<strong>in</strong>er that the food is <strong>in</strong> or on. You should ALWAYS use<br />
<strong>oven</strong> gloves when remov<strong>in</strong>g items from the <strong>microwave</strong>.<br />
o You should make sure that you do not cook food for too long or<br />
at too high a power level. This could cause certa<strong>in</strong> areas of the<br />
food to dry out or even ignite.<br />
o You should not use ceramic or porcela<strong>in</strong> crockery, or porous<br />
earthenware <strong>in</strong>side of your <strong>microwave</strong>. These dishes could<br />
absorb moisture from the food whilst it is cook<strong>in</strong>g, which could<br />
cause pressure to build up and shatter the dish.<br />
o If you are heat<strong>in</strong>g certa<strong>in</strong> foods and any liquid, moisture will<br />
evaporate and condensation may occur. This does not <strong>in</strong>dicate<br />
that the appliance is faulty and it can be particularly noticeable if<br />
the ambient temperature of the room is high.<br />
o IMPORTANT: Any condensation should be wiped up <strong>with</strong> a soft<br />
cloth as soon as you have f<strong>in</strong>ished us<strong>in</strong>g the <strong>microwave</strong>.<br />
o After the cook<strong>in</strong>g time has completed, you should let the food<br />
stand for a few m<strong>in</strong>utes. This is called “stand<strong>in</strong>g time” and will<br />
allow the heat generated by the <strong>microwave</strong> to spread evenly<br />
throughout the food.<br />
21
Materials you can use <strong>in</strong> a <strong>microwave</strong> <strong>oven</strong><br />
Material<br />
Remarks<br />
Alum<strong>in</strong>ium foil To be used for shield<strong>in</strong>g only. Small smooth pieces can<br />
be used to cover th<strong>in</strong> parts of meat or poultry to<br />
prevent overcook<strong>in</strong>g. Arc<strong>in</strong>g can occur if foil is too<br />
close to the cavity walls. The foil should be at least 2.5<br />
cm away from the cavity walls.<br />
Brown<strong>in</strong>g dish Follow the manufacturer’s <strong>in</strong>structions. The bottom of<br />
the brown<strong>in</strong>g dish must be at least 5 mm thick above<br />
the turntable. Incorrect usage may cause the<br />
turntable to break.<br />
D<strong>in</strong>nerware Microwave-safe only. Follow the manufacturer’s<br />
<strong>in</strong>structions. Do not use cracked or chipped dishes.<br />
Glass jars Always remove the lid. Use only to heat food until just<br />
warm. Most glass jars are not heat resistant and may<br />
break.<br />
Glassware Heat-resistant <strong>oven</strong> glassware only. Make sure there is<br />
no metallic trim. Do not use cracked or chipped<br />
dishes.<br />
Oven cook<strong>in</strong>g Follow the manufacturer’s <strong>in</strong>structions. Do not close<br />
bags<br />
<strong>with</strong> a metal tie. Make slits <strong>in</strong> the bag to allow steam<br />
to escape.<br />
Paper plates Use for short-term cook<strong>in</strong>g/warm<strong>in</strong>g only. Do not<br />
and cups leave the <strong>oven</strong> unattended whilst cook<strong>in</strong>g.<br />
Paper towels Use to cover food for reheat<strong>in</strong>g and absorb<strong>in</strong>g fat. Use<br />
Parchment<br />
paper<br />
under supervision and for short-term cook<strong>in</strong>g only.<br />
Use as a cover to prevent splatter<strong>in</strong>g or as a wrap for<br />
steam<strong>in</strong>g<br />
Plastic<br />
Microwave-safe only. Follow the manufacturer’s<br />
<strong>in</strong>structions. It should be labelled as “<strong>microwave</strong> safe”.<br />
Some plastic conta<strong>in</strong>ers soften as the food <strong>in</strong>side gets<br />
hot. “Boil<strong>in</strong>g bags” and tightly closed plastic bags<br />
should be slit, pierced or vented, as described by the<br />
package.<br />
Plastic wrap Microwave-safe only. Use to cover food dur<strong>in</strong>g cook<strong>in</strong>g<br />
to reta<strong>in</strong> moisture. Do not allow the plastic wrap to<br />
touch the food.<br />
Thermometers Microwave-safe only. Meat and candy thermometers.<br />
Wax paper Use as a cover to prevent splatter<strong>in</strong>g and to reta<strong>in</strong><br />
moisture.<br />
22
Materials not to be placed <strong>in</strong> a <strong>microwave</strong> <strong>oven</strong><br />
Material<br />
Alum<strong>in</strong>ium tray<br />
Food carton <strong>with</strong><br />
metal handle<br />
Metal or metaltrimmed<br />
utensils<br />
Metal twist ties<br />
Paper bags<br />
Plastic foam<br />
Wood<br />
Remarks<br />
May cause arc<strong>in</strong>g. Transfer food <strong>in</strong>to a<br />
<strong>microwave</strong>-safe dish.<br />
May cause arc<strong>in</strong>g. Transfer food <strong>in</strong>to a<br />
<strong>microwave</strong>-safe dish.<br />
Metal shields the food from <strong>microwave</strong> energy.<br />
The metal trim may cause arc<strong>in</strong>g.<br />
May cause arc<strong>in</strong>g and could cause a fire <strong>in</strong> the<br />
<strong>oven</strong>.<br />
May cause a fire <strong>in</strong> the <strong>oven</strong>.<br />
Plastic foam may melt or contam<strong>in</strong>ate the liquid<br />
<strong>in</strong>side when exposed to a high temperature.<br />
Wood will dry out when used <strong>in</strong> the <strong>microwave</strong><br />
<strong>oven</strong> and may split or crack.<br />
Utensils table<br />
Cookware Microwave Grill Comb<strong>in</strong>ation*<br />
Heat-resistant<br />
Yes Yes Yes<br />
glass<br />
Non heatresistant<br />
No No No<br />
glass<br />
Heat-resistant<br />
Yes Yes Yes<br />
ceramics<br />
Microwave-safe Yes No No<br />
plastic dish<br />
Kitchen paper Yes No No<br />
Metal tray No Yes No<br />
Metal rack No Yes No<br />
Alum<strong>in</strong>ium foil<br />
and foil<br />
conta<strong>in</strong>ers<br />
No Yes No<br />
* Comb<strong>in</strong>ation mode applies to <strong>microwave</strong> + <strong>grill</strong> mode.<br />
23
Defrost<strong>in</strong>g guidel<strong>in</strong>es<br />
o Only use <strong>microwave</strong>-safe dishes for defrost<strong>in</strong>g (porcela<strong>in</strong>, glass,<br />
suitable plastic).<br />
o The defrost<strong>in</strong>g time depends on the quantity and weight of the<br />
food that you are defrost<strong>in</strong>g. When freez<strong>in</strong>g, you should split the<br />
food <strong>in</strong>to quantities that are suitable for defrost<strong>in</strong>g <strong>in</strong> the<br />
<strong>microwave</strong>.<br />
o Distribute the food as evenly as possible <strong>with</strong><strong>in</strong> the <strong>microwave</strong><br />
cavity. The thickest parts of fish or chicken legs should be<br />
placed on top.<br />
o The thicker parts of the food should be turned around several<br />
times dur<strong>in</strong>g the defrost<strong>in</strong>g process.<br />
o Foods that are rich <strong>in</strong> fats, such as butter, cottage cheese and<br />
cream should not be entirely defrosted. If they are at room<br />
temperature, they will be ready to serve <strong>with</strong><strong>in</strong> a few m<strong>in</strong>utes. If<br />
cream are deep frozen and little bits of ice rema<strong>in</strong> on the top of<br />
it, the cream should be whipped before eat<strong>in</strong>g.<br />
o Bread should be wrapped <strong>in</strong> a napk<strong>in</strong> so that it does not get too<br />
dry when be<strong>in</strong>g defrosted.<br />
o Remove frozen food from its packag<strong>in</strong>g and do not forget to<br />
remove any metal clips. If the conta<strong>in</strong>ers are suitable for plac<strong>in</strong>g<br />
<strong>in</strong> a freezer and a <strong>microwave</strong>, then you can simply remove the<br />
lid.<br />
o The liquid that is created dur<strong>in</strong>g the defrost process, particularly<br />
<strong>in</strong> the case of poultry should be discarded. Under no<br />
circumstances should it come <strong>in</strong>to contact <strong>with</strong> other foods.<br />
o A rest<strong>in</strong>g period is required when defrost<strong>in</strong>g food, to ensure that<br />
the food is totally defrosted. This normally takes between 15 –<br />
20 m<strong>in</strong>utes.<br />
24
Defrost<strong>in</strong>g table<br />
Food type<br />
Steaks/chops<br />
M<strong>in</strong>ced beef<br />
Roast meat<br />
(beef, lamb,<br />
pork)<br />
Poultry<br />
Chicken pieces<br />
(w<strong>in</strong>gs or<br />
drumsticks)<br />
Defrost<strong>in</strong>g guidance<br />
- Shield the th<strong>in</strong> end of the meat <strong>with</strong> foil.<br />
- Position the food <strong>in</strong> a s<strong>in</strong>gle layer on a shallow dish,<br />
<strong>with</strong> the th<strong>in</strong>ner part of the meat <strong>in</strong> the centre.<br />
- If pieces are stuck together, try to separate them as<br />
quickly as possible.<br />
- When prompted, turn the food over and then shield the<br />
sections that have already defrosted <strong>with</strong> foil.<br />
- After the defrost time, leave the meat covered <strong>with</strong><br />
alum<strong>in</strong>ium foil for 5 – 15 m<strong>in</strong>utes.<br />
- Place the frozen m<strong>in</strong>ced beef on a shallow dish,<br />
shield<strong>in</strong>g the edges <strong>with</strong> foil.<br />
- When prompted, turn the food over and remove the<br />
defrosted portions. Turn over and shield the edges <strong>with</strong><br />
foil.<br />
- After the defrost time, leave the m<strong>in</strong>ce covered <strong>with</strong><br />
alum<strong>in</strong>ium foil for 5 – 15 m<strong>in</strong>utes.<br />
- Place the jo<strong>in</strong>t <strong>with</strong> the lean side fac<strong>in</strong>g upwards on a<br />
shallow dish, shield<strong>in</strong>g the edges <strong>with</strong> foil strips.<br />
- When prompted, turn the food over and then shield the<br />
sections that have already defrosted <strong>with</strong> foil.<br />
- After the defrost time, leave the meat covered <strong>with</strong><br />
alum<strong>in</strong>ium foil for 10 – 30 m<strong>in</strong>utes.<br />
- Remove the poultry from its orig<strong>in</strong>al packag<strong>in</strong>g. Place it<br />
on a shallow dish, shield<strong>in</strong>g the w<strong>in</strong>g and leg tips <strong>with</strong><br />
foil.<br />
- When prompted, turn the food over and then shield the<br />
sections that have already defrosted <strong>with</strong> foil.<br />
- After the defrost time, leave the poultry covered <strong>with</strong><br />
alum<strong>in</strong>ium foil for 15 – 30 m<strong>in</strong>utes.<br />
- After stand<strong>in</strong>g time, run under cold water to remove<br />
the giblets (if necessary).<br />
- Place the chicken on a shallow dish, shield<strong>in</strong>g the<br />
exposed bone <strong>with</strong> foil.<br />
- When prompted, turn the food over and then shield the<br />
sections that have already defrosted <strong>with</strong> foil.<br />
- After the defrost time, leave the chicken pieces covered<br />
<strong>with</strong> alum<strong>in</strong>ium foil for 5 – 30 m<strong>in</strong>utes.<br />
<strong>25</strong>
Clean<strong>in</strong>g and ma<strong>in</strong>tenance<br />
The appliance exterior<br />
Clean<strong>in</strong>g operations must only be carried out<br />
when the <strong>oven</strong> is cool.<br />
The appliance should be disconnected from your<br />
ma<strong>in</strong>s supply before commenc<strong>in</strong>g any clean<strong>in</strong>g<br />
process.<br />
o You should wipe over the front of the appliance <strong>with</strong> a soft cloth<br />
and warm water mixed <strong>with</strong> a little wash<strong>in</strong>g up liquid.<br />
o DO NOT use abrasive cleaners or sharp objects to clean the<br />
front surface of the <strong>microwave</strong>.<br />
The appliance <strong>in</strong>terior<br />
o You should wipe over the <strong>in</strong>side of the appliance <strong>with</strong> a soft cloth<br />
and warm water mixed <strong>with</strong> a little wash<strong>in</strong>g up liquid.<br />
o You should pay particular attention to the door seal and the<br />
surround<strong>in</strong>g area.<br />
o DO NOT use abrasive cleaners or sharp objects to clean the<br />
<strong>in</strong>side of the <strong>microwave</strong>.<br />
Rotat<strong>in</strong>g plate and rotat<strong>in</strong>g base<br />
o The rotat<strong>in</strong>g plate and rotat<strong>in</strong>g base should be removed from the<br />
<strong>microwave</strong> for clean<strong>in</strong>g purposes after each use.<br />
o Clean the rotat<strong>in</strong>g plate and rotat<strong>in</strong>g base <strong>in</strong> warm water mixed<br />
<strong>with</strong> a little wash<strong>in</strong>g up liquid.<br />
General clean<strong>in</strong>g advice<br />
o IMPORTANT: Any condensation should be wiped up <strong>with</strong> a soft<br />
cloth as soon as you have f<strong>in</strong>ished us<strong>in</strong>g the <strong>microwave</strong>.<br />
o To remove odours from <strong>in</strong>side of the <strong>microwave</strong>, you should boil<br />
one cup of water mixed <strong>with</strong> several tablespoons of lemon juice<br />
<strong>in</strong>side of the cavity.<br />
26
o The <strong>microwave</strong> should be thoroughly cleaned before it is<br />
operated for the first time and after each use. This will avoid<br />
residual food stuffs becom<strong>in</strong>g baked on the <strong>oven</strong> cavity. After<br />
residues have been baked on several times, they are far more<br />
difficult to remove.<br />
o Never clean the <strong>oven</strong> surfaces by steam clean<strong>in</strong>g.<br />
o We would recommend that an appropriate sta<strong>in</strong>less steel cleaner<br />
and polish is regularly used on the sta<strong>in</strong>less steel surfaces of this<br />
appliance.<br />
o If you use any form of <strong>oven</strong> cleaner on your appliance, then you<br />
must check <strong>with</strong> the manufacturer of the cleaner that it is<br />
suitable for use on your appliance.<br />
o Any damage that is caused to the appliance by a clean<strong>in</strong>g<br />
product will not be fixed by Baumatic free of charge, even<br />
if the appliance is <strong>with</strong><strong>in</strong> the guarantee period.<br />
Installation<br />
The <strong>in</strong>stallation must be carried out by a suitably<br />
qualified person, <strong>in</strong> accordance <strong>with</strong> the current<br />
version of the follow<strong>in</strong>g.<br />
o Regulations and Safety Standards.<br />
o Build<strong>in</strong>g Regulations<br />
o Build<strong>in</strong>g Standards<br />
o Wir<strong>in</strong>g Regulations.<br />
Electrical connection<br />
YOUR MICROWAVE IS INTENDED FOR FITTED AND<br />
PERMANENT INSTALLATION.<br />
o Before connect<strong>in</strong>g the appliance, make sure that the supply<br />
voltage marked on the rat<strong>in</strong>g plate corresponds <strong>with</strong> your ma<strong>in</strong>s<br />
supply voltage.<br />
o We recommend that the appliance is connected by a qualified<br />
electrician, who will comply <strong>with</strong> national and local regulations.<br />
27
o WARNING: THIS APPLIANCE MUST BE EARTHED.<br />
o This appliance is supplied <strong>with</strong> a moulded plug, which must be<br />
connected to an earthed socket.<br />
o The outlet must still be accessible even when your <strong>microwave</strong><br />
is located <strong>in</strong> its hous<strong>in</strong>g.<br />
o The wir<strong>in</strong>g <strong>in</strong> the ma<strong>in</strong>s lead is coloured as follows:<br />
Brown<br />
Blue<br />
Green and yellow<br />
Live<br />
Neutral<br />
Earth<br />
o As the colours of the wires <strong>in</strong> the appliance’s ma<strong>in</strong>s lead may not<br />
correspond <strong>with</strong> the coloured mark<strong>in</strong>gs identify<strong>in</strong>g the term<strong>in</strong>als<br />
<strong>in</strong> your spur box, please proceed as follows:<br />
The brown wire must be connected to the term<strong>in</strong>al marked “L”<br />
(live), or coloured red.<br />
The blue wire must be connected to the term<strong>in</strong>al marked “N”<br />
(neutral), or coloured black.<br />
The green and yellow wire must be connected to the term<strong>in</strong>al<br />
marked “E” (earth), or by the earth symbol, or coloured green<br />
and yellow.<br />
o When the connection is completed, no stray strands or cut wire<br />
should be present. The cord clamp must be secured over the<br />
outer sheath.<br />
o Broken or damaged power leads must only be replaced by a<br />
suitably qualified person. A power lead of a similar type must be<br />
used <strong>in</strong> replacement.<br />
Before beg<strong>in</strong>n<strong>in</strong>g to <strong>in</strong>stall your appliance, check that<br />
there is no sign of damage (on the <strong>in</strong>side or the<br />
outside of the <strong>microwave</strong>), and that there are no<br />
pack<strong>in</strong>g materials or accessories <strong>in</strong>side the cavity.<br />
Remove any protective film on the <strong>microwave</strong>.<br />
28
Aperture and ventilation requirements<br />
o The diagrams above show the aperture and ventilation<br />
requirements that you require to build the appliance <strong>in</strong>to a<br />
hous<strong>in</strong>g unit.<br />
o Ensure that the rear panel of the furniture hous<strong>in</strong>g unit has been<br />
removed.<br />
o This <strong>oven</strong> may be <strong>in</strong>stalled <strong>with</strong>out any additional ventilation cut<br />
outs be<strong>in</strong>g made <strong>in</strong> the hous<strong>in</strong>g unit. However the ventilation cut<br />
shown <strong>in</strong> the diagram MUST be present, otherwise the<br />
<strong>microwave</strong> <strong>oven</strong> may not function correctly.<br />
o Do not cover the ventilation slots or air <strong>in</strong>take po<strong>in</strong>ts.<br />
29
Install<strong>in</strong>g the <strong>microwave</strong> <strong>in</strong>to the hous<strong>in</strong>g unit<br />
o Secure the top air guide onto<br />
the top of the <strong>microwave</strong><br />
hous<strong>in</strong>g (as shown <strong>in</strong> the<br />
diagram opposite).<br />
o Secure the rear outer baffle<br />
onto the back of the <strong>microwave</strong><br />
hous<strong>in</strong>g, us<strong>in</strong>g the 6 x self<br />
lock<strong>in</strong>g screws (as shown <strong>in</strong> the<br />
diagram opposite).<br />
o Secure the holders onto each side of the <strong>microwave</strong> hous<strong>in</strong>g,<br />
us<strong>in</strong>g the 12 x self lock<strong>in</strong>g screws (as shown <strong>in</strong> the diagram<br />
opposite).<br />
o Place the <strong>microwave</strong> <strong>in</strong>to the<br />
hous<strong>in</strong>g unit and then fix it <strong>in</strong>to<br />
position us<strong>in</strong>g the 8 x wood<br />
screws (as shown <strong>in</strong> the diagram<br />
opposite).<br />
30
o Secure the sta<strong>in</strong>less steel frame<br />
onto the holders on the front of<br />
the <strong>microwave</strong> to complete the<br />
<strong>in</strong>stallation.<br />
Troubleshoot<strong>in</strong>g<br />
o The <strong>microwave</strong> will not switch on.<br />
* Check that the appliance has been connected to the ma<strong>in</strong>s<br />
supply correctly.<br />
* Check that the fuse <strong>in</strong> the moulded plug has not blown.<br />
* Check that the fuses <strong>in</strong> your fuse box have not blown.<br />
* If fuses blow on a regular basis, then we would recommend that<br />
you consult <strong>with</strong> a qualified electrician.<br />
* Check that there has not been a power cut.<br />
o The <strong>microwave</strong> will not start cook<strong>in</strong>g.<br />
* Check that the door is properly shut.<br />
* Check that the door seal and surround<strong>in</strong>g area are clean.<br />
o The turntable is not turn<strong>in</strong>g.<br />
* Check that the rotat<strong>in</strong>g base is connected to the drive motor<br />
correctly.<br />
* Check that the <strong>oven</strong>ware is not larger than the rotat<strong>in</strong>g plate.<br />
* Check that the food you are cook<strong>in</strong>g does not extend beyond the<br />
rotat<strong>in</strong>g plate.<br />
o Check that there is noth<strong>in</strong>g underneath the rotat<strong>in</strong>g base that is<br />
prevent<strong>in</strong>g it from turn<strong>in</strong>g.<br />
31
o The <strong>microwave</strong> does not switch off.<br />
* Isolate the <strong>microwave</strong> from your ma<strong>in</strong>s supply and then contact<br />
Th<strong>in</strong>k <strong>Appliances</strong> Customer Care Department.<br />
o The <strong>in</strong>terior light bulb is not work<strong>in</strong>g.<br />
* Call the Th<strong>in</strong>k <strong>Appliances</strong> Customer Care Department. The <strong>in</strong>terior light<br />
bulb can only be replaced by a tra<strong>in</strong>ed service technician.<br />
o My food is not cook<strong>in</strong>g properly.<br />
* Check that the power level and cook<strong>in</strong>g time that you have set,<br />
is appropriate for the food that you are cook<strong>in</strong>g.<br />
* If you are cook<strong>in</strong>g a double amount of food, then you will<br />
normally need to almost double the cook<strong>in</strong>g time.<br />
* If the food that you have placed <strong>in</strong> the cavity is colder than<br />
normal, then the power level and cook<strong>in</strong>g time may need to be<br />
<strong>in</strong>creased.<br />
o I am gett<strong>in</strong>g condensation <strong>in</strong> my <strong>oven</strong>.<br />
* Steam and condensation are a natural by product of cook<strong>in</strong>g <strong>in</strong> a<br />
<strong>microwave</strong>.<br />
* Do not leave food <strong>in</strong> the <strong>oven</strong> to cool after it has been cooked<br />
and the <strong>oven</strong> has been switched off.<br />
* Use a covered conta<strong>in</strong>er, where practical, when cook<strong>in</strong>g to<br />
reduce the amount of condensation that forms.<br />
* You should wipe over any condensation that has formed, as soon<br />
as the food has stopped cook<strong>in</strong>g.<br />
32
CONDITIONS OF GUARANTEE<br />
Dear Customer,<br />
The conditions of guarantee which apply to your appliance are as follows:This<br />
product is guaranteed for 12 months from the date of orig<strong>in</strong>al purchase.Th<strong>in</strong>k<br />
<strong>Appliances</strong> will repair any defect that arises due to faulty manufactur<strong>in</strong>g or<br />
workmanship free of charge dur<strong>in</strong>g this period.<br />
Please refer to the warranty card for details.<br />
This guarantee is <strong>in</strong> addition to and does not dim<strong>in</strong>ish your statutory or legal<br />
rights.<br />
If you have any further questions please contact Th<strong>in</strong>k <strong>Appliances</strong> Pty Ltd:<br />
SERVICE DEPARTMENT<br />
Phone:1800 444 357<br />
Fax:1300 133 279<br />
Email:service@th<strong>in</strong>kappliances.com<br />
SALES DEPARTMENT<br />
Phone:1300 132 824<br />
Fax:1300 660 188<br />
Web:www.th<strong>in</strong>kappliances.com<br />
33
www.baumatic.nl 36