Elm Creek Quilts - Winding Way by Red Rooster - 3 Dudes Quilting
Elm Creek Quilts - Winding Way by Red Rooster - 3 Dudes Quilting
Elm Creek Quilts - Winding Way by Red Rooster - 3 Dudes Quilting

You also want an ePaper? Increase the reach of your titles
YUMPU automatically turns print PDFs into web optimized ePapers that Google loves.
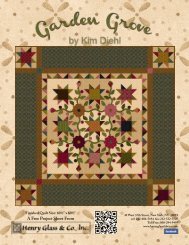
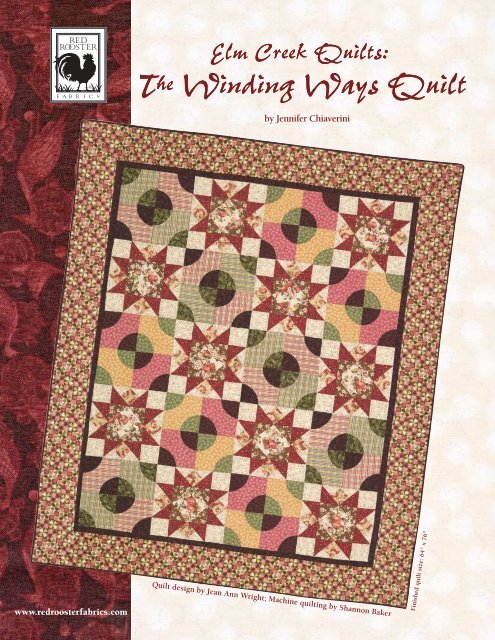
y Jennifer Chiaverini<br />
www.redroosterfabrics.com<br />
Quilt design <strong>by</strong> Jean Ann Wright; Machine quilting <strong>by</strong> Shannon Baker<br />
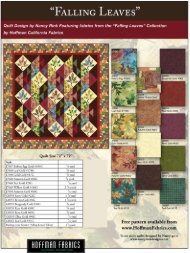
Finished quilt size: 64" x 76"
Fabrics from the “<strong>Elm</strong> <strong>Creek</strong> <strong>Quilts</strong>: The <strong>Winding</strong> <strong>Way</strong>s<br />
Quilt” collection (style #3343) <strong>by</strong> Jennifer Chiaverini for<br />
<strong>Red</strong> <strong>Rooster</strong> Fabrics.<br />
FABRIC REQUIREMENTS:<br />
Pattern #16258 – MUL 1................... 7 /8 yard<br />
16258 – RED 1.................... 1 /2 yard<br />
18100 – CRE 1.................... 1 /2 yard<br />
18101 – BRO 1.................... 1 /3 yard<br />
18102 – ROS 1.................... 1 7 /8 yards<br />
18103 – GRE 1.................... 1 /4 yard<br />
18103 – WIN 1................... 1 1 /8 yards<br />
(includes binding)<br />
18104 – GRE 1.................... 1 /3 yard<br />
18105 – GOL 1.................... 1 /2 yard<br />
18105 – GRE 1.................... 1 /4 yard<br />
18105 – ROS 1.................... 1 /2 yard<br />
18105 – WIN 1................... 1 /4 yard<br />
18106 – GRE 1.................... 1 /2 yard<br />
18106 – RED 1.................... 1 /2 yard<br />
Backing (fabric of choice)....................4 yards<br />
Batting................................................70" x 82"<br />
Additional supplies:<br />
Fusible web for appliqué quarter circles<br />
Invisible thread<br />
appliqué Preparation:<br />
Fuse web to wrong side of fabric following the<br />
manufacturer’s instructions. For each color, trace<br />
twenty quarter circle templates onto fusible web and<br />
cut out on traced line.<br />
CUTTING INSTRUCTIONS:<br />
A. Pattern #16258 – MUL1 (vines):<br />
1. Cut four 3 1 /2" x 42" strips. Crosscut forty<br />
3 1 /2" squares (A).<br />
2. Cut three 4 1 /4" x 42" strips. Crosscut twenty<br />
4 1 /4" squares, and then cut on diagonal twice<br />
to yield eighty triangles (B).<br />
B. Pattern #16258 – RED1 (vines):<br />
1. Cut four 3 7 /8" x 42" strips. Crosscut forty<br />
3 7 /8" squares, and then cut on diagonal once to<br />
yield eighty triangles (C).<br />
C. Pattern #18100 – CRE1 (apples):<br />
1. Cut two 4 3 /4" x 42" strips. Crosscut ten<br />
4 3 /4" squares (D).<br />
D. Pattern #18101 – BRO1 (blossoms):<br />
1. Cut two 3 7 /8" x 42" strips. Crosscut twenty<br />
3 7 /8" squares, and then cut on diagonal once to<br />
yield forty triangles (E).<br />
E. Pattern #18102 – ROS1 (geometric):<br />
1. Cut eight 7 1 /2" x 42" strips. Sew together<br />
end-to-end. Recut into two 70" horizontal<br />
outer borders and two 80" vertical outer<br />
borders (F).<br />
F. Pattern #18103 – GRE1 (cranes):<br />
1. Follow APPLIQUÉ PREPARATION directions<br />
to fuse and cut out twenty quarter circles (G).<br />
G. Pattern #18103 – WIN1 (cranes):<br />
1. Follow APPLIQUÉ PREPARATION directions<br />
to fuse and cut out twenty quarter circles (H).<br />
2. Cut six 1 1 /2" x 42" strips. Sew together<br />
end-to-end. Cut two vertical inner borders<br />
60 1 /2" long and two horizontal inner borders<br />
50 1 /2" long (I).<br />
3. Cut seven 2 1 /4" x 42" strips for binding.<br />
H. Pattern #18104 – GRE1 (tie dye):<br />
1. Cut three 2 5 /8" x 42" strips. Crosscut forty<br />
2 5 /8" squares (J).<br />
I. Pattern #18105 – GOL1 (ba<strong>by</strong> rattles):<br />
1. Cut two 6 1 /2" x 42" strips. Crosscut ten<br />
6 1 /2" squares (K).<br />
J. Pattern #18105 – GRE1 (ba<strong>by</strong> rattles):<br />
1. Follow APPLIQUÉ PREPARATION directions<br />
to fuse and cut out twenty quarter circles (L).<br />
K. Pattern #18105 – ROS1 (ba<strong>by</strong> rattles):<br />
1. Cut two 6 1 /2" x 42" strips. Crosscut ten<br />
6 1 /2" squares (M).<br />
L. Pattern #18105 – WIN1 (ba<strong>by</strong> rattles):<br />
1. Follow APPLIQUÉ PREPARATION directions<br />
to fuse and cut out twenty quarter circles (N).<br />
M. Pattern #18106 – GRE1 (plaid):<br />
1. Cut two 6 1 /2" x 42" strips. Crosscut ten<br />
6 1 /2" squares (O).<br />
N. Pattern #18106 – RED1 (plaid):<br />
1. Cut two 6 1 /2" x 42" strips. Crosscut ten<br />
6 1 /2" squares (P).<br />
PIECING INSTRUCTIONS: Use 1 /4" seam allowances.<br />
Paradox Blocks:<br />
1. Sew an E triangle to each side of a<br />
D square to make the center unit.<br />
2. Sew a B triangle to two adjacent<br />
sides of a J square. Sew a C triangle<br />
to the short sides of B/J to complete<br />
a star point unit. Sew four units for<br />
each block.<br />
3. Sew a star point unit to opposite<br />
sides of the center unit. Sew an<br />
A square to each side of the<br />
remaining two star point units<br />
and sew to remaining two sides.<br />
Make ten blocks.<br />
Puzzle Blocks:<br />
1. Follow the APPLIQUÉ PREPARA-<br />
TION directions above. Fuse the<br />
quarter circles to the 6 1 /2" squares<br />
as shown.<br />
2. Machine appliqué the quarter<br />
circles in place using invisible<br />
thread. Make forty units.<br />
3. Sew the units together in sets of four to complete the blocks. Make ten<br />
blocks, five in each color combination.<br />
QUILT ASSEMBLY: Refer to cover photo.<br />
1. Sew the blocks together in five rows of four blocks each, alternating<br />
Paradox and Puzzle blocks in each row. Sew rows together.<br />
©2008 <strong>Red</strong> <strong>Rooster</strong> Fabrics. All rights reserved. Not intended for individual resale.<br />
The design for this <strong>Red</strong> <strong>Rooster</strong> Fabrics’ pattern is protected <strong>by</strong> U.S. copyright law.<br />
For additional copies of this pattern, please call or write <strong>Red</strong> <strong>Rooster</strong> Fabrics at:<br />
253 West 35th Street, 11th Floor, New York, NY 10001<br />
401.728.4200 • www.redroosterfabrics.com<br />
A<br />
C<br />
E<br />
B<br />
J<br />
D<br />
Paradox Block<br />
Finished block size:<br />
12˝ square. Make ten.<br />
G<br />
O<br />
H<br />
P<br />
Puzzle Block<br />
Finished block size:<br />
12˝ square. Make ten.<br />
N<br />
M<br />
L<br />
K<br />
2. Inner Border: Sew the vertical borders (I)<br />
to opposite sides of the quilt top. Sew the<br />
horizontal borders (I) to the top and<br />
bottom of the quilt top.<br />
3. Outer Border: Fold the four border<br />
strips (F) in half end-to-end and<br />
press the center fold line. Pin the<br />
center of a vertical border strip to the center of one side of the quilt top.<br />
Pin from the center to the outside edge of both ends stopping 1 /4" from<br />
the edge of the quilt top. Sew border strip in place. Sew remaining three<br />
border strips in the same manner. Miter each corner, trim excess, and<br />
press seams open.<br />
FINISHING:<br />
1. Prepare backing with a horizontal seam to<br />
measure 70" x 82".<br />
2. Layer the quilt top, batting, and<br />
backing. Baste layers together.<br />
3. Quilt as desired.<br />
4. Trim the backing and<br />
batting even with<br />
the quilt top.<br />
5. Join the binding<br />
strips together<br />
with diagonal<br />
seams. Press<br />
seams open.<br />
Attach<br />
binding<br />
to quilt<br />
using<br />
your<br />
favorite<br />
method.<br />
Quarter Circle<br />
Template<br />
100%