one Bill Validator with 2500 Banknote Cashbox - Sensis
one Bill Validator with 2500 Banknote Cashbox - Sensis
one Bill Validator with 2500 Banknote Cashbox - Sensis

Create successful ePaper yourself
Turn your PDF publications into a flip-book with our unique Google optimized e-Paper software.
A division of<br />
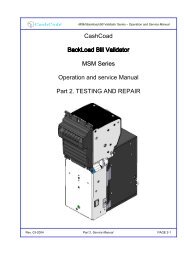
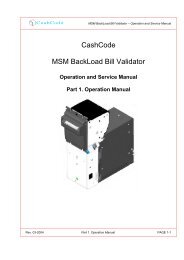
With <strong>2500</strong> <strong>Bill</strong> <strong>Cashbox</strong><br />
Part 1: Operational Manual<br />
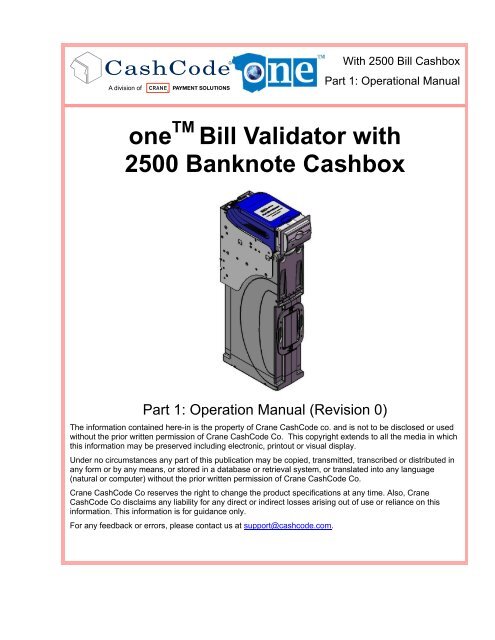
<strong>one</strong> TM <strong>Bill</strong> <strong>Validator</strong> <strong>with</strong><br />
<strong>2500</strong> <strong>Banknote</strong> <strong>Cashbox</strong><br />
Part 1: Operation Manual (Revision 0)<br />
The information contained here-in is the property of Crane CashCode co. and is not to be disclosed or used<br />
<strong>with</strong>out the prior written permission of Crane CashCode Co. This copyright extends to all the media in which<br />
this information may be preserved including electronic, printout or visual display.<br />
Under no circumstances any part of this publication may be copied, transmitted, transcribed or distributed in<br />
any form or by any means, or stored in a database or retrieval system, or translated into any language<br />
(natural or computer) <strong>with</strong>out the prior written permission of Crane CashCode Co.<br />
Crane CashCode Co reserves the right to change the product specifications at any time. Also, Crane<br />
CashCode Co disclaims any liability for any direct or indirect losses arising out of use or reliance on this<br />
information. This information is for guidance only.<br />
For any feedback or errors, please contact us at support@cashcode.com.
A division of<br />
With <strong>2500</strong> <strong>Bill</strong> <strong>Cashbox</strong><br />
Part 1: Operational Manual<br />
1. INTRODUCTION: 4<br />
1.1 Glossary: 4<br />
1.2 Safety Instructions: 5<br />
1.3 Product Labels: 6<br />
1.4 Product Documentation: 7<br />
1.5 Product Overview: 8<br />
1.6 General Specifications: 9<br />
1.7 Compliance Approvals: 11<br />
1.8 Unit Dimensions: 12<br />
1.8.1 ONE BV <strong>with</strong>out Bezel, Foldable Handle Cash Box (<strong>2500</strong> <strong>Bill</strong>s): 12<br />
2. MODULAR SYSTEM 13<br />
2.1 Validating Head: 13<br />
2.2 Housing: 14<br />
2.3 Bezel: 15<br />
2.4 <strong>2500</strong> <strong>Bill</strong> <strong>Cashbox</strong>: 16<br />
2.5 Accessories: 16<br />
2.6 Memory Card: 17<br />
2.6.1 Memory Card Part Number Legend: 17<br />
2.6.2 Memory Card Options: 18<br />
3. START UP & INSTALLATION: 19<br />
3.1 Start-up: 19<br />
3.2 Installation of Main Unit: 19<br />
3.3 Security Switch Kit Installation: 20<br />
3.4 <strong>Cashbox</strong> Lock Installation: 21<br />
3.5 Interface connection: 22<br />
3.5.1 Type 1 Interface Connection: 22<br />
3.5.2 Terminal/Signal description for Type 1 Interface Connection: 23<br />
Rev 0 - 2 - © 2009 Crane CashCode Co.
A division of<br />
With <strong>2500</strong> <strong>Bill</strong> <strong>Cashbox</strong><br />
Part 1: Operational Manual<br />
3.5.3 Type 2 Interface Connection: 24<br />
3.6 Input / Output Circuits: 25<br />
3.7 Switch Settings: 26<br />
4. MAINTENANCE & SERVICE: 28<br />
4.1 Collect <strong>Bill</strong>s or Barcode Tickets: 28<br />
4.2 Scheduled Maintenance: 29<br />
5. SOFTWARE UPDATES: 30<br />
5.1 Memory Care Update Procedure: 30<br />
5.2 Download Procedure Via Interface Connector: 32<br />
5.3 Download Procedure Via Front Service USB Port: 33<br />
5.4 Software Update Diagnostics: 34<br />
6. TROUBLE SHOOTING: 35<br />
6.1 Operation Mode Diagnostics: 36<br />
6.2 Diagnosing <strong>with</strong> a PC 37<br />
7. HOW TO REACH US: 38<br />
7.1 Technical Support Department: 38<br />
7.2 Service Centers: 38<br />
Rev 0 - 3 - © 2009 Crane CashCode Co.
A division of<br />
With <strong>2500</strong> <strong>Bill</strong> <strong>Cashbox</strong><br />
Part 1: Operational Manual<br />
1. INTRODUCTION:<br />
All CashCode products have two types of manuals:<br />
Part-1: Operation Manual<br />
Part-2: Service Manual<br />
This document is designed to help <strong>with</strong> the integration of <strong>one</strong> TM bill <strong>Validator</strong>.<br />
Select Part Number for the specific hardware configuration<br />
Unit Dimension and comp<strong>one</strong>nt nomenclatures<br />
<strong>Bill</strong> <strong>Validator</strong> Specification and Configuration<br />
General Specification for Dip Switch setting<br />
Easy Diagnostic for any service requirements<br />
1.1 Glossary:<br />
Anti Stringing Sensor – Sensor used to detect bills being pulled back illegally by using a<br />
string, wire or tape.<br />
Bar Code Sensor – Sensor to scan bar coded tickets<br />
BDP – Bi directional protocol<br />
Bezel – Face Plate<br />
BV – <strong>Bill</strong> <strong>Validator</strong> or <strong>Bill</strong> Acceptor<br />
Centering Mechanism – CashCode patented bill centering mechanism which aligns bills<br />
before entry into bill path<br />
CST – Cassette or Cash Box<br />
CPU – Central Processing Unit<br />
Dielectric Sensor – CashCode Patented Sensor used to measure the paper density<br />
DIP Switch – Dual Inline Package Switch<br />
ONE /FLS – The ONE FrontLoad Standard <strong>Bill</strong> <strong>Validator</strong><br />
Memory Card – Portable programmable memory which can used to program BV <strong>with</strong>out<br />
any tools<br />
Magnetic Sensor – Sensor used to read magnetic properties / ink on the bill<br />
Stacker Mechanism – A scissor type attachment used to stack the bill into cashbox<br />
TITO – Ticket In Ticket Out Standard<br />
U/V – Ultra Violet Sensor<br />
<br />
<br />
- Caution / Safety Instructions<br />
- Comments / Notes<br />
Rev 0 - 4 - © 2009 Crane CashCode Co.
A division of<br />
With <strong>2500</strong> <strong>Bill</strong> <strong>Cashbox</strong><br />
Part 1: Operational Manual<br />
1.2 Safety Instructions:<br />
Please follow the below guidelines:<br />
Please make sure the top lid is closed and the 24 pin connector is connected to the ONE<br />
<strong>Validator</strong> before power on.<br />
Please follow the specifications for operating temperature, humidity and storage<br />
conditions<br />
Do not lift or transport the unit by the cashbox handle.<br />
Be sure to remove power before removing the validating head.<br />
Please follow proper cleaning and maintenance procedures, ensuring the performance<br />
of the unit.<br />
All information about this product is available online 24hrs a day, visit our website at<br />
http://support.cashcode.com/en/documentation/index.php<br />
Rev 0 - 5 - © 2009 Crane CashCode Co.
A division of<br />
With <strong>2500</strong> <strong>Bill</strong> <strong>Cashbox</strong><br />
Part 1: Operational Manual<br />
1.3 Product Labels:<br />
Boot Version Label<br />
FLSV-XXXX<br />
Validating Head Label<br />
FLS-XXXX-XXXXXX<br />
Software Version Label<br />
<strong>one</strong> TM <strong>Bill</strong><br />
<strong>Validator</strong> Label<br />
FLS-6XXX<br />
Main Product Label<br />
FLSH-XXXX<br />
Housing Label<br />
FLSC-<strong>2500</strong><br />
<strong>Cashbox</strong> P/N Label<br />
Additional Labels:<br />
Packaging Label (Box Exterior)<br />
Memory Card Label (See Section 2.6)<br />
Bezel Label (See Section 2.3)<br />
All Product Labels contain a generic part number and unique serial number.<br />
Rev 0 - 6 - © 2009 Crane CashCode Co.
A division of<br />
With <strong>2500</strong> <strong>Bill</strong> <strong>Cashbox</strong><br />
Part 1: Operational Manual<br />
1.4 Product Documentation:<br />
Document Type<br />
Document Part Numbers<br />
Descriptions<br />
User’s Guide UG-FLS-XXXX_Rev XX Hardware Configuration.<br />
Software Release<br />
Specification<br />
<strong>Bill</strong> Set Descriptions<br />
<strong>Cashbox</strong> Users Guide<br />
Bezel Users Guide<br />
Basic Operational<br />
Manual<br />
<strong>2500</strong> <strong>Bill</strong> <strong>Cashbox</strong><br />
Operational Manual<br />
Service Manual<br />
Onetrack Operation<br />
Manual<br />
OneCheck Operation<br />
Manual<br />
3D Outline Model<br />
SRS FLS-XXXX-XXXXXX<br />
Rev XX<br />
BSD-XXXX-X<br />
FLSC-XXXX<br />
UG-FLSB-XXXX_X<br />
One_Part1_x<br />
One_<strong>2500</strong>_Part1_x<br />
One_Part2_x<br />
Onetrack_Part1_x<br />
Onecheck_Part1_x<br />
Step or IGS format<br />
available upon request<br />
Software Users Guide:<br />
Dip Switch Settings<br />
<strong>Bill</strong> Table Reference<br />
Diagnostics<br />
CRC<br />
Picture of Accepted <strong>Bill</strong>s and<br />
Denominations for specific software.<br />
Description and detail of Cash Box<br />
and its options.<br />
Details of Bezel, opening and<br />
mounting arrangement.<br />
Basic Operation Manual.<br />
Additional Information regarding<br />
operation of validator <strong>with</strong> the <strong>2500</strong><br />
<strong>Bill</strong> <strong>Cashbox</strong>.<br />
Extended Manual <strong>with</strong> details on<br />
disassembling and servicing<br />
validator.<br />
Basic Operation Manual and setup<br />
detail for Onetrack (RFID tag based<br />
soft counting) system.<br />
Basic Operation Manual and setup<br />
detail for OneCheck (TITO Printer<br />
based soft counting) system.<br />
Contact your sales representative.<br />
You can also visit our website for available documents.<br />
http://support.cashcode.com/en/documentation/index.php<br />
Rev 0 - 7 - © 2009 Crane CashCode Co.
A division of<br />
With <strong>2500</strong> <strong>Bill</strong> <strong>Cashbox</strong><br />
Part 1: Operational Manual<br />
1.5 Product Overview:<br />
The ONE <strong>Bill</strong> <strong>Validator</strong> was developed to validate bills having a width up to 85 mm.<br />
Compared to the previous Front Load bill <strong>Validator</strong> models, the ONE has the following<br />
distinctive features:<br />
Utilizes a light-weight plastic shockproof cashbox and a plastic validating head.<br />
Universal platform allowing use of the device in both 12VDC and 24VDC applications<br />
utilizing different interfaces.<br />
The block of sensors contains ultra-violet sensor.<br />
Two barcode sensors allow 4-way acceptance of barcode tickets.<br />
The <strong>one</strong> TM BV consists of five main modules. Each module is available in different variations<br />
to suit your needs. The picture above illustrates the different modules:<br />
The <strong>one</strong> TM BV is designed to accommodate bills of different sizes from 62 to 85 mm<br />
wide, and from 125 to 172 mm long – which represents most of the world currencies.<br />
Certain currencies have different widths depending on denomination. For accurate<br />
validation of such currencies, the <strong>one</strong> TM Validating Head has a centering mechanism,<br />
which aligns the bills for processing of different widths.<br />
The lockable-removable <strong>Cashbox</strong> is used for temporary storage of validated bills. It<br />
can be locked <strong>with</strong> two standard ¾” tubular locks.<br />
<strong>Bill</strong> Capacity (2,500 banknotes) refers to the number of new bills that the <strong>Cashbox</strong><br />
can store. Actual <strong>Cashbox</strong> capacity can decrease in real applications due to<br />
variations in thickness of street-grade bills.<br />
The <strong>one</strong> TM Housing joins all the other modules. It is meant to be permanently secured<br />
inside a Gaming, Vending or other type of host machine.<br />
Several Bezel styles are available for the <strong>one</strong> TM FrontLoad Standard.<br />
Software updates can be easily d<strong>one</strong> <strong>with</strong> a Memory Card.<br />
Bezel<br />
<strong>Validator</strong><br />
USB Board<br />
Housing<br />
<strong>2500</strong> <strong>Bill</strong> <strong>Cashbox</strong><br />
Memory Card<br />
Rev 0 - 8 - © 2009 Crane CashCode Co.
A division of<br />
With <strong>2500</strong> <strong>Bill</strong> <strong>Cashbox</strong><br />
Part 1: Operational Manual<br />
1.6 General Specifications:<br />
Validation Sensors:<br />
4 Color optical Sensors:<br />
Dielectric Sensors:<br />
Inductive Sensors:<br />
Anti Stringing Sensors:<br />
Barcode Sensors:<br />
U/V Sensors:<br />
Interface connector:<br />
Standard:<br />
Optional:<br />
Supported Protocols and Interfaces:<br />
Universal Platform:<br />
Optional:<br />
<strong>Cashbox</strong> locks:<br />
Standard:<br />
Optional:<br />
<strong>Cashbox</strong> Free Fall Test:<br />
(Standard: IEC 68-2-32: 1975)<br />
Maximum stacking capacity (new bills):<br />
Bezels and indication:<br />
Standard:<br />
Universal for any currency<br />
1 (Differential)<br />
3<br />
1 set<br />
2 (Upper cover and Lower Body)<br />
1<br />
24-pin CC proprietary power and signal<br />
connector.<br />
USB on the back (excludes back mounting<br />
option); includes an extra board <strong>with</strong> USB data<br />
connector and a dedicated power connector<br />
(Molex 39-30-3045 or 39-30-3047).<br />
RS232<br />
Secondary RS232 channel<br />
Opto-isolated serial (ID003)<br />
Cctalk<br />
CCS/VFM<br />
USB (an external board required)<br />
No locks installed, only cams supplied. Shipped<br />
<strong>with</strong> shipping lock and cap.<br />
Special Cam for Australian OEM.<br />
Functional Height: 0.5 metres<br />
Number of falls: 14 (6 sides, 6 edges, 2 corners)<br />
<strong>2500</strong> <strong>Bill</strong>s<br />
No bezel installed. Green/Red Status Light.<br />
Optional Bezel:<br />
GPT Style, Cole Style, Konami Style, BAT Style<br />
Rev 0 - 9 - © 2009 Crane CashCode Co.
A division of<br />
With <strong>2500</strong> <strong>Bill</strong> <strong>Cashbox</strong><br />
Part 1: Operational Manual<br />
Service indication:<br />
Service port:<br />
Memory programming:<br />
Supported memory stick types:<br />
Mode selection:<br />
Acceptance:<br />
<strong>Bill</strong>s:<br />
Accepted Denominations:<br />
Validating Rate:<br />
Supported <strong>Bill</strong> Width (mm):<br />
Length of <strong>Bill</strong> supported(mm):<br />
<strong>Bill</strong> Escrow:<br />
Bar Code Tickets:<br />
Bar Code Specification:<br />
Encoding standard:<br />
Narrow bar width, in mm:<br />
Wide/Narrow bar ratio:<br />
Number of characters:<br />
PCS (Print Contrast Signal) value:<br />
<strong>Bill</strong> processing cycle time:<br />
Flashing of LED or the bezel lights.<br />
Front-service USB, Type B connector.<br />
CashCode Memory card<br />
Interface controlled <strong>with</strong> NDEG card<br />
installed or using USB service port<br />
CCFS format (Stay-in, One Time<br />
Programmable, Multi-update)<br />
NDEG<br />
12-position DIP switch<br />
Lengthwise 4 ways<br />
Refer to Software Description Guide<br />
96% or higher (on first insertion)<br />
60 ~ 85<br />
120 ~ 172<br />
One <strong>Bill</strong> or One Barcode Ticket<br />
Lengthwise 4 ways or 2 ways (refer to settings).<br />
ANSI/AIM BC2-1995, Uniform Symbology<br />
Specification – Interleaved 2 of 5<br />
0.5 to 0.6<br />
3:1<br />
6 to 18<br />
0.6 min<br />
3.2 seconds (from <strong>Bill</strong> insertion to ready for next<br />
bill).<br />
Power supply voltage:<br />
Universal platform: 12 VDC ±5% or 24 VDC ±5%<br />
Current consumption:<br />
12 V DC, operating mode (max):<br />
12 V DC, standby:<br />
3 Amp<br />
0.6 Amp<br />
Rev 0 - 10 - © 2009 Crane CashCode Co.
A division of<br />
With <strong>2500</strong> <strong>Bill</strong> <strong>Cashbox</strong><br />
Part 1: Operational Manual<br />
Environmental Specifications:<br />
Allowed applications:<br />
Operating temperature:<br />
Storage temperature:<br />
Relative Operating Humidity:<br />
Relative Storage Humidity:<br />
Lifetime Expectation:<br />
Installation:<br />
Access to cashbox:<br />
Outer Dimensions: (H x W x D)<br />
Unit Weight:<br />
Validating Head:<br />
Housing:<br />
Expanded <strong>Cashbox</strong> (Empty):<br />
Net Weight:<br />
Indoor only<br />
0 °C ~ +50 °C<br />
-20°C ~ +60°C<br />
30% - 90% (non-condensing)<br />
30% ~ 80% (non- condensing)<br />
1,500,000 processed bank notes or 7 Years<br />
(whichever comes first).<br />
Any in forward-back plane, vertical in left-right<br />
plane.<br />
From front side of the <strong>Validator</strong>.<br />
600 mm x 115 mm x 235 mm<br />
(23.62 inch x 4.52 inch x 9.25 inch )<br />
1.22 kg (2.69 lb)<br />
1.58 kg (3.48 lb)<br />
3.52 kg (7.76 lb)<br />
6.32 kg (13.93 lb)<br />
1.7 Compliance Approvals:<br />
FCC class B<br />
CE Compliance<br />
U/L 756<br />
ROHS Compliant<br />
CE Declaration is available upon request. Contact your sales representative for details.<br />
U/L listing can be found on http://www.ul.com/<br />
Rev 0 - 11 - © 2009 Crane CashCode Co.
A division of<br />
With <strong>2500</strong> <strong>Bill</strong> <strong>Cashbox</strong><br />
Part 1: Operational Manual<br />
1.8 Unit Dimensions:<br />
1.8.1 ONE BV <strong>with</strong>out Bezel, Foldable Handle Cash Box (<strong>2500</strong> <strong>Bill</strong>s):<br />
All dimensions are in mm (inches in bracket) for reference only.<br />
Rev 0 - 12 - © 2009 Crane CashCode Co.
A division of<br />
With <strong>2500</strong> <strong>Bill</strong> <strong>Cashbox</strong><br />
Part 1: Operational Manual<br />
2. MODULAR SYSTEM<br />
A Modular System is an interchangeable group of parts – easily configured to a user’s<br />
specifications. Below is a more detailed description of each module and its features.<br />
Following options are available:<br />
<strong>Cashbox</strong> – <strong>2500</strong> <strong>Bill</strong>s<br />
USB interface (optional)<br />
Bezel<br />
Security switches – 1 or 2 (Switches have Quick Connect terminals and are rated for 5A<br />
at 250 V)<br />
Contact your sales representative for sample request.<br />
2.1 Validating Head:<br />
The Validating Head <strong>with</strong> 24 pin output connector is universal and can be used in any<br />
application.<br />
Rev 0 - 13 - © 2009 Crane CashCode Co.
A division of<br />
With <strong>2500</strong> <strong>Bill</strong> <strong>Cashbox</strong><br />
Part 1: Operational Manual<br />
2.2 Housing:<br />
The Housing is made of a rigid metal structure, which allows you to mount the validator<br />
using the left, right or back side.<br />
Rev 0 - 14 - © 2009 Crane CashCode Co.
A division of<br />
With <strong>2500</strong> <strong>Bill</strong> <strong>Cashbox</strong><br />
Part 1: Operational Manual<br />
2.3 Bezel:<br />
The Bezels are U/L and CE compliant and 85 mm wide opening. Multiple bezel designs<br />
make the CashCode <strong>one</strong> TM <strong>Bill</strong> <strong>Validator</strong> compatible <strong>with</strong> a wide variety of door styles.<br />
Part Number<br />
Picture<br />
Description<br />
FLSB-5101<br />
GPT Compatible Bezel <strong>with</strong> runway lights<br />
(Blue/Red)<br />
FLSB-530XY<br />
Flange Cut Top<br />
Raised Bottom<br />
Surface<br />
Cole Style Bezel <strong>with</strong> Runway Lights<br />
X-Variant:<br />
1 – Full rectangle<br />
3 – Flange cut top<br />
5 – Raised bottom surface<br />
7 – Flange cut top and raised bottom<br />
surface<br />
Y-Variant:<br />
_ - Green/Red Lights<br />
R – Red/Green Lights<br />
B – Blue/Red Lights<br />
FLSB-5901<br />
BAT (Aristocrat compatible) Bezel <strong>with</strong> oval<br />
shaped indicator light (Blue/Red)<br />
FLSB-570X<br />
Konami Compatible Bezel <strong>with</strong> open from<br />
top and runway light (Green/Red)<br />
X-Variant:<br />
1 – Standard<br />
2 – AGT/Star games customized<br />
If you have custom bezel requirements, please contact your CashCode Sales Representative.<br />
Rev 0 - 15 - © 2009 Crane CashCode Co.
A division of<br />
With <strong>2500</strong> <strong>Bill</strong> <strong>Cashbox</strong><br />
Part 1: Operational Manual<br />
2.4 <strong>2500</strong> <strong>Bill</strong> <strong>Cashbox</strong>:<br />
The <strong>2500</strong> <strong>Bill</strong> <strong>Cashbox</strong> stores, stacks and holds validated bills in a secure cassette. The<br />
cashbox has a stacking mechanism and is typically equipped <strong>with</strong> a latch. Users are<br />
encouraged to replace the latch <strong>with</strong> a regular metal <strong>one</strong>. Users have a choice between <strong>one</strong><br />
or two locks for added security. A locking mechanism allows for the installation of security<br />
locks (<strong>one</strong> or two 3/4” tubular locks measuring 1 1 / 16 ” ± P 1 / 16” or 1<br />
locks are supplied by user.<br />
1 / ” ± 8<br />
1 / ”). All security<br />
Although the <strong>Cashbox</strong> has a <strong>2500</strong> bill storage capacity, street grade bills require more space<br />
and as a result full capacity may be reduced. The <strong>Cashbox</strong> can store bills from 60 to 85 mm<br />
wide and from 120 to 172 mm long.<br />
16<br />
2.5 Accessories:<br />
If no special requirements have been indicated, then ONE FLS will automatically be supplied<br />
<strong>with</strong> a 24-pin connector. For download via the interface connector from a PC the Power<br />
Supply OPT-PS5-FLS-DB9 is required.<br />
Accessories<br />
P/N<br />
OPT-MKFLS-<br />
24<br />
OPT-PS5-<br />
FLS-DB9<br />
OPT-PS5-<br />
FLS-DB9-01<br />
OPT-MKFLS-<br />
SWH<br />
OPT-MKFLS-<br />
USB<br />
Description<br />
Mounting Kit Connector.<br />
24 Pin Connector, Pins, Mounting<br />
Screws.<br />
Power Supply.<br />
OneCheck enabled power supply.<br />
Housing Kit <strong>with</strong> 1 Switch Option<br />
(Factory installed).<br />
Extra Kit for USB enabled device<br />
(Factory installed)<br />
Order Status<br />
Standard, supplied <strong>with</strong> every bill<br />
<strong>Validator</strong>.<br />
To be ordered separately.<br />
To be ordered <strong>with</strong> OneCheck system.<br />
To be ordered separately. If you need two<br />
switches, order qty – 2.<br />
To be ordered separately.<br />
5110086 Standard Lock Hasp Standard, supplied <strong>with</strong> every cashbox.<br />
N/A Special Lock Cam To be ordered separately.<br />
N/A<br />
Custom Harness (for each cabinet<br />
or application)<br />
To be ordered separately.<br />
Rev 0 - 16 - © 2009 Crane CashCode Co.
A division of<br />
With <strong>2500</strong> <strong>Bill</strong> <strong>Cashbox</strong><br />
Part 1: Operational Manual<br />
2.6 Memory Card:<br />
Each CashCode <strong>one</strong> TM <strong>Bill</strong> <strong>Validator</strong> is supplied <strong>with</strong> pre-installed software or a Stay-In<br />
Memory Card (for gaming applications), according to users order. A Stay-In Memory Card<br />
may be a single download, a <strong>one</strong> time programmable, or an NDEG card.<br />
Software updates are recommended whenever:<br />
New currency is issued, or<br />
A new series of counterfeit bills are discovered.<br />
2.6.1 Memory Card Part Number Legend:<br />
Type 31 Memory Card:<br />
Dallas Chip, 128 K Memory<br />
FSM-34US20-361011<br />
FSM – <strong>one</strong>TM BV Standard Memory Card<br />
34 – Type of memory card (see table)<br />
US – Country code (ISO 3166-3)<br />
20 – Protocol/OEM Customization<br />
Software version:<br />
36 – Control Firmware<br />
10 – Validation Firmware<br />
11 – C/C Code Configuration<br />
Type 34 Memory Card:<br />
Dallas Chip, 512 K Memory<br />
Type 42 Memory Card<br />
CPU Chip, 512 K Memory<br />
Memory<br />
Card<br />
Type<br />
Mfg.<br />
Download<br />
Single<br />
Update<br />
One Time<br />
Update<br />
Kobetron<br />
Signature<br />
Verification<br />
Multi-<br />
Download<br />
NDEG<br />
Service<br />
USB<br />
Enabler<br />
31 X X X X X √ X<br />
34 √ √ √ √ X √ √<br />
42 √ √ √ X √ √ √<br />
Rev 0 - 17 - © 2009 Crane CashCode Co.
A division of<br />
With <strong>2500</strong> <strong>Bill</strong> <strong>Cashbox</strong><br />
Part 1: Operational Manual<br />
2.6.2 Memory Card Options:<br />
Single Download (Stay-In) Memory Card:<br />
Example Part Number: FSM-34US20-080500<br />
New software can be ordered on single-download Memory Cards. The software from the<br />
new Memory Card is downloaded as soon as it is inserted into the slot, and the Validating<br />
Head is powered on. The Memory Card must be present at all times for the <strong>Bill</strong> <strong>Validator</strong> to<br />
operate.<br />
The Stay-In/Single Download update scheme is the recommended option for gaming applications.<br />
One Time Programmable (Stay-In) Memory Card:<br />
Example Part Number: FSM-34US20-080500-OP<br />
The One Time Programmable (OTP) Card is a Single-Update/Stay-In type memory card that<br />
has been locked as read-only. When an <strong>one</strong> TM <strong>Bill</strong> <strong>Validator</strong> is updated using an OTP card, it<br />
is locked to only accept software updates through OTP in the future.<br />
NDEG (Stay-In) Memory Card:<br />
Example Part Number: FSM-34C02<br />
A special Memory Card can be ordered, which allows the download of new software through<br />
the interface connector. After the download, the Memory Card must be present in the<br />
Validating Head at all times. If the host controller supports the CCNET interface, then the<br />
download can be d<strong>one</strong> via the host controller (and local network). Other interfaces do not<br />
support this download feature. Downloads in this case can be completed <strong>with</strong> any personal<br />
computer (PC or laptop) and a CashCode adapter. (The <strong>Validator</strong> must be temporarily<br />
disconnected from the host controller).<br />
Multiple Download Card:<br />
Example Part Number: FSM-34US20-080500-XX<br />
New software can be ordered <strong>with</strong> a multi-download Memory Card. The multi-download<br />
Memory Card can be used for updating multiple <strong>one</strong> TM <strong>Bill</strong> <strong>Validator</strong>, depending on the<br />
number of licenses ordered. Subsequently, the card does not have to remain inside the unit<br />
during operation. Typically a multi-download Memory Card is issued for a limited number of<br />
downloads (maximum 99), and therefore the number of licenses required must be defined in<br />
the user’s order.<br />
USB Enabler Memory Card:<br />
Example Part Number: FSM-34US20-080500-UB<br />
A USB Enabler memory enables future software updates through the front service USB port<br />
of the <strong>one</strong> TM <strong>Validator</strong>. This option can be attached to any of the above memory card<br />
options.<br />
Procedures for software updates can be found in section 5.<br />
Rev 0 - 18 - © 2009 Crane CashCode Co.
A division of<br />
With <strong>2500</strong> <strong>Bill</strong> <strong>Cashbox</strong><br />
Part 1: Operational Manual<br />
3. START UP & INSTALLATION:<br />
3.1 Start-up:<br />
To avoid damage of any kind during start-up process, please carefully check all points<br />
specified below:<br />
Make sure to use proper cable harness based on interface and cabinet.<br />
Power supply must conform to the specification on the label.<br />
Proceed as follows to install the ONE <strong>Bill</strong> <strong>Validator</strong> in the main cabinet.<br />
3.2 Installation of Main Unit:<br />
The ONE <strong>Bill</strong> <strong>Validator</strong> is installed by using (3) M4 screws on each side of the Front Load<br />
frame. The length of these screws should not be longer than required. Otherwise they may<br />
protrude through the inside of the frame.<br />
If the position of the mounting screws is different than the position of the mounting holes<br />
provided in the target equipment, then additional frame mounting comp<strong>one</strong>nts may be<br />
required.<br />
The <strong>Bill</strong> <strong>Validator</strong> can also be secured through the holes in the rear wall of the Housing. In<br />
this case, M3 screws and locator pins can be used.<br />
For dimensions of the mounting holes, please refer to the dimensional drawings (Section<br />
1.6).<br />
Screw M4<br />
Four Holes 4,2x4,6<br />
76<br />
101.6<br />
Four screws M3<br />
Rev 0 - 19 - © 2009 Crane CashCode Co.
A division of<br />
With <strong>2500</strong> <strong>Bill</strong> <strong>Cashbox</strong><br />
Part 1: Operational Manual<br />
3.3 Security Switch Kit Installation:<br />
The optional security switch kit (Part Number: OPT-MKFLS-SWH) allows the host machine<br />
to detect whether a cashbox is present in the validator Housing. Security switches can be<br />
installed on <strong>one</strong> or both sides of the housing, and need to be ordered together <strong>with</strong> your<br />
<strong>one</strong> TM bill validator for factory installation. Skip to step 3 unless you are installing the housing<br />
yourself:<br />
1. Attach the provided cable to the security<br />
switch as shown in the diagram.<br />
2. Use a #2x 1 / 2 ” wood screw to secure the<br />
switch to the bill validator Housing.<br />
3. Install the housing inside the host<br />
machine as shown in section 3.2.<br />
4. Feed the cable up through the housing<br />
and connect the applicable wires in the<br />
appropriate port of your host machine:<br />
a. Brown Wire – NC (Normally<br />
Closed) Switch. This contact is<br />
opened when a cashbox is<br />
inside the housing.<br />
b. Red Wire – NO (Normally Open)<br />
Switch. This contact is closed<br />
when a cashbox is inside the<br />
housing.<br />
c. Orange Wire – Common<br />
Ground.<br />
NO<br />
NC<br />
Ground<br />
Rev 0 - 20 - © 2009 Crane CashCode Co.
A division of<br />
With <strong>2500</strong> <strong>Bill</strong> <strong>Cashbox</strong><br />
Part 1: Operational Manual<br />
3.4 <strong>Cashbox</strong> Lock Installation:<br />
In order to install the security locks into the <strong>Cashbox</strong>, open the <strong>Cashbox</strong> cover, remove the<br />
plastic lock and plug, and follow the diagram shown below:<br />
Hex Nut<br />
Washer<br />
Hasp<br />
5110086<br />
Nut<br />
Washer<br />
Lock<br />
Cover<br />
A= 5 8" or A=1 1 8"<br />
Cassette<br />
The cashbox design supports 1 to 2<br />
locks, either 5 / 8 ” or 1 1 / 8 ” in length.<br />
Suitable manufacturers include<br />
MEDECO, KABA, ABLOY, VSR, and<br />
Bilock.<br />
The locks must rotate in opposite<br />
directions (<strong>one</strong> lock 90 degrees<br />
clockwise and second should be 90<br />
degrees counterclockwise - see figure<br />
on the left).<br />
Two standard locking hasps are<br />
shipped <strong>with</strong> every cashbox:<br />
P/N - 5110086 Standard<br />
Square head locks are special order<br />
and must be specified when ordering:<br />
P/N - 5110086-02 Square head<br />
Due to variations in regulatory<br />
requirements, CashCode does not<br />
provide locks, but we provide cam<br />
and applicable washers.<br />
Detailed Dimension of Slot for Lock<br />
Rev 0 - 21 - © 2009 Crane CashCode Co.
A division of<br />
With <strong>2500</strong> <strong>Bill</strong> <strong>Cashbox</strong><br />
Part 1: Operational Manual<br />
3.5 Interface connection:<br />
The <strong>one</strong> TM <strong>Bill</strong> <strong>Validator</strong> has the flexibility of five different protocol/interface options:<br />
Type 1: RS232 levels (CCNET), Opto-Isolated (BDP), Isolated Pulse Low Current or<br />
RS485, 24 pin validating head.<br />
Type 2: USB, 24 pin validating head.<br />
3.5.1 Type 1 Interface Connection:<br />
For the type 1 connection, the Host Controller may reset <strong>Bill</strong> <strong>Validator</strong> by holding line M-RES<br />
“active” for 1 ms. this informs the <strong>Bill</strong> <strong>Validator</strong> to abort any activity and return to its power-on<br />
reset state.<br />
Rear Connector Pin<br />
Assignment:<br />
1 6<br />
7 12<br />
13 18<br />
19 24<br />
(View from the back of <strong>Bill</strong> <strong>Validator</strong>)<br />
Plug Housing (24 Pin) P/N: #5105068<br />
Mating Socket P/N: #0100455 (CashCode 24 Pin Connector)<br />
Contact Crimp Terminal DR-SC20-1-7000 (JAE) required for above<br />
For detailed interface descriptions, please refer to the corresponding Interface (Protocol)<br />
Description Manual. The manuals may be downloaded from the CashCode website at<br />
Thttp://support.cashcode.com/en/documentation/index.php<br />
Rev 0 - 22 - © 2009 Crane CashCode Co.
A division of<br />
With <strong>2500</strong> <strong>Bill</strong> <strong>Cashbox</strong><br />
Part 1: Operational Manual<br />
3.5.2 Terminal/Signal description for Type 1 Interface Connection:<br />
TERMINAL SIGNAL FUNCTION ACTIVITY<br />
1* GROUND GROUND BUS -<br />
2 RxD-EXT RECEIVE DATA HIGH/LOW<br />
3 TxD-EXT TRANSMIT DATA HIGH/LOW<br />
4 VCC POWER -<br />
5 GND GROUND -<br />
6 RXD-EXT1 RECEIVE DATA HIGH/LOW -<br />
7* GND-EXT/EXT1 INTERFACE GROUND -<br />
8 TXD-EXT1 TRANSMIT DATA HIGH/LOW -<br />
9 RS485-A RS485 BUS -<br />
10 RS485-B RS485 BUS -<br />
11 INP-RXD INPUT SIGNAL/ RECEIVE DATA -<br />
12 INP-TTL1 INPUT SIGNAL -<br />
13* POWER- POWER 0V -<br />
14 INP-TTL2 INPUT SIGNAL -<br />
15 OC-TXD OUTPUT SIGNAL (OPEN-COLLECTOR )/ TRANSMIT DATA -<br />
16 OC-OUT1 OUTPUT SIGNAL (OPEN-COLLECTOR ) -<br />
17 C-LED-BDP / OC-OUT2 LED CATHODE/ OUTPUT SIGNAL (OPEN-COLLECTOR ) -<br />
18 A-LED-BDP LED ANODE -<br />
19 POWER+ POWER 12V/24V -<br />
20 TXD-BDP TRANSMIT DATA HIGH/LOW<br />
21 RXD-BDP RECEIVE DATA HIGH/LOW<br />
22 RST-BDP MASTER RESET LOW<br />
23 GND-BDP INTERFACE GND -<br />
24 +12V BDP INTERFACE POWER -<br />
The channel identified by EXT (pins 2, 3 and 7) is assigned for RS232 level interface (CCNET).<br />
A second RS232 level channel identified by EXT1 (pins 6 and 8) is currently reserved. The<br />
channel identified by BDP (pins 20 to 24) is assigned for Opto-Isolated interface (BDP).<br />
Recommendations:<br />
*Please connect Terminal 1 (Ground) to validator<br />
housing in order to eliminate external interference<br />
(i.e.: inside rear of housing):<br />
**Do not connect Terminal 7 and 13 on the same<br />
connector.<br />
Rev 0 - 23 - © 2009 Crane CashCode Co.
A division of<br />
With <strong>2500</strong> <strong>Bill</strong> <strong>Cashbox</strong><br />
Part 1: Operational Manual<br />
3.5.3 Type 2 Interface Connection:<br />
Rear USB Pin Assignment:<br />
USB “B” Plug<br />
Signals Description for USB 12 Volt version:<br />
TERMINAL SIGNAL FUNCTION ACTIVITY<br />
1 +5 V POWER -<br />
2 D- USB BUS, DATA- -<br />
3 D+ USB BUS, DATA+<br />
4 GND POWER -<br />
Power Pin Assignment<br />
Socket 39-01-4040 (MOLEX)<br />
Signals Description for power connector (Type 5):<br />
TERMINAL SIGNAL FUNCTION ACTIVITY<br />
1 +12V DC POWER -<br />
2 GND POWER -<br />
3 GND POWER -<br />
4 +24V DC POWER -<br />
Rev 0 - 24 - © 2009 Crane CashCode Co.
A division of<br />
With <strong>2500</strong> <strong>Bill</strong> <strong>Cashbox</strong><br />
Part 1: Operational Manual<br />
3.6 Input / Output Circuits:<br />
RS 232<br />
RS 485<br />
CCTALK<br />
OPTO ISOLATED ID003<br />
CCS / VFM:<br />
Rev 0 - 25 - © 2009 Crane CashCode Co.
A division of<br />
With <strong>2500</strong> <strong>Bill</strong> <strong>Cashbox</strong><br />
Part 1: Operational Manual<br />
3.7 Switch Settings:<br />
The switches are located on the side of the Validating head near the bottom.<br />
The first series of four (4) DIP switches is defined below. Only the 4 th switch should be used<br />
during operation and diagnostic of the <strong>one</strong> TM <strong>Bill</strong> <strong>Validator</strong>, to switch between:<br />
Host Mode: This is the normal operational mode for the validator<br />
Service Mode: This mode is only for testing the <strong>Validator</strong> and does not require the<br />
connection to a host machine.<br />
ON State of switch<br />
1 2 3 4<br />
OFF State of switch<br />
PARAMETER SWITCH ON OFF<br />
Orientation of the ticket SW2.1 Bar Code - Four-Way Bar Code – Face Up<br />
Stacker orientation SW2.2 Down Up<br />
Interface communication speed SW2.3 9600 Bps 19200 Bps<br />
Mode SW2.4 Service Mode Host Mode<br />
Rev 0 - 26 - © 2009 Crane CashCode Co.
A division of<br />
With <strong>2500</strong> <strong>Bill</strong> <strong>Cashbox</strong><br />
Part 1: Operational Manual<br />
The second series of eight (8) DIP switches controls accepted denominations and<br />
acceptance settings.<br />
ON State of switch<br />
1 2 3 4<br />
5 6 7 8<br />
OFF State of switch<br />
SWITCH ON OFF<br />
SW1.1 Denomination #1 Enable Denomination #1 Disable<br />
SW1.2 Denomination #2 Enable Denomination #2 Disable<br />
SW1.3 Denomination #3 Enable Denomination #3 Disable<br />
SW1.4 Denomination #4 Enable Denomination #4 Disable<br />
SW1.5 Denomination #5 Enable Denomination #5 Disable<br />
SW1.6 Denomination #6 Enable Denomination #6 Disable<br />
SW1.7 Denomination #7 Enable Denomination #7 Disable<br />
SW1.8 Accept All Reject Unfit <strong>Bill</strong>s<br />
DIP switch setting may vary based on software requirement for specific country or customer. For a complete<br />
explanation of switch settings, please refer to “software version description” for your particular <strong>Bill</strong> <strong>Validator</strong>. You can find<br />
at http://support.cashcode.com/en/documentation/index.php<br />
.<br />
Rev 0 - 27 - © 2009 Crane CashCode Co.
A division of<br />
With <strong>2500</strong> <strong>Bill</strong> <strong>Cashbox</strong><br />
Part 1: Operational Manual<br />
4. MAINTENANCE & SERVICE:<br />
4.1 Collect <strong>Bill</strong>s or Barcode Tickets:<br />
To collect bills from the <strong>one</strong> TM <strong>Bill</strong> <strong>Validator</strong>, simply pull out the <strong>Cashbox</strong> using the handle.<br />
To open the <strong>Cashbox</strong> cover, open the locks located at the two corners. To replace the<br />
<strong>Cashbox</strong>, close the cover, and insert the <strong>Cashbox</strong> into the FrontLoad ONE frame.<br />
Rev 0 - 28 - © 2009 Crane CashCode Co.
A division of<br />
With <strong>2500</strong> <strong>Bill</strong> <strong>Cashbox</strong><br />
Part 1: Operational Manual<br />
4.2 Scheduled Maintenance:<br />
During normal operation, dust and dirt accumulate on<br />
the optical sensors and the rollers of the validating<br />
head, possible resulting in a reduced acceptance rate.<br />
The bill path is recommended to be cleaned <strong>with</strong> a soft<br />
moist cloth, as explained below, every 6 months or<br />
after acceptance of 60,000 bills, whichever comes first.<br />
Transport Rollers<br />
Lenses<br />
O-Rings<br />
Procedure:<br />
1. Open the top cover of the validating head.<br />
2. Use compressed air to blow away all loose<br />
particles from the bill path and cashbox<br />
chamber.<br />
3. Wipe away any remaining dirt <strong>with</strong> a soft,<br />
moist cloth.<br />
4. Check all lenses for scratches and clean <strong>with</strong> a<br />
soft cloth and clean water.<br />
5. Check for cracked o-rings and transport rollers<br />
and clean them using a soft cloth <strong>with</strong><br />
isopropyl alcohol (70%).<br />
6. If any lenses, o-rings, or rollers are damaged,<br />
contact your closest service centre to have<br />
them replaced.<br />
DO NOT use Acet<strong>one</strong>, Petroleum, or Mineral oil<br />
based cleaning products as they will cause damage to<br />
validator parts and void your warranty.<br />
Rev 0 - 29 - © 2009 Crane CashCode Co.
A division of<br />
With <strong>2500</strong> <strong>Bill</strong> <strong>Cashbox</strong><br />
Part 1: Operational Manual<br />
5. SOFTWARE UPDATES:<br />
The <strong>one</strong>TM <strong>Bill</strong> <strong>Validator</strong> is shipped <strong>with</strong> pre-installed software, according to a user’s ordered<br />
specifications. It is recommended to keep your BV up to date. You can order updates from<br />
CashCode as they become available using the original part number for your system.<br />
5.1 Memory Care Update Procedure:<br />
1. Turn Power OFF.<br />
2. Lift up the Latch under the Validating Head, and Remove the Validating Head from the<br />
Housing.<br />
Rev 0 - 30 - © 2009 Crane CashCode Co.
A division of<br />
With <strong>2500</strong> <strong>Bill</strong> <strong>Cashbox</strong><br />
Part 1: Operational Manual<br />
3. Insert the new CashCode Memory Card into the Memory Card slot of the Validating<br />
Head (for correct insertion, please see diagram below).<br />
Memory Stick Label should be down and notch on memory stick should be on the left as per diagram<br />
above.<br />
4. Insert the Validating Head into the Housing.<br />
5. Turn Power ON and wait until the download process<br />
is completed. During the download, a red-green<br />
status light will blink. Once the download is<br />
completed, the diagnostic light will turn green. If the<br />
light stays red, please refer to the next section<br />
“Software Update Diagnostics”<br />
After the update, a single-download Memory Card must<br />
be present in the <strong>Bill</strong> <strong>Validator</strong> at all times during<br />
operation. A multiple-download card can be removed<br />
and used to update more units, until the number of<br />
licenses is reached.<br />
Rev 0 - 31 - © 2009 Crane CashCode Co.
A division of<br />
With <strong>2500</strong> <strong>Bill</strong> <strong>Cashbox</strong><br />
Part 1: Operational Manual<br />
5.2 Download Procedure Via Interface Connector:<br />
In order to properly complete an interface download, the Network Download Enable Memory<br />
Card must be present in the Memory Card slot at all times – before, during and after the<br />
download.<br />
For a direct download in the service mode via the interface connector, please follow the<br />
instructions below:<br />
1. Turn power OFF.<br />
2. Disconnect the interface connector from the <strong>Bill</strong> <strong>Validator</strong>.<br />
3. Remove the Validating Head from the Housing, and set Mode Switch to Service mode<br />
(Refer to section 3.7).<br />
4. Install the Validating Head into the Housing.<br />
5. Connect the CashCode Adaptor: a) to the Computer, b) to the interface connector of the<br />
<strong>Bill</strong> <strong>Validator</strong>, and c) to the power outlet (AC 100-250V).<br />
6. From the computer, run the latest software version of the program.<br />
7. Follow the instructions displayed on the computer screen.<br />
8. After completing step 7, disconnect the CashCode Adaptor: a) from the power outlet, b)<br />
from the <strong>Bill</strong> <strong>Validator</strong>, and c) from the Computer.<br />
9. Remove the Validating Head from the Housing, and set Mode Switch to Validation mode<br />
(refer to section 3.7).<br />
10. Install the Validating Head into the Housing.<br />
11. Connect the interface connector to the <strong>Bill</strong> <strong>Validator</strong>.<br />
When the ONE <strong>Bill</strong> <strong>Validator</strong> has a CCNET protocol, the software download can be completed via the host<br />
controller (refer to CCNET Protocol Description).<br />
Rev 0 - 32 - © 2009 Crane CashCode Co.
A division of<br />
With <strong>2500</strong> <strong>Bill</strong> <strong>Cashbox</strong><br />
Part 1: Operational Manual<br />
5.3 Download Procedure Via Front Service USB Port:<br />
In order to perform a software update through the front service USB port, the <strong>one</strong> TM <strong>Bill</strong><br />
<strong>Validator</strong> must be USB-enabled using a USB enabling (–UB) memory card. The PC used for<br />
the installation must also have the latest CashCode software and drivers installed (located<br />
on the installation CD that came <strong>with</strong> your <strong>one</strong> TM <strong>Bill</strong> <strong>Validator</strong>)<br />
1. To begin, please ensure the validator is turned ON and connected to a host machine.<br />
2. Connect the validator’s front service USB port to the PC using a standard USB A/B<br />
cable.<br />
3. If required, use the “Add New Hardware” utility to select the VCOM driver, located in the<br />
/vcom/ folder of your CashCode installation directory.<br />
4. Launch the USB firmware update utility (DownloadCFSFile.exe) utility.<br />
5. Select “Load” and pick your software update file.<br />
6. Select “Start”.<br />
7. The firmware update process will be accompanied by a rapidly blinking red/green status<br />
light for approximately a minute. Please wait until the update is finished before<br />
proceeding.<br />
8. Remove the USB Connection.<br />
The diagnostic light will turn green. If the light stays red, please refer to section 5.4:<br />
“Software Update Diagnostics”<br />
Rev 0 - 33 - © 2009 Crane CashCode Co.
A division of<br />
With <strong>2500</strong> <strong>Bill</strong> <strong>Cashbox</strong><br />
Part 1: Operational Manual<br />
5.4 Software Update Diagnostics:<br />
Normally, the download process will be accompanied by a blinking red-green status light for<br />
about 1 minute. If the download has competed successfully, the status light will turn green.<br />
Should the download be unsuccessful, the status light will turn red, <strong>with</strong> short green flashes.<br />
The following table lists possible errors which may take place during a download:<br />
Green<br />
Flashes<br />
1<br />
Error<br />
Unable to write program<br />
memory<br />
Solution<br />
Turn POWER OFF, remove and insert the Memory<br />
Card again, turn POWER ON.<br />
Send validating head for service<br />
2 Firmware integrity error Reprogram device using proper Memory Card<br />
3 Wrong memory card<br />
4 Security error<br />
Follow the next steps checking whether device went<br />
back to operation:<br />
Verify that the software is suitable to the <strong>Bill</strong> <strong>Validator</strong><br />
type.<br />
Insert correct type of CashCode Memory Card.<br />
Turn POWER OFF, remove and insert the Memory<br />
Card again, turn POWER ON.<br />
Replace Memory Card <strong>with</strong> the new <strong>one</strong>.<br />
Verify that software is suitable for download.<br />
Repeat procedure.<br />
Rev 0 - 34 - © 2009 Crane CashCode Co.
A division of<br />
With <strong>2500</strong> <strong>Bill</strong> <strong>Cashbox</strong><br />
Part 1: Operational Manual<br />
6. TROUBLE SHOOTING:<br />
CashCode’s <strong>one</strong> TM <strong>Bill</strong> <strong>Validator</strong> is equipped <strong>with</strong> a self-diagnostic feature to aid in repair and<br />
maintenance. When the power to the <strong>Bill</strong> <strong>Validator</strong> is turned ON, the <strong>Bill</strong> <strong>Validator</strong> begins its<br />
self-diagnostic operation.<br />
If the self-diagnostic test is passed, then the status light will turn green. If an error is detected,<br />
then the status light on the front of the <strong>Bill</strong> <strong>Validator</strong> will blink red.<br />
The number of times the red light flashes on the <strong>Bill</strong> <strong>Validator</strong> is an indication of a specific<br />
problem or malfunction. A detailed list of these errors and corrective action is provided in the<br />
Diagnostics section to follow.<br />
Red-green<br />
status light<br />
Rev 0 - 35 - © 2009 Crane CashCode Co.
A division of<br />
With <strong>2500</strong> <strong>Bill</strong> <strong>Cashbox</strong><br />
Part 1: Operational Manual<br />
6.1 Operation Mode Diagnostics:<br />
During normal operation, the status light remains a steady green. If an error occurs, it will<br />
begin to flash red. Count the flashes and use the following table to diagnose any problems<br />
<strong>with</strong> your <strong>one</strong> TM validator.<br />
Red Flashes Error Solution<br />
1<br />
2<br />
<strong>Cashbox</strong> is removed from<br />
bill <strong>Validator</strong><br />
An error occurred during<br />
CPU exchange <strong>with</strong><br />
magnetic board<br />
3 <strong>Cashbox</strong> is full<br />
4<br />
5<br />
Mechanical Jam in<br />
<strong>Cashbox</strong> or Stacker fail<br />
Failure of die-electric<br />
Sensor<br />
6 Failure of Optical Sensor<br />
7 Failure of Magnetic Sensor<br />
8<br />
9<br />
10<br />
Failure of Transport Motor<br />
Speed of Transport motor<br />
is too fast<br />
Failure in alignment<br />
mechanism<br />
11 <strong>Bill</strong> pathway is not empty<br />
12<br />
13<br />
<strong>Bill</strong> jam in entry slot and no<br />
credit is issued<br />
Overload of transport<br />
motor<br />
14 System Error<br />
Check if <strong>Cashbox</strong> is installed correctly<br />
Reset device power, if the problem persists send<br />
device for repair.<br />
Remove <strong>Cashbox</strong>, empty <strong>Cashbox</strong> and insert<br />
empty <strong>Cashbox</strong>.<br />
Remove <strong>Cashbox</strong> from <strong>Bill</strong> <strong>Validator</strong> Housing and<br />
extract crumpled or jammed bill.<br />
Turn power on and check if stacker motor rotates.<br />
Reset device power, if the problem persists send<br />
device for repair.<br />
Open <strong>Validator</strong> head guide, clean optical sensors<br />
(please see maintenance section for cleaning<br />
details on these sensors).<br />
Open <strong>Validator</strong> head guide, clean inductive sensors<br />
(please see maintenance section for cleaning<br />
details on these sensors).<br />
1. Open <strong>Validator</strong> head guide, clean path.<br />
2. Close <strong>Validator</strong> head guide.<br />
3. If <strong>Validator</strong> does not start, turn off power, release<br />
<strong>Validator</strong> head and check receiving path.<br />
4. Insert <strong>Validator</strong> head and turn power on.<br />
Check power supply voltage.<br />
See Solution 8.<br />
1. Open receiving path and check that it is clean.<br />
2. Remove <strong>Cashbox</strong> from bill <strong>Validator</strong> and clean<br />
path.<br />
Open receiving path and check that it is clean.<br />
Open <strong>Validator</strong> head guide and check to see if path<br />
is clean.<br />
Reset device power. If the problem still exists send<br />
device for repair.<br />
If any problems persist, contact your nearest service center or CashCode Technical Support.<br />
Rev 0 - 36 - © 2009 Crane CashCode Co.
A division of<br />
With <strong>2500</strong> <strong>Bill</strong> <strong>Cashbox</strong><br />
Part 1: Operational Manual<br />
6.2 Diagnosing <strong>with</strong> a PC<br />
Using the FLS Navigator utility, you can diagnose, locate, and repair problems <strong>with</strong> your<br />
<strong>one</strong> TM bill validator, as well as check performance statistics. The PC used for the diagnostic<br />
must have the latest CashCode software and drivers installed (located on the installation CD<br />
that came <strong>with</strong> your <strong>one</strong> TM <strong>Bill</strong> <strong>Validator</strong>).<br />
1. To begin, please ensure the validator is turned ON and connected to a host<br />
machine.<br />
2. Connect the front service USB port to the PC using a standard USB A/B cable.<br />
3. If required, use the “Add New Hardware” utility to select the VCOM driver, located in<br />
the /vcom/ folder of your CashCode installation directory.<br />
4. Launch the FLS Navigator (FLSNav.exe) utility.<br />
5. Click the “Connect” button to establish connection between the PC and the<br />
validator.<br />
6. To collect statistics use the following functions:<br />
a. Downloads statistics from the validator and displays them.<br />
b. Saves statistics in an external file on your PC.<br />
c. Opens previously saved statistics for viewing.<br />
7. To troubleshoot your validator:<br />
a. Click the Diagnose button to begin the diagnostic process.<br />
b. The validator will run through a self-diagnostic test.<br />
c. Once finished, click on the guide tab to see an overview of detected<br />
problems and solutions.<br />
d. If an error prompts you to “look at View X”, you can use the view tabs to see<br />
the physical location of the problem inside the validator.<br />
e. Click on the print button to print a repair ticket <strong>with</strong> detected problems.<br />
Two copies will be printed; <strong>one</strong> for your records and <strong>one</strong> for the Service<br />
Center)<br />
8. Once finished, press the “Disconnect” button to sever the connection.<br />
Rev 0 - 37 - © 2009 Crane CashCode Co.
A division of<br />
With <strong>2500</strong> <strong>Bill</strong> <strong>Cashbox</strong><br />
Part 1: Operational Manual<br />
7. HOW TO REACH US:<br />
7.1 Technical Support Department:<br />
*CashCode Head Office)<br />
Crane CashCode,<br />
(A division of Crane Payment Solutions).<br />
553 Basaltic Road, Concord, Ontario<br />
Canada L4K 4W8<br />
Ph<strong>one</strong>: 1-800-584-2633 (+1-905-303-8874)<br />
Fax: 1-800-593- 2633 (+1-905-303-8875)<br />
E-mail:<br />
support@cashcode.com<br />
ELearning<br />
http://elearning.cashcode.com<br />
Website<br />
http://support.cashcode.com<br />
7.2 Service Centers:<br />
To locate your nearest service center, please check our website:<br />
http://support.cashcode.com/en/service-locator/index.php<br />
Rev 0 - 38 - © 2009 Crane CashCode Co.
Filename:<br />
One_<strong>2500</strong>_Part1_0<br />
Directory:<br />
\\Cc-serv\engineering\R-Drive\Manuals\Operation<br />
Manuals\FLS\Draft<br />
Template:<br />
C:\Documents and Settings\pbovbel\Application<br />
Data\Microsoft\Templates\Manual.dot<br />
Title:<br />
Crane Cash Code<br />
Subject:<br />
Onetrack Operation Manual<br />
Author:<br />
Pavel Bovbel<br />
Keywords:<br />
<strong>one</strong>track<br />
Comments:<br />
Creation Date: 11/9/2009 3:30:00 PM<br />
Change Number: 9<br />
Last Saved On: 12/7/2009 10:16:00 AM<br />
Last Saved By: nshah<br />
Total Editing Time: 10 Minutes<br />
Last Printed On: 12/7/2009 10:17:00 AM<br />
As of Last Complete Printing<br />
Number of Pages: 38<br />
Number of Words: 6,400 (approx.)<br />
Number of Characters: 33,542 (approx.)