TT INTEGRABLE GAR final GB - Vintec and Transtherm
TT INTEGRABLE GAR final GB - Vintec and Transtherm
TT INTEGRABLE GAR final GB - Vintec and Transtherm

You also want an ePaper? Increase the reach of your titles
YUMPU automatically turns print PDFs into web optimized ePapers that Google loves.
<strong>TT</strong> <strong>INTEGRABLE</strong> <strong>GAR</strong> <strong>final</strong> <strong>GB</strong> 1/10/01 13:56 Page 10<br />
Layout <strong>and</strong> loading recommendations<br />
Every rack can be used as a storage rack or as a sliding rack. Your cabinet’s<br />
racks have 8 cut-outs for Bordeaux or Alsace bottle, <strong>and</strong> 7 for Burgundy or<br />
Champagne bottles. These enable you to install your bottles in total security.<br />
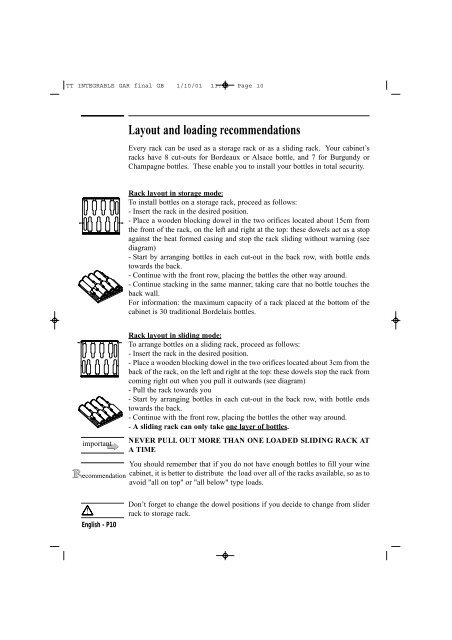
Rack layout in storage mode:<br />
To install bottles on a storage rack, proceed as follows:<br />
- Insert the rack in the desired position.<br />
- Place a wooden blocking dowel in the two orifices located about 15cm from<br />
the front of the rack, on the left <strong>and</strong> right at the top: these dowels act as a stop<br />
against the heat formed casing <strong>and</strong> stop the rack sliding without warning (see<br />
diagram)<br />
- Start by arranging bottles in each cut-out in the back row, with bottle ends<br />
towards the back.<br />
- Continue with the front row, placing the bottles the other way around.<br />
- Continue stacking in the same manner, taking care that no bottle touches the<br />
back wall.<br />
For information: the maximum capacity of a rack placed at the bottom of the<br />
cabinet is 30 traditional Bordelais bottles.<br />
important<br />
ecommendation<br />
Rack layout in sliding mode:<br />
To arrange bottles on a sliding rack, proceed as follows:<br />
- Insert the rack in the desired position.<br />
- Place a wooden blocking dowel in the two orifices located about 3cm from the<br />
back of the rack, on the left <strong>and</strong> right at the top: these dowels stop the rack from<br />
coming right out when you pull it outwards (see diagram)<br />
- Pull the rack towards you<br />
- Start by arranging bottles in each cut-out in the back row, with bottle ends<br />
towards the back.<br />
- Continue with the front row, placing the bottles the other way around.<br />
- A sliding rack can only take one layer of bottles.<br />
NEVER PULL OUT MORE THAN ONE LOADED SLIDING RACK AT<br />
A TIME<br />
You should remember that if you do not have enough bottles to fill your wine<br />
cabinet, it is better to distribute the load over all of the racks available, so as to<br />
avoid "all on top" or "all below" type loads.<br />
English - P10<br />
Don’t forget to change the dowel positions if you decide to change from slider<br />
rack to storage rack.