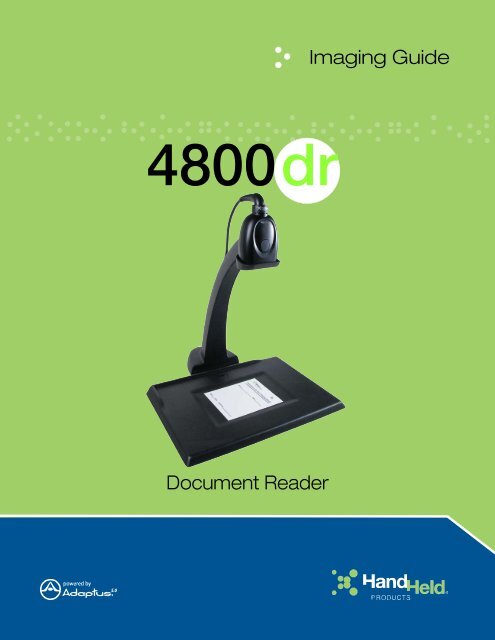
Document Reader Imaging Guide
Document Reader Imaging Guide
Document Reader Imaging Guide
Create successful ePaper yourself
Turn your PDF publications into a flip-book with our unique Google optimized e-Paper software.
<strong>Document</strong> <strong>Reader</strong><br />
<strong>Imaging</strong> <strong>Guide</strong>
Disclaimer<br />
Hand Held Products (“Hand Held Products”) reserves the right to make changes in specifications and other information contained<br />
in this document without prior notice, and the reader should in all cases consult Hand Held Products to determine whether any<br />
such changes have been made. The information in this publication does not represent a commitment on the part of Hand Held<br />
Products.<br />
Hand Held Products shall not be liable for technical or editorial errors or omissions contained herein; nor for incidental or<br />
consequential damages resulting from the furnishing, performance, or use of this material.<br />
This document contains proprietary information that is protected by copyright. All rights are reserved. No part of this document<br />
may be photocopied, reproduced, or translated into another language without the prior written consent of Hand Held Products.<br />
©2007 Hand Held Products All rights reserved.<br />
Web Address: www.handheld.com<br />
Microsoft ® Windows ® is either a registered trademark or trademarks of Microsoft Corporation in the United States and/or other<br />
countries.<br />
Macintosh ® is a trademark of Apple Computer, Inc., registered in the U.S. and other countries.<br />
Other product names or marks mentioned in this document may be trademarks or registered trademarks of other companies and<br />
are the property of their respective owners.<br />
FCC Class A Compliance Statement<br />
This device complies with part 15 of the FCC Rules. Operation is subject to the following two conditions:<br />
• This device may not cause harmful interference.<br />
• This device must accept any interference received, including interference that may cause undesired operation.<br />
This equipment has been tested and found to comply with the limits for a Class A digital device, pursuant to part 15 of the FCC<br />
Rules. These limits are designed to provide reasonable protection against harmful interference when the equipment is operated<br />
in a commercial environment. This equipment generates, uses, and can radiate radio frequency energy and, if not installed and<br />
used in accordance with the instruction manual, may cause harmful interference to radio communications. However, there is no<br />
guarantee that interference will not occur in a particular installation. Operation of this equipment in a residential area is likely to<br />
cause harmful interference, in which case the user will be required to correct the interference at his own expense.<br />
Caution: Any changes or modifications made to this device that are not expressly approved by Hand Held Products, Inc. may<br />
void the user's authority to operate the equipment.<br />
Note: To maintain compliance with FCC Rules and Regulations, cables connected to this device must be shielded cables, in<br />
which the cable shield wire(s) have been grounded (tied) to the connector shell.<br />
Canadian Class A Compliance<br />
This Class A digital apparatus complies with Canadian ICES-003.<br />
Conformité à la règlementation canadienne<br />
Cet appareil numérique de la Classe A est conforme à la norme NMB-003 du Canada.<br />
The CE mark on the product indicates that the system has been tested to and conforms with the provisions noted<br />
within the 2004/108/EC Electromagnetic Compatibility Directive and the 2006/95/EC Low Voltage Directive.<br />
For further information please contact:<br />
Hand Held Products<br />
Nijverheidsweg 9-13<br />
5627 BT Eindhoven<br />
The Netherlands<br />
Hand Held Products shall not be liable for use of our product with equipment (i.e., power supplies, personal computers, etc.) that<br />
is not CE marked and does not comply with the Low Voltage Directive.<br />
Patents<br />
Please refer to the product packaging for a list of patents.
LED Safety Statement<br />
This device has been tested in accordance with IEC60825-1 LED safety, and has been certified to be under the limits of a Class<br />
1 LED device.<br />
Laser Eye Safety Statement<br />
This product is under the limits of a class 2 laser device.<br />
This device has been tested in accordance with and complies with IEC60825-1: 1993+A1+A2 and 21 CFR 1040.10 and 1040.11,<br />
except for deviations pursuant to Laser Notice No. 50, dated July 26, 2001.<br />
LASER LIGHT, DO NOT STARE INTO BEAM, CLASS 2 LASER PRODUCT, 1.0 mW MAX OUTPUT: 650nM.<br />
Caution: Use of controls or adjustments or performance of procedures other than those specified herein may result in hazardous<br />
radiation exposure.<br />
UL and cUL Statement<br />
UL and cUL listed: UL60950-1 and CSA C22.2 No.60950-1-03.<br />
C-Tick Statement<br />
Conforms to AS/NZS 3548. C-Tick number: N10410.<br />
Solids and Water Protection<br />
The 4800dr has a rating of IP40, immunity of foreign particles and dripping water.<br />
GS Mark<br />
This product has been issued a GS certificate.<br />
Waste Electrical and Electronic Equipment Information<br />
Note: Hand Held Products complies with Directive 2002/96/EC OF THE EUROPEAN PARLIAMENT AND OF THE COUNCIL of<br />
27 January 2003 on waste electrical and electronic equipment (WEEE).<br />
This product has required the extraction and use of natural resources for its production. It may contain hazardous substances<br />
that could impact health and the environment, if not properly disposed.<br />
In order to avoid the dissemination of those substances in our environment and to diminish the pressure on the natural resources,<br />
we encourage you to use the appropriate take-back systems for product disposal. Those systems will reuse or recycle most of<br />
the materials of the product you are disposing in a sound way.<br />
The crossed out wheeled bin symbol informs you that the product should not be disposed of along with municipal waste<br />
and invites you to use the appropriate separate take-back systems for product disposal.<br />
If you need more information on the collection, reuse, and recycling systems, please contact your local or regional waste<br />
administration.<br />
You may also contact your supplier for more information on the environmental performances of this product.
<strong>Document</strong> <strong>Reader</strong> Identification<br />
Compliance Label<br />
location<br />
LASER LIGHT. DO NOT STARE INTO BEAM<br />
CLASS 2 LASER PRODUCT<br />
1.0 mW MAX OUTPUT: 650nM<br />
IEC60825-1: 1993+A1+A2<br />
Complies with 21 CFR 1040.10 and 1040.11<br />
except for deviations pursuant to Laser<br />
Notice No. 50, dated July 26, 2001.<br />
Laser Light Emissions
Table of Contents<br />
Chapter 1 - <strong>Imaging</strong> Commands<br />
Single-Use Basis ................................................................................................................................. 1-1<br />
Command Syntax................................................................................................................................ 1-1<br />
Step 1 - Take a Picture Using IMGSNP ....................................................................................1-1<br />
Image Snap - IMGSNP ....................................................................................................................... 1-1<br />
IMGSNP Modifiers ...................................................................................................................... 1-1<br />
P - <strong>Imaging</strong> Style ................................................................................................................... 1-1<br />
B - Beeper ............................................................................................................................. 1-1<br />
T - Wait for Trigger .............................................................................................................. 1-2<br />
L - LED State ........................................................................................................................ 1-2<br />
A - Aimer Lines .................................................................................................................... 1-2<br />
E - Exposure .......................................................................................................................... 1-2<br />
G - Gain ................................................................................................................................. 1-3<br />
W - Target White Value ........................................................................................................ 1-3<br />
D - Delta for Acceptance ...................................................................................................... 1-3<br />
U - Update Tries .................................................................................................................... 1-3<br />
% - Target Set Point Percentage ........................................................................................... 1-4<br />
Step 2 - Ship a Picture Using IMGSHP or IMGACP ...............................................................1-5<br />
Image Ship - IMGSHP........................................................................................................................ 1-5<br />
Image Auto Crop - IMGACP.............................................................................................................. 1-5<br />
IMGSHP/IMGACP Modifiers...................................................................................................... 1-6<br />
A - Infinity Filter ................................................................................................................... 1-6<br />
C - Compensation .................................................................................................................. 1-6<br />
D - Pixel Depth ..................................................................................................................... 1-6<br />
E - Edge Sharpen ................................................................................................................... 1-7<br />
F - File Format ...................................................................................................................... 1-7<br />
H - Histogram Stretch ........................................................................................................... 1-7<br />
I - Invert Image ..................................................................................................................... 1-8<br />
IF- Noise Reduction .............................................................................................................. 1-8<br />
IU - Image Adaptive Text Filter ........................................................................................... 1-9<br />
IS - Unsharp/Brighten Filter ............................................................................................... 1-10<br />
J - JPEG Image Quality ....................................................................................................... 1-10<br />
K - Gamma Correction ........................................................................................................ 1-10<br />
L, R, T, B, M - Image Cropping ......................................................................................... 1-11<br />
P - Protocol .......................................................................................................................... 1-11<br />
S - Pixel Ship ....................................................................................................................... 1-12<br />
U - <strong>Document</strong> Image Filter ................................................................................................. 1-12<br />
V - Blur Image .................................................................................................................... 1-13<br />
W - Histogram Ship ............................................................................................................ 1-13<br />
Intelligent Signature Capture - IMGBOX......................................................................................... 1-14<br />
IMGBOX Modifiers ................................................................................................................... 1-14<br />
A - Output Image Width ..................................................................................................... 1-14<br />
B - Output Image Height ..................................................................................................... 1-15<br />
i
D - Pixel Depth ....................................................................................................................1-15<br />
F - File Format .....................................................................................................................1-15<br />
H - Height of Signature Capture Area .................................................................................1-15<br />
K - Gamma Correction ........................................................................................................1-15<br />
R - Resolution of Signature Capture Area ...........................................................................1-16<br />
S - Barcode Aspect Ratio ....................................................................................................1-16<br />
W - Width of Signature Capture Area .................................................................................1-16<br />
X - Horizontal Barcode Offset ............................................................................................1-16<br />
Y - Vertical Barcode Offset .................................................................................................1-16<br />
Chapter 2 - Serial Default Commands<br />
Conventions .........................................................................................................................................2-1<br />
Menu Command Syntax ......................................................................................................................2-1<br />
Query Commands .........................................................................................................................2-1<br />
Concatenation of Multiple Commands .........................................................................................2-2<br />
Responses......................................................................................................................................2-2<br />
Examples of Query Commands ....................................................................................................2-2<br />
Menu Commands.................................................................................................................................2-3<br />
Chapter 3 - Customer Support<br />
Technical Assistance ...........................................................................................................................3-1<br />
Online Technical Assistance.........................................................................................................3-1<br />
For Further Information ................................................................................................................3-1<br />
Product Service and Repair .................................................................................................................3-1<br />
Online Product Service and Repair Assistance.............................................................................3-2<br />
ii
1<br />
<strong>Imaging</strong> Commands<br />
The document reader is like a digital camera in the way it captures, manipulates, and transfers images. The following commands<br />
allow you to alter the way the document reader performs these functions.<br />
Single-Use Basis<br />
<strong>Imaging</strong> Commands with their modifiers send instructions to the document reader on a single-use basis, and take effect for a<br />
single image capture. Once that capture is complete, the document reader reverts to its imaging default settings. If you want to<br />
permanently change a setting, you must use the serial default commands (see Chapter 2). When the serial default command is<br />
used, that selection becomes the new, permanent setting for the document reader.<br />
Command Syntax<br />
Multiple modifiers and commands can be issued within one sequence. If additional modifiers are to be applied to the same<br />
command, just add the modifiers to that command. For example, to add 2 modifiers to the Image Snap command, such as setting<br />
the <strong>Imaging</strong> Style to 1P and the Wait for Trigger to 1T, you would enter IMGSNP1P1T.<br />
Note: After processing an image capture command (IMGSNP or IMGBOX), you must follow it with an IMGSHP or IMGACP<br />
command if you want to see it on your terminal.<br />
To add a command to a sequence, each new command is separated with a semicolon. For example, to add the Image Ship<br />
command to the above sequence, you would enter IMGSNP1P1T;IMGSHP.<br />
The imaging commands are:<br />
Image Snap - IMGSNP (page 1-1)<br />
Image Ship - IMGSHP (page 1-5)<br />
Intelligent Signature Capture - IMGBOX (page 1-14)<br />
The modifiers for each of these commands follow the command description.<br />
Image Snap - IMGSNP<br />
Step 1 - Take a Picture Using IMGSNP<br />
An image is taken whenever the hardware button is pressed, or when the Image Snap (IMGSNP) command is processed.<br />
The image snap command has many different modifiers that can be used to change the look of the image in memory. Modifiers<br />
always begin with numbers and end with a letter (case insensitive). Any number of modifiers may be appended to the IMGSNP<br />
command. For example, you can use the following command to snap an image, increase the gain, and have the beeper sound<br />
once the snap is complete:<br />
IMGSNP2G1B<br />
IMGSNP Modifiers<br />
P - <strong>Imaging</strong> Style<br />
This sets the Image Snap style.<br />
0P Decoding Style. This processing allows a few frames to be taken until the exposure parameters are met. The<br />
last frame is then available for further use.<br />
1P Photo Style (default). This mimics a simple digital camera, and results in a visually optimized image.<br />
2P Manual Style. This is an advanced style that should only be used by an experienced user. It allows you the<br />
most freedom to set up the document reader, and has no auto-exposure.<br />
B - Beeper<br />
Causes a beep to sound after an image is snapped.<br />
0B No beep (default)<br />
1B Sounds a beep when the image is captured.<br />
<strong>Document</strong> <strong>Reader</strong> <strong>Imaging</strong> <strong>Guide</strong> 1 - 1
T - Wait for Trigger<br />
Waits for a hardware button push before taking the image. This is only available when using Photo Style (1P).<br />
0T Takes image immediately (default)<br />
1T Waits for a button push, then takes the image<br />
L - LED State<br />
Determines if the LEDs should be on or off, and when. Ambient illumination (0L) is preferred for taking pictures of color<br />
documents, such as ID cards, especially when the document reader is in a stand. LED illumination (1L) is preferred when<br />
the document reader is hand held. LED State is not available when using Decoding Style (0P).<br />
0L LEDs off (default)<br />
1L LEDs on<br />
A - Aimer Lines<br />
Sets whether the aimer lines will be captured with the image or not. In order to capture the aimer lines, the LEDs must also<br />
be off. If the LEDs are on, the aimer lines will not be captured.<br />
0A Aimer Lines off (default)<br />
1A Aimer Lines on<br />
Example of Aimer Lines Off (0A):<br />
Example of Aimer Lines On (1A) with LEDs off (0L):<br />
E - Exposure<br />
Exposure is used in Manual Style only (2P), and allows you to set the exposure time. This is similar to setting a shutter<br />
speed on a camera. The exposure time determines how long the imager takes to record an image. On a bright day,<br />
exposure times can be very short because plenty of light is available to help record an image. At nighttime, exposure time<br />
can increase dramatically due to the near absence of light. Units are 127 microseconds. (Default = 7874)<br />
nE Range: 1 - 7874<br />
Example of Exposure at 7874E with fluorescent lighting:<br />
Example of Exposure at 100E with fluorescent lighting:<br />
1 - 2 <strong>Document</strong> <strong>Reader</strong> <strong>Imaging</strong> <strong>Guide</strong>
G - Gain<br />
Gain is used in Manual Style only (2P). Like a volume control, the gain modifier boosts the signal and multiplies the pixel<br />
value. As you increase the gain, the noise in an image is also amplified.<br />
1G No gain (default)<br />
2G Medium gain<br />
4G Heavy gain<br />
8G Maximum gain<br />
Example of Gain at 1G: Example of Gain at 4G: Example of Gain at 8G:<br />
W - Target White Value<br />
Sets the target for the median grayscale value in the captured image. For capturing close-up images of high contrast<br />
documents, a lower setting, such as 75, is recommended. Higher settings result in longer exposure times and brighter<br />
images, but if the setting is too high, the image may be overexposed. Target White Value is only available when using Photo<br />
Style (1P). (Default = 125)<br />
nW Range: 0 - 255<br />
Example of White<br />
Value at 75W:<br />
Example of White<br />
Value at 125W:<br />
Example of White<br />
Value at 200W:<br />
D - Delta for Acceptance<br />
This sets the allowable range for the white value setting (see W - Target White Value). Delta is only available when using<br />
Photo Style (1P). (Default = 25)<br />
nD Range: 0 - 255<br />
U - Update Tries<br />
This sets the maximum number of frames the document reader should take to reach the D - Delta for Acceptance. Update<br />
Tries is only available when using Photo Style (1P). (Default = 6)<br />
nU Range: 0 - 10<br />
<strong>Document</strong> <strong>Reader</strong> <strong>Imaging</strong> <strong>Guide</strong> 1 - 3
% - Target Set Point Percentage<br />
Sets the target point for the light and dark values in the captured image. A setting of 75% means 75% of the pixels are at<br />
or below the target white value, and 25% of the pixels are above the target white value. Altering this setting from the default<br />
is not recommended under normal circumstances. To alter grayscale values, W - Target White Value should be used.<br />
(Default = 97)<br />
n% Range: 1 - 99<br />
Example of Target Set<br />
Point Percentage at 97%:<br />
Example of Target Set<br />
Point Percentage at 50%:<br />
Example of Target Set<br />
Point Percentage at 40%:<br />
1 - 4 <strong>Document</strong> <strong>Reader</strong> <strong>Imaging</strong> <strong>Guide</strong>
Image Ship - IMGSHP<br />
Step 2 - Ship a Picture Using IMGSHP or IMGACP<br />
An image is taken whenever the button is pressed, or when the Image Snap (IMGSNP) command is processed. The last image<br />
is always stored in memory. You can “ship” the image by using the IMGSHP or IMGACP command.<br />
The image ship and image auto crop commands have many different modifiers that can be used to change the look of the image<br />
output by the document reader. Modifiers affect the image that is transmitted, but do not affect the image in memory. Modifiers<br />
always begin with a number and end with a letter (case insensitive). Any number of modifiers may be appended to the IMGSHP<br />
or IMGACP command. For example, you can use the following command to snap and ship a bitmap image with gamma<br />
correction and document image filtering:<br />
IMGSNP;IMGSHP8F75K26U<br />
Image Auto Crop - IMGACP<br />
Image Auto Crop removes unwanted portions of an image, such as blank space surrounding an image. Image Auto Crop uses<br />
artificial intelligence to search for the area of the image that contains text. It then crops the image to just that area and adjusts it<br />
to a horizontal display. Depending on the size and position of the document, this may possibly result in an upside-down or<br />
sideways image. The image can then be rotated to the proper orientation using your local software. Smaller documents will crop<br />
more quickly than larger documents. The accuracy of auto crop is affected by the density of the text, amount of non-text features,<br />
and contrast in the image.<br />
Note: Any modifiers to IMGACP are applied to the resultant, auto cropped image.<br />
The same modifiers are used for image ship and image auto crop. The following command was used to take and crop an image<br />
that had the white value lowered and the edge sharpen filter on:<br />
IMGSNP75W;IMGACP14E<br />
Image taken without Autocrop:<br />
Image taken with Autocrop:<br />
<strong>Document</strong> <strong>Reader</strong> <strong>Imaging</strong> <strong>Guide</strong> 1 - 5
IMGSHP/IMGACP Modifiers<br />
A - Infinity Filter<br />
Enhances pictures taken from very long distances (greater than 10 feet or 3m). The Infinity Filter should not be used with<br />
Image Auto Crop - IMGACP (page 1-5).<br />
0A Infinity filter off (default)<br />
1A Infinity filter on<br />
Example of Infinity Filter off (0A)<br />
from approximately 12 feet (3.66m) away:<br />
Example of Infinity Filter on (1A)<br />
from approximately 12 feet (3.66m) away:<br />
C - Compensation<br />
Flattens the image to account for variations in illumination across the image.<br />
0C Compensation disabled (default)<br />
1C Compensation enabled<br />
Example of Compensation at 0C: Example of Compensation at 1C:<br />
D - Pixel Depth<br />
Indicates the number of bits per pixel in the transmitted image (KIM or BMP format only).<br />
8D 8 bits per pixel, grayscale image (default)<br />
1D 1 bit per pixel, black and white image<br />
1 - 6 <strong>Document</strong> <strong>Reader</strong> <strong>Imaging</strong> <strong>Guide</strong>
E - Edge Sharpen<br />
An edge sharpen filter cleans up the edges of an image, making it look cleaner and sharper. While edge sharpening does<br />
make the image look cleaner, it also removes some fine detail from the original image. The strength of the edge sharpen<br />
filter can be entered from 1 to 24. Entering a 23E gives the sharpest edges, but also increases noise in the image.<br />
0E Don’t sharpen image (default)<br />
14E Apply edge sharpen for typical image<br />
ne Apply edge sharpen using strength n (n = 1-24)<br />
Example of Edge Sharpen at 0E: Example of Edge Sharpen at 24E:<br />
F - File Format<br />
Indicates the desired format for the image.<br />
0F KIM format<br />
1F TIFF binary<br />
2F TIFF binary group 4, compressed<br />
3F TIFF grayscale<br />
4F Uncompressed binary (upper left to lower right, 1 pixel/bit, 0 padded end of line)<br />
5F Uncompressed grayscale (upper left to lower right, bitmap format)<br />
6F JPEG image (default)<br />
8F BMP format (lower right to upper left, uncompressed)<br />
H - Histogram Stretch<br />
Increases the contrast of the transmitted image. Not available with some image formats.<br />
0H No stretch (default)<br />
1H Histogram stretch<br />
Example of Histogram Stretch at 0H: Example of Histogram Stretch at 1H:<br />
<strong>Document</strong> <strong>Reader</strong> <strong>Imaging</strong> <strong>Guide</strong> 1 - 7
I - Invert Image<br />
Invert image is used to rotate the image around the X or Y axis.<br />
Note: This feature should only be used with Image Ship - IMGSHP (page 1-5). Using this feature with Image Auto Crop -<br />
IMGACP (page 1-5) may produce undesired results since Image Auto Crop attempts to rotate an image to a horizontal<br />
display.<br />
1ix<br />
1iy<br />
Invert around the X axis (flips picture upside down)<br />
Invert around the Y axis (flips picture left to right)<br />
Example of image not inverted:<br />
Example of image<br />
with Invert Image set to 1ix:<br />
Example of image<br />
with Invert Image set to 1iy:<br />
IF- Noise Reduction<br />
Used to reduce the salt and pepper noise in an image.<br />
0if No salt and pepper noise reduction (default)<br />
1if Salt and pepper noise reduction<br />
Example of Noise Reduction Off (0if):<br />
Example of Noise Reduction On (1if):<br />
1 - 8 <strong>Document</strong> <strong>Reader</strong> <strong>Imaging</strong> <strong>Guide</strong>
IR - Image Rotate<br />
Note: This feature should only be used with Image Ship - IMGSHP (page 1-5). Using this feature with Image Auto Crop -<br />
IMGACP (page 1-5) may produce undesired results since Image Auto Crop attempts to rotate an image to a horizontal<br />
display.<br />
0ir<br />
1ir<br />
2ir<br />
3ir<br />
Image as snapped (rightside up) (default)<br />
Rotate image 90 degrees to the right<br />
Rotate image 180 degrees (upside down)<br />
Rotate image 90 degrees to the left<br />
Example of Image Rotate set to 0ir:<br />
Example of Image Rotate set to 2ir:<br />
Example of Image Rotate set to 1ir:<br />
Example of Image Rotate set to 3ir:<br />
IU - Image Adaptive Text Filter<br />
The Adaptive Text Filter automatically sharpens the edges and smooths the area between the edges of text in an image.<br />
The Adaptive Text Filter enhances images of documents such as ID cards and prescriptions, resulting in crisper text.<br />
See U - <strong>Document</strong> Image Filter (page 1-12) for information about setting the <strong>Document</strong> Image Filter manually.<br />
Note: The Adaptive Text Filter should not be used concurrently with the IS - Unsharp/Brighten Filter.<br />
0iu<br />
1iu<br />
Adaptive Text Filter off (default)<br />
Adaptive Text Filter on<br />
Example of Adaptive Text Filter Off (0iu):<br />
Example of Adaptive Text Filter On (1iu):<br />
<strong>Document</strong> <strong>Reader</strong> <strong>Imaging</strong> <strong>Guide</strong> 1 - 9
IS - Unsharp/Brighten Filter<br />
The Unsharp/Brighten Filter automatically sharpens the text and brightens the contrast of the image, making text more<br />
readable. This is similar to the Image Adaptive Text Filter, however it brightens the image as well. You should test both<br />
image processing techniques to determine which filter works best for your environment.<br />
Note: The Unsharp/Brighten Filter should not be used concurrently with the IU - Image Adaptive Text Filter.<br />
0is<br />
1is<br />
Unsharp/Brighten Filter off (default)<br />
Unsharp/Brighten Filter on<br />
Example of Unsharp/Brighten Filter Off (0is):<br />
Example of Unsharp/Brighten Filter On (1is):<br />
J - JPEG Image Quality<br />
Sets the desired quality when the JPEG image format is selected. Higher numbers result in higher quality, but larger files.<br />
Smaller numbers result in greater amounts of lossy compression, faster transmission times, lower quality, but smaller files.<br />
(Default = 50)<br />
nJ Image is compressed as much as possible while preserving quality factor of n (n = 0 - 100)<br />
0J worst quality (smallest file)<br />
100J best quality (largest file)<br />
K - Gamma Correction<br />
Gamma measures the brightness of midtone values produced by the image. You can brighten or darken an image using<br />
gamma correction. A higher gamma correction yields an overall brighter image. The lower the setting, the darker the image.<br />
The optimal setting for text images is 50K.<br />
0K Gamma correction off (default)<br />
50K Apply gamma correction for brightening typical document image<br />
nK Apply gamma correction factor n (n = 0-1,000)<br />
Example of Gamma Correction<br />
set to 0K:<br />
Example of Gamma Correction<br />
set to 50K:<br />
Example of Gamma Correction<br />
set to 255K:<br />
1 - 10 <strong>Document</strong> <strong>Reader</strong> <strong>Imaging</strong> <strong>Guide</strong>
L, R, T, B, M - Image Cropping<br />
Note: Image Cropping should not be used with Image Auto Crop - IMGACP (see page 1-5).<br />
Ships a window of the image by specifying the left, right, top, and bottom pixel coordinates. Device columns are numbered<br />
0 through 1279, and device rows are numbered 0 through 959.<br />
nL The left edge of the shipped image corresponds to column n of the image in memory. Range: 000 - 1279.<br />
(Default = 0)<br />
nR The right edge of the shipped image corresponds to column n - 1 of the image in memory. Range: 000 - 1279.<br />
(Default = all columns)<br />
nT The top edge of the shipped image corresponds to row n of the image in memory. Range: 000 - 959. (Default =<br />
0)<br />
nB The bottom edge of the shipped image corresponds to row n - 1 of the image in memory. Range: 000 - 959.<br />
(Default = all rows)<br />
Uncropped Image:<br />
Example of Image<br />
Crop set to 300R:<br />
Example of Image<br />
Crop set to 300L:<br />
Example of Image Crop set to 200B:<br />
Example of Image Crop set to 200T:<br />
Alternately, specify the number of pixels to cut from the outside margin of the image; thus only the center pixels are<br />
transmitted.<br />
nM<br />
Margin: cut n columns from the left, n + 1 columns from the right, n rows from the top, and n + 1 rows from the<br />
bottom of the image. Ship the remaining center pixels. Range: 0 - 478.<br />
(Default = 0, or full image)<br />
Example of Image<br />
Crop set to 238M:<br />
P - Protocol<br />
Used for shipping an image. Protocol covers two features of the image data being sent to the host. It addresses the protocol<br />
used to send the data (Hmodem, which is an Xmodem 1K variant that has additional header information), and the format of<br />
the image data that is sent.<br />
0P None (raw data)<br />
2P None (default for USB)<br />
3P Hmodem compressed (default for RS-232)<br />
4P Hmodem<br />
<strong>Document</strong> <strong>Reader</strong> <strong>Imaging</strong> <strong>Guide</strong> 1 - 11
S - Pixel Ship<br />
Pixel Ship sizes an image in proportion to its original size. It decimates the image by shipping only certain, regularly spaced<br />
pixels. For example, 4S would transmit every fourth pixel from every fourth line. The smaller number of pixels shipped, the<br />
smaller the image, however, after a certain point the image becomes unusable.<br />
1S ship every pixel (default)<br />
2S ship every 2nd pixel, both horizontally and vertically<br />
3S ship every 3rd pixel, both horizontally and vertically<br />
Example of Pixel Ship set to 1S: Example of Pixel Ship set to 2S: Example of Pixel Ship set to 3S: Example of Pixel Ship set to 4S:<br />
U - <strong>Document</strong> Image Filter<br />
Allows you to input parameters to sharpen the edges and smooth the area between the edges of text in an image. This filter<br />
should be used with gamma correction (see page 1-10), with the document reader in a stand, and the image captured using<br />
the command:<br />
IMGSNP1P0L168W90%32D<br />
This filter typically provides better JPEG compression than the standard E - Edge Sharpen command (see page 1-13). This<br />
filter also works well when shipping pure black and white images (1 bit per pixel). The optimal setting is 26U.<br />
Note: If you want to use an automatic image filter, rather than changing these settings manually, refer to IU - Image Adaptive<br />
Text Filter (page 1-9).<br />
0U<br />
26U<br />
nU<br />
<strong>Document</strong> image filter off (default)<br />
Apply document image filter for typical document image<br />
Apply document image filter using grayscale threshold n. Use lower numbers when the image contrast is lower.<br />
1U will have a similar effect to setting E - Edge Sharpen (page 1-7) to 22e. Range: 0-255.<br />
Example of <strong>Document</strong> Image<br />
Filter set to 0U:<br />
Example of <strong>Document</strong> Image<br />
Filter set to 26U:<br />
1 - 12 <strong>Document</strong> <strong>Reader</strong> <strong>Imaging</strong> <strong>Guide</strong>
V - Blur Image<br />
Smooths transitions by averaging the pixels next to the hard edges of defined lines and shaded areas in an image.<br />
0V Don’t blur (default)<br />
1V Blur<br />
Example of Blur Image Off (0V):<br />
Example of Blur Image On (1V):<br />
W - Histogram Ship<br />
A histogram gives a quick picture of the tonal range of an image, or key type. A low-key image has detail concentrated in<br />
the shadows; a high-key image has detail concentrated in the highlights; and an average-key image has detail concentrated<br />
in the midtones. This modifier ships the histogram for an image.<br />
0W Don’t ship histogram (default)<br />
1W Ship histogram<br />
Image used for histogram:<br />
Histogram of image at left:<br />
<strong>Document</strong> <strong>Reader</strong> <strong>Imaging</strong> <strong>Guide</strong> 1 - 13
Intelligent Signature Capture - IMGBOX<br />
IMGBOX allows you to configure the size and location of a signature capture area relative to its proximity to a barcode. This<br />
allows you to tailor a signature capture area to a specific form. In order to use IMGBOX, you need a set form where the signature<br />
box location is in a known location relative to a barcode. You can input the overall size of the signature area, as well as specify<br />
how far the signature area is from the barcode, vertically and horizontally. You can also set the resolution and file format for the<br />
final output of the signature capture image.<br />
Note: IMGBOX commands can only be triggered by one of the following types of barcodes: PDF417, Code 39, Code 128, Aztec,<br />
Codabar, and Interleaved 2 of 5. Once one of these symbologies has been read, the image is retained for a possible<br />
IMGBOX command.<br />
The following IMGBOX example was executed and viewed using QuickView software. This software is available at<br />
www.handheld.com. Click on Services and Support-Download Software. Select 4800dr from the Products list, then select<br />
QuickView Software Utility.<br />
Below is an example of a signature capture application. In this example, the aimer is centered over the signature capture area<br />
and the trigger is pressed. A single beep is emitted, indicating that the imager has read a Code 128 barcode and the data has<br />
been transferred to the host. An IMGBOX command may now be sent from the host to specify the coordinates of the signature<br />
capture area below that code, and indicating that only that area containing the signature should be transferred as an image to<br />
the host.<br />
To see this example, align the aimer with the signature area (not with the barcode), then press the trigger.<br />
Send the following IMGBOX command string after the button push:<br />
IMGBOX245w37h55y.<br />
Note: Case is not important in the command string. It is used here only for clarity.<br />
The following image is captured:<br />
The IMGBOX commands have many different modifiers that can be used to change the size and appearance of the signature<br />
image output by the document reader. Modifiers affect the image that is transmitted, but do not affect the image in memory.<br />
Modifiers always begin with a number and end with a letter (case insensitive). Any number of modifiers may be appended to the<br />
IMGBOX command.<br />
Note: The IMGBOX command will return a NAK unless a window size (width and height) are specified. See H - Height of<br />
Signature Capture Area (page 1-15) and W - Width of Signature Capture Area (page 1-16).<br />
IMGBOX Modifiers<br />
A - Output Image Width<br />
This option is used to size the image horizontally. If using this option, set the resolution (R) to zero.<br />
Example of Image Width set to 200A: Example of Image Width set to 600A:<br />
1 - 14 <strong>Document</strong> <strong>Reader</strong> <strong>Imaging</strong> <strong>Guide</strong>
B - Output Image Height<br />
This option is used to size the image vertically. If using this option, set the resolution (R) to zero.<br />
Example of Image Height set to 50B: Example of Image Height set to 100B:<br />
D - Pixel Depth<br />
This indicates the number of bits per pixel in the transmitted image, which defines whether it will be grayscale or black and<br />
white.<br />
8D 8 bits per pixel, grayscale image (default)<br />
1D 1 bit per pixel, black and white image<br />
F - File Format<br />
This option indicates the type of file format in which to save the image.<br />
0F KIM format<br />
1F TIFF binary<br />
2F TIFF binary group 4, compressed<br />
3F TIFF grayscale<br />
4F Uncompressed Binary<br />
5F Uncompressed grayscale<br />
6F JPEG image (default)<br />
7F Outlined image<br />
8F BMP format<br />
H - Height of Signature Capture Area<br />
The height of the signature capture area must be measured in inches divided by .01. In the example, the height of the area<br />
to be captured is 3/8 inch, resulting in a value of H = .375/0.01 = 37.5.<br />
Example: IMGBOX245w37h55y.<br />
K - Gamma Correction<br />
Gamma measures the brightness of midtone values produced by the image. You can brighten or darken an image using<br />
gamma correction. A higher gamma correction yields an overall brighter image. The lower the setting, the darker the image.<br />
The optimal setting for text images is 50K.<br />
0K Gamma correction off (default)<br />
50K Apply gamma correction for brightening typical document image<br />
nK Apply gamma correction factor n (n = 1-255)<br />
Example of Gamma Correction<br />
set to 0K:<br />
Example of Gamma Correction<br />
set to 50K:<br />
Example of Gamma Correction<br />
set to 255K:<br />
<strong>Document</strong> <strong>Reader</strong> <strong>Imaging</strong> <strong>Guide</strong> 1 - 15
R - Resolution of Signature Capture Area<br />
The resolution is the number of pixels that the document reader outputs per each minimum bar width. The higher the value<br />
for R, the higher the quality of the image, but also the larger the file size. Values begin at 1000. The document reader<br />
automatically inserts a decimal point between the first and second digit. For example, use 2500 to specify a resolution of<br />
2.5. Set to zero when using the A and B modifiers (see A - Output Image Width and B - Output Image Height on page 1-15).<br />
Example of Resolution set to 0R:<br />
Example of Resolution set to 1000R:<br />
Example of Resolution set to 2000R:<br />
S - Barcode Aspect Ratio<br />
All dimensions used in IMGBOX are measured as multiples of the minimum element size of the barcode. The barcode<br />
aspect ratio allows you to set the ratio of the barcode height to the narrow element width. In the example, the narrow element<br />
width is .010 inches and the barcode height is 0.400 inches, resulting in a value of S = 0.4/0.01 = 40.<br />
W - Width of Signature Capture Area<br />
The width of the signature capture area must be measured in inches divided by .01. In the example, the width of the area<br />
to be captured is 2.4 inches, resulting in a value of W = 2.4/0.01 = 240. (A value of 245 was used in the example to<br />
accommodate a slightly wider image area.)<br />
Example: IMGBOX245w37h55y.<br />
X - Horizontal Barcode Offset<br />
The horizontal barcode offset allows you to offset the horizontal center of the signature capture area. Positive values move<br />
the horizontal center to the right and negative values to the left. Measurements are in multiples of the minimum bar width.<br />
Example of Horizontal Offset set to 75X:<br />
Example of Horizontal Offset set to -75X:<br />
Y - Vertical Barcode Offset<br />
The vertical barcode offset allows you to offset the vertical center of the signature capture area. Negative numbers indicate<br />
that the signature capture is above the barcode, and positive numbers indicate that the area is below the barcode.<br />
Measurements are in multiples of the minimum bar width.<br />
Example of Vertical Offset set to -7Y:<br />
Example of Vertical Offset set to 65Y:<br />
1 - 16 <strong>Document</strong> <strong>Reader</strong> <strong>Imaging</strong> <strong>Guide</strong>
2<br />
Serial Default Commands<br />
The following serial default commands are used to program the imaging features for your document reader. For complete<br />
descriptions of each command, refer to the corresponding page in this manual. For non-imaging programming commands, refer<br />
to the Barcode Manual.<br />
The following commands can be sent via a PC COM port using terminal emulation software.<br />
Conventions<br />
The following conventions are used for menu and query command descriptions:<br />
parameterA label representing the actual value you should send as part of a command.<br />
[option] An optional part of a command.<br />
{Data} Alternatives in a command.<br />
bold Names of menus, menu commands, buttons, dialog boxes, and windows that appear on the screen.<br />
Menu Command Syntax<br />
Menu commands have the following syntax (spaces have been used for clarity only):<br />
Prefix Tag SubTag {Data} [, SubTag {Data}] [; Tag SubTag {Data}] […] Storage<br />
Prefix Three ASCII characters: SYN M CR (ASCII 22,77,13).<br />
Tag A 3 character case-insensitive field that identifies the desired menu command group. For example, all RS-232 configuration<br />
settings are identified with a Tag of 232.<br />
SubTag A 3 character case-insensitive field that identifies the desired menu command within the tag group. For example,<br />
the SubTag for the RS-232 baud rate is BAD.<br />
Data The new value for a menu setting, identified by the Tag and SubTag.<br />
Storage A single character that specifies the storage table to which the command is applied. An exclamation point (!) performs<br />
the command’s operation on the device’s volatile menu configuration table. A period (.) performs the command’s<br />
operation on the device’s non-volatile menu configuration table. Use the non-volatile table only for semipermanent<br />
changes you want saved through a power cycle.<br />
Query Commands<br />
Several special characters can be used to query the device about its settings.<br />
^ What is the default value for the setting(s).<br />
? What is the device’s current value for the setting(s).<br />
* What is the range of possible values for the setting(s). (The device’s response uses a dash (-) to indicate a continuous<br />
range of values. A pipe (|) separates items in a list of non-continuous values.)<br />
Tag Field Usage<br />
When a query is used in place of a Tag field, the query applies to the entire set of commands available for the particular storage<br />
table indicated by the Storage field of the command. In this case, the SubTag and Data fields should not be used because they<br />
are ignored by the device.<br />
SubTag Field Usage<br />
When a query is used in place of a SubTag field, the query applies only to the subset of commands available that match the Tag<br />
field. In this case, the Data field should not be used because it is ignored by the device.<br />
Data Field Usage<br />
When a query is used in place of the Data field, the query applies only to the specific command identified by the Tag and SubTag<br />
fields.<br />
<strong>Document</strong> <strong>Reader</strong> <strong>Imaging</strong> <strong>Guide</strong> 2 - 1
Concatenation of Multiple Commands<br />
Multiple commands can be issued within one Prefix/Storage sequence. Only the Tag, SubTag, and Data fields must be repeated<br />
for each command in the sequence. If additional commands are to be applied to the same Tag, then the new command sequence<br />
is separated with a comma (,) and only the SubTag and Data fields of the additional command are issued. If the additional<br />
command requires a different Tag field, the command is separated from previous commands by a semicolon (;).<br />
Responses<br />
The device responds to serial commands with one of three responses:<br />
ACK Indicates a good command which has been processed.<br />
ENQ Indicates an invalid Tag or SubTag command.<br />
NAK Indicates the command was good, but the Data field entry was out of the allowable range for this Tag and SubTag<br />
combination, e.g., an entry for a minimum message length of 100 when the field will only accept 2 characters.<br />
When responding, the device echoes back the command sequence with the status character inserted directly before each of the<br />
punctuation marks (the period, exclamation point, comma, or semicolon) in the command.<br />
Examples of Query Commands<br />
In the following examples, a bracketed notation [ ] depicts a non-displayable response.<br />
Example #1:What is the range of possible values for <strong>Imaging</strong> Style?<br />
Enter: snpsty*.<br />
Response: SNPSTY0-2[ACK]<br />
This response indicates that <strong>Imaging</strong> Style (SNPSTY) has a range of values from 0 to 2.<br />
Example #2: What is the default value for <strong>Imaging</strong> Style?<br />
Enter: snpsty^.<br />
Response: SNPSTY1[ACK]<br />
This response indicates that the default setting for <strong>Imaging</strong> Style (SNPSTY) is 1, or Photo.<br />
Example #3: What is the device’s current setting for <strong>Imaging</strong> Style?<br />
Enter: snpsty?.<br />
Response: SNPSTY2[ACK]<br />
This response indicates that the device’s <strong>Imaging</strong> Style (SNPSTY) is set to 2, or Manual.<br />
2 - 2 <strong>Document</strong> <strong>Reader</strong> <strong>Imaging</strong> <strong>Guide</strong>
Menu Commands<br />
The following chart lists the settings for each of the serial default commands. The factory default setting is indicated by an<br />
asterisk (*).<br />
Selection<br />
Setting<br />
* Indicates default<br />
Serial Command<br />
# Indicates a numeric entry<br />
<strong>Imaging</strong> Default Commands<br />
Default all <strong>Imaging</strong> Commands IMGDFT 1-1<br />
Image Snap (IMGSNP) <strong>Imaging</strong> Style - Decoding SNPSTY0 1-1<br />
*<strong>Imaging</strong> Style - Photo SNPSTY1 1-1<br />
<strong>Imaging</strong> Style - Manual SNPSTY2 1-1<br />
Beeper On SNPBEP1 1-1<br />
*Beeper Off SNPBEP0 1-1<br />
Aimer Lines On SNPAIM1 1-2<br />
*Aimer Lines Off SNPAIM0 1-2<br />
Exposure (1-7874 microseconds) SNPEXP 1-2<br />
*Gain - None SNPGAN1 1-3<br />
Gain - Medium SNPGAN2 1-3<br />
Gain - Heavy SNPGAN4 1-3<br />
Gain - Maximum SNPGAN8 1-3<br />
Delta for Acceptance (0-255) *25 SNPDEL### 1-3<br />
*LED State - Off SNPLED0 1-2<br />
LED State - On SNPLED1 1-2<br />
*Wait for Trigger Off SNPTRG0 1-2<br />
Wait for Trigger On SNPTRG1 1-2<br />
Update Tries (0-10) *6 SNPTRY## 1-3<br />
Target White Value (0-255) *125 SNPWHT### 1-3<br />
Target Set Point Percentage (1-99) *97 SNPPCT## 1-4<br />
Image Ship (IMGSHP) *Infinity Filter - Off IMGINF0 1-6<br />
Infinity Filter - On IMGINF1 1-6<br />
*Compensation Off IMGCOR0 1-6<br />
Compensation On IMGCOR1 1-6<br />
*Pixel Depth - 8 bits/pixel (grayscale) IMGBPP8 1-6<br />
Pixel Depth - 1 bit/pixel (B&W) IMGBPP1 1-6<br />
*Don’t Sharpen Edges IMGEDG0 1-7<br />
Sharpen Edges (0-23) IMGEDG## 1-7<br />
*File Format - JPEG IMGFMT6 1-7<br />
File Format - KIM IMGFMT0 1-7<br />
File Format - TIFF binary IMGFMT1 1-7<br />
File Format - TIFF binary group 4, compressed IMGFMT2 1-7<br />
File Format - TIFF grayscale IMGFMT3 1-7<br />
File Format - Uncompressed binary IMGFMT4 1-7<br />
File Format - Uncompressed grayscale IMGFMT5 1-7<br />
File Format - BMP IMGFMT8 1-7<br />
*Histogram Stretch Off IMGHIS0 1-7<br />
Histogram Stretch On IMGHIS1 1-7<br />
For full description,<br />
see page<br />
<strong>Document</strong> <strong>Reader</strong> <strong>Imaging</strong> <strong>Guide</strong> 2 - 3
Selection<br />
Setting<br />
* Indicates default<br />
Serial Command<br />
# Indicates a numeric entry<br />
Image Ship (continued) Invert Image around X axis IMGNVX1 1-8<br />
Invert Image around Y axis IMGNVY1 1-8<br />
*Noise Reduction Off IMGFSP0 1-8<br />
Noise Reduction On IMGFSP1 1-8<br />
*Rotate Image Off IMGROT0 1-9<br />
Rotate Image 90° right IMGROT1 1-9<br />
Rotate Image 180° IMGROT2 1-9<br />
Rotate Image 90° left IMGROT3 1-9<br />
*Adaptive Text Filter Off IMGAUT0 1-9<br />
Adaptive Text Filter On IMGAUT1 1-9<br />
*Unsharp/Brighten Filter Off IMGSNZ0 1-10<br />
Unsharp/Brighten Filter On IMGSNZ1 1-10<br />
JPEG Image Quality (0-100) *50 IMGJQF### 1-10<br />
*Gamma Correction Off IMGGAM0 1-10<br />
Gamma Correction On (0-1,000) IMGGAM### 1-10<br />
Image Crop - Left (0-1279) *0 IMGWNL### 1-11<br />
Image Crop - Right (0-1279) *1279 IMGWNR### 1-11<br />
Image Crop - Top (0-959) *0 IMGWNT### 1-11<br />
Image Crop - Bottom (0-959) *959 IMGWNB### 1-11<br />
Image Crop - Margin (0-478) *0 IMGMAR### 1-11<br />
Protocol - None (raw) IMGXFR0 1-11<br />
Protocol - None (default USB) IMGXFR2 1-11<br />
Protocol - Hmodem IMGXFR3 1-11<br />
Protocol - Hmodem Compressed IMGXFR4 1-11<br />
*Ship Every Pixel IMGSUB1 1-12<br />
Ship Every 2nd Pixel IMGSUB2 1-12<br />
Ship Every 3rd Pixel IMGSUB3 1-12<br />
*<strong>Document</strong> Image Filter Off IMGUSH0 1-12<br />
<strong>Document</strong> Image Filter On (0-255) IMGUSH### 1-12<br />
*Blur Image Off no serial command 1-13<br />
Blur Image On no serial command 1-13<br />
*Don’t Ship Histogram IMGHST0 1-13<br />
Ship Histogram IMGHST1 1-13<br />
Image Auto Crop<br />
*Infinity Filter - Off IMGINF0 1-6<br />
(IMGACP)<br />
Infinity Filter - On IMGINF1 1-6<br />
*Compensation Off IMGCOR0 1-6<br />
Compensation On IMGCOR1 1-6<br />
*Pixel Depth - 8 bits/pixel (grayscale) IMGBPP8 1-6<br />
Pixel Depth - 1 bit/pixel (B&W) IMGBPP1 1-6<br />
*Don’t Sharpen Edges IMGEDG0 1-7<br />
Sharpen Edges (0-23) IMGEDG## 1-7<br />
*File Format - JPEG IMGFMT6 1-7<br />
File Format - KIM IMGFMT0 1-7<br />
File Format - TIFF binary IMGFMT1 1-7<br />
File Format - TIFF binary group 4, compressed IMGFMT2 1-7<br />
For full description,<br />
see page<br />
2 - 4 <strong>Document</strong> <strong>Reader</strong> <strong>Imaging</strong> <strong>Guide</strong>
Selection<br />
Image Auto Crop<br />
(continued)<br />
Intelligent Signature<br />
Capture (IMGBOX)<br />
Setting<br />
* Indicates default<br />
Serial Command<br />
# Indicates a numeric entry<br />
File Format - TIFF grayscale IMGFMT3 1-7<br />
File Format - Uncompressed binary IMGFMT4 1-7<br />
File Format - Uncompressed grayscale IMGFMT5 1-7<br />
File Format - BMP IMGFMT8 1-7<br />
*Histogram Stretch Off IMGHIS0 1-7<br />
Histogram Stretch On IMGHIS1 1-7<br />
Invert Image around X axis IMGNVX1 1-8<br />
Invert Image around Y axis IMGNVY1 1-8<br />
*Noise Reduction Off IMGFSP0 1-8<br />
Noise Reduction On IMGFSP1 1-8<br />
*Rotate Image Off IMGROT0 1-9<br />
Rotate Image 90° right IMGROT1 1-9<br />
Rotate Image 180° IMGROT2 1-9<br />
Rotate Image 90° left IMGROT3 1-9<br />
*Adaptive Text Filter Off IMGAUT0 1-9<br />
Adaptive Text Filter On IMGAUT1 1-9<br />
*Unsharp/Brighten Filter Off IMGSNZ0 1-10<br />
Unsharp/Brighten Filter On IMGSNZ1 1-10<br />
JPEG Image Quality (0-100) *50 IMGJQF### 1-10<br />
*Gamma Correction Off IMGGAM0 1-10<br />
Gamma Correction On (1-255) IMGGAM### 1-10<br />
Protocol - None (raw) IMGXFR0 1-11<br />
Protocol - None (default USB) IMGXFR2 1-11<br />
Protocol - Hmodem Compressed IMGXFR3 1-11<br />
Protocol - Hmodem IMGXFR4 1-11<br />
Ship Every Pixel IMGSUB1 1-12<br />
Ship Every 2nd Pixel IMGSUB2 1-12<br />
Ship Every 3rd Pixel IMGSUB3 1-12<br />
*<strong>Document</strong> Image Filter Off IMGUSH0 1-12<br />
<strong>Document</strong> Image Filter On (0-255) IMGUSH### 1-12<br />
*Blur Image Off no serial command 1-13<br />
Blur Image On no serial command 1-13<br />
*Don’t Ship Histogram IMGHST0 1-13<br />
Ship Histogram IMGHST1 1-13<br />
Output Image Width no serial command 1-14<br />
Output Image Height no serial command 1-15<br />
*Pixel Depth - 8 bits/pixel (grayscale) IMGBPP8 1-15<br />
Pixel Depth - 1 bit/pixel (B&W) IMGBPP1 1-15<br />
*File Format - JPEG IMGFMT6 1-15<br />
File Format - KIM IMGFMT0 1-15<br />
File Format - TIFF binary IMGFMT1 1-15<br />
File Format - TIFF binary group 4, compressed IMGFMT2 1-15<br />
File Format - TIFF grayscale IMGFMT3 1-15<br />
File Format - Uncompressed binary IMGFMT4 1-15<br />
File Format - Uncompressed grayscale IMGFMT5 1-15<br />
For full description,<br />
see page<br />
<strong>Document</strong> <strong>Reader</strong> <strong>Imaging</strong> <strong>Guide</strong> 2 - 5
Selection<br />
Intelligent Signature<br />
Capture (continued)<br />
Setting<br />
* Indicates default<br />
Serial Command<br />
# Indicates a numeric entry<br />
File Format - BMP IMGFMT8 1-15<br />
Height of Signature Capture Area no serial command 1-15<br />
*Gamma Correction Off IMGGAM0 1-15<br />
Gamma Correction On (1-255) IMGGAM### 1-15<br />
Resolution of Signature Capture Area (0-2500) no serial command 1-16<br />
Barcode Aspect Ratio no serial command 1-16<br />
Width of Signature Capture Area no serial command 1-16<br />
Horizontal Barcode Offset no serial command 1-16<br />
Vertical Barcode Offset no serial command 1-16<br />
For full description,<br />
see page<br />
2 - 6 <strong>Document</strong> <strong>Reader</strong> <strong>Imaging</strong> <strong>Guide</strong>
3<br />
Customer Support<br />
Technical Assistance<br />
If you need assistance installing or troubleshooting, please call your Distributor or the nearest Hand Held Products technical<br />
support office:<br />
North America/Canada<br />
Telephone: (800) 782-4263<br />
Fax number: (315) 554-6705<br />
E-mail: natechsupport@handheld.com<br />
Latin America<br />
Telephone: (803) 835-8000<br />
Telephone: (800) 782-4263<br />
E-mail: latechsupport@handheld.com<br />
Brazil<br />
Telephone: +55 (21) 3535-9100<br />
Fax: +55 (21) 3535-9105<br />
E-mail: brsuporte@handheld.com<br />
Mexico<br />
Telephone: (803) 835-8000<br />
E-mail: latechsupport@handheld.com<br />
Europe, Middle East, and Africa<br />
Telephone: +31 (0) 40 7999 393<br />
Fax: +31 (0) 40 2425 672<br />
E-mail: eurosupport@handheld.com<br />
Asia Pacific<br />
Telephone - Hong Kong: +852-3188-3485 or 2511-3050<br />
Telephone - China: +86 21 6361 3818<br />
E-mail: aptechsupport@handheld.com<br />
Japan<br />
Telephone: +813 5770-6312<br />
E-mail: aptechsupport@handheld.com<br />
Malaysia<br />
Telephone: +603-6201-7020<br />
E-mail: aptechsupport@handheld.com<br />
Online Technical Assistance<br />
You can also access technical assistance online at www.handheld.com.<br />
For Further Information<br />
To download the full User’s <strong>Guide</strong> for these products, visit our website at www.handheld.com.<br />
Product Service and Repair<br />
Hand Held Products provides service for all its products through service centers throughout the world. To obtain warranty or<br />
non-warranty service, return the unit to Hand Held Products (postage paid) with a copy of the dated purchase record attached.<br />
Contact the appropriate location below to obtain a Return Material Authorization number (RMA #) before returning the product.<br />
North America<br />
Telephone: (800) 782-4263<br />
Fax: (803) 835-8012<br />
E-mail: naservice@handheld.com<br />
<strong>Document</strong> <strong>Reader</strong> <strong>Imaging</strong> <strong>Guide</strong> 3 - 1
Latin America<br />
Telephone: (803) 835-8000<br />
Telephone: (800) 782-4263<br />
Fax: (239) 263-9689<br />
E-mail: laservice@handheld.com<br />
Brazil<br />
Telephone: +55 (21) 3535-9100<br />
Fax: +55 (21) 3535-9105<br />
E-mail: brservice@handheld.com<br />
Mexico<br />
Telephone: +52 (55) 5203-2100<br />
Fax: +52 (55) 5531-3672<br />
E-mail: mxservice@handheld.com<br />
Europe, Middle East, and Africa<br />
Telephone: +31 (0) 40 2901 633<br />
Fax: +31 (0) 40 2901 631<br />
E-mail: euservice@handheld.com<br />
Asia Pacific<br />
Telephone: +852-2511-3050<br />
Fax: +852-2511-3557<br />
E-mail: apservice@handheld.com<br />
Japan<br />
Telephone: +813-5770-6312<br />
Fax: +813-5770-6313<br />
E-mail: apservice@handheld.com<br />
Online Product Service and Repair Assistance<br />
You can also access product service and repair assistance online at www.handheld.com.<br />
3 - 2 <strong>Document</strong> <strong>Reader</strong> <strong>Imaging</strong> <strong>Guide</strong>
Hand Held Products, Inc.<br />
700 Visions Drive<br />
P.O. Box 208<br />
Skaneateles Falls, NY 13153-0208<br />
<br />
4800dr-IMG Rev A<br />
12/07


