Maple 13 Installation Guide
Maple 13 Installation Guide
Maple 13 Installation Guide

Create successful ePaper yourself
Turn your PDF publications into a flip-book with our unique Google optimized e-Paper software.
<strong>Maple</strong> <strong>13</strong> <strong>Installation</strong> <strong>Guide</strong> 7/28/2010<br />
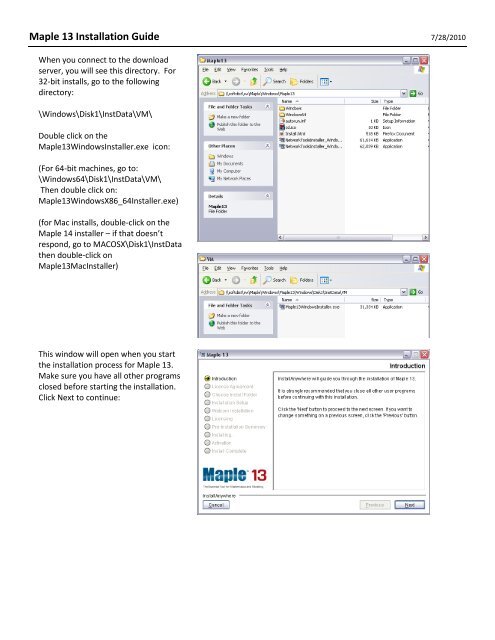
When you connect to the download<br />
server, you will see this directory. For<br />
32-bit installs, go to the following<br />
directory:<br />
\Windows\Disk1\InstData\VM\<br />
Double click on the<br />
<strong>Maple</strong><strong>13</strong>WindowsInstaller.exe icon:<br />
(For 64-bit machines, go to:<br />
\Windows64\Disk1\InstData\VM\<br />
Then double click on:<br />
<strong>Maple</strong><strong>13</strong>WindowsX86_64Installer.exe)<br />
(for Mac installs, double-click on the<br />
<strong>Maple</strong> 14 installer – if that doesn’t<br />
respond, go to MACOSX\Disk1\InstData<br />
then double-click on<br />
<strong>Maple</strong><strong>13</strong>MacInstaller)<br />
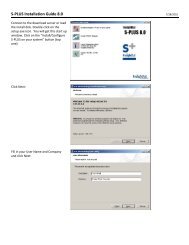
This window will open when you start<br />
the installation process for <strong>Maple</strong> <strong>13</strong>.<br />
Make sure you have all other programs<br />
closed before starting the installation.<br />
Click Next to continue:
Select the “I accept…” option and click<br />
Next:<br />
Choose where you would like the<br />
software to be installed – the default is<br />
C:\Program Files. If you would like to<br />
change the location, click on Choose.<br />
Click Next once you have the location<br />
folder selected:<br />
At this point, you can choose what type<br />
of installation you prefer. The default is<br />
the Full <strong>Installation</strong>. Click Next if this is<br />
the installation you prefer, or click on<br />
one of the other installation sets and<br />
then click Next:
If you would like a shortcut installed on<br />
your desktop for <strong>Maple</strong> <strong>13</strong>, choose Yes.<br />
Or choose No if you do not need a<br />
shortcut, then click Next:<br />
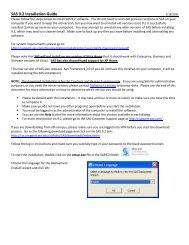
Choose where you would like the<br />
Watcom folder installed, then click Next:<br />
Choose the “Single User License” if you<br />
are installing on your home or work<br />
computer as a stand-alone installation (if<br />
you are connecting to a server to run<br />
<strong>Maple</strong>, choose “Network License”) then<br />
click Next:
This window gives you a summary of the<br />
<strong>Maple</strong> <strong>13</strong> installation. Click on Install<br />
once you are ready to begin the<br />
installation process:<br />
You will see this window as the<br />
installation process takes place:<br />
When the installation is complete, click<br />
on the “Activate Now” selection to<br />
license <strong>Maple</strong> <strong>13</strong>. You can also choose to<br />
activate later, if you prefer (you can do<br />
this by going to Start -> Programs -><br />
<strong>Maple</strong> <strong>13</strong> -> Tools -> Activate <strong>Maple</strong> <strong>13</strong>).<br />
Click Next to continue:
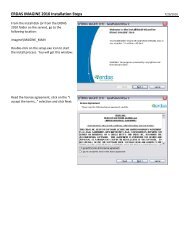
This window lists information on the<br />
activation process. Read through it, then<br />
click Next:<br />
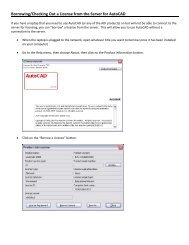
Enter the code you were given in the<br />
Purchase Code field, and select “No” for<br />
the question about a Proxy server. Click<br />
Next to continue:<br />
Fill in at least the required information in<br />
this window…
… and decide if you want any<br />
subscriptions <strong>Maple</strong> offers. Click Next to<br />
continue. This should activate your<br />
<strong>Maple</strong> <strong>13</strong> software.<br />
You will get a message that the<br />
activation was successful.<br />
You will get this final installation window.<br />
You can either choose to restart at this<br />
time, or choose not to restart, then click<br />
Done: