February 2012 Issue - Target Shooter Magazine
February 2012 Issue - Target Shooter Magazine
February 2012 Issue - Target Shooter Magazine

You also want an ePaper? Increase the reach of your titles
YUMPU automatically turns print PDFs into web optimized ePapers that Google loves.
QUIGLEY SHOOTING<br />
ASSOCIATION NEWS<br />
LOADING THE<br />
BLACKPOWDER SHOTSHELL<br />
Part 2 by Ken Hall<br />
In the previous chapter on this subject, I hopefully<br />
whetted your appetite enough to encourage you<br />
to try handloading the black powder shotshell<br />
yourselves. Traditionally, shotshell cartridges were<br />
made of paper or card tube, with a brass base<br />
containing a thick base wad with a hole for the large<br />
shotgun primer. This design has hardly changed<br />
except the outer tube is now made of plastic and<br />
the brass base has been replaced with a brass plated<br />
ferrous metal to keep production costs down. This<br />
means that reloading tools designed in the 19th<br />
century to reload the paper shotshell will work just as<br />
well in the 21st century with today’s cases.<br />
Let’s look at the way I reload the 12 gauge black<br />
powder shotshell but first, as usual, I want to say<br />
that what has proven to be safe in my own turn of<br />
the century hammer gun may not prove to be so in<br />
other vintage guns so, if you intend to use the load<br />
in anything other than a modern nitro proofed gun,<br />
please have it checked by a competent gunsmith to<br />
determine its’ serviceability.<br />
I tend to use once-fired cases for reloading; this<br />
means that if the case has been fired in a different<br />
gun than the shell is intended for, then the brass base<br />
will need to be resized to standard dimensions in order<br />
to freely enter the chamber. Simple hand tools exist<br />
for this purpose but I cheat and use the resizing die<br />
with my Lee ‘Load-All’ machine as it is much quicker<br />
to use. (If new bought cases are preferred then this<br />
process is not necessary).<br />
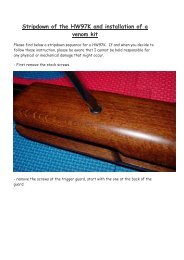
Next, the spent primer needs to be removed, I use<br />
an antique de-priming and re-priming tool for this<br />
purpose but it could be simply knocked out with a<br />
nail punch. As I sometimes use reclaimed (salvaged)<br />
cases which are of different overall lengths, I then take<br />
the unprimed case and trim it to the required length<br />
using another vintage tool which was illustrated in the<br />
last instalment. If you don’t have this tool then this<br />
process can be completed later using a simple home<br />
made tool. The new primer is then seated using the<br />
previously mentioned re-priming tool; once again<br />
this can also be achieved simply by placing the primer<br />
on a flat surface and pressing the case over it using a<br />
suitably sized dowel inside the case.<br />
bowl to vary the volume. English and American made<br />
tools are usually graduated in drams for powder and<br />
ounces for shot, whilst continental ones are usually in<br />
decigrammes for powder and grammes for shot.<br />
What simplifies things is that once you have adjusted<br />
the measure for the weight of shot, it is customary<br />
to use the same volume setting for powder. Using<br />
my English measure, I have settled on a load of 1oz<br />
Shotshell component parts<br />
shot, this approximates to 28grams. At this setting<br />
the measure indicates a powder weight of 2½ drams,<br />
(74grains in common reloading parlance). This load<br />
should be more than adequate for CAS steel plate<br />
shooting.<br />
So, using a cartridge filler tube, I take my primed case,<br />
pour in a measure of 2½drams of Swiss No 4, I then<br />
take a 3mm thick over-powder card wad and push this<br />
onto the powder, next comes a 13mm fibre cushioning<br />
wad, then a 3mm felt wad to prevent the shot<br />
embedding in the fibre. Next, using the same measure<br />
setting, I pour in 1oz of shot, (anything from No7s to<br />
No5s is good for knocking over steel plates) followed<br />
by a thin over-shot card wad. All that is left to do is to<br />
form the crimp to hold the components together. If, as<br />
I mentioned earlier, the case has not been previously<br />
cut to length, then that will be necessary before the<br />
crimping stage.<br />
Even though modern nitro game and target cartridges<br />
are still relatively cheap to purchase, the tools and<br />
components required to manufacture ammunition at<br />
home are still being made and are readily available<br />
from several retailers, of note are Henry Krank & Co at<br />
Typical hand tools<br />
www.henrykrank.com and Clay & Game Reloaders at<br />
www.claygame.co.uk . Also of interest is the extract<br />
from the Parker Hale catalogue showing vintage tools<br />
still available at least as late as 1958.<br />
Comments and questions please to;<br />
khall6548@aol.com<br />
QUIGLEY SHOOTING<br />
ASSOCIATION NEWS<br />
Home made trimming gauge<br />
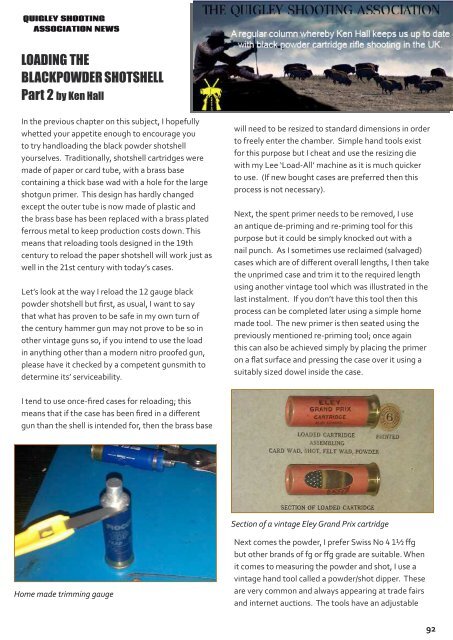
Section of a vintage Eley Grand Prix cartridge<br />
Next comes the powder, I prefer Swiss No 4 1½ ffg<br />
but other brands of fg or ffg grade are suitable. When<br />
it comes to measuring the powder and shot, I use a<br />
vintage hand tool called a powder/shot dipper. These<br />
are very common and always appearing at trade fairs<br />
and internet auctions. The tools have an adjustable<br />
I made a simple gauge out of a piece of aluminium<br />
rod as pictured, which allows for an overlap of 3mm<br />
for crimping. The whole is now placed in the vintage<br />
cartridge closer and the roll crimp applied. I generally<br />
now mark the cartridge with an indelible pen to show<br />
it is charged with black powder.<br />
Parker Hale cat 58<br />
92 93