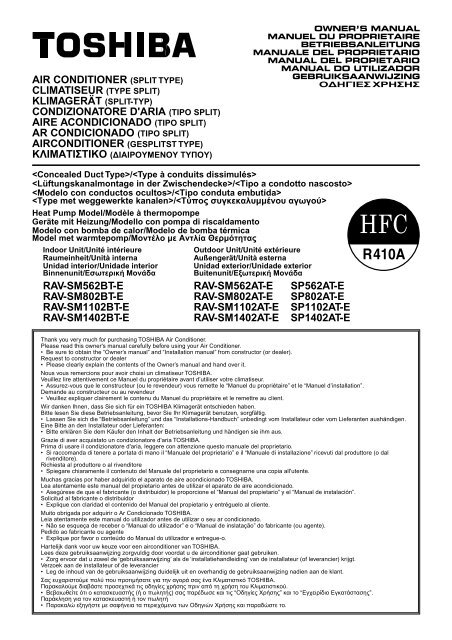
AIR CONDITIONER (SPLIT TYPE) CLIMATISEUR ... - Klimatizace TSC
AIR CONDITIONER (SPLIT TYPE) CLIMATISEUR ... - Klimatizace TSC
AIR CONDITIONER (SPLIT TYPE) CLIMATISEUR ... - Klimatizace TSC

Create successful ePaper yourself
Turn your PDF publications into a flip-book with our unique Google optimized e-Paper software.
<strong>AIR</strong> <strong>CONDITIONER</strong> (<strong>SPLIT</strong> <strong>TYPE</strong>)<br />
<strong>CLIMATISEUR</strong> (<strong>TYPE</strong> <strong>SPLIT</strong>)<br />
KLIMAGERÄT (<strong>SPLIT</strong>-TYP)<br />
CONDIZIONATORE D'ARIA (TIPO <strong>SPLIT</strong>)<br />
<strong>AIR</strong>E ACONDICIONADO (TIPO <strong>SPLIT</strong>)<br />
AR CONDICIONADO (TIPO <strong>SPLIT</strong>)<br />
<strong>AIR</strong><strong>CONDITIONER</strong> (GE<strong>SPLIT</strong>ST <strong>TYPE</strong>)<br />
ÊËÉÌÁÔÉÓÔÉÊÏ (ÄÉÁÉÑÏÕÌÅÍÏÕ ÔÕÐÏÕ)<br />
OWNER’S MANUAL<br />
MANUEL DU PROPRIET<strong>AIR</strong>E<br />
BETRIEBSANLEITUNG<br />
MANUALE DEL PROPRIETARIO<br />
MANUAL DEL PROPIETARIO<br />
MANUAL DO UTILIZADOR<br />
GEBRUIKSAANWIJZING<br />
ÏÄÇÃÉÅÓ ×ÑÇÓÇÓ<br />
/<br />
/<br />
/<br />
/<br />
Heat Pump Model/Modèle à thermopompe<br />
Geräte mit Heizung/Modello con pompa di riscaldamento<br />
Modelo con bomba de calor/Modelo de bomba térmica<br />
Model met warmtepomp/ÌïíôÝëï ìå Áíôëßá Èåñìüôçôáò<br />
Indoor Unit/Unité intérieure<br />
Raumeinheit/Unità interna<br />
Unidad interior/Unidade interior<br />
Binnenunit/ÅóùôåñéêÞ ÌïíÜäá<br />
Outdoor Unit/Unité extérieure<br />
Außengerät/Unità esterna<br />
Unidad exterior/Unidade exterior<br />
Buitenunit/ÅîùôåñéêÞ ÌïíÜäá<br />
RAV-SM562BT-E RAV-SM562AT-E SP562AT-E<br />
RAV-SM802BT-E RAV-SM802AT-E SP802AT-E<br />
RAV-SM1102BT-E RAV-SM1102AT-E SP1102AT-E<br />
RAV-SM1402BT-E RAV-SM1402AT-E SP1402AT-E<br />
Thank you very much for purchasing TOSHIBA Air Conditioner.<br />
Please read this owner's manual carefully before using your Air Conditioner.<br />
• Be sure to obtain the “Owner’s manual” and “Installation manual” from constructor (or dealer).<br />
Request to constructor or dealer<br />
• Please clearly explain the contents of the Owner’s manual and hand over it.<br />
Nous vous remercions pour avoir choisi un climatiseur TOSHIBA.<br />
Veuillez lire attentivement ce Manuel du propriétaire avant d’utiliser votre climatiseur.<br />
• Assurez-vous que le constructeur (ou le revendeur) vous remette le “Manuel du propriétaire” et le “Manuel d’installation”.<br />
Demande au constructeur ou au revendeur<br />
• Veuillez expliquer clairement le contenu du Manuel du propriétaire et le remettre au client.<br />
Wir danken Ihnen, dass Sie sich für ein TOSHIBA Klimagerät entschieden haben.<br />
Bitte lesen Sie diese Betriebsanleitung, bevor Sie Ihr Klimagerät benutzen, sorgfältig.<br />
• Lassen Sie sich die “Betriebsanleitung” und das “Installations-Handbuch” unbedingt vom Installateur oder vom Lieferanten aushändigen.<br />
Eine Bitte an den Installateur oder Lieferanten:<br />
• Bitte erklären Sie dem Käufer den Inhalt der Betriebsanleitung und händigen sie ihm aus.<br />
Grazie di aver acquistato un condizionatore d'aria TOSHIBA.<br />
Prima di usare il condizionatore d'aria, leggere con attenzione questo manuale del proprietario.<br />
• Si raccomanda di tenere a portata di mano il “Manuale del proprietario” e il “Manuale di installazione” ricevuti dal produttore (o dal<br />
rivenditore).<br />
Richiesta al produttore o al rivenditore<br />
• Spiegare chiaramente il contenuto del Manuale del proprietario e consegnarne una copia all'utente.<br />
Muchas gracias por haber adquirido el aparato de aire acondicionado TOSHIBA.<br />
Lea atentamente este manual del propietario antes de utilizar el aparato de aire acondicionado.<br />
• Asegúrese de que el fabricante (o distribuidor) le proporcione el “Manual del propietario” y el “Manual de instalación”.<br />
Solicitud al fabricante o distribuidor<br />
• Explique con claridad el contenido del Manual del propietario y entréguelo al cliente.<br />
Muito obrigada por adquirir o Ar Condicionado TOSHIBA.<br />
Leia atentamente este manual do utilizador antes de utilizar o seu ar condicionado.<br />
• Não se esqueça de receber o “Manual do utilizador” e o “Manual de inslatação” do fabricante (ou agente).<br />
Pedido ao fabricante ou agente<br />
• Explique por favor o conteúdo do Manual do utilizador e entregue-o.<br />
Hartelijk dank voor uw keuze voor een airconditioner van TOSHIBA.<br />
Lees deze gebruiksaanwijzing zorgvuldig door voordat u de airconditioner gaat gebruiken.<br />
• Zorg ervoor dat u zowel de ‘gebruiksaanwijzing’ als de ‘installatiehandleiding’ van de installateur (of leverancier) krijgt.<br />
Verzoek aan de installateur of de leverancier<br />
• Leg de inhoud van de gebruiksaanwijzing duidelijk uit en overhandig de gebruiksaanwijzing nadien aan de klant.<br />
Óáò åõ÷áñéóôïýìå ðïëý ðïõ ðñïôéìÞóáôå ãéá ôçí áãïñÜ óáò Ýíá Êëéìáôéóôéêü TOSHIBA.<br />
Ðáñáêáëïýìå äéáâÜóôå ðñïóå÷ôéêÜ ôéò ïäçãßåò ÷ñÞóçò ðñéí áðü ôç ÷ñÞóç ôïõ Êëéìáôéóôéêïý.<br />
• Âåâáéùèåßôå üôé ï êáôáóêåõáóôÞò (Þ ï ðùëçôÞò) óáò ðáñÝäùóå êáé ôéò “Ïäçãßåò ×ñÞóçò” êáé ôï “Åã÷åéñßäéï ÅãêáôÜóôáóçò”.<br />
ÐáñÜêëçóç ãéá ôïí êáôáóêåõáóôÞ Þ ôïí ðùëçôÞ<br />
• Ðáñáêáëþ åîçãÞóôå ìå óáöÞíåéá ôá ðåñéå÷üìåíá ôùí Ïäçãéþí ×ñÞóçò êáé ðáñáäþóôå ôï.
ADOPTION OF NEW REFRIGERANT<br />
This Air Conditioner is a new type which adopts a new refrigerant HFC (R410A) instead of the conventional refrigerant<br />
R22 in order to prevent destruction of the ozone layer.<br />
UTILISATION DU NOUVEAU REFRIGERANT<br />
Ce climatiseur est d’un type inédit qui utilise le nouveau réfrigérant HFC (R410A) au lieu du réfrigérant traditionnel<br />
R22, afin d’éviter la destruction de la couche d’ozone.<br />
EINFÜHRUNG EINES NEUEN KÜHLMITTELS<br />
Dies ist ein neuartiges Klimagerät. Anstatt des herkömmlichen Kühlmittels R22 verwendet es das neue ozonschichtschonende<br />
HFC Kühlmittel R410A.<br />
ADOZIONE DI UN NUOVO REFRIGERANTE<br />
Questo condizionatore d'aria è di un tipo nuovo che adotta un nuovo refrigerate HFC (R410A) al posto del<br />
refrigerante convenzionale R22, per prevenire la distruzione dello strato di ozono dell'atmosfera terrestre.<br />
ADOPCIÓN DE NUEVO REFRIGERANTE<br />
Este aparato de aire acondicionado es un modelo reciente que incorpora el nuevo refrigerante HFC (R410A) en<br />
lugar del refrigerante convencional R22 para así evitar daños en la capa de ozono.<br />
ADOPÇÃO DO NOVO REFRIGERANTE<br />
Este ar condicionado é um modelo novo que adopta um novo refrigerante HFC (R410A) em vez do refrigerante<br />
convencional R22 para evitar a destruição da cama de ozono.<br />
TOEPASSING VAN EEN NIEUW KOELMIDDEL<br />
Deze airconditioner is een nieuwe type dat werkt met een nieuw koelmiddel HFC (R410A) in plaats van met het<br />
conventionele koelmiddel R22, als bijdrage om de aantasting van de ozonlaag te reduceren.<br />
ÕÉÏÈÅÔÇÓÇ ÍÅÏÕ ØÕÊÔÉÊÏÕ<br />
Ôï ðáñüí Êëéìáôéóôéêü åßíáé íÝïò ôýðïò ðïõ õéïèåôåß íÝï øõêôéêü HFC (R410A) óôç èÝóç ôïõ óõìâáôéêïý øõêôéêïý<br />
R22 ðñïêåéìÝíïõ íá âïçèÞóåé óôçí ðñïóôáóßá ôïõ üæïíôïò.
ACCESSORIES (SOLD SEPARATELY) ......................................... 1<br />
PRECAUTIONS FOR SAFETY ....................................................... 1<br />
PARTS NAME ................................................................................. 3<br />
PARTS NAME OF REMOTE CONTROLLER ................................. 4<br />
CORRECT USAGE ......................................................................... 6<br />
AUTOMATIC OPERATION (Auto Changeover) ............................ 7<br />
ACCESSOIRES (VENDUS SEPAREMENT) ................................ 15<br />
MESURES DE SECURITE ........................................................... 15<br />
NOM DES PIECES ....................................................................... 17<br />
NOM DES PIECES DE LA TELECOMMANDE ............................ 18<br />
UTILISATION CORRECTE ........................................................... 20<br />
FONCTIONNEMENT AUTOMATIQUE<br />
(Commutation Automatique) ...................................................... 21<br />
ZUBEHÖR (GESONDERT ERHÄLTLICH) ................................... 29<br />
SICHERHEITSVORKEHRUNGEN ............................................... 29<br />
TEILEBEZEICHNUNGEN ............................................................. 31<br />
TEILEBEZEICHNUNG DER FERNBEDIENUNG ........................ 32<br />
RICHTIGE HANDHABUNG .......................................................... 34<br />
AUTOMATISCHER BETRIEB (Automatischer Wrchsel) ........... 35<br />
ACCESSORI (DA ACQUISTARE A PARTE) ................................ 43<br />
PRECAUZIONI PER LA SICUREZZA .......................................... 43<br />
NOME DELLE PARTI .................................................................... 45<br />
NOME DELLE PARTI DEL TELECOMANDO .............................. 46<br />
USO CORRETTO .......................................................................... 48<br />
FUNZIONAMENTO AUTOMATICO<br />
(Commutazione Automatica) ...................................................... 49<br />
ACCESORIOS (VENDIDOS POR SEPARADO) .......................... 57<br />
PRECAUCIONES PARA SU SEGURIDAD .................................. 57<br />
NOMBRE DE LOS COMPONENTES ........................................... 59<br />
DESCRIPCIÓN DE LOS BOTONES DEL CONTROL REMOTO 60<br />
UTILIZACIÓN CORRECTA ........................................................... 62<br />
FUNCIONAMIENTO AUTOMÁTICO (Cambio automático) ....... 63<br />
ACESSÓRIOS (VENDIDO SEPARADAMENTE) ......................... 71<br />
PRECAUÇÕES DE SEGURANÇA ............................................... 71<br />
NOME DAS PEÇAS ...................................................................... 73<br />
NOME DAS PEÇAS DO CONTROLADOR REMOTO ................. 74<br />
UTILIZAÇÃO CORRECTA ............................................................ 76<br />
FUNCIONAMENTO AUTOMÁTICO (Mudança Automática) ...... 77<br />
ACCESSOIRES (NIET MEEGELEVERD) .................................... 85<br />
VOORZORGSMAATREGELEN VOOR UW VEILIGHEID ............ 85<br />
BENAMING VAN DE ONDERDELEN .......................................... 87<br />
BENAMING VAN DE ONDERDELEN VAN DE<br />
AFSTANDSBEDIENING ............................................................... 88<br />
CORRECT GEBRUIK ................................................................... 90<br />
AUTOMATISCHE BEDIENING (Automatisch Omschakelen) ... 91<br />
ÐÁÑÅËÊÏÌÅÍÁ (ÐÙËÏÕÍÔÁÉ ÎÅ×ÙÑÉÓÔÁ) ........................... 99<br />
ÐÑÏÖÕËÁÎÅÉÓ ÁÓÖÁËÅÉÁÓ ....................................................... 99<br />
ÏÍÏÌÁ ÔÌÇÌÁÔÙÍ ................................................................. 101<br />
ÏÍÏÌÁÓÉÁ ÔÌÇÌÁÔÙÍ ÔÏÕ ÔÇËÅ×ÅÉÑÉÓÔÇÑÉÏÕ ............... 102<br />
ÏÑÈÇ ×ÑÇÓÇ ............................................................................. 104<br />
ÁÕÔÏÌÁÔÇ ËÅÉÔÏÕÑÃÉÁ (Áõôüìáôç ÌåôáâïëÞ) ................... 105<br />
CONTENTS<br />
SOMM<strong>AIR</strong>E<br />
INHALT<br />
INDICE<br />
CONTENIDO<br />
ÍNDICE<br />
INHOUD<br />
ÐÅÑÉÅ×ÏÌÅÍÁ<br />
TIMER OPERATION ....................................................................... 8<br />
MAINTENANCE ............................................................................ 10<br />
<strong>AIR</strong> <strong>CONDITIONER</strong> OPERATIONS AND PERFORMANCE ....... 11<br />
RE-INSTALLATION ....................................................................... 12<br />
TROUBLES AND CAUSES .......................................................... 12<br />
TROUBLES AND CAUSES (Concerning Remote Controller) .. 14<br />
FONCTIONNEMENT PAR MINUTERIE ....................................... 22<br />
ENTRETIEN .................................................................................. 24<br />
FONCTIONNEMENT ET PERFORMANCES DU <strong>CLIMATISEUR</strong> 25<br />
REINSTALLATION ........................................................................ 26<br />
PROBLEMES ET CAUSES .......................................................... 26<br />
PROBLEMES ET CAUSES (Concernant la Télécommande) ... 28<br />
ZEITBETRIEB ............................................................................... 36<br />
WARTUNG .................................................................................... 38<br />
FUNKTIONEN UND LEISTUNG DES KLIMAGERÄTS ............... 39<br />
NEU-INSTALLATION .................................................................... 40<br />
STÖRUNGEN UND IHRE URSACHEN ........................................ 40<br />
STÖRUNGEN UND IHRE URSACHEN (Fernbedienung) .......... 42<br />
FUNZIONAMENTO CON TIMER .................................................. 50<br />
MANUTENZIONE .......................................................................... 52<br />
OPERAZIONI E PRESTAZIONI DEL<br />
CONDIZIONATORE D'ARIA ......................................................... 53<br />
RE-INSTALLAZIONE .................................................................... 54<br />
PROBLEMI E CAUSE ................................................................... 54<br />
PROBLEMI E CAUSE (Riguardanti il Telecomando) ................ 56<br />
FUNCIONAMIENTO DEL TEMPORIZADOR ............................... 64<br />
MANTENIMIENTO ........................................................................ 66<br />
FUNCIONES Y RENDIMIENTO DEL APARATO DE <strong>AIR</strong>E<br />
ACONDICIONADO ........................................................................ 67<br />
REINSTALACIÓN .......................................................................... 68<br />
PROBLEMAS Y CAUSAS ............................................................. 68<br />
OPERAÇÃO DO TEMPORIZADOR ............................................. 78<br />
MANUTENÇÃO ............................................................................. 80<br />
OPERAÇÃO E FUNCIONAMENTO DO AR CONDICIONADO ... 81<br />
REINSTALAÇÃO .......................................................................... 82<br />
PROBLEMAS E CAUSAS ............................................................ 82<br />
PROBLEMAS E CAUSA<br />
(Respeitantes ao Controlador Remoto) .................................... 84<br />
DE TIMER GEBRUIKEN ............................................................... 92<br />
ONDERHOUD ............................................................................... 94<br />
BEDIENING EN WERKING VAN DE <strong>AIR</strong><strong>CONDITIONER</strong> ........... 95<br />
OPNIEUW INSTALLEREN ........................................................... 96<br />
PROBLEMEN EN OORZAKEN .................................................... 96<br />
AUTOMATISCHE BEDIENING (Automatisch Omschakelen) ... 98<br />
ËÅÉÔÏÕÑÃÉÁ ×ÑÏÍÏÄÉÁÊÏÐÔÇ .............................................. 106<br />
ÓÕÍÔÇÑÇÓÇ ............................................................................... 108<br />
ËÅÉÔÏÕÑÃÉÅÓ ÊËÉÌÁÔÉÓÔÉÊÏÕ ÊÁÉ ÁÐÏÄÏÓÇ ...................... 109<br />
ÅÃÊÁÔÁÓÔÁÓÇ ÅÊ ÍÅÏÕ ......................................................... 110<br />
ÐÑÏÂËÇÌÁÔÁ ÊÁÉ ÁÉÔÉÅÓ ....................................................... 110<br />
ÐÑÏÂËÇÌÁÔÁ ÊÁÉ ÁÉÔÉÁ (Ó÷åôéêÜ ìå ôï Ôçëå÷åéñéóôÞñéï) .. 112<br />
ÅËËÇÍÉÊÁ NEDERLANDS PORTUGUÊS ESPAÑOL ITALIANO DEU<strong>TSC</strong>H FRANCAIS ENGLISH
ACCESSORIES (SOLD SEPARATELY)<br />
Remote controller<br />
CODE No.<br />
SET DATA<br />
SETTING<br />
TEST<br />
UNIT No.<br />
H<br />
R.C.<br />
No.<br />
TEMP.<br />
ON / OFF<br />
TIMER SET<br />
FAN<br />
MODE<br />
TIME<br />
SWING/FIX<br />
VENT<br />
FILTER<br />
RESET TEST<br />
SET<br />
CL<br />
UNIT<br />
PRECAUTIONS FOR SAFETY<br />
WARNING<br />
WARNINGS ABOUT INSTALLATION<br />
• Make sure to ask the qualified installation professional in electric work to install<br />
the air conditioner.<br />
If the air conditioner is inappropriate installed by yourself, it may cause water leak,<br />
electric shock, fire, and so on.<br />
• Be sure to provide grounding.<br />
Do not connect ground wires to gas pipes, water pipes, lightning rods or ground<br />
wires for telephone cables.<br />
CAUTION<br />
TO DISCONNECT THE APPLIANCE FROM THE MAINS SUPPLY<br />
This appliance must be connected to the mains by means of a switch with a<br />
contact separation of at least 3 mm.<br />
The installation fuse (25A D type ) must be used for the power<br />
supply line of this conditioner.<br />
WARNINGS ABOUT OPERATION<br />
• Cleaning of the air filter and other parts of the air filter involves dangerous work in<br />
high places, so be sure to have a service person do it. Do not attempt it yourself.<br />
The cleaning diagram for the air filter is there for the service person, and not for<br />
the customer.<br />
• Avoid cooling the room too strong or exposing the human body to cool breeze for<br />
a long time as it is bad for the health.<br />
• When you notice something abnormal with the air conditioner (smells like something<br />
scorching, poor cooling, etc.), immediately turn off the main switch, the<br />
circuit breaker, from the mains to stop the air conditioner, and contact the dealer.<br />
If the air conditioner is continuously operated with something abnormal, it may<br />
cause machine failure, electric shock, fire, and so on.<br />
WARNINGS ABOUT MOVEMENT AND REP<strong>AIR</strong><br />
• Do not move or repair any unit by yourself.<br />
Since there is high voltage inside the unit, you may get electric shock when<br />
removing the cover and main unit.<br />
• Whenever the air conditioner needs repair, make sure to ask the dealer to do it.<br />
If it is repaired imperfectly, it may cause electric shock or fire.<br />
• When moving the air conditioner for re-installing at another place, ask the dealer<br />
to do it. If it is imperfectly installed, it may cause electric shock or fire.<br />
1
CAUTION<br />
CAUTIONS ABOUT INSTALLATION<br />
• Be sure to confirm the following cautions.<br />
• Certainly lay the drain hose for perfect draining.<br />
Bad drainage may cause flooding in the house and getting furniture<br />
wet.<br />
• Make sure to connect the air conditioner to an exclusive power<br />
supply of the rated voltage, otherwise the unit may break down or<br />
cause a fire.<br />
• Do not install the unit in a place where inflammable gas may leak.<br />
If inflammable gas accumulates around the unit, it may cause a fire.<br />
CAUTIONS ABOUT OPERATION<br />
• Carefully read this manual before starting the air conditioner. There<br />
are many important things to keep in mind for daily operation.<br />
• Do not use this air conditioner for special purposes such as preserving<br />
food, precision instruments, art objects, breeding animals,<br />
growing potted plants, etc.<br />
• Avoid exposing potted plants and animals to the wind of the air<br />
conditioner, since it badly affects the health and growth of them.<br />
• When the air conditioner is operated with a combustion appliance in<br />
the same place, be careful of ventilation to let fresh air enter the<br />
room.<br />
Poor ventilation causes oxygen shortage.<br />
• Do not place any combustion appliance in a place where it is directly<br />
exposed to the wind of air conditioner, otherwise it may cause<br />
imperfect combustion.<br />
• When the air conditioner is used in a closed room, be careful of<br />
sufficient ventilation of the room. Poor ventilation causes oxygen<br />
shortage.<br />
• Do not touch any switches with wet finger, otherwise you may get an<br />
electric shock.<br />
• If the air conditioner won’t be used for a considerably long time, turn<br />
off the main switch or the circuit breaker, for safety.<br />
• Check the concrete blocks, etc. of the base of the outdoor unit<br />
occasionally.<br />
If the base is left damaged or deteriorated, the unit may topple over<br />
and inflict an injury to a person as the worst case.<br />
• Do not put anything on the outdoor unit nor step onto it. If you do so,<br />
it may not only topple over the unit but also injure yourself.<br />
• To make the air conditioner operate in its original performance,<br />
operate it within the range of the operating temperature specified in<br />
the instructions.<br />
Otherwise it may cause a malfunction, or water leak from the unit.<br />
• Prevent any liquid from falling into the remote controller. Do not spill<br />
juice, water or any kind of liquid.<br />
GREEK DUTCH ITALIAN GERMAN FRENCH ENGLISH<br />
ENGLISH<br />
2
PARTS NAME<br />
Indoor unit<br />
Discharge port flange<br />
Connects the discharge duct<br />
Earth screw<br />
Included in the electric parts box<br />
Suction port<br />
Sucks room air from here<br />
Knob<br />
Opens/Closes the suction port<br />
Air filter<br />
Removes dust or waste<br />
(Mounted in the suction port)<br />
CODE No.<br />
SET DATA<br />
SETTING<br />
TEST<br />
UNIT No.<br />
H<br />
R.C.<br />
No.<br />
TEMP.<br />
ON / OFF<br />
Outdoor unit<br />
Air inlet (Side and rear)<br />
Remote controller<br />
(Sold separately)<br />
FILTER<br />
RESET TEST<br />
TIMER SET<br />
TIME<br />
SET CL<br />
FAN<br />
SWING/FIX<br />
UNIT<br />
MODE<br />
VENT<br />
Pipes and electric wires<br />
Air outlet<br />
3
PARTS NAME OF REMOTE CONTROLLER<br />
Display section<br />
All display items are shown in right figure for the explanation.<br />
Only selected contents are displayed in actual operation.<br />
• When turning on the leakage breaker at the first time, [SET DATA]<br />
flashes on the display part of the remote controller. While this<br />
display is flashing, the model is being automatically confirmed.<br />
Accordingly, wait for a while after [SET DATA] display has disappeared,<br />
and then use the remote controller.<br />
SET DATA<br />
H<br />
TEMP.<br />
FILTER<br />
RESET TEST<br />
SETTING<br />
TEST<br />
TIMER SET<br />
SET<br />
TIME<br />
CL<br />
UNIT No.<br />
R.C.<br />
No.<br />
FAN<br />
SWING/FIX<br />
UNIT<br />
CODE No.<br />
ON / OFF<br />
MODE<br />
VENT<br />
Display<br />
section<br />
Operation<br />
section<br />
16 9<br />
1<br />
4<br />
6<br />
15<br />
2<br />
3<br />
5<br />
7<br />
10<br />
CODE No.<br />
SET DATA SETTING TEST<br />
UNIT No.<br />
R.C. No.<br />
8<br />
H<br />
13<br />
11<br />
12<br />
14<br />
1 SET DATA display<br />
Displayed during setup a timer.<br />
2 Operation mode display<br />
The selected operation mode is displayed.<br />
3 CHECK display<br />
Displayed while the protective device works<br />
or a trouble occurs.<br />
4 Timer time display<br />
Set time by the timer is displayed.<br />
(When a trouble occurs, the check code is<br />
displayed.)<br />
5 Timer SETIN setup display<br />
When pushing the Timer SET button, the<br />
display of the timer is selected in order of<br />
[OFF] → [OFF] repeat OFF timer<br />
→ [ON]<br />
→ No display.<br />
6 Filter display<br />
If “FILTER<br />
” is displayed, clean the air<br />
filter.<br />
7 UP/DOWN grille display<br />
8 Ventilator operation display<br />
9 Flap position display<br />
10 SWING display<br />
Displayed during up/down movement of the<br />
flap.<br />
11 Set up temperature display<br />
The selected set up temp. is displayed.<br />
12 Remote controller sensor display<br />
Displayed while the sensor of the remote<br />
controller is working.<br />
13 PRE-HEAT display<br />
Displayed when the heating operation starts or<br />
defrost operation is carried out.<br />
While this indication is displayed, the indoor<br />
fan stops or the mode changes in LOW.<br />
14 No function display<br />
Displayed if there is no function even if the<br />
button is pushed.<br />
15 Fan mode display<br />
The selected fan mode is displayed.<br />
(AUTO)<br />
(HIGH)<br />
(MED.)<br />
(LOW)<br />
16 TEST run display<br />
Displayed during a test run.<br />
4
Operation section<br />
Push each button to select a desired operation.<br />
• The details of the operation needs to be set up once, the same states are used by pushing<br />
button.<br />
ON / OFF<br />
1 7<br />
10<br />
2<br />
5<br />
TEMP.<br />
FILTER<br />
RESET TEST<br />
TIMER SET<br />
TIME<br />
SET CL<br />
FAN<br />
SWING/FIX<br />
UNIT<br />
ON / OFF<br />
MODE<br />
VENT<br />
8<br />
9<br />
4<br />
6<br />
3<br />
1 Fan mode button<br />
Selects a fan mode.<br />
2 Timer set button<br />
TIMER SET button is used when the timer is<br />
set up.<br />
3 Check button<br />
CHECK button is used for check operation.<br />
During normal operation, do not use this<br />
button.<br />
4 Fan button<br />
FAN button is used when a fan which is sold on<br />
the market or etc. is connected.<br />
• If “No function ” is displayed on the<br />
remote controller when pushing the FAN<br />
button, a fan is not connected.<br />
5 Filter reset button<br />
Resets (Erases) “FILTER ” display.<br />
6 UNIT and AUTO flap button<br />
No function<br />
7 Operation lamp<br />
Lamp is lit during the operation. Lamp is off<br />
when stopped.<br />
It flashes when operating a protection device<br />
or abnormal occurred.<br />
8<br />
ON / OFF<br />
button<br />
When the button is pushed, operation starts,<br />
and it stops by pushing the button again.<br />
When the operation stops, the operation lamp<br />
and all displays disappear.<br />
9 Operation select button<br />
Selects operation mode.<br />
10 Set up temperature button<br />
Adjusts required room temperature.<br />
Set required set temperature by pushing<br />
or .<br />
FILTER UP/DOWN button<br />
(No function display)<br />
OPTION :<br />
Remote controller sensor<br />
Usually the TEMP. sensor of the indoor unit measures<br />
a temperature. A temperature around the<br />
remote controller can also be measured.<br />
For details, contact the dealer from which you have<br />
purchased the air conditioner.<br />
5
CORRECT USAGE<br />
When you use the air conditioner for the first time or when you change SET DATA value, follow the procedure<br />
ON / OFF<br />
below. From the next time, the operation will start as set state by pushing the button.<br />
Preparation<br />
Turn on the main power switch and/or the leakage breaker.<br />
• When the power supply is turned on, display section is displayed on the remote controller.<br />
*<br />
After the power supply is turned on, the remote controller does not accept an operation for approx. 1 minute,<br />
but it is not a failure.<br />
REQUIREMENT<br />
ON / OFF<br />
• While using the air conditioner, operate it only with button without turning off the main power<br />
switch and the leakage breaker.<br />
• When starting the operation after stop for a long time, turn on the main power switch for 12 hours or<br />
more before start. (This is required to turn on the compressor case heater for warming in order to<br />
prevent overload on the compressor when activating the outdoor unit.)<br />
4<br />
TEMP.<br />
TIMER SET<br />
FAN<br />
ON / OFF<br />
MODE<br />
1<br />
3 2<br />
TIME<br />
SWING/FIX<br />
VENT<br />
FILTER<br />
RESET TEST<br />
SET<br />
CL<br />
UNIT<br />
ON / OFF<br />
1 Push button.<br />
The operation lamp goes on, and the operation starts.<br />
2 Select an operation mode with the<br />
“MODE MODE ” button.<br />
AUTO HEAT DRY COOL FAN<br />
One push of the button, in each time the display<br />
changes in the order shown on the right.<br />
• In HEAT mode, if the room temperature reaches to the set temperature, the outdoor unit stops and<br />
the air flow becomes LOW and the air volume decreases.<br />
• In the defrost mode, the fan stops so that cool air<br />
is not discharged and PRE-DEF is displayed.<br />
AUTO HIGH MED. LOW<br />
FAN<br />
3 Select air volume with “ ” button.<br />
One push of the button, in each time the display changes in the order shown on the right.<br />
• When air volume is “AUTO ”, air volume differs according to the room temperature.<br />
• In DRY mode, “AUTO ” is displayed and the air volume is LOW.<br />
• In heating operation, if the room temperature is not heated sufficiently with fan mode “LOW ” operation,<br />
select “MED. ” or “HIGH ” operation.<br />
4 Determine the set up temperature by pushing the “TEMP. ” or “TEMP. ” button.<br />
Stop<br />
Push<br />
ON / OFF<br />
button.<br />
The operation lamp goes off, and the operation stops.<br />
6
AUTOMATIC OPERATION (Auto Changeover)<br />
When you set the air conditioner in mode or switch over from AUTO operation, it will automatically select<br />
either cooling, heating, or fan only operation depending on the indoor room temperature.<br />
3<br />
TEMP.<br />
TIMER SET<br />
TIME<br />
FAN<br />
SWING/FIX<br />
ON / OFF<br />
MODE<br />
VENT<br />
1<br />
2<br />
FILTER<br />
RESET TEST<br />
SET<br />
CL<br />
UNIT<br />
Start<br />
1<br />
ON / OFF<br />
button<br />
Push this button to start the air conditioner.<br />
2 Mode select button (MODE)<br />
Select Auto.<br />
3 Temperature button<br />
Set the desired temperature.<br />
• In case of cooling, start the operation after approx. 1 minute.<br />
• In case of heating, starts the operation after approximately 3 to 5 minutes.<br />
• When you select the Auto mode, it is unnecessary to set the fan speed.<br />
The fan speed display will show and fan speed will be automatically controlled.<br />
• After heating operation stops, FAN operation may continue for approx. 30 seconds.<br />
• When the room temperature reaches the set temperature and the outdoor unit stops, the LOW wind is<br />
discharged and the air volume decreases excessively. During defrost operation, the fan stops so that cool<br />
air is not discharged and is displayed.<br />
• If the Auto mode is uncomfortable, you can select the desired conditions manually.<br />
NOTE<br />
When restarting the operation after stop<br />
• When restarting the operation immediately after stop, the air conditioner does not operate for approx. 3<br />
minutes to protect a compressor.<br />
Stop<br />
Push<br />
ON / OFF<br />
button.<br />
Push this button again to stop the air conditioner.<br />
7
TIMER OPERATION<br />
A type of timer operation can be selected from the following three types.<br />
OFF timer : The operation stops after the set time has passed.<br />
Repeat OFF timer : Every time, the operation stops after the set time has passed.<br />
ON timer : The operation starts after the set time has passed.<br />
Timer operation<br />
TEMP.<br />
ON / OFF<br />
1<br />
FILTER<br />
RESET TEST<br />
TIMER SET<br />
TIME<br />
SET CL<br />
FAN<br />
SWING/FIX<br />
UNIT<br />
MODE<br />
VENT<br />
2<br />
3<br />
4<br />
1 Push TIMER SET button.<br />
• The timer display (type) changes every<br />
push of the button.<br />
OFF<br />
(OFF timer)<br />
OFF<br />
(Repeat OFF timer)<br />
ON<br />
(ON timer)<br />
• SET DATA and timer time displays flash.<br />
No display<br />
2 Push<br />
TIME<br />
to select “SET TIME”.<br />
For every push of button, the set time increases in the unit of 0.5 hr (30 minutes).<br />
The maximum set time is 72.0 hr.<br />
For every push of button, the set time decreases in the unit of 0.5 hr (30 minutes).<br />
The minimum set time is 0.5 hr.<br />
3 Push SET button.<br />
• SETTING display disappears and timer time display goes on.<br />
(When ON timer is activated, timer time, ON timer are displayed and other displays disappear.)<br />
Clear of timer operation<br />
4 Push CL button.<br />
• TIMER display disappears.<br />
NOTICE<br />
• Once set “Repeat OFF timer” resumes. So start again, stop by same timer.<br />
For cancel timer, push CL<br />
button.<br />
8
HINTS FOR ECONOMICAL OPERATION<br />
Maintain room temperature at comfortable level<br />
Clean air filters<br />
Airflow and performance are reduced if the air filters become blocked.<br />
Do not open doors and windows more often than necessary<br />
To keep cool or warm air in the room, do not open doors and windows more often than necessary.<br />
Window curtains<br />
In cooling, close the curtains to avoid direct sunlight.<br />
In heating, close the curtains to keep the heat in.<br />
Get uniform circulation of room air<br />
Adjust the air flow direction for the even<br />
circulation of room air.<br />
Gee, chilly<br />
Control<br />
Clean, please.<br />
Please close<br />
Blows upward<br />
Cool<br />
and<br />
dry<br />
air<br />
Warm<br />
air<br />
Blows downward<br />
Air flow adjustment<br />
9
MAINTENANCE<br />
Cleaning of remote controller<br />
CAUTION<br />
• Use a dry cloth to wipe the remote controller.<br />
• A cloth dampened with cold water may be used on the indoor unit if<br />
it is very dirty.<br />
• Never use a damp cloth on the remote controller.<br />
• Do not use a chemically-treated duster for wiping or leave such<br />
materials on the unit for long. It may damage or fade the surface of<br />
the unit.<br />
• Do not use benzine, thinner, polishing powder, or similar solvents for<br />
cleaning. These may cause the plastic surface to crack or deform.<br />
Thinner<br />
If you do not plan to use the unit for more than 1 month<br />
(1) Operate the fan for 3 to 4 hours to dry inside the unit<br />
Operate “FAN ONLY” mode with set temperature 30°C.<br />
(2) Stop the air conditioner and turn off the main power switch or the<br />
circuit breaker.<br />
Checks before operation<br />
(1) Check that the air filters are installed.<br />
(2) Check that the air outlet or inlet is not blocked.<br />
(3) Turn on the main power switch or the circuit breaker for the main<br />
power supply to the air conditioner.<br />
FAN ONLY operation<br />
WARNING<br />
Cleaning of the air filter and other parts of the air filter involves dangerous work in high places, so be sure<br />
to have a service person do it. Do not attempt it yourself.<br />
NOTE<br />
For Air conditioning system which is operated regularly, cleaning and maintenance of the indoor/outdoor<br />
units are strongly recommended.<br />
As a general rule, if an indoor unit is operated for about 8 hours daily, the indoor/outdoor units will need to<br />
be cleaned at least once every 3-MONTH. This cleaning and maintenance shall be carried out by a<br />
qualified person.<br />
Failure to clean the indoor/outdoor units regularly will result in poor performance, icing, water leaking and<br />
even compressor failure.<br />
10
<strong>AIR</strong> <strong>CONDITIONER</strong> OPERATIONS AND PERFORMANCE<br />
3 minutes protection function<br />
3-minutes protection function prevents the air conditioner from starting for initial 3 minutes after the main<br />
power switch/circuit breaker is turned on for re-starting the air conditioner.<br />
Power failure<br />
Power failure during operation will stop the unit completely.<br />
• To restart the operation, push the START/STOP button on the remote controller.<br />
• Lightning or a wireless car telephone operating nearby may cause the unit to malfunction. Turn off the main<br />
power switch or circuit breaker and then turn them on again. Push the START/STOP button on the remote<br />
controller to restart.<br />
Heating characteristics<br />
Preheating operation<br />
The air conditioner will not deliver warm air immediately after it is turned on. Warm air will start to flow out<br />
after approximately 5 minutes when the indoor heat exchanger warmed up.<br />
Warm air control (In heating operation)<br />
When the room temperature reaches the set temperature, the fan speed is automatically reduced to prevent<br />
to blow cold draft. At this time, the outdoor unit will stop.<br />
Defrosting operation<br />
If the outdoor unit is frosted during the heating operation, defrosting starts automatically (for approximately<br />
2 to 10 minutes) to maintain the heating capacity.<br />
• The fans in both indoor and outdoor units will stop during the defrosting operation.<br />
• During the defrosting operation, the defrosted water will be drained from the bottom plate of the outdoor<br />
unit.<br />
Heating capacity<br />
In the heating operation, the heat is absorbed from the outside and brought into the room. This way of heating<br />
is called heat pump system. When the outside temperature is too low, it is recommended to use another<br />
heating apparatus in combination with the air conditioner.<br />
Attention to snowfall and freeze on the outdoor unit<br />
• In snowy areas, the air inlet and air outlet of the outdoor unit are often covered with snow or frozen up.<br />
If snow or freeze on the outdoor unit is left as it is, it may cause machine failure or poor warming.<br />
• In cold areas, pay attention to the drain hose so that it perfectly drains water without water remaining inside<br />
for freeze prevention. If water freezes in the drain hose or inside the outdoor unit, it may cause machine<br />
failure or poor warming.<br />
Air conditioner operating conditions<br />
For proper performance, operate the air conditioner under the following temperature conditions:<br />
Cooling Outdoor temperature : –5°C to 43°C (RAV-SM∗∗∗2AT-E)<br />
operation<br />
–15°C to 43°C (RAV-SP∗∗∗2AT-E)<br />
Room temperature<br />
: 21°C to 32°C (Dry valve temp.), 15°C to 24°C (Wet valve temp.)<br />
CAUTION<br />
Room relative humidity – less than 80 %. If the air conditioner operates<br />
in excess of this figure, the surface of the air conditioner may cause dewing.<br />
Dry operation Outdoor temperature : 15°C to 43°C (Maximum suction air temp. 46°C)<br />
Room temperature : 17°C to 32°C<br />
Heating Outdoor temperature : –15°C to 15°C (Wet valve temp.)<br />
operation<br />
Room temperature : 15°C to 28°C (Dry valve temp.)<br />
If air conditioner is used outside of the above conditions, safety protection may work.<br />
11
RE-INSTALLATION<br />
DANGER<br />
Ask the dealer or an installation professional to re-install the air conditioner to a new place or<br />
move it to another place and to observe the following items.<br />
If the air conditioner is inappropriate installed by yourself, it may cause electric shock or fire.<br />
Do not install the air conditioner in the following places<br />
• Do not install the air conditioner in any place within 1 m from a TV, stereo, or radio set. If the unit is installed<br />
in such place, noise transmitted from the air conditioner affects the operation of these appliances.<br />
• Do not install the air conditioner near a high frequency appliance (sewing machine or massager for business<br />
use, etc.), otherwise the air conditioner may malfunction.<br />
• Do not install the air conditioner in a humid or oily place, or in a place where steam, soot, or corrosive gas is<br />
generated.<br />
• Do not install the air conditioner in a salty place such as seaside area.<br />
• Do not install the air conditioner in a place where a great deal of machine oil is used.<br />
• Do not install the air conditioner in a place where it is usually exposed to strong wind such as in seaside<br />
area or on the roof or upper floor of a building.<br />
• Do not install the air conditioner in a place where sulfureous gas generated such as in a spa.<br />
• Do not install the air conditioner in a vessel or mobile crane.<br />
Be careful with noise or vibrations<br />
• Do not install the air conditioner in a place where noise by outdoor unit or hot air from its air outlet annoys<br />
your neighbors.<br />
• Install the air conditioner on a solid and stable foundation so that it prevents transmission of resonating,<br />
operation noise and vibration.<br />
• If one indoor unit is operating, some sound may be audible from other indoor units that are not operating.<br />
TROUBLES AND CAUSES<br />
CAUTION<br />
If any of the following conditions occur, turn off the main power supply switch and immediately contact the<br />
dealer :<br />
• The operation lamps flash at short intervals (5 Hz) even though you have tried turning off the power<br />
supply and turning on again after 2 or 3 minutes.<br />
• Switch operation does not work properly.<br />
• The main power fuse often blows out, or the circuit breaker is often activated.<br />
• A foreign matter or water fall inside the air conditioner.<br />
• Any other unusual conditions are observed.<br />
12
Before you ask for servicing or repairs, check the following points.<br />
Inoperative<br />
• The main power switch is turned off.<br />
• The circuit breaker is activated to cut off power supply.<br />
• The main power fuse has blown out.<br />
• Stoppage of electric current.<br />
Recheck<br />
Does not cool well or heat well<br />
• The air inlet and/or outlet of the outdoor unit is blocked.<br />
• Doors or windows are opened.<br />
• The fan speed is set to low.<br />
• The air conditioner is set in the DRY mode.<br />
• The set temperature is too high. (In cooling operation)<br />
• The set temperature is too low. (In heating operation)<br />
Indoor unit or outdoor unit makes a strange noise.<br />
• When the temperature suddenly changes, the indoor or outdoor unit<br />
occasionally makes a strange noise because of changing of refrigerant flow or<br />
expansion work.<br />
The room air is smelly or a bad odor comes from the air conditioner.<br />
• Smells impregnated in the walls‚ carpets, furniture, clothing, or furs, come<br />
out from the air conditioner.<br />
These are not failures.<br />
Outdoor unit is frosted in heating operation.<br />
Water drains from outdoor unit.<br />
• The outdoor unit is sometimes frosted in heating operation.<br />
In that case, the unit automatically performs defrosting<br />
(for 2 to 10 minutes) for increasing the heating efficiency.<br />
• In defrosting operation, both the indoor and outdoor units stop air flow.<br />
• Hiss sound is heard when flow of the refrigerant is changed for defrosting.<br />
• Resultant water of automatic defrosting in heating operation drains from<br />
outdoor unit.<br />
Air flow changes without FAN button set to AUTO mode.<br />
• When the temperature of blown air drops in heating operation,<br />
the air conditioner automatically changes or stops air flow from the<br />
indoor unit not to make persons in the room feel chilly.<br />
• Air flow of the indoor unit is occasionally changed in the cooling operation.<br />
Calm<br />
A white mist of chilled air or water is generated from the outdoor unit.<br />
• The indoor unit in cooling operation or the outdoor unit in defrosting<br />
operation occasionally cause steams.<br />
13
TROUBLES AND CAUSES (Concerning Remote Controller)<br />
Before you ask for servicing or repairs, check the following points:<br />
Setting Change is Impossible<br />
Symptoms<br />
The fan speed can not be<br />
changed.<br />
Causes<br />
• Check whether the MODE indicated<br />
on the display is “AUTO”.<br />
AUTO<br />
• Check whether the MODE indicated<br />
on the display is “DRY”.<br />
(DRY)<br />
Reason and Disposal<br />
When the automatic mode is selected,<br />
the air conditioner automatically<br />
selects the fan speed.<br />
When dry operation is selected, the<br />
air conditioner automatically selects<br />
the fan speed.<br />
14
This product is compliant with Directive 2002/95/EC, and cannot be disposed as unsorted municipal waste.<br />
Ce produit est conforme à la Directive 2002/95/CE et il ne peut pas être jeté avec les ordures ménagères non triées.<br />
Dieses Produkt entspricht der Richtlinie 2002/95/EWG und darf nicht als normaler, unsortierter Hausabfall entsorgt<br />
werden.<br />
Questo prodotto è conforme alla direttiva 2002/95/CE, e per disfarsene non deve essere gettato con la spazzatura della<br />
casa.<br />
Este producto cumple con la Directiva 2002/95/EC, y no se puede desechar como la basura municipal.<br />
Este produto respeita a Directiva 2002/95/EC e não pode ser deitado fora como lixo municipal.<br />
Dit product is in overeenstemming met richtlijn 2002/95/EC en mag niet als huishoudelijk afval worden afgevoerd.<br />
Ôï ðñïúüí áõôü óõµµïñöþíåôáé µå ôçí Ïäçãßá 2002/95/ÅÅ êáé äåí µðïñåß íá áðïññéöôåß ùò µç ôáîéíïµçµÝíï äçµïôéêü<br />
áðüâëçôï.<br />
TOSHIBA CARRIER CORPORATION<br />
2 CHOME 12-32, KONAN, MINATOKU, TOKYO, 108-0075, JAPAN<br />
EH99923901