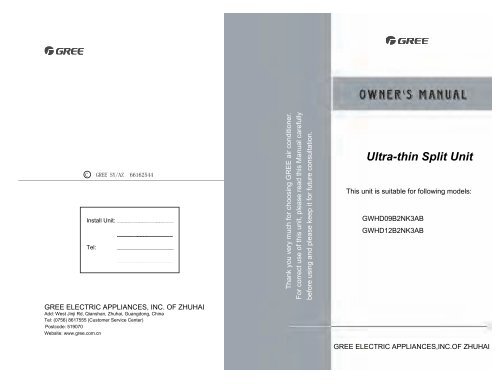
Ultra-thin Split Unit - Lomax
Ultra-thin Split Unit - Lomax
Ultra-thin Split Unit - Lomax

Create successful ePaper yourself
Turn your PDF publications into a flip-book with our unique Google optimized e-Paper software.
C GREE SY/AZ<br />
Install <strong>Unit</strong>:<br />
Tel:<br />
GREE ELECTRIC APPLIANCES, INC. OF ZHUHAI<br />
Add: West Jinji Rd, Qianshan, Zhuhai, Guangdong, China<br />
Tel: (0756) 8617555 (Customer Service Center)<br />
Postcode: 519070<br />
Website: www.gree.com.cn<br />
Thank you very much for choosing GREE air conditioner.<br />
For correct use of this unit, please read this Manual carefully<br />
before using and please keep it for future consultation.<br />
<strong>Ultra</strong>-<strong>thin</strong> <strong>Split</strong> <strong>Unit</strong><br />
This unit is suitable for following models:<br />
GWHD09B2NK3AB<br />
GWHD12B2NK3AB<br />
GREE ELECTRIC APPLIANCES,INC.OF ZHUHAI
CONTENT<br />
and Usage<br />
Structure Principle<br />
Structure and Function 1<br />
Usage Notice 2<br />
Specification and Technical Parameter 5<br />
Names and Functions of Wireless Remote Control 6<br />
Operation Guideline 8<br />
Install Notice 9<br />
Installation<br />
Install of Indoor <strong>Unit</strong> 12<br />
Install of Outdoor <strong>Unit</strong> 15<br />
Trial Run and Check Items after Installation 17<br />
Maintenance<br />
Maintenance 19<br />
When <strong>Unit</strong> Cannot Work Normally 20<br />
Thank you for choosing this air conditioner. For correct use of this unit,<br />
please read this Manual carefully and keep it for future consultation.
Structure Principle and Usage<br />
◆<br />
Structure and Function<br />
Panel<br />
Air in<br />
Filter<br />
Indoor<br />
<strong>Unit</strong><br />
Wiring cover<br />
Air out<br />
Power plug<br />
Wireless remote<br />
control<br />
: Heat (This light doesn't on in cool only unit)<br />
: Cool / Dry<br />
: Run<br />
Drainage hose<br />
: Auto<br />
Air in<br />
wire<br />
pipe and connect<br />
Connect<br />
Air outlet<br />
grill<br />
Outdoor<br />
<strong>Unit</strong><br />
Air out
Structure Principle and Usage<br />
Usage Notice (Read the following items carefully before using)<br />
WARNING<br />
Ensure power plug has<br />
been inserted firmly.<br />
Otherwise electric shock or<br />
fire may occur.<br />
Don't plug out power plug<br />
when the unit is operating.<br />
Otherwise electric shock or<br />
fire may occur.<br />
Don't damage wire or use<br />
the unappointed wire.<br />
Otherwise electric shock or<br />
fire may occur.<br />
Don't share the socket with<br />
other appliances or use the<br />
prolonged wire.<br />
Otherwise electric shock or<br />
fire may occur.<br />
Don't operate the unit by<br />
wet hand. Or electric shock<br />
may occur.<br />
Don't insert fingers or stick<br />
like <strong>thin</strong>gs into air intake or<br />
outlet vent. Otherwise damage<br />
may occur.<br />
Danger<br />
Don't apply the cool air to<br />
body for a longtime, and don't<br />
set indoor temp. too low. It is<br />
not good for health.<br />
If abnormal phenomenon<br />
(like buring odor etc.) occur,<br />
turn off power supply at once<br />
and contact with our service<br />
center. If abnormal state is<br />
remained, the unit may damage<br />
and even cause electric shock<br />
or fire.<br />
Cut off<br />
power<br />
Don't repair the unit by<br />
yourself. Incorrect repair would<br />
cause electric shock or fire.<br />
Contact our service center<br />
to have the unit repaired.
Structure Principle and Usage<br />
★ Earth: Do connect<br />
earth reliably! Earth wire<br />
should be connected onto<br />
special earth settings of the<br />
building. If there is no the setting<br />
connect earth by professional<br />
personnel. Don't connect the<br />
wire to gas pipe, water pipe,<br />
blowing pipe and other places<br />
that professional personnel<br />
considers it unreliable.<br />
★ When the unit will not be<br />
used for a long time, do plug<br />
out the power plug.<br />
★ When cleaning the unit,<br />
cut off the power.<br />
Otherwise electric shock or<br />
damaged would occur.<br />
★ Don't plug out the power<br />
plug by pulling the wire.<br />
Or fire would occur by overheat<br />
of wire.<br />
★ • Don't blow the burning<br />
cooker directly.<br />
Otherwise CO toxicosis may<br />
occur for imcomplete burning.<br />
★ Keep chemical sprayer 1m<br />
or more away from indoor and<br />
outdoor unit. Otherwise fire<br />
or explosion may occur.<br />
Gas<br />
★ Check if the chassis of<br />
outdoor unit is damaged.<br />
If chassis is broken without<br />
repair, unit may fall and cause<br />
injury.<br />
★ Don't stand or put some<strong>thin</strong>g<br />
on the outdoor unit.<br />
Man or <strong>thin</strong>gs may fall from<br />
the unit and cause indury.<br />
★ Don't block the air intake or<br />
outlet vent of indoor and outdoor<br />
unit. It can decrease the working<br />
capacity or even stop the unit.
Structure Principle and Usage<br />
Indoor temperature should be set properly<br />
Proper set temp. can save electricity.<br />
Temp. dif of<br />
indoor and outdoors<br />
should be 5<br />
NOTICE<br />
● Adjust airflow and direction properly<br />
When the unit is running, adjust up and down adjusting<br />
louver by wireless remote control can adjust vertical<br />
direction of air, hold the adjust louver that control left<br />
and rignt direction can adjust horizontal flow direction<br />
of air.<br />
Left and right adjust louver<br />
Up and down adjust louver<br />
When the unit is running, don't open windows<br />
or doors of the room for long time.<br />
It would lower performance of the unit.<br />
● Don't blow pets or plants directly for it is not<br />
good for them.<br />
Don't pour water on the unit or wash it by<br />
water for malfunction or electric shock may<br />
occur.<br />
Power hose of this unit adopts Y type connection,<br />
don't cut off or damage it and signal control wire.<br />
If the supply cord is damaged, it must be replaced<br />
by the manufacturer, its service agent or similarly<br />
qualified persons in order to avoid a hazard.<br />
The unit allow voltage fluctuation of 220-<br />
240 V, too low of voltage may increase<br />
libration of compressor that cause damage<br />
on cool system.<br />
This unit cannot be used to dry clothes or refrigerate<br />
and store foods etc..<br />
50Hz~220-240V<br />
4
Structure Principle and Usage<br />
Usage of Wireless Remote Control<br />
Names and Functions of Wireless Remote Control<br />
Note: Make sure that there is no obstruction between the control and receive<br />
window.<br />
Don't drop or throw the wireless remote control.<br />
Don't let any liquid flow into the control, or put it to where suffer direct<br />
sunburn or where is very hot.<br />
MODE<br />
Press MODE serially to<br />
change running mode<br />
by following order:<br />
Auto<br />
FAN<br />
Every press to this button,<br />
fan speed changes by<br />
following order:<br />
Auto<br />
Note: Under mode,<br />
fan speed cannot be<br />
adjusted.<br />
SWING<br />
Guide louver begins<br />
swing on certain angle<br />
when SWING is pressed<br />
once. Repress it to stop.<br />
TEMPERATURE<br />
Every press of +℃ set<br />
temp. increase 1℃; press<br />
-℃ once and set temp.<br />
lower 1℃.<br />
Under<br />
indoor temp. can be<br />
adjusted between<br />
16℃~30℃.<br />
“ ”means cooling<br />
“ ”means drying<br />
“ ”means fan<br />
“ ”means heating<br />
ON/OFF<br />
The unit begins running<br />
when this button is pressed.<br />
Repress it for stop.<br />
6
Structure Principle and Usage<br />
◆<br />
Names and Functions of Wireless Remote Control<br />
Note: This wireless remote control is of general type that can be used by<br />
many kinds (functions) of unit. Please understand that we won't<br />
introduce the button that is unavailable here.<br />
Liquid Crystal Displayer<br />
Display signals of all selected<br />
buttons.<br />
SLEEP<br />
Press once to begin sleep<br />
mode, and repress to exit.<br />
Note: "Auto" and " "mode<br />
has no SLEEP mode.<br />
TIMER ON<br />
Press TIMER ON when unit<br />
is off, auto on time can be<br />
set in 0~24 hours.<br />
0 24h<br />
CANCEL<br />
TIMER OFF<br />
Press TIMER OFF when unit<br />
is running, auto off time can<br />
be set in 0~24 hours.<br />
0 24h<br />
CANCEL<br />
7
Structure Principle and Usage<br />
◆ Operation Guideline<br />
General process:<br />
1. After connecting with power, buzzer sounds in music and unit be in running state.<br />
(Note: Every electrify or receiving wireless remote control signal, buzzer sounds in music.)<br />
2. Press ON/OFF on wireless remote control, then run indicator light and relevant<br />
indicator light on, set temperature by fan speed, and unit begins to run.<br />
3. Press MODE to select needed operation mode.<br />
4. Press FAN to set fan speed.<br />
5. Press SWING then guide louver swings automatically; repress to stop swinging.<br />
6. Press +℃ or -℃ to set proper temperature.<br />
Selectable process:<br />
7. Press SLEEP to set sleep state.<br />
8. Press TIMER ON or TIMER OFF to set auto on or off time.<br />
Note: When AUTO mode is selected, unit would select proper operation mode<br />
according to indoor ambient to make environment comfort.<br />
◆ Change Batteries of Wireless Remote Control<br />
The wireless remote control adopts 2 No.7 dry alkaline cells.<br />
1. Slide the cell cover downward to take out the worn cells, then change 2 new<br />
ones (note to the correct polarity).<br />
2.Cover the cell cover.<br />
Note:<br />
● Don't confuse the new and worn or<br />
batteries of different types.<br />
● If the wireless remote control would not be<br />
used for weeks, please take out batteries to<br />
prevent liquid leakage from damaging it.<br />
● The operation of wireless remote control<br />
should wi<strong>thin</strong> its receivable distance.<br />
● The distance between wireless remote<br />
control and both TV or Hi-fi etc. should be<br />
above 1m.<br />
8
Installation<br />
◆ Installation Notice<br />
Select of Install Location<br />
Indoor <strong>Unit</strong><br />
1. The air intake and outlet vent should be far away from obstruction to ensure<br />
the air is blowed to the entire room.<br />
2. Select place where is easy to drain condensate or connect with outdoor unit.<br />
3. Far away from heat resource, steam and flammable gas.<br />
4. Select place where can stand the weight of indoor unit without increasing<br />
running noise and librations.<br />
5. Ensure there is enough space for maintenance, and height of indoor unit<br />
to floor should be at least 2.3m.<br />
6. Place where is at least 1m away from TV, Hi-fi and other appliances.<br />
7. Select place where air filter can be taken out easily.<br />
8. Ensure the install of indoor unit fits requirements on Install Dimension<br />
Diagram.<br />
9.Do not use the unit in the immediate surroundings of a laundry a bath a shower<br />
or a swimming pool.<br />
10.The plug should be accessible after the appliance is positioned.<br />
Outdoor <strong>Unit</strong><br />
1. Select place where noise and airflow produced when exharsting will not annoy<br />
neighbours.<br />
2. Ensure well ventilation of outdoor unit.<br />
3. There should be no obstruction that may impact air in and out near outdoor unit.<br />
4. Install place should be able to stand weight and libration of outdoor unit and ensure<br />
safe operation of the outdoor unit.<br />
5. Select place where there is no leakage of flammable or corrosible gas.<br />
6. Ensure the install of outdoor unit fits requirements on Install Dimension Diagram.<br />
9
Installation<br />
Wiring Collocation<br />
1. Power must adopt rated voltage and special circuit for air conditioner, diameter<br />
of the power cord should be big enough.<br />
2. Please don't pull power wire forcibly.<br />
3. Ear<strong>thin</strong>g should be reliable, and it should be connected on special ear<strong>thin</strong>g settings<br />
of the building. Do have them connected by professional personnel. Electric leakage<br />
protect switch and air switch with enough capacitance must be set in rated circuit<br />
(Refer to the following form). Air switch should includes magnetic and heat drop-out<br />
functions to ensure protect when curcuit short or overload occurs.<br />
Use Models<br />
Capacitance<br />
of air switch<br />
Min section<br />
of earth wire<br />
Min section<br />
of unit power cord<br />
GWHD09B2NK3AB<br />
10A<br />
1.0mm 2<br />
1.0mm 2<br />
GWHD12B2NK3AB<br />
15A<br />
1.5mm 2<br />
1.5mm 2<br />
Ear<strong>thin</strong>g Requirements<br />
1. Air conditioner is type I appliance, please do conduct reliable ear<strong>thin</strong>g measure.<br />
2. The yellow-green wire in the unit is earth wire, don't use it for other purpose or<br />
cut it. Don't fix it by self tapping screw, or electric shock may occur.<br />
3. Earth resistance should meet requirements on national standard GB17790.<br />
4.User power supply should offer reliable earth terminal. Don't connect earth wire to<br />
following places:<br />
1 Water pipe 2 Gas pipe 3 Drainage pipe 4 Other places where professional<br />
personnel considers unreliable.<br />
10
Installation<br />
Install Dimension Diagram<br />
15cm<br />
or<br />
more<br />
Distance to ceiling<br />
15cm<br />
or more<br />
Distance to wall<br />
Distance to wall<br />
15cm<br />
or more<br />
300cm<br />
or more<br />
Exhaust side<br />
230cm<br />
or Distance to floor<br />
more<br />
Important Advance<br />
★ To ensure better usage, please have the installation done by<br />
professional personnel by following this manual.<br />
★ Please contact the local service center before installation. Malfunction<br />
caused by installation by unauthorized unit may be hard to solve for<br />
inconvenient business contact.<br />
★ When moving the units, it is better to be guided by professional personnel.<br />
50cm<br />
or<br />
more<br />
Distance to shelter<br />
Air in side<br />
30cm<br />
or more<br />
Distance to wall<br />
30cm<br />
or more<br />
50cm<br />
or more<br />
Distance to wall<br />
200cm<br />
or<br />
more Exhaust<br />
side<br />
11
Installation<br />
◆ Installation of Indoor <strong>Unit</strong><br />
☆• Install the Rear Panel<br />
1. Measure horizon by hanging line or<br />
horizontal measurement. Since drainage<br />
hole is at left side, it is better to adjust left<br />
side little lower.<br />
Fig. 1<br />
2. Fix rear panel on wall by bolts.<br />
3. Pull the panel by hand after installation to see if it is firm enough. The rear panel<br />
should be able to stand the weight of an adult (60kg). And the weight should be<br />
evenly shared each screw.<br />
☆ Install the Piping Hole<br />
1. After determined pipe hole location as fig.1, drill a hole (φ90) slant downward.<br />
2. In order to protect pipe and cable from damaging when going though wall, put on<br />
wall pipe.<br />
☆ Install the Drainage Hose<br />
1. For well draining, the drainage hose shoule be<br />
placed at a downward slant.<br />
Wrench<br />
Bend<br />
2. Do not wrench, bend or heave the drainage hose<br />
Don't flood it<br />
or flood its end in water.<br />
in water<br />
3. The prolonged drainage hose should be wrapped with insulation material<br />
when passing through indoor.<br />
☆ Install the Indoor <strong>Unit</strong><br />
1. Refer fig.a for piping mode of indoor unit. When piping (wiring) at left side, cut<br />
off tailings from pipe left from chassis of host (as shown in fig.4(b)).<br />
(1) Cut off tailing 1 when only power cord is led;<br />
(2) Cut off tailing 1 and 2 when connect pipe and wire are led;<br />
Piping mode 1 is recommended.<br />
12
Installation<br />
2. After wrapped pipe and wire, pull them though the pipe hole (as shown in fig.5).<br />
3. Hang the mounting slot behind indoor unit on the pothook of the rear panel and<br />
move it to check if it is firm enough (as shown in fig.6).<br />
4.Ensure the install height of indoor unit is 2m or higher.<br />
1 Left piping<br />
(a)<br />
2 Rear left piping<br />
Wrap strap<br />
Connect pipe<br />
Tailing 2<br />
Tailing 1<br />
Fig. 5<br />
Drainage host<br />
(b)<br />
Fig. 4<br />
Fig. 6<br />
13
Installation<br />
☆ Electric wiring<br />
1. Open the panel upwards;<br />
2. Disassemble the fixing bolts of wiring cover,<br />
as shown in right figure;<br />
3. Lead power connect cord though rear of<br />
button case from down to up;<br />
terminal, yellow-green wire (i.e. earth wire) onto "<br />
electric box.<br />
Power connect cord of<br />
indoor and outdoor unit<br />
4. Connect blue wire in power connect wire onto "N(1)" terminal, brown wire onto "2"<br />
" terminal (as shownin fig.3);<br />
and press the power connect cord by wire clamp that in front of line bank on<br />
5. To heat pump type unit, signal control cord connect with indoor unit through connector<br />
as (shown in fig.3), and tighten the control cord by clamp on bottom of case.<br />
6. Install the cover plate on its original and tighten screws.<br />
Wiring cover<br />
Line bank<br />
Brown<br />
Wire<br />
clamp<br />
Power connect cord<br />
Fig. 3<br />
14
Install the outdoor unit<br />
Install of quick connector<br />
1. Screw out bolt that pointed out by arrowhead.<br />
Bolt<br />
2. Press big handle downward to take it off.<br />
3. Open the tightening plate of quick<br />
connector. (male)<br />
Orientating pin<br />
Tightening plate<br />
4. Pull tightening sleeve inward by the<br />
direction pointed by arrowhead.<br />
Tightening sleeve<br />
5. Insert the quick connector (male) into the other quick connector<br />
(female) to the end forcibly and reposit tightening sleeve simultaneity.<br />
Note: Orientating pin is downward.<br />
15
6. Rotate tightening plate and press it to bottom.<br />
Note: The tightening plate cannot be<br />
pressed to right position if the<br />
tightening sleeve is not rep<br />
sited completely.<br />
Tightening plate<br />
7. Connect with wiring terminal,<br />
install wire clamp and press<br />
the connecting wire tight.<br />
and the wiring connect on the terminal board,<br />
Wire clamp<br />
Connection terminal<br />
8. Install big handle<br />
Electric heating belt<br />
When outdoor ambient sensor malfunction happened,<br />
both of the electric heating belts stop working, otherwise,<br />
it will run at the following control:When Toutdoor ambient<br />
5 and the compressor doesn't started, that the<br />
compressor electric heating belt starts to work; Otherwise<br />
if compressor started or compressor doesn't start but<br />
Toutdoor ambient2 , the electric heating belt<br />
will not work. Compressor doesn't start and 5<br />
Toutdoor ambient 2compressor electric heating<br />
belt keeps the original state. When Toutdoor ambient<br />
3, the condenser electric heating belt work; Otherwise,<br />
if Toutdoor ambient6 , the condenser electric heating<br />
belt will not work. 3Toutdoor ambient6, the condenser<br />
electric heating belt will keep the original state.<br />
Electric heating belt<br />
16
Installation<br />
☆ Drainage of Condensate of Outdoor <strong>Unit</strong><br />
When unit is heating, condensate<br />
produced by outdoor unit and defrost<br />
water when defrosting would be drained<br />
to proper place by drainage hose.<br />
Install method: Insert outdoor drainage<br />
joint into hole Ø25 at chassis, then connect<br />
the hose onto drainage nozzle can drain<br />
condensate and defrost water to proper<br />
place.<br />
Base plate of<br />
outdoor unit<br />
Outdoor drainage joint<br />
Fig. 10<br />
◆ Trial Run and Check Items after Installation<br />
☆ Trial Run<br />
1. Preparation for Trial Run<br />
(1) Don't turn on power supply if entire<br />
installations are not completed.<br />
(2) Connect of control circuit should be<br />
correct, all wire connect should be firm. Heat indicator ON/OFF button<br />
(3) All scattered components, especially metal<br />
Run indicator<br />
scrap thrum etc. should be cleared from unit. Cool/dry indicator<br />
2. Trial Run Method<br />
(1) Press ON/OFF on wireless remote control after connecting to power then unit<br />
begins running.<br />
(2) Press MODE to select run mode of COOL, HEAT and FAN etc. to check if<br />
can run normally.<br />
(3) When wireless remote control is lost, operation unit by following mode:<br />
(a) When unit is off, press the ON/OFF button, then unit begins to run in AUTO,<br />
micro-computer selects COOL, HEAT or FAN automatically according to indoor<br />
temp. to make comfort effect. Repress ON/OFF to stop the unit from running.<br />
(b) When unit is running, press ON/OFF to stop unit from running.<br />
17
Installation<br />
☆ Check after Installation<br />
Items to be checked<br />
Is the installation firm enough?<br />
Is leakage test done?<br />
Is heat insulation sufficient?<br />
Is drainage smooth?<br />
Is the power voltage the same with that in<br />
product nameplate?<br />
Is the install of circuit and pipeline correct?<br />
Possible malfunction<br />
<strong>Unit</strong> may drop, shake or emit noise<br />
It may cause insufficient of cooling<br />
(heating) capacity<br />
Condensation or water drop may occur<br />
Condensation or water drop may occur<br />
Malfunction or burn out of parts may occur<br />
Malfunction or burn out of parts may occur<br />
Is the unit earthed safely?<br />
Electric leakage may occur<br />
Is model of wire fit that of regulation? Malfunction or burn out of parts may occur<br />
Is both the air intake or outlet vent of both It may cause insufficient of cooling<br />
indoor and outdoor unit blocked? (heating) capacity<br />
18
Maintenance<br />
◆<br />
Warning<br />
Maintenance<br />
▲Turn off the unit and pull out the power plug before cleaning the unit, otherwise<br />
electric shock may occur.<br />
▲Do not make the unit wet, or electric shock may occur. Ensure that the unit<br />
would not be washed by water under any circumstance.<br />
▲Volatile liquid like <strong>thin</strong>ner or gasoline would damage the appearance of the unit<br />
(only adopts soft dry cloth and wet cloth moisted with neuture cleaning fluid to<br />
clean appearance of the unit).<br />
Disassemble and wash of filter<br />
1. Lift the panel by hand according to arrow direction;<br />
2. Pull down panel by arrow direction;<br />
3. Uplift the panel a little by arrow direction 1, then take<br />
out filter by arrow direction 2. Adopt cleaner or water<br />
to wash filter, if the filter is too dirty (like oil spot), wash<br />
it by warm water (lower than 45℃) melted with neutral<br />
cleaning fluid then dry it in shade.<br />
Installation of filter<br />
1. Uplift the panel a little by arrow direction 1, then insert<br />
the filter from nether of the panel by arrow direction 2.<br />
2. Uplift the panel by arrow direction to the location shown<br />
as figure.<br />
3. Insert the clamp A, B and C to the 3 rotating shaft by<br />
arrow direction and cover panel.<br />
19
Maintenance<br />
Check before use<br />
1. Check if air intake or outlet vent of both<br />
indoor or outdoor unit is blocked.<br />
2. Check if earth wire is earthed firmly.<br />
3. Check if batteries in wireless remote<br />
control is changed.<br />
4. Check if install supporter of outdoor unit is<br />
damaged, if so, contact our service center.<br />
1. Clean filter and the body of indoor and<br />
outdoor unit.<br />
2. Cut off power supply of the unit.<br />
3. Clear dust and <strong>thin</strong>gs on outdoor unit.<br />
4. If outdoor unit rusts, paint oil paint on<br />
rust to prevent its spreading.<br />
Maintenance after use<br />
◆<br />
When <strong>Unit</strong> Cannot Work Normally<br />
Warning: Please don't repair the unit by yourself for incorrect repair would cause electric<br />
shock or fire; please contact our service center to have the unit repaired by<br />
professional personnel. Check the following items before requesting on service<br />
center would saves your time and cost.<br />
Phenomenon<br />
When unit is restarted immediately after being<br />
turned off, compressor cannot work.<br />
Waiting<br />
Troubleshooting<br />
When unit is restarted immediately after being turned<br />
off, unit protect setting would make it run after a delay<br />
of 3 minutes.<br />
Odor comes out from the unit when it is just<br />
turned on.<br />
This is caused by the odor from furniture or cigarette<br />
that was sucked in the unit but now be blown from it<br />
when the unit is conditioning.<br />
20
Maintenance<br />
Phenomenon<br />
Water flowing sound is heard when unit is running.<br />
Troubleshooting<br />
This is the sound of flowing of refrigerant inside the<br />
unit.<br />
When cooling, mist comes from air outlet vent<br />
vent sometimes.<br />
This is because the indoor air is cooled rapidly.<br />
Slight creaking noise can be heard when the unit<br />
turned on or off.<br />
This is the frictional sound caused by expansion of<br />
panel since the change of temperature.<br />
<strong>Unit</strong> cannot run.<br />
Trip<br />
· Is power supply cut off?<br />
· Is power cord loosen?<br />
· Is circuit protector tripped?<br />
· Is voltage higher than 253V or lower than 195V?<br />
· Is Timer On set by wireless remote control?<br />
Bad cooling (heating) effect.<br />
Wireless remote control cannot control.<br />
· Is temperature set in proper?<br />
· Is intake or outlet vent of outdoor unit blocked?<br />
· Is there too much dust on air filter?<br />
· Are windows and doors closed?<br />
· Is airflow set to Low?<br />
· Is there any heat source in room?<br />
·The unit is interfered by abnormal interference or<br />
changing function too frequently, wireless remote<br />
control cannot control occationally. Plug out power<br />
plug and reinsert it well could resume normal<br />
operation.<br />
·Is the control in the receiving area? or is there<br />
obstruction?<br />
·Check if the voltage of batteries in the control is<br />
enough. if not, change batteries.<br />
21
Maintenance<br />
Stop the unit from running immediately and take<br />
out power plug when following circumstance occur,<br />
then contact our service center.<br />
Please contact our<br />
Service Center if there<br />
is any problem.<br />
▲ Harsh noise is heard when the unit is running;<br />
▲ Fuse and protector always trip;<br />
▲ Water or other <strong>thin</strong>gs is poured into unit or<br />
the wireless remote control;<br />
▲ Water leakage occured in room;<br />
▲ Power connecting wire and power cord is extremely hot;<br />
▲ Abnormal odor is produced when the unit is running.<br />
22
Maintenance<br />
Circuit Diagram<br />
GWHD09B2NK3AB GWHD12B2NK3AB<br />
Indoor <strong>Unit</strong><br />
GWHD09B2NK3AB GWHD12B2NK3AB<br />
Outdoor <strong>Unit</strong><br />
23