Mounting/Demounting instructions UHP* and Run Flat Tyres - Corghi
Mounting/Demounting instructions UHP* and Run Flat Tyres - Corghi
Mounting/Demounting instructions UHP* and Run Flat Tyres - Corghi

You also want an ePaper? Increase the reach of your titles
YUMPU automatically turns print PDFs into web optimized ePapers that Google loves.
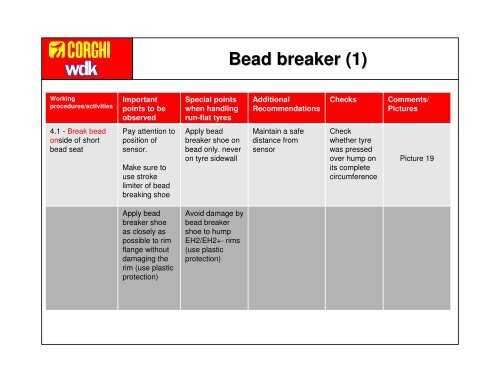
Bead breaker (1)<br />
Working<br />
procedures/activities<br />
Important<br />
points to be<br />
observed<br />
Special points<br />
when h<strong>and</strong>ling<br />
run-flat tyres<br />
Additional<br />
Recommendations<br />
Checks<br />
Comments/<br />
Pictures<br />
4.1 - Break bead<br />
onside of short<br />
bead seat<br />
Pay attention to<br />
position of<br />
sensor.<br />
Make sure to<br />
use stroke<br />
limiter of bead<br />
breaking shoe<br />
Apply bead<br />
breaker shoe on<br />
bead only. never<br />
on tyre sidewall<br />
Maintain a safe<br />
distance from<br />
sensor<br />
Check<br />
whether tyre<br />
was pressed<br />
over hump on<br />
its complete<br />
circumference<br />
Picture 19<br />
Apply bead<br />
breaker shoe<br />
as closely as<br />
possible to rim<br />
flange without<br />
damaging the<br />
rim (use plastic<br />
protection)<br />
Avoid damage by<br />
bead breaker<br />
shoe to hump<br />
EH2/EH2+- rims<br />
(use plastic<br />
protection)