Temperature Calibration Procedures - Mesa Labs
Temperature Calibration Procedures - Mesa Labs
Temperature Calibration Procedures - Mesa Labs
You also want an ePaper? Increase the reach of your titles
YUMPU automatically turns print PDFs into web optimized ePapers that Google loves.
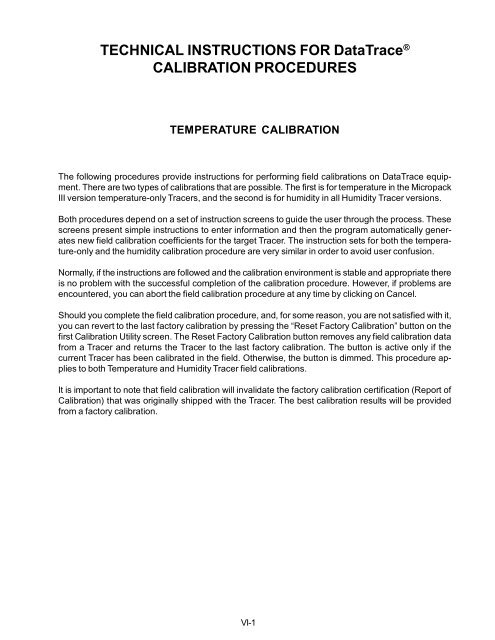
TECHNICAL INSTRUCTIONS FOR DataTrace ®<br />
CALIBRATION PROCEDURES<br />
TEMPERATURE CALIBRATION<br />
The following procedures provide instructions for performing field calibrations on DataTrace equipment.<br />
There are two types of calibrations that are possible. The first is for temperature in the Micropack<br />
III version temperature-only Tracers, and the second is for humidity in all Humidity Tracer versions.<br />
Both procedures depend on a set of instruction screens to guide the user through the process. These<br />
screens present simple instructions to enter information and then the program automatically generates<br />
new field calibration coefficients for the target Tracer. The instruction sets for both the temperature-only<br />
and the humidity calibration procedure are very similar in order to avoid user confusion.<br />
Normally, if the instructions are followed and the calibration environment is stable and appropriate there<br />
is no problem with the successful completion of the calibration procedure. However, if problems are<br />
encountered, you can abort the field calibration procedure at any time by clicking on Cancel.<br />
Should you complete the field calibration procedure, and, for some reason, you are not satisfied with it,<br />
you can revert to the last factory calibration by pressing the “Reset Factory <strong>Calibration</strong>” button on the<br />
first <strong>Calibration</strong> Utility screen. The Reset Factory <strong>Calibration</strong> button removes any field calibration data<br />
from a Tracer and returns the Tracer to the last factory calibration. The button is active only if the<br />
current Tracer has been calibrated in the field. Otherwise, the button is dimmed. This procedure applies<br />
to both <strong>Temperature</strong> and Humidity Tracer field calibrations.<br />
It is important to note that field calibration will invalidate the factory calibration certification (Report of<br />
<strong>Calibration</strong>) that was originally shipped with the Tracer. The best calibration results will be provided<br />
from a factory calibration.<br />
VI-1
TEMPERATURE CALIBRATION<br />
The following instructions allow you to perform a temperature sensor recalibration on the DataTrace ®<br />
Micropack III (MPIII) Tracer.<br />
We recommend that a field calibration be performed on a Tracer only when you detect and verify a drift<br />
in it’s temperature accuracy. Furthermore, there are some considerations related to the reference<br />
environment that must be adhered to. If these requirements can not be met in the field, it is best to<br />
return the Tracers to the factory for calibration and certification.<br />
1) The minimum calibration dwell time in a stable environment is 20 minutes per point.<br />
This means that the bath or isothermal block must have attained the target temperature<br />
and stay at that temperature for at least 20 minutes at each point for an acceptable<br />
calibration to be performed.<br />
2) The stability of the reference environment is critical to a good calibration. The field calibration<br />
requires 0.05°C environmental stability for the calibration to be completed successfully.<br />
The factory calibration stability is 0.003°C.<br />
The DataTrace ® <strong>Calibration</strong> Utility allows the user great flexibility with respect to selecting the appropriate<br />
calibration points to match the requirements of the application and also accommodate changing<br />
needs and capabilities in the future. Once the procedure is initiated, instructions must be followed<br />
explicitly to complete the calibration process successfully. However, you can abort the field calibration<br />
procedure at any time with no ill affect on the Tracer by clicking on Cancel.<br />
The temperature calibration procedure is initiated from the Program Tracer window under the MAIN<br />
Tab of the DataTrace Control Panel. Select Calibrate Mode by clicking on that option. Calibrate Mode<br />
installs a special temperature field calibration program that is used to create, verify, and install new<br />
calibration coefficients into a temperature Tracer in either a One Point or a Two Point <strong>Calibration</strong> cycle.<br />
The calibration process starts when the Program button is pressed. However, the field calibration<br />
procedure’s operator screens will not appear until the Tracer is retrieved from the reference environment<br />
and then read in the <strong>Calibration</strong> Utility.<br />
A One or Two Point <strong>Calibration</strong> optimizes a Tracer to a particular process or application. In most cases<br />
it is best to perform a two point field temperature calibration. In a two point calibration plan for the lower<br />
target calibration temperature to be 10°C below the lowest process temperature and the higher temperature<br />
should be 10°C above the highest process temperature. As a rule of thumb, do not use a two<br />
point calibration where the range of interest is less than 75°C. For this small of a range, use a one point<br />
calibration where the critical target temperature value is defined to “focus” the calibration on that critical<br />
temperature. If a two point calibration with a range less than 20°C is attempted a Range Error will be<br />
generated and the calibration will be aborted.<br />
VI-2
Procedure For a One or Two Point <strong>Temperature</strong> <strong>Calibration</strong><br />
The procedure for a One or Two Point <strong>Calibration</strong> is virtually the same. The primary difference is that<br />
for a two point calibration you must be prepared to expose the target Tracer to two temperature environments<br />
during the process, and the <strong>Calibration</strong> Utility will request information on two references<br />
rather than just one. The appropriate steps are listed in the following section of this document.<br />
1) Select the Calibrate Mode option on the Program Tracer screen. The temperature calibration<br />
procedure starts by automatically programming the Tracer with a special program<br />
called “CALBRATE”. (Note the missing “i” in calibrate.) Press the Program button.<br />
When initiated, a dialog box appears, stating that the calibration program has been<br />
loaded into the Tracer and that the Tracer must be placed into the appropriate reference<br />
environment(s). Do this as soon as possible as the Tracer starts taking readings once<br />
each minute beginning at the time it was programmed.<br />
If a two point calibration is being performed, allow sufficient time to transfer the target<br />
Tracer between the two reference environments and/or to allow the first bath to stabilize<br />
at the second point.<br />
Note that a calibration requires at least 20 minutes in a stable environment for each<br />
point. It is always best to error on the side of allowing too much time rather than too little.<br />
2) Place the target Tracer into the selected calibration reference environment for the specified<br />
amount of time.<br />
Please note the reference temperature value(s) used and the time when each target<br />
reference temperature is attained and is stable. It is a good idea to write these values<br />
down so they are not forgotten.<br />
Retrieve the target Tracer from the reference environment after the required minimum<br />
stabilization time. Prepare to read the Tracer.<br />
3) Go to the UTILITIES Tab of the DataTrace Control Panel, then click the <strong>Calibration</strong> Utility<br />
button. Place the Tracer in the PC Interface and press the Read Tracer button.<br />
4) On the <strong>Calibration</strong> Information screen, select the type of field calibration, either a One<br />
Point or a Two Point. Select either the One Point or the Two Point option.<br />
VI-3
5) You will note two text boxes titled “When the Tracer’s X reading was:” which include a<br />
listing of the data collected during the field calibration run. Depending on your previous<br />
entry defining the number of points, either the first or both text boxes will contain entries.<br />
Skip down to the next text box(es) titled “It should have read:” and enter the reference<br />
value(s) from the environment(s) that you placed the Tracer into.<br />
6) Now select from the data listing in the first text box the temperature value that is closest<br />
to the time that the Reference value(s) entered above were determined. Click on that<br />
value to highlight it. If this is a two point field calibration, do the same for the second<br />
point.<br />
7) Drop down to the last text box(es) and enter the references’ identifying Lot # or Certification<br />
#. This data is used to document the calibration and will be stored in the <strong>Calibration</strong><br />
History log located under the REPORTS Tab of the DataTrace Control Panel. Click<br />
Next.<br />
8) On the second screen a summary appears that displays the results of the field calibration<br />
procedure. The first value is the reference that the field calibration was performed<br />
in. The second item in the list is the value that you selected as the most appropriate<br />
value from the Tracer’s collected data. Next, the difference between the first two values<br />
is calculated and displayed. The Corrected Value is the new value following the field<br />
calibration. Lastly, the value that the last factory calibration would have reported is displayed.<br />
All of this information is also logged into the <strong>Calibration</strong> History log under the<br />
REPORTS Tab.<br />
VI-4
9) On the Finish screen of the field calibration procedure, you may enter any comments<br />
you would like in the space provided. The program enters the Operator’s Name automatically<br />
for documentation purposes. You may edit this if you wish.<br />
You can also elect to have a calibration report generated for this Tracer. This report<br />
displays a summary of this Tracer’s field calibration procedure; it is not the same as the<br />
Report of <strong>Calibration</strong> supplied following a factory calibration.<br />
VI-5
10) The temperature field calibration procedure is now complete. Press Finish. A calibration<br />
complete message will appear, press OK. Please note the warning about removing the<br />
Tracer from the PC Interface before pressing the Finish button. The field calibration<br />
procedure is not complete until the Finish button is pressed and the <strong>Calibration</strong> Complete<br />
message appears.<br />
If, for some reason the completed field calibration needs to be removed, you can restore the last<br />
factory calibration by placing the Tracer in the PC Interface and then start the <strong>Calibration</strong> Utility. At the<br />
bottom of the first calibration screen there is a Restore Factory <strong>Calibration</strong> button. When this button is<br />
clicked, the field calibration is removed and the last factory calibration is restored.<br />
VI-6


