iBT-GPS Bluetooth GPS Data Logger - GPSDGPS
iBT-GPS Bluetooth GPS Data Logger - GPSDGPS
iBT-GPS Bluetooth GPS Data Logger - GPSDGPS

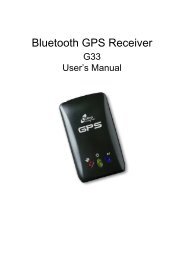
Create successful ePaper yourself
Turn your PDF publications into a flip-book with our unique Google optimized e-Paper software.
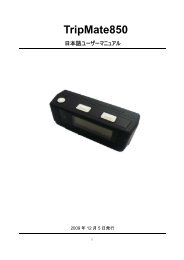
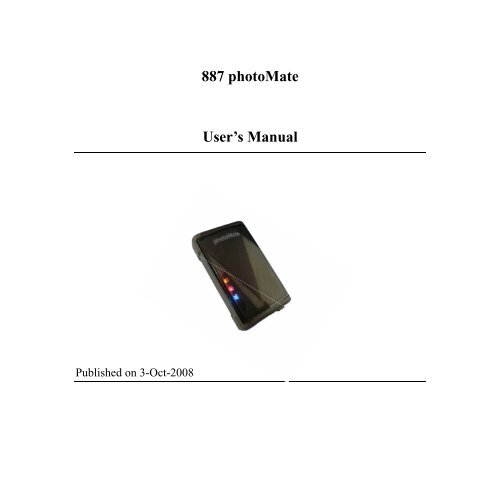
887 photoMate<br />
User’s Manual<br />
Published on 3-Oct-2008
Table of Contents<br />
Chapter 1 Before you begin.........................................................................................4<br />
1.1 Note and Warning ..........................................................................................4<br />
1.2 Introduction....................................................................................................5<br />
1.3 Features...........................................................................................................5<br />
1.4 Applications ....................................................................................................6<br />
1.5 Appearance .....................................................................................................6<br />
1.6 Power On/Off and Push Button....................................................................7<br />
1.7 LED Display ...................................................................................................8<br />
Chapter 2 Getting Started ...........................................................................................9<br />
2.1 Checking the package content ......................................................................9<br />
2.2 Getting Started .............................................................................................10<br />
Step 1 Charging Your Battery...................................................................10<br />
Step 2 Turning on the power switch (NAV/ LOG)...................................11<br />
Step 3 Connecting your handheld device with 887 .................................11<br />
Step 4 Loading your <strong>GPS</strong> mapping or routing software ........................14<br />
Step 5 Starting the application..................................................................14<br />
2.3 Helpful Tips ..................................................................................................15<br />
Chapter 3 How to configure your <strong>GPS</strong> Record ?....................................................16<br />
3.1 Driver Installation........................................................................................16<br />
3.2 GpsView software ........................................................................................16<br />
3.2.1 Connect USB cable between <strong>GPS</strong> and laptop.................................16<br />
3.2.2 Executing GpsView Program....................................................17<br />
3.2.3 Download A<strong>GPS</strong>.........................................................................18<br />
Chapter 4 Using Photo Tagger software ..................................................................21<br />
2
4.1 Execute and install software utility Photo Tagger ....................................21<br />
4.2 Google Earth.................................................................................................21<br />
4.3 Software Utility --- 887 Photo Tagger.........................................................21<br />
Appendix.....................................................................................................................22<br />
Appendix A. Specifications................................................................................22<br />
Appendix B. locr <strong>GPS</strong> Photo.............................................................................25<br />
Appendix C. Certification .................................................................................26<br />
Appendix D. Warranty Information ................................................................28<br />
3
Chapter 1 Before you begin<br />
1.1 Note and Warning<br />
- 887 uses + Lithium-Ion battery. If 887 is used in temperature lower<br />
than -10℃ or higher than 60℃, its battery charging capability will<br />
decrease. Please leave the 887 far from heat or high temperature<br />
environment. In addition, do not expose your 887 in temperature<br />
higher than 140 ℉ /60 ℃ . If you do not follow these rules, the battery<br />
inside 887 may overheat, explode or burn itself, and this will lead to<br />
very serious damage. The + Lithium-Ion battery inside the 887 should<br />
be recycled.<br />
- While in the hospital, turning off the 887 is recommended. Wireless<br />
<strong>GPS</strong> receiver may interfere with medical equipments which use radio<br />
frequency.<br />
- For a long period not using 887, take out the battery and store it in<br />
dry/cool places.<br />
- For safety, keep the 887 and all accessories out of children’s reach.<br />
- The manufacturer assumes no responsibility for any damages and loss<br />
resulting from the use of this manual, or from deletion of data as a<br />
result of malfunction, dead battery, or from misuse of the product in<br />
any way.<br />
- Use only the supplied and approved accessories. Unauthorized<br />
accessories, modifications or attachments could damage the 887, and<br />
may violate regulations governing radio devices.<br />
- Use a dry, clean soft cloth to clean the unit. Do not use harsh cleaning<br />
4
solvents, chemicals, or strong detergents.<br />
- Do not attempt to open the 887 yourself. Unauthorized hacking may<br />
damage the unit, and void your warranty.<br />
1.2 Introduction<br />
This 887 logger features an all-in-one, cost-effective portable <strong>GPS</strong><br />
logging solution. With its on-board memory, it allows you to log your<br />
routes by ways of time/ distance/ speed. Through user friendly software<br />
utility, it shows your track on Google Earth. This data logger is small<br />
and robust, ideal to carry everywhere for applications such as route<br />
tracking, mountain climbing or fleet management.<br />
1.3 Features<br />
1. Dual mode for both <strong>Data</strong> record and Navigation.<br />
2. Smart LOG function (User can record the date by setting the interval<br />
of time, distance and speed.)<br />
3. 125,000 waypoints.<br />
4. A<strong>GPS</strong> available.<br />
5. Fuzzy Auto on/off.<br />
6. Phototagger software.<br />
7. G-Mouse function<br />
5
1.4 Applications<br />
- Record your travels<br />
- Manage business trip expense<br />
- Concerned about one’s driving behavior<br />
- Geo-photo<br />
1.5 Appearance<br />
1. DC jack (mini USB type)<br />
2. Button (Power off/ Navigation/ Navigation&log)<br />
3. <strong>Bluetooth</strong> status LED (blue)<br />
4. Battery status LED (red/green)<br />
5. <strong>GPS</strong> status LED (orange)<br />
6. Recorder LED (green)<br />
6
1.6 Power On/Off and Push Button<br />
Push button 3sec<br />
Push button 1sec<br />
Push button 3sec<br />
Push button 1sec<br />
Power off NAV LOG<br />
Difference between NAV and LOG:<br />
NAV Working as a <strong>Bluetooth</strong> <strong>GPS</strong> receiver.<br />
LOG Both of navigation and logging functions are enabled.<br />
After you into the log mode, the 887 will automatic start smart log<br />
function.<br />
What is the Smart log function?<br />
The 887 will auto adjust log frequency depend on speed.<br />
7
1.7 LED Display<br />
887 photoMate has four LED lights, one is <strong>Bluetooth</strong> Status LED, the 2 nd<br />
one is Battery Status LED, the 3 rd one is <strong>GPS</strong> Status LED, the 4 nd one is<br />
Log LED. The status table of LED shows as follows:<br />
Category SYMBOL COLOR STATUS Function<br />
<strong>Bluetooth</strong> Status<br />
LED<br />
Battery Status<br />
LED<br />
<strong>GPS</strong> Status LED<br />
LOG Status LED<br />
Blue Always<br />
on:<br />
<strong>Bluetooth</strong> on, but not connected<br />
to any <strong>Bluetooth</strong> devices yet<br />
1/5Hz Sleeping mode<br />
blinking:<br />
1/2Hz<br />
blinking:<br />
<strong>Bluetooth</strong> is connected and<br />
ready for data transmission<br />
Off In LOG mode<br />
Red Blinking: The battery is too low<br />
Green On: The battery is charging<br />
Green Off The battery is fully charged<br />
Orange Always Acquiring satellites, <strong>GPS</strong><br />
on: position not fixed<br />
1Hz <strong>GPS</strong> position is fixed,<br />
Blinking: Navigation<br />
Green 1/3Hz In LOG mode.<br />
Blinking<br />
Always The memory has been full.<br />
on:<br />
8
Chapter 2 Getting Started<br />
2.1 Checking the package content<br />
Congratulations on your purchase of the 887 with built-in + Lithium-Ion<br />
chargeable battery. Before you start using 887, please make sure if your<br />
package includes the following items. If any item is damaged or missing,<br />
please contact your dealer at once.<br />
- photoMate - 887 x 1<br />
- USB to mini-USB cable x 1<br />
- Car charger x 1<br />
- Strap<br />
- CD Tool x 1 (user manual, software utility, driver)<br />
- Quick start guide x 1<br />
*Unit package contents may vary depending on countries without prior<br />
notice.<br />
*NOTE: The Cigarette Adapter can only be used to charge 887. Please<br />
don’t make use of it with devices other than 887.<br />
9
2.2 Getting Started<br />
Please follow the procedure step by step.<br />
Step 1 Charging Your Battery<br />
To charge your 887 data logger, you have to plug your USB cable into the<br />
power source. Charging time is about 90 minutes and you can charge<br />
from PC/ Notebook’s USB HOST or from cigarette-lighter in car.<br />
For the 1st time you use the 887, please charge battery until it is full (the<br />
green LED is off). Shown in below<br />
- If the LED is red, that means battery power is critically low. Charge immediately.<br />
- If the LED is green, that means battery is charging now.<br />
- If the no LED light display, that means battery is fully charged.<br />
10
Step 2 Turning on the power (NAV/ LOG)<br />
Push button 3sec<br />
Push button 1sec<br />
Push button 3sec<br />
Push button 1sec<br />
Power off NAV LOG<br />
Difference between NAV and LOG:<br />
NAV Working as a <strong>Bluetooth</strong> <strong>GPS</strong> receiver.<br />
LOG Both of navigation and logging functions are enabled.<br />
Step 3 Connecting your handheld device with 887<br />
Please refer to the user manual of PDA to enable the <strong>Bluetooth</strong><br />
connectivity. If the connection between your device and 887 is successful,<br />
the blue LED of 887 will be blinking.<br />
Below, we provide a common procedure of software installation to set up<br />
your PDA. (For other PDA, the steps may be different. <strong>Bluetooth</strong><br />
Manager is a popular program used on <strong>Bluetooth</strong> device.)<br />
11
--><br />
Start -> <strong>Bluetooth</strong> Manager<br />
New<br />
1. Open “<strong>Bluetooth</strong> Manager” on your pocket pc, and establish a new<br />
connection.<br />
--><br />
Explore A <strong>Bluetooth</strong> device<br />
->Next<br />
Tap 887 <strong>GPS</strong><br />
12
2. Explore a <strong>Bluetooth</strong> device, and find the “887”<br />
Passkey 0000 (if your PDA<br />
asks for the passkey)<br />
3. (Optional)<br />
--><br />
Select SPP slave->Next<br />
Finish<br />
13
4. Connect to Serial Port Profile (SPP) Slave<br />
--><br />
Tap and Hold 887: SPP slave, Done<br />
Connect<br />
5. Finish <strong>Bluetooth</strong> Manager Setup<br />
Step 4 Loading your <strong>GPS</strong> mapping or routing software<br />
You should have mapping software on your PDA/ Smartphone/ laptop or<br />
you need to install it before using the 887 for navigation.<br />
Step 5 Starting the application<br />
Select the correct COM port & baud rate within the application.<br />
Note: The <strong>Bluetooth</strong> device in most of the applications has an<br />
“auto-detect” feature so that you do not need to select the Baud Rate.<br />
14
2.3 Helpful Tips<br />
- It’s better to turn off the 887 when you don’t use it, or the serial Flash's life<br />
can’t last long.<br />
- Some vehicles having heavy metallic sun protecting coating on windshields<br />
may affect <strong>GPS</strong> signal receptions<br />
- Driving in and around high buildings may affect <strong>GPS</strong> signal receptions.<br />
- Driving in tunnels or indoor park may affect signal receptions.<br />
- In general, any <strong>GPS</strong> receiver performs best in open space where it can see<br />
clean sky. Also weather will affect <strong>GPS</strong> reception – rain & snow contribute<br />
to worse sensitivity.<br />
- Low battery of a PDA or of an 887 may affect signal receptions.<br />
- Please check the correct “COM” and “Baudrate” of your PDA.<br />
- 887 output data updates every second, therefore the actual position and the<br />
position shown in your map may have slight time delay. This may happen<br />
when you drive at higher speed or make a turn around a corner.<br />
- Note that 887 may not work indoors where it can not see the sky.<br />
- For the 1 st time you use the 887, it will take 1 to 3 minutes to obtain the<br />
satellite constellation information and fix your position, this is called “Cold<br />
Start”. If you replace the battery, 887 will do Cold Start again.<br />
- If your 887 can’t fix your position for more than 20 minutes, we suggest you<br />
change to another spot with open space and then try again.<br />
15
Chapter 3 How to configure your <strong>GPS</strong> Record ?<br />
The GpsView program only supports the Microsoft Windows based<br />
platform.<br />
3.1 Driver Installation<br />
Before the USB connector plugs in your PC/ Laptop, please have your<br />
USB Driver Installation ready. (Install InstallDriver.exe driver for USB<br />
port from CD-ROM.)<br />
3.2 GpsView software<br />
Open the GpsView software, please select correct COM port and Baud<br />
Rate (USB / <strong>Bluetooth</strong> :115,200bps) to configure <strong>GPS</strong>.<br />
3.2.1 Connect USB cable between <strong>GPS</strong> and laptop<br />
To USB port on PC/Laptop<br />
16
3.2.2 Executing GpsView Program<br />
Click “Command” tap. Update Rate 1 ~ 5Hz is user configurable. And<br />
still more options for choice of NMEA output, D<strong>GPS</strong>…etc. all available<br />
through pull-down menus.<br />
17
3.2.3 Download A<strong>GPS</strong><br />
1. Start→Control Panel→System→Hardware→Device<br />
Management→Connector(COM and LPT)Check Com<br />
port position。<br />
2. Open GpsView.exe→Check Baud Rate and Com port→<br />
click On<br />
18
3. Choice Setup<br />
4. Choice Update。<br />
19
5. When Updating now…100%, click Enter complete。<br />
NOTE: When you use A<strong>GPS</strong> function, we suggest use<br />
GpsView to download the A<strong>GPS</strong> data via USB cable.<br />
20
Chapter 4 Using Photo Tagger software<br />
4.1 Execute and install software utility Photo Tagger<br />
Complete <strong>GPS</strong> Photo Tagger and USB drivers installation (Refer to CD)<br />
4.2 Google Earth<br />
If you computer is not yet installed with Google Earth. Google Earth has<br />
free download version, go download it in the internet first. For more<br />
information, please visit http://earth.google.com/.<br />
4.3 Software Utility --- 887 Photo Tagger<br />
For further function to use the Photo Tagger software in detail, please<br />
refer to Photo Tagger user manual:<br />
Photo Tagger software > Help > User Manual<br />
To use a mini-USB cable to connect the 887 to your PC, you have to<br />
power on the 887 unit. Please keep in mind to switch to LOG mode while<br />
using Photo Tagger software.<br />
21
Appendix<br />
Appendix A. Specifications<br />
General<br />
Frequency L1,1575.42MHZ<br />
C/A Code<br />
1.023MHZ<br />
Datum<br />
WGS84<br />
Performance Characteristics<br />
Position Accuracy Without aid: 3.0m 2D-RMS<br />
Update<br />
1Hz<br />
Dynamic<br />
Altitude Maximum 18,000m<br />
Velocity<br />
Maximum 515m/s<br />
Acceleration Maximum 4g<br />
Power<br />
Input Voltage Vin : 5.0V±10%<br />
Battery<br />
Built-in chargeable + Lithium-Ion battery<br />
I/O<br />
Available Baud Rates 115200 bps<br />
Protocols NMEA 0183 v3.01<br />
Environment<br />
Operating<br />
Temperature -10 ~ 60C<br />
Storage Temperature -20 ~ 60C<br />
Charging<br />
0 ~ 45C<br />
<strong>Bluetooth</strong><br />
Standard Fully compliant with <strong>Bluetooth</strong> V1.2<br />
Output Power 0dBm (Typical),ClassII<br />
Range<br />
Over 10 meters<br />
<strong>Bluetooth</strong> Profile Serial Port Profile(SPP)<br />
Frequency 2.4G ~ 2.4835GHz ISM Band<br />
Security<br />
Yes<br />
23
USB Bridge<br />
Standard<br />
Fully compliant with USB2.0<br />
Full speed<br />
12Mbps<br />
Dimension 44 x 26 x 15 mm<br />
<strong>Data</strong> Log<br />
32Mb serial Flash ROM<br />
125,000 way points.<br />
Log <strong>GPS</strong> data by time interval/ distance/ speed limit.<br />
User can configure settings by using utility.<br />
*.Citation MTK original chipset spec.<br />
24
Appendix B. locr <strong>GPS</strong> Photo<br />
With 887 data logger and locr <strong>GPS</strong> Photo software, users are allowed to<br />
import geotagging adds information to photos. The position (latitude/<br />
longitude) then be written into the EXIF header for the further application.<br />
Also, locr <strong>GPS</strong> Photo can integrated travel log and digital photos by date/<br />
time to show photos on the map directly.<br />
Please find the installation file for Windows XP/ Vista in CD tool, or go<br />
to http://www.locr.com for further information.<br />
25
Appendix C. Certification<br />
FCC Notices<br />
This device complies with part 15 of the FCC rules. Operation is subject<br />
to the following two conditions:<br />
1. This device may not cause harmful interface, and<br />
2. This device must accept any interference received, including<br />
interference that may cause undesired operation.<br />
FCC RF Exposure requirements:<br />
This device and its antenna(s) must not be co-located or operation in<br />
conjunction with any other antenna or transmitter.<br />
NOTE: THE MANUFACTURER IS NOT RESPONSIBLE FOR ANY<br />
RADIO OR TV INTERFERENCE CAUSED BY UNAUTHOURIZED<br />
MODIFICATION TO THIS EQUIPMENT. SUCH MODIFICATIONS<br />
COULD VOID THE USER’S AUTHORITY TO OPERATE THE<br />
EQUIPMENT.<br />
26
CE Notices<br />
Is herewith confirmed to comply with the requirements set out in the<br />
Council Directive on the Approximation of the Laws of the Member<br />
States relating to Electromagnetic Compatibility (89/336/EEC),<br />
Low-voltage Directive (73/23/EEC) and the Amendment Directive<br />
(93/68/EEC), the procedures given in European Council Directive<br />
99/5/EC and 89/3360EEC.<br />
The equipment was passed. The test was performed according to the<br />
following European standards:<br />
- EN 300 328-2 V.1.2.1 (2001-08)<br />
- EN 301 489-1 V.1.4.1 (2002-04) / EN 301 489-17 V.1.2.1 (2002-04)<br />
- EN 50371: 2002<br />
- EN 60950: 2000<br />
27
Appendix D. Warranty Information<br />
Thank you for your purchase of <strong>GPS</strong> product from the company.<br />
The company warrants this product to be free from defects in materials<br />
and workmanship for one year from the date of purchase. The warranty<br />
for accessories is six months. The stamp of distributor or a copy of the<br />
original sales receipt is required as the proof of purchase for warranty<br />
repairs. The company will, as its sole option, repair or replace any<br />
components, which fail in normal use. Such repair or replacement will be<br />
made at no charge to the customer for parts or labor. The customer is,<br />
however, responsible for any transportation costs.<br />
This warranty does not cover failures due to abuse, misuse, accident or<br />
unauthorized alteration of repairs. The company assumes no<br />
responsibility for special, incidental punitive or consequential damages,<br />
or loss of use.<br />
28