Turb 550 / Turb 550 IR - Fagerberg
Turb 550 / Turb 550 IR - Fagerberg
Turb 550 / Turb 550 IR - Fagerberg

You also want an ePaper? Increase the reach of your titles
YUMPU automatically turns print PDFs into web optimized ePapers that Google loves.
Operation<br />
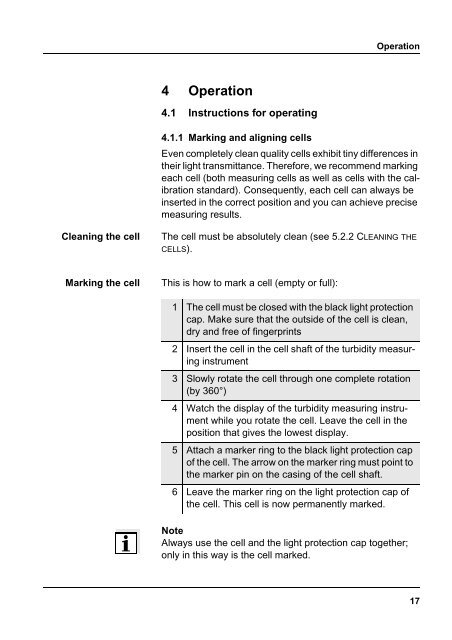
4 Operation<br />
4.1 Instructions for operating<br />
4.1.1 Marking and aligning cells<br />
Even completely clean quality cells exhibit tiny differences in<br />
their light transmittance. Therefore, we recommend marking<br />
each cell (both measuring cells as well as cells with the calibration<br />
standard). Consequently, each cell can always be<br />
inserted in the correct position and you can achieve precise<br />
measuring results.<br />
Cleaning the cell<br />
The cell must be absolutely clean (see 5.2.2 CLEANING THE<br />
CELLS).<br />
Marking the cell<br />
This is how to mark a cell (empty or full):<br />
1 The cell must be closed with the black light protection<br />
cap. Make sure that the outside of the cell is clean,<br />
dry and free of fingerprints<br />
2 Insert the cell in the cell shaft of the turbidity measuring<br />
instrument<br />
3 Slowly rotate the cell through one complete rotation<br />
(by 360°)<br />
4 Watch the display of the turbidity measuring instrument<br />
while you rotate the cell. Leave the cell in the<br />
position that gives the lowest display.<br />
5 Attach a marker ring to the black light protection cap<br />
of the cell. The arrow on the marker ring must point to<br />
the marker pin on the casing of the cell shaft.<br />
6 Leave the marker ring on the light protection cap of<br />
the cell. This cell is now permanently marked.<br />
Note<br />
Always use the cell and the light protection cap together;<br />
only in this way is the cell marked.<br />
17