Cisco Router Experimentation
Cisco Router Experimentation
Cisco Router Experimentation

Create successful ePaper yourself
Turn your PDF publications into a flip-book with our unique Google optimized e-Paper software.
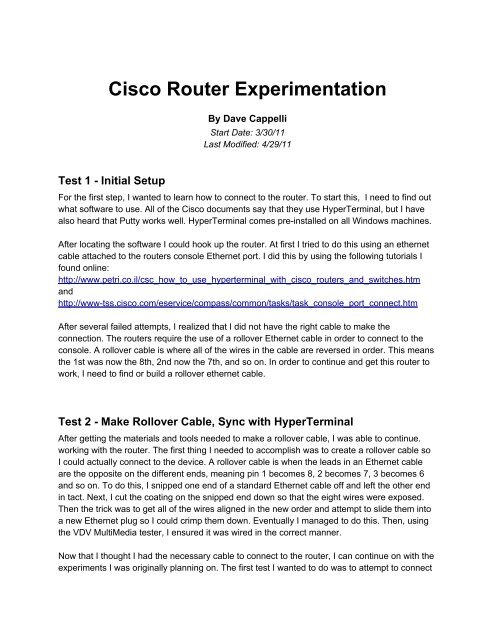
<strong>Cisco</strong> <strong>Router</strong> <strong>Experimentation</strong><br />
By Dave Cappelli<br />
Start Date: 3/30/11<br />
Last Modified: 4/29/11<br />
Test 1 - Initial Setup<br />
For the first step, I wanted to learn how to connect to the router. To start this, I need to find out<br />
what software to use. All of the <strong>Cisco</strong> documents say that they use HyperTerminal, but I have<br />
also heard that Putty works well. HyperTerminal comes pre-installed on all Windows machines.<br />
After locating the software I could hook up the router. At first I tried to do this using an ethernet<br />
cable attached to the routers console Ethernet port. I did this by using the following tutorials I<br />
found online:<br />
http://www.petri.co.il/csc_how_to_use_hyperterminal_with_cisco_routers_and_switches.htm<br />
and<br />
http://www-tss.cisco.com/eservice/compass/common/tasks/task_console_port_connect.htm<br />
After several failed attempts, I realized that I did not have the right cable to make the<br />
connection. The routers require the use of a rollover Ethernet cable in order to connect to the<br />
console. A rollover cable is where all of the wires in the cable are reversed in order. This means<br />
the 1st was now the 8th, 2nd now the 7th, and so on. In order to continue and get this router to<br />
work, I need to find or build a rollover ethernet cable.<br />
Test 2 - Make Rollover Cable, Sync with HyperTerminal<br />
After getting the materials and tools needed to make a rollover cable, I was able to continue.<br />
working with the router. The first thing I needed to accomplish was to create a rollover cable so<br />
I could actually connect to the device. A rollover cable is when the leads in an Ethernet cable<br />
are the opposite on the different ends, meaning pin 1 becomes 8, 2 becomes 7, 3 becomes 6<br />
and so on. To do this, I snipped one end of a standard Ethernet cable off and left the other end<br />
in tact. Next, I cut the coating on the snipped end down so that the eight wires were exposed.<br />
Then the trick was to get all of the wires aligned in the new order and attempt to slide them into<br />
a new Ethernet plug so I could crimp them down. Eventually I managed to do this. Then, using<br />
the VDV MultiMedia tester, I ensured it was wired in the correct manner.<br />
Now that I thought I had the necessary cable to connect to the router, I can continue on with the<br />
experiments I was originally planning on. The first test I wanted to do was to attempt to connect
the router with HyperTerminal on my machine. This is the software that will allow me to do all of<br />
the necessary configuration and complete the rest of the labs.<br />
The next trouble encountered occurred when trying to get my machine with HyperTerminal to<br />
recognize and connect to the router. For some reason I am not able to see or connect to the<br />
router at all. I am not sure what is causing this. It could be a problem with the rollover cable, the<br />
router, the software, or my machine. I will continue experimenting with this in order to get it to<br />
work.<br />
Test 3 - Troubleshoot why connection is not occuring<br />
For quite awhile I was trying everything I could possibly think of to connect to a router. I tried<br />
various cables, routers, and programs in order to get the command prompt to show up. We<br />
attempted to use Linux with a program called Minicom. We also tried to connect using an<br />
ethernet to serial adapter. This went on for a couple of weeks until Professor Matthews and I<br />
decided that we had to order a Serial to USB adapter and an Ethernet rollover to serial adapter<br />
in order to get this connection to occur.<br />
When this <strong>Cisco</strong> console cable connection kit arrived, I was able to install an included driver for<br />
the adapter. Once this completed, I set everything up and made the connection. Finally, I was<br />
given the command prompt for the routers.<br />
Test 4 - Command Line Functions and Configuration<br />
To start working with the <strong>Cisco</strong> routers, I first looked in the CCNA Lab Companion book.<br />
Starting on page 109, there are some labs that only required you to be hooked up to one router.<br />
These labs were a good starting point to learn how to navigate through the layers and get a<br />
basic idea of how everything works.<br />
After searching through these and experimenting on the routers, I moved on to some more in<br />
depth processes, mainly focusing on configuration. The following two sources I found to be very<br />
helpful for configuration. They do a good job of explaining how the commands are structured<br />
and how to use them.<br />
http://www.joshgentry.com/cisco/cisco.htm<br />
http://www.tele.pitt.edu/~telelab/labs/General%20Lab%20Documentation/pdf/<br />
GeneralLab%20Documentation~<strong>Cisco</strong>%20<strong>Router</strong>%20Configuration%20Tutorial~08.20.05.pdf<br />
Using these tutorials, I was able to configure the ports on the routers in the ITL. The follow<br />
demonstrates what I accomplished:
<strong>Router</strong> C - Furthest from ITL Lab - Below Catalyst 5000<br />
Hostname: <strong>Cisco</strong>_<strong>Router</strong>_C14865<br />
Ethernet 1/1:<br />
IP Address = 113.113.111.1<br />
Subnet Mask = 255.255.255.0<br />
Ethernet ½:<br />
IP Address = 113.113.112.2 - - - …...02 was not accepted, overlaps with 1/1<br />
Subnet Mask = 255.255.255.0<br />
Serial 4/1:<br />
IP Address = 113.112.111.1<br />
Subnet Mask = 255.255.255.0<br />
Fddi 0/0:<br />
IP Address = 113.111.111.1<br />
Subnet Mask = 255.255.255.0<br />
To finish up the work I have been doing this semster, I would like to hook up at least three<br />
routers and get them all talking to each other.<br />
Test 5 - 4 <strong>Router</strong> Configuration 4/29/2011<br />
For the final experiment of the semester, I wanted to get the routers hooked up, configured, and<br />
operating together. To do this, I used the three large routers in the ITL with one of the <strong>Cisco</strong><br />
1604 routers.<br />
To begin, I connected the power supplies to the routers and powered them all up. The initial<br />
configuration for these included giving each router a host-name. For this, I used the number that<br />
was on the asset tag on each router. Next, I used the FDDI cables to connect the three larger<br />
routers. The FDDI cables are connected from the PHY A port to the PHY B port on the next<br />
router. With the three large routers I could make a loop. The configuration for each of these was<br />
as follows:<br />
<strong>Router</strong> A<br />
(Closest to the ITL)<br />
<strong>Router</strong> B<br />
<strong>Router</strong> C<br />
(Closest to the COSI)<br />
Hostname: C14867 Hostname: C14864 Hostname: C14865<br />
Interface: fddi 3/0 Interface: fddi 0/0 Interface: fddi 0/0
IP Address: 10.0.1.1 IP Address: 10.0.1.2 IP Address: 10.0.1.3<br />
Subnet Mask: 255.255.255.0 Subnet Mask: 255.255.255.0 Subnet Mask: 255.255.255.0<br />
In order to program these, I used this site: http://www.joshgentry.com/cisco/cisco.htm.<br />
Once these three routers were connected, I attempted to ping each of the routers. This was<br />
successful. Knowing that the fddi cables I used were good, I labeled all of them as working for<br />
future use.<br />
After this test, Professor Matthews and I decided to expand the topology to include another<br />
network by connecting the 1604 router via Ethernet. To do this, we needed a crossover Ethernet<br />
cable. I set the 1604 router up using its serial number as the host-name. Professor Matthews<br />
wired one of these up and labeled in properly. To show the configuration of the network we set<br />
up, I have included the following graphics:<br />
<strong>Cisco</strong> 1604 <strong>Router</strong> Config<br />
Hostname: 08428403<br />
Interface: ethernet0<br />
IP Address: 10.0.2.1<br />
Subnet Mask: 255.255.255.0
As you can see from the above graphics, there are four routers configured in a two network<br />
topology. In order to get the networks talking to each other, each router had to be configured for<br />
RIP. To do this, you type the following:<br />
>enable<br />
>config<br />
>router rip<br />
>network 10.0.1.0<br />
>network 10.0.2.0<br />
This configuration will allow all of the routers to talk to each other. I was able to successfully<br />
program this on all but <strong>Router</strong> A, the one named C14867. For some unknown reason, this router<br />
did not recognize the “router rip” command.<br />
After this was setup, all of the routers could ping each other, with the exception of C14867. This<br />
concluded the router test.<br />
Everything was packed up and organized. All of the devices and cables were put in the cabinet<br />
in the back of the ITL.<br />
Sources:Overview of <strong>Cisco</strong> Cabeling Connections and Techniques<br />
http://www.conserver.com/consoles/<strong>Cisco</strong>/ciscocons.html<br />
<strong>Cisco</strong> Documentation for Console Cabeling<br />
http://www.cisco.com/en/US/products/hw/routers/ps332/<br />
products_tech_note09186a0080094ce6.shtml<br />
<strong>Cisco</strong> Documentation for 1600 <strong>Router</strong> Console Connection<br />
http://www.cisco.com/en/US/products/hw/routers/ps214/<br />
products_tech_note09186a00801f5d85.shtml?referring_site=smartnavRD<br />
Wiki Page on Crossover Cables<br />
http://en.wikipedia.org/wiki/Ethernet_crossover_cable<br />
Wiki Page on Rollover Cables<br />
http://en.wikipedia.org/wiki/Rollover_cable<br />
Youtube Video on <strong>Cisco</strong> Console Cables<br />
http://www.youtube.com/watch?v=VIKB4tn6yXc<br />
<strong>Router</strong> Configuration Tutorial 1::<br />
http://www.joshgentry.com/cisco/cisco.htm<br />
<strong>Router</strong> Configuration Tutorial 2:<br />
http://www.tele.pitt.edu/~telelab/labs/General%20Lab%20Documentation/pdf/
GeneralLab%20Documentation~<strong>Cisco</strong>%20<strong>Router</strong>%20Configuration%20Tutorial~08.20.05.pdf