SRP-770 / 770II, SLP-T400 / T403 - bixolon
SRP-770 / 770II, SLP-T400 / T403 - bixolon
SRP-770 / 770II, SLP-T400 / T403 - bixolon

Create successful ePaper yourself
Turn your PDF publications into a flip-book with our unique Google optimized e-Paper software.
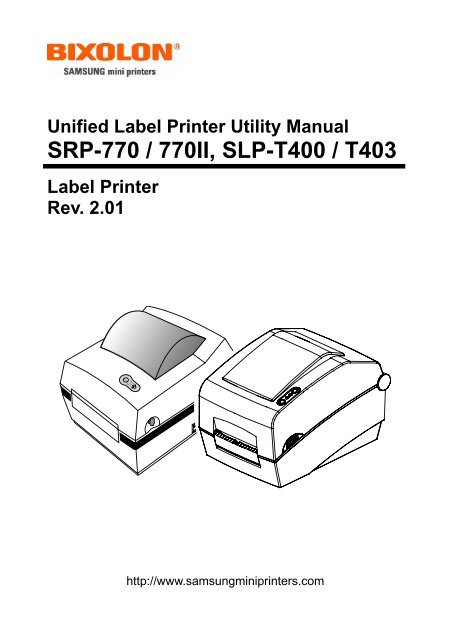
Unified Label Printer Utility Manual<br />
<strong>SRP</strong>-<strong>770</strong> / <strong>770</strong>II, <strong>SLP</strong>-<strong>T400</strong> / <strong>T403</strong><br />
Label Printer<br />
Rev. 2.01<br />
http://www.samsungminiprinters.com
<strong>SRP</strong>-<strong>770</strong> / <strong>770</strong>II, <strong>SLP</strong>-<strong>T400</strong> / <strong>T403</strong><br />
■ Table of Contents<br />
1. Foreword ........................................................................................................................3<br />
2. Usage Preparation .........................................................................................................4<br />
3. Unified Label Printer Utility Usage ...............................................................................5<br />
3-1 Firmware Downloader.................................................................................................5<br />
3-2 Factory Font Downloader ...........................................................................................6<br />
3-3 Soft-Font(or Downloadable-Font) Downloader ...........................................................7<br />
3-4 PCX File Downloader .................................................................................................9<br />
3-5 Memory Switch Downloader .....................................................................................11<br />
3-6 File Transfer..............................................................................................................16<br />
3-7 SLCS Tester..............................................................................................................17<br />
3-8 Manual Calibration....................................................................................................18<br />
Rev. 2.01 - 2 -
<strong>SRP</strong>-<strong>770</strong> / <strong>770</strong>II, <strong>SLP</strong>-<strong>T400</strong> / <strong>T403</strong><br />
1. Foreword<br />
The Unified Label Printer Utility can be used for various purposes.<br />
Details on the usage of each function are described as follows.<br />
1) Firmware Downloader<br />
This function can only be used when changing the firmware installed on the printer by<br />
default.<br />
2) Factory Font Downloader<br />
This function can only be used when changing the default font installed in flash memory.<br />
3) Soft-Font (or Downloadable-font) Downloader<br />
This function is used when downloading a non-default, user-defined font.<br />
4) PCX File Downloader<br />
This function is used when saving a black-and-white PCX-format image to flash memory.<br />
5) User Setting Manager<br />
This function is used to change default settings of the printer, including code pages,<br />
serial settings, paper size, and print density, to values suited to the user environment.<br />
6) File Transfer Manager<br />
This function is used when sending test files, such as command scripts, to the printer.<br />
7) SLCS Tester<br />
This function is used to test printing-related commands of the SLCS (Samsung Label<br />
Command Set) and create a brief label sample for test printing.<br />
Rev. 2.01 - 3 -
<strong>SRP</strong>-<strong>770</strong> / <strong>770</strong>II, <strong>SLP</strong>-<strong>T400</strong> / <strong>T403</strong><br />
2. Usage Preparation<br />
1) Printer and PC Connection<br />
Connect the printer and PC via the interface cable.<br />
(The interfaces available for usage are Serial, Parallel, and USB.)<br />
2) Unified Label Printer Utility Program Execution<br />
The program can be installed from the accompanying CD, and can also be downloaded<br />
from the BIXOLON website. (www.samsungminiprinters.com)<br />
The file name is as follows: “Unified Label Printer Utility VX.X.X.exe”.<br />
3) Select the interface type and communication conditions.<br />
4) Click the “Connect” button. The inactive buttons become active.<br />
If the printer is not connected, the error message, ”Cannot Open Port”, appears.<br />
Rev. 2.01 - 4 -
<strong>SRP</strong>-<strong>770</strong> / <strong>770</strong>II, <strong>SLP</strong>-<strong>T400</strong> / <strong>T403</strong><br />
3. Unified Label Printer Utility Usage<br />
3-1 Firmware Downloader<br />
This function can only be used when changing the firmware installed on the printer by<br />
default.<br />
The firmware file must be prepared prior to using this function.<br />
Firmware files can be downloaded from the BIXOLON website.<br />
(www.samsungminiprinters.com)<br />
1) Conduct a self-test to first confirm the current firmware version.<br />
To conduct a self-test, hold down the printer’s “Feed” button and turn on the power<br />
switch.<br />
2) Turn off the printer.<br />
3) Turn on the printer, and confirm that it is in the standard operation mode<br />
(green LED turned on).<br />
4) Click the “Firmware Downloader” button.<br />
5) Load the firmware file (*.hex).<br />
6) Click the “Firmware Downloader” button to begin downloading.<br />
7) When the download is complete, the LED changes color from green to orange to finally<br />
red.<br />
8) Turn off the printer.<br />
9) Conduct a self-test to confirm that the firmware version has been updated.<br />
** CAUTION **<br />
Make sure not to turn power off before the download has been completed.<br />
If the power is turned off during download, contact customer service to receive<br />
required service.<br />
Rev. 2.01 - 5 -
<strong>SRP</strong>-<strong>770</strong> / <strong>770</strong>II, <strong>SLP</strong>-<strong>T400</strong> / <strong>T403</strong><br />
3-2 Factory Font Downloader<br />
This function can only be used when changing the default font installed in flash memory.<br />
The font file must be prepared prior to using this function.<br />
Font files can be downloaded from the BIXOLON website.<br />
(www.samsungminiprinters.com)<br />
1) Turn on the printer, and confirm that it is in the standard operation mode (green LED<br />
turned on).<br />
2) Click the “Factory Font Downloader” button.<br />
3) Select the font file (*.bin).<br />
4) Click the “Download” button to begin downloading.<br />
When the font download begins, the message, “WAIT TILL MESSAGE PRINTED”,<br />
appears.<br />
When the font download is complete, the message, “COMPLETED”, appears.<br />
Rev. 2.01 - 6 -
3-3 Soft-Font(or Downloadable-Font) Downloader<br />
This function is used when changing a user-defined font.<br />
<strong>SRP</strong>-<strong>770</strong> / <strong>770</strong>II, <strong>SLP</strong>-<strong>T400</strong> / <strong>T403</strong><br />
User-defined fonts must be selected from among ASCII 256 characters to be available for<br />
use.<br />
For further details, refer to the soft-font-related commands in the programming manual.<br />
Soft Font Downloader usage is described as follows.<br />
The font file must be prepared prior to using this function.<br />
Font files can be downloaded from the BIXOLON website.<br />
(www.samsungminiprinters.com)<br />
Click the “Soft-Font Downloader” button.<br />
3-3-1 Downloadable Font Store (DS)<br />
1) Open the ASCII font file (should be prepared by user) to be downloaded.<br />
2) Input the exact font size (width and height) and font name to be used for recalling via<br />
the T command and deletion via the DD command.<br />
3) Click the Download button to start downloading the font.<br />
3-3-2 Downloadable Font Delete (DD)<br />
1) This command is used to delete downloadable fonts stored in the printer memory.<br />
2) Check the list of stored fonts by clicking the Print Information button, entering the name<br />
of the font to be deleted, and clicking the Delete button.<br />
3) To delete all fonts stored in the printer memory, click the Delete All button without<br />
entering a font name.<br />
3-3-3 Downloadable Font Print Test<br />
The T command prints a sample of the downloaded font.<br />
3-3-4 Downloadable Font Information<br />
Information for the saved font is displayed.<br />
Rev. 2.01 - 7 -
Rev. 2.01 - 8 -<br />
<strong>SRP</strong>-<strong>770</strong> / <strong>770</strong>II, <strong>SLP</strong>-<strong>T400</strong> / <strong>T403</strong>
<strong>SRP</strong>-<strong>770</strong> / <strong>770</strong>II, <strong>SLP</strong>-<strong>T400</strong> / <strong>T403</strong><br />
3-4 PCX File Downloader<br />
This function is used when saving a black-and-white PCX-format image to flash memory.<br />
Saved images can be recalled at any time for printing.<br />
PCX File Downloader usage is described as follows.<br />
The image file must be prepared prior to using this function.<br />
Click the “PCX File Downloader” button.<br />
3-4-1 Image Store (IS)<br />
1) Open the PCX file (*.pcx).<br />
2) Enter the image name and click the Download button. The image name is used to<br />
recall or delete images<br />
3-4-2 Image Delete (ID)<br />
1) Check the list of stored images by clicking the Image Information button.<br />
2) Enter the name of the image to be deleted and click the Delete Image button.<br />
3) To delete all images stored in the printer memory, click the Delete All Images button<br />
without entering an image name.<br />
3-4-3 Image Information (II)<br />
Information for the saved image is displayed.<br />
3-4-4 Image Recall (IR)<br />
Downloaded images can be recalled and printed using the IR command.<br />
Rev. 2.01 - 9 -
Rev. 2.01 - 10 -<br />
<strong>SRP</strong>-<strong>770</strong> / <strong>770</strong>II, <strong>SLP</strong>-<strong>T400</strong> / <strong>T403</strong>
<strong>SRP</strong>-<strong>770</strong> / <strong>770</strong>II, <strong>SLP</strong>-<strong>T400</strong> / <strong>T403</strong><br />
3-5 Memory Switch Downloader<br />
This function is used to change default settings of the printer, including code pages, serial<br />
settings, paper size, and print density, to values suited to the user environment.<br />
Click the “User Setting Manager” button.<br />
3-5-1 Serial Communication Settings<br />
1) Click the “Serial” tab and “Get” button to load current serial settings.<br />
2) After modifying setting values, click the “Set” button to store the changed settings.<br />
3) Click the “Default Setting” button followed by the “Set” button to set each item to its<br />
default value.<br />
Rev. 2.01 - 11 -
<strong>SRP</strong>-<strong>770</strong> / <strong>770</strong>II, <strong>SLP</strong>-<strong>T400</strong> / <strong>T403</strong><br />
3-5-2 Default Code Page & ICS Settings<br />
1) Click the “Language” tab and “Get” button to load current serial settings.<br />
2) After modifying setting values, click the “Set” button to store the changed settings.<br />
Rev. 2.01 - 12 -
<strong>SRP</strong>-<strong>770</strong> / <strong>770</strong>II, <strong>SLP</strong>-<strong>T400</strong> / <strong>T403</strong><br />
3-5-3 Printer & Page Settings<br />
1) Click the “Print & Page” tab.<br />
2) After modifying setting values, click the “Set” button to store the changed settings.<br />
3) Click the individual “Initialize” buttons to return the corresponding item(s) to its default<br />
value.<br />
4) For “Print Strobe”, the value can be set after click “Get” to assess the current setting.<br />
Rev. 2.01 - 13 -
<strong>SRP</strong>-<strong>770</strong> / <strong>770</strong>II, <strong>SLP</strong>-<strong>T400</strong> / <strong>T403</strong><br />
3-5-4 Hardware Information Settings<br />
1) Click the “Hardware Info” tab and each “Get” button to load each current serial setting.<br />
2) After modifying setting values, click the “Set” button to store the changed settings.<br />
3) The Hardware Version can have a maximum of 4 digits.<br />
4) The Serial Number can have a maximum of 17 digits.<br />
5 The User Defined Printer ID can have a maximum of 7 digits.<br />
6) Click the individual “Initialize” buttons to return the corresponding item(s) to its default<br />
value.<br />
Rev. 2.01 - 14 -
<strong>SRP</strong>-<strong>770</strong> / <strong>770</strong>II, <strong>SLP</strong>-<strong>T400</strong> / <strong>T403</strong><br />
3-5-5 Printer Information<br />
1) Click the “Printer Info” tab and “Get” button to load current serial settings<br />
Rev. 2.01 - 15 -
<strong>SRP</strong>-<strong>770</strong> / <strong>770</strong>II, <strong>SLP</strong>-<strong>T400</strong> / <strong>T403</strong><br />
3-6 File Transfer<br />
This function is used when sending test files, such as command scripts, to the printer.<br />
1) Click the “File Transfer Manager” button.<br />
2) Select the file to be sent and click the “Download” button to send the file to the printer.<br />
Rev. 2.01 - 16 -
<strong>SRP</strong>-<strong>770</strong> / <strong>770</strong>II, <strong>SLP</strong>-<strong>T400</strong> / <strong>T403</strong><br />
3-7 SLCS Tester<br />
This function is used to test printing-related commands of the SLCS (Samsung Label<br />
Command Set) and create a brief label sample for test printing.<br />
1) Click the “SLCS Tester” button.<br />
2) The function of each button is described as follows.<br />
a) Text: creates a command for text string recognition<br />
b) 1D Barcode: creates a command for a 1-dimensional barcode<br />
c) 2D Barcode: creates a command for a 2-dimensional barcode<br />
d) Line & Box: creates a command for line and box drawing<br />
e) Character Set: creates a command for code page and ICS setting<br />
f) Speed & Density & Direction: creates a command for speed, print density, and print<br />
direction setting<br />
g) Margin & Width & Length: creates a command for margin and width and length of<br />
print paper setting<br />
h) Multi Send: creates a command for number of pages to print setting<br />
i) Send Data: sends a print command for printing<br />
j) SLCS Command Edit: function for command cutting, copying, pasting, and erasing<br />
k) Load: recalls a file with a saved command<br />
l) Save: saves a created command to a file<br />
m) Convert: converts measurement units (inch, mm, cm)<br />
n) Close: closes the SCLC test program.<br />
Rev. 2.01 - 17 -
<strong>SRP</strong>-<strong>770</strong> / <strong>770</strong>II, <strong>SLP</strong>-<strong>T400</strong> / <strong>T403</strong><br />
3-8 Manual Calibration<br />
Manual-calibration of media detection can be used when the printer cannot detect a media<br />
gap (or black mark) even after auto-calibration has been executed.<br />
Users can calibrate sensor parameters in detail by using the utility program provided by<br />
the manufacturer.<br />
The utility can be obtained from the enclosed CD or downloaded from the Internet via the<br />
BIXOLON website www.samsungminiprinters.com<br />
Please make sure the printer is connected and execute the utility program.<br />
Press the Calibration Setting Manager Button after setting the interface type.<br />
1) If the firmware version is Ver.1.39 or higher, please click “F/W Ver. 1.39 or Later” tap.<br />
If the firmware is lower than Ver.139, please click on “F/W Ver. Less than” tab.<br />
2) Select the sensing type and input the label length by millimeter and click on “Check<br />
Sensing Value” tap. Then printer starts to calibrate.<br />
3) Printer will print the scanned values after calibration and the values will appear on the<br />
Screen.<br />
4) Optimal sensing values will appear in black bold letters on the left of the utility screen<br />
and select one of the values and click on “Save Calibration”<br />
5) If chosen value does not work properly, please try the other values among the black<br />
bold letters.<br />
6) To go back to the initial value, please click on “Cancel Calibration”.<br />
Rev. 2.01 - 18 -