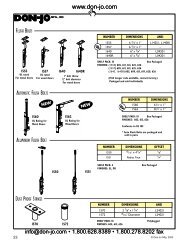
Von Duprin CS 98 9949 Installation Instructions - Access Hardware ...
Von Duprin CS 98 9949 Installation Instructions - Access Hardware ...
Von Duprin CS 98 9949 Installation Instructions - Access Hardware ...

You also want an ePaper? Increase the reach of your titles
YUMPU automatically turns print PDFs into web optimized ePapers that Google loves.
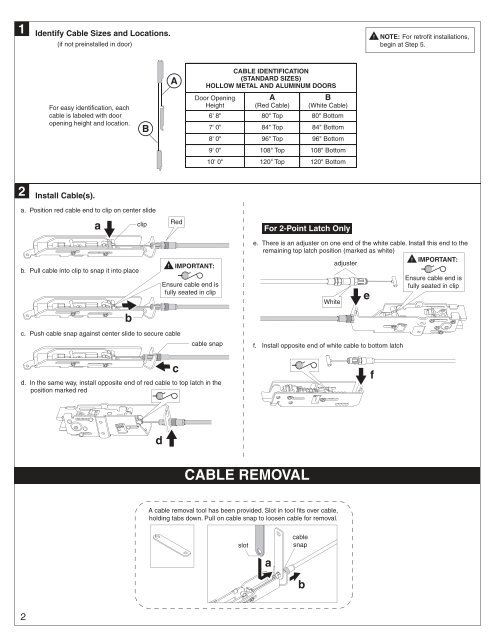
1 Identify Cable Sizes and Locations.<br />
(if not preinstalled in door)<br />
A<br />
!<br />
NOTE: For retrofit installations,<br />
begin at Step 5.<br />
For easy identification, each<br />
cable is labeled with door<br />
opening height and location.<br />
B<br />
CABLE IDENTIFICATION<br />
(STANDARD SIZES)<br />
HOLLOW METAL AND ALUMINUM DOORS<br />
Door Opening<br />
Height<br />
6' 8"<br />
7' 0"<br />
8' 0"<br />
9' 0"<br />
10' 0"<br />
A<br />
(Red Cable)<br />
80" Top<br />
84" Top<br />
96" Top<br />
108" Top<br />
120" Top<br />
B<br />
(White Cable)<br />
80" Bottom<br />
84" Bottom<br />
96" Bottom<br />
108" Bottom<br />
120" Bottom<br />
2 Install Cable(s).<br />
For 2-Point Latch Only<br />
a. Position red cable end to clip on center slide<br />
a<br />
clip<br />
Red<br />
b. Pull cable into clip to snap it into place<br />
c. Push cable snap against center slide to secure cable<br />
b<br />
c<br />
cable snap<br />
d. In the same way, install opposite end of red cable to top latch in the<br />
position marked red<br />
!<br />
IMPORTANT:<br />
Ensure cable end is<br />
fully seated in clip<br />
e. There is an adjuster on one end of the white cable. Install this end to the<br />
remaining top latch position (marked as white)<br />
! IMPORTANT:<br />
adjuster<br />
White<br />
f. Install opposite end of white cable to bottom latch<br />
e<br />
f<br />
Ensure cable end is<br />
fully seated in clip<br />
d<br />
CABLE REMOVAL<br />
A cable removal tool has been provided. Slot in tool fits over cable,<br />
holding tabs down. Pull on cable snap to loosen cable for removal.<br />
slot<br />
a<br />
cable<br />
snap<br />
b<br />
2