QIG - Pixord
QIG - Pixord
QIG - Pixord

Create successful ePaper yourself
Turn your PDF publications into a flip-book with our unique Google optimized e-Paper software.
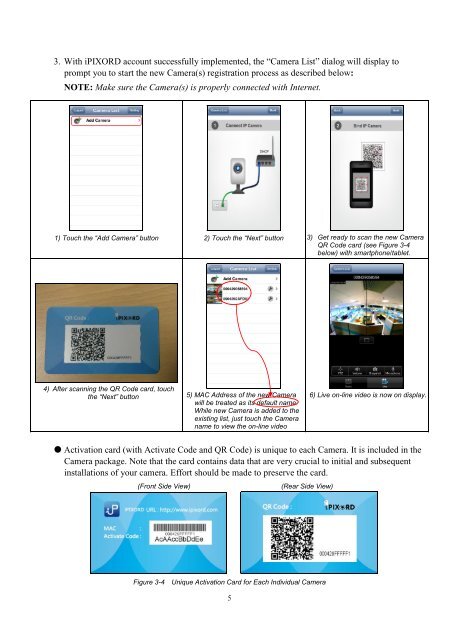
3. With iPIXORD account successfully implemented, the “Camera List” dialog will display to<br />
prompt you to start the new Camera(s) registration process as described below:<br />
NOTE: Make sure the Camera(s) is properly connected with Internet.<br />
1) Touch the “Add Camera” button 2) Touch the “Next” button 3) Get ready to scan the new Camera<br />
QR Code card (see Figure 3-4<br />
below) with smartphone/tablet.<br />
4) After scanning the QR Code card, touch<br />
the “Next” button<br />
5) MAC Address of the new Camera<br />
will be treated as its default name.<br />
While new Camera is added to the<br />
existing list, just touch the Camera<br />
name to view the on-line video<br />
6) Live on-line video is now on display.<br />
• Activation card (with Activate Code and QR Code) is unique to each Camera. It is included in the<br />
Camera package. Note that the card contains data that are very crucial to initial and subsequent<br />
installations of your camera. Effort should be made to preserve the card.<br />
(Front Side View)<br />
(Rear Side View)<br />
Figure 3-4 Unique Activation Card for Each Individual Camera<br />
5