Installation Guide - DATAQ Instruments
Installation Guide - DATAQ Instruments
Installation Guide - DATAQ Instruments
Create successful ePaper yourself
Turn your PDF publications into a flip-book with our unique Google optimized e-Paper software.
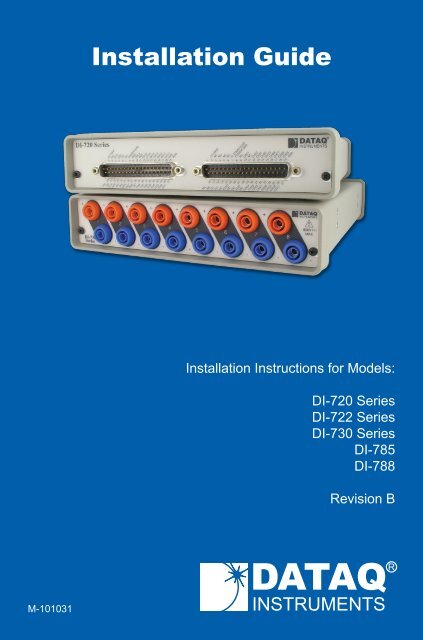
<strong>Installation</strong> <strong>Guide</strong><br />
<strong>Installation</strong> Instructions for Models:<br />
DI-720 Series<br />
DI-722 Series<br />
DI-730 Series<br />
DI-785<br />
DI-788<br />
Revision B<br />
M-101031
Hardware and Software <strong>Installation</strong> <strong>Guide</strong><br />
DI-720, DI-722, DI-730, DI-785, and DI-788<br />
Products <strong>Installation</strong> with WinDa q ® Acquisition<br />
and Playback Software<br />
SYSTEM REQUIREMENTS<br />
Hardware<br />
Operating System<br />
Disk Space<br />
Intel or compatible PC<br />
Windows 2000, XP, or Vista*<br />
40MB plus space for recorded data<br />
*Printer Port products are not supported in Vista.<br />
This installation guide explains how to install all <strong>DATAQ</strong><br />
<strong>Instruments</strong> DI-720 Series, DI-722 Series, DI-730 Series, DI-785,<br />
and DI-788 products to your personal computer.<br />
Table of Contents<br />
Section A: Printer Port Instrument <strong>Installation</strong> ................................. 3<br />
Section B: USB Instrument <strong>Installation</strong> ............................................ 4<br />
Section C: Installing an Ethernet device directly connected to your<br />
PC ............................................................................................... 5<br />
Section D: Installing an Ethernet device via a distributed network<br />
without a DHCP server ............................................................... 9<br />
Section E: Installing an Ethernet device via a distributed network<br />
with a DHCP server .................................................................. 11<br />
Section F: Connecting your Ethernet Device .................................. 12<br />
Section G: Installing Multiple Ethernet Devices in a Daisy Chain . 13<br />
Section H: WinDa q Software <strong>Installation</strong> ....................................... 14<br />
Section I: Documentation and Support ........................................... 19<br />
2
Section A: Printer Port Instrument <strong>Installation</strong><br />
Hardware and Software <strong>Installation</strong> <strong>Guide</strong><br />
All DI-720, DI-722, and DI-730 Series instruments can use your<br />
computer’s parallel printer port to interface digital and analog signals to<br />
your computer. Ethernet/USB models provide Ethernet/USB interface<br />
ports. These ports cannot be used concurrently with the printer port.<br />
NOTE: These printer port instruments are not supported in Windows Vista.<br />
1.<br />
2.<br />
3.<br />
Plug the appropriate end of the supplied parallel communications<br />
cable to the 25-pin male connector labeled PRINTER PORT on the<br />
rear panel of the instrument.<br />
Connect the other end of this cable to your computer’s parallel<br />
(printer) port. Note the LPT port number to which you connected your<br />
device (LPT1, LPT2, etc.).<br />
Set up your computer’s Printer Port operating mode. The parallel<br />
port may be set up in Standard, Bidirectional, or EPP mode to<br />
communicate with your instrument. Use the following chart to select<br />
the parallel port mode based on the desired sample rate:<br />
Parallel Port Mode<br />
Standard**<br />
Bidirectional (PS/2)<br />
EPP<br />
Maximum Data Throughput*<br />
DI-720, DI-722, and DI-730: 40,000 samples/second<br />
DI-720 and DI-730: 80,000 samples/second<br />
DI-722: 50,000 samples/second<br />
DI-720: 200,000 samples/second<br />
DI-722: 50,000 samples/second<br />
DI-730: 150,000 samples/second<br />
*Maximum stream-to-disk rate using WinDa q software on a 350 MHz Pentium II<br />
machine running Windows 98. Triggered storage rates will be faster. Contact <strong>DATAQ</strong><br />
<strong>Instruments</strong> to determine expected maximum sample rates for your system.<br />
**Standard mode not available on products with USB or Ethernet interfaces.<br />
For example, if you will record five channels at 20 Hz each, then the<br />
Standard mode will be more than adequate (5 channels @ 20 Hz =<br />
100 Hz throughput, which is well within the DI-7xx Series 40KHz<br />
standard mode throughput). If, however, you plan to record at a much<br />
higher sample rate (for example, five channels at 10KHz each) the<br />
Standard mode will not reliably record your data gap-free — this<br />
3
Hardware and Software <strong>Installation</strong> <strong>Guide</strong><br />
throughput rate exceeds the DI-7xx’s standard mode maximum<br />
throughput (5 channels @ 10KHz = 50KHz). To reliably record data<br />
gap-free at this sample rate, your computer’s parallel port must be<br />
operated in something other than standard mode.<br />
Access your computer’s BIOS setup routine to change the printer port<br />
operating mode. Consult your computer documentation for BIOS<br />
setup information.<br />
4. Apply power to the instrument and your computer. Windows must be<br />
running. Close all other applications.<br />
5. Install WinDa q Software. All software is included in the WinDaq<br />
Resource CD. See Section H: WinDaq Software <strong>Installation</strong>.<br />
Section B: USB Instrument <strong>Installation</strong><br />
USB instruments require driver installation. Your USB instrument may be<br />
installed and run as a Printer Port device if desired (see Section A: Printer<br />
Port Instrument <strong>Installation</strong>). The USB and Printer Port communications<br />
interfaces on a single instrument cannot be used at the same time.<br />
1. Apply power to the USB instrument and your computer. Windows<br />
must be running. Close all other applications.<br />
2. Plug the appropriate end of the supplied USB cable into the port<br />
labeled USB on the rear panel of the instrument. Connect the other<br />
end of the USB cable to your computer’s USB port.<br />
3. Windows will detect the new hardware and the Found New Hardware<br />
Wizard will run.<br />
4. Insert the WinDaq Resource CD into your CD-ROM drive. The root<br />
directory of the CD contains the USB drivers. If the Windows auto<br />
start feature is enabled, the installation program will run. Exit from the<br />
installation program.<br />
5. When the Found New Hardware Wizard asks “Can Windows connect<br />
to Windows Update to search for software” select “No, not this time”<br />
and click the Next button.<br />
4
Hardware and Software <strong>Installation</strong> <strong>Guide</strong><br />
6. Select the “Install from a list or specific location (Advanced)” and<br />
click the Next button.<br />
7. Select the “Search for the best driver in these locations” radio button.<br />
8. Check the “Search removable media (floppy, CD-ROM...)” check box<br />
and click the Next button.<br />
9. Windows will search for the correct drivers. If you receive a message<br />
saying that this driver “has not passed Windows logo testing” click the<br />
Continue Anyway button.<br />
10. Windows completes driver installation. Install WinDaq Software (see<br />
Section H: WinDaq Software <strong>Installation</strong>).<br />
Section C: Installing an Ethernet device directly connected to<br />
your PC or connected via a hub or switch where ONLY<br />
DI-720/722/730/785/788 products are installed<br />
<strong>Installation</strong> of an Ethernet device directly connected to the network card on<br />
your computer requires you to change the IP address of your network card.<br />
<strong>Installation</strong> of an Ethernet device via a hub/switch containing ONLY<br />
DI-720/722/730/785/788 products also requires you to change the IP address<br />
of your network card.<br />
5
Hardware and Software <strong>Installation</strong> <strong>Guide</strong><br />
1. Find the Network Connections on your computer (usually in the<br />
Control Panel).<br />
2. Double-click on the Local Area Connection icon.<br />
3. Click on the Properties button.<br />
Select 4. Internet Protocol (TCP/IP) in the “This connection uses the<br />
following items” window and click on the Properties button.<br />
6
Hardware and Software <strong>Installation</strong> <strong>Guide</strong><br />
5. Click on the General tab.<br />
6. Select the radio button Use the following IP address.<br />
7. Enter 169.254.0.1 in the space provided for the IP address.<br />
8. Enter 255.255.0.0 in the space provided for the Subnet mask.<br />
7
Hardware and Software <strong>Installation</strong> <strong>Guide</strong><br />
9. Click on the OK button to close the Internet Protocol (TCP/IP)<br />
Properties dialog box then click on the OK button in the Local Area<br />
Connection Properties dialog box for the changes to take effect.<br />
NOTE: If you unplug your device and connect your PC to a network or<br />
router you should change the TCP/IP properties back to their original state.<br />
10. Install WinDa q software (see Section H: WinDaq Software<br />
<strong>Installation</strong>).<br />
11. Run the TCP/IP Manager software (default location is Start ><br />
Programs > WINDAQ > IP Manager).<br />
12. Connect and power the device (see Section F: Connecting your<br />
Ethernet Device).<br />
8
Hardware and Software <strong>Installation</strong> <strong>Guide</strong><br />
NOTE: Always start the TCP/IP Manager software BEFORE powering the<br />
device to avoid extended delays resolving IP addresses.<br />
Section D: Installing an Ethernet device via a distributed<br />
network without a DHCP server where one or more <strong>DATAQ</strong><br />
<strong>Instruments</strong> devices will coexist with other Ethernet devices,<br />
and where static IP address are individually assigned<br />
<strong>Installation</strong> of an Ethernet device connected to a distributed network that<br />
does not have a DHCP server or where the DHCP server is turned off requires<br />
you to set a static IP to the device after installation to drastically reduce<br />
the amount of time it takes for the TCP/IP Manager to find the device.<br />
NOTE: In the illustration above, the Hubs could instead be routers with<br />
DHCP turned off (i.e., a static IP assigned network). Contact your system<br />
administrator for details about your network.<br />
1.<br />
Have the system administrator designate an IP address for your device.<br />
2. Install WinDa q software (see Section H: WinDaq Software<br />
<strong>Installation</strong>) entering the device’s MAC address at Step 15b.<br />
3. Run the TCP/IP Manager software (default location is Start ><br />
Programs > WINDAQ > IP Manager).<br />
9
Hardware and Software <strong>Installation</strong> <strong>Guide</strong><br />
4. Connect and power the device (see Section F: Connecting your<br />
Ethernet Device).<br />
5. In the TCP/IP Manager main window, select the device you are<br />
installing.<br />
6. Select the Change IP Address drop down command.<br />
7. Select the Set a static IP Address radio button.<br />
8. Enter the IP address given to you by your system administrator in Step<br />
1 above.<br />
9. Click on the OK button for the change to take effect.<br />
NOTE: These instructions change the settings inside the device. If you<br />
move the device to a DHCP-enabled network (i.e., where IP addresses<br />
are assigned automatically by a DHCP server or router) you will need to<br />
change the device settings using the Dataq TCP/IP Manager. See the Dataq<br />
<strong>Instruments</strong> TCP/IP Manager help file for complete details.<br />
10
Hardware and Software <strong>Installation</strong> <strong>Guide</strong><br />
Section E: Installing an Ethernet device via a distributed<br />
network with a DHCP server<br />
<strong>Installation</strong> of an Ethernet device connected to a distributed network that<br />
has a DHCP server (i.e., a DHCP router automatically assigns IP addresses<br />
to each device connected to the network) requires no extra setup.<br />
NOTE: If you are unsure whether your network is DHCP-enabled or not,<br />
check with your system administrator before installing WinDa q .<br />
1. Install WinDa q software (see Section H: WinDaq Software<br />
<strong>Installation</strong>).<br />
2. Connect your Ethernet device to your Local Area Network (see<br />
Section F: Connecting your Ethernet Device).<br />
3. Run the TCP/IP Manager software (default location is Start ><br />
Programs > WINDAQ > IP Manager).<br />
4. Apply power to the device.<br />
11
Hardware and Software <strong>Installation</strong> <strong>Guide</strong><br />
Section F: Connecting your Ethernet Device<br />
Your DI-720/722/730 (the DI-785 and DI-788 do not have a Printer Port)<br />
Ethernet instrument may be installed and run as a Printer Port device if<br />
desired (see Section A: Printer Port Instrument <strong>Installation</strong>). The Ethernet<br />
and Printer Port communications interfaces on a single unit cannot be used<br />
at the same time. See Section G: Installing Multiple Ethernet Devices in a<br />
Daisy Chain if you are installing multiple units in a daisy chain.<br />
1. Connect one end of a CAT-5 Ethernet cable to the Toward PC port on<br />
the rear of the instrument.<br />
2. Connect the other end of the CAT-5 Ethernet cable to an Ethernet port<br />
on your PC or to a port on an accessible network.<br />
3. Install WinDa q software (see Section H: WinDaq Software<br />
<strong>Installation</strong>) and run the TCP/IP Manager (default location is Start ><br />
Programs > WINDAQ > IP Manager) before applying power to the<br />
device.<br />
NOTE: DO NOT connect the Expansion port back to your network or<br />
PC. These Ethernet products use an Ethernet switch. Looping any Ethernet<br />
switch will crash your network or PC.<br />
12
Hardware and Software <strong>Installation</strong> <strong>Guide</strong><br />
Section G: Installing Multiple Ethernet Devices in a Daisy Chain<br />
Daisy-chain multiple Ethernet instruments to create one synchronous<br />
distributed data acquisition system. Multiple DI-720/722/730 instruments<br />
may be placed in the same chain. To maintain synchronicity, Ethernet hubs<br />
and switches cannot be used between units. Daisy-chains must be installed<br />
to your PC or LAN — you cannot access more than one device per IP address<br />
outside of your subnet. If you are not sure whether or not the instruments<br />
are in your subnet see your system administrator before installation.<br />
You may acquire data from only one daisy chain at a time.<br />
NOTE: Installing other units on the same subnet as a daisy-chained group<br />
of instruments will disrupt synchronicity.<br />
1. Connect one end of a CAT-5 Ethernet cable to the Toward PC port of<br />
the first Ethernet instrument.<br />
2. Connect the other end of the same CAT-5 Ethernet cable to an<br />
Ethernet port on your PC or LAN.<br />
3. Connect one end of another CAT-5 Ethernet Cable to the Expansion<br />
port on the rear of the first Ethernet instrument.<br />
4. Connect the other end of the same CAT-5 Ethernet cable to the<br />
Toward PC port on the second Ethernet instrument.<br />
5. Continue installing your Ethernet instruments by connecting a CAT-5<br />
Ethernet cable to the Expansion port of the last instrument in the<br />
chain and the Toward PC port on the next instrument in the chain.<br />
Install up to 32 devices in a chain, each up to 100 meters apart.<br />
NOTE: DO NOT connect the Expansion port on the last device in the<br />
chain back to your network or PC. These Ethernet products use an Ethernet<br />
switch. Looping any Ethernet switch will crash your network or PC.<br />
Install 6. WinDa q Software (see Section H: WinDaq Software<br />
<strong>Installation</strong>). You must enter EACH instrument’s MAC address during<br />
software installation.<br />
13
Hardware and Software <strong>Installation</strong> <strong>Guide</strong><br />
Section H: WinDa q Software <strong>Installation</strong><br />
All software is included in the WinDaq Resource CD.<br />
1. Insert the WinDaq Resource CD into your CD-ROM drive. The<br />
Windows auto run feature should start the installation program. If the<br />
Windows auto run feature is not enabled on your PC, run the setup.exe<br />
program located on the root of the CD directory.<br />
2. In the “What do you want to do” dialog box select the Install<br />
Software radio button and click OK.<br />
3. In the “Installing Software” dialog box select the Install Software for<br />
all other products radio button and click OK.<br />
4. In the “Specify the product” dialog box you must choose the version<br />
of WinDa q you would like to install. If you purchased WinDa q /Pro or<br />
Pro+ software, select the appropriate option and click OK. If you did<br />
not purchase software, choose the WinDa q /Lite option and click OK.<br />
5. In the “Specify the Instrument” dialog box select the DI-<br />
720/740/730HV Portable <strong>Instruments</strong> radio button for all<br />
DI-720/722/730 products or the DI-785/788 Desktop <strong>Instruments</strong><br />
radio button for all DI-785 and DI-788 products and click OK.<br />
6. DI-720/722/730 <strong>Instruments</strong>: In the “Specify the Instrument” dialog<br />
box select the appropriate communications connection and click OK.<br />
DI-785 and DI-788 <strong>Instruments</strong>: In the “Select a Device” dialog box<br />
select the DI-785/788 ENB radio button and click OK.<br />
7. DI-720/730 Ethernet <strong>Instruments</strong> Only: Check the sticker located<br />
on the bottom of your instrument and note the model number. In the<br />
“Select a device” dialog select the model number of your device and<br />
click OK.<br />
8. Read the warning information (if present) and follow any instructions<br />
relevant to your situation in the “Welcome” dialog box. Click OK to<br />
continue the installation.<br />
9. Read through the Software License agreement carefully and either<br />
Accept and Continue to continue or Cancel to exit the installation.<br />
10. Enter your Registration Information in the appropriate text boxes and<br />
14
Hardware and Software <strong>Installation</strong> <strong>Guide</strong><br />
click OK.<br />
11. Select the destination directory where you would like all folders and<br />
files to reside on your hard drive. We recommend you accept the<br />
default path, but you can name this new directory anything you like.<br />
Simply substitute the desired drive and directory in the Destination<br />
Directory text box. Once you have chosen the directory click OK.<br />
12. The “Make Backups” dialog box provides the option of creating<br />
backup copies of any files that may be replaced during installation.<br />
This is a safety courtesy; backup copies are not required. Click on No<br />
if you don’t want to make backups. Click on Yes to create backups.<br />
If you decide to create backups, you will be prompted to specify a<br />
backup file directory.<br />
13. If you are installing a Printer Port Instrument:<br />
a. Specify the instrument you are installing. If you are installing<br />
a DI-720 or DI-722 select the DI-720/DI-740/ DI-722/DI-5001<br />
Portable Unit radio button. If you are installing a DI-730 select the<br />
DI-730HV Portable Unit radio button. Click OK to continue.<br />
b. Choose the Printer Port you connected your instrument to (LPT1,<br />
LPT2, or LPT3). Click OK to continue.<br />
c. Select the program manager group you would like to place the<br />
program shortcuts in your Windows programs. The default is<br />
recommended, but you can specify any program group or create a<br />
new one. Click OK to continue.<br />
d. The “<strong>Installation</strong> Option” dialog box allows you to specify access<br />
to WinDa q for multiple users on the same PC. If you are the only<br />
user or you would like to allow access to all users click Yes. If<br />
there are multiple users and you would like to be the only one able<br />
to access WinDa q click No. Click Cancel to abort the installation.<br />
e. Select the desired options for installation of WinDa q /XL and<br />
Advanced CODAS.<br />
f. <strong>Installation</strong> is complete. Re-start your PC to enable WinDa q device<br />
drivers for the printer port.<br />
g. Run WinDa q software from the program group designated in Step<br />
15
Hardware and Software <strong>Installation</strong> <strong>Guide</strong><br />
13a above (default is Start > Programs > WINDAQ > WinDaq<br />
Pro(version of the software installed - Lite/Pro/Pro+) Data Acq<br />
DI-7xx(model number) LPT. For help running WinDa q Acquisition<br />
and Playback software please see the help files inside the<br />
application (F1 for context-sensitive help or use the Help menu).<br />
14. If you are installing a USB Instrument:<br />
a. Select the Program Manager Group you would like to place the<br />
program shortcuts in your Windows programs. The default is<br />
recommended, but you can specify any program group or create a<br />
new one. Click OK to continue.<br />
b. Enter the ID address of your instrument. Every DI-720-USB,<br />
DI-722-USB or DI-730-USB is initially assigned an ID address<br />
of 0. If you are adding only one DI-720-USB, DI-722-USB or DI-<br />
730-USB to your system or if this is the first USB instrument you<br />
are installing, do not change the ID address. If this is not the first<br />
DI-720, DI-722 or DI-730 USB device, change the ID address. The<br />
second device installed should have an ID address of 1, the third<br />
device installed should have an ID address of 2, etc. Click OK to<br />
continue installation.<br />
NOTE: You must download and run the SetUSBID Program to change<br />
the USB ID address of your device. Follow the instructions at http://www.<br />
dataq.com/misc/bnm/.<br />
c. The “<strong>Installation</strong> Option” dialog box allows you to specify access<br />
to WinDa q for multiple users on the same PC. If you are the only<br />
user or you would like to allow access to all users click Yes. If<br />
there are multiple users and you would like to be the only one able<br />
to access WinDa q click No. Click Cancel to abort the installation<br />
d. Select the desired options for installation of WinDa q /XL and<br />
Advanced CODAS.<br />
e. <strong>Installation</strong> is complete. If you are installing multiple devices, run<br />
through the installation for each device making sure to change<br />
the ID address in step 14b above. This does not install multiple<br />
16
Hardware and Software <strong>Installation</strong> <strong>Guide</strong><br />
versions of the software.<br />
f. Run WinDa q software from the program group designated in Step<br />
14a above (default is Start > Programs > WINDAQ > WinDaq<br />
Pro(version of the software installed - Lite/Pro/Pro+) Data Acq<br />
DI-7xx(model number) USBx(ID address - usually 0). For help<br />
running WinDa q Acquisition and Playback software please see the<br />
help files inside the application (F1 for context-sensitive help or<br />
use the Help menu).<br />
15. If you are installing an Ethernet Instrument:<br />
a. Select the Program Manager Group you would like to place the<br />
program shortcuts in your Windows programs. The default is<br />
recommended, but you can specify any program group or create a<br />
new one. Click OK to continue.<br />
b. You must know either the MAC address or the IP address of the<br />
device to continue. The MAC address is located on the sticker on<br />
the bottom of your device. IP addresses must be retrieved from the<br />
system administrator. Enter the MAC address or IP address in the<br />
text box provided in the “MAC or IP address of the device” dialog<br />
box. If you are installing a device that is not connected to your<br />
Local Area Network, the system administrator must forward the<br />
instrument through port 2501. Then, if you enter the IP address of<br />
the network where the instrument resides, the software will retrieve<br />
the MAC address for you. This will save further setup in the TCP/<br />
IP Manager. Click OK to continue. See the TCP/IP Manager help<br />
files for more information.<br />
NOTE: If you enter the wrong MAC address you will have to re-run this<br />
installation program with the correct MAC address to access the device.<br />
c. Click Yes in the “More Ethernet devices to install” dialog box if<br />
you are installing multiple Ethernet instruments.<br />
d. Repeat Steps b and c until all Ethernet instruments’ MAC<br />
addresses or IP addresses have been entered. Click No to continue<br />
installation.<br />
17
Hardware and Software <strong>Installation</strong> <strong>Guide</strong><br />
e. The “<strong>Installation</strong> Option” dialog box allows you to specify access<br />
to WinDa q for multiple users on the same PC. If you are the only<br />
user or you would like to allow access to all users click Yes. If<br />
there are multiple users and you would like to be the only one able<br />
to access WinDa q click No. Click Cancel to abort the installation.<br />
f. Select the desired options for installation of WinDa q /XL and<br />
Advanced CODAS.<br />
g. <strong>Installation</strong> is complete.<br />
h. Run the TCP/IP Manager via the Windows program group<br />
specified in step 15a above (default is Start > Programs ><br />
WINDAQ > IP Manager) to access the device and run WinDa q<br />
Acquisition Software. Use the WinDa q Waveform Navigator<br />
program to playback synchronized data files. For help running<br />
the TCP/IP Manager, WinDa q Waveform Navigator, or WinDa q<br />
Acquisition and Playback software please see the help files inside<br />
the application (F1 for context-sensitive help or use the Help<br />
menu).<br />
18
Section I: Documentation and Support<br />
Hardware and Software <strong>Installation</strong> <strong>Guide</strong><br />
Full Hardware documentation is available from the Windows Program<br />
Group designated during installation (default is Start > Programs ><br />
WINDAQ > Documentation > DI-xxx Hardware Manual).<br />
A Fast Start guide with multimedia demonstrations is available after<br />
installation from the Windows Program Group designated during<br />
installation (default is Start > Programs > WINDAQ > Documentation ><br />
Multimedia Fast Start <strong>Guide</strong> to WinDaq Software).<br />
Context-sensitive Help is available in all software programs. Highlight a<br />
menu item and press F1 for help regarding that menu item.<br />
Support Forum: http://support.dataq.com<br />
E-mail: support@dataq.com<br />
Phone: 330-668-1444 Monday through Friday 8AM to 5PM EST<br />
19
<strong>DATAQ</strong> <strong>Instruments</strong>, Inc.<br />
241 Springside Drive<br />
Akron, Ohio 44333 U.S.A.<br />
Telephone: 330-668-1444<br />
Fax: 330-666-5434<br />
www.dataq.com<br />
Designed and manufactured in the<br />
United States of America<br />
Copyright © 2007-2008 by <strong>DATAQ</strong> <strong>Instruments</strong>, Inc.<br />
<strong>DATAQ</strong> <strong>Instruments</strong>’ hardware and software products are not designed to be<br />
used in the diagnosis and treatment of humans, nor are they to be used as critical<br />
components in any life-support systems whose failure to perform can reasonably be<br />
expected to cause significant injury to humans.<br />
<strong>DATAQ</strong>, the <strong>DATAQ</strong> logo, and WinDa q are registered trademarks of <strong>DATAQ</strong> <strong>Instruments</strong>,<br />
Inc. All rights reserved.


