1/10 XXX-SCT Brushless - English - Horizon Hobby
1/10 XXX-SCT Brushless - English - Horizon Hobby
1/10 XXX-SCT Brushless - English - Horizon Hobby

You also want an ePaper? Increase the reach of your titles
YUMPU automatically turns print PDFs into web optimized ePapers that Google loves.
Instruction Manual<br />
Bedienungsanleitung<br />
Manuel d’utilisation<br />
Manuale di Istruzioni<br />
Manual de instrucciones<br />
Before operating this vehicle, please read all printed materials thoroughly.<br />
<strong>Horizon</strong> <strong>Hobby</strong> is not responsible for inadvertent errors in this manual.
EN<br />
NOTICE<br />
All instructions, warranties and other collateral documents are subject to change at the sole discretion of <strong>Horizon</strong> <strong>Hobby</strong>, Inc.<br />
For up-to-date product literature, visit horizonhobby.com and click on the support tab for this product.<br />
Meaning of Special Language<br />
The following terms are used throughout the product literature to indicate various levels of potential harm when operating this product:<br />
NOTICE: Procedures, which if not properly followed, create a possibility of physical property damage AND a little or no possibility of injury.<br />
CAUTION: Procedures, which if not properly followed, create the probability of physical property damage AND a possibility of serious injury.<br />
WARNING: Procedures, which if not properly followed, create the probability of property damage, collateral damage, and serious injury OR create a high probability of superficial injury.<br />
WARNING: Read the ENTIRE instruction manual to become familiar with<br />
the features of the product before operating. Failure to operate the product correctly<br />
can result in damage to the product, personal property and cause serious injury.<br />
This is a sophisticated hobby product. It must be operated with caution and common<br />
sense and requires some basic mechanical ability. Failure to operate this Product in a<br />
safe and responsible manner could result in injury or damage to the product or other<br />
property. This product is not intended for use by children without direct adult supervision.<br />
Do not use with incompatible components or alter this product in any way outside<br />
of the instructions provided by <strong>Horizon</strong> <strong>Hobby</strong>, Inc. This manual contains instructions for<br />
safety, operation and maintenance. It is essential to read and follow all the instructions<br />
and warnings in the manual, prior to assembly, setup or use, in order to operate correctly<br />
and avoid damage or serious injury.<br />
WARNING AGAINST COUNTERFEIT PRODUCTS<br />
Always purchase from a <strong>Horizon</strong> <strong>Hobby</strong>, Inc. authorized dealer to ensure authentic<br />
high-quality Spektrum product. <strong>Horizon</strong> <strong>Hobby</strong>, Inc. disclaims all support and warranty<br />
with regards, but not limited to, compatibility and performance of counterfeit products<br />
or products claiming compatibility with DSM or Spektrum.<br />
Age Recommendation: Not for children under 14 years. This is not a toy.<br />
Safety Precautions and Warnings<br />
• Always keep a safe distance in all directions around your model to avoid<br />
collisions or injury. This model is controlled by a radio signal subject to<br />
interference from many sources outside your control. Interference can<br />
cause momentary loss of control.<br />
• Always operate your model in open spaces away from full-size vehicles,<br />
traffic and people.<br />
• Always carefully follow the directions and warnings for this and any optional<br />
support equipment (chargers, rechargeable battery packs, etc.).<br />
Table of Contents<br />
Register Your Losi Product Online ..........................................................................2<br />
Components<br />
Recommended Accessories<br />
Tools Included<br />
Contents.....................................................................................................................3<br />
Water-Resistant Vehicle with Waterproof Electronics..........................................3<br />
Quick Start.................................................................................................................3<br />
Charging Warnings....................................................................................................4<br />
Charging the Battery................................................................................................4<br />
Removing and Installing the Battery......................................................................4<br />
Spektrum DX2L Radio System.................................................................................5<br />
Installing the Transmitter Batteries<br />
Transmitter and Receiver Binding...........................................................................6<br />
Control Test................................................................................................................6<br />
Before Running Your Vehicle....................................................................................6<br />
Driving Precautions..................................................................................................7<br />
Run Time.....................................................................................................................7<br />
Tuning, Adjusting & Maintaining Your Vehicle.......................................................7<br />
Service/Repair...........................................................................................................7<br />
Cleaning<br />
Dynamite Tazer Waterproof 45A Sensorless <strong>Brushless</strong> ESC (DYN4940).............8<br />
Dynamite Tazer 3300KV 4-Pole <strong>Brushless</strong> Motor (DYN4942)..............................9<br />
Troubleshooting Guide.............................................................................................9<br />
Limited Warranty.....................................................................................................<strong>10</strong><br />
FCC Information......................................................................................................<strong>10</strong><br />
IC Information.........................................................................................................<strong>10</strong><br />
Warranty and Service Contact Information...........................................................11<br />
Compliance Information for the European Union...............................................11<br />
Declaration of Conformity<br />
Instructions for Disposal of WEEE by Users in the European Union<br />
Parts Listings...........................................................................................................52<br />
Optional Parts..........................................................................................................55<br />
Exploded Views.......................................................................................................58<br />
2<br />
• Always keep all chemicals, small parts and anything electrical out<br />
of the reach of children.<br />
• Always avoid water exposure to all equipment not specifically designed<br />
and protected for this purpose. Moisture causes damage to electronics.<br />
• Never place any portion of the model in your mouth as it could cause serious<br />
injury or even death.<br />
• Never operate your model with low transmitter batteries.<br />
Register Your Losi Product Online<br />
Register your vehicle now and be the first to find out about the latest option parts, product<br />
updates and more. Click on the Support tab at WWW.LOSI.COM and follow the product<br />
registration link to stay connected.<br />
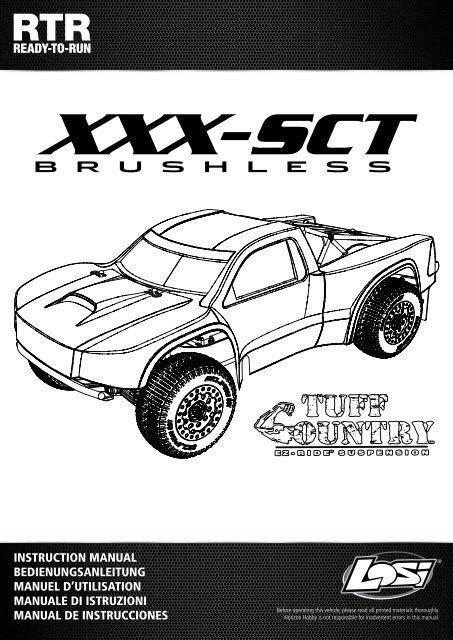
Components<br />
• 1/<strong>10</strong>-Scale Tuff Country <strong>XXX</strong>-<strong>SCT</strong> <strong>Brushless</strong> RTR<br />
• Spektrum DX2L 2.4GHz DSM ® Radio System<br />
• Dynamite ® Tazer Waterproof 45A Sensorless <strong>Brushless</strong> ESC<br />
• Dynamite Tazer 3300Kv 4-Pole <strong>Brushless</strong> Motor<br />
• 313WP High-Torque Waterproof Servo<br />
• Dynamite Speedpack Silver 2S 7.4V 3000mAh 20C Li-Po Battery<br />
• Dynamite <strong>10</strong>W Li-Po AC Balance Charger<br />
• 4 AA batteries (for transmitter)<br />
Recommended Accessories<br />
• <strong>Hobby</strong> grade knife<br />
• Needle nose pliers<br />
• Side cutting pliers<br />
• Safety goggles<br />
• Soldering iron<br />
• Double-sided tape (LOSA4004)<br />
• CA glue (LOSA7880 or LOSA7881)<br />
Tools Included<br />
• 2-Way Wrench<br />
• 4 L-Shaped Hex Wrenches<br />
• Flat Turnbuckle Wrench<br />
Use only Losi ® tools or other high-quality tools. Use of inexpensive tools can cause damage<br />
to the small screws and parts used on this type of model.<br />
LOSI Tuff Country <strong>XXX</strong>-<strong>SCT</strong> RTR • INstruction manual
EN<br />
Contents<br />
Water-resistant Vehicle with Waterproof Electronics<br />
Your new <strong>Horizon</strong> <strong>Hobby</strong> vehicle has been designed and built with a combination of<br />
waterproof and water-resistant components to allow you to operate the product in many<br />
“wet conditions”, including puddles, creeks, wet grass, snow and even rain.<br />
While the entire vehicle is highly water-resistant, it is not completely waterproof and your<br />
vehicle should NOT be treated like a submarine. The various electronic components used in the<br />
vehicle, such as the Electronic Speed Control (ESC), servo(s) and receiver are waterproof, however,<br />
most of the mechanical components are water-resistant and should not be submerged.<br />
Metal parts, including the bearings, hinge pins, screws and nuts, as well as the contacts<br />
in the electrical cables, will be susceptible to corrosion if additional maintenance is not<br />
performed after running in wet conditions. To maximize the long-term performance of your<br />
vehicle and to keep the warranty intact, the procedures described in the “Wet Conditions<br />
Maintenance” section below must be performed regularly if you choose to run in wet<br />
conditions. If you are not willing to perform the additional care and maintenance<br />
required, then you should not operate the vehicle in those conditions.<br />
CAUTION: Failure to exercise caution while using this product and<br />
complying with the following precautions could result in product malfunction<br />
and/or void the warranty.<br />
General Precautions<br />
• Read through the wet conditions maintenance procedures and make sure that you<br />
have all the tools you will need to properly maintain your vehicle.<br />
• Not all batteries can be used in wet conditions. Consult the battery manufacturer before<br />
use. Caution should be taken when using Li-Po batteries in wet conditions.<br />
• Most transmitters are not water-resistant. Consult your transmitter’s manual or the<br />
manufacturer before operation.<br />
• Never operate your transmitter or vehicle where lightning may be present.<br />
• Do not operate your vehicle where it could come in contact with salt water (ocean<br />
water or water on salt-covered roads), contaminated or polluted water. Salt water<br />
is very conductive and highly corrosive, so use caution.<br />
• Even minimal water contact can reduce the life of your motor if it has not been certified<br />
as water-resistant or waterproof. If the motor becomes excessively wet, apply very light<br />
throttle until the water is mostly removed from the motor. Running a wet motor at high<br />
speeds may rapidly damage the motor.<br />
• Driving in wet conditions can reduce the life of the motor. The additional resistance of<br />
operating in water causes excess strain. Alter the gear ratio by using a smaller pinion or<br />
larger spur gear. This will increase torque (and motor life) when running in mud, deeper<br />
puddles, or any wet conditions that will increase the load on the motor for an extended<br />
period of time.<br />
Wet Conditions Maintenance<br />
• Drain any water that has collected in the tires by spinning them at high speed. With the<br />
body removed, place the vehicle upside down and pull full throttle for a few short bursts<br />
until the water has been removed.<br />
CAUTION: Always keep hands, fingers, tools and any loose or hanging objects<br />
away from rotating parts when performing the above drying technique.<br />
• Remove the battery pack(s) and dry the contacts. If you have an air compressor or a can<br />
of compressed air, blow out any water that may be inside the recessed connector housing.<br />
• Remove the tires/wheels from the vehicle and gently rinse the mud and dirt off with a<br />
garden hose. Avoid rinsing the bearings and transmission.<br />
NOTICE: Never use a pressure washer to clean your vehicle.<br />
• Use an air compressor or a can of compressed air to dry the vehicle and help remove<br />
any water that may have gotten into small crevices or corners.<br />
• Spray the bearings, drive train, fasteners and other metal parts with WD-40 ® solvent<br />
or any other water-displacing light oil. Do not spray the motor.<br />
• Let the vehicle air dry before you store it. Water (and oil) may continue<br />
to drip for a few hours.<br />
• Increase the frequency of disassembly, inspection and lubrication of the following:<br />
--<br />
Front and rear axle hub assembly bearings.<br />
--<br />
All transmission cases, gears and differentials.<br />
--<br />
Motor—clean with an aerosol motor cleaner and re-oil the bushings<br />
with lightweight motor oil.<br />
Quick Start<br />
Please read the entire manual to gain a full understanding of the Tuff Country <strong>XXX</strong>-<strong>SCT</strong> RTR vehicle, fine-tuning the setup and performing maintenance.<br />
1. Read the safety precautions found in this manual.<br />
2. Remove the battery from the vehicle and charge it. Refer to the included<br />
charging warnings and instructions for battery charging information.<br />
3. Install the AA batteries in the transmitter. Only use alkaline<br />
or rechargeable batteries.<br />
4. Install the fully charged battery in the vehicle.<br />
5. Power ON the transmitter and then the vehicle. Always power the transmitter<br />
ON before the vehicle and power it OFF after the vehicle has been powered OFF.<br />
6. Check the steering and throttle control directions. Verify that the servos<br />
are moving in the correct direction.<br />
7. Drive your vehicle.<br />
8. Perform any necessary maintenance.<br />
LOSI Tuff Country <strong>XXX</strong>-<strong>SCT</strong> RTR • INstruction manual<br />
3
EN<br />
Charging Warnings<br />
WARNING: Failure to exercise caution while using this product and comply<br />
with the following warnings could result in product malfunction, electrical issues,<br />
excessive heat, FIRE, and ultimately injury and property damage.<br />
• Never leave the charger and battery unattended during use.<br />
• Never attempt to charge dead, damaged or wet battery packs.<br />
• Never attempt to charge a battery pack containing different types of batteries.<br />
• Never allow children under 14 years of age to charge battery packs.<br />
• Never charge batteries in extremely hot or cold places or place in direct sunlight.<br />
• Never charge a battery if the cable has been pinched or shorted.<br />
• Never connect more than one battery pack to this charger at a time.<br />
• Never connect the charger if the power cable has been pinched or shorted.<br />
• Never attempt to dismantle the charger or use a damaged charger.<br />
• Never reverse the positive and negative terminals.<br />
• Always use only rechargeable batteries designed for use with this type of charger.<br />
• Always inspect the battery before charging.<br />
• Always keep the battery away from any material that could be affected by heat.<br />
• Always monitor the charging area and have a fire extinguisher available at all times.<br />
• Always end the charging process if the battery becomes hot to the touch or starts to<br />
change form (swell) during the charge process.<br />
• Always disconnect the battery after charging, and let the charger cool between charges.<br />
• Always charge in a well-ventilated area.<br />
• Always terminate all processes and contact <strong>Horizon</strong> <strong>Hobby</strong> if the product malfunctions.<br />
Charging the Battery<br />
Charge only batteries that are cool to the touch and are not damaged. Inspect the battery<br />
to make sure it is not damaged e.g., swollen, bent, broken or punctured.<br />
1. Connect the AC power cord to the power slot on the charger, then connect the other<br />
end of the power cord to an AC power source.<br />
2. The three LEDs will turn green when the charger is connected to the AC power source.<br />
3. Connect the balance connector of the battery to the proper charge port on the charger<br />
(the 3S charge port has 4 pins and the 2S charge port has 3 pins).<br />
4. The three LEDs will turn red, indicating the battery is charging.<br />
5. When the charging of one cell is complete, the corresponding LED turns green.<br />
6. Once the battery is fully charged, all three LEDs will turn green.<br />
7. Disconnect the balance connector from the charger.<br />
8. Disconnect the AC power cord from the AC power source.<br />
CAUTION: Always disconnect a Li-Po battery from the charger to avoid<br />
over-discharging the battery. Batteries discharged to a voltage lower than the lowest<br />
approved voltage may become damaged, resulting in loss of performance and potential<br />
fire when batteries are charged.<br />
CAUTION: Never exceed the recommended charge rate of the battery pack.<br />
CAUTION: If at any time batteries become damaged, hot, or begin to balloon or<br />
swell, discontinue charging (or discharging) immediately. Quickly and safely disconnect<br />
the charger. DO NOT continue to handle, attempt to use or ship the batteries. Failure<br />
to follow these procedures can cause damage to batteries, personal property or<br />
cause serious injury.<br />
Removing and Installing the Battery<br />
1. Remove the clip from the battery strap.<br />
2. Lift the strap and pull forward.<br />
3. Remove the battery from the vehicle.<br />
4. Charge the battery.<br />
5. Install the fully charged battery in the vehicle.<br />
6. Ensure the ESC is powered OFF.<br />
7. Connect the battery to the ESC.<br />
8. Reinstall the battery strap and clip. The battery strap has a flat<br />
side and a ribbed side. The ribbed side should face the battery.<br />
9. Power ON the transmitter, then the vehicle.<br />
4<br />
LOSI Tuff Country <strong>XXX</strong>-<strong>SCT</strong> RTR • INstruction manual
EN<br />
Spektrum DX2L Radio System<br />
9<br />
8<br />
11 12 13<br />
14 15<br />
16 17<br />
7<br />
6<br />
4<br />
18<br />
1. Steering Wheel Controls direction (left/right) of the model<br />
2. Throttle Trigger Controls speed and direction (forward/brake/reverse) of the model<br />
3. R.O.S.S. Button Used with vehicles featuring the R.O.S.S. Remote Start System<br />
4. Antenna Transmits the signal to the model<br />
5. On/Off Switch Turns the power on/off for the transmitter<br />
6. Indicator Lights<br />
--<br />
Solid green (right) light—indicates adequate battery power<br />
--<br />
Flashing green light—indicates the battery voltage is critically low. Replace batteries<br />
--<br />
Solid red (left) light—indicates good signal strength. When the red light fades,<br />
signal strength is weakening<br />
7. ST. Trim Adjusts the “hands off” direction of the model<br />
8. TH. Trim Adjusts the motor speed to stop at neutral<br />
9. Steering Dual Rate Adjusts the amount the front wheels move<br />
when the steering wheel is turned left and right<br />
<strong>10</strong>. Battery Cover Covers and holds the batteries that power the transmitter<br />
11. BIND Button Puts the transmitter into Bind Mode<br />
12. ST. REV Reverses the function of the steering when the wheel is turned left or right<br />
13. TH. REV Reverses the function of the speed control when pulled back or pushed forward<br />
14. TH-F Forward Endpoint—Adjusts the amount of full throttle<br />
15. TH-B Brake Endpoint—Adjusts the amount of full brake<br />
16. ST-L Steering Left Endpoint—Adjusts the amount of left steering travel<br />
17. ST-R Steering Right Endpoint—Adjusts the amount of right steering travel<br />
18. Throttle Limiter Limits the throttle to Low (50%), Medium (75%) or High<br />
(full throttle is equal to the high Throttle Travel position)<br />
19. Bind Plug Compartment<br />
5<br />
3<br />
2<br />
1<br />
Installing the Transmitter Batteries<br />
1. Push in the battery cover a small amount to release the retaining tab,<br />
then remove the cover.<br />
2. Install 4 AA batteries, taking care to align the battery polarity to the diagram<br />
in the transmitter’s battery case.<br />
3. Carefully reinstall the battery cover by aligning the tabs with the slots on the transmitter.<br />
CAUTION: Do not remove the transmitter batteries while the model is powered<br />
on or while operating, as a loss of model control, damage or injury can result.<br />
<strong>10</strong><br />
19<br />
For more information on the transmitter, go to www.horizonhobby.com and click<br />
on the support tab for the Spektrum DX2L to download the instruction manual.<br />
LOSI Tuff Country <strong>XXX</strong>-<strong>SCT</strong> RTR • INstruction manual<br />
5
EN<br />
Transmitter and Receiver Binding<br />
Your Spektrum DX2L comes prebound to the vehicle.<br />
1. Make sure the transmitter and vehicle are both powered OFF.<br />
2. Install a bind plug in the receiver battery/bind port. You do not need to remove<br />
any of the other plugs to re-bind.<br />
3. With the bind plug installed, power ON the vehicle. The receiver LED will flash green.<br />
4. With the steering and throttle in the desired preset failsafe positions (neutral), press and<br />
hold the bind button and power ON the transmitter. The transmitter's red LED will flash<br />
after 4 seconds when the transmitter is in bind mode. Release the bind button once<br />
the red LED flashes. Continue holding the failsafe positions until the binding<br />
process is complete.<br />
5. When the receiver binds to the transmitter, the receiver LED will turn solid.<br />
6. Power OFF the vehicle, then the transmitter.<br />
7. Disconnect the battery from the ESC. Remove the bind plug from the receiver.<br />
8. Safely store the bind plug in the bind plug compartment in the transmitter.<br />
9. The receiver will keep the binding to the transmitter until another binding is done.<br />
If you encounter problems, obey binding instructions and refer to the transmitter<br />
troubleshooting guide for other instructions. If needed, contact the appropriate<br />
<strong>Horizon</strong> Product Support office.<br />
Control Test<br />
Perform a control test with the vehicle wheels off the ground. If the wheels rotate after the<br />
vehicle is powered ON, adjust the “TH. Trim” knob until they stop. To make the wheels move<br />
forward, pull the trigger. To reverse them, wait for the wheels to stop, then push the trigger.<br />
When moving forward, the wheels should maintain a straight line without any steering<br />
wheel input. If not, adjust the “ST. Trim” knob, so the wheels maintain a straight<br />
line without having to turn the steering wheel.<br />
Forward<br />
Brake/Reverse<br />
Before Running Your Vehicle<br />
1. Break in the differential. While holding the chassis with only the left rear tire firmly on the<br />
ground, give the vehicle about 1/8 throttle for 30 seconds. The right rear tire should spin<br />
freely during this time. Do this with only the right rear tire firmly on the ground, allowing<br />
the left to spin freely. Repeat this 2–3 times.<br />
2. Check for free suspension movement. All suspension arms and steering components<br />
should move freely. Any binds will cause the vehicle to handle poorly.<br />
3. Set the ride height. Set the ride height of your truck with all components installed<br />
so that the bottom of the chassis is 29.5mm from the ground in the front and<br />
29.0mm in the rear by adjusting the shock collars.<br />
4. Set the camber. Adjusting the camber tie rod length changes the camber.<br />
Set the front tires to have 1 degree of negative camber at ride height.<br />
Set the rear tires to have 1.5 degrees of negative camber at ride height.<br />
5. Set the front toe-in. Adjust the steering tie rods so that when the servo<br />
is centered on the transmitter, the front tires are both pointing straight.<br />
6. Charge the battery.<br />
7. Check the calibration of the ESC. If recalibration is required, follow the setup instructions.<br />
8. Check the steering endpoints of the vehicle by turning the steering wheel with the front<br />
tires off the ground. When turning left, the left front tire should reach full steering throw<br />
as the steering wheel reaches the end of its motion (and vice-versa for turning right).<br />
If it does not, use the steering endpoint dials to adjust.<br />
6<br />
LOSI Tuff Country <strong>XXX</strong>-<strong>SCT</strong> RTR • INstruction manual
EN<br />
Driving Precautions<br />
• Maintain sight of the vehicle at all times.<br />
• Routinely inspect the vehicle for loose wheel hardware.<br />
• Routinely inspect the steering assembly for any loose hardware. Driving the vehicle<br />
off-road can cause fasteners to loosen over time.<br />
• Do not drive the vehicle in tall grass. Doing so can damage the vehicle or electronics.<br />
• Stop driving the vehicle when you notice a lack of power. Driving the vehicle when<br />
the battery is discharged can cause the receiver to power off. If the receiver loses power,<br />
you will lose control of the vehicle. Damage due to an over-discharged Li-Po battery is<br />
not covered under warranty.<br />
CAUTION: Do not discharge a Li-Po battery below 3V per cell. Batteries discharged<br />
to a voltage lower than the lowest approved voltage may become damaged,<br />
resulting in loss of performance and potential fire when batteries are charged.<br />
• Do not apply forward or reverse throttle if the vehicle is stuck.<br />
Applying throttle in this instance can damage the motor or ESC.<br />
• After driving the vehicle, allow the electronics to cool before driving the vehicle again.<br />
Run Time<br />
The largest factor in run time is the capacity of the battery pack. A larger mAh rating<br />
increases the amount of run time experienced.<br />
The condition of a battery pack is also an important factor in both run time and speed.<br />
The battery connectors may become hot during driving. Batteries will lose performance<br />
and capacity over time.<br />
Driving the vehicle from a stop to full speed repeatedly will damage the batteries<br />
and electronics over time. Sudden acceleration will also lead to shorter run times.<br />
To Improve Run Times<br />
• Clean and oil the bearings often. If the bearings are dirty, they will increase friction<br />
and cause reduced performance.<br />
• Keep your vehicle clean and maintained.<br />
• Allow more airflow to the ESC and motor.<br />
• Change the gearing to a lower ratio. A lower ratio decreases the operating temperature<br />
of the electronics. Use a smaller pinion gear or larger spur gear to lower the gear ratio.<br />
• Use a battery pack with a higher mAh rating.<br />
Tuning, Adjusting &<br />
Maintaining Your Vehicle<br />
• Examine your vehicle on a regular basis.<br />
• Use a brush to remove dirt and dust.<br />
• Look for damage to the suspension arms and other molded parts.<br />
• Re-glue the tires to the wheels, if necessary.<br />
• Clean and oil all wheel bearings.<br />
• Use suitable tools to tighten fasteners.<br />
• Make sure the camber and steering linkages are not bent. Replace any bent linkages.<br />
• Adjust the toe and camber settings, if necessary.<br />
• Remove the shocks and inspect them for damage. Rebuild the shocks if oil is leaking.<br />
• Inspect the electronics and batteries for exposed wires. Repair exposed wires with<br />
shrink-wrap, or replace the wire.<br />
• Make sure the ESC and receiver are secure on the chassis. Replace the double-sided tape,<br />
if necessary.<br />
• Power ON the transmitter. If the green LED is dim or off, replace the AA batteries<br />
in your transmitter.<br />
• Check the spur gear and pinion gear for wear.<br />
Service/Repair<br />
If any problems other than those covered in this manual arise, please call the appropriate<br />
electronics service department. Refer to the Warranty and Service Information section for<br />
the appropriate department to contact.<br />
Cleaning<br />
Performance can be hindered if dirt gets in any of the moving suspension parts.<br />
Use compressed air, a soft paintbrush or a toothbrush to remove dust or dirt. Avoid<br />
using solvents or chemicals, as they can actually wash dirt into the bearings or moving<br />
parts, as well as cause damage to the electronics.<br />
LOSI Tuff Country <strong>XXX</strong>-<strong>SCT</strong> RTR • INstruction manual<br />
7
EN<br />
Dynamite Tazer Waterproof 45A Sensorless <strong>Brushless</strong> ESC (DYN4940)<br />
Specifications<br />
Type<br />
Constant/Peak<br />
Resistance<br />
Function<br />
Operation<br />
Battery Type/Input Voltage<br />
BEC Output<br />
Overload Protection<br />
Dimensions (LxWxH)<br />
Weight<br />
ESC LED STATUS<br />
Sensorless <strong>Brushless</strong>/Waterproof<br />
45A/290A<br />
0.0012 Ohm<br />
Forward Only with Brake<br />
Forward/Reverse with Brake<br />
Proportional forward,<br />
proportional reverse with braking delay<br />
2- to 3-cell Li-Po/Li-Fe 4- to 9-cell Ni-MH/Ni-Cd<br />
6V/3A<br />
Thermal<br />
1.89 x 1.39 x 1.39 in (48 x 35.2 x 35.2mm)<br />
2.61 oz (74 g) with wires<br />
• No ESC LEDs will glow when there is no throttle input from the transmitter.<br />
• The red ESC LED glows when there is any throttle input from the transmitter.<br />
AUDIBLE WARNING TONES<br />
• Input voltage The ESC checks the in put voltage when it is powered ON. If a voltage<br />
problem is detected, the ESC continuously sounds 2 beeps with a 1 second pause<br />
(xx-xx-xx). Power OFF the ESC and ensure the connections are secure and that<br />
the battery power is not too low for safe operation.<br />
• Radio connection The ESC checks radio signal input when it is powered ON.<br />
If a problem is detected, the ESC continuously sounds 1 beep with a 2 second pause<br />
(x--x--x). Power OFF the ESC and ensure the radio system is operating correctly.<br />
ESC CALIBRATION PROCEDURE<br />
Ensure proper ESC function by calibrating the ESC to your transmitter inputs.<br />
1. Power OFF the ESC.<br />
2. Ensure your transmitter is powered ON, the throttle is not reversed, the throttle trim is<br />
neutral and the throttle travel range is at <strong>10</strong>0%.<br />
3. Press the SET button while powering ON the ESC. Release the button as soon as the<br />
green LED starts to flash.<br />
4. Calibrate the throttle points by pressing the SET button once after each step.<br />
--<br />
Neutral (1 flash)—leave the throttle at rest, untouched<br />
--<br />
Full throttle (2 flashes)—pull the throttle fully back<br />
--<br />
Full brake/reverse (3 flashes)—push the throttle fully forward<br />
5. The motor vibrates for 3 seconds after the last step is completed.<br />
ESC FUNCTIONS AND MODES<br />
The ESC includes programming options so you can adjust the way your vehicle performs.<br />
Refer to the included settings table to adjust the ESC for your driving conditions.<br />
ESC programming procedure<br />
Programming is accomplished using the SET button on the ON/OFF switch.<br />
1. Connect a fully charged battery to the ESC.<br />
2. Power ON the ESC.<br />
3. Hold the SET button for 1 second until the green LED blinks, then release the SET button<br />
to enter programming mode.<br />
4. Press and release the SET button as needed to get to the desired menu option (the green<br />
LED will blink corresponding to the menu item number).<br />
5. When at the desired menu item, hold the SET button for 3 seconds until the red LED blinks.<br />
6. Press the SET button to move among the settings based on how many times the red LED<br />
blinks (Refer to the table for more information).<br />
7. Save the setting by holding the SET button for 3 seconds.<br />
8. Power OFF the ESC and repeat the instructions above to change other settings.<br />
Tip: If desired, the ESC programming can be returned to default settings<br />
by powering ON the ESC and holding the SET button for 5 seconds.<br />
The black-shaded setting is the factory default.<br />
Programmable Items<br />
1 Running Mode Forward with<br />
Brake<br />
Programmable Value<br />
1 2 3 4 5 6 7 8<br />
Forward/Reverse<br />
with Brake<br />
2 Drag Brake Force 0% 5% <strong>10</strong>% 15% 20% 25% 30% 40%<br />
3 Low Voltage Cutoff non-protection 2.6 V/Cell 2.8 V/Cell 3.0 V/Cell 3.2 V/Cell 3.4 V/Cell<br />
4 Start Mode (Punch) Level 1 Level 2 Level 3 Level 4<br />
5 Max Brake Force 25% 50% 75% <strong>10</strong>0%<br />
NOTICE: Always disconnect the battery from the ESC when you have finished operating your vehicle. The ESC switch only controls power to the receiver and servos.<br />
The ESC will continue to draw current when connected to the battery, resulting in possible damage to the battery through over-discharge.<br />
Descriptions<br />
1. Running Mode<br />
--<br />
Forward Only with Brake<br />
Intended for competition use, this mode allows only forward and brake controls.<br />
--<br />
Forward/Reverse with Brake<br />
This mode is the basic all-around mode, allowing forward, reverse and brake controls.<br />
To engage reverse while moving forward, apply the brake until the vehicle has come to<br />
a complete stop, release brake, then apply the brake again. While braking or in reverse,<br />
engaging the throttle will result in the vehicle immediately accelerating forward.<br />
2. Drag Brake Force<br />
Adjusts the amount of brake automatically applied when the throttle is returned to the<br />
neutral position. This simulates the engine braking effect of a full-scale vehicle, allowing<br />
improved turn-in and your vehicle’s general response to controls.<br />
3. Low Voltage Cutoff<br />
This function helps to prevent battery over-discharge. The ESC continuously monitors the<br />
battery’s voltage. If the voltage falls below the voltage threshold for 2 seconds, the output<br />
power shuts off and the red LED flashes twice repeatedly.<br />
The cutoff threshold calculation is based on individual Li-Po cell voltage. For Ni-MH batteries,<br />
if the voltage battery pack is higher than 9.0V, it will be treated as a 3-cell Li-Po battery<br />
pack; if it is lower than 9.0V, it will be treated as a 2-cell Li-Po battery pack. Example:<br />
for a 8.0V Ni-MH battery pack used with a 2.6V/cell threshold, it will be treated as a<br />
2-cell Li-Po battery pack and the low-voltage cut-off threshold will be 5.2V (2.6x2=5.2).<br />
4. Start Mode (Punch)<br />
Sets the initial throttle punch when the car accelerates. Level 1 gives<br />
a very soft initial acceleration and level 4 gives a stronger initial acceleration.<br />
5. Max Brake Force<br />
Adjusts the maximum braking force. A higher value provides stronger braking,<br />
but can also cause the wheels to lock, resulting in loss of control of the car.<br />
8<br />
LOSI Tuff Country <strong>XXX</strong>-<strong>SCT</strong> RTR • INstruction manual
EN<br />
Dynamite Tazer 3300Kv 4-Pole <strong>Brushless</strong> Motor (DYN4942)<br />
Precautions<br />
• Never touch moving parts.<br />
• Never disassemble while the batteries are installed.<br />
• Always let parts cool before touching.<br />
Adjusting the Slipper<br />
Turn the 1/4" (3mm) adjustment nut clockwise (to the right) to reduce the slip<br />
or counterclockwise (to the left) to increase the slip.<br />
Setting the Gear Mesh<br />
The gear mesh has already been set at the factory. Setting it is only necessary when changing<br />
motors or gears.<br />
Proper gear mesh (how gear teeth meet) is important to the performance of the vehicle. When<br />
the gear mesh is too loose, the spur gear could be damaged by the pinion gear of the motor. If<br />
the mesh is too tight, speed could be limited and the motor and ESC will overheat.<br />
GEARING<br />
Your vehicle has been equipped with the optimal gearing for the stock platform. It offers an<br />
ideal balance between speed, power and efficiency. Should you decide to customize your<br />
vehicle with optional batteries or motors, it may be necessary for you to change the pinion or<br />
spur gear.<br />
Installing a pinion gear with less teeth or a spur gear with more teeth will provide greater<br />
torque but will reduce top speed. Likewise, a pinion gear with more teeth or a spur gear with<br />
fewer teeth will reduce torque and increase top speed. Care should be taken when installing<br />
larger pinion gears as this can “overgear” the vehicle, resulting in overheating of the motor<br />
and ESC. When testing different gearing options, pay close attention to the temperature of<br />
the motor and speed control to ensure you are operating within the temperature range of the<br />
components. The motor or ESC should never be so hot that it cannot be touched. If temperatures<br />
are too hot, a different gearing combination with a lower pinion gear and/or higher spur<br />
gear is suggested.<br />
CHANGING THE PINION GEAR/GEAR RATIO<br />
1. Unscrew the gear cover screws and remove the gear cover.<br />
2. Loosen the motor screws and slide the motor back.<br />
3. Loosen the set screw and remove the installed pinion gear.<br />
4. Place the new pinion on the end of the motor shaft so the set screw is located<br />
over the flat on the shaft.<br />
5. Position it so the teeth line up with the spur gear and secure the pinion by tightening<br />
the set screw.<br />
6. Set the gear mesh.<br />
7. Reinstall the gear cover.<br />
1. Unscrew the gear cover screws and remove the gear cover.<br />
2. Loosen the motor screws and slide the motor back.<br />
3. Put a small piece of paper between the pinion and spur gears.<br />
4. Push the gears together while tightening the motor screws.<br />
5. Remove the paper. Check the mesh at 3–5 different locations around<br />
the spur gear for a small amount of movement.<br />
6. Reinstall the gear cover.<br />
Troubleshooting Guide<br />
If after reading below you cannot resolve your problem,<br />
contact the appropriate <strong>Horizon</strong> product support center.<br />
Steering servo operates but the motor does not run<br />
• Reprogram the ESC by following the programming instructions.<br />
• Confirm the ESC is properly connected to the throttle channel on the receiver.<br />
• Damaged motor: Test motor independently, repair or replace as needed.<br />
• Vehicle battery voltage is low: Charge as needed.<br />
• ESC overload protection is enabled: Check motor and connections.<br />
• Transmission is damaged: Check transmission gears, spur gear<br />
and pinion gear for damage.<br />
Steering and motor do not function<br />
• Servo and ESC are not properly connected to the receiver:<br />
Check polarity of the connectors to the receiver.<br />
• Transmitter batteries or vehicle battery pack discharged: Recharge or replace as needed.<br />
• Transmitter and receiver have become unbound. Refer to the Transmitter and Receiver<br />
Binding section to re-bind.<br />
Full speed not attainable<br />
• ESC programmed incorrectly: Reprogram the ESC.<br />
• Check battery connectors for damage.<br />
• Vehicle battery is weak: Recharge vehicle battery.<br />
Vehicle will not reverse<br />
• Confirm the throttle trim is at neutral.<br />
• Confirm the ESC is not in Forward Only mode.<br />
• ESC is not calibrated correctly: Reprogram the ESC.<br />
Spur gear is damaged repeatedly<br />
• Improper gear mesh.<br />
• Slipper clutch is not adjusted correctly.<br />
Motor starts running as soon<br />
as the battery is connected<br />
• Always power ON the transmitter before powering ON the vehicle.<br />
• ESC is damaged and needs to be replaced.<br />
• Throttle trim is adjusted incorrectly.<br />
Motor slows but will not stop<br />
• Throttle trim is adjusted incorrectly.<br />
• ESC program does not match transmitter: Reprogram the ESC.<br />
Reduced radio range<br />
• Electrical noise from the motor: Move the receiver away from ESC, motor and wiring.<br />
• Transmitter batteries are weak: Replace AA batteries.<br />
Transmitter does not power ON<br />
• Confirm the AA batteries are installed correctly.<br />
• Replace AA batteries in the transmitter.<br />
LOSI Tuff Country <strong>XXX</strong>-<strong>SCT</strong> RTR • INstruction manual<br />
9
EN<br />
Limited Warranty<br />
What this Warranty Covers<br />
<strong>Horizon</strong> <strong>Hobby</strong>, Inc. (“<strong>Horizon</strong>”) warrants to the original purchaser that the product<br />
purchased (the "Product") will be free from defects in materials and workmanship<br />
at the date of purchase.<br />
What is Not Covered<br />
This warranty is not transferable and does not cover (i) cosmetic damage, (ii) damage due<br />
to acts of God, accident, misuse, abuse, negligence, commercial use, or due to improper use,<br />
installation, operation or maintenance, (iii) modification of or to any part of the Product, (iv)<br />
attempted service by anyone other than a <strong>Horizon</strong> <strong>Hobby</strong> authorized service center, (v)<br />
Product not purchased from an authorized <strong>Horizon</strong> dealer, or (vi) Product not compliant<br />
with applicable technical regulations.<br />
OTHER THAN THE EXPRESS WARRANTY ABOVE, HORIZON MAKES NO OTHER WARRANTY<br />
OR REPRESENTATION, AND HEREBY DISCLAIMS ANY AND ALL IMPLIED WARRANTIES,<br />
INCLUDING, WITHOUT LIMITATION, THE IMPLIED WARRANTIES OF NON-INFRINGEMENT,<br />
MERCHANTABILITY AND FITNESS FOR A PARTICULAR PURPOSE. THE PURCHASER AC-<br />
KNOWLEDGES THAT THEY ALONE HAVE DETERMINED THAT THE PRODUCT WILL SUITABLY<br />
MEET THE REQUIREMENTS OF THE PURCHASER’S INTENDED USE.<br />
Purchaser’s Remedy<br />
<strong>Horizon</strong>’s sole obligation and purchaser’s sole and exclusive remedy shall be that <strong>Horizon</strong><br />
will, at its option, either (i) service, or (ii) replace, any Product determined by <strong>Horizon</strong> to be<br />
defective. <strong>Horizon</strong> reserves the right to inspect any and all Product(s) involved in a warranty<br />
claim. Service or replacement decisions are at the sole discretion of <strong>Horizon</strong>. Proof of purchase<br />
is required for all warranty claims. SERVICE OR REPLACEMENT AS PROVIDED UNDER THIS<br />
WARRANTY IS THE PURCHASER’S SOLE AND EXCLUSIVE REMEDY.<br />
Limitation of Liability<br />
HORIZON SHALL NOT BE LIABLE FOR SPECIAL, INDIRECT, INCIDENTAL OR CONSEQUEN-<br />
TIAL DAMAGES, LOSS OF PROFITS OR PRODUCTION OR COMMERCIAL LOSS IN ANY WAY,<br />
REGARDLESS OF WHETHER SUCH CLAIM IS BASED IN CONTRACT, WARRANTY, TORT,<br />
NEGLIGENCE, STRICT LIABILITY OR ANY OTHER THEORY OF LIABILITY, EVEN IF HORIZON HAS<br />
BEEN ADVISED OF THE POSSIBILITY OF SUCH DAMAGES. Further, in no event shall the liability<br />
of <strong>Horizon</strong> exceed the individual price of the Product on which liability is asserted. As <strong>Horizon</strong><br />
has no control over use, setup, final assembly, modification or misuse, no liability shall be<br />
assumed nor accepted for any resulting damage or injury. By the act of use, setup or assembly,<br />
the user accepts all resulting liability. If you as the purchaser or user are not prepared to<br />
accept the liability associated with the use of the Product, purchaser is advised to return the<br />
Product immediately in new and unused condition to the place of purchase.<br />
Law<br />
These terms are governed by Illinois law (without regard to conflict of law principals). This<br />
warranty gives you specific legal rights, and you may also have other rights which vary from<br />
state to state. <strong>Horizon</strong> reserves the right to change or modify this warranty at any time<br />
without notice.<br />
WARRANTY SERVICES<br />
Questions, Assistance, and Services<br />
Your local hobby store and/or place of purchase cannot provide warranty support or service.<br />
Once assembly, setup or use of the Product has been started, you must contact your local<br />
distributor or <strong>Horizon</strong> directly. This will enable <strong>Horizon</strong> to better answer your questions<br />
and service you in the event that you may need any assistance. For questions or assistance,<br />
please visit our website at www.horizonhobby.com, submit a Product Support Inquiry, or call<br />
the toll free telephone number referenced in the Warranty and Service Contact Information<br />
section to speak with a Product Support representative.<br />
Inspection or Services<br />
If this Product needs to be inspected or serviced and is compliant in the country you live and<br />
use the Product in, please use the <strong>Horizon</strong> Online Service Request submission process found<br />
on our website or call <strong>Horizon</strong> to obtain a Return Merchandise Authorization (RMA) number.<br />
Pack the Product securely using a shipping carton. Please note that original boxes may be included,<br />
but are not designed to withstand the rigors of shipping without additional protection.<br />
Ship via a carrier that provides tracking and insurance for lost or damaged parcels, as <strong>Horizon</strong><br />
is not responsible for merchandise until it arrives and is accepted at our facility. An Online<br />
Service Request is available at http://www.horizonhobby.com/content/_service-center_renderservice-center.<br />
If you do not have internet access, please contact <strong>Horizon</strong> Product Support<br />
to obtain a RMA number along with instructions for submitting your product for service.<br />
When calling <strong>Horizon</strong>, you will be asked to provide your complete name, street address, email<br />
address and phone number where you can be reached during business hours. When sending<br />
product into <strong>Horizon</strong>, please include your RMA number, a list of the included items, and a<br />
brief summary of the problem. A copy of your original sales receipt must be included for<br />
warranty consideration. Be sure your name, address, and RMA number are clearly written<br />
on the outside of the shipping carton.<br />
Warranty Requirements<br />
For Warranty consideration, you must include your original sales receipt verifying<br />
the proof-of-purchase date. Provided warranty conditions have been met, your Product<br />
will be serviced or replaced free of charge. Service or replacement decisions are at the sole<br />
discretion of <strong>Horizon</strong>.<br />
Non-Warranty Service<br />
Should your service not be covered by warranty, service will be completed<br />
and payment will be required without notification or estimate of the expense<br />
unless the expense exceeds 50% of the retail purchase cost. By submitting the<br />
item for service you are agreeing to payment of the service without notification. Service<br />
estimates are available upon request. You must include this request with your item submitted<br />
for service. Non-warranty service estimates will be billed a minimum of ½ hour of labor. In addition<br />
you will be billed for return freight. <strong>Horizon</strong> accepts money orders and cashier’s checks,<br />
as well as Visa, MasterCard, American Express, and Discover cards. By submitting any item to<br />
<strong>Horizon</strong> for service, you are agreeing to <strong>Horizon</strong>’s Terms and Conditions found on our website<br />
http://www.horizonhobby.com/content/_service-center_render-service-center.<br />
ATTENTION: <strong>Horizon</strong> service is limited to Product compliant in the country of use and<br />
ownership. If received, a non-compliant Product will not be serviced. Further, the sender<br />
will be responsible for arranging return shipment of the un-serviced Product, through<br />
a carrier of the sender’s choice and at the sender’s expense. <strong>Horizon</strong> will hold non-compliant<br />
Product for a period of 60 days from notification, after which it will be discarded.<br />
FCC Information<br />
This device complies with part 15 of the FCC rules. Operation is subject to the following two<br />
conditions: (1) This device may not cause harmful interference, and (2) this device must accept<br />
any interference received, including interference that may cause unde-sired operation.<br />
CAUTION: Changes or modifications not expressly approved by the party<br />
responsible for compliance could void the user’s authority to operate the equipment.<br />
This product contains a radio transmitter with wireless technology which has been tested and<br />
found to be compliant with the applicable regulations governing a radio transmitter in the<br />
2.400 GHz to 2.4835 GHz frequency range.<br />
Antenna Separation Distance<br />
When operating your Spektrum transmitter, please be sure to maintain a separation distance<br />
of at least 5 cm between your body (excluding fingers, hands, wrists, ankles and feet) and<br />
the antenna to meet RF exposure safety requirements as determined by FCC regulations.<br />
The following illustrations show the approximate 5 cm RF exposure area and typical<br />
hand placement when operating your Spektrum transmitter.<br />
IC Information<br />
This device complies with Industry Canada licence-exempt RSS standard(s). Operation is<br />
subject to the following two conditions: (1) this device may not cause interference, and (2)<br />
this device must accept any interference, including interference that may cause undesired<br />
operation of the device.<br />
NOTICE: Do not ship LiPo batteries to <strong>Horizon</strong>. If you have any issue with<br />
a Li-Po battery, please contact the appropriate <strong>Horizon</strong> Product Support office.<br />
<strong>10</strong><br />
LOSI Tuff Country <strong>XXX</strong>-<strong>SCT</strong> RTR • INstruction manual
EN<br />
Warranty and Service Contact Information<br />
Country of Purchase <strong>Horizon</strong> <strong>Hobby</strong> Contact Information Address<br />
United States of America <strong>Horizon</strong> Service Center<br />
servicecenter.horizonhobby.com/RequestForm/<br />
4<strong>10</strong>5 Fieldstone Rd<br />
(Repairs and Repair Requests)<br />
Champaign, Illinois, 61822 USA<br />
United Kingdom<br />
<strong>Horizon</strong> Product Support<br />
(Product Technical Assistance)<br />
Sales<br />
Service/Parts/Sales:<br />
<strong>Horizon</strong> <strong>Hobby</strong> Limited<br />
www.quickbase.com/db/bghj7ey8ca=GenNewRecord<br />
888-959-2305<br />
sales@horizonhobby.com<br />
888-959-2305<br />
sales@horizonhobby.co.uk<br />
+44 (0) 1279 641 097<br />
Germany <strong>Horizon</strong> Technischer Service<br />
Sales: <strong>Horizon</strong> <strong>Hobby</strong> GmbH<br />
service@horizonhobby.de<br />
+49 (0) 4121 2655 <strong>10</strong>0<br />
France<br />
Service/Parts/Sales:<br />
infofrance@horizonhobby.com<br />
<strong>Horizon</strong> <strong>Hobby</strong> SAS<br />
+33 (0) 1 60 18 34 90<br />
China<br />
Service/Parts/Sales:<br />
<strong>Horizon</strong> <strong>Hobby</strong> - China<br />
info@horizonhobby.com.cn<br />
+86 (021) 5180 9868<br />
Units 1–4 Ployters Rd<br />
Staple Tye<br />
Harlow, Essex<br />
CM18 7NS, United Kingdom<br />
Christian-Junge-Straße 1<br />
25337 Elmshorn, Germany<br />
11 Rue Georges Charpak<br />
77127 Lieusaint, France<br />
Room 506, No. 97 Changshou Rd.<br />
Shanghai, China 200060<br />
Compliance Information for the European Union<br />
No. HH2013051601<br />
Product(s):<br />
Item Number(s):<br />
Equipment class: 2<br />
Declaration of Conformity<br />
(in accordance with ISO/IEC 17050-1)<br />
LOS 1/<strong>10</strong> Tuff Country <strong>XXX</strong>-<strong>SCT</strong> BL RTR (includes Spektrum<br />
DX2L Transmitter with Spektrum SR200WP Receiver)<br />
LOSB0115I<br />
The object of declaration described above is in conformity with the requirements of the<br />
specifications listed below, following the provisions of the European R&TTE directive<br />
1999/5/EC, EMC Directive 2004/<strong>10</strong>8/EC and LVD Directive 2006/95/EC:<br />
EN 300-328 V1.7.1: 2006<br />
EN301 489-1 V1.9.2: 2012<br />
EN301 489-17 V2.1.1: 2009<br />
EN60950-1:2006+A11:2009+A1:20<strong>10</strong>+A12: 2011<br />
EN55022:20<strong>10</strong> + AC:2011<br />
EN55024:20<strong>10</strong><br />
EN6<strong>10</strong>00-3-2:2006+A1:2009+A2:2009<br />
EN6<strong>10</strong>00-3-3:2008<br />
Signed for and on behalf of:<br />
<strong>Horizon</strong> <strong>Hobby</strong>, Inc.<br />
Champaign, IL USA<br />
May 16, 2013<br />
Steven A. Hall<br />
Executive Vice President and Chief Operating Officer<br />
International Operations and Risk Management<br />
<strong>Horizon</strong> <strong>Hobby</strong>, Inc.<br />
Instructions for disposal of WEEE<br />
by users in the European Union<br />
This product must not be disposed of with other waste. Instead, it is the user’s responsibility<br />
to dispose of their waste equipment by handing it over to a designated collections point for<br />
the recycling of waste electrical and electronic equipment. The separate collection and recycling<br />
of your waste equipment at the time of disposal will help to conserve natural resources<br />
and ensure that it is recycled in a manner that protects human health and the environment.<br />
For more information about where you can drop off your waste equipment for recycling,<br />
please contact your local city office, your household waste disposal service or where<br />
you purchased the product.<br />
LOSI Tuff Country <strong>XXX</strong>-<strong>SCT</strong> RTR • INstruction manual<br />
11