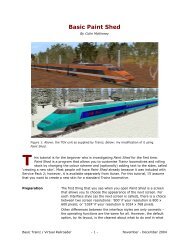
View/save (right click) file - Virtual Railroader
View/save (right click) file - Virtual Railroader
View/save (right click) file - Virtual Railroader

You also want an ePaper? Increase the reach of your titles
YUMPU automatically turns print PDFs into web optimized ePapers that Google loves.
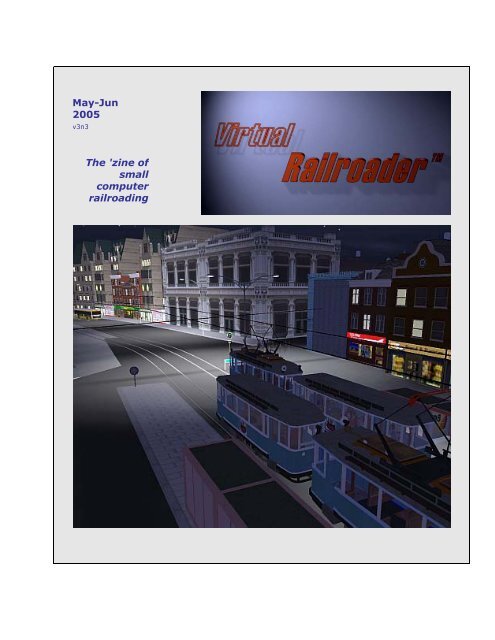
Cover page<br />
May-Jun<br />
2005<br />
v3n3<br />
The 'zine of<br />
small<br />
computer<br />
railroading
In this issue<br />
From the Publisher: Another Milestone<br />
Field Notes: Transitions<br />
The Long and Short: This ‘n That<br />
Personal: Meet Jeff Barr<br />
Trainz Operations: The Razorback Railway<br />
Trainz Feature: A Pair of Museum Routes<br />
Trainz Feature: Let’s Get That Waterfall Flowing!<br />
BVE Extra: Converting Older Trains to Use BVE 4 Timetables<br />
In Transit: Tramming in Amsterdam<br />
Narrow Gauge: Big Fun From a Small Route<br />
Basic Trainz: Using the Forum, Part 2<br />
Download Gold: Now For Something Completely Different!<br />
Reference: Train Sim Webfinder<br />
Credits<br />
<strong>Virtual</strong> <strong>Railroader</strong> - 2 - May – June 2005
From the Publisher<br />
Another Milestone<br />
By Alfred Barten<br />
W<br />
e did it! With this issue we have just completed a full year as <strong>Virtual</strong> <strong>Railroader</strong>.<br />
If you count our <strong>Virtual</strong> Model Railway Journal, we have just completed a year<br />
and a half. Either way, it’s something to be proud of. I have each issue of VR<br />
bound in a half-inch three-ring binder, lined up on the shelf behind my desk. I often reach<br />
back and grab an issue to see how we said something, or more importantly, how to do this<br />
or that thing. I sincerely hope you, our readers, are finding our efforts to be equally useful<br />
to your enjoyment of virtual railroading.<br />
Looking back, there are a lot of things we tried. Some worked well<br />
and continue to be a part of our present thinking. Others worked<br />
less well and may or may not reappear some day in revised format<br />
or re-energized approach. One thing you can count on is that we<br />
will continue to be on the lookout for ways to improve VR.<br />
In this issue<br />
In place of my usual editorial I added a Field Notes column. This<br />
column is aimed at looking carefully at the things we are modeling<br />
– landscape, buildings, trains, and people. It’s what modelers do.<br />
Steve Legge gives us a good idea of what life is like on the<br />
Razorback Railway, an online Trainz railway filled with scenarios<br />
and interesting driving.<br />
Eezypeazy, who prefers to keep his true identity a mystery, gives<br />
us some valuable information for working with the new BVE 4, in<br />
this installment converting older trains so they can use BVE 4<br />
timetables.<br />
Colin McKinney is back with the concluding part of his Basic Trainz<br />
article on using the Trainz Forum. Many of us take the Forum for<br />
granted, but Colin’s careful examination of the features may<br />
surprise even some old-timers.<br />
John D’Angelo brings us a bevy of articles, including “Meet Jeff<br />
Barr,” who many know as Magicland. Jeff has created numerous<br />
items for the Trainz Download Station (DLS), such as NYCTA<br />
subway cars, Budd RDC cars, and New York area class 1<br />
locomotives and railway cars.<br />
John also describes the technique for adding an animated waterfall<br />
to your route, and covers in his Download Gold article the terrific<br />
new rule by Sforget, “Emit Train Now.” This rule could forever<br />
change the way you use Trainz. Finally, John describes his 3 Mile<br />
Harbor & North Sea RR route, based on an article in the May 2005<br />
issue of Model <strong>Railroader</strong>.<br />
To round out the issue, I introduce two museum layouts for use in<br />
demonstrating Trainz and I review Jan Andree’s AmsterdamTram 4<br />
<strong>Virtual</strong> <strong>Railroader</strong> - 3 - May – June 2005
oute – a tram lover’s dream come true. I’ve also updated our<br />
Train Sim Web Finder and continued our odds and ends series in<br />
The Long and Short column.<br />
Well, that’s about it. We hope you enjoy it all and let us know what<br />
you would like to see more of (and less of).<br />
Cheers,<br />
Al<br />
Article ©2005 Alfred Barten. All <strong>right</strong>s reserved.<br />
<strong>Virtual</strong> <strong>Railroader</strong> - 4 - May – June 2005
Field Notes<br />
Transitions<br />
By Alfred Barten<br />
Spring in Western Massachusetts, a transition from Winter to Summer. Larger stones take their place<br />
along the river’s edge, the forest floor is rusty with last year’s fallen leaves, and larger trees along the<br />
bank will someday be undercut and felled by the river.<br />
I<br />
n my first (and only) year of studying mechanical engineering, I took a one-semester<br />
course in descriptive geometry. When I transferred to architecture I took another<br />
course in descriptive geometry, this one different, longer, and more inclusive. The<br />
first course was geared toward drawing the intersections of geometric shapes and then<br />
unrolling the forms as though they were made of sheet metal. The second course added<br />
shade, shadow, and perspective. One of the most challenging assignments we were given<br />
was to draw the shadow of a diamond-shaped pendant hanging in cylindrical shaped niche<br />
in a wall. The upper part of the niche was spherical shaped. I wince just thinking of that<br />
assignment.<br />
<strong>Virtual</strong> <strong>Railroader</strong> - 5 - May – June 2005
Intersections<br />
For any artist trying to draw three-dimensional shapes,<br />
intersections are an important factor in describing the forms. We<br />
can see this best in nature where crystalline forms are involved.<br />
There is one form, which if presented by itself in its entirety, has<br />
no intersections. That’s a sphere, and it requires the shading<br />
provided by light to define its surface.<br />
In the real world, not the abstract one of descriptive geometry,<br />
much more is at play than intersections. I’ve already alluded to<br />
one, light; but there are more. As 3D modelers we need to<br />
examine the things that make our renderings believable. I’m going<br />
to take the idea of intersections to a more realistic level and refer<br />
to that level as transitions.<br />
Transitions<br />
Transitions include intersections, but are more complex. They are<br />
also needed in nearly all cases if we want to present something<br />
realistically. Take a cube, for example. If the cube is all brown and<br />
placed with one face resting on a horizontal plane that’s all green,<br />
we can see that the cube is sitting on the plane or suspended<br />
above the plane or coming up through the plane. We can’t<br />
distinguish among the three unless we add light and shadow.<br />
(Moreover, if the plane were tipped and the cube were suspended<br />
above the plane, we would not know either condition.) Even adding<br />
light, and assuming the plane is level, we can’t tell whether the<br />
cube is sitting on the plane or coming up through it unless we<br />
know that we’re dealing with a cube. Then we would know by the<br />
proportions of the visible object.<br />
Buildings. In real life, say a house sitting on the ground, we have<br />
familiar clues that can help us determine the exact relationship of<br />
the house and the ground. A house is generally built on top of a<br />
foundation, and a bit of that foundation pokes up through the<br />
ground to keep the wood framing of the house away from the<br />
ground, where it is likely to wick up moisture. In America we are<br />
also accustomed to surrounding our foundations with bushes,<br />
though that would not be the case with a barn.<br />
Something else happens besides light, shadow, and shading (notice<br />
the side facing the sun is a lighter shade of its color than the side<br />
not facing the sun). The ground around the house may be different<br />
in the sense that it is more worn where people walk, and is<br />
probably greener where the lawn is maintained than where the<br />
lawn is allowed to become meadow. We may also notice that<br />
variations occur in paving that surrounds a building, especially if<br />
automobile traffic is involved.<br />
<strong>Virtual</strong> <strong>Railroader</strong> - 6 - May – June 2005
Note the variations in building wall colorations from shadows, weathering, and construction; the dark<br />
line along the walls just above the water; and the vegetation growing from crevices in the walls.<br />
Nature. The most interesting transitions occur in nature. Study the<br />
transition between land and water. There are many variations. The<br />
ocean is separated from grassy areas by a rocky shore or a beach.<br />
A forest is separated from a field by various bushes and shrubs<br />
that love the forest edge but can’t survive inside the forest. Moss<br />
grows over rocks, and trees and bushes grow out of crevices in<br />
rocks.<br />
Water. Lakes, rivers, streams, and marshes all have different<br />
transitions with the surrounding dry land and are worth studying in<br />
themselves. The streams where I live tend to handle runoff water<br />
from higher elevations. The streambeds are gravelly with plenty of<br />
small stones. The lager stones are more apt to be along the edges<br />
of the stream, though the exact locations of the edges vary<br />
according to the season and the current weather. The variations in<br />
stream activity and underlying ground produce pockets of deeper<br />
water and shallower eddies, which in turn produce variations in<br />
vegetation along the banks. Trees are apt to grow along the edges,<br />
<strong>Virtual</strong> <strong>Railroader</strong> - 7 - May – June 2005
only to be undermined and felled when the banks are cut away by<br />
the rushing waters.<br />
Note the demarcation of the water and the marshy grasses. The dead tree trunks are<br />
also examples of transition where bog meets forest.<br />
Mist is also a transition.<br />
<strong>Virtual</strong> <strong>Railroader</strong> - 8 - May – June 2005
Even a still pond has some sort of delineating edge between the<br />
water and dry ground. This could be shadow from overhanging<br />
growth or reflections in the water showing the underside of the<br />
vegetation or different vegetation exposed by a lower water level.<br />
Ground cover planted at tree base is a man-made transition.<br />
Trees. Trees, as they grow older, often raise the ground in their<br />
immediate surrounding as the spreading roots come closer to the<br />
surface. Trees with spreading roots also have the tendency to drain<br />
nutrients from the surrounding lawn, leaving a browner area at the<br />
tree’s base. The reverse can also happen. A tree can shade a<br />
<strong>Virtual</strong> <strong>Railroader</strong> - 9 - May – June 2005
portion of a lawn enough to keep that portion lush while other<br />
parts of the lawn dry out in August and turn brown.<br />
Groups or groves of trees change the ground beneath them as<br />
fallen leaves or pine needles change the ground to a rusty orange.<br />
Depending on the lighting, we may also see the ground as dark<br />
from the heavy shadows that a dense group of trees, especially<br />
conifers, can create.<br />
Note how the ground rises to meet the tree.<br />
<strong>Virtual</strong> <strong>Railroader</strong> - 10 - May – June 2005
Weather. Let’s not forget the effects of long-term exposure to the<br />
weather. Barns fade and often show a marked contrast in<br />
coloration from high to low. Wood telephone poles are uniformly<br />
colored only when new. After the sun gets to them the creosote or<br />
weather-resistant compounds they are treated with begin to bleach<br />
and wash out. Such poles are lighter at the top than at the bottom.<br />
Simulations<br />
Our simulations have a way to go before they provide us with all<br />
the tools we need to create perfect renditions of scenery; but<br />
armed with a recognition of the forces at work and the variations<br />
they produce, as well as having a willingness to carefully observe<br />
our surroundings, we can find ways to improve our scenery.<br />
Start by anchoring buildings with a dark or musty spray – very<br />
lightly – around their bases. Do the same with trees. Study<br />
waterways carefully and look for ways to make a distinguishing<br />
texture between land and water. One way is to use a different<br />
green along the water’s edge. Another way is to bring the dark<br />
water bottom up onto the ground. Add minor variations to<br />
uniformly textured surfaces. If handled with a light touch, textures<br />
can be applied in semi-transparent layers.<br />
Begin to observe nature and man-made structures whenever the<br />
opportunity arises. If you can, take plenty of pictures for reference.<br />
You may have to remember a location when passing by in a car<br />
(please keep your eyes on the road!) and then come back at some<br />
more opportune time.<br />
There are so many variations in real life scenes that it’s difficult to<br />
present the subject in a less-than-general way, but I’ll be looking<br />
for opportunities to describe single settings and present them in<br />
future Field Notes articles.<br />
Al<br />
Article and screen shots ©2005 Alfred Barten. All <strong>right</strong>s reserved.<br />
<strong>Virtual</strong> <strong>Railroader</strong> - 11 - May – June 2005
The Long and Short<br />
This ‘n That<br />
By Alfred Barten<br />
Multi-document<br />
text editor<br />
Every now and then I explore the shareware world for handy<br />
utilities. The one I turned up recently is called Super NoteTab. (I've<br />
since found others like it.) Super NoteTab lets you open a group of<br />
text <strong>file</strong>s and places each one in a tab, much like the multiple<br />
worksheet idea with Excel. I mention this particularly with BVE<br />
in mind because I find that when I'm building routes I often have<br />
the route <strong>file</strong> and several object <strong>file</strong>s open at the same time, going<br />
back and forth, tinkering with adjustments. Super NoteTab is<br />
perfect for this. You can find it free at most shareware sites. Super<br />
NoteTab has a payware sibling, NoteTab Pro, that sells for $5 at<br />
http://www.ideamarket.com . The latter is faster and has a<br />
number of added features.<br />
Features I'd like<br />
to see in Trainz<br />
There are plenty of things I'd like to see in Trainz, but here<br />
are two features that rise to the top. I'm not a programmer, so I<br />
may be asking for the moon without realizing it. Still, I can dream,<br />
can't I<br />
Fine line nozzle. Oh how I wish a could texture a finite portion of<br />
the landscape grid, making a point or a small circle or even a line.<br />
<strong>Virtual</strong> <strong>Railroader</strong> - 12 - May – June 2005
The texturing seems to work like a spray gun. So, by my<br />
reasoning, if a spray gun can be narrowed down, why can't we do<br />
it with our texturing<br />
Group and lock objects. How often have you placed two or more<br />
objects together to form a third Most graphics and page layout<br />
programs let you group these objects together so they act as one.<br />
In many cases you can even lock them together so they don't<br />
come apart inadvertently while being moved. This capability would<br />
be a great addition to Trainz Surveyor.<br />
Working with<br />
widescreen<br />
I recently had a look at a widescreen laptop. Its 17-inch<br />
display was phenomenal - smooth, grainless, sharp. All those<br />
building signs and rolling stock road names were clearly legible.<br />
The widescreen, as you might expect, has a different aspect ratio<br />
than the normal screen. DirectX and OpenGL don't pick up on this,<br />
with the result that your images are elongated. I did a little<br />
investigation and found a full fix for Trainz, a partial fix for BVE,<br />
and a hint of a fix for MSTS.<br />
Trainz. The key in Trainz is to add the width and height<br />
parameters to the trainzoptions.txt <strong>file</strong>. Follow these steps:<br />
1. Open TRS2004 folder<br />
2. Open trainzoptions.txt <strong>file</strong> using Notepad<br />
3. Add a line for the width and another for the height. The<br />
following is for a 17" widescreen with 1920x1200<br />
resolution:<br />
-width=1920<br />
-height=1200<br />
4. Save the <strong>file</strong><br />
BVE. The only way to handle widescreen with BVE is to run BVE in<br />
windowed mode. This produces a disappointingly small, though<br />
sharp, image on a large screen.<br />
MSTS. I searched one forum for answers and found one person<br />
who claimed to have solved the problem by tinkering under the<br />
hood (along the lines of what you do with Trainz), but couldn't<br />
remember what he had done. I spent some time looking for things<br />
one might change in MSTS, but came up empty handed.<br />
<strong>Virtual</strong> <strong>Railroader</strong> - 13 - May – June 2005
Sample page from Rail Font catalog.<br />
Rail Fonts<br />
Benn Coifman's Rail Fonts have been around for a number of years<br />
now. I even contributed some artwork for his Transit font before I<br />
became involved in train simulation. The idea is that each font<br />
produces graphic images instead of a letters, numbers, or<br />
characters. Some of Benn's fonts, however, do produce letters, etc.<br />
These are fonts patterned after various railroads and are perfect<br />
for lettering rolling stock in Trainz, BVE, and MSTS (not to mention<br />
other simulators). The list of available railroads now includes<br />
Southern Pacific, Rio Grande, C&O, Western Maryland, New Haven,<br />
New York Central, Pennsylvania, Lehigh Valley, Union Pacific,<br />
Seaboard, Atlantic, Nickel Plate, Burlington, Illinois Central, CSX,<br />
Conrail, and Great Western Railway (England). Some of Benn's<br />
picture fonts may be useful for creating signs along the <strong>right</strong>-ofway<br />
as well. And of course there are the railroad heralds, which<br />
could come in handy for rolling stock. Benn has a full catalog and<br />
online service at his web site, http://www.railfonts.com<br />
Al<br />
Article ©2005 Alfred Barten. All <strong>right</strong>s reserved.<br />
<strong>Virtual</strong> <strong>Railroader</strong> - 14 - May – June 2005
Personal<br />
Meet Jeff Barr<br />
By John D’Angelo with Jeff Barr<br />
W<br />
hen I started using Trainz, it had just been released and the availability of<br />
custom items were at their minimum. I remember going to Trainz-Luvr.com and<br />
the Trainz Download Station for any items that I could add to my Trainz<br />
Community Edition program. One item I hungered for was a good heavyweight Pullman car,<br />
and I also hoped to find passenger cars for other class one trains such as the 20 th Century<br />
Limited. It was Jeff Barr who came to the rescue. Under the screen name of Magicland, Jeff<br />
created beautiful examples of passenger rolling stock. As seen below, this is a series of<br />
screenshots of Jeff’s 20 th Century Limited running along the Hudson River on NYOW2000’s<br />
New York City Region Route.<br />
<strong>Virtual</strong> <strong>Railroader</strong> - 15 - May – June 2005
20 th Century Limited.<br />
<strong>Virtual</strong> <strong>Railroader</strong> - 16 - May – June 2005
Jeff also created beautiful sets of Pennsylvania Railroad<br />
heavyweight Pullmans, which I gladly added to my roster of rolling<br />
stock. Seen below is a screenshot of his Pennsylvania Railroad<br />
Pullman Observation at the tail end of the Broadway Limited. I<br />
added the people for this picture.<br />
Broadway Limited.<br />
Jeff Barr has continued to contribute rolling stock for Trainz users<br />
both as freeware and payware, and has over the years greatly<br />
added to our enjoyment of Trainz. I would like Jeff to tell us about<br />
his involvement with Trainz, so let’s meet Jeff Barr!<br />
Hi there!<br />
You’ll have to excuse the paint and plaster, you’ve caught me in the middle of<br />
restoring a train station that hasn’t existed in the “real world” for over 25<br />
years (Bayonne, NJ’s West 8 th Street).<br />
I’ve always been interested in trains, and I’d always dreamed of having a<br />
large train layout, but both space and finances always seemed to keep that<br />
from happening. I’d tried various “railroad software” previously, but most<br />
were just useless junk. Even Microsoft’s Train Simulator fell short of what I<br />
wanted. It was fine if you just wanted to drive a train, but next to impossible<br />
<strong>Virtual</strong> <strong>Railroader</strong> - 17 - May – June 2005
if you wanted to build a route of your<br />
own. Then one day a copy of Auran’s<br />
Trainz fell into my hands. It was<br />
amazing. Not only could you drive the<br />
trains, but you could create the world<br />
they ran in with amazing ease.<br />
I immediately purchased a copy of my<br />
own. Of course, in those early days<br />
(Trainz 1.1) the program wasn’t without<br />
its faults. I don’t know how many hours<br />
of route creation I lost due to sudden<br />
crashes, but it was still light years<br />
ahead of anything else out there. One of<br />
the early problems was lack of<br />
equipment. Other than what came with<br />
the program, there wasn’t a heck of a<br />
lot available. Reskinning was just<br />
starting, without any instructions or<br />
tutorials, and creating content from scratch was attempted by only a few<br />
brave individuals (notably Landrvr1 and JoshEH, along with a handful of<br />
others).<br />
Driven by a desire to have items that weren’t otherwise available, I plunged<br />
into the dark and icy waters of reskinning. After many attempts (and lots of<br />
plain white or simply missing equipment) I figured out most of the required<br />
naming conventions, and had some Pennsy equipment running at home. I<br />
tried reskinning some European passenger cars as CNJ equipment, which was<br />
fine for me at the time, but not anything I wanted to share with anyone else.<br />
Then one day Josh Harvey (JoshEH) uploaded the gmax <strong>file</strong> to a GP7 that he’d<br />
done. I figured it shouldn’t be too difficult to add the standard CNJ “box”<br />
which contained the coach light generators, and after a few tries, I managed<br />
to do it. I reskinned these in both CNJ green paint schemes, with and without<br />
stripes. I believe this is among my earliest pre-SP3 content on the download<br />
station.<br />
Around this time, I<br />
also reskinned Scott<br />
Struik’s (Landrvr1) old<br />
CSS&SB interurbans<br />
as Pennsy MP54’s. Not<br />
satisfied, I asked him<br />
if I could modify his<br />
meshes, and he<br />
graciously allowed it.<br />
After many attempts<br />
at forming a suitable<br />
clerestory roof, I<br />
finally had one I was<br />
satisfied with, and<br />
released them upon an<br />
unsuspecting public.<br />
<strong>Virtual</strong> <strong>Railroader</strong> - 18 - May – June 2005
Shortly thereafter, I realized that they were too long (the whole dimension<br />
thing of gmax was foreign at the time), and planned a re-release once I’d<br />
scaled them down to the proper length.<br />
During this time, JoshEH released his BN lightweight passenger cars, which I<br />
promptly reskinned to create the 20 th Century Limited, the Phoebe Snow, and<br />
the Panama Limited. Then SP3 came along and turned the world as we knew<br />
it on end.<br />
Many items created prior to this would no longer work. The current KUID<br />
system’s usage was started, and content creators had to modify previous<br />
releases, or even those that did work would stop shortly (and did, when UTC<br />
was released). There was a LOT of old content that never did get updated,<br />
including JoshEH’s passenger cars. Of course, this left me pretty much out of<br />
business as a reskinner, as most of the things I’d skinned were either now not<br />
functioning, or were about to become defunct. I had two choices, create or<br />
quit. During this time, I’d been working to modify my MP54’s into standard<br />
heavyweight equipment, and was nearly finished with an ambitious 15-car<br />
Pennsy package, so my content creation skills were improving. I figured it<br />
wasn’t much of a leap from heavyweight to lightweight equipment (in fact,<br />
the smooth roofs made it much easier), so I went ahead and created my own<br />
replacements for JoshEH’s now outdated passenger cars. They even used the<br />
same mapping, so skins from the earlier versions would work with only minor<br />
adjustments.<br />
This was the beginning<br />
of a long period of<br />
content creation.<br />
Some items I created<br />
because I wanted<br />
them, some to update<br />
previous versions, and<br />
some just because it<br />
seemed like a good<br />
idea at the time (my<br />
Erie-Lackawanna<br />
snowplow falls into<br />
this category). Many<br />
projects were thrust<br />
upon me. When<br />
LRV3400 was unable<br />
to complete his F40PH, I volunteered to host the mesh so others could finish<br />
it. When I didn’t see that happening, I finished it myself, patching together<br />
the skin from actual photos of Amtrak engines. After a lot of work (until now<br />
I’d primarily reskinned other’s textures, rather than created them on my<br />
own), I achieved what I thought was an adequate result, though if you<br />
compare that version against the recently released update, they’re like night<br />
and day. Upon completion of that, I realized there was nothing to run behind<br />
it, and set about making my most ambitious project to date, the Amfleet cars.<br />
Due to their uniquely curving bodies, they were a challenge to get correctly.<br />
Fortunately, I found a photo of one from the end, which detailed the curves<br />
fairly well. I used this as the basis for the end, and simply extruded the body<br />
<strong>Virtual</strong> <strong>Railroader</strong> - 19 - May – June 2005
from there. I also had to create the bogies from scratch, as there was nothing<br />
like the Pioneer 2 bogies they used then in existence for Trainz. One of the<br />
difficulties of creating for Trainz is that sooner or later you need to make<br />
something but don’t know how to make, and you have to spend a lot of trial<br />
and error learning. Somewhere in there I also took a crack at signaling,<br />
creating the old PRR style signals used on the NEC in the days prior to<br />
Amtrak’s taking it over.<br />
During this period, I spent so much time on content creation that I wasn’t<br />
doing anything else with Trainz. All the route creation that I loved I didn’t<br />
have time for, so I was determined to get back to it. I started on a project<br />
that allowed nice, long passenger runs. Creating the terminal for one end of<br />
the route, I decided that I’d like it to serve both long distance passengers and<br />
commuter rail, so I could run a few subway cars I’d recently created as well,<br />
even if they had to run on the surface. Of course, one thing led to another,<br />
and before I knew it I was neck deep in creating a subway system for Trainz.<br />
One of the problems with Trainz is that the technology keeps evolving. While<br />
this is great for the end users, it’s a huge headache for content creators. As I<br />
was nearing completion of my subways (by then labeled the “Subway<br />
Construction Set”), Auran came out with TRS2004, which promised passenger<br />
support. Around this time I was also finishing up my Budd RDC’s, which I<br />
made after getting tired of waiting several years for Auran to release theirs.<br />
That took priority over the “SCS,” as Auran was also about to release their<br />
content CD’s, which included their unfinished RDC’s, and as I’d put a lot of<br />
time into my own, I didn’t want to be finally eclipsed by what I built them to<br />
replace. SP2 finally<br />
came out with the<br />
promised passenger<br />
support, six months<br />
late. After a lot more<br />
trial and error figuring<br />
out how passengers<br />
and animated doors<br />
worked, I added these<br />
features to my RDC’s,<br />
and released them.<br />
Unfortunately, the<br />
“SCS” took another<br />
hit.<br />
I’d designed its stations as modular splines that you could simply snap<br />
together in any assortment you liked. There were start modules, exit<br />
modules, end modules, modules with girders, modules without girders,<br />
everything you’d need to build a large number of stations without them all<br />
looking alike. Unfortunately, you can’t load passengers from splines, so to<br />
make the subways passenger-interactive, it would take a complete redesign<br />
of the station methods, a task which is still ongoing, though nearing<br />
completion now.<br />
Often projects get sidelined for reasons that the average end user doesn’t<br />
know, or other things come along that rate a higher priority. Then, there are<br />
just some things that kick around the workshop even though they’ve been<br />
<strong>Virtual</strong> <strong>Railroader</strong> - 20 - May – June 2005
finished for quite a while, as the items they’re meant to support aren’t ready.<br />
I’ve had subway signals and switches completed for over a year, but haven’t<br />
released them yet. I just recently released the subway track that I made<br />
when I created my first subway car. Eventually, with any luck, most of it will<br />
see the light of day.<br />
Old projects need to be updated. New projects pop up. And I’m finally<br />
working on that route I wanted to build for so long. This time it’s a<br />
prototypical route, which is perhaps the most diverse in the entire country (if<br />
not the world). It’s seen steam, electric and diesel operation, passenger and<br />
freight, operated by 2 class 1 railroads at the same time (the CNJ and the<br />
PRR); heavyweight coaches, lightweight coaches, streamlined coaches, even<br />
old and new electric MU’s trod its rails, often all at the same time.<br />
Just about every engine owned by the CNJ, the PRR, and even some others (a<br />
few old Southern Railroad E8’s, once used on the Southern Crescent, called it<br />
home prior to their retirement). Cars painted for the CNJ, PRR, Great<br />
Northern (in both Empire Builder and Big Sky Blue), Burlington Northern, and<br />
even an old FEC observation car worked it regularly, in combinations on the<br />
same trains. It’s a labor of love, but not without its own challenges. At the<br />
moment, I need a 2-track swing bridge to cross the Raritan River, and<br />
wouldn’t you know it, one doesn’t exist for Trainz. Looks like I’m headed back<br />
to the ol’ drawing board once again…<br />
Thanks Jeff, I appreciate your taking the time to give us a good<br />
insight into all the effort that creators make when they bring new<br />
custom items for us users. Perhaps when we download something<br />
that took many hours to create, we’ll be able to not take it for<br />
granted, but say THANKS!<br />
John<br />
Article ©2005 John D’Angelo and Jeff Barr.<br />
Screen shots ©2005 John D’Angelo. All <strong>right</strong>s reserved.<br />
<strong>Virtual</strong> <strong>Railroader</strong> - 21 - May – June 2005
Trainz Operations<br />
The Razorback Railway<br />
By Steve Legge<br />
T<br />
he Razorback Railway is, in it’s own words, the “World’s First <strong>Virtual</strong> Railway for<br />
Trainz…” that is, put simply, a collection of scenarios that one can run with Auran’s<br />
Trainz. And yet, it is so much MORE than that. This is a web site built around a<br />
fictional Australian-themed layout spread over 230 kilometres of Australian landscape.<br />
Now, lets get one thing straight before we go much further. If you are as much a train sim<br />
fan as I am, you can expect to lose HUGE amounts of your free time travelling the many<br />
routes available on the Razorback.<br />
Schematic diagram of Version 6.<br />
<strong>Virtual</strong> <strong>Railroader</strong> - 22 - May – June 2005
Driving<br />
You can use this layout in one of two ways.<br />
You can download the layout and, using Trainz Surveyor, place<br />
your own consists and create your own activities using the interactive<br />
industries already there. Or…<br />
You can just run various scenarios available from the Razorback<br />
site as a driver. These activities place you in the cab of, say, an<br />
Endeavor passenger consist, with your task being to travel from<br />
Altona to Apollo Bay, keeping to the time-table, and travelling with<br />
the safety and comfort of the passengers in mind. Points are<br />
deducted from your overall score at the end of the scenario if any<br />
of these parameters are breached.<br />
Once you have completed that activity, you might find that your<br />
next “task” is to take a long-haul coal run from the Goldex mine to<br />
the Port Hunter terminal, running an 82 Class Diesel-Electric, or a<br />
couple of huge GP38’s heading a 30-truck consist loaded with<br />
export quality coal. Slow and steady on this one!!!<br />
The next job may have you hauling timber from Freidman Forest to<br />
Rutherton Mill, all in the pouring rain – and at night!<br />
All these activities, (and there are over fifty of them at last count,<br />
with more being added regularly) take between 20 minutes and a<br />
couple of hours real time. In most of the scenarios, the time clock<br />
is sped up to enable a realistic time frame. And it’s your choice of<br />
whether you drive in the cab with realistic controls and levers, or<br />
settle for the easier DCC mode, using your keyboard buttons.<br />
Obviously, cab control is much more difficult, but some drivers will<br />
use no other method. This is what driving a train is all about!<br />
Super Freighter cab.<br />
<strong>Virtual</strong> <strong>Railroader</strong> - 23 - May – June 2005
Dispatcher page<br />
Membership<br />
The “Dispatcher” page is where you are issued “tasks”, whereby<br />
you are given a unique starter code to enable to you begin each<br />
scenario. When you have completed the task, a finishing code is<br />
given; this is then submitted to the Dispatcher so that a record is<br />
kept of all your completed (or failed) tasks. You can have as many<br />
practice runs on each task as you like, until you are happy with<br />
your final result.<br />
The Razorback Railway is free to join; all that’s required is<br />
registration and preferably the latest version of TRS2004 on your<br />
computer. There is a range of forums available, ranging from<br />
FAQ’s, to in-depth discussions and help for the scenarios, and<br />
general Trainz chat. There’s also a “First Class Club Lounge”,<br />
available only to Razorback Access members. As I have mentioned,<br />
membership is free, however, purchasing an Access membership<br />
(available at the Shop) for a nominal fee enables you to get<br />
advanced access to the latest scenarios, plus priority help if you<br />
have a problem with your scenario. You simply go to the activity<br />
page and raise a “problem” ticket. Also at the shop are CD’s and<br />
membership renewals.<br />
Razorback Railway home page.<br />
<strong>Virtual</strong> <strong>Railroader</strong> - 24 - May – June 2005
So, if your thing is to design and create your own unique layouts,<br />
then Surveyor is for you. But if you want to just sit in the cab and<br />
drive, then the Razorback Railway is just the place for you! All this<br />
and more is available at http://www.razorbackrailway.com<br />
Steve<br />
Article and screen shots ©2005 Steve Legge. All <strong>right</strong>s reserved.<br />
<strong>Virtual</strong> <strong>Railroader</strong> - 25 - May – June 2005
Trainz Feature<br />
A Pair of Museum Routes<br />
By Alfred Barten<br />
Completion of the return run from Stockdale to Blantyre.<br />
H<br />
ave you ever tried to demonstrate the wonders of Trainz to someone only to realize<br />
that with a little better organization and preparation you could have made a killer<br />
presentation instead of just a good one (By the way - there are no bad<br />
presentations with Trainz.)<br />
I’ve wrestled with the question and finally decided to create a pair of layouts I could count<br />
on. One is for standard rail; the other for trolleys. Both are in a museum setting, which<br />
provides advantages in size, scope, operation, choice of rolling stock, and expansion.<br />
The layouts are the same, except the trolley route adds turning<br />
loops at each end. In essence, the museum run consists of two<br />
stops, about ¾-mile apart. Operation is out and back. For the Rail<br />
Museum route the locomotive disengages at each stop and runs<br />
around the train to be at the head end for the return trip. For the<br />
Trolley Museum route the trolley just runs around the loop.<br />
<strong>Virtual</strong> <strong>Railroader</strong> - 26 - May – June 2005
Stockdale<br />
Station<br />
Viaduct<br />
Expansion<br />
Rail Museum Route<br />
Blantyre<br />
Station<br />
Industry<br />
Flanking the museum in each case is a two-track viaduct with<br />
portals at each end. I use the viaduct to provide background trains<br />
running in AI mode. Adjoining the museum is a local branch line<br />
freight operation to serve the neighboring industries. The museum<br />
can be thought of as operating over a section of the branch line.<br />
Turning<br />
loop<br />
Expansion<br />
Trolley Museum Route<br />
Turning<br />
loop<br />
<strong>Virtual</strong> <strong>Railroader</strong> - 27 - May – June 2005
I’ve added a lot of little things to each layout that will become part<br />
of the demos. These include track markers for use as destinations,<br />
speed signs to keep automatic train moves at realistic speeds, and<br />
cameras to enable attractive hands-off viewing. I preset track<br />
switches to let automatic operation, especially with trolleys, follow<br />
a prescribed route. The trolleys will track through a trailing switch<br />
regardless of which way the switch is thrown, thus you only need<br />
to be concerned with divergent switches. I also turned off the<br />
online help. Now I don’t have to turn it off each time I go into<br />
Driver mode.<br />
Turning loops are perfect for automatic trolley running.<br />
Portals<br />
The portals at each end of the viaduct need to be programmed<br />
before you can use them. John D’Angelo has covered portals in<br />
detail in previous articles (see “Portals to fun” VMRJ 15 May 2004<br />
and “George’s Gorge Basic Edition for <strong>Virtual</strong> <strong>Railroader</strong> Readers”<br />
VR March-April 2005) so I’ll just give an outline here.<br />
Remember, portals are treated by Trainz as objects. Open the<br />
Objects palette in Surveyor, select the “Get object ‘G’ ” tool, and<br />
<strong>click</strong> on a portal. Now select the “Edit properties ‘N’ ” (question<br />
mark) tool on the palette and <strong>click</strong> the portal. The Properties sheet<br />
displays.<br />
You can experiment with different settings. For the portals with<br />
“In” as part of their names (<strong>right</strong>-hand tracks), all you need to do<br />
<strong>Virtual</strong> <strong>Railroader</strong> - 28 - May – June 2005
is select “Consume trains” and “Accept all trains”. (If you are<br />
programming for use in countries where it is normal to drive on the<br />
left, you can reverse my left-hand and <strong>right</strong>-hand comments.)<br />
For portals with “Out” as part of their names, you will want to<br />
select “Produce new trains” (I set 3-minute intervals in one<br />
direction and 4-minute intervals for the other direction. That way I<br />
avoid any obvious pattern as to meeting place on the viaduct.) You<br />
can have a random selection of different trains if you like. My rapid<br />
transit trains are all alike.<br />
I find it easiest to have previously created and <strong>save</strong>d consists for<br />
ready selection. You will also need to select a driver from the list in<br />
order to issue instructions. I just use the “Drive to South In” or<br />
“Drive to North In” command depending on which portal I’m<br />
programming. You can get fancy and have a train stop at some<br />
point and wait, but in order to do so will need to insert a track<br />
mark somewhere along the viaduct for each track.<br />
A museum theme provides a good excuse for running (left to <strong>right</strong>) a PCC car, a Peter Witt, a pair of<br />
British double deckers, and an articulated LRV. Note the rapid transit train on the viaduct.<br />
<strong>Virtual</strong> <strong>Railroader</strong> - 29 - May – June 2005
Operation<br />
Driver commands. Right-<strong>click</strong> the locomotive to bring up a list of<br />
commands. You can issue commands one at a time for execution<br />
or you can build a string of commands to be performed in<br />
sequence. When setting up a sequence, begin with the “Wait for >”<br />
command and select enough time to let you enter the remaining<br />
commands before the action begins.<br />
For the Rail Museum route you can use the following sequence:<br />
Wait for > 30 seconds<br />
Drive To Trackmark > Stockdale West<br />
Wait for > 10 seconds<br />
Run Around Train<br />
Drive To Trackmark > Blantyre T1 M<br />
Wait for > 10 seconds<br />
Run Around Train<br />
<strong>Virtual</strong> <strong>Railroader</strong> - 30 - May – June 2005
For the Trolley Museum route you can use the following sequence:<br />
Wait for > 30 seconds<br />
Drive To Trackmark > Stockdale West<br />
Wait for > 5 seconds<br />
Drive To Trackmark > Stockdale East<br />
Wait for > 5 seconds<br />
Drive To Trackmark > Branch Line Jct<br />
Drive To Trackmark > Blantyre Loop<br />
Drive To Trackmark > Blantyre T1 M<br />
<strong>View</strong> points. Four views are available: Cab <strong>View</strong>, External <strong>View</strong>,<br />
Tracking <strong>View</strong>, and Free Roaming. I generally demonstrate the first<br />
three. For the Cab <strong>View</strong>, though, you will want to make sure your<br />
loco has a good cab interior. I find the GE 44T diesel switchers by<br />
Eric Stork are good. I also like the RDC’s by Magicland. I<br />
encountered a nonfatal stack dump error when using the RDC’s<br />
and the NYCTA Low-V subway cars (on the viaduct), which I “fixed”<br />
by removing the offending “lights” script. The procedure is<br />
described at the end of the article.<br />
Cab view from a GE 44 ton diesel switcher.<br />
Manual control. You can operate the museum trains in manual<br />
mode and even select different pieces of equipment to run. Another<br />
<strong>Virtual</strong> <strong>Railroader</strong> - 31 - May – June 2005
option is to set the museum trains running with a string of<br />
commands and then jump over to the freight operation and switch<br />
cars manually. With the Trolley Museum layout you can just set a<br />
car going and ignore it. The turning loops take care of everything<br />
else.<br />
Layout extension<br />
One thing I like to show is how easy it is to build routes. Both<br />
demo routes are designed to be extended by simply adding a new<br />
baseboard to the west side. You can extend the freight line track<br />
and the museum track at Stockdale, each in their own fashion, or<br />
you can join them for continuous running. In any case, the<br />
following are things I like to show when extending the route, which<br />
I <strong>save</strong> to a new name before extending:<br />
Switches<br />
Tunnel<br />
Water<br />
Cut and fill<br />
Portal<br />
Placing buildings and scenery<br />
Placing object splines<br />
Texturing<br />
Placing cameras<br />
If you expand your route you may want to consider running the<br />
freight line into a portal. You can send freight trains to the portal<br />
as you please, and have new ones appear as you please by using<br />
the “Emit Train Now” rule (see John D’Angelo’s Download Gold<br />
article in this issue entitled “Now For Something Completely<br />
Different!”)<br />
Dependencies<br />
The two layouts should be available at the Trainz Download Station<br />
(DLS) by the time you read this. All dependencies other than the<br />
ones built into Trainz TRS2004 are available from the DLS.<br />
<strong>Virtual</strong> <strong>Railroader</strong> - 32 - May – June 2005
Fixing some rolling<br />
stock problems<br />
In testing the routes, I discovered that two classes of train cars<br />
caused nonfatal stack dump errors. One group was the Budd RDC<br />
cars by Magicland; the other was the NYCTA Low-V subway car,<br />
also by Magicland. Both have a problem with a script involving<br />
lights. Specifically, the cars have red running lights at both car<br />
ends. The script turns the lights off at whichever end is considered<br />
front. (The end can be toggled in the cab-view mode by pressing<br />
the Alt-C key combination.)<br />
I solved the stack dump error problem by taking the script out of<br />
play. That means the red running lights now are on at both ends<br />
and at all times, but I find it preferable to being interrupted by<br />
error messages. Both cars are useful for the demo, especially the<br />
RDC’s since there is no suitable American substitute (British users<br />
can use the GWR AEC cars).<br />
Here’s how to modify the cars:<br />
Locate proper config.txt <strong>file</strong><br />
1. Follow this path to open the Downloads folder:<br />
Auran\TRS2004\World\Dispatcher\Downloads\<br />
2. Locate the folder of the car in question. These are the ones I’m<br />
concerned with:<br />
kuid 58843 150 (New York Central RDC)<br />
kuid 58843 151 (Central of New Jersey RDC)<br />
kuid 58843 155 (New Haven RDC)<br />
kuid 58843 310 1 (NYCTA Low-V)<br />
Modify config.txt <strong>file</strong><br />
3. Open the folder and, using Notepad, open the config.txt <strong>file</strong><br />
4. Locate the line:<br />
script “lights”<br />
Insert a semi-colon at the start of the line, turning the line into<br />
a comment:<br />
;script “lights”<br />
5. Save the <strong>file</strong>.<br />
Enjoy the ride!<br />
Al<br />
Article and screen shots ©2005 Alfred Barten. All <strong>right</strong>s reserved.<br />
<strong>Virtual</strong> <strong>Railroader</strong> - 33 - May – June 2005
Trainz Feature<br />
Let’s Get That Waterfall Flowing!<br />
By John D’Angelo<br />
Animated waterfall at George’s Gorge.<br />
I<br />
n the March-April issue of <strong>Virtual</strong> <strong>Railroader</strong> we introduced a free route, called<br />
George’s Gorge, which could be downloaded from our site. The route was designed so<br />
that it would have no custom items, using only standard issue track and scenery<br />
items from the basic TRS2004 program. The route is still available. It is a minimalist route,<br />
although generous in size, to allow the person with the slowest running acceptable<br />
computer to run the program without frame rate problems. It is also a teaching tool.<br />
Our plan is to add scenery and other items to the route over time<br />
and to describe the process so that anyone who has the route can<br />
read the article, and then add the custom items themselves if they<br />
wish. For this issue of <strong>Virtual</strong> <strong>Railroader</strong> we will create an animated<br />
waterfall under the high trestle at George’s Gorge.<br />
<strong>Virtual</strong> <strong>Railroader</strong> - 34 - May – June 2005
Original cliff.<br />
The original cliff under the trestle only had texturing that came<br />
with TRS2004 and no waterfall animation. We will now redraw the<br />
textures with new textures that are available from the Trainz<br />
Download Station (DLS). After we are finished texturing the cliff we<br />
will then add the animated waterfall effect. For the waterfall<br />
texturing I chose the following textures created by atsfrr3000:<br />
Waterfall01<br />
Waterfall02<br />
Waterfall03<br />
KUID:89219:100026<br />
KUID:89219:100027<br />
KUID:89219:100028<br />
For the rock look I chose:<br />
Greystone Crack<br />
KUID -1:1007 (Standard Issue)<br />
The animated waterfall effect and the rowboat are by Vulcan:<br />
Waterfall Effects<br />
Rowboat<br />
KUID:60238:27146<br />
KUID:60238:26141<br />
<strong>Virtual</strong> <strong>Railroader</strong> - 35 - May – June 2005
OK, let’s get going!<br />
The George’s Gorge route came with standard issue sky and this is<br />
an excellent time to give that sky some extra spark. My favorite<br />
sky look is called Golden October by CAB (KUID: 60349:21004).<br />
After downloading it from the DLS you can select the sky using the<br />
world menu.<br />
Golden October sky.<br />
The very next thing to do is to clear some water from the bottom<br />
of the cliff. This will enable you to see better when you place the<br />
waterfall effect and the rowboat.<br />
<strong>Virtual</strong> <strong>Railroader</strong> - 36 - May – June 2005
Clearing away the water.<br />
OK, the water’s been pulled back, the sky looks good; it’s time to<br />
paint!<br />
<strong>Virtual</strong> <strong>Railroader</strong> - 37 - May – June 2005
Painting in the textures.<br />
Painting in textures is a subjective process, and you may decide to<br />
try things differently for your own pleasure. For this scene I first<br />
used the water texture with the striping and rotated it using the<br />
“direction” arrow so that the striping effect was vertical. I then<br />
“fogged in” the other two water textures until I felt I had a decent<br />
balance of water look. It’s a bit of a trial and error process. Finally I<br />
used the rock texture to darken the rocks in the front of the<br />
waterfall to give depth to the image. I used the smallest radius for<br />
my paintbrush to do my painting and I really hope that someday<br />
Auran can create a very sharp and narrow brush effect.<br />
Adding the<br />
waterfall effect<br />
The waterfall effect is one of my favorite devices for adding the<br />
illusion of falling water/mist. When you add it to the route it<br />
appears as an icy rock with a curved mist of water that moves<br />
down from above. It can be moved up or down using the height<br />
adjust tool, back and forth and rotated to any angle. This gives you<br />
complete freedom to adjust the stream to fit any area as you wish.<br />
It also includes a rushing water sound effect which makes it very<br />
effective. Nice job, Vulcan!<br />
<strong>Virtual</strong> <strong>Railroader</strong> - 38 - May – June 2005
All the waterfall units are added.<br />
As you can see from the above picture, I have added four<br />
individual waterfall units. I will now fit them into the scene by<br />
rotating them and lowering them for the effect I want.<br />
<strong>Virtual</strong> <strong>Railroader</strong> - 39 - May – June 2005
The first unit has been rotated.<br />
The units have been rotated, moved into the cliff and lowered.<br />
<strong>Virtual</strong> <strong>Railroader</strong> - 40 - May – June 2005
You need to move the units into the cliff so that the tops of the<br />
water spray look like they’re coming from the cliff. If you don’t<br />
move them far enough in, the spray will look like it is starting from<br />
mid-air, and this will hurt the illusion. Using a side view will help<br />
the process. When you lower the units into the ground to get the<br />
effect you want on the cliff, sometimes the base will be totally<br />
underground. I switch to wire frame mode at this point to make<br />
any further adjustments of the units’ bases.<br />
Wire frame mode.<br />
I placed three units against the cliff and the fourth unit directly in<br />
front of the second unit, but dropped down in order to give that<br />
stream a tumbling out effect.<br />
<strong>Virtual</strong> <strong>Railroader</strong> - 41 - May – June 2005
Adding the rowboat.<br />
To add the rowboat, I place it on the riverbed before I put back the<br />
water and, by using the height adjust tool, raise it above the level<br />
the water will be. I then add back the water.<br />
<strong>Virtual</strong> <strong>Railroader</strong> - 42 - May – June 2005
Lowering the boat to the water.<br />
I use the height adjust tool and lower the rowboat until I see water<br />
in the bottom of the boat, then raise it until the water disappears<br />
from the bottom.<br />
<strong>Virtual</strong> <strong>Railroader</strong> - 43 - May – June 2005
The gorge in winter.<br />
For this winter scene of the waterfall, I changed the water textures<br />
a bit to make the water look colder and changed the sky from<br />
October to January. A little light snow and we have a nice winter<br />
view.<br />
One important note: Don’t forget to <strong>save</strong> your route after doing<br />
your work! My wife called me as I finished building the scene in the<br />
article, and I exited the route without saving it! I’ll be going back<br />
to rebuild it and it will most probably be a little different when I get<br />
finished, but that’s the fun!<br />
John<br />
Article and screen shots ©2005 John D’Angelo. All <strong>right</strong>s reserved.<br />
<strong>Virtual</strong> <strong>Railroader</strong> - 44 - May – June 2005
BVE Extra<br />
Converting Older Trains to Use BVE 4 Timetables<br />
By eezypeazy<br />
Enlarged timetable.<br />
V<br />
ersion 4 of BVE, Mackoy’s superb freeware railway simulator, was released in<br />
January this year. There’s no doubt that it provides a superior driving experience<br />
compared to the earlier version.<br />
However, to take advantage of many of the improvements, the army of volunteer<br />
developers around the world will need to either develop new BVE 4 compatible trains or<br />
make significant amendments to their existing work.<br />
How it works<br />
Probably the feature that most simmers need is the BVE timetable.<br />
BVE 4 works differently from BVE 2. It uses a bitmap image of the<br />
timetable, which can only be displayed in compatible train cabs. So<br />
I delved into how BVE 4 works with existing trains, to see how I<br />
could resolve the problem to make trains display the timetable.<br />
I found that BVE 4 needs an extra <strong>file</strong> in the train folder, named<br />
panel2.cfg. This <strong>file</strong>, in fully compatible trains, contains all the<br />
statements needed to make not just the timetable, but also all the<br />
other features, such as AWS, work properly. I felt that all these<br />
<strong>Virtual</strong> <strong>Railroader</strong> - 45 - May – June 2005
extras were beyond my ability at the moment – all I wanted to do<br />
was get the timetable working!<br />
When you run BVE 4, if it fails to find a panel2.cfg <strong>file</strong> for your<br />
train, it creates a temporary one in a temporary folder. My<br />
machine runs Windows XP with SP2, so the temporary folder is<br />
created in c:\documents and setting\username\local……\bve. If you<br />
watch the text at the bottom of the window as BVE 4 loads, you’ll<br />
see where this folder is on your machine. As well as creating the<br />
panel2.cfg <strong>file</strong>, BVE 4 also creates the bitmaps it needs for the cab<br />
to work properly, and places these in the temporary folder as well.<br />
So, all you need to do is copy the contents of that folder, and paste<br />
them into your train folder. Beware – this will overwrite some of<br />
the cab bitmaps with new ones, which are also larger <strong>file</strong>s.<br />
Tips<br />
Tip 1 Run BVE4 in windowed mode, so that while it’s running you<br />
can go to the temporary folder to get its contents. If you run full<br />
screen, when you exit BVE 4, the contents of the temporary folder<br />
gets deleted!<br />
Tip 2 Before you start, make a copy of your trains, so that if<br />
anything goes wrong, you can revert to them!<br />
Tip 3 This fix works for me in most routes. I don’t guarantee it to<br />
work at all, nor can I accept responsibility should it not work, or<br />
cause any damage of any kind… be warned!<br />
Next time you run BVE 4 it will use the panel2.cfg and bitmap <strong>file</strong>s<br />
in your train folder, rather than making temporary ones.<br />
Next step<br />
The next thing to do is to modify the panel2.cfg <strong>file</strong> to enable your<br />
train to display BVE 4 timetables. You do this by adding a<br />
[timetable] statement, which should look something like this:<br />
[Timetable]<br />
Location = 300, 300<br />
Width = 128<br />
Height = 128<br />
Layer = 15<br />
Location is measured from top <strong>right</strong>. The example shown above<br />
draws the timetable starting at a point 300 down the screen and<br />
300 across. Precisely where you want the timetable to appear is a<br />
matter of personal choice.<br />
Width and Height are the dimensions in which the bitmap will be<br />
displayed.<br />
Layer is the picture layer in which the image will be displayed. 15<br />
is topmost, so it makes sense to use that number.<br />
<strong>Virtual</strong> <strong>Railroader</strong> - 46 - May – June 2005
And there you have it. The next time you run BVE 4, your train will<br />
be able to make use of the timetable, assuming you are using a<br />
BVE 4 compatible route, properly coded and including the timetable<br />
bitmap.<br />
Cab view without timetable modification.<br />
Timetable added<br />
to display<br />
Cab view with timetable modification.<br />
Copy<strong>right</strong> issues<br />
Next, I faced the problem of copy<strong>right</strong>. Obviously, the original<br />
authors retain all <strong>right</strong>s to their work, and this must be<br />
acknowledged and respected. There are some marvelous trains out<br />
there! By publishing this “how to”, I’m simply telling you how you<br />
can “switch on” BVE 4 timetables. However, to make it easier, I’ve<br />
added some “update” <strong>file</strong>s to my web site. Here, you can download<br />
the extra <strong>file</strong>s you will need that I’ve created as above – simply<br />
extract them into your train folders! But, YOU MUST DOWNLOAD<br />
THE ORIGINAL TRAINS FROM WHEREVER THE AUTHORS HAVE<br />
<strong>Virtual</strong> <strong>Railroader</strong> - 47 - May – June 2005
THEM HOSTED. If I were to distribute the original <strong>file</strong>s, I would be<br />
most definitely breaching intellectual property <strong>right</strong>s, which I am<br />
not prepared to do.<br />
The trains I’ve produced extra <strong>file</strong>s for so far are:<br />
Class 104 DMU<br />
Class 156 Sprinter DMU<br />
Class 43 HST<br />
Virgin Voyager class<br />
Class 87<br />
… and that’s merely because these are my favourite trains.<br />
Now, how about having a go yourself at doing other mods, such as<br />
working windscreen wipers, AWS, etc, etc….<br />
Enjoy!<br />
eezypeazy<br />
Article and screen shots ©2005 eezypeazy. All <strong>right</strong>s reserved.<br />
<strong>Virtual</strong> <strong>Railroader</strong> - 48 - May – June 2005
In Transit<br />
Tramming in Amsterdam<br />
By Alfred Barten<br />
“T<br />
hat’s Centraal Station … This is the Red Light District … Next will be<br />
Rembrandtsplein.”<br />
A member of my audience was identifying – even anticipating – the locations<br />
along the route. I was showing a small group of museum representatives the<br />
potential of Trainz, and had chosen Jan Andree’s Amsterdam routes as samples because<br />
they had so much life and interest in them – a huge contrast with the Microsoft Train<br />
Simulator route I had just shown.<br />
I had been to Amsterdam for 5 days back in 1990 and had ridden<br />
the trams as much as I could during that time without missing the<br />
many other sights. Since I was curious about the accuracy of this<br />
person’s prediction I quickly pressed the M key to have a look at<br />
the map.<br />
Guess what He was <strong>right</strong> on the nose!<br />
And that’s what I would say about Jan’s routes: <strong>right</strong> on the nose.<br />
These are beautiful and great fun to drive. The streets are filled<br />
with vehicles, people, and sounds; and lined by small shops and<br />
apartments. At first I assumed the routes were an approximation,<br />
but when I checked Route 4 on my Amsterdam street map I<br />
realized that the routes were in accordance with the prototype.<br />
Routes and trams<br />
The two routes go by the names AmsterdamTram 4 and<br />
Amsterdam Tram 4 SP2. Both are available at the Trainz Download<br />
Station (DLS).<br />
AmsterdamTram 4 is the earlier of the two and a bit smaller. It<br />
comes as a basic route that you place trams on in Surveyor and<br />
then run in Driver. Amsterdam Tram 4 SP2, which I’ll cover in a<br />
second part of this article, comes as a route you run in Driver with<br />
sessions already set up. It takes advantage of Trainz’s ability to<br />
load and unload passengers. In order to run it properly you will<br />
need Max Moire’s Tram and Beiwagen trailer. In runs that I’ll<br />
illustrate later, I selected the nighttime run to contrast with the<br />
daytime run in the first route.<br />
<strong>Virtual</strong> <strong>Railroader</strong> - 49 - May – June 2005
For AmsterdamTram 4, I like to drive the PCC cars or Boston’s<br />
Type 7. The reason is that both have credible, though not quite<br />
correct (as another member of the audience pointed out), cab<br />
views. Both of these cars and their variations are available at the<br />
DLS. The same cab view that’s used for the PCC and Type 7 is also<br />
used by the Muni LRV. Unfortunately, the cab view and exterior in<br />
this case are clearly out of sync with each other.<br />
RAI<br />
Centraal<br />
Station<br />
AmsterdamTram 4 map.<br />
The PCC is not entirely out of place in a European setting. Though<br />
the European PCCs were typically narrower than the American<br />
ones, they at least had a family resemblance.<br />
The LHB69_Tram Gt6 1969 tram by Cosey is perfect for the<br />
setting, and has a full interior with driver; but I had trouble with<br />
the cab view. I also found that the cab view of the Max Moire’s<br />
tram doesn’t agree with the car’s exterior. I use both cars in AI<br />
mode since they fit the scene so well.<br />
As long as I’m being fussy, I should point out that the Boston PCCs<br />
are incorrectly named “Type 5.” Boston cars are given a “Type”<br />
designation only if they are unique to Boston. PCC cars were<br />
certainly not unique to Boston. Neither were the Boeing LRVs,<br />
which I’ve seen labeled in the MSTS world as Type 6. The real<br />
Boston Type 5 was a semi-convertible car produced from 1922<br />
through 1927 and the real Type 6 never made it to production,<br />
being preempted by Boston’s purchase of the Boeing cars. There is<br />
a front-end mockup of the planned Type 6 at the Seashore Trolley<br />
Museum in Kennebunkport, Maine. From an appearance point of<br />
view, I’m sorry the Type 6 never came to fruition.<br />
<strong>Virtual</strong> <strong>Railroader</strong> - 50 - May – June 2005
If you have the payware route Modula City 2004, you can use the<br />
two trams that come with the route. The seven-section ultra low<br />
floor NF10 Silverline has a beautiful cab with working speedometer<br />
and full view of the road ahead. After purchasing Modula City 2004,<br />
the Silverline is my tram of choice for Amsterdam.<br />
For Amsterdam pictures and roster listing, see this page from the<br />
nycsubway.org web site.<br />
Available models<br />
Here are some route and rolling stock listings.<br />
AmsterdamTram 4 route and suggested trams<br />
Name Author KUID Source<br />
AmsterdamTram 4 Jan Andree 45977:100001 DLS<br />
LHB69_TramA Cosey 112820:100:1 www.bahnwerk.com<br />
LHB69_TramB Cosey 112820:101:1 www.bahnwerk.com<br />
TYPE5 MBTA Green 1 Damon Smith 32871:320 DLS<br />
TYPE5 MBTA Green 2 Damon Smith 32871:330 DLS<br />
TYPE5 MBTA Red 1 Damon Smith 32871:350 DLS<br />
TYPE7 MBTA Original A Damon Smith 32871:100 DLS<br />
TYPE7 MBTA Original B Damon Smith 32871:101 DLS<br />
TYPE7 MBTA Repaint A Damon Smith 32871:110 DLS<br />
TYPE7 MBTA Repaint B Damon Smith 32871:111 DLS<br />
For the Amsterdam Tram 4 SP2 route, you must have Max’s Tram<br />
and Beiwagen.<br />
Amsterdam Tram 4 SP2 route and required rolling stock<br />
Name Author KUID Source<br />
Amsterdam Tram 4 SP2 Jan Andree 45977:101468 DLS<br />
Strab, mit 4,7 m hohem Lyra-Bügel<br />
(Tram)<br />
Max Moire 50861:12:0 www.bahnwerk.com<br />
Strab, Beiwagen Max Moire 50861:10006:0 DLS<br />
When you go to Max Moire’s super German web site,<br />
www.bahnwerk.com, select Deutsche Loks, then Elektrischer<br />
Antrieb. Scroll down till you find the section labeled<br />
<strong>Virtual</strong> <strong>Railroader</strong> - 51 - May – June 2005
Strassenbahnen. Here you will find a number of German trams,<br />
some payware and some freeware.<br />
The following table lists the many trams I’ve found available for<br />
TRS2004, but excludes those listed in the other tables. There’s no<br />
sure way of knowing whether or not I’ve got them all, so I<br />
apologize for any I may have missed.<br />
Other trams for TRS<br />
Name Author KUID Source<br />
Peter Witt Streetcar John Hull 316:10 DLS<br />
LRV MUNI A Damon Smith 32871:220 DLS<br />
LRV MUNI B Damon Smith 32871:221 DLS<br />
Strab 1 (yellow) Max Moire 50861:1 DLS<br />
Strab 2 (blue) Max Moire 50861:2 DLS<br />
TRAM – 4Wheel ClBalcClCab Alan G Smith 62391:71 DLS<br />
TRAM - Balcony Bogie - Hudds #71 Stephen Brook 84912:71:2 DLS<br />
TRAM - Balcony Bogie - Hudds #72 Stephen Brook 84912:72:2 DLS<br />
TRAM - Balcony Bogie - Hudds #73 Stephen Brook 84912:73:2 DLS<br />
TRAM - Balcony Bogie - Hudds #74 Stephen Brook 84912:74:2 DLS<br />
TRAM - Balcony Bogie - Hudds #75 Stephen Brook 84912:75:2 DLS<br />
TRAM - Open Top Bogie - Hudds #1 Stephen Brook 84912:1:2 DLS<br />
TRAM - Open Top Bogie - Hudds #2 Stephen Brook 84912:2:2 DLS<br />
TRAM - Open Top Bogie - Hudds #4 Stephen Brook 84912:4:2 DLS<br />
TRAM - Open Top Bogie - Hudds #5 Stephen Brook 84912:5:2 DLS<br />
TRAM - Short Top Bogie - Hudds #11 Stephen Brook 84912:11 DLS<br />
TRAM - Short Top Bogie - Hudds #3 Stephen Brook 84912:3 DLS<br />
TRAM - Short Top Bogie - Hudds #6 Stephen Brook 84912:6 DLS<br />
TRAM - Short Top Bogie - Hudds #7 Stephen Brook 84912:7 DLS<br />
TRAM - Short Top Bogie - Hudds #8 Stephen Brook 84912:8 DLS<br />
TRAM - Short Top Bogie - Hudds #9 Stephen Brook 84912:9 DLS<br />
ICEMANTRAM db143 www.bahnwerk.com<br />
B<strong>right</strong>sea Tramcar Graham Smith 129997:2 DLS<br />
Brown Tramcar Alan G Smith 62391:53 DLS<br />
<strong>Virtual</strong> <strong>Railroader</strong> - 52 - May – June 2005
City Tramcar Alan G Smith 62391:40 DLS<br />
Light Rail Tram 5016 Trainz.nl A KLM/ANGELUS12 79824:1 DLS<br />
Light Rail Tram 5016 Trainz.nl B KLM/ANGELUS12 79824:2 DLS<br />
Light Rail Tram 5016 Original A KLM/ANGELUS12 79824:568 DLS<br />
Light Rail Tram 5016 Original B KLM/ANGELUS12 79824:569 DLS<br />
Liverpool Tramcar Alan G Smith 62391:35 DLS<br />
Tramway de Caen - Gare Gregory Deryckère 61109:49 DLS<br />
Tramway de Caen - Maladrerie Gregory Deryckère 61109:47 DLS<br />
Tramway de Caen – St Martin Gregory Deryckère 61109:48 DLS<br />
Tramway de Caen – St Pierre Gregory Deryckère 61109:45 DLS<br />
Tramway de Caen - Venoix Gregory Deryckère 61109:46 DLS<br />
Tramlok 1 Max Moire 50861:3 www.bahnwerk.com<br />
There’s at least one payware tram route with rolling stock available<br />
and another on the way.<br />
Payware route and rolling stock (packaged as one download for 12.95 Euro)<br />
Name Author Source<br />
Modula City 2004 (route) Rolf Westphalen and Karsten Cornelsen http://www.trainzland.com/mf_mc2004.htm<br />
NF10 Silverline Phil Campbell http://www.trainzland.com/mf_mc2004.htm<br />
LHB GT6 Coerni http://www.trainzland.com/mf_mc2004.htm<br />
Operations<br />
Now let’s get down to the fun part – operating the routes. First is<br />
the Amsterdam4 Tram route in daylight.<br />
<strong>Virtual</strong> <strong>Railroader</strong> - 53 - May – June 2005
Centraal Station through the cab of a PCC car.<br />
Ferris wheel and calliope sounds b<strong>right</strong>en this scene.<br />
<strong>Virtual</strong> <strong>Railroader</strong> - 54 - May – June 2005
Double track at canal crossing; latticed track through narrow street beyond.<br />
Entering the turning loop at RAI.<br />
<strong>Virtual</strong> <strong>Railroader</strong> - 55 - May – June 2005
Two LHB Gt6 1969 trams running in multiple, turning onto Amstel.<br />
Bird’s eye view of Muntplein.<br />
<strong>Virtual</strong> <strong>Railroader</strong> - 56 - May – June 2005
Cab view from NF10 Silverline payware tram.<br />
I’m happy to report that the Silverline fits in the passing tracks.<br />
<strong>Virtual</strong> <strong>Railroader</strong> - 57 - May – June 2005
Part 2 next<br />
In part 2 (next issue) we’ll drive the Amsterdam 4 Tram SP2 route<br />
at night. Here’s a preview.<br />
Cheers,<br />
Al<br />
Article and screen shots ©2005 Alfred Barten. All <strong>right</strong>s reserved.<br />
<strong>Virtual</strong> <strong>Railroader</strong> - 58 - May – June 2005
Narrow Gauge<br />
Big Fun From a Small Route<br />
By John D’Angelo<br />
Narrow gauge coal dock at 3 Mile Harbor.<br />
I<br />
guess you can just call me “Mr. Fidgety.” Almost as soon as I finish building a route I<br />
start thinking about building another one; sometimes bigger, sometimes smaller, but<br />
always with the idea of trying out something new. I’ve been this way since my first<br />
American Flyer layout. When I played on the beach at the summer hotel where we stayed,<br />
my friends and I would build sand train tracks. We made sidings, stations, even tunnels;<br />
and by the end of the day, when the tide came rushing up to erase what we did, the layout<br />
would be all over the place! I haven’t stopped since.<br />
Route<br />
This little gem of a route is not my creation. I found it in the May<br />
2005 issue of Model <strong>Railroader</strong>. The layout is called the “Bay Point<br />
& Diablo” and was built by Bill Wilson. The original route is a near<br />
square, around-the-walls layout measuring 11’ x 12’ and built for<br />
an On2½ scale railway. After looking at the plan, I felt the track<br />
plan would be perfect for a single baseboard route in Trainz. I<br />
<strong>Virtual</strong> <strong>Railroader</strong> - 59 - May – June 2005
worked the track plan into a single baseboard and then made my<br />
changes.<br />
I decided to expand the scenery on all sides of the route by an<br />
additional baseboard to allow for a seascape and hills in the<br />
background, but the track remains only on the center baseboard.<br />
The original route was for a southwestern look, but being a guy<br />
who lives out on the edge of the eastern seaboard of the United<br />
States, I wanted to give it a coastal look. The center of the original<br />
route was open for the operator to stand in, but since we don’t<br />
need to do this in Trainz, I made the center into a boat harbor. I<br />
renamed my version of the route to the 3 Mile Harbor & North Sea<br />
RR.<br />
Here’s a screen shot of the Trainzmap image:<br />
3 Mile Harbor & North Sea RR.<br />
<strong>Virtual</strong> <strong>Railroader</strong> - 60 - May – June 2005
The History of the The 3 Mile Harbor & North Sea RR is a fictional route located on the<br />
3 Mile Harbor & east end of Long Island, New York, and is a 3’ narrow gauge<br />
North Sea RR<br />
railroad. There are some interesting things about this route, and<br />
sometimes a fictional story to go along with it can help the illusion.<br />
The 3 Mile Harbor & North Sea RR came about when the Sparks R<br />
Us power plant in Connecticut made a contract with the North Sea<br />
Coal Mine on Long Island.<br />
Rather than move coal along the Long island Railroad tracks southwest<br />
to New York City, then back up north-east along the<br />
Connecticut coast on the New Haven line, the company would have<br />
a ship at 3 Mile Harbor load up with coal and travel directly across<br />
Long Island Sound to deliver the coal. This would <strong>save</strong> time and<br />
transportation costs. Once the plan was agreed upon, the 3 Mile<br />
Harbor & North Sea RR looked about for the cheapest running gear<br />
they could find. They were able to lease old narrow gauge<br />
locomotives and rolling stock from the Denver & Rio Grande<br />
Western. The only requirement was that the D&RGW wanted them<br />
to leave the rolling stock lettered for the D&RGW. Before they<br />
could start laying track, the Long Island Railroad also contacted<br />
them and advised them that the LIRR would like to be able to<br />
move passengers and freight from the LIRR tracks into the 3 Mile<br />
Harbor area. After consulting with both railroads, the 3MH&NS<br />
railroad brass decided to make their track dual gauge throughout<br />
to accommodate both standard and narrow gauge traffic.<br />
This was how the route was configured; there was a coal loading<br />
dock facing Gardner’s Bay at Three Mile Harbor from which a coal<br />
ship would be loaded with the coal that was delivered there by the<br />
coal drag from the coal mine at North Sea. At Sammi’s Beach the<br />
Fish Factory would supply fresh fish to Long Island customers via<br />
the LIRR. There were freight depots at 3 Mile Harbor, Sammi’s<br />
Beach and North Sea for freight delivery and pickups.<br />
The dual gauge track would handle all the traffic that came down<br />
the rails, including freight and passenger trains from the LIRR.<br />
<strong>Virtual</strong> <strong>Railroader</strong> - 61 - May – June 2005
3 Mile Harbor.<br />
Loading coal at the North Sea Coal Mine.<br />
<strong>Virtual</strong> <strong>Railroader</strong> - 62 - May – June 2005
3 Mile Harbor Yard.<br />
The Fish Factory at Sammi’s Beach,<br />
<strong>Virtual</strong> <strong>Railroader</strong> - 63 - May – June 2005
LIRR GP 38 heading for the Fish Factory, reefer in hand.<br />
Add-ons used<br />
For the route I used MAN6 Four Rail Track (Single Track Dual<br />
Gauge) KUID 63290:38017 throughout.<br />
The coal dock used the Coal Unloader Super Basic<br />
KUID:86311:45052<br />
All of the other industry units were LARS operation units available<br />
from www.trainsproroutes.com .<br />
All of the freight cars are LARS capable, including the narrow gauge<br />
ore car KUID:8661:15040.<br />
The D&RGW narrow gauge locomotives are available from Prowler’s<br />
web site: http://steammachine.com/prowler/trainz/trainz.html .<br />
Operations<br />
The key to operating this single baseboard route is the use of the<br />
“Emit Train Now” rule combined with portals that resemble team<br />
tracks at 3 Mile Harbor and North Sea. Please read my article in<br />
this issue’s Download Gold for a complete description of how the<br />
“Emit Train Now” rule works. Using this rule lets you pop trains and<br />
rolling stock into the route any time you want them.<br />
A day’s activity would consist of an empty coal drag of three cars<br />
being sent out from 3 Mile Harbor to the mine at North Sea,<br />
loading the ore cars and then heading to the coal dock at 3 Mile<br />
Harbor and unloading the coal. A second engine at 3 Mile Harbor<br />
would pick up a freight car from the team track and deliver it to a<br />
<strong>Virtual</strong> <strong>Railroader</strong> - 64 - May – June 2005
freight depot at North Sea or Sammi’s Beach. At North Sea a LIRR<br />
GP would enter at the team track with either a passenger Pullman<br />
for 3 mile Harbor or a reefer for the Fish Factory at Sammi’s Beach.<br />
Sometimes the LIRR GP would be pulling a boxcar for the freight<br />
depots. The GP would leave the route via the team track at North<br />
Sea.<br />
Passenger station at 3 Mile Harbor.<br />
Although the route is very compact, using the portals and the “Emit<br />
Train Now” rule can give it a whole new dimension. I hope this<br />
article has given you enough ideas to create your own little gem.<br />
John<br />
Article and screen shots ©2005 John D’Angelo. All <strong>right</strong>s reserved.<br />
<strong>Virtual</strong> <strong>Railroader</strong> - 65 - May – June 2005
Basic Trainz<br />
Using the Forum, Part 2<br />
By Colin McKinney<br />
Part One looked at how to register with Auran, what the different parts of a posting mean,<br />
and how to <strong>save</strong> time when reading by viewing new messages only. Here in Part Two are<br />
detailed instructions for how to search the forum to find the answer to a query you may<br />
have (or find a posting you read at an earlier time), and how to submit (post) your own<br />
messages. A small number of slightly more advanced tips is also briefly considered.<br />
Figure 1:The main forum page, showing where to <strong>click</strong> to open the Search page.<br />
S<br />
imply reading forum messages will certainly teach you things you didn’t know<br />
before, but you are not really using the forum properly until you can actively search<br />
for information hidden somewhere in the vast number of postings made over<br />
previous months or years; or until you know how to submit your own postings. As<br />
you gain confidence, you will also find yourself joining in some of the discussions and adding<br />
your comments to threads begun by other users.<br />
Let’s begin by conducting a search. You should do this before<br />
posting a question, as often topics have been covered before,<br />
<strong>Virtual</strong> <strong>Railroader</strong> - 66 - May – June 2005
sometimes several times, and it is no more than good manners to<br />
check this before posting the same question again. That said, you<br />
should not hesitate to ask questions at any time, as generally<br />
members are only too happy to help ‘newbies’ (people who are<br />
‘new’ to Trainz, who want to identify themselves as beginners).<br />
Reminder: make sure you have a live Internet connection.<br />
Searching the forum<br />
You conduct a forum search to find something specific, e.g. to<br />
answer a question you have, or to find something you’ve read<br />
somewhere on the forum in the past, but which you can’t find now.<br />
As an example for this article, let’s say you wonder why (in<br />
Surveyor) a loco sometimes faces one way when you place it on a<br />
track, and sometimes the other, and you want to see if this<br />
question has been answered already.<br />
Open the Search page by <strong>click</strong>ing on Forum Search on the main<br />
forums page (refer to the white arrow in Figure 1). Figure 2 shows<br />
the screen that appears. In the space at top left (red arrow), enter<br />
what you are looking for. Generally you will get the best results by<br />
entering just one or two key words. The search engine is very<br />
literal: e.g. “loco direction” and “locomotive direction” are two<br />
different searches and will yield different results.<br />
Figure 2: The Search page.<br />
You will probably have more success if you change the default<br />
setting to “Search titles only” (green arrow). This means exactly<br />
what it says: if someone posted a question and named it “Loco<br />
direction – why does it change” and your Keywords are “Loco<br />
direction”, then this search will find it. On the other hand, if<br />
someone posted exactly the same message but named it “This is<br />
driving me mad!!!”, of course it won’t be found. This is one reason,<br />
incidentally, for making sure that when you post messages you<br />
name them as descriptively as possible.<br />
<strong>Virtual</strong> <strong>Railroader</strong> - 67 - May – June 2005
Also, “Search titles only” is preferred to “Search entire posts”<br />
because the latter option may yield hundreds of threads – too<br />
many to be of much use. However, it does rely on members writing<br />
descriptive titles – and you guessing the <strong>right</strong> keywords – neither<br />
of which is necessarily true. You will develop your own preferred<br />
routine. This is mine.<br />
Leave all other settings as they are, and press Perform Search<br />
(white arrow). This will take you to the next screen – see Figure 3.<br />
Figure 3: Search results using the keywords “loco direction”.<br />
Although these thread titles look promising, in fact what you would<br />
find if you opened each of them in turn is that they do not discuss<br />
the problem we are trying to solve. This happens quite often! So<br />
let’s go back and try a different search, this time using the<br />
Keywords “wrong direction”. Figure 4 shows the results of this<br />
search (without the red and white arrows, of course, which have<br />
been added):<br />
<strong>Virtual</strong> <strong>Railroader</strong> - 68 - May – June 2005
Figure 4: Search results using the keywords “wrong direction”.<br />
Of these four results, the third one (red arrow) is unlikely, as the<br />
thread title shows that it is about switch levers, not locos.<br />
Similarly, the fourth (red arrow) is also unlikely, as it is about<br />
bogies, not locos – also, the Forum is one that is unlikely to have<br />
useful information for a beginner. However, the other two (white<br />
arrows) are both possible. In fact, on opening the second thread<br />
and reading it, you will find this section of the discussion:<br />
Figure 5: An extract from the second thread – direction is in red because it is a keyword.<br />
So there’s the solution to our example problem: the direction a<br />
loco faces when you place it on a track in Surveyor depends on the<br />
direction in which the track was laid in the first place.<br />
Note: After performing a search, <strong>click</strong>ing the browser’s ‘back’<br />
button to return to previous pages does not always work<br />
<strong>Virtual</strong> <strong>Railroader</strong> - 69 - May – June 2005
properly, so instead <strong>click</strong> on the appropriate words in small<br />
white text at the top left of the screen, which is a ‘tree’ diagram<br />
showing where you are.<br />
One final point about searches: on the Search page, there is<br />
another option that can make a search that yields too many results<br />
less cumbersome. There is a drop-down selection box in the<br />
bottom half of the screen, which allows you to choose a particular<br />
forum in which to conduct your search, instead of all forums, which<br />
is the default. In the ‘loco direction’ example just used, the solution<br />
was found in a thread from the Route Builders forum, not General<br />
Trainz, which might perhaps be the forum a beginner would try<br />
first. However, Route Builders deals with predominantly Surveyor<br />
questions, so if you knew that, you could have narrowed the<br />
search by choosing that forum before <strong>click</strong>ing on the Perform<br />
Search button.<br />
Submitting (posting) The time will come when you want an answer to a question, you<br />
your first message try searching for it, but can’t find the solution. It is time to post the<br />
question yourself. When you’ve done this a few times you think<br />
nothing of it, but for many people the very first time can be a little<br />
daunting – after all, many thousands of other people will see it.<br />
The thing to remember is that EVERYONE has a first time – and, if<br />
you’ve spent some time reading the forums, you soon see that<br />
every so often there is a question from a ‘newbie’. One thing about<br />
the Trainz forum is that it is particularly tolerant of beginners, and<br />
if you say you’re new you’re likely to get many messages of<br />
welcome and encouragement, as well as answers to your<br />
questions.<br />
The first thing to note is that there is not one Trainz forum, but<br />
twelve (in English) – see Figure 1. The one you are likeliest to need<br />
is the first one, underneath Auran Announcements: General Trainz.<br />
Click on the words General Trainz, and the General Trainz Forum<br />
will open. Near the top of the page, <strong>click</strong> on the <strong>right</strong> hand button,<br />
New Thread (see arrow, Figure 6):<br />
Figure 6: The start of the General Trainz forum, showing where to <strong>click</strong> to post a<br />
message.<br />
<strong>Virtual</strong> <strong>Railroader</strong> - 70 - May – June 2005
A new screen will open: this is the one where you will type your<br />
posting. Figure 7 shows the top part of the screen.<br />
Figure 7: The top section of the Post New Thread screen.<br />
For now, only those features that concern a person posting their<br />
first thread will be discussed. As your confidence increases, you will<br />
experiment with other features – or, if you want to, you could post<br />
a question to find out about any of them!<br />
The arrows show all you need to begin a posting. First, enter a<br />
subject title for your thread (green arrow). This is what will appear<br />
on the forum page. Make your title concise, and descriptive of your<br />
topic: for example, How do I use yellow direction markers gives<br />
readers a good idea of the content of your posting. It is also better<br />
for search purposes in the future, as discussed earlier in this<br />
article. Compare that with the unhelpful heading, Newbie with a<br />
problem – even if it is truthful!<br />
Next, write your question in the panel indicated by the yellow<br />
arrow. Be as clear and direct as you can. It’s best to limit your<br />
questions to one per posting.<br />
The next step is to check the button next to Email Notification (see<br />
Figure 8, blue arrow) if you would like to receive an email<br />
whenever somebody replies to your posting.<br />
<strong>Virtual</strong> <strong>Railroader</strong> - 71 - May – June 2005
Figure 8: The bottom section of the Post New Thread screen.<br />
Email notification is a good idea, as it <strong>save</strong>s you having to keep<br />
checking your posting in the forum to see if anyone has responded.<br />
Of course, you need to have supplied your email address in your<br />
Pro<strong>file</strong> for this feature to work. Finally, press the Submit New<br />
Thread screen (yellow arrow) and your message will be posted in<br />
the forum for all to see. If you have worded your question clearly<br />
the first response will probably arrive within minutes.<br />
Don’t worry if another member asks you for more information –<br />
just reply! (See below.) You’re almost certain to be overwhelmed<br />
by helpful responses.<br />
Responding<br />
(replying) to an<br />
existing message<br />
If you are reading another user’s posting – or you have posted a<br />
question and someone asks for clarification – don’t start another<br />
thread, just continue with the existing one. To do this, scroll to the<br />
bottom of the thread and <strong>click</strong> on the Post Reply button (light blue<br />
arrow, Figure 9). A screen that looks like the Post New Thread<br />
screen described above appears, and you use it in exactly the<br />
same way except you can ignore the ‘Post Subject’ box at the top –<br />
just write your reply directly in the large white panel then <strong>click</strong><br />
Submit Reply.<br />
Figure 9: Posting a reply to an existing thread.<br />
<strong>Virtual</strong> <strong>Railroader</strong> - 72 - May – June 2005
Note: while you are in the Post Reply screen just described, if<br />
you want to check on other messages in the thread, you don’t<br />
have to go back – just scroll further down and you can see the<br />
other postings in the thread. For your convenience they are in<br />
reverse order, that is, the latest posting appears at the top.<br />
As a final comment regarding the posting of messages, whether<br />
‘thread-starters’ or responses, it should go without saying that any<br />
rudeness or signs of impatience will not be taken kindly by other<br />
forum users. (Serious rudeness contravenes forum rules and you<br />
can be prevented from using the forum by a forum moderator.)<br />
Remember that in the forum, just as with emails, something that<br />
might pass without comment in a letter or a conversation can often<br />
seem rude, so it is better to err on the side of courtesy.<br />
A few final pieces of<br />
information<br />
It is beyond the scope of this article to get into detail about some<br />
of the finer points of the forum. Like Trainz itself, there’s a lot<br />
there, and you learn by experimenting – or by using the forum! To<br />
finish up with, here is a small miscellany of items in brief:<br />
Main Forums page:<br />
●<br />
●<br />
At the bottom of the main Forums page, there is a list of all<br />
those members who are currently logged in. You might get by<br />
for years without ever using this feature, but the more familiar<br />
you become with the forum, the more you get to recognise<br />
individual members’ log-on names – if you wanted to email a<br />
particular member, you’d know there was a good chance they<br />
were at home if their name appeared in this list.<br />
Clicking directly on any of the names in the list mentioned<br />
above brings up that person’s pro<strong>file</strong><br />
Any specific Forum page:<br />
●<br />
●<br />
The coloured or flaming folders on the extreme left-hand side<br />
indicate how often that post has been viewed or replied to – a<br />
key at the bottom of the page gives the details<br />
At the bottom of the page there is another search you can do to<br />
find, say, all posts sorted alphabetically by thread title, or by<br />
the number of replies (i.e. which ones have generated the most<br />
discussion), and a number of other parameters (“Using the<br />
Forum, Part 1” explained how to view only messages posted<br />
since the last time you looked)<br />
When looking at a particular thread:<br />
●<br />
You can open a ‘printable version’ by <strong>click</strong>ing in the appropriate<br />
place at the end of the thread – one use for this would be to<br />
make it easier to cut and paste material into a word processing<br />
<strong>Virtual</strong> <strong>Railroader</strong> - 73 - May – June 2005
●<br />
program, if you wanted to keep particularly interesting<br />
messages<br />
You can also email the link to a particular page (thread) to<br />
someone by <strong>click</strong>ing on the wording at the bottom of the page<br />
next to the previous feature – one application for this would be<br />
to send such an email to yourself at home, if you were checking<br />
the forum at work<br />
When composing a new message:<br />
●<br />
●<br />
●<br />
You can experiment with formatting in a message (for example,<br />
bold, italic, or coloured text) by <strong>click</strong>ing/choosing the<br />
appropriate drop-down menu items from the area just above<br />
the white panel where you compose the message, THEN writing<br />
the word(s) to be formatted in the pop-up box before <strong>click</strong>ing<br />
OK and continuing with the message<br />
More ambitious formatting (e.g. inserting hyperlinks into your<br />
message) can be explored by <strong>click</strong>ing on Vb Code [help] to the<br />
left of the symbols just described: a knowledge of basic HTML<br />
would help here, but even without that you can experiment by<br />
copying from the Help page and pasting into the message area,<br />
and making the appropriate changes to the text<br />
If you change formatting you won’t see the effect until you<br />
either submit the posting or – to be on the safe side – check it<br />
first by <strong>click</strong>ing on Preview Post<br />
When adding a comment (replying) to an existing thread:<br />
●<br />
If you want to include in your reply a quote from another<br />
posting in the thread, locate the posting from which you want<br />
to quote and <strong>click</strong> the ‘quote’ button at its end. The text that<br />
you see (not anything in square brackets) is the entire text<br />
from that posting. Highlight and delete what you don’t want,<br />
leaving only the section which you wish to appear in your reply<br />
as a quotation, taking care not to cut out the square brackets<br />
or any of the material inside the brackets. Continue with your<br />
reply underneath. Preview before sending (see last point<br />
above).<br />
Colin<br />
Article and screen shots ©2005 Colin McKinney. All <strong>right</strong>s reserved.<br />
<strong>Virtual</strong> <strong>Railroader</strong> - 74 - May – June 2005
Download Gold<br />
Now For Something Completely Different!<br />
By John D’Angelo<br />
A<br />
s the Montey Python saying<br />
goes… This Download Gold<br />
column is about something<br />
completely different. It is about a single<br />
rule, but WHAT a rule! This rule will<br />
completely change the way you can<br />
operate with Trainz. After you place this<br />
rule in operation you will have complete<br />
freedom to add locomotives, rolling<br />
stock, complete trains, and even other<br />
devices to your route while it is in<br />
operation, and at any time you choose.<br />
Now you can operate your route just the<br />
way you could operate a model railroad,<br />
dropping cars and other items onto your<br />
tracks using the old 0-5-0 switcher (your hand).<br />
The rule is called “Emit Train Now” and is available at the Trainz<br />
Download Station (DLS). It was created by Sforget; the KUID<br />
number is KUID 2: 117746:990:1.<br />
This rule is designed to work in conjunction with Portals on your<br />
route. After the rule is installed, you have the ability to choose any<br />
piece of rolling stock, including any drivable items, such as aircraft,<br />
and assign them to be immediately sent out from any of your<br />
portals. When I was using portals to generate trains, they would<br />
start sending out the trains at regular intervals. Once I<br />
programmed a coal drag and set the time delay for 15 minutes,<br />
every 15 minutes another coal drag would appear whether I was<br />
ready for it or not. This rule overcomes that problem.<br />
Once the rule has been installed, you will see a notation on your<br />
driver screen saying “New Train”. Just <strong>click</strong> on that and you can<br />
introduce your selection into the route as it is operating. The rule is<br />
limited to working only when you are in DCC mode, but that seems<br />
to be the only limitation I can see. Because this is a rule that has<br />
to be added to your operation, I am going to describe the entire<br />
process.<br />
<strong>Virtual</strong> <strong>Railroader</strong> - 75 - May – June 2005
Basic procedure<br />
Set up the portal. In Surveyor, place the portal by Selecting<br />
“Portal Basic” from the Objects palette. You do not have to set any<br />
properties. You could select “Portal” instead, if you want the portal<br />
to be a tunnel.<br />
Activate the rule. In Surveyor, use the pull-down menu and<br />
choose “Edit Session”, <strong>click</strong> the Add button and choose the Rule<br />
“Emit Train Now”. Now <strong>click</strong> the checkmark to close the Rules sheet<br />
and <strong>click</strong> the next checkmark to accept the rule and close the Edit<br />
Session sheet.<br />
Use the rule. In Driver, <strong>click</strong> the New Train button in the lower<br />
<strong>right</strong>-hand corner of the screen. A property sheet displays.<br />
NOTE: The button is not visible if you have the heads up<br />
display turned off. You can toggle the display by pressing the<br />
F5 key.<br />
Select a train (vehicle) from the list on the left and <strong>click</strong> the Add<br />
button. The train appears in the <strong>right</strong>-hand list.<br />
Click the Send To Portal button. The property sheet closes and the<br />
train appears on the portal track.<br />
Example<br />
I am going to use my United Central route as the operating<br />
example. My route began with two portals that can be used for this<br />
rule. I added another, which I will explain. After the rule is<br />
downloaded and installed, you need to edit the session to activate<br />
the rule.<br />
<strong>Virtual</strong> <strong>Railroader</strong> - 76 - May – June 2005
Editing the session.<br />
Click the Add button.<br />
<strong>Virtual</strong> <strong>Railroader</strong> - 77 - May – June 2005
Choose the Rule “Emit Train Now”.<br />
Springfield Yard Team Track (Portal).<br />
<strong>Virtual</strong> <strong>Railroader</strong> - 78 - May – June 2005
Because this rule allows you to drop even a single car into an<br />
operation session at any portal, I added a portal to my Springfield<br />
Yard to be used as a team track. The portal does not have to be<br />
programmed to produce trains with this rule, but can retain the<br />
ability to delete trains if you wish. I use this portal and the Emit<br />
Train Now rule to drop any type of car or locomotive into the<br />
operation as I need. If I’m operating, and need a reefer to be sent<br />
to an industry, I <strong>click</strong> on “Add Train”, choose the proper car, send<br />
it to this portal, and it appears on the track ready for my switcher<br />
to move it. If I don’t have a switcher available, I can have it<br />
delivered, already coupled to a locomotive, ready for delivery.<br />
There’s more<br />
But wait, that’s not all! I can also deliver other rolling stock items<br />
such as aircraft. This allows you to keep from slowing down your<br />
operation by having idling aircraft at the airport when you are not<br />
using them.<br />
To take advantage of this aspect, I changed the configuration of<br />
my Northville portal. I made it into an airport runway with tie-less<br />
track running down it. At the end of the runway there is a switch<br />
where you can choose the invisible track for the plane to take off,<br />
or the track with ties to introduce a train to the route.<br />
Northville Portal disguised as a runway with rails in it.<br />
<strong>Virtual</strong> <strong>Railroader</strong> - 79 - May – June 2005
Click on “New Train”.<br />
Choose the item.<br />
<strong>Virtual</strong> <strong>Railroader</strong> - 80 - May – June 2005
After <strong>click</strong>ing on “New Train” the above the menu displays. First<br />
choose the item from the list of your available gear, then add the<br />
item to the blackboard at the <strong>right</strong>. When you are finished adding<br />
the items, send it to the portal of your choice. In this case I have<br />
chosen the drivable Cessna 150 (KUID: 152080:20501) by Minitrix,<br />
have added it to the list, and am sending it to the Northville portal.<br />
The Cessna appears on the runway.<br />
<strong>Virtual</strong> <strong>Railroader</strong> - 81 - May – June 2005
Take off!<br />
At the end of the runway the Cessna will be switched to the<br />
invisible track and will fly over the route. I DO have to remember<br />
to switch properly to be sure an express train doesn’t come flying<br />
across the sky or a Cessna doesn’t come down the tracks!<br />
One wrinkle<br />
There was only one problem with the rule, which was a bit of a<br />
bother. Originally, the rule could not be <strong>save</strong>d if the session was<br />
<strong>save</strong>d. If you wanted to <strong>save</strong> an operation, when you replayed it,<br />
the rule “New Train” indicator did not appear again.<br />
Everybody put in a lot of hanger time trying to figure out that<br />
problem, and finally Dieter came up with a solution. His idea was to<br />
use a trigger located on the route that would reactivate the “Emit<br />
Train Now” rule. The trigger could be placed on an unused siding<br />
and a boxcar could be placed over it, so that it would be continually<br />
reactivated.<br />
Ingenious! Here is what Dieter wrote to me regarding how to make<br />
the fix:<br />
Place a trigger on your route (somewhere in a siding you don’t<br />
use) and name it Restart Rule.<br />
Place a vehicle, such as a boxcar, on the trigger.<br />
In the Session Options add a trigger rule and link it to the<br />
Restart Rule trigger.<br />
Now insert the Emit Trains Now as a child of the trigger rule.<br />
<strong>Virtual</strong> <strong>Railroader</strong> - 82 - May – June 2005
Here is what the sequence should look like:<br />
Startup options<br />
Driver Setup<br />
Emit Trains Now<br />
Trigger Rule<br />
Emit Trains Now (Indented)<br />
Now every time you reload the session, the vehicle on the<br />
trigger restarts the rule.<br />
Hope this is of some help to you. It took me 6 days to figure<br />
out the solution, but the rule is so good it was worth the effort.<br />
Regards,<br />
Dieter<br />
Adding the trigger and boxcar.<br />
Thank you very much, Dieter, for working out that problem so well.<br />
Thank you, Sforget for coming up with the rule in the first place,<br />
and thank you Maggs, for your excellent Re-Rail portals, KUID<br />
2:116387:5:1 and KUID 2:116387:6:1.<br />
<strong>Virtual</strong> <strong>Railroader</strong> - 83 - May – June 2005
Together they add a totally new dimension to Trainz. Since I have<br />
devoted my entire column this month to this subject, I think you all<br />
can see how important I think your contribution has been.<br />
Thanks!<br />
John<br />
Article and screen shots © 2005 John D’Angelo. All <strong>right</strong>s reserved.<br />
<strong>Virtual</strong> <strong>Railroader</strong> - 84 - May – June 2005
Reference<br />
Train Sim Webfinder<br />
By Alfred Barten<br />
We’ve assembled some of our favorite links. We don’t want to leave anyone out, so we’ll be<br />
adding to the list each issue. Feel free to send suggestions (and corrections).<br />
-- Al<br />
Listings in bold are new for this issue.<br />
Site Owner URL<br />
Publication<br />
<strong>Virtual</strong><strong>Railroader</strong> Alfred Barten http://www.virtualrailroader.com<br />
Simulators<br />
BVE Mackoy http://mackoy.cool.ne.jp<br />
JBSS BAHN Jan Bochmann http://www.jbss.de/start_e.htm#Anfang<br />
MSTS Microsoft http://www.microsoft.com/games/trainsimulator<br />
Rail3D Martin Goodspeed http://www.rail3d.net<br />
SpoorSim Charl Vockerodt http://homepage.ntlworld.com/slsim<br />
Train Dispatcher 2<br />
Train Dispatcher 3<br />
Signal Computer<br />
Consultants<br />
Softrail Railroad<br />
Software<br />
http://www.signalcc.com/train2/td2freeware.html<br />
http://www.softrail.com/railsof.html<br />
Trainz Auran http://www.auran.com<br />
YKTRain Yuuta Kawai http://www.geocities.jp/yuuchankellyy/indexe.html<br />
Forums<br />
New York City BVE<br />
Motorman's Forum<br />
NYCTBA<br />
http://forum.nyctba.com/index.php<br />
train-sim.com Nels Anderson http://train-sim.com<br />
Trainz Forum Auran http://forums.auran.com/TRS2004/forum/default.htm<br />
UKTrainSim Atomic Systems http://www.uktrainsim.com<br />
BVE<br />
BVE Mackoy http://mackoy.cool.ne.jp<br />
BVE Vince Black http://www.vince-black.me.cz/BVE_welcome_EN.htm<br />
BVE Cornwall Chris Lees http://www.bvecornwall.tk<br />
BVE-routes.com Uwe Post http://bve-routes.com<br />
<strong>Virtual</strong> <strong>Railroader</strong> - 85 - May – June 2005
BVE-Train.de<br />
Martin Finken and Peter<br />
Schötz<br />
http://bve-train.de<br />
BVE Works in Progress Alfred Barten http://alfredbarten.com<br />
eezypeazy’s BVE<br />
pages<br />
eezypeazy<br />
http://members.lycos.co.uk/eezypeazy<br />
Hirakami Railway Hitetsu Hirakami Group http://hirakami.com/railway/indexeng.htm<br />
Italian BVE fans Luigi Cartello http://web.tiscali.it/lcartello<br />
New York City Transit<br />
BVE Authority<br />
NYCTBA<br />
http://www.nyctba.com<br />
Rail Sim Routes UK Anthony Bowden http://www.anthony-b.pwp.blueyonder.co.uk/rsr-uk/links.html<br />
Sasha's BVE Website Sasha Dodd http://www.superduper.eclipse.co.uk<br />
Scottish Railway<br />
Preservation Society<br />
Don Clarke<br />
http://www.gotopcs.net/index.phpoption=content&task=view<br />
&id=46&Itemid=40<br />
Scottish Rail Sim Files Robert Glass http://www.scotrailsim.co.uk<br />
Train Sim Central Steve Green http://www.trainsimcentral.co.uk<br />
trensim.com<br />
http://www.trensim.com/index.php<br />
<strong>Virtual</strong>-Rail.co.uk Damon Cox http://www.virtual-rail.co.uk<br />
YKTRain Yuuta Kawai http://www.geocities.jp/yuuchankellyy/indexe.html<br />
MSTS<br />
trensim.com<br />
trensim.com<br />
http://www.trensim.com/index.php<br />
http://www.trensim.com/index.php<br />
Trainz<br />
Amsterdam Trams<br />
Roster<br />
http://world.nycsubway.org/eu/nl/ams-roster.html<br />
Bahnwerk.com Max Moire http://www.bahnwerk.com<br />
constructiongames.de Burkhard Jahnen http://www.constructiongames.de/trainz<br />
Downloader Pro Jelte http://www.huijelte.com/trainz/downloaderpro.php<br />
MyTrainz.tk Jan http://www.trainz.nl/downloads/mytrainz_tests/index<br />
.php<br />
Razorback Railway<br />
http://www.razorbackrailway.com<br />
Rob Shaw Rob Shaw http://robshaw.org/trainz.htm<br />
Prowler Todd Hohlenkamp http://steammachine.com/prowler/trainz/Trainz.html<br />
Section Shed<br />
http://www.sectionshed.com/english/downlprog.html<br />
Sirgibby's TrainZONE Mike Sutton http://www.trainzone.co.nz<br />
Slugsmasher Rich Blake http://steammachine.com/slugsmasher<br />
SteamTrainz<br />
Chris Grossman<br />
(atsfrr3000)<br />
http://www.steamtrainz.com/gallery<br />
<strong>Virtual</strong> <strong>Railroader</strong> - 86 - May – June 2005
Swedish Train<br />
Workshops<br />
STW<br />
http://msts.e-buzz.net/stw<br />
The Cowboy Shane Perrman http://www.cowboystrainzstation.com<br />
Toronto Trainz<br />
Trainz Download<br />
Station<br />
Trainz Land<br />
Trainz Luvr<br />
Auran<br />
http://www.torontotrainz.com<br />
http://www.auran.com/TRS2004/DLS.php<br />
http://www.trainzland.com<br />
http://trainz.luvr.net<br />
TrainzObjectz Terry Franks http://tafweb-trainz.co.uk<br />
TrainzProRoutes TrainzProRoutes http://www.trainzproroutes.com<br />
TrainzItalia<br />
trensim.com<br />
http://www.trainzitalia.com<br />
http://www.trensim.com/index.php<br />
VistaMare Software TrainzMap http://www.vistamaresoft.com/trainz<br />
Virtueller Modellbau<br />
<strong>Virtual</strong>-Motive-Division<br />
Rolf Westphalen and<br />
Karsten Cornelsen<br />
Christian Steurer and<br />
Steffen Gross<br />
www.wohnseiten.de/einrichten.html<br />
http://www.virtual-motive-division.com<br />
World of Trainz Phil Campbell www.worldoftrainz.com<br />
Article ©2005 Alfred Barten. All <strong>right</strong>s reserved.<br />
<strong>Virtual</strong> <strong>Railroader</strong> - 87 - May – June 2005
Credits<br />
<strong>Virtual</strong> <strong>Railroader</strong> is published bi-monthly by Alfred Barten. No part of this publication may<br />
be reproduced without the expressed permission of Alfred Barten. All material contained<br />
within this publication is copy<strong>right</strong>ed as noted or, lacking specific notation, is ©2005 Alfred<br />
Barten. All <strong>right</strong>s are reserved.<br />
Visit our web site at http://www.virtualrailroader.com for details about the authors and for<br />
information about other issues of <strong>Virtual</strong> <strong>Railroader</strong> and our predecessor, <strong>Virtual</strong> Model<br />
Railway Journal.<br />
<strong>Virtual</strong> <strong>Railroader</strong> - 88 - May – June 2005