
Create successful ePaper yourself
Turn your PDF publications into a flip-book with our unique Google optimized e-Paper software.
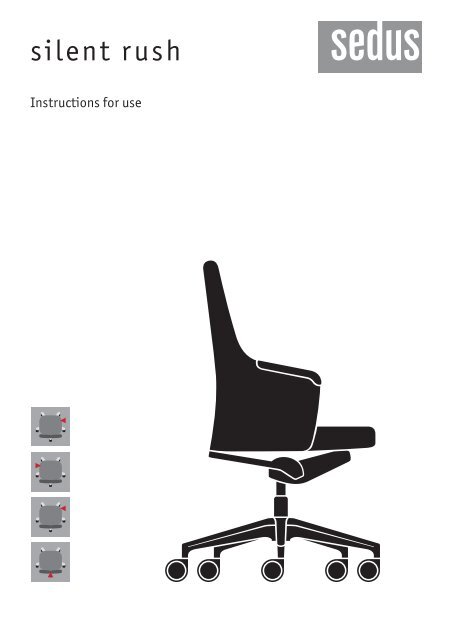
<strong>silent</strong> r ush<br />
Instructions for use
Healthy sitting is a question of attitude<br />
® Use the whole seat surface<br />
The anatomically shaped seat should be fully occupied.<br />
Only then is proper contact with the supporting backrest<br />
assured.<br />
® Adjust the height of the seat precisely<br />
The correct seat height means that the elbow joint<br />
adopts an angle of about 90° when the forearms are<br />
resting horizontally on the desktop. The knee joint<br />
will also adopt an angle of about 90° when the feet<br />
are flat on the floor. If your desktop is too high, and<br />
cannot be lowered to a correct position, you need a<br />
footrest with adjustable height and tilt.<br />
® Adjust the backrest<br />
Adjust the height of the lumbar support so that the<br />
curvature of the backrest supports the spine in the<br />
region of the third and fourth lumbar vertebrae (where<br />
the forward curvature is greatest). This stabilises the<br />
natural S-shape of the spine in every sitting position.<br />
® Dynamic sitting<br />
Dynamic sitting means changing your sitting posture<br />
frequently, or in other words shifting as often as<br />
possible between the front and rear sitting posture.<br />
You should therefore adjust the backrest dynamically.<br />
“<strong>silent</strong> <strong>rush</strong>” is equipped with a “Similar” mechanism,<br />
allowing you to adjust the backrest pressure as best<br />
suits you. This ensures that the backrest and seat<br />
automatically give your body support in every sitting/<br />
lying position.<br />
English 7
The functions of the swivel chair<br />
A B<br />
Height of the seat<br />
® Lowering the seat:<br />
1. Sit down on the seat<br />
2. Pull the lever upwards<br />
(the seat will drop slowly)<br />
3. Releasing the lever at the<br />
desired height will lock<br />
the position<br />
® Raising the seat:<br />
1. Stand up<br />
2. Pull the lever upwards<br />
(the seat will rise slowly)<br />
3. Releasing the lever at<br />
the desired height will<br />
lock the position<br />
8 English<br />
Angle of the backrest<br />
® Adjusting the<br />
backrest dynamically:<br />
1. Pull the lever upwards<br />
and release it<br />
2. Lean against the backrest<br />
3. The backrest is automatically<br />
released<br />
® Locking the backrest<br />
into position:<br />
1. Lean back until the backrest<br />
reaches the desired angle<br />
2. Press the lever down and<br />
release it to lock the backrest<br />
into position<br />
B<br />
D
D<br />
C<br />
Strength of the backrest pressure<br />
® Increasing the backrest pressure:<br />
1. Pull out the handle<br />
2. Crank the handle clockwise<br />
(forwards)<br />
3. Push the handle back in<br />
® Reducing the backrest pressure:<br />
1. Pull out the handle<br />
2. Crank the handle anticlockwise<br />
(backwards)<br />
3. Push the handle back in<br />
A<br />
C<br />
D<br />
Height of the lumbar support<br />
® Adjusting the height:<br />
1. Do not lean against the backrest<br />
2. Slide the lumbar support into<br />
the required position<br />
English 9
Tips for users<br />
Correct use<br />
This office swivel chair is designed<br />
for a user weight of up to 120 kg<br />
and may only be used for the purpose<br />
intended while exercising due<br />
care and attention. Using it inappropriately<br />
(e.g. as a stepladder,<br />
sitting on the armrests or placing<br />
extreme weight on one side) could<br />
result in accidents.<br />
Castors<br />
Please remove the red or blue<br />
transport protection before using<br />
the product for the first time.<br />
A variety of castors are available,<br />
for the sake of your safety and for<br />
use on different types of flooring in<br />
accordance with safety regulations:<br />
– Hard castors for soft flooring<br />
(standard)<br />
– Soft castors for hard floors are<br />
optional<br />
Changing castors: this might be<br />
necessary, for instance, after<br />
moving office, or after the installation<br />
of a new floor covering –<br />
simply pull out the castors and<br />
push new ones in.<br />
Plastic parts<br />
Soapy water is suitable for cleaning.<br />
Please do not use any<br />
aggressive cleaning materials.<br />
Upholstery<br />
For light dirty marks, only clean the<br />
cover material using fine washing<br />
agents or using the cleaner supplied<br />
by <strong>Sedus</strong>.<br />
The seat and backrest can only be<br />
replaced in the factory.<br />
10 English<br />
Leather<br />
Leather is a natural product.<br />
The natural markings of the<br />
animal skin gives the material<br />
its unmistakable texture.<br />
Rub off light soiling with a soft<br />
woollen cloth. Heavier soiling<br />
should only be treated with<br />
cleaners designed for anilinedyed<br />
leather.<br />
Do not expose semi-aniline<br />
leather to direct sunshine.<br />
Neck support pad<br />
The neck support pad can be removed<br />
so it can be cleaned or replaced.<br />
To do this, compress the neck<br />
support pad at the front and back<br />
simultaneously, by pressing<br />
together the bottom four corners,<br />
and push it upwards about 3 cm,<br />
until the pad comes loose. To refit<br />
it, place the neck support pad on<br />
the four guide-pins, push against<br />
the back pad at all four corners and<br />
then push down.<br />
Arm-rest pads<br />
If required, the arm-rest pads can<br />
be replaced by our Customer Service<br />
department.<br />
Servicing<br />
Servicing work, such as exchanging<br />
or working on the pneumatic<br />
springs, may only be carried out<br />
by trained personnel.
Deutschland<br />
<strong>Sedus</strong> Stoll Aktiengesellschaft, Brückenstraße 15, D-79761 Waldshut<br />
Telefon (07751) 84-0, Telefax (07751) 84-310<br />
E-Mail sedus@sedus.de, Internet www.sedus.de<br />
Belgique<br />
<strong>Sedus</strong> Stoll b.v.b.a./s.p.r.l., Korte Massemensesteenweg 58/2, B-9230 Wetteren<br />
Telefoon (09) 3699614, Telefax (09) 3681982<br />
E-Mail sedus.be@sedus.com, Internet www.sedus.be<br />
España<br />
<strong>Sedus</strong> Stoll, S. A., Parque Empresarial San Fernando, Avenida Castilla, 2<br />
Edificio Italia – 1 a planta, E-28830 San Fernando de Henares<br />
Teléfono 91 / 5970176, Telefax 91 / 6763245<br />
E-Mail sedus.es@sedus.com, Internet www.sedus.es<br />
France<br />
<strong>Sedus</strong> Sarl, 10 rue Auber, F-75009 Paris<br />
Téléphone 0153772050, Fax 01 53 77 20 51<br />
E-Mail commercial@sedus.fr, Internet www.sedus.fr<br />
Great Britain<br />
<strong>Sedus</strong> Stoll Ltd., 157A St John Street, Clerkenwell, London EC1V 4DU<br />
Telephone 020 7566 3990, Telefax 020 7566 3999<br />
E-Mail sedus.uk@sedus.co.uk, Internet www.sedus.co.uk<br />
Italia<br />
<strong>Sedus</strong> Stoll S.r.l., Via Volta snc, I-22071 Cadorago (CO)<br />
Telefono 031.494.111, Telefax 031.494.140<br />
E-Mail sedus.it@sedus.com, Internet www.sedus.it<br />
Nederland<br />
<strong>Sedus</strong> Stoll B.V., Platinastraat 33, NL-2718 SZ Zoetermeer<br />
Telefoon 079 3631590, Telefax 079 3631599<br />
E-Mail sedus.nl@sedus.com, Internet www.sedus.nl<br />
Österreich<br />
<strong>Sedus</strong> Stoll Ges.m.b.H., Kirchenstraße 37/1/13, A-5301 Eugendorf<br />
Telefon (06225) 21 0 54-0, Telefax (06225) 21 0 56<br />
E-Mail sedus.at@sedus.at, Internet www.sedus.at<br />
Schweiz<br />
<strong>Sedus</strong> Stoll AG, Industriestrasse West 24, CH-4613 Rickenbach<br />
Telefon 062 / 2164114, Telefax 062 / 2163828<br />
E-Mail sedus.ch@sedus.ch, Internet www.sedus.ch<br />
75.0442.900<br />
02.2012