Vivotek-IP8362 Quick Installation Guide
Vivotek-IP8362 Quick Installation Guide
Vivotek-IP8362 Quick Installation Guide

Create successful ePaper yourself
Turn your PDF publications into a flip-book with our unique Google optimized e-Paper software.
POWER CO LISION<br />
1 2 3 4 5<br />
LINK<br />
RECEIVE<br />
PARTITION<br />
English<br />
4<br />
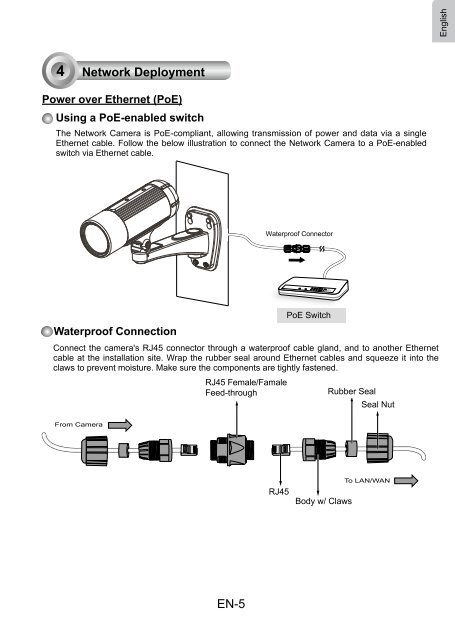
Network Deployment<br />
Power over Ethernet (PoE)<br />
Using a PoE-enabled switch<br />
The Network Camera is PoE-compliant, allowing transmission of power and data via a single<br />
Ethernet cable. Follow the below illustration to connect the Network Camera to a PoE-enabled<br />
switch via Ethernet cable.<br />
Waterproof Connector<br />
Waterproof Connection<br />
PoE Switch<br />
Connect the camera's RJ45 connector through a waterproof cable gland, and to another Ethernet<br />
cable at the installation site. Wrap the rubber seal around Ethernet cables and squeeze it into the<br />
claws to prevent moisture. Make sure the components are tightly fastened.<br />
RJ45 Female/Famale<br />
Feed-through<br />
Rubber Seal<br />
Seal Nut<br />
From Camera<br />
RJ45<br />
Body w/ Claws<br />
To LAN/WAN<br />
EN-5