J-Flash ARM User Guide - SEGGER Microcontroller
J-Flash ARM User Guide - SEGGER Microcontroller
J-Flash ARM User Guide - SEGGER Microcontroller

You also want an ePaper? Increase the reach of your titles
YUMPU automatically turns print PDFs into web optimized ePapers that Google loves.
34 CHAPTER 4 Settings<br />
4.1 Project Settings<br />
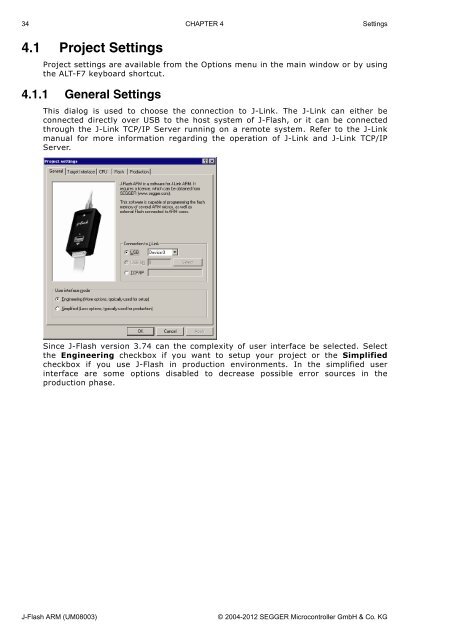
Project settings are available from the Options menu in the main window or by using<br />
the ALT-F7 keyboard shortcut.<br />
4.1.1 General Settings<br />
This dialog is used to choose the connection to J-Link. The J-Link can either be<br />
connected directly over USB to the host system of J-<strong>Flash</strong>, or it can be connected<br />
through the J-Link TCP/IP Server running on a remote system. Refer to the J-Link<br />
manual for more information regarding the operation of J-Link and J-Link TCP/IP<br />
Server.<br />
Since J-<strong>Flash</strong> version 3.74 can the complexity of user interface be selected. Select<br />
the Engineering checkbox if you want to setup your project or the Simplified<br />
checkbox if you use J-<strong>Flash</strong> in production environments. In the simplified user<br />
interface are some options disabled to decrease possible error sources in the<br />
production phase.<br />
J-<strong>Flash</strong> <strong>ARM</strong> (UM08003) © 2004-2012 <strong>SEGGER</strong> <strong>Microcontroller</strong> GmbH & Co. KG