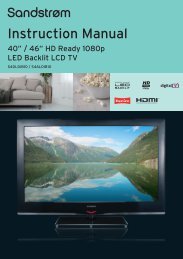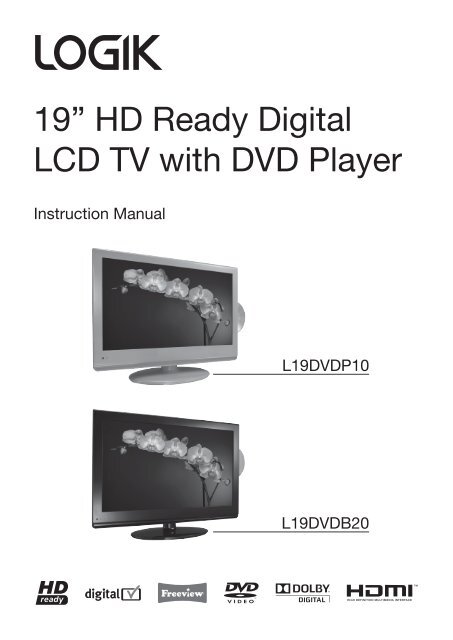
19†HD Ready Digital LCD TV with DVD Player - KnowHow
19†HD Ready Digital LCD TV with DVD Player - KnowHow
19†HD Ready Digital LCD TV with DVD Player - KnowHow

Create successful ePaper yourself
Turn your PDF publications into a flip-book with our unique Google optimized e-Paper software.
19” <strong>HD</strong> <strong>Ready</strong> <strong>Digital</strong><br />
<strong>LCD</strong> <strong>TV</strong> <strong>with</strong> <strong>DVD</strong> <strong>Player</strong><br />
Instruction Manual<br />
L19<strong>DVD</strong>P10<br />
L19<strong>DVD</strong>B20<br />
Logik L19<strong>DVD</strong>P10_B20_IB_100914_Zell.indd 1 14/09/2010 3:02 PM
Logik L19<strong>DVD</strong>P10_B20_IB_100914_Zell.indd 2 14/09/2010 3:02 PM
Contents<br />
Preparation ............................................................................................................................................................................... 5<br />
Unpacking the <strong>TV</strong> ...................................................................................................................................................................................................5<br />
Installing / Removing the Base Stand .............................................................................................................................................................6<br />
Front / Top / Side View and Controls ...............................................................................................................................................................7<br />
Rear View and Sockets ..........................................................................................................................................................................................8<br />
Installing Batteries in the Remote Control ....................................................................................................................................................9<br />
Remote Control Operation Range ....................................................................................................................................................................9<br />
Remote Control .................................................................................................................................................................................................... 10<br />
Connections ............................................................................................................................................................................ 13<br />
Making Video and Audio Connections ........................................................................................................................................................ 13<br />
Connecting an AV Device <strong>with</strong> <strong>HD</strong>MI Cable .............................................................................................................................................. 13<br />
Connecting a Computer <strong>with</strong> VGA Cable ................................................................................................................................................... 14<br />
Connecting an AV Device <strong>with</strong> Component (YPbPr) Cable ................................................................................................................. 14<br />
Connecting an AV Device <strong>with</strong> SCART Cable ............................................................................................................................................ 15<br />
Connecting an AV Device <strong>with</strong> S-Video Cable .......................................................................................................................................... 15<br />
Connecting an AV Device <strong>with</strong> Composite Cable .................................................................................................................................... 16<br />
Connecting a Coaxial Audio Receiver .......................................................................................................................................................... 16<br />
Connecting Earphones ...................................................................................................................................................................................... 17<br />
Connecting a USB Storage Device ................................................................................................................................................................. 17<br />
Connecting the Aerial ........................................................................................................................................................................................ 18<br />
Initial Setup ............................................................................................................................................................................ 18<br />
Turning the <strong>TV</strong> On for the First Time ............................................................................................................................................................ 18<br />
− Selecting the Input Source................................................................................................................................................................... 19<br />
− Channel Selection ................................................................................................................................................................................... 19<br />
− Volume Adjustment ................................................................................................................................................................................ 19<br />
Using the Features ................................................................................................................................................................. 20<br />
Customising the PICTURE Setting ................................................................................................................................................................. 20<br />
− Picture Mode ............................................................................................................................................................................................. 20<br />
Customising the SOUND Setting ................................................................................................................................................................... 21<br />
− Sound Mode .............................................................................................................................................................................................. 21<br />
− Stereo / Dual Sound Reception (<strong>TV</strong> Mode) .................................................................................................................................... 21<br />
− Speaker Sound Output Selection (D<strong>TV</strong> Mode) ............................................................................................................................. 21<br />
Customising the FUNCTION Setting ............................................................................................................................................................. 22<br />
− Video Size ................................................................................................................................................................................................... 22<br />
− TT Language .............................................................................................................................................................................................. 23<br />
− Sleep Timer ................................................................................................................................................................................................ 23<br />
− OSD Timer................................................................................................................................................................................................... 24<br />
− Blue Screen ................................................................................................................................................................................................ 24<br />
− Child Lock ................................................................................................................................................................................................... 24<br />
− Key Locked ................................................................................................................................................................................................. 25<br />
− Reset ............................................................................................................................................................................................................ 26<br />
− Installation .................................................................................................................................................................................................. 26<br />
Customising the <strong>TV</strong> Setting (<strong>TV</strong> Mode) ....................................................................................................................................................... 27<br />
− Country ........................................................................................................................................................................................................ 27<br />
− Auto Tuning ............................................................................................................................................................................................... 27<br />
− Manual Tuning .......................................................................................................................................................................................... 28<br />
− Channel Edit .............................................................................................................................................................................................. 28<br />
Customising the <strong>TV</strong> Settings (D<strong>TV</strong> Mode) .................................................................................................................................................. 29<br />
− Auto Tuning ............................................................................................................................................................................................... 29<br />
− Manual Tuning .......................................................................................................................................................................................... 30<br />
− Channel Edit .............................................................................................................................................................................................. 30<br />
− Timer ............................................................................................................................................................................................................ 31<br />
− Rating ........................................................................................................................................................................................................... 31<br />
− CI (Common Interface) (D<strong>TV</strong> Mode) .................................................................................................................................................. 32<br />
Logik L19<strong>DVD</strong>P10_B20_IB_100914_Zell.indd 3 14/09/2010 3:02 PM
Customising the <strong>TV</strong> Settings (PC Mode) ..................................................................................................................................................... 33<br />
Customising the <strong>TV</strong> Settings (<strong>HD</strong>MI and YPbPr Modes)........................................................................................................................ 33<br />
Teletext (<strong>TV</strong> Mode) .............................................................................................................................................................................................. 34<br />
− To Turn on Teletext Function............................................................................................................................................................... 34<br />
<strong>Digital</strong> Teletext (D<strong>TV</strong> Mode) ............................................................................................................................................................................. 35<br />
− Teletext <strong>with</strong>in <strong>Digital</strong> Service ............................................................................................................................................................ 35<br />
EPG (Electronic Programme Guide) (D<strong>TV</strong> Mode) ..................................................................................................................................... 35<br />
− Switch On/Off EPG ................................................................................................................................................................................... 35<br />
− Select a Programme ............................................................................................................................................................................... 35<br />
Using the Features via USB Port ........................................................................................................................................... 36<br />
My Album................................................................................................................................................................................................................ 36<br />
My Music ................................................................................................................................................................................................................. 37<br />
My Movie ................................................................................................................................................................................................................. 37<br />
My Recorder ........................................................................................................................................................................................................... 38<br />
− Recorded List ............................................................................................................................................................................................. 38<br />
− Recording Device ..................................................................................................................................................................................... 39<br />
− Recording Preference .............................................................................................................................................................................40<br />
DVR (<strong>Digital</strong> Video Recorder) ................................................................................................................................................ 41<br />
Time Shift Function ............................................................................................................................................................................................. 41<br />
− Auto Time Shift Mode ............................................................................................................................................................................ 41<br />
− Pause Time Shift Mode .......................................................................................................................................................................... 41<br />
Recording D<strong>TV</strong> Programme onto a USB Storage Device ...................................................................................................................... 42<br />
Timer Programming ........................................................................................................................................................................................... 43<br />
Using the <strong>DVD</strong> Features .........................................................................................................................................................44<br />
Using the Built-in <strong>DVD</strong> <strong>Player</strong> ..........................................................................................................................................................................44<br />
Compatible Disc Types ......................................................................................................................................................................................44<br />
− Supported Formats .................................................................................................................................................................................44<br />
− Region Code ..............................................................................................................................................................................................44<br />
Basic <strong>DVD</strong> Playback Functions ........................................................................................................................................................................ 45<br />
− Playing the <strong>DVD</strong> ....................................................................................................................................................................................... 45<br />
− Menu Playback (for <strong>DVD</strong>) ...................................................................................................................................................................... 45<br />
− Stopping Playback ................................................................................................................................................................................... 45<br />
− Previous / Next (for <strong>DVD</strong> / CD / Multimedia discs) ...................................................................................................................... 45<br />
− Forward / Backward (for <strong>DVD</strong> / CD / Multimedia discs) ............................................................................................................. 45<br />
− Pause (for <strong>DVD</strong> / CD / Multimedia discs) ......................................................................................................................................... 45<br />
− Repeat (for <strong>DVD</strong> / CD / Multimedia discs) ....................................................................................................................................... 45<br />
− Info (for <strong>DVD</strong> / CD / Multimedia discs) .............................................................................................................................................46<br />
− Goto (for <strong>DVD</strong> / CD / Multimedia discs) ...........................................................................................................................................46<br />
− Audio (for <strong>DVD</strong> / CD) ...............................................................................................................................................................................46<br />
− Repeat A-B (for <strong>DVD</strong> / CD).....................................................................................................................................................................46<br />
Playing Multimedia Discs ..................................................................................................................................................................................46<br />
Using the <strong>DVD</strong> System Setup Page ............................................................................................................................................................... 47<br />
Using the <strong>DVD</strong> Language Setup Page..........................................................................................................................................................48<br />
Using the <strong>DVD</strong> Audio Setup Page .................................................................................................................................................................. 49<br />
Using the <strong>DVD</strong> Speaker Setup Page .............................................................................................................................................................. 50<br />
Using the <strong>DVD</strong> Dolby <strong>Digital</strong> Setup Page ................................................................................................................................................... 50<br />
Maintenance ........................................................................................................................................................................... 51<br />
Hints and Tips ......................................................................................................................................................................... 52<br />
Display Modes ........................................................................................................................................................................54<br />
YPbPr Mode ........................................................................................................................................................................................................... 54<br />
PC Mode .................................................................................................................................................................................................................. 54<br />
<strong>HD</strong>MI Mode ........................................................................................................................................................................................................... 54<br />
Specification ........................................................................................................................................................................... 55<br />
Safety Warnings .....................................................................................................................................................................56<br />
Logik L19<strong>DVD</strong>P10_B20_IB_100914_Zell.indd 4 14/09/2010 3:02 PM
Congratulations on the purchase of your new Logik <strong>TV</strong>.<br />
Your new <strong>TV</strong> has many features and incorporates the latest technology to enhance your viewing<br />
experience. We recommend that you spend some time reading this instruction manual in order that you<br />
fully understand these features. You will also find some hints and tips to help you resolve any issues.<br />
Read all the safety instructions carefully before use and keep this instruction manual for future reference.<br />
Unpacking the <strong>TV</strong><br />
Remove all packaging from the <strong>TV</strong>. Retain the packaging. If you dispose of it please do so according to local regulations.<br />
The following items are included:<br />
<strong>TV</strong> <strong>with</strong> <strong>TV</strong> Stand Support<br />
<strong>TV</strong> Stand Support’s part number<br />
I.01.519770013 (L19<strong>DVD</strong>P10)<br />
I.01.597705112 (L19<strong>DVD</strong>B20)<br />
<strong>TV</strong> Base Stand<br />
part number<br />
I.01.519770014 (L19<strong>DVD</strong>P10)<br />
I.01.597705001 (L19<strong>DVD</strong>B20)<br />
Screw A x 1<br />
part number I.03.TW3012A01<br />
Instruction Manual<br />
part number I.08.995197720<br />
AV Cable<br />
part number E.14.113150013<br />
Remote Control / AAA Batteries x 2<br />
Remote Control’s part number<br />
I.14.000000672 (L19<strong>DVD</strong>P10)<br />
I.14.000000661 (L19<strong>DVD</strong>B20)<br />
AAA Battery’s part number<br />
E.17.101570001<br />
If items are missing, or damaged please contact Partmaster (UK only). Tel: 0844 800 3456 for assistance.<br />
Video<br />
Video<br />
Quick Start Guide<br />
part number I.08.015197718<br />
R<br />
L<br />
R<br />
L<br />
Mains Cable<br />
part number E.14.050150900<br />
<strong>Digital</strong> <strong>TV</strong> Switchover Addendum<br />
part number I.08.035197804<br />
Logik L19<strong>DVD</strong>P10_B20_IB_100914_Zell.indd 5 14/09/2010 3:02 PM<br />
GB-5<br />
Preparation<br />
Connections<br />
Initial Setup<br />
Using the Features<br />
Using the Features<br />
via USB port<br />
DVR (<strong>Digital</strong><br />
Video Recorder)<br />
Using the <strong>DVD</strong><br />
Features<br />
Hints and Tips, Specification<br />
and Safety Warnings
Preparation Connections Initial Setup Using the Features Using the Features DVR (<strong>Digital</strong><br />
via USB port Video Recorder)<br />
Using the <strong>DVD</strong><br />
Features<br />
Hints and Tips, Specification<br />
and Safety Warnings<br />
Installing / Removing the Base Stand<br />
4. To remove the base stand, untighten the 4 screws that<br />
hold the base stand to the rear of the <strong>TV</strong>.<br />
GB-6<br />
Remove the base stand before mounting the <strong>TV</strong> onto the wall.<br />
The <strong>LCD</strong> display is very fragile, and must be protected at all times when installing and removing the base stand. Be sure<br />
that no hard or sharp object, or anything that could scratch or damage the <strong>LCD</strong> display, comes into contact <strong>with</strong> it. DO<br />
NOT exert pressure on the front of the <strong>TV</strong> at any time because the screen could crack.<br />
1. Disconnect all cables connected to the <strong>TV</strong>.<br />
2. Lay the <strong>TV</strong> down on a flat surface <strong>with</strong> the back side<br />
facing up. Please make sure to place a soft cushioned<br />
material (such as a pillow or thick piece of foam)<br />
beneath the screen.<br />
3. To install the base stand, attach the base stand <strong>with</strong><br />
the supplied screw A.<br />
Keep all the spare screws should you want to use<br />
the base stand option.<br />
5. Mounting on the wall. This <strong>TV</strong> is designed to<br />
be wallmounted <strong>with</strong> a standard 100 mm x 100<br />
mm mounting kit designed for flat-panel <strong>TV</strong>s<br />
(sold separately). Mount this <strong>TV</strong> according to the<br />
instructions included in the mounting kit. Due to the<br />
space restriction, we recommend that you make all<br />
connections before final mounting on the wall. (refer to<br />
page 13-18 for details)<br />
Screws A x 1<br />
(P.N. I.03.TW3012A01)<br />
Screws B x 4<br />
(P.N. I.03.MP4010001)<br />
100 mm<br />
If items are missing, or damaged please contact Partmaster (UK only). Tel: 0844 800 3456 for assistance.<br />
100 mm<br />
Four mounting holes<br />
(size M4 screw)<br />
Logik L19<strong>DVD</strong>P10_B20_IB_100914_Zell.indd 6 14/09/2010 3:02 PM
Front / Top / Side View and Controls<br />
Item Description<br />
1 POWER LED<br />
2 IR (Infrared Receiver)<br />
3 VOL +/–<br />
4 CH +/–<br />
Illuminates blue when the <strong>TV</strong> is turned on. Illuminates red when the <strong>TV</strong> is in standby<br />
mode. The LED will illuminate blue when the timer programming has started in the<br />
standby mode.<br />
Receives IR signals from the remote control.<br />
Do not put anything near the sensor, as its function may be affected.<br />
Adjust the volume.<br />
Select and adjust a setting in the OSD menus.<br />
Select a channel.<br />
Select a sub-menu of the OSD menu.<br />
5 MENU Displays the OSD (on screen display) menu.<br />
6 SOURCE<br />
7<br />
Select among the different input signal sources:<br />
D<strong>TV</strong> / <strong>TV</strong> / <strong>DVD</strong> / AV / S-VIDEO / SCART / YPBPR / <strong>HD</strong>MI / PC<br />
Switch the <strong>TV</strong> on from standby.<br />
Switch the <strong>TV</strong> back to standby.<br />
8 Press to stop (<strong>DVD</strong> mode)<br />
9 Press to playback previous track or chapter (<strong>DVD</strong> mode)<br />
10 Press to playback next track or chapter (<strong>DVD</strong> mode)<br />
11<br />
1 2<br />
Press to start playback or pause. (<strong>DVD</strong> mode)<br />
12 Press to insert and eject disc. (<strong>DVD</strong> mode)<br />
13 Disc Slot<br />
3 4 5 6 7<br />
Insert the disc <strong>with</strong> the mirror side facing towards you (12 cm discs only. Don’t insert 8<br />
cm discs)<br />
Logik L19<strong>DVD</strong>P10_B20_IB_100914_Zell.indd 7 14/09/2010 3:02 PM<br />
8<br />
11<br />
9<br />
10<br />
12<br />
13<br />
GB-7<br />
Preparation<br />
Connections<br />
Initial Setup<br />
Using the Features<br />
Using the Features<br />
via USB port<br />
DVR (<strong>Digital</strong><br />
Video Recorder)<br />
Using the <strong>DVD</strong><br />
Features<br />
Hints and Tips, Specification<br />
and Safety Warnings
Preparation Connections Initial Setup Using the Features Using the Features DVR (<strong>Digital</strong><br />
via USB port Video Recorder)<br />
Using the <strong>DVD</strong><br />
Features<br />
Hints and Tips, Specification<br />
and Safety Warnings<br />
Rear View and Sockets<br />
Item Description<br />
1 POWER ON/OFF Switch on the POWER ON/OFF switch to turn the <strong>TV</strong> to standby mode.<br />
2 AC~ Connect to the mains cable to the mains socket.<br />
3 Connect earphones for private listening.<br />
4 RF (75 Ω) Connect to the aerial socket on the wall <strong>with</strong> the RF coaxial cable.<br />
5 VIDEO / AUDIO (L/R)<br />
6 Y, PB, PR<br />
GB-8<br />
Connect to the Composite VIDEO and AUDIO (L/R) output sockets on external video<br />
devices.<br />
Connect to a <strong>DVD</strong> player, <strong>Digital</strong> Set-Top-Box, or other AV devices <strong>with</strong> component<br />
(YPbPr) video and audio output sockets.<br />
7 COAXIAL Connect to the audio socket on the digital/standard 5.1 audio system.<br />
8 SCART Connect to a VCR, <strong>DVD</strong> <strong>Player</strong>, or other AV devices <strong>with</strong> SCART output socket.<br />
9 CI (Common Interface) Slot Allows the insertion of a Common Access Module. (Refer to page 31 for details.)<br />
10 VGA / PC AUDIO Connect to a computer or other devices <strong>with</strong> a VGA interface.<br />
11 <strong>HD</strong>MI<br />
3 4<br />
<strong>HD</strong>MI (High-Definition Multimedia Interface) provides an uncompressed, all digital audio/<br />
video interface between this <strong>TV</strong> and any <strong>HD</strong>MI-device, such as a set-top box, Blu-ray<br />
player, and AV receiver.<br />
12 S-VIDEO Connect to a VCR, <strong>DVD</strong> <strong>Player</strong>, or other AV devices <strong>with</strong> S-Video output sockets.<br />
13 DVR USB port<br />
1 ON OFF<br />
2<br />
5<br />
7 8 10<br />
11<br />
CARD FACE FRONT<br />
6 9<br />
12 13<br />
Allows the insertion of a USB storage device. You can view media files or record D<strong>TV</strong><br />
programmes through this port. (Media Mode)<br />
Logik L19<strong>DVD</strong>P10_B20_IB_100914_Zell.indd 8 14/09/2010 3:02 PM
Installing Batteries in the Remote Control<br />
1. Press and lift the back cover up to open the battery compartment of the<br />
remote control.<br />
2. Insert two AAA size batteries. Make sure to match the (+) and ( - ) ends<br />
of the batteries <strong>with</strong> the (+) and ( - ) ends indicated in the battery<br />
compartment.<br />
3. Close the battery compartment cover.<br />
Handling the Batteries<br />
• Improper or incorrect use of batteries may cause<br />
corrosion or battery leakage, which could cause<br />
fire, personal injury or damage to property.<br />
• Only use the battery type indicated in this manual.<br />
• When the batteries are exhausted, the remote will<br />
not function. Replace both batteries at the same<br />
time <strong>with</strong> new ones.<br />
• Do not install new batteries <strong>with</strong> used ones and<br />
do not mix different types of batteries.<br />
• Do not dispose of used batteries as domestic<br />
waste. Dispose of them in accordance <strong>with</strong> local<br />
regulations.<br />
Remote Control Operation Range<br />
Point the remote control at the <strong>TV</strong> no more than 5 metres from the<br />
remote control sensor on the <strong>TV</strong> and <strong>with</strong>in 60° in front of the <strong>TV</strong>.<br />
The operating distance may vary depending on the brightness of the<br />
room.<br />
Handling the Remote Control<br />
• Take care of your fingernails when you press and<br />
hold the battery release tab.<br />
• Do not drop or cause impact to the remote<br />
control.<br />
• Do not spill water or any liquid on the remote<br />
control.<br />
• Do not place the remote control on a wet object.<br />
• Do not place the remote control under direct<br />
sunlight or near sources of excessive heat.<br />
• Remove the battery from the remote control<br />
when not in use for a long period of time, as it<br />
could cause corrosion or battery leakage and may<br />
result in physical injury and/or property damage<br />
including fire.<br />
30° 30°<br />
Logik L19<strong>DVD</strong>P10_B20_IB_100914_Zell.indd 9 14/09/2010 3:02 PM<br />
5M<br />
GB-9<br />
Preparation<br />
Connections<br />
Initial Setup<br />
Using the Features<br />
Using the Features<br />
via USB port<br />
DVR (<strong>Digital</strong><br />
Video Recorder)<br />
Using the <strong>DVD</strong><br />
Features<br />
Hints and Tips, Specification<br />
and Safety Warnings
Preparation Connections Initial Setup Using the Features Using the Features DVR (<strong>Digital</strong><br />
via USB port Video Recorder)<br />
Using the <strong>DVD</strong><br />
Features<br />
Hints and Tips, Specification<br />
and Safety Warnings<br />
Remote Control<br />
1 Transmission Indicator<br />
Illuminates red when you press a button.<br />
2<br />
3<br />
GB-10<br />
Switch the <strong>TV</strong> between on and standby mode.<br />
Mute and restore your <strong>TV</strong> sound.<br />
4 P.MODE<br />
Selects picture mode: Personal / Standard / Movie / Mild /<br />
Game.<br />
S.MODE<br />
Selects sound mode: Standard / Music / Voice / Theatre /<br />
Personal.<br />
5 ASPECT<br />
Select from the following modes settings: Auto / Full / 4:3 /<br />
14:9 / Zoom.<br />
6 SLEEP<br />
Set the <strong>TV</strong> sleep timer.<br />
NICAM<br />
Switch between different audio languages (only applicable<br />
when the <strong>TV</strong> programme has this feature).<br />
7 FAV<br />
Display the Favourite Channel List.<br />
FAV +/-<br />
Switch between your favourite channels.<br />
8 0-9 Number Button<br />
Select a programme.<br />
Select numbered items in a menu.<br />
9 -/--<br />
Select and switch to a channel that is higher than<br />
Channel 9. (<strong>TV</strong> mode)<br />
10+<br />
For example: for track 23, press 10+ twice followed by 3.<br />
(<strong>DVD</strong> mode)<br />
10<br />
Return to previous viewing channel.<br />
11 MEDIA<br />
Enter the Multimedia Setup Menu.<br />
12 REC<br />
One button recording function button. Press it to record the<br />
current D<strong>TV</strong> video.<br />
13<br />
Press to start playback or pause. (Media / <strong>DVD</strong> mode)<br />
Press to stop playback. (Media / <strong>DVD</strong> mode)<br />
/<br />
Press to skip to the beginning of the previous / next chapter<br />
or track. (Media / <strong>DVD</strong> mode)<br />
/<br />
Use to advance or reverse playback rapidly. (Media / <strong>DVD</strong><br />
mode)<br />
Logik L19<strong>DVD</strong>P10_B20_IB_100914_Zell.indd 10 14/09/2010 3:02 PM<br />
2<br />
4<br />
5<br />
8<br />
9<br />
11<br />
12<br />
1<br />
3<br />
6<br />
7<br />
10<br />
13
14 SOURCE<br />
Select among the different input signal sources:<br />
D<strong>TV</strong> / <strong>TV</strong> / <strong>DVD</strong> / AV / S-VIDEO / SCART / YPBPR / <strong>HD</strong>MI /<br />
PC<br />
15 CH +/-<br />
Select a channel.<br />
16 VOL +/-<br />
Adjust the volume.<br />
17 MENU<br />
Display the OSD (On Screen Display) menu.<br />
18 EXIT<br />
Exit the OSD (On Screen Display) menu.<br />
19<br />
Allows you to navigate the OSD menus and adjust the<br />
system settings to your preference.<br />
OK<br />
• Confirm the selection in the OSD menus.<br />
• Display a list of channels saved in the <strong>TV</strong> tuner<br />
memory.<br />
20 EPG<br />
Display the EPG (Electronic Programme Guide). (D<strong>TV</strong><br />
mode)<br />
21 DISPLAY<br />
Display the present screen information such as the<br />
current channel and the input source.<br />
22 TEXT<br />
Turn on and off the Teletext function. (<strong>TV</strong> / D<strong>TV</strong> mode)<br />
<strong>DVD</strong> SETUP<br />
Press to display the setup menu screen. (<strong>DVD</strong> mode)<br />
23 SUBTITLE<br />
Display the subtitle which is broadcast <strong>with</strong> the<br />
programme. (<strong>TV</strong> / D<strong>TV</strong> mode)<br />
<strong>DVD</strong> MENU<br />
Displays the OSD (on screen display) menu. (<strong>DVD</strong> mode)<br />
24 INDEX<br />
Press to select the page number of the Index from<br />
teletext. (<strong>TV</strong> mode)<br />
GOTO<br />
Press to skip to a specific location on a <strong>DVD</strong> / CD. (<strong>DVD</strong><br />
mode)<br />
25 SIZE<br />
To enlarge the picture on the <strong>TV</strong> in teletext. (<strong>TV</strong> mode)<br />
ZOOM<br />
Zoom in / zoom out the displayed frame. (<strong>DVD</strong> mode)<br />
14<br />
15<br />
17<br />
20<br />
23<br />
22<br />
Logik L19<strong>DVD</strong>P10_B20_IB_100914_Zell.indd 11 14/09/2010 3:02 PM<br />
19<br />
16<br />
18<br />
21<br />
24<br />
25<br />
GB-11<br />
Preparation<br />
Connections<br />
Initial Setup<br />
Using the Features<br />
Using the Features<br />
via USB port<br />
DVR (<strong>Digital</strong><br />
Video Recorder)<br />
Using the <strong>DVD</strong><br />
Features<br />
Hints and Tips, Specification<br />
and Safety Warnings
Preparation Connections Initial Setup Using the Features Using the Features DVR (<strong>Digital</strong><br />
via USB port Video Recorder)<br />
Using the <strong>DVD</strong><br />
Features<br />
Hints and Tips, Specification<br />
and Safety Warnings<br />
26 REVEAL<br />
Reveal hidden information such as the answer to a quiz<br />
in Teletext. (<strong>TV</strong> mode)<br />
GB-12<br />
REPEAT<br />
Repeat a title, chapter, track or whole disc. (<strong>DVD</strong> mode)<br />
27 CANCEL<br />
To cancel the teletext mode completely. (<strong>TV</strong> mode)<br />
A-B<br />
Repeat a segment between A and B. (<strong>DVD</strong> mode)<br />
28 SUBPAGE<br />
Display the subpage on the teletext screen. (<strong>TV</strong> mode)<br />
AUDIO<br />
Change the audio language or audio channel. (<strong>DVD</strong><br />
mode)<br />
29 HOLD<br />
Freeze a multi-page passage on screen in Teletext. (<strong>TV</strong><br />
mode)<br />
SUB.T<br />
Display subtitle in the <strong>DVD</strong>. (<strong>DVD</strong> mode)<br />
30 Coloured buttons<br />
Access the TELETEXT items or programme edit when<br />
using <strong>Digital</strong> / Freeview <strong>TV</strong> Channels. (<strong>TV</strong> / D<strong>TV</strong> / <strong>DVD</strong><br />
mode)<br />
INFO (red)<br />
Display information. (<strong>DVD</strong> mode)<br />
ANGLE (green)<br />
Select different angles for the video. (<strong>DVD</strong> mode)<br />
SLOW (yellow)<br />
Select slow speed playing and resume normal play.<br />
(<strong>DVD</strong> mode)<br />
(blue)<br />
To insert and eject disc. (<strong>DVD</strong> mode)<br />
Logik L19<strong>DVD</strong>P10_B20_IB_100914_Zell.indd 12 14/09/2010 3:02 PM<br />
26<br />
27<br />
30<br />
29<br />
28
Making Video and Audio Connections<br />
Not all AV devices have the ability to connect to a <strong>TV</strong>, please refer to the owner’s manual of your AV device for compatibilty and<br />
connection procedures.<br />
When connecting any external AV device, do not connect the mains cable to the mains socket until all other connections are<br />
complete.<br />
Best Video<br />
Performance<br />
Signal Type<br />
<strong>HD</strong>MI<br />
(480i/480p/576i/576p/720p/1080i/1080p*)<br />
VGA<br />
Component Video<br />
(480i/480p/576i/576p/720p/1080i/1080p*)<br />
Separate audio<br />
connection required<br />
No<br />
Yes<br />
Yes<br />
SCART (RGB Input) No<br />
S-Video Yes<br />
Composite Video<br />
*1080p: Although this <strong>TV</strong> is compatible <strong>with</strong> a 1080p input, the screen is not capable of<br />
displaying this resolution and consequently the image will be scaled to suit the screen.<br />
Connecting an AV Device <strong>with</strong> <strong>HD</strong>MI Cable<br />
• This <strong>TV</strong> can accept High-Definition Multimedia Interface (<strong>HD</strong>MI) supports <strong>HD</strong>CP (High-Bandwidth <strong>Digital</strong> Content Protection)<br />
Protocol.<br />
• When you connect to the output of an <strong>HD</strong> ready player (blu-ray disc player, game console, set-top box or computer) switch to<br />
the <strong>HD</strong>MI function and the <strong>TV</strong> will automatically detect the resolution used by the <strong>HD</strong>MI source.<br />
• To get the best picture quality, adjust the blu-ray disc player, game console or set-top box output resolution up to 1920 x<br />
1080p.<br />
Right Rear Side View of <strong>TV</strong><br />
1. Use a <strong>HD</strong>MI cable to connect the <strong>TV</strong>’s <strong>HD</strong>MI input<br />
socket to an external AV device’s <strong>HD</strong>MI output socket.<br />
2. Plug the connected devices into the mains socket<br />
before switching on the POWER ON/OFF switch at<br />
the side of the <strong>TV</strong>.<br />
3. Press the / I button on the top panel of the <strong>TV</strong> or<br />
the button on the remote control to turn on your<br />
<strong>TV</strong>.<br />
4. Press the SOURCE button to display the Source List.<br />
Use the buttons to select <strong>HD</strong>MI and then press<br />
the OK button or the button to confirm.<br />
Although this <strong>TV</strong> is able to connect to <strong>HD</strong>MI<br />
device, it is possible that some devices may<br />
not operate correctly.<br />
Game Console<br />
Set-top Box<br />
CARD FACE FRONT<br />
<strong>HD</strong>MI Cable<br />
(not included)<br />
Blu-ray <strong>Player</strong> / <strong>DVD</strong> <strong>Player</strong> /<br />
Recorder<br />
Logik L19<strong>DVD</strong>P10_B20_IB_100914_Zell.indd 13 14/09/2010 3:02 PM<br />
GB-13<br />
Preparation<br />
Connections<br />
Initial Setup<br />
Using the Features<br />
Using the Features<br />
via USB port<br />
DVR (<strong>Digital</strong><br />
Video Recorder)<br />
Using the <strong>DVD</strong><br />
Features<br />
Hints and Tips, Specification<br />
and Safety Warnings
Preparation Connections Initial Setup Using the Features Using the Features DVR (<strong>Digital</strong><br />
via USB port Video Recorder)<br />
Using the <strong>DVD</strong><br />
Features<br />
Hints and Tips, Specification<br />
and Safety Warnings<br />
Connecting a Computer <strong>with</strong> VGA Cable<br />
1. Use a VGA cable to connect the <strong>TV</strong>’s VGA input<br />
socket to a computer’s VGA output socket. Use an<br />
audio cable to connect the <strong>TV</strong>’s PC AUDIO input<br />
socket to the computer’s audio output socket.<br />
2. Plug the connected devices into the mains socket<br />
before switching on the POWER ON/OFF switch<br />
at the side of the <strong>TV</strong>.<br />
3. Press the / I button on the top panel of the <strong>TV</strong><br />
or the button on the remote control to turn on<br />
your <strong>TV</strong>.<br />
4. Press the SOURCE button to display the Source<br />
List. Use the buttons to select PC and then<br />
press the OK button or the button to confirm.<br />
Connecting an AV Device <strong>with</strong> Component (YPbPr) Cable<br />
1. Use a component cable to connect the <strong>TV</strong>’s YPbPr<br />
input sockets to an external AV device’s component<br />
output sockets.<br />
2. Use the supplied AV cable to connect the <strong>TV</strong>’s<br />
AUDIO(L/R) input sockets to the external AV device’s<br />
component audio output sockets. (Audio Left = white,<br />
and Audio Right = red)<br />
GB-14<br />
• The best resolution is 1360 * 768.<br />
• If your computer is set to shut down after a<br />
few minutes of idle mode, the <strong>TV</strong> will also<br />
switch to standby due to no signal being<br />
received, this is to save energy. Press the<br />
/ I button on the top panel of the <strong>TV</strong><br />
or the button on the remote control to<br />
restart the <strong>TV</strong>.<br />
Component port on the <strong>TV</strong> Y Pb Pr<br />
Video output ports on <strong>DVD</strong><br />
player<br />
Y Pb Pr<br />
Y Cb Cr<br />
3. Plug the connected devices into the mains socket<br />
before switching on the POWER ON/OFF switch at<br />
the side of the <strong>TV</strong>.<br />
4. Press the / I button on the top panel of the <strong>TV</strong> or<br />
the button on the remote control to turn on your<br />
<strong>TV</strong>.<br />
5. Press the SOURCE button to display the Source List.<br />
Use the buttons to select YPBPR and then press<br />
the OK button or the button to confirm.<br />
Y<br />
Pr/Cr<br />
AV Cable<br />
(included)<br />
Y<br />
Pb/Cb<br />
Pb/Cb<br />
Pb<br />
Y<br />
Pr/Cr<br />
Pr<br />
White (L)<br />
L<br />
Video Camera<br />
Right Rear Side View of <strong>TV</strong><br />
Right Rear Side View of <strong>TV</strong><br />
Red (R)<br />
White (L)<br />
R<br />
CARD FACE FRONT<br />
Component Cable<br />
(not included)<br />
Red (R)<br />
CARD FACE FRONT<br />
COMPONENT<br />
OUT<br />
Yellow (Video)<br />
Yellow (Video)<br />
Game Console<br />
Blu-ray <strong>Player</strong> / <strong>DVD</strong> <strong>Player</strong> /<br />
Recorder<br />
Audio Cable<br />
(not included)<br />
Computer<br />
Set-top Box<br />
Satellite Receiver<br />
VGA Cable<br />
(not included)<br />
Logik L19<strong>DVD</strong>P10_B20_IB_100914_Zell.indd 14 14/09/2010 3:02 PM
Connecting an AV Device <strong>with</strong> SCART Cable<br />
1. Use a SCART cable to connect the <strong>TV</strong>’s SCART input<br />
socket to an external AV device’s SCART output<br />
socket.<br />
2. Plug the connected devices into the mains socket<br />
before switching on the POWER ON/OFF switch at<br />
the side of the <strong>TV</strong>.<br />
3. Press the / I button on the top panel of the <strong>TV</strong> or<br />
the button on the remote control to turn on your<br />
<strong>TV</strong>.<br />
4. The <strong>TV</strong> will change the input source to SCART<br />
automatically once the AV device is switched on.<br />
Connecting an AV Device <strong>with</strong> S-Video Cable<br />
1. Use a S-Video cable to connect the <strong>TV</strong>’s S-VIDEO<br />
input socket to an external AV device’s S-VIDEO<br />
output socket.<br />
2. Use the supplied AV cable to connect the <strong>TV</strong>’s<br />
AUDIO(L/R) input sockets to the external AV<br />
device’s audio output sockets. (Audio Left = white,<br />
and Audio Right = red)<br />
3. Plug the connected devices into the mains socket<br />
before switching on the POWER ON/OFF switch<br />
at the side of the <strong>TV</strong>.<br />
4. Press the / I button on the top panel of the <strong>TV</strong><br />
or the button on the remote control to turn on<br />
your <strong>TV</strong>.<br />
5. Press the SOURCE button to display the Source<br />
List. Use the buttons to select S-VIDEO and<br />
then press the OK button or the button to<br />
confirm.<br />
White (L)<br />
Video Camera<br />
VCR<br />
<strong>DVD</strong> <strong>Player</strong> / Recorder<br />
VCR<br />
Right Rear Side View of <strong>TV</strong><br />
Right Rear Side View of <strong>TV</strong><br />
Game Console<br />
CARD FACE FRONT<br />
CARD FACE FRONT<br />
AV Cable<br />
(included)<br />
SCART Cable<br />
(not included)<br />
Set-top Box<br />
Satellite Receiver<br />
<strong>DVD</strong> <strong>Player</strong><br />
Set-top Box<br />
S-Video Cable<br />
(not included)<br />
Satellite Receiver<br />
Logik L19<strong>DVD</strong>P10_B20_IB_100914_Zell.indd 15 14/09/2010 3:02 PM<br />
Red (R)<br />
Red (R)<br />
White (L)<br />
Yellow (Video)<br />
Yellow (Video)<br />
GB-15<br />
Preparation<br />
Connections<br />
Initial Setup<br />
Using the Features<br />
Using the Features<br />
via USB port<br />
DVR (<strong>Digital</strong><br />
Video Recorder)<br />
Using the <strong>DVD</strong><br />
Features<br />
Hints and Tips, Specification<br />
and Safety Warnings
Preparation Connections Initial Setup Using the Features Using the Features DVR (<strong>Digital</strong><br />
via USB port Video Recorder)<br />
Using the <strong>DVD</strong><br />
Features<br />
Hints and Tips, Specification<br />
and Safety Warnings<br />
Connecting an AV Device <strong>with</strong> Composite Cable<br />
1. Use the supplied AV cable to connect the <strong>TV</strong>’s<br />
AUDIO(L/R)/VIDEO input sockets to an external AV<br />
device’s composite audio/video sockets. (Video =<br />
yellow, Audio Left = white, and Audio Right = red)<br />
2. Plug the connected devices into the mains socket<br />
before switching on the POWER ON/OFF switch<br />
at the side of the <strong>TV</strong>.<br />
3. Press the / I button on the top panel of the <strong>TV</strong><br />
or the button on the remote control to turn on<br />
your <strong>TV</strong>.<br />
4. Press the SOURCE button to display the Source<br />
List. Use the buttons to select AV and then<br />
press the OK button or the button to confirm.<br />
Connecting a Coaxial Audio Receiver<br />
For better sound quality, you may want to play the <strong>DVD</strong> audio through your multi-channel audio receiver. (<strong>DVD</strong> mode)<br />
1. Use an audio cable to connect the <strong>TV</strong>’s COAXIAL<br />
output socket to an external audio receiver’s<br />
audio coaxial input socket.<br />
2. Plug the connected devices into the mains socket<br />
before switching on the POWER ON/OFF switch<br />
at the side of the <strong>TV</strong>.<br />
3. Press the / I button on the top panel of the <strong>TV</strong><br />
or the button on the remote control to turn on<br />
your <strong>TV</strong> and your audio receiver and then set it to<br />
Coaxial mode.<br />
4. Press the SOURCE button to display the Source<br />
List. Use the buttons to select <strong>DVD</strong> and then<br />
press the OK button or the button to confirm.<br />
GB-16<br />
The <strong>TV</strong>’s volume control will have no effect.<br />
You may control the audio level via the Audio<br />
Receiver.<br />
White (L)<br />
Red (R)<br />
Red (R)<br />
Video Camera<br />
AV Cable<br />
(included)<br />
White (L)<br />
VCR<br />
Yellow (Video)<br />
Right Rear Side View of <strong>TV</strong><br />
Yellow (Video)<br />
Game Console<br />
CARD FACE FRONT<br />
Right Rear Side View of <strong>TV</strong><br />
CARD FACE FRONT<br />
Audio Cable<br />
(not included)<br />
Audio Receiver<br />
<strong>DVD</strong> <strong>Player</strong> / Recorder<br />
Set-top Box<br />
Satellite Receiver<br />
Logik L19<strong>DVD</strong>P10_B20_IB_100914_Zell.indd 16 14/09/2010 3:02 PM
Connecting Earphones<br />
Connect your earphones to the <strong>TV</strong>’s socket.<br />
Before putting on earphones, turn the volume down<br />
then put the earphones on and slowly increase the<br />
volume until you reach a comfortable listening level.<br />
Listening to loud sounds for prolonged<br />
periods of time may permanently damage<br />
your hearing.<br />
Connecting a USB Storage Device<br />
1. Switch off the <strong>TV</strong> before connecting any USB storage<br />
device.<br />
2. Connect your USB storage device to the USB port of<br />
your <strong>TV</strong>.<br />
3. Plug the connected devices into the mains socket<br />
before switching on the POWER ON/OFF switch<br />
at the side of the <strong>TV</strong>.<br />
4. Press the / I button on the top panel of the <strong>TV</strong><br />
or the button on the remote control to turn on<br />
your <strong>TV</strong> and your audio receiver and then set it to<br />
Coaxial mode.<br />
5. Press the SOURCE button to display the Source<br />
List. Use the buttons to select D<strong>TV</strong> and then<br />
press the OK button or the button to confirm.<br />
Press the MEDIA button to enter Media Mode.<br />
(Refer to page 35-42 for details.)<br />
Earphones Cable<br />
(not included)<br />
Right Rear Side View of <strong>TV</strong><br />
CARD FACE FRONT<br />
Right Rear Side View of <strong>TV</strong><br />
CARD FACE FRONT<br />
USB Hub<br />
USB<br />
Portable<br />
hard Disk<br />
• If a hard disk is used, make sure its mains adapter is connected to the mains supply.<br />
• If a USB hub is used, make sure its mains adapter is connected to the mains supply as the total current<br />
consumption may exceed 500mA.<br />
• If a USB hub is used, you may refer to the Recording Device on page 38 for details on selecting the<br />
active device when several USB storage devices are connected.<br />
• The maximum supported storage space of the hard disk is 1 TB.<br />
• The file system only supports FAT32 format.<br />
• If you want to store the video streaming of a D<strong>TV</strong> programme, the transfer rate of the USB storage device<br />
must not be less than 5MB/s, otherwise the picture and sound of the programme will be affected and<br />
a warning statement will be shown on the screen. If this happens, please upgrade your USB storage<br />
device.<br />
• The <strong>TV</strong> screen will be blank temporarily as it will take time to start up and stabilise the connected hard<br />
disk. This is normal and the starting time may vary depending on the brand and the memory size of the<br />
connected hard disk.<br />
• Disconnect the USB storage device if it is not in use.<br />
USB Cable<br />
Logik L19<strong>DVD</strong>P10_B20_IB_100914_Zell.indd 17 14/09/2010 3:02 PM<br />
Adapter<br />
GB-17<br />
Preparation<br />
Connections<br />
Initial Setup<br />
Using the Features<br />
Using the Features<br />
via USB port<br />
DVR (<strong>Digital</strong><br />
Video Recorder)<br />
Using the <strong>DVD</strong><br />
Features<br />
Hints and Tips, Specification<br />
and Safety Warnings
Preparation Connections Initial Setup Using the Features Using the Features DVR (<strong>Digital</strong><br />
via USB port Video Recorder)<br />
Using the <strong>DVD</strong><br />
Features<br />
Hints and Tips, Specification<br />
and Safety Warnings<br />
Connecting the Aerial<br />
Connect one end of the RF coaxial cable to the aerial<br />
socket on the wall and the other end of the cable to<br />
the RF (75Ω) socket on the right rear side of your <strong>TV</strong>.<br />
GB-18<br />
Do not connect the <strong>TV</strong> to the mains supply<br />
until you have completed all the connections.<br />
Turning the <strong>TV</strong> On for the First Time<br />
1. Connect the supplied mains cable to the AC~ socket at the back<br />
of your <strong>TV</strong> and then connect it to the mains socket after you have<br />
completed all the connections.<br />
2. Switch on the POWER ON/OFF switch at the side of the <strong>TV</strong>.<br />
At this stage, the <strong>TV</strong> switches to standby mode. The red LED<br />
indicator will illuminate on the front panel of the <strong>TV</strong>.<br />
3. In standby mode, press the / I button on the top panel of the<br />
<strong>TV</strong> or the button on the remote control to turn the <strong>TV</strong> on. The<br />
red LED indicator will turn blue.<br />
Always disconnect the <strong>TV</strong> from the mains socket when not in<br />
use for a long period of time.<br />
The / I button on the top panel of the <strong>TV</strong> or the button<br />
on the remote control is only used for switching the <strong>TV</strong> into<br />
standby, it does not disconnect the <strong>TV</strong> from the mains power.<br />
To completely disconnect the mains power, please remove<br />
the mains plug from the mains socket or switch off the<br />
POWER ON/OFF switch.<br />
4. The first time you turn the <strong>TV</strong> on, it will go straight into the<br />
FIRST TIME INSTALLATION menu. (If you have already installed<br />
the <strong>TV</strong> using the Quick Start Guide, please go to the next step<br />
“Selecting the Input Source” on the next page.)<br />
OR<br />
RF coaxial cable<br />
(not included)<br />
5. Press the buttons to navigate the menu and change the settings.<br />
Country Select the country where you will operate the <strong>TV</strong>.<br />
Delete Program Select to delete the tuned channels in the <strong>TV</strong>.<br />
Search Program Select to search automatically for analogue and<br />
digital <strong>TV</strong> programmes.<br />
6. Select YES on the screen and then press the OK button on the<br />
remote control to start the First Time Installation.<br />
Select NO on the screen to cancel the First Time Installation.<br />
A First Time Installation reminder will appear the next time you<br />
turn on the <strong>TV</strong>.<br />
ON OFF<br />
To the mains socket<br />
Logik L19<strong>DVD</strong>P10_B20_IB_100914_Zell.indd 18 14/09/2010 3:02 PM<br />
CARD FACE FRONT
Selecting the Input Source<br />
1. Press the SOURCE button to display the input source list.<br />
2. Press the buttons to select the input source that you want:<br />
D<strong>TV</strong> / <strong>TV</strong> / <strong>DVD</strong> / AV / S-VIDEO / SCART / YPBPR / <strong>HD</strong>MI / PC.<br />
3. Press the OK button to confirm your selection.<br />
Channel Selection<br />
• Press the CH + / – buttons repeatedly or the 0-9 buttons to select the channel.<br />
Alternative<br />
In D<strong>TV</strong> mode, press the OK button to enter the Channel List. Then<br />
use the buttons to highlight and select the channel. Press the OK<br />
button to view the selected channel.<br />
If a blocked channel is selected, the password screen will be displayed.<br />
Press the 0-9 buttons to enter the password, the channel will then be<br />
unlocked (refer to page 27 and 29 for details on Channel Edit).<br />
• Press the FAV + / – buttons repeatedly to select the favourite channel if you have previously preset your favourite channels.<br />
Alternative<br />
Press the FAV button to view the Favourite List. Then use the<br />
buttons to highlight and select the channel. Press the OK button to<br />
view the selected channel.<br />
• Press the button to return to the previously viewed channel.<br />
Volume Adjustment<br />
• Press the VOL + / – buttons to adjust the volume.<br />
• If you wish to switch the sound off, press the button, press the button again or the VOL+ button to resume audio<br />
listening.<br />
Logik L19<strong>DVD</strong>P10_B20_IB_100914_Zell.indd 19 14/09/2010 3:02 PM<br />
GB-19<br />
Preparation<br />
Connections<br />
Initial Setup<br />
Using the Features<br />
Using the Features<br />
via USB port<br />
DVR (<strong>Digital</strong><br />
Video Recorder)<br />
Using the <strong>DVD</strong><br />
Features<br />
Hints and Tips, Specification<br />
and Safety Warnings
Preparation Connections Initial Setup Using the Features Using the Features DVR (<strong>Digital</strong><br />
via USB port Video Recorder)<br />
Using the <strong>DVD</strong><br />
Features<br />
Hints and Tips, Specification<br />
and Safety Warnings<br />
Customising the PICTURE Setting<br />
Picture Mode<br />
Allows you to set your preferred picture mode.<br />
1. Press the MENU button and then use the buttons to select the PICTURE<br />
menu and then press the button.<br />
2. Press the buttons to highlight an individual Picture option.<br />
3. Press the buttons to change the following settings.<br />
GB-20<br />
Picture Mode Cycles among display types: Personal / Standard /<br />
Movie / Mild / Game.<br />
Alternative<br />
Press the P.MODE button to select the display<br />
type directly.<br />
Brightness Increase or decrease the amount of white in the<br />
picture. (for Personal mode)<br />
Contrast Adjusts the difference between light and dark levels<br />
in the picture. (for Personal mode)<br />
Colour Controls the colour intensity. (for Personal mode)<br />
Tint (For NTSC<br />
format)<br />
Adjusts the balance between red and green levels.<br />
(Tint is only available for NTSC signal reception.)<br />
4. Press the MENU button to save the settings and return back to the previous<br />
menu.<br />
5. Press the EXIT button to exit the menu.<br />
Logik L19<strong>DVD</strong>P10_B20_IB_100914_Zell.indd 20 14/09/2010 3:02 PM
Customising the SOUND Setting<br />
Sound Mode<br />
Allows you to select an audio-enhancement technique.<br />
1. Press the MENU button and then use the buttons to select the SOUND<br />
menu and then press the button.<br />
2. Press the buttons to highlight an individual Sound option.<br />
3. Press the buttons to change the following settings.<br />
Sound Mode Allows selection of an audio-enhancement<br />
technique from among the following options:<br />
Standard / Music / Voice / Theatre / Personal.<br />
Alternative<br />
Press the S.MODE button to select the<br />
audio-enhancement technique.<br />
Bass Controls the relative intensity of lower-pitched<br />
sounds.<br />
Treble Controls the relative intensity of higher pitched<br />
sounds.<br />
Balance Adjusts the relative volume of the speakers in a<br />
stereo speaker system.<br />
Auto Volume<br />
Control (AVC)<br />
Volume levels are automatically controlled.<br />
(e.g. advertisements tend to be louder than the<br />
programmes)<br />
4. Press the MENU button to save the settings and return back to the previous<br />
menu.<br />
5. Press the EXIT button to exit the menu.<br />
Stereo / Dual Sound Reception (<strong>TV</strong> Mode)<br />
When a programme is selected, press the NICAM button to display the sound information for the selected station.<br />
Broadcast On Screen Display<br />
Mono<br />
MONO<br />
Stereo<br />
Dual<br />
STEREO<br />
DUAL I, DUAL II, DUAL I/II<br />
Mono sound selection<br />
If the stereo signal is weak in stereo reception, you can switch to mono by pressing the NICAM button. In mono reception, the<br />
clarity of sound is improved. To switch back to stereo, press the NICAM button again.<br />
Language selection for dual language broadcast<br />
If a programme can be received in two languages (dual language), you can switch to DUAL I, DUAL II, DUAL I/II or MONO by<br />
pressing the NICAM button repeatedly.<br />
DUAL I Sends the primary broadcast language to the loudspeakers<br />
DUAL II Sends the secondary broadcast language to the loudspeakers<br />
DUAL I/II Sends the primary and secondary broadcast languages to the<br />
loudspeakers<br />
Speaker Sound Output Selection (D<strong>TV</strong> Mode)<br />
Press the NICAM button to switch between different audio languages (only applicable when the <strong>TV</strong> programme has this feature).<br />
Logik L19<strong>DVD</strong>P10_B20_IB_100914_Zell.indd 21 14/09/2010 3:02 PM<br />
GB-21<br />
Preparation<br />
Connections<br />
Initial Setup<br />
Using the Features<br />
Using the Features<br />
via USB port<br />
DVR (<strong>Digital</strong><br />
Video Recorder)<br />
Using the <strong>DVD</strong><br />
Features<br />
Hints and Tips, Specification<br />
and Safety Warnings
Preparation Connections Initial Setup Using the Features Using the Features DVR (<strong>Digital</strong><br />
via USB port Video Recorder)<br />
Using the <strong>DVD</strong><br />
Features<br />
Hints and Tips, Specification<br />
and Safety Warnings<br />
Customising the FUNCTION Setting<br />
Video Size<br />
Allows you to watch the screen in various picture formats. For <strong>TV</strong> Mode, Auto / Full / 4:3 / 14:9 / Zoom are the available options.<br />
For D<strong>TV</strong> mode, Auto / Full are the available options. For YPbPr and <strong>HD</strong>MI mode, Full / 4:3 are the available options.<br />
1. Press the MENU button and then use the buttons to select the<br />
FUNCTION menu and then press the button.<br />
2. Press the buttons to select VIDEO SIZE.<br />
3. Press the buttons to select the desired format.<br />
Auto<br />
When your <strong>TV</strong> receives a 4:3 or 16:9<br />
signal it will automatically change to<br />
the picture format broadcast.<br />
14:9<br />
You can view a picture format of 14:9<br />
or a general <strong>TV</strong> programme in the<br />
14:9 mode. The 14:9 screen is viewed<br />
in the same way as in 4:3, but is<br />
magnified to the left and right.<br />
GB-22<br />
4:3<br />
16:9<br />
Full<br />
This selection will allow you to view<br />
the picture in full screen.<br />
Zoom<br />
This selection will allow you to view<br />
the picture <strong>with</strong>out any alteration,<br />
while filling the entire screen.<br />
However, the top and bottom of the<br />
picture will be cropped.<br />
4. Press the MENU button to save the setting and return back to the previous<br />
menu.<br />
5. Press the EXIT button to exit the menu.<br />
4:3<br />
This selection will allow you to view<br />
a picture <strong>with</strong> an original 4:3 aspect<br />
ratio, black bars will appear on both<br />
the left and right of the screen.<br />
Logik L19<strong>DVD</strong>P10_B20_IB_100914_Zell.indd 22 14/09/2010 3:03 PM
TT Language<br />
Allows you to select your preferred Teletext language.<br />
1. Press the MENU button and then use the buttons to select the<br />
FUNCTION menu and then press the button.<br />
2. Press the buttons to select TT Language.<br />
3. Press the buttons to change the settings.<br />
4. Press the MENU button to save the setting and return back to the previous<br />
menu.<br />
5. Press the EXIT button to exit the menu.<br />
Sleep Timer<br />
The sleep timer automatically switches the <strong>TV</strong> to standby after the preset time has elapsed.<br />
The clock will be set automatically when receiving a digital signal.<br />
Time must be set before using Sleep Timer / OSD Timer function.<br />
1. Press the MENU button and then use the buttons to select the<br />
FUNCTION menu and then press the button.<br />
2. Press the buttons to select SLEEP TIMER.<br />
3. Press the buttons to select a period of time after which the <strong>TV</strong><br />
automatically switches to standby mode: 15 / 30 / 45 / 60 / 75 / 90 / 105 /<br />
120 min / OFF. The timer begins to count down from the number of minutes<br />
selected.<br />
4. Press the MENU button to save the setting and return back to the previous<br />
menu.<br />
5. Press the EXIT button to exit the menu.<br />
Alternative<br />
1. You may press the SLEEP button repeatedly to select the number of<br />
minutes: 15 / 30 / 45 / 60 / 75 / 90 / 105 / 120 min / OFF directly.<br />
2. To cancel the sleep time, press the SLEEP button repeatedly until Off<br />
appears.<br />
\<br />
If you turn the <strong>TV</strong> off after setting the sleep timer, the sleep timer setting<br />
will be erased.<br />
Logik L19<strong>DVD</strong>P10_B20_IB_100914_Zell.indd 23 14/09/2010 3:03 PM<br />
GB-23<br />
Preparation<br />
Connections<br />
Initial Setup<br />
Using the Features<br />
Using the Features<br />
via USB port<br />
DVR (<strong>Digital</strong><br />
Video Recorder)<br />
Using the <strong>DVD</strong><br />
Features<br />
Hints and Tips, Specification<br />
and Safety Warnings
Preparation Connections Initial Setup Using the Features Using the Features DVR (<strong>Digital</strong><br />
via USB port Video Recorder)<br />
Using the <strong>DVD</strong><br />
Features<br />
Hints and Tips, Specification<br />
and Safety Warnings<br />
OSD Timer<br />
Allows you to select the display time of the on-screen menu.<br />
1. Press the MENU button and then use the buttons to select the<br />
FUNCTION menu and then press the button.<br />
2. Press the buttons to select OSD TIMER.<br />
3. Press the buttons to select time: 5 / 10 / 30 / 60 sec / NEVER.<br />
4. Press the MENU button to save the setting and return back to the previous<br />
menu.<br />
5. Press the EXIT button to exit the menu.<br />
Blue Screen<br />
Allows the blue background to turn On or Off during weak or no signal conditions.<br />
1. Press the MENU button and then use the buttons to select the<br />
FUNCTION menu and then press the button.<br />
2. Press the buttons to select BLUE SCREEN.<br />
3. Press the buttons to turn it ON or OFF.<br />
4. Press the MENU button to save the setting and return back to the previous<br />
menu.<br />
5. Press the EXIT button to exit the menu.<br />
Child Lock<br />
Child Lock is designed to prevent accidental retuning of the <strong>TV</strong> / losing channels and prevent children watching unsuitable<br />
programmes.<br />
The Lock System must be set to On for this function to operate. If the Child Lock is set to On, a valid password must be entered<br />
when you access the Auto Tuning / Manual Tuning / Program Edit / First Time Installation.<br />
1. Press the MENU button and then use the buttons to select the<br />
FUNCTION menu and then press the button.<br />
2. Press the buttons to select CHILD LOCK and then press the OK button<br />
or the button.<br />
3. Press the buttons to select CHILD LOCK and then press the buttons<br />
to select On.<br />
GB-24<br />
Logik L19<strong>DVD</strong>P10_B20_IB_100914_Zell.indd 24 14/09/2010 3:03 PM
4. Press the button and then press the button to select CHANGE CODE.<br />
5. Use the 0–9 buttons to input a 4-digit password.<br />
The default password is “0000”.<br />
If you change the password, be sure to remember the new password!<br />
If you forget your password, press the master password “8899” on the<br />
remote control.<br />
6. Re-enter new password for confirmation.<br />
7. Press the MENU button to save the setting and return back to the previous<br />
menu.<br />
8. Press the EXIT button to exit the menu.<br />
Key Locked<br />
Key Locked is designed to prevent children from pressing the buttons on the <strong>TV</strong>. The Lock System must be set to On for this<br />
function to operate. If the Key Locked is set to On, all buttons on the <strong>TV</strong> will be locked. All <strong>TV</strong> operations can be controlled by the<br />
remote control only.<br />
1. Press the MENU button and then use the buttons to select the<br />
FUNCTION menu and then press the button.<br />
2. Press the buttons to select CHILD LOCK and then press the OK button<br />
or the button.<br />
3. Press the buttons to select KEY LOCKED and then press the<br />
buttons to select ON.<br />
4. Press the MENU button to save the setting and return back to the previous<br />
menu.<br />
5. Press the EXIT button to exit the menu.<br />
To switch off the Key Locked, repeat steps 1-3 and then press the<br />
buttons to select OFF.<br />
Logik L19<strong>DVD</strong>P10_B20_IB_100914_Zell.indd 25 14/09/2010 3:03 PM<br />
GB-25<br />
Preparation<br />
Connections<br />
Initial Setup<br />
Using the Features<br />
Using the Features<br />
via USB port<br />
DVR (<strong>Digital</strong><br />
Video Recorder)<br />
Using the <strong>DVD</strong><br />
Features<br />
Hints and Tips, Specification<br />
and Safety Warnings
Preparation Connections Initial Setup Using the Features Using the Features DVR (<strong>Digital</strong><br />
via USB port Video Recorder)<br />
Using the <strong>DVD</strong><br />
Features<br />
Hints and Tips, Specification<br />
and Safety Warnings<br />
Reset<br />
Restores all settings to factory defaults.<br />
1. Press the MENU button and then use the buttons to select the<br />
FUNCTION menu and then press the button.<br />
2. Press the buttons to select RESET and then press the OK button or the<br />
button.<br />
3. Press the buttons to select YES on the screen. All settings will be reset<br />
to factory defaults and the FUNCTION menu will disappear.<br />
Installation<br />
Allows you to set up your <strong>TV</strong> if you have not previously done so or if you have moved house.<br />
1. Press the MENU button and then use the buttons to select the<br />
FUNCTION menu and then press the button.<br />
2. Press the buttons to select INSTALLATION and then press the OK<br />
button or the button.<br />
3. Press the buttons to navigate the menu and change the settings.<br />
4. Select YES on the screen and then press the OK button on the remote<br />
control to start the First Time Installation.<br />
Select NO on the screen to cancel the First Time Installation.<br />
A First Time Installation reminder will appear the next time you turn on the<br />
<strong>TV</strong>.<br />
GB-26<br />
Country Select the country where you will operate the <strong>TV</strong>.<br />
Delete Program Select to delete the tuned channels in the <strong>TV</strong>.<br />
Search Program Select to search automatically for analogue and<br />
digital <strong>TV</strong> programmes.<br />
If you stop the tuning before it has finished, the <strong>TV</strong> will report it<br />
as a no signal error. This is normal because all previous channel<br />
memory has been cleared before tuning is carried out.<br />
Logik L19<strong>DVD</strong>P10_B20_IB_100914_Zell.indd 26 14/09/2010 3:03 PM
Customising the <strong>TV</strong> Setting (<strong>TV</strong> Mode)<br />
Country<br />
Allows you to select the country where you are using the <strong>TV</strong>.<br />
1. Press the MENU button and then use the buttons to select the <strong>TV</strong> menu<br />
and then press the button.<br />
2. Press the buttons to select COUNTRY.<br />
3. Press the buttons to select the country: UK, Italy, Spain, France, Germany<br />
and Other.<br />
4. You may now proceed to the Auto Tuning or Manual Tuning.<br />
Auto Tuning<br />
Use this to automatically find and store all available channels. This is normally recommended if some channels have been added/<br />
removed by the broadcaster or you have moved house.<br />
1. In the <strong>TV</strong> menu, press the buttons to select AUTO TUNING and then<br />
press the OK button or the button.<br />
2. The Auto Tuning screen will pop up. Press the buttons to select YES and<br />
then press the OK button to start the auto tuning.<br />
If you stop the tuning before it has finished, the <strong>TV</strong> will report it<br />
as a no signal error. This is normal because all previous channel<br />
memory has been cleared before tuning is carried out.<br />
Logik L19<strong>DVD</strong>P10_B20_IB_100914_Zell.indd 27 14/09/2010 3:03 PM<br />
GB-27<br />
Preparation<br />
Connections<br />
Initial Setup<br />
Using the Features<br />
Using the Features<br />
via USB port<br />
DVR (<strong>Digital</strong><br />
Video Recorder)<br />
Using the <strong>DVD</strong><br />
Features<br />
Hints and Tips, Specification<br />
and Safety Warnings
Preparation Connections Initial Setup Using the Features Using the Features DVR (<strong>Digital</strong><br />
via USB port Video Recorder)<br />
Using the <strong>DVD</strong><br />
Features<br />
Hints and Tips, Specification<br />
and Safety Warnings<br />
Manual Tuning<br />
Allows you to make manual fine tuning adjustments if the channel reception is poor under <strong>TV</strong> mode.<br />
1. In the <strong>TV</strong> menu, press the buttons to select MANUAL TUNING and then<br />
press the OK button or the button.<br />
2. Press the buttons to change the following settings.<br />
GB-28<br />
Channel To select a channel number for a particular<br />
frequency through manual tuning.<br />
Sound System To select <strong>TV</strong> sound system between: BG / I / DK / L.<br />
(for AUTO & SECAM system only)<br />
Colour System To select <strong>TV</strong> colour system between: AUTO / PAL /<br />
SECAM. (not available for I sound system)<br />
Auto Fine Tune<br />
(AFT)<br />
To fine tune the channel automatically when the<br />
signal is weak.<br />
Manual Tuning Performs manual search for analogue <strong>TV</strong><br />
programmes. Press and hold the buttons<br />
to adjust the channel frequency. Press the<br />
buttons repeatedly to perform fine tuning.<br />
3. Press the MENU button to save the setting and return back to the previous<br />
menu.<br />
4. Press the EXIT button to exit the menu.<br />
Channel Edit<br />
Allows you to edit analogue <strong>TV</strong> programmes in the Channel List.<br />
1. Press the MENU button and then use the buttons to select the <strong>TV</strong> menu<br />
and then press the button.<br />
2. Press the buttons to select CHANNEL EDIT and then press the OK<br />
button or the button.<br />
3. To add a channel to the favourite channel list<br />
a. Press the buttons to highlight a channel and then press the GREEN<br />
button.<br />
b. Press the GREEN button again to undo it.<br />
To Skip<br />
a. Press the buttons to highlight a channel and then press the<br />
YELLOW button.<br />
b. Press the YELLOW button again to undo it.<br />
Logik L19<strong>DVD</strong>P10_B20_IB_100914_Zell.indd 28 14/09/2010 3:03 PM
To Lock<br />
a. Press the buttons to highlight a channel and then press the BLUE<br />
button.<br />
b. Press the BLUE button again to unlock.<br />
To Move<br />
a. Press the buttons and then press the button to select a channel.<br />
b. Press the buttons to move the selected channel.<br />
c. Press the OK button to confirm.<br />
To Rename<br />
a. Press the<br />
button.<br />
buttons to highlight a channel and then press the OK<br />
b. Key in the character by press the OK button on the remote control.<br />
c. Press the buttons and then press the button to select OK<br />
displayed on the screen when finished.<br />
4. Press the MENU button to save and return back to the previous menu.<br />
5. Press the EXIT button to exit the menu.<br />
Customising the <strong>TV</strong> Settings (D<strong>TV</strong> Mode)<br />
Auto Tuning<br />
Use this to automatically find and store all available channels. This is normally recommended if some channels have been added/<br />
removed by the broadcaster or you have moved house.<br />
1. Press the MENU button and then use the buttons to select the D<strong>TV</strong><br />
menu and then press the button.<br />
2. Press the buttons to select AUTO TUNING and then press the OK<br />
button or the button.<br />
3. The Auto Tuning screen will pop up. Press the buttons to select YES and<br />
then press the OK button to start the auto tuning.<br />
If you stop the tuning before it has finished, the <strong>TV</strong> will report it<br />
as a no signal error. This is normal because all previous channel<br />
memory has been cleared before tuning is carried out.<br />
Logik L19<strong>DVD</strong>P10_B20_IB_100914_Zell.indd 29 14/09/2010 3:03 PM<br />
GB-29<br />
Preparation<br />
Connections<br />
Initial Setup<br />
Using the Features<br />
Using the Features<br />
via USB port<br />
DVR (<strong>Digital</strong><br />
Video Recorder)<br />
Using the <strong>DVD</strong><br />
Features<br />
Hints and Tips, Specification<br />
and Safety Warnings
Preparation Connections Initial Setup Using the Features Using the Features DVR (<strong>Digital</strong><br />
via USB port Video Recorder)<br />
Using the <strong>DVD</strong><br />
Features<br />
Hints and Tips, Specification<br />
and Safety Warnings<br />
Manual Tuning<br />
Allows you to make manual fine tuning adjustments if the channel reception is poor under D<strong>TV</strong> mode.<br />
1. Press the MENU button and then use the buttons to select the D<strong>TV</strong><br />
menu and then press the button.<br />
2. Press the buttons to select MANUAL TUNING and then press the OK<br />
button or the button.<br />
3. Press the buttons to change the following settings.<br />
Channel To select a channel number for a particular<br />
frequency through manual tuning.<br />
Start Search Performs manual search for digital <strong>TV</strong><br />
programmes.<br />
4. Press the MENU button to save the setting and return back to the previous<br />
menu.<br />
5. Press the EXIT button to exit the menu.<br />
Channel Edit<br />
Allows you to edit D<strong>TV</strong> programmes in the Channel List.<br />
1. Press the MENU button and then use the buttons to select the D<strong>TV</strong><br />
menu and then press the button.<br />
2. Press the buttons to select CHANNEL EDIT and then press the OK<br />
button or the button.<br />
3. To Lock<br />
a. Press the BLUE button on the remote control.<br />
b. Press the buttons to highlight a channel.<br />
c. Press the OK button to lock the channel.<br />
d. Press the OK button again to unlock.<br />
To Delete<br />
a. Press the buttons to highlight a channel.<br />
b. Press the RED button to delete the channel.<br />
To Reorder<br />
a. Press the buttons to highlight a channel.<br />
b. Press the GREEN button and then press the buttons to move the<br />
channel.<br />
c. Press the OK button to confirm.<br />
To Rename<br />
a. Press the buttons to highlight a channel and then press the<br />
YELLOW button.<br />
b. Key in the character and then press the OK button.<br />
c. Press the GREEN button when finished.<br />
d. Press the YELLOW button to cancel.<br />
4. Press the MENU button to save and return back to the previous menu.<br />
5. Press the EXIT button to exit the menu.<br />
GB-30<br />
Logik L19<strong>DVD</strong>P10_B20_IB_100914_Zell.indd 30 14/09/2010 3:03 PM
Timer<br />
Timer programming is only available when a USB storage device is connected.<br />
1. Press the MENU button and then use the buttons to select the D<strong>TV</strong><br />
menu and then press the button.<br />
2. Press the buttons to select TIMER and then press the OK button or the<br />
button.<br />
3. See page 42 for details on Timer Programming.<br />
Rating<br />
This function allows you to set up blocking schemes to block specific channels and ratings. It operates according to information<br />
from the broadcasting station, therefore if the signal has incorrect information, this function does not operate.<br />
This <strong>TV</strong> is programmed to remember which option it was last set to even if you switch the <strong>TV</strong> off.<br />
When a programme is locked or rated <strong>with</strong> delayed state, the message “locked programme” is displayed <strong>with</strong>out displaying the<br />
password window.<br />
When recording a locked or rated programme, the recorded programme will be locked unless you enter the password before the<br />
recording is finished. If you wish to play the locked programme, you should enter the password.<br />
1. Press the MENU button and then use the buttons to select the D<strong>TV</strong><br />
menu and then press the button.<br />
2. Press the buttons to select RATING.<br />
3. Press the buttons to select a different rating.<br />
4. Press the MENU button to save the setting and return back to the previous<br />
menu.<br />
5. Press the EXIT button to exit the menu.<br />
Logik L19<strong>DVD</strong>P10_B20_IB_100914_Zell.indd 31 14/09/2010 3:03 PM<br />
GB-31<br />
Preparation<br />
Connections<br />
Initial Setup<br />
Using the Features<br />
Using the Features<br />
via USB port<br />
DVR (<strong>Digital</strong><br />
Video Recorder)<br />
Using the <strong>DVD</strong><br />
Features<br />
Hints and Tips, Specification<br />
and Safety Warnings
Preparation Connections Initial Setup Using the Features Using the Features DVR (<strong>Digital</strong><br />
via USB port Video Recorder)<br />
Using the <strong>DVD</strong><br />
Features<br />
Hints and Tips, Specification<br />
and Safety Warnings<br />
CI (Common Interface) (D<strong>TV</strong> Mode)<br />
The common interface allows the use of a Common Access Module to enable you to view scrambled (pay to view) services. These<br />
services are provided by TopUp <strong>TV</strong> (UK only) and others. The Common Access Module and viewing card can be obtained from the<br />
service provider.<br />
3. Press the OK button or the button to display the Common Interface screen<br />
and then press the OK button.<br />
4. Press the buttons and then press the OK button to display CI<br />
information (Status / Messages / Language Setup / Update Software / Quit).<br />
5. Press the EXIT button to return back to the previous menu.<br />
6. Press the EXIT button again to exit the menu.<br />
GB-32<br />
Do not repeatedly insert or remove the<br />
Common Access Module as this may damage<br />
the interface and cause a malfunction.<br />
This feature is not available in all countries.<br />
To insert the Common Access Module<br />
1. Before you insert the Common Access Module,<br />
ensure that the <strong>TV</strong> is switched off and the viewing<br />
card is inserted in accordance <strong>with</strong> the Service<br />
Provider’s instructions.<br />
2. Insert the Common Access Module into the slot.<br />
Flip the Common Access Module to another side<br />
and try again if you feel resistance.<br />
3. Switch the <strong>TV</strong> on.<br />
To remove the Common Access Module<br />
1. Before you remove the Common Access Module,<br />
ensure that the <strong>TV</strong> is switched off.<br />
2. Pull the Common Access Module from the slot.<br />
3. Switch the <strong>TV</strong> on.<br />
To view the module information<br />
1. Press the MENU button and then use the buttons to select the D<strong>TV</strong><br />
menu and then press the button.<br />
2. Press the buttons to select CI.<br />
Right Rear Side View of <strong>TV</strong><br />
CARD FACE FRONT<br />
CI (Common Interface) slot<br />
Allows the Common Access Module to be inserted<br />
and access the content that has been encrypted.<br />
CARD FACE FRONT<br />
Common Access<br />
Module<br />
This screen is for illustration only.<br />
Logik L19<strong>DVD</strong>P10_B20_IB_100914_Zell.indd 32 14/09/2010 3:03 PM
Customising the <strong>TV</strong> Settings (PC Mode)<br />
Allows you to adjust the PC desktop content.<br />
1. Press the MENU button and then use the buttons to select the PC menu<br />
and then press the button.<br />
2. Press the buttons to highlight an individual PC Position option.<br />
3. Press the buttons to change the following settings.<br />
H Position Adjusts the position of the picture left and right in<br />
the window.<br />
V Position Adjusts the position of the picture up and down in<br />
the window.<br />
Phase Controls the signal phase, which can improve<br />
focus clarity and image stability based on the PC<br />
mode.<br />
Clock Control the signal clock, which can improve the<br />
image stability based on the PC mode.<br />
Auto Adjust Allows you to synchronise PC signal automatically.<br />
4. Press the MENU button to save the settings and return back to the previous<br />
menu.<br />
5. Press the EXIT button to exit the menu.<br />
Customising the <strong>TV</strong> Settings (<strong>HD</strong>MI and YPbPr Modes)<br />
Allows you to adjust the displayed content.<br />
1. Press the MENU button and then use the buttons to select the <strong>HD</strong>MI /<br />
YPBPR menu and then press the button.<br />
2. Press the buttons to highlight an individual <strong>HD</strong>MI / YPBPR option.<br />
3. Press the buttons to change the following settings.<br />
H Position Adjusts the position of the picture left and right in<br />
the window.<br />
V Position Adjusts the position of the picture up and down in<br />
the window.<br />
Position Reset Resets to default settings.<br />
4. Press the MENU button to save the setting and return back to the previous<br />
menu.<br />
5. Press the EXIT button to exit the menu.<br />
Logik L19<strong>DVD</strong>P10_B20_IB_100914_Zell.indd 33 14/09/2010 3:03 PM<br />
GB-33<br />
Preparation<br />
Connections<br />
Initial Setup<br />
Using the Features<br />
Using the Features<br />
via USB port<br />
DVR (<strong>Digital</strong><br />
Video Recorder)<br />
Using the <strong>DVD</strong><br />
Features<br />
Hints and Tips, Specification<br />
and Safety Warnings
Preparation Connections Initial Setup Using the Features Using the Features DVR (<strong>Digital</strong><br />
via USB port Video Recorder)<br />
Using the <strong>DVD</strong><br />
Features<br />
Hints and Tips, Specification<br />
and Safety Warnings<br />
Teletext (<strong>TV</strong> Mode)<br />
Teletext is a free service broadcast by some <strong>TV</strong> stations which gives up-to-the-minute information on news, weather, television<br />
programmes, share prices and many other topics. Using the Teletext control buttons you can view pages of information that are<br />
listed in the teletext index.<br />
To Turn on Teletext Function<br />
GB-34<br />
Make sure the <strong>TV</strong> channel you are watching transmits teletext.<br />
“No Teletext” sign will show on the screen if teletext is not available.<br />
In <strong>TV</strong> mode, press the TEXT button to enter Teletext mode. Press the INDEX button to display the index page.<br />
Press the TEXT button twice to exit and the <strong>TV</strong> will return to the channel you were watching.<br />
To select a page of text<br />
Find the number of the page in the index and enter it using the 0-9 buttons. The page number will appear on the top left corner<br />
of the screen.<br />
The page counter will search for your page. When it finds it, the page will be displayed.<br />
To move to the next page of text, press the button.<br />
To move to the previous page, press the button.<br />
To return to the index page, enter the “100” by using the 0-9 buttons or press the INDEX button.<br />
Mix<br />
To view a page of text whilst watching a <strong>TV</strong> programme, press the TEXT button twice. The text will be superimposed over the <strong>TV</strong><br />
programme.<br />
Page search while watching <strong>TV</strong><br />
Press the CANCEL button while viewing teletext, enter the page number you want by using the 0-9 buttons. The page number<br />
will remain on the top left hand corner of the screen.<br />
Double height text<br />
If you have difficulty reading the text on the <strong>TV</strong> you can double the height of the text.<br />
Press the SIZE button. The top half of the page will be displayed in double height text.<br />
Press the SIZE button again. The bottom half of the page will be displayed in double height text.<br />
Press the SIZE button again to return to the full page.<br />
Page HOLD<br />
If the page of text you have selected contains subpages, these subpages will automatically be displayed in order <strong>with</strong> a delay to<br />
allow you to have enough time to read the page.<br />
Press the buttons to scroll through the subpages.<br />
Alternative<br />
Press the SUBPAGE button, then enter a 4-digit page number.<br />
To Reveal Information<br />
Press the REVEAL button to reveal concealed information (quiz answers etc.).<br />
Press the REVEAL button again to conceal the information again.<br />
Fasttext<br />
At the bottom of the teletext screen is a row of subject headings in red, green, yellow and blue.<br />
The remote control has a row of colour buttons corresponding to the row of coloured subjects on the screen.<br />
Pressing one of the colour buttons will take you directly to the page corresponding to the subject heading.<br />
Logik L19<strong>DVD</strong>P10_B20_IB_100914_Zell.indd 34 14/09/2010 3:03 PM
<strong>Digital</strong> Teletext (D<strong>TV</strong> Mode)<br />
<strong>Digital</strong> teletext can access special digital teletext services and specific services which broadcast digital teletext. The subtitle will<br />
temporarily auto off when digital teletext function is turned on.<br />
Teletext <strong>with</strong>in <strong>Digital</strong> Service<br />
1. In D<strong>TV</strong> mode, press the OK button to display the Channel List. Press the<br />
buttons to select a channel <strong>with</strong> a icon displayed.<br />
2. Press the TEXT button to display the teletext page.<br />
3. Press the 0-9 buttons to select a page number.<br />
4. Follow the instructions on digital teletext and move onto the next step by<br />
pressing OK, , RED, GREEN, YELLOW, BLUE or the 0-9 buttons etc.<br />
5. To change digital teletext service, select a different service by pressing the<br />
0-9 buttons or the buttons.<br />
EPG (Electronic Programme Guide) (D<strong>TV</strong> Mode)<br />
This system has an Electronic Programme Guide (EPG) to help you navigate through all the possible viewing options.<br />
The EPG supplies information such as programme listings, start and end times for all available services. In addition, detailed<br />
information about the programme is often available in the EPG (the availability and amount of programme information will vary,<br />
depending on the particular broadcaster).<br />
This function can be used only when the EPG information is broadcast by broadcasting companies.<br />
The EPG displays the programme details for the next 7 days.<br />
Switch On/Off EPG<br />
1. Press the EPG button to switch on EPG.<br />
2. Press the EPG button or the EXIT button again to switch off EPG and return<br />
to normal <strong>TV</strong> viewing.<br />
Select a Programme<br />
1. Press the , CH + or CH - buttons to select the desired channel and then<br />
press the buttons to select the desired programme. Press the OK button<br />
to confirm.<br />
Button Functions in a 7 Days Guide<br />
Remote Control Button Function<br />
RED Timer Programming<br />
See page 42 for details on Timer Programming<br />
GREEN Reminder<br />
Press this button while on the selected programme. The <strong>TV</strong> will automatically tune to the selected<br />
programme when it starts<br />
YELLOW - Day (To view schedule of the previous day)<br />
BLUE + Day (To view schedule of the next day)<br />
or<br />
or<br />
To select a channel<br />
To view a programme’s information<br />
OK To confirm and view the selected channel<br />
DISPLAY To preview the selected channel on the preview screen<br />
EPG / EXIT Switch off EPG<br />
Logik L19<strong>DVD</strong>P10_B20_IB_100914_Zell.indd 35 14/09/2010 3:03 PM<br />
GB-35<br />
Preparation<br />
Connections<br />
Initial Setup<br />
Using the Features<br />
Using the Features<br />
via USB port<br />
DVR (<strong>Digital</strong><br />
Video Recorder)<br />
Using the <strong>DVD</strong><br />
Features<br />
Hints and Tips, Specification<br />
and Safety Warnings
Preparation Connections Initial Setup Using the Features Using the Features DVR (<strong>Digital</strong><br />
via USB port Video Recorder)<br />
Using the <strong>DVD</strong><br />
Features<br />
Hints and Tips, Specification<br />
and Safety Warnings<br />
My Album<br />
1. Press the SOURCE button and select D<strong>TV</strong> mode and then press the MEDIA<br />
button.<br />
2. Press the buttons and then press the OK button to select My Album.<br />
3. Press the BLUE button to open the directory. Press the buttons to select<br />
your desired folder and then press the OK button to enter the folder. All<br />
picture files will be listed on the right.<br />
4. Press the buttons to select the picture file and then press the OK button<br />
to view.<br />
GB-36<br />
If the current folder has no photos, press the OK button or<br />
the MENU button to select ROOT (USB) to return to the root<br />
directory.<br />
File format supported: JPEG/BMP.<br />
5. Press the MEDIA button to return to Thumbnail view. Press the<br />
buttons to navigate in the thumbnail view. Press the OK button to select the<br />
photo you want to view.<br />
6. Press the DISPLAY button to display the function bar.<br />
Press the RED button to zoom in on the picture.<br />
Press the GREEN button to display the music folder, so you can play music at<br />
the same time.<br />
Press the YELLOW button to flip the photo horizontally.<br />
Press the BLUE button to flip the photo vertically.<br />
Press the OK button to start the slideshow.<br />
7. During slideshow, press the DISPLAY button to display the function bar.<br />
Press the RED button to pause and press the RED button again to resume<br />
the slideshow.<br />
Press the GREEN button to display the music folder, so you can play music at<br />
the same time.<br />
Press the YELLOW button to set repeat mode of the slideshow. (Repeat Once<br />
/ All)<br />
Press the BLUE button to select the transition speed of the slideshow. (Slow<br />
/ Middle / Fast)<br />
8. Press the MENU button or the MEDIA button to return to the previous<br />
menu.<br />
9. Press the EXIT button to exit the menu.<br />
Logik L19<strong>DVD</strong>P10_B20_IB_100914_Zell.indd 36 14/09/2010 3:03 PM
My Music<br />
1. Press the SOURCE button and select D<strong>TV</strong> mode and then press the MEDIA<br />
button.<br />
2. Press the buttons and then press the OK button to select My Music.<br />
3. Press the buttons to navigate in the music folder. Select the music<br />
you want to play and then press the OK button to play it.<br />
Some audio file formats will not be supported.<br />
4. Press the RED button to pause the music playback and press again to<br />
resume the playback.<br />
Press the GREEN button to stop the music playback.<br />
Press the YELLOW button to set repeat mode of the music (Repeat All/<br />
Repeat One/ NO Repeat).<br />
Press the BLUE button to fast forward the music playback.<br />
Press the DISPLAY button to switch to the device type menu.<br />
5. Press the MENU button or the MEDIA button to return to the previous<br />
menu.<br />
6. Press the EXIT button to exit the menu.<br />
My Movie<br />
1. Press the SOURCE button and select D<strong>TV</strong> mode and then press the MEDIA<br />
button.<br />
2. Press the buttons and then press the OK button to select My Movie.<br />
Logik L19<strong>DVD</strong>P10_B20_IB_100914_Zell.indd 37 14/09/2010 3:03 PM<br />
GB-37<br />
Preparation<br />
Connections<br />
Initial Setup<br />
Using the Features<br />
Using the Features<br />
via USB port<br />
DVR (<strong>Digital</strong><br />
Video Recorder)<br />
Using the <strong>DVD</strong><br />
Features<br />
Hints and Tips, Specification<br />
and Safety Warnings
Preparation Connections Initial Setup Using the Features Using the Features DVR (<strong>Digital</strong><br />
via USB port Video Recorder)<br />
Using the <strong>DVD</strong><br />
Features<br />
Hints and Tips, Specification<br />
and Safety Warnings<br />
3. If more than one USB storage device is connected, press the DISPLAY button<br />
to switch to the device type menu. Press the buttons to select the<br />
active device and then press the OK button to confirm.<br />
4. Press the buttons to navigate in the movie folder. Select the movie<br />
you want to play and then press the OK button to play it.<br />
5. During the movie playback, press the DISPLAY button to display the<br />
function bar.<br />
Press the RED button to pause the movie playback. Press the RED button<br />
again to resume the playback.<br />
Press the GREEN button repeatedly to play the movie frame-by-frame. Press<br />
the RED button to resume the playback.<br />
Press the YELLOW button to set a fast-backward speed to view the movie.<br />
Press the RED button to resume the playback.<br />
Press the BLUE button to set a fast-forward speed to view the movie. Press<br />
the RED button to resume the playback.<br />
Press the buttons to view previous / next movie.<br />
6. Press the MENU button or the MEDIA button to return to the previous<br />
menu.<br />
7. Press the EXIT button to exit the menu.<br />
Recorded List<br />
GB-38<br />
Some video file formats will not be supported.<br />
My Recorder<br />
1. Press the SOURCE button and select D<strong>TV</strong> mode and then press the MEDIA<br />
button.<br />
2. Press the buttons and then press the OK button to select My Recorder<br />
to enter the DVR SETUP menu.<br />
You can play or delete from the recorded programme list.<br />
1. In the DVR SETUP menu, press the buttons and then press<br />
the OK button to select Recorded List.<br />
2. If more than one USB storage devices is connected, press the<br />
DISPLAY button to switch to the device type menu. Press the<br />
buttons to select the active device and then press the<br />
OK button to confirm.<br />
Logik L19<strong>DVD</strong>P10_B20_IB_100914_Zell.indd 38 14/09/2010 3:03 PM
To Play<br />
a. In the Recorded List, press the buttons to select the<br />
recorded programme you want to view.<br />
b. Press the GREEN button to preview the recorded programme<br />
and then press the OK button to play the selected programme.<br />
1<br />
2<br />
If the selected programme was stopped before it had<br />
finished the last time you viewed it, the “DVR PLAY<br />
OPTION” will pop up.<br />
Press the buttons to select between Play From Start<br />
/ Play From Last Viewed. Press the OK button to confirm<br />
your selected option.<br />
c. During playback, press the DISPLAY button to display the DVR<br />
Playback Progress Bar. Press the or button to play the<br />
previous or next movie.<br />
3 4 5 6<br />
To Delete<br />
a. Press the buttons to select the recorded programme you<br />
want to delete.<br />
b. Press the RED button to delete the recorded programme and<br />
then press the OK button to confirm.<br />
3. Press the MENU button or the MEDIA button to return to the previous<br />
menu.<br />
4. Press the EXIT button to exit the menu.<br />
Recording Device<br />
2<br />
3<br />
1 Preview window for the<br />
recorded video selected<br />
2 Information of the recorded<br />
video selected<br />
3 Recorded video list<br />
The ‘DVR Playback Progress Bar’<br />
1 Indicates the programme’s name<br />
2 Indicates the playback status of the<br />
recorded programme<br />
3 Indicates the status of the<br />
programme’s runtime<br />
4 Indicates the current playback<br />
position<br />
5 Indicates the elapsed playback time<br />
6 Indicates the total playback time<br />
You can view the status of the storage device and select the device you wish to record to if there is more than one device<br />
connected.<br />
1. In the DVR SETUP menu, press the buttons and then press the<br />
OK button to select Recording Device.<br />
Logik L19<strong>DVD</strong>P10_B20_IB_100914_Zell.indd 39 14/09/2010 3:03 PM<br />
1<br />
GB-39<br />
Preparation<br />
Connections<br />
Initial Setup<br />
Using the Features<br />
Using the Features<br />
via USB port<br />
DVR (<strong>Digital</strong><br />
Video Recorder)<br />
Using the <strong>DVD</strong><br />
Features<br />
Hints and Tips, Specification<br />
and Safety Warnings
Preparation Connections Initial Setup Using the Features Using the Features DVR (<strong>Digital</strong><br />
via USB port Video Recorder)<br />
Using the <strong>DVD</strong><br />
Features<br />
Hints and Tips, Specification<br />
and Safety Warnings<br />
2. Press the buttons to adjust the settings.<br />
GB-40<br />
Device Type Indicates that a USB device is connected.<br />
Slot Select the active USB storage device connected<br />
to the USB hub slot (1 2 3 4).<br />
Partition Select the active partition (1 2 …<br />
max.15) on the selected USB device.<br />
3. Press the RED button to select Format. Press the OK button to confirm. All<br />
data will be lost from the formatted partition.<br />
Press the GREEN button to select Format The Disk. Press the OK button to<br />
confirm. All data will be lost from the disk.<br />
Formatting may be needed occasionally due to a hard disk<br />
malfunction. In most cases, this will restore normal operation of the<br />
hard disk, however all data previously stored will be lost.<br />
4. Press the MENU button or the MEDIA button to save the settings and return<br />
to the previous menu.<br />
5. Press the EXIT button to exit the menu.<br />
Recording Preference<br />
1. In the DVR SETUP menu, press the buttons and then press the OK<br />
button to select Recording Preference.<br />
2. Press the buttons to adjust the settings.<br />
Time Shift Size The minimum USB’s time shift size is 768MB. The<br />
time shift size will vary depending on the size of<br />
USB storage device.<br />
Time Shift Set the time shift recording Off/ Pause/ Auto.<br />
One Button<br />
Recording<br />
Default Record<br />
Duration<br />
Set the one button recording on /off.<br />
The longest recording duration is 8 hours.<br />
The shortest recording duration is 15 minutes.<br />
3. Press the MENU button or the MEDIA button to save the settings and return<br />
to the previous menu.<br />
4. Press the EXIT button to exit the menu.<br />
• Only D<strong>TV</strong> programmes can be recorded by DVR. During<br />
recording, you can change to another input source (except<br />
<strong>TV</strong> mode) <strong>with</strong>out affecting the recording progress.<br />
• Copy-protected programmes may not be recorded.<br />
• Recording a programme for an hour would approximately<br />
take up 2G of storage space, when the D<strong>TV</strong> video rate is<br />
5Mbps. (For reference only)<br />
1<br />
2<br />
1 USB Storage device type<br />
2 Storage capacity of the active<br />
USB storage device<br />
3 Format<br />
4 Format disk<br />
3 4<br />
Hard disk size Approximate hour can be recorded<br />
40 GB 20 hrs<br />
80 GB 40 hrs<br />
160 GB 80 hrs<br />
320 GB 160 hrs<br />
640 GB 320 hrs<br />
1 TB 500 hrs<br />
Logik L19<strong>DVD</strong>P10_B20_IB_100914_Zell.indd 40 14/09/2010 3:03 PM
Time Shift Function<br />
This function allows the <strong>TV</strong> to automatically record live <strong>TV</strong> and make it available for viewing at any time.<br />
With the Time Shift Mode set to Auto or Pause, you may pause or rewind normal <strong>TV</strong> viewing at any time <strong>with</strong>out missing any of<br />
the live broadcast.<br />
• To set Time Shift mode, please refer to the Recording Preference on page 39 for details.<br />
• Time Shift Mode and Recording functions may not work if the signal strength is weak.<br />
Auto Time Shift Mode<br />
During the normal <strong>TV</strong> viewing, you may press the button to virtually pause the live viewing broadcast programme if you want<br />
to go out for a while (e.g. going to the bathroom / kitchen). When you have returned, press the<br />
broadcast programme. The DVR Time Shift progress bar will be displayed on the screen.<br />
button to play the missed<br />
In other circumstances, you may just leave the <strong>TV</strong> for a while <strong>with</strong>out pressing any buttons. When you have returned, press<br />
the button to virtually rewind the live viewing broadcast programme. Press the button to play the missed broadcast<br />
programme. The DVR Time Shift progress bar will be displayed on the screen.<br />
Pause Time Shift Mode<br />
During the normal <strong>TV</strong> viewing, you may press the button to virtually pause the live viewing broadcast programme if you want<br />
to go out for a while (e.g. going to the bathroom / kitchen). When you have returned, press the button to play the missed<br />
broadcast programme. The DVR Time Shift progress bar will be displayed on the screen.<br />
1<br />
2<br />
The progress bar will hide automatically after 3 seconds. Press DISPLAY button to display the DVR Time Shift progress bar again.<br />
Using the remote control<br />
You can shift playback to any point <strong>with</strong>in the recorded programme.<br />
or<br />
3 4<br />
When playing,<br />
• press the button repeatedly to speed up x 2 / x 4 / x 8 / x 16 / x 32.<br />
• press the button repeatedly to speed up x 2 / x 4 / x 8 / x 16 / x 32.<br />
• During fast forward / fast backward state, press the button to return to normal playback.<br />
or • Press the button to jump about 10% forward.<br />
• Press the button to jump about 10% back.<br />
The ‘DVR Time Shift Progress Bar’<br />
1 Indicates the recording programmes<br />
name<br />
2 Indicates the status of the currently<br />
displayed video ( / / / )<br />
3 Indicates the time lagging behind<br />
the live broadcast (DVR reviewing)<br />
4 Indicates the total recorded time<br />
• During playback, press the button to display a still screen and then press the button again<br />
to resume playback.<br />
• During playback, press the button and then press the button for slow motion.<br />
• During fast forward / fast backward state, press the button to return to normal playback.<br />
If you want to exit the DVR Time Shift progress bar and return to the current live broadcast, press<br />
the button.<br />
Logik L19<strong>DVD</strong>P10_B20_IB_100914_Zell.indd 41 14/09/2010 3:03 PM<br />
GB-41<br />
Preparation<br />
Connections<br />
Initial Setup<br />
Using the Features<br />
Using the Features<br />
via USB port<br />
DVR (<strong>Digital</strong><br />
Video Recorder)<br />
Using the <strong>DVD</strong><br />
Features<br />
Hints and Tips, Specification<br />
and Safety Warnings
Preparation Connections Initial Setup Using the Features Using the Features DVR (<strong>Digital</strong><br />
via USB port Video Recorder)<br />
Using the <strong>DVD</strong><br />
Features<br />
Hints and Tips, Specification<br />
and Safety Warnings<br />
Recording D<strong>TV</strong> Programme onto a USB Storage Device<br />
Use this function to record the D<strong>TV</strong> programme you are watching on the main screen and save them for future viewing.<br />
You may use the DVR Time Shift function during recording to view the recorded programme instantly. Please refer to the section<br />
“Time Shift Function” for detail.<br />
1. Press the SOURCE button and select D<strong>TV</strong> mode and then press the MEDIA<br />
button.<br />
2. Press the buttons and then press the OK button to select My Recorder<br />
to enter the DVR SETUP menu.<br />
3. In the DVR SETUP menu, press the buttons and then press the OK<br />
button to select Recording Preference.<br />
GB-42<br />
Method 1<br />
1. Press the buttons to select One Button Recording and set it to<br />
On.<br />
2. Press the button to set the Default Record Duration (preset<br />
configuration). Press the buttons to set the recording duration.<br />
The longest recording duration is 8 hours, the shortest recording<br />
duration is 15 minutes.<br />
3. Press the EXIT button to exit the menu and return back to the main<br />
screen you were watching.<br />
4. Press the REC button on the remote control to start recording. The<br />
current recording status will be displayed in the top left hand corner of<br />
the screen.<br />
5. To stop recording, press the button and then press the OK button to<br />
confirm.<br />
Method 2<br />
1. If the One Button Recording is set to Off.<br />
2. While you are watching the main screen, press the REC button on the<br />
remote control. Press the buttons to set the record duration. The<br />
Record Duration menu will be displayed. The longest record duration<br />
is 8 hours, the shortest record duration is 15 minutes.<br />
3. Press the OK button to confirm and start recording. The current<br />
recording status will be displayed in the top left hand corner of the<br />
screen.<br />
4. To stop recording, press the button and then press the OK button to<br />
confirm.<br />
Recording will stop automatically when the disk is full.<br />
Logik L19<strong>DVD</strong>P10_B20_IB_100914_Zell.indd 42 14/09/2010 3:03 PM
Timer Programming<br />
This function is used to perform scheduled recording.<br />
1. Press the EPG button on the remote control. The EPG menu will appear.<br />
2. Press the RED button on the remote control to enter the Timer Programming<br />
menu.<br />
Alternative<br />
1. You may press the MENU button and then use the<br />
buttons to select the D<strong>TV</strong> menu and then press the<br />
button.<br />
2. Press the buttons to select TIMER and then press<br />
the OK button or the button to enter the TIMER<br />
PROGRAMMING menu.<br />
3. Press the OK button to enter the Enter Details menu for recording setting.<br />
CN Input / Select the channel no.<br />
Date Set the recording date<br />
Time Set the starting time of recording<br />
Duration Set the duration of recording<br />
DVR Set YES for programme recording and NO for<br />
programme reminder.<br />
Repeat Set repeat function among Daily / Weekly /<br />
Mon-Fri / Mon-Sat / NO<br />
Subtitles Set subtitles to be included during recording<br />
4. Press the buttons to select CN / Date / Time / Duration / DVR / Repeat /<br />
Subtitles.<br />
5. Press the buttons for adjustment.<br />
6. Press the OK button to save the setting.<br />
If a programme recording starts when the <strong>TV</strong> is in standby<br />
mode, the blue LED indicator will illuminate.<br />
Logik L19<strong>DVD</strong>P10_B20_IB_100914_Zell.indd 43 14/09/2010 3:03 PM<br />
GB-43<br />
Preparation<br />
Connections<br />
Initial Setup<br />
Using the Features<br />
Using the Features<br />
via USB port<br />
DVR (<strong>Digital</strong><br />
Video Recorder)<br />
Using the <strong>DVD</strong><br />
Features<br />
Hints and Tips, Specification<br />
and Safety Warnings
Preparation Connections Initial Setup Using the Features Using the Features DVR (<strong>Digital</strong><br />
via USB port Video Recorder)<br />
Using the <strong>DVD</strong><br />
Features<br />
Hints and Tips, Specification<br />
and Safety Warnings<br />
Using the Built-in <strong>DVD</strong> <strong>Player</strong><br />
1. Press the SOURCE button and select <strong>DVD</strong> mode.<br />
2. Insert a disc <strong>with</strong> label side facing backward to you. (CD-R, CD-RW, <strong>DVD</strong>-R,<br />
<strong>DVD</strong>-RW, CD, <strong>DVD</strong>+R, or <strong>DVD</strong>+RW). Allow 10 seconds for the player to load<br />
the disc.<br />
3. After the disc is inserted, Smart NAVl will show the content of the disc<br />
automatically.<br />
4. If the <strong>DVD</strong> player does not automatically play the disc, press the button<br />
on the remote control to start playing.<br />
5. Press the button if you want to remove the disc.<br />
Compatible Disc Types<br />
GB-44<br />
Disc Types Disc Logo Recorded Content<br />
<strong>DVD</strong>-VIDEO (<strong>Digital</strong> Versatile Disc) AUDIO + VIDEO<br />
<strong>DVD</strong>±RW (Audio/Video format or JPEG files)<br />
<strong>DVD</strong>+ReWritable<br />
<strong>DVD</strong>±R (<strong>DVD</strong> Recordable - Audio/Video<br />
format or JPEG files) <strong>DVD</strong>+R<br />
CD-R (CD Recordable - Audio/Video format<br />
or JPEG files)<br />
CD-RW (CD-Rewritable - Audio/Video<br />
format or JPEG files)<br />
AUDIO-CD (Compact Disc <strong>Digital</strong> Audio) AUDIO<br />
Supported Formats<br />
JPEG<br />
• The file extensions has to be .jpg and not .jpeg<br />
• Pictures encoding must comply <strong>with</strong> JPEG/ISO format.<br />
AUDIO + VIDEO + JPEG<br />
AUDIO + VIDEO + JPEG<br />
AUDIO + VIDEO + JPEG<br />
AUDIO + VIDEO + JPEG<br />
• This <strong>DVD</strong> player can only display DCF-standard still pictures or JPEG pictures such as TIFF.<br />
Some recorded files may not be able to be played due to the type and format of disc or condition of the recording.<br />
Region Code<br />
Both the <strong>DVD</strong> player and the discs are coded by region. These regional codes must match in order to play the disc. If the codes do<br />
not match, the disc will not play.<br />
The Region Number for this <strong>DVD</strong> player is described on the rear panel of the <strong>DVD</strong> player.<br />
Disc Type <strong>DVD</strong>-VIDEO<br />
Region code<br />
Only insert 12cm discs. Do not insert<br />
or play 8cm discs. They will get stuck.<br />
Logik L19<strong>DVD</strong>P10_B20_IB_100914_Zell.indd 44 14/09/2010 3:03 PM
Basic <strong>DVD</strong> Playback Functions<br />
Playing the <strong>DVD</strong><br />
Depending on the disc, a menu may appear on the <strong>TV</strong> screen once the disc has loaded. When playing the disc, you may use the<br />
button to toggle between Play and Pause mode. This product also supports Menu / Title / Sequential / Program Playback.<br />
Menu Playback (for <strong>DVD</strong>)<br />
For <strong>DVD</strong> discs, the screen will display the <strong>DVD</strong> Disc Menu (Root Menu).<br />
Press the OK button or the button to start from the highlighted content.<br />
Press the <strong>DVD</strong> MENU button to return to the Root Menu when playing the disc.<br />
For some <strong>DVD</strong> discs you may need to press the <strong>DVD</strong> MENU button or the TITLE button to display the Disc Menu.<br />
Stopping Playback<br />
Press the button once to stop. Press the button to resume from where you stopped.<br />
Press the button twice to stop. Press the button to start from the beginning.<br />
In order to protect the disc, press the button and then press the button to eject the disc. When the disc is ejected, hold the<br />
disc edge slightly and remove it from the disc slot.<br />
When not using the <strong>DVD</strong> function (in stand-by-mode or using others modes for a long period of time), please take out the disc to<br />
protect the <strong>DVD</strong> loader and the disc.<br />
Previous / Next (for <strong>DVD</strong> / CD / Multimedia discs)<br />
Press the button to play the last Title / Chapter / Track.<br />
Press the button to play the next Title / Chapter / Track.<br />
If the current track is the first one, pressing the button will stop the playback.<br />
If the current track is the last one, pressing the button will stop the playback.<br />
For <strong>DVD</strong> discs, the above functions may very due to different <strong>DVD</strong> disc’s structure.<br />
Forward / Backward (for <strong>DVD</strong> / CD / Multimedia discs)<br />
There are 4 speeds for forward. Press the button to toggle between different forward options in sequence. (FORWARD x 2 /<br />
FORWARD x 4 / FORWARD x 8 / FORWARD x 20 / Play).<br />
Press the button to resume normal speed.<br />
For <strong>DVD</strong> discs, when selecting backward to first title / chapter, the disc will start from the beginning.<br />
The sound will be off during Forward or Backward.<br />
Pause (for <strong>DVD</strong> / CD / Multimedia discs)<br />
• For CD / JPEG discs, press the button to pause; press the button again to resume.<br />
• For <strong>DVD</strong> discs, press the button to pause; press the button again to resume.<br />
Repeat (for <strong>DVD</strong> / CD / Multimedia discs)<br />
Press the REPEAT button once to display the current repeat mode.<br />
• For CD discs, while playing in sequence, you may use the repeat playback. There are 2 repeat modes, press the REPEAT button<br />
to toggle between different repeat modes in sequence. (REPEAT (OFF) / REPEAT (1) / REPEAT (ALL)).<br />
• For <strong>DVD</strong> discs, you may setup the repeat playback mode. There are 3 repeat modes, press the REPEAT button to toggle<br />
between different repeat modes in sequence. (REP: (OFF) / REP: (CHAPTER) / REP: (TITLE) / REP: (ALL)).<br />
• For MP3 / JPEG discs, while playing the disc, you may use the repeat playback. There are 3 repeat modes, press the REPEAT<br />
button to toggle between different repeat modes in sequence. (REPEAT (OFF) / REPEAT (1) / REPEAT (DIR) / REPEAT (ALL)).<br />
Logik L19<strong>DVD</strong>P10_B20_IB_100914_Zell.indd 45 14/09/2010 3:03 PM<br />
GB-45<br />
Preparation<br />
Connections<br />
Initial Setup<br />
Using the Features<br />
Using the Features<br />
via USB port<br />
DVR (<strong>Digital</strong><br />
Video Recorder)<br />
Using the <strong>DVD</strong><br />
Features<br />
Hints and Tips, Specification<br />
and Safety Warnings
Preparation Connections Initial Setup Using the Features Using the Features DVR (<strong>Digital</strong><br />
via USB port Video Recorder)<br />
Using the <strong>DVD</strong><br />
Features<br />
Hints and Tips, Specification<br />
and Safety Warnings<br />
Info (for <strong>DVD</strong> / CD / Multimedia discs)<br />
Press the INFO button to activate the on screen roll-down menu for the current Title, Chapter, Time and other information.<br />
For <strong>DVD</strong> discs, press the INFO button once to display the first page as shown below:<br />
Press the INFO button again to display the second page as shown below:<br />
Press the INFO button repeatedly to turn off the on screen display.<br />
For CD / JPEG discs, press the INFO button once to display first page: Disc type, Track -/- (Current / Full), Mute status, Repeat mode<br />
status, Current track time.<br />
Press the INFO button repeatedly to turn off the screen display.<br />
Goto (for <strong>DVD</strong> / CD / Multimedia discs)<br />
This function allows you to play your favorite Title / Chapter / Track. Press the GOTO button to activate the on screen scroll-down<br />
menu for selecting. Input your Title / Chapter / Track number by 0-9 buttons or input the playback time. After editing, press the<br />
OK button to start. If the input is invalid, it will not function.<br />
Audio (for <strong>DVD</strong> / CD)<br />
Press the AUDIO button once to display current audio mode.<br />
Press again to toggle between different audio modes in sequence.<br />
For CD discs: Stereo / MonoL / MonoR<br />
GB-46<br />
Some disc may contain multi-languages which can be selected by pressing the AUDIO button.<br />
Repeat A-B (for <strong>DVD</strong> / CD)<br />
Disc Type -/- (Current / Full) -/- (Current / Full) Elapsed disc time<br />
Title Chapter<br />
When playing <strong>DVD</strong>, CD disc, press the A-B button to repeat certain content. Press the A-B button on the start point (A) and the<br />
end point (B) to select the repeat part. Press the A-B button a third time to cancel the A-B button function and return to normal<br />
playback.<br />
Playing Multimedia Discs<br />
Audio Language Subtitle -/- (Current / Full) or OFF Angle ON / OFF<br />
-/- (Current / Full) or OFF Audio Type<br />
After loading the multimedia disc, the disc contents will<br />
automatically be displayed and sorted by different file<br />
formats into Music / Picture / Video folders.<br />
Press the buttons to navigate through the folders<br />
and files.<br />
Press the 0-9 buttons to select the contents directly. For<br />
numbers over 10, press the 10+ button first. (e.g. File number<br />
15, press 10+ then 5.)<br />
When playing or pausing <strong>with</strong> picture playback, you may use<br />
the buttons to flip / rotate the picture.<br />
Folders Files in the<br />
selected<br />
folder<br />
Logik L19<strong>DVD</strong>P10_B20_IB_100914_Zell.indd 46 14/09/2010 3:03 PM<br />
Music<br />
folder<br />
Picture<br />
folder<br />
Video<br />
folder
Using the <strong>DVD</strong> System Setup Page<br />
In the <strong>DVD</strong> mode, press the <strong>DVD</strong> SETUP button on the remote control. Press the buttons to select the System Setup menu,<br />
and the buttons to select the menu options. Press the <strong>DVD</strong> Setup button to exit the menu.<br />
In Setup mode, the disc playback function will not be available.<br />
Option Description<br />
<strong>TV</strong> SYSTEM In order for the disc to play, the colour system of the <strong>DVD</strong><br />
player, disc and <strong>TV</strong> should match.<br />
NTSC<br />
This format is used by some other countries, e.g. USA.<br />
PAL<br />
This is the format used in UK.<br />
AUTO<br />
This format can be used if your <strong>TV</strong> / <strong>DVD</strong> is capable of both<br />
PAL and NTSC formats and this is the default setting.<br />
PAL format is generally used for <strong>TV</strong>’s in the UK.<br />
If NTSC is selected <strong>with</strong> a non-compatible<br />
television, you may experience interference or<br />
picture scrolling.<br />
SCREEN SAVER When the player stops or the picture becomes motionless for<br />
a couple of minutes, there will be a screen saver to prevent<br />
damage to the display screen.<br />
ON: To activate screen saver.<br />
OFF: To disable screen saver.<br />
<strong>TV</strong> TYPE 4:3 Pan Scan<br />
Widescreen picture shown in the<br />
full screen <strong>with</strong> some part cut.<br />
4:3 Letter box<br />
Widescreen picture shown in the<br />
full screen <strong>with</strong> black bars on the<br />
top and bottom of the screen.<br />
16:9<br />
Widescreen picture shown in the<br />
full screen.<br />
Logik L19<strong>DVD</strong>P10_B20_IB_100914_Zell.indd 47 14/09/2010 3:03 PM<br />
GB-47<br />
Preparation<br />
Connections<br />
Initial Setup<br />
Using the Features<br />
Using the Features<br />
via USB port<br />
DVR (<strong>Digital</strong><br />
Video Recorder)<br />
Using the <strong>DVD</strong><br />
Features<br />
Hints and Tips, Specification<br />
and Safety Warnings
Preparation Connections Initial Setup Using the Features Using the Features DVR (<strong>Digital</strong><br />
via USB port Video Recorder)<br />
Using the <strong>DVD</strong><br />
Features<br />
Hints and Tips, Specification<br />
and Safety Warnings<br />
GB-48<br />
Option Description<br />
Using the <strong>DVD</strong> Language Setup Page<br />
PASSWORD PASSWORD MODE<br />
Select to change old password to new password. (Factory<br />
default is 0000)<br />
PASSWORD CHANGE<br />
To change the password, you need to:<br />
1. Input old password.<br />
2. Input a new 4 digit password.<br />
3. Input the new password again to confirm.<br />
RATING RATING<br />
Allows the user to set a maximum rating level for a movie<br />
that can be played (e.g. PG rating). Movies rated higher than<br />
the level set will not be played. The parental lock can only be<br />
changed after inputting the correct password.<br />
This function is available only when the discs have<br />
ratings encoded on them.<br />
DEFAULT DEFAULT<br />
To restore all setup parameters to the factory settings EXCEPT<br />
the password.<br />
This function is available in stop state or when the tray is<br />
opened.<br />
In the <strong>DVD</strong> mode, press the <strong>DVD</strong> SETUP button on the remote control. Press the buttons to select the Language Setup<br />
menu, and the buttons to select the menu options. Press the <strong>DVD</strong> Setup button to exit the menu.<br />
In Setup mode, the disc playback function will not be available.<br />
Option Description<br />
AUDIO LANG Set the audio language to your language of choice.<br />
Not all <strong>DVD</strong> discs support multiple audio languages.<br />
Logik L19<strong>DVD</strong>P10_B20_IB_100914_Zell.indd 48 14/09/2010 3:03 PM
Option Description<br />
Using the <strong>DVD</strong> Audio Setup Page<br />
SUBTITLE LANG SUBTITLE<br />
Select the Subtitle language.<br />
In the <strong>DVD</strong> mode, press the <strong>DVD</strong> SETUP button on the remote control. Press the buttons to select the Audio Setup menu,<br />
and the buttons to select the menu options. Press the <strong>DVD</strong> Setup button to exit the menu.<br />
In Setup mode, the disc playback function will not be available.<br />
MENU LANG DISC MENU<br />
Select the Disc Menu language.<br />
Option Description<br />
AUDIO OUT SPDIF OFF<br />
Set as default, there will be no digital audio signal output.<br />
SPDIF RAW<br />
Set as default, the digital audio signal output will be in RAW<br />
format. Normally, this mode is used for DTS signal and Dolby<br />
digital signal.<br />
SPDIF PCM<br />
Set as default, the digital audio signal output will be in PCM<br />
format. Normally, this mode is use for audio CD signal.<br />
TONE Adjust the tone setting.<br />
Not all <strong>DVD</strong>’s offer subtitles in multiple languages.<br />
The default language is English.<br />
Logik L19<strong>DVD</strong>P10_B20_IB_100914_Zell.indd 49 14/09/2010 3:03 PM<br />
GB-49<br />
Preparation<br />
Connections<br />
Initial Setup<br />
Using the Features<br />
Using the Features<br />
via USB port<br />
DVR (<strong>Digital</strong><br />
Video Recorder)<br />
Using the <strong>DVD</strong><br />
Features<br />
Hints and Tips, Specification<br />
and Safety Warnings
Preparation Connections Initial Setup Using the Features Using the Features DVR (<strong>Digital</strong><br />
via USB port Video Recorder)<br />
Using the <strong>DVD</strong><br />
Features<br />
Hints and Tips, Specification<br />
and Safety Warnings<br />
Using the <strong>DVD</strong> Speaker Setup Page<br />
In the <strong>DVD</strong> mode, press the <strong>DVD</strong> SETUP button on the remote control. Press the buttons to select the Speaker Setup menu,<br />
and the buttons to select the menu options. Press the <strong>DVD</strong> Setup button to exit the menu.<br />
Using the <strong>DVD</strong> Dolby <strong>Digital</strong> Setup Page<br />
In the <strong>DVD</strong> mode, press the <strong>DVD</strong> SETUP button on the remote control. Press the buttons to select the <strong>Digital</strong> Setup menu,<br />
and the buttons to select the menu options. Press the <strong>DVD</strong> Setup button to exit the menu.<br />
GB-50<br />
In Setup mode, the disc playback function will not be available.<br />
Option Description<br />
In Setup mode, the disc playback function will not be available.<br />
AUDIO OUT LT/RT<br />
Select this option when the <strong>DVD</strong> player is connected to an<br />
external amplifier <strong>with</strong> Pro-Logic decoding function.<br />
Option Description<br />
STEREO<br />
Press the button to select STEREO and then press the OK<br />
button to confirm.<br />
VSS<br />
Press the button to select VSS (Virtual Surround Sound) and<br />
then press the OK button to confirm.<br />
DYNAMIC RANGE When the dynamic range is set to FULL, the audio level<br />
during quiet and loud parts of the movie will be automatically<br />
adjusted.<br />
This setting is used to play Dolby <strong>Digital</strong> encoded<br />
discs. Best used for night time viewing.<br />
DUAL MONO STEREO<br />
The player will output both left channel and right channel<br />
audio.<br />
MONO L<br />
It means that the player will output left channel audio only.<br />
MONO R<br />
The player will output right channel audio only.<br />
MIX MONO<br />
The player will output the average signal of the left channel<br />
and right channel audio.<br />
This setting is used to play Dolby AC-3 encoded 2<br />
channel discs. This setting may not be adjustable for<br />
some discs.<br />
Logik L19<strong>DVD</strong>P10_B20_IB_100914_Zell.indd 50 14/09/2010 3:03 PM
Maintenance<br />
Careful and regular cleaning can prolong the life of your <strong>TV</strong>.<br />
Be sure to switch off the POWER ON/OFF switch and disconnect the mains<br />
cable from the mains socket before you start any cleaning.<br />
1. Use a soft dry cloth to wipe away the dust from the screen and surfaces.<br />
2. If the surfaces are extremely dirty, clean the <strong>TV</strong> <strong>with</strong> a cloth which has been<br />
dipped in a weak soapy water. Wring the cloth until it is almost dry, then use it to<br />
wipe the <strong>TV</strong>.<br />
3. Ensure there is no excess water on the screen. Allow any water or dampness to<br />
evaporate before switching the <strong>TV</strong> on.<br />
Never use alcohol, benzine, paint-thinner, cleaning fluid or other chemicals.<br />
Do not use compressed air to remove dust.<br />
Handling Discs<br />
• Do not touch the playback side of the disc.<br />
• Do not attach paper or tape to the disc.<br />
Cleaning Discs<br />
• Fingerprints and dust on the disc cause picture and sound deterioration. Wipe the disc from the centre outwards <strong>with</strong> a soft<br />
cloth. Always keep the disc clean.<br />
• If you cannot wipe off the dust <strong>with</strong> a soft cloth, wipe the disc lightly <strong>with</strong> a slightly moistened soft cloth and finish <strong>with</strong> a dry<br />
cloth.<br />
• Do not use any type of solvent such as thinner, benzine, commercially available cleaners or antistatic spray. They may damage<br />
the disc.<br />
Storing Discs<br />
Playback side<br />
• Do not store discs in places subjected to direct sunlight or near heat sources.<br />
• Do not store discs in places subjected to moisture and dust such as a bathroom or near a humidifier.<br />
• Storing discs vertically in a case, stacking discs or placing objects on discs outside of their cases may cause warping.<br />
Logik L19<strong>DVD</strong>P10_B20_IB_100914_Zell.indd 51 14/09/2010 3:03 PM<br />
GB-51<br />
Preparation<br />
Connections<br />
Initial Setup<br />
Using the Features<br />
Using the Features<br />
via USB port<br />
DVR (<strong>Digital</strong><br />
Video Recorder)<br />
Using the <strong>DVD</strong><br />
Features<br />
Hints and Tips, Specification<br />
and Safety Warnings
Preparation Connections Initial Setup Using the Features Using the Features DVR (<strong>Digital</strong><br />
via USB port Video Recorder)<br />
Using the <strong>DVD</strong><br />
Features<br />
Hints and Tips, Specification<br />
and Safety Warnings<br />
Hints and Tips<br />
If a problem does occur, it may often be due to something very minor. The following table contains various tips.<br />
The <strong>TV</strong> does not operate properly.<br />
The remote control does not work<br />
Power is suddenly turned off<br />
The video function does not work.<br />
No Picture & No Sound<br />
Picture appears slowly after<br />
switching on<br />
No or poor colour or poor picture<br />
Horizontal / Vertical bar or picture<br />
shaking<br />
Poor reception on some channels<br />
GB-52<br />
• Check to see if there are any objects between the <strong>TV</strong> and the remote control<br />
causing an obstruction. Ensure that you are pointing the remote control directly at<br />
the <strong>TV</strong>.<br />
• Ensure that the batteries are installed <strong>with</strong> correct polarity (+ to +, – to –).<br />
• Install new batteries.<br />
• Check the power of the <strong>TV</strong>. The mains supply maybe interrupted.<br />
• Check if the sleep timer is set.<br />
• Check whether the Auto Sleep is activated.<br />
• Check whether the <strong>TV</strong> is switched on.<br />
• Try another channel. The problem may be caused by the broadcaster.<br />
• This is normal, the image is muted during the <strong>TV</strong> startup process. Please contact<br />
your service centre, if the picture has not appeared after five minutes.<br />
• Adjust the settings in the PICTURE menu.<br />
• Try another channel. The problem may be caused by the broadcaster.<br />
• Check if the video cables are connected properly.<br />
• Check for local interference such as an electrical appliance or power tool.<br />
• Station or cable channel may be experiencing problems, tune to another station.<br />
• Station signal is weak, reposition the aerial for better reception.<br />
• Check for sources of possible interference.<br />
Lines or streaks in pictures • Check aerial (Change the position of the aerial.)<br />
No pictures when connecting <strong>HD</strong>MI • Check if the input source is <strong>HD</strong>MI.<br />
The audio function does not work.<br />
Picture OK but no sound<br />
• Press the VOL +/– buttons.<br />
• Sound muted? Press the button.<br />
• Try another channel. The problem may be caused by the broadcaster.<br />
No output from one of the speakers • Adjust the Balance settings in the SOUND menu.<br />
Unusual sound from Inside the <strong>TV</strong><br />
No sound when connecting <strong>HD</strong>MI • Check if the input source is <strong>HD</strong>MI.<br />
• A change in ambient humidity or temperature may result in an unusual noise when<br />
the <strong>TV</strong> is switched on or off and does not indicate a fault <strong>with</strong> the <strong>TV</strong>.<br />
Audio noise • Keep the RF coaxial cable away from the other connected cables.<br />
Password<br />
Lost password<br />
The DVR function does not work.<br />
One button recording / timer<br />
programming does not work<br />
• Select the Child Lock setting in the FUNCTION menu, then enter the following<br />
master password “8899”. The master password clears your previous password and<br />
allows you to enter a new password.<br />
• Check if the <strong>TV</strong> is in D<strong>TV</strong> mode.<br />
• Check the connection of the external USB storage device.<br />
• Check if the capacity of the USB storage device is full.<br />
Logik L19<strong>DVD</strong>P10_B20_IB_100914_Zell.indd 52 14/09/2010 3:03 PM
There is a problem in PC mode.<br />
The signal is out of range (Invalid<br />
format)<br />
Vertical bar or stripe on background<br />
& Horizontal Noise & Incorrect<br />
position<br />
Screen colour is unstable or single<br />
colour<br />
The <strong>DVD</strong> function does not work.<br />
<strong>DVD</strong> will not read the disc<br />
• Adjust resolution, horizontal frequency, or vertical frequency.<br />
• Use Auto configure or adjust clock, phase, or H/V position.<br />
• Check the signal cable.<br />
• Reinstall the PC video card.<br />
<strong>DVD</strong> does not have the signal • Check if the <strong>TV</strong> is in <strong>DVD</strong> mode.<br />
FAQs (Frequently Asked Questions)<br />
Why have I lost some/all of my<br />
channels?<br />
Why do I get ‘blocking’ on my digital<br />
picture?<br />
Can I watch Freeview using a<br />
portable set-top aerial?<br />
What type of aerial do I need?<br />
• Check if the disc is correctly inserted.<br />
• Check that the disc is clean.<br />
• Check if there is any obvious damage to the disc.<br />
• Try to play the disc on another <strong>DVD</strong> to check whether it is has content.<br />
• It happens sometimes, if you have a weak signal. Usually it just means you’ll need<br />
to rescan your digital box or <strong>TV</strong>. Don’t worry, it easy to do. And once you’ve done it,<br />
you should get all the Freeview channels available to you. If problems persist you<br />
may need to get your aerial checked. Talk to your retailer or contact your local aerial<br />
installer.<br />
• In most cases, blocking is caused by a reception problem - either the signal is too<br />
weak or there is some kind of interference. Talk to your retailer or contact your local<br />
aerial installer.<br />
• Blocking can also be caused by a digital signal that is too strong. If you are still<br />
experiencing blocking and the signal is strong, consult your local aerial installer for<br />
advice.<br />
• Some, but only a few, homes may be able to use a set top aerial. However, for a<br />
much better reception, we strongly recommend that you use a rooftop aerial.<br />
• If you do not have access to a rooftop aerial - for example, if you rent a flat and the<br />
aerial is the responsibility of your landlord, or if you’re using a second <strong>TV</strong> in the<br />
bedroom and don’t want the hassle and expense of using extension cables - a settop<br />
aerial may be your only option.<br />
• If you are installing a new aerial, we recommend a wideband rooftop aerial rather<br />
than a loft aerial. Loft aerials generally receive a weaker digital signal and are more<br />
likely to get interference from other electrical devices in the home. We suggest you<br />
have an aerial survey done before getting an aerial upgrade.<br />
• Talk to your retailer or contact your local aerial installer.<br />
Logik L19<strong>DVD</strong>P10_B20_IB_100914_Zell.indd 53 14/09/2010 3:03 PM<br />
GB-53<br />
Preparation<br />
Connections<br />
Initial Setup<br />
Using the Features<br />
Using the Features<br />
via USB port<br />
DVR (<strong>Digital</strong><br />
Video Recorder)<br />
Using the <strong>DVD</strong><br />
Features<br />
Hints and Tips, Specification<br />
and Safety Warnings
Preparation Connections Initial Setup Using the Features Using the Features DVR (<strong>Digital</strong><br />
via USB port Video Recorder)<br />
Using the <strong>DVD</strong><br />
Features<br />
Hints and Tips, Specification<br />
and Safety Warnings<br />
Display Modes<br />
The screen resolution has been optimised during production for the display modes listed below.<br />
Whilst the <strong>TV</strong> is capable of accepting a 1080p input, it is not capable of displaying this screen resolution and therefore the display<br />
will be scaled to fit the native resolution of the screen automatically.<br />
YPbPr Mode<br />
PC Mode<br />
GB-54<br />
Resolution Vertical Frequency (Hz) Aspect Ratio<br />
480I: 720 x 480<br />
480P: 720 x 480<br />
60<br />
Full, 4:3<br />
Full, 4:3<br />
576I: 720 x 576<br />
576P: 720 x 576<br />
50<br />
Full, 4:3<br />
Full, 4:3<br />
720P: 1280 x 720<br />
50<br />
60<br />
Full, 4:3<br />
1080I: 1920 x 1080<br />
50<br />
60<br />
Full, 4:3<br />
Full, 4:3<br />
1080P: 1920 x 1080<br />
50<br />
60<br />
Full, 4:3<br />
Full, 4:3<br />
Please check the display settings of your computer before connecting to the <strong>TV</strong>. If the display setting of your computer does not<br />
match the <strong>TV</strong>, there may be no video.<br />
<strong>HD</strong>MI Mode<br />
Resolution Vertical Frequency (Hz)<br />
60<br />
Aspect Ratio<br />
640 x 480<br />
72<br />
75<br />
60<br />
Full<br />
800 x 600<br />
72<br />
75<br />
60<br />
Full<br />
1024 x 768<br />
70<br />
75<br />
Full<br />
1360 x 768 60 Full<br />
Resolution Vertical Frequency (Hz) Aspect Ratio<br />
480I: 1440 x 480 60 Full, 4:3<br />
480P: 720 x 480 60 Full, 4:3<br />
576I: 1440 x 576 50 Full, 4:3<br />
576P: 720 x 576 50 Full, 4:3<br />
720P: 1280 x 720<br />
50<br />
60<br />
Full, 4:3<br />
1080I: 1920 x 1080<br />
50<br />
60<br />
Full, 4:3<br />
1080P: 1920 x 1080<br />
50<br />
60<br />
Full, 4:3<br />
Logik L19<strong>DVD</strong>P10_B20_IB_100914_Zell.indd 54 14/09/2010 3:03 PM
Specification<br />
Model<br />
L19<strong>DVD</strong>P10<br />
L19<strong>DVD</strong>B20<br />
Panel System 18.5 inch <strong>LCD</strong> panel<br />
Display Resolution<br />
1366 pixels (horizontal) x<br />
768 pixels (vertical)<br />
Television System PAL I/BG/DK, SECAM L/BG/DK<br />
Brightness 210-300 cd/m 2<br />
Contrast Ratio 800-1000:1<br />
Inputs/Output<br />
SCART 1<br />
<strong>HD</strong>MI 1<br />
VGA 1<br />
PC AUDIO 1<br />
S-VIDEO 1<br />
YPbPr 1<br />
CI 1<br />
USB 1<br />
<strong>DVD</strong> 1<br />
VIDEO IN (RCA) 1<br />
AUDIO IN (RCA) 1 (L + R)<br />
COAXIAL 1<br />
RF (75 Ω) 1<br />
Speaker Power 3 W + 3 W<br />
Earphone (3.5mm) 1<br />
Power Source 100V-240V~50/60Hz<br />
Dimension( W x D x H) <strong>with</strong> base 460 x 170 x 344 mm<br />
Weight (Net) 4.7 kg<br />
Features and specifications are subject to change <strong>with</strong>out notice.<br />
Logik L19<strong>DVD</strong>P10_B20_IB_100914_Zell.indd 55 14/09/2010 3:03 PM<br />
GB-55<br />
Preparation<br />
Connections<br />
Initial Setup<br />
Using the Features<br />
Using the Features<br />
via USB port<br />
DVR (<strong>Digital</strong><br />
Video Recorder)<br />
Using the <strong>DVD</strong><br />
Features<br />
Hints and Tips, Specification<br />
and Safety Warnings
Preparation Connections Initial Setup Using the Features Using the Features DVR (<strong>Digital</strong><br />
via USB port Video Recorder)<br />
Using the <strong>DVD</strong><br />
Features<br />
Hints and Tips, Specification<br />
and Safety Warnings<br />
Safety Warnings<br />
• Read all the instructions carefully before using the unit<br />
and keep them for future reference.<br />
• Retain the manual. If you pass the unit onto a third<br />
party make sure to include this manual.<br />
• Check that the voltage marked on the rating label<br />
matches your mains voltage.<br />
Damage<br />
• Please inspect the unit for damage after unpacking.<br />
• Do not continue to operate the unit if you are in any<br />
doubt about it working normally, or if it is damaged<br />
in any way - switch off, <strong>with</strong>draw the mains plug and<br />
consult your dealer.<br />
Location of Unit<br />
• The unit must be placed on a flat stable surface and<br />
should not be subjected to vibrations.<br />
• Do not place the unit on sloped or unstable surfaces as<br />
the unit may fall off or tip over.<br />
• The mains socket must be located near the unit and<br />
should be easily accessible.<br />
• This unit is designed for indoor use only.<br />
Temperature<br />
• Avoid extreme degrees of temperature, either hot or<br />
cold. Place the unit well away from heat sources such<br />
as radiators or gas/electric fires.<br />
• Avoid exposure to direct sunlight and other sources of<br />
heat.<br />
Naked Flames<br />
• Never place any type of candle or naked flame on the<br />
top of or near the unit.<br />
Moisture<br />
• To reduce the risk of fire, electric shock or product<br />
damage, do not expose this unit to rain, moisture,<br />
dripping or splashing. No objects filled <strong>with</strong> liquids,<br />
such as vases, should be placed on the unit.<br />
• If you spill any liquid into the unit, it can cause serious<br />
damage. Switch it off at the mains immediately.<br />
Withdraw the mains plug and consult your dealer.<br />
Ventilation<br />
• To prevent the risk of electric shock or fire hazard<br />
due to overheating, ensure that curtains and other<br />
materials do not obstruct the ventilation vents.<br />
• Do not install or place this unit in a bookcase, built-in<br />
cabinet or in another confined space. Ensure the unit is<br />
well ventilated.<br />
• Make sure that there is a gap of at least 10 cm on both<br />
sides and a gap of 20 cm at the top.<br />
GB-56<br />
20 cm<br />
10 cm 10 cm<br />
10 cm<br />
Safety<br />
• Always disconnect the unit from the mains supply<br />
before connecting/disconnecting other devices or<br />
moving the unit.<br />
• Unplug the unit from the mains socket during a<br />
lightning storm.<br />
Mains Cable<br />
• Make sure the unit or unit stand is not resting on top of<br />
the mains cable, as the weight of the unit may damage<br />
the mains cable and create a safety hazard.<br />
• If the mains cable is damaged it must be replaced<br />
by the manufacturer, its service agent, or similarly<br />
qualified persons in order to avoid a hazard.<br />
Interference<br />
• Do not place the unit on or near appliances which may<br />
cause electromagnetic interference. If you do, it may<br />
adversely affect the operating performance of the unit,<br />
and cause a distorted picture or sound.<br />
Optimum viewing<br />
• View the unit in moderate light to prevent eye strain. It<br />
is recommended to watch the unit from a distance<br />
3-7 times that of the screen height.<br />
<strong>LCD</strong> screen<br />
• The <strong>LCD</strong> screen is manufactured using high-precision<br />
technology. However, some tiny black points and/<br />
or bright points (red, blue or green in colour) may<br />
constantly appear on the <strong>LCD</strong> screen. These points<br />
are generated in the manufacturing process and are<br />
normal.<br />
Screen Burn<br />
• A characteristic of Plasma and <strong>LCD</strong> <strong>TV</strong> Panels is that<br />
displaying the same image for a long time may cause<br />
a permanent after-image to remain on the screen. This<br />
is called screen burn. Most pictures shown on the unit<br />
will be constantly moving and fill the screen.<br />
• Examples of images that you need to watch out for are<br />
as follows (this is not an all-inclusive list):<br />
1. Black Bars: If black bars appear at the left/right or<br />
top/bottom of the screen, it is recommended to<br />
change the format so that the picture fills the entire<br />
screen.<br />
2. <strong>TV</strong> Channel Logos: e.g. Shopping channel logos<br />
and pricing displays - especially if they are bright<br />
and stationary. Moving or low-contrast graphics are<br />
less likely to cause ageing of the screen.<br />
3. Time Displays<br />
4. Teletext: Do not view a stationary page for long<br />
periods of time.<br />
5. <strong>TV</strong> Menus<br />
6. Pause Mode: Do not leave the screen in pause<br />
mode for long periods of time, e.g. When watching<br />
videos.<br />
• To prevent screen burn if viewing any of the above for<br />
long periods of time, reduce contrast and brightness<br />
when viewing. Once burn-in occurs it will never<br />
disappear completely.<br />
Logik L19<strong>DVD</strong>P10_B20_IB_100914_Zell.indd 56 14/09/2010 3:03 PM
Earphones<br />
• Listening to loud sounds for prolonged periods of time<br />
may permanently damage your hearing.<br />
• Before putting on earphones, turn the volume down<br />
then put the earphones on and slowly increase the<br />
volume until you reach a comfortable listening level.<br />
Standby<br />
• The button on the remote control does not switch<br />
off the unit completely. The unit will continue to draw<br />
electricity from the mains supply while in standby. In<br />
the interests of safety and to avoid unnecessary energy<br />
consumption, never leave the unit in standby while<br />
unattended for long periods of time, e.g. overnight,<br />
while on holiday or while out of the house. Switch it off<br />
and disconnect the mains plug from the mains socket.<br />
Batteries<br />
• Batteries used in the remote control for this unit<br />
are easily swallowed by young children and this is<br />
dangerous.<br />
• Keep loose batteries away from young children and<br />
make sure that the battery holder tray is secure in the<br />
remote control. Seek medical advice if you believe a<br />
cell has been swallowed.<br />
• Please dispose of batteries correctly by following the<br />
guidance in this manual.<br />
Supervision<br />
• Children should be supervised to ensure that they do<br />
not play <strong>with</strong> the unit and the remote control.<br />
• Never let anyone especially children push anything<br />
into the holes, slots or any other openings in the case -<br />
this could result in a fatal electric shock.<br />
<strong>DVD</strong><br />
• Class 1 Laser Product<br />
This unit utilises a laser. Use<br />
of controls, adjustments or<br />
performance of procedures other<br />
than those specified herein may<br />
result in hazardous radiation<br />
exposure.<br />
CLASS 1<br />
LASER PRODUCT<br />
• Before moving the unit, ensure the disc tray is empty.<br />
• Always remove the disc when the unit is not in use.<br />
• Failure to do so will risk severely damaging the disc<br />
and the unit.<br />
• Do not stack devices, heat from other devices may<br />
affect the performance of the unit.<br />
CAUTION<br />
RISK OF ELECTRIC SHOCK<br />
DO NOT OPEN<br />
The lightning flash <strong>with</strong> arrowhead symbol,<br />
<strong>with</strong>in an equilateral triangle, is intended to<br />
alert the user to the presence of uninsulated<br />
“dangerous voltage” <strong>with</strong>in the unit’s<br />
enclosure that may be of sufficient<br />
magnitude to constitute a risk of electric<br />
shock.<br />
The exclamation point <strong>with</strong>in an equilateral<br />
triangle is intended to alert the user to the<br />
presence of important operating and<br />
maintenance (servicing) instructions in the<br />
manual accompanying the unit.<br />
Service<br />
• To reduce the risk of electric shock, do not remove<br />
screws. The unit does not contain any user-serviceable<br />
parts. Please leave all maintenance work to qualified<br />
personnel.<br />
• Do not open any fixed covers as this may expose<br />
dangerous voltages.<br />
Maintenance<br />
• Ensure to unplug the unit from the mains socket before<br />
cleaning.<br />
• Do not use any type of abrasive pad or abrasive<br />
cleaning solutions as these may damage the unit’s<br />
surface.<br />
• Do not use liquids to clean the unit.<br />
Logik L19<strong>DVD</strong>P10_B20_IB_100914_Zell.indd 57 14/09/2010 3:03 PM<br />
GB-57<br />
Preparation<br />
Connections<br />
Initial Setup<br />
Using the Features<br />
Using the Features<br />
via USB port<br />
DVR (<strong>Digital</strong><br />
Video Recorder)<br />
Using the <strong>DVD</strong><br />
Features<br />
Hints and Tips, Specification<br />
and Safety Warnings
Logik L19<strong>DVD</strong>P10_B20_IB_100914_Zell.indd 58 14/09/2010 3:03 PM
Logik L19<strong>DVD</strong>P10_B20_IB_100914_Zell.indd 59 14/09/2010 3:03 PM
If you require a replacement for any of the items listed below, please quote their<br />
corresponding part numbers:<br />
Remote Control<br />
Replacement Part Part Number<br />
I.14.000000672 (L19<strong>DVD</strong>P10)<br />
I.14.000000661 (L19<strong>DVD</strong>B20)<br />
Batteries (x2) E.17.101570001<br />
AV Cable E.14.113150013<br />
Mains Cable E.14.050150900<br />
<strong>TV</strong> Stand Support<br />
<strong>TV</strong> Base Stand<br />
I.01.519770013 (L19<strong>DVD</strong>P10)<br />
I.01.597705112 (L19<strong>DVD</strong>B20)<br />
I.01.519770014 (L19<strong>DVD</strong>P10)<br />
I.01.597705001 (L19<strong>DVD</strong>B20)<br />
Screw A x 1 I.03.TW3012A01<br />
Screw B x 4 I.03.MP4010001<br />
Visit Partmaster.co.uk today for the easiest way to<br />
buy electrical spares and accessories. With over<br />
1 million spares and accessories available we can<br />
deliver direct to your door the very next day. Visit www.partmaster.co.uk or call<br />
0844 800 3456 (UK customers only) Calls charged at National Rate.<br />
This symbol on the product or in the instructions means that your<br />
electrical and electronic equipment should be disposed at the end<br />
of its life separately from your household waste. There are separate<br />
collection systems for recycling in the EU.<br />
For more information, please contact the local authority or your<br />
retailer where you purchased the product.<br />
Notes for battery disposal<br />
The batteries used <strong>with</strong> this product contain chemicals that are harmful to the<br />
environment. To preserve our environment, dispose of used batteries according to<br />
your local laws or regulations. Do not dispose of batteries <strong>with</strong> normal household<br />
waste.<br />
For more information, please contact the local authority or your retailer where you<br />
purchased the product.<br />
<strong>HD</strong>MI, the <strong>HD</strong>MI Logo and High-Definition Multimedia Interface are trademarks or<br />
registered trademarks of <strong>HD</strong>MI Licensing LLC.<br />
The FREEVIEW word and logo are trademarks of D<strong>TV</strong> services Ltd and are used<br />
under licence. ©D<strong>TV</strong> Services Ltd 2002<br />
The “<strong>HD</strong> <strong>Ready</strong>” Logo is a trademark of EICTA.<br />
All trademarks are the property of their respective owners and all rights are<br />
acknowledged.<br />
DSG Retail Ltd • Maylands Avenue • Hemel Hempstead<br />
Herts • HP2 7TG • England<br />
(P.N. I.08.995197720)<br />
Logik L19<strong>DVD</strong>P10_B20_IB_100914_Zell.indd 60 14/09/2010 3:03 PM