XEMIO-857 MP4 PLAYER / TOUCH SCREEN User manual ... - Lenco
XEMIO-857 MP4 PLAYER / TOUCH SCREEN User manual ... - Lenco
XEMIO-857 MP4 PLAYER / TOUCH SCREEN User manual ... - Lenco

Create successful ePaper yourself
Turn your PDF publications into a flip-book with our unique Google optimized e-Paper software.
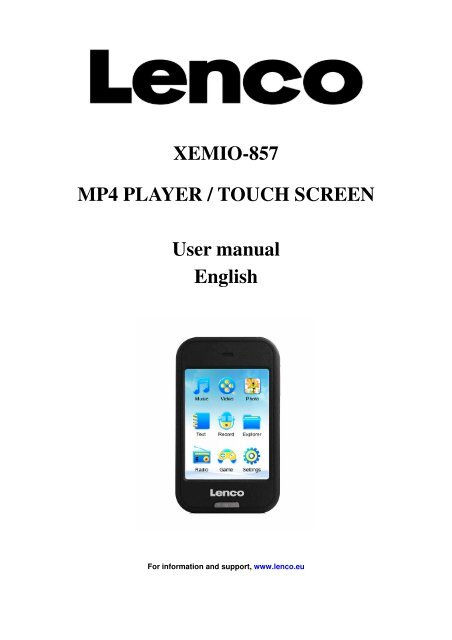
<strong>XEMIO</strong>-<strong>857</strong><br />
<strong>MP4</strong> <strong>PLAYER</strong> / <strong>TOUCH</strong> <strong>SCREEN</strong><br />
<strong>User</strong> <strong>manual</strong><br />
English<br />
For information and support, www.lenco.eu
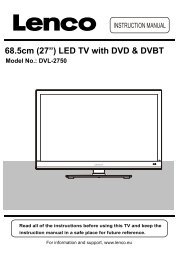
1. Basic controls and interfaces of the player<br />
Item Description<br />
Item Description<br />
1 Microphone (mono) 7 Button<br />
2 Power On/Off, Hold (Key Lock) 8 Memory Card Slot (Micro SD Card)<br />
3 USB Port (PC Connection / Charge) 9 TFT Display (Touch Function)<br />
4 M Button (Exit, Back to desktop menu) 10 Reset (Built-In Tact Switch)<br />
5 Earphone Output Jack (3.5mm Stereo) 11 Mini Speaker (mono)<br />
6 Button<br />
2. Internal Battery<br />
The player has an internal battery. When using the unit for the first time, charge it for 3 hours<br />
or until the battery icon is show the battery is in full.<br />
Note: The player continues to use battery power after it’s been turned to off, if unit isn’t used for a<br />
while, the battery might need to be charged.<br />
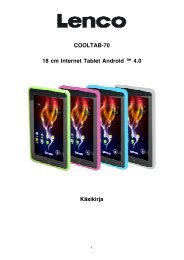
3. Connection and Charging<br />
• Once you have connected player with computer / Power charger, then you will see the<br />
“Opening” > “Connect” or “Charging” screen.<br />
• In connect screen, the battery is in charging at background.<br />
• In charging screen, the bar levels are running in battery icon, the battery is in charging.<br />
• The battery icon will show “Full” when the charging is completed. Disconnect it when it is<br />
done.
Connect Screen Charging Screen Battery Is In Full<br />
Important: The battery cannot be charged when your computer is in sleep mode. The USB port on<br />
most keyboards does not provide enough power to charge the player. Connect player direct to a<br />
USB port on your computer only to prevent charging problem.<br />
4. Connecting and disconnecting the player<br />
Connect the player to your computer to upload media files to your player; or to download<br />
recorded voice memos to your computer.<br />
Connecting the player<br />
• Plug the USB cable to the Player’s mini USB port and into a USB port on your computer, then<br />
the computer will detect and install the driver automatically. Once the installation is complete<br />
the player will be displayed in “My Computer” or for MAC users on the desktop.<br />
• Now the player is ready for music files upload / download with your computer.<br />
• Transfer the media files by using the computer mouse use drag and place, or copy and paste, in<br />
between the player and your computer. Disconnect it when you’re done.<br />
Disconnecting the player<br />
• Do not disconnect the player while it’s uploading or downloading files with your computer.<br />
• Windows system PC, disconnect the player by clicking the “Safely Remove Hardware” icon in<br />
the Windows system tray.<br />
• Mac system PC, disconnect the player by dragging the player icon on the desktop to the Trash.<br />
• Now it is safe to unplug the USB cable.<br />
Note: If you do not “Safely remove hardware” before disconnecting, data can be lost!
5. File Storage<br />
Player will create some default folders, in the internal flash memory, when you use it. However,<br />
for best result, this is recommended you to put files of different types to store under different<br />
directories.<br />
For example, music file should be stored under MUSIC dir. Record file stored under RECORD<br />
directory. Picture files under PICTURES directory. Video files VIDEO directory. Text files TXT<br />
directory. The corresponding application may unable to find the file If it is not saved in this way.<br />
6. Getting Started<br />
This player is equipped with a touch screen so you can choose the items or functions by<br />
tapping the related icons or files.<br />
Turning the player ON and OFF<br />
• Slide the power switch to “ON/OFF” position and hold it for 3 seconds to turn the player On<br />
and Off.<br />
• When the player is turning to On, first the opening screen and then desktop menu will appears<br />
to use, the “generating database” message are display at same time. Now the player is ready to<br />
use.<br />
• Turn OFF the player when you’re not uses it for a longer period.<br />
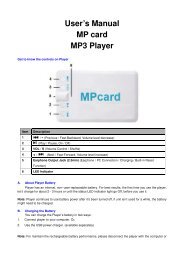
Desktop Menu<br />
Every time you turn on the player, you will see the opening screen followed by the desktop<br />
menu which contains applications of your player. Tap one of the application icons to open it.<br />
Desktop Menu
Player Applications<br />
Icon caption<br />
Music<br />
Description<br />
Listen to your songs. Create play list. Listen songs in Artists / Albums /<br />
Genre play lists from your music library.<br />
View your favorite Video / Movie files.<br />
Video<br />
View your favorite photos and watch them use slide show function.<br />
Photo<br />
Text<br />
Record<br />
Explorer<br />
Radio<br />
Watch your favorite book. Add tag and pick tag. Selecting favorite page<br />
to view.<br />
NOTE: This function only supports .txt files.<br />
Record voice memos with built-in microphone. Playback them on player<br />
or save them to your computer.<br />
Browse all type of supported media files and direct selects your favorite<br />
media file to play. Manage to delete those unwanted media files direct<br />
from the player.<br />
Listen to the radio stations. Set region, search stations by auto / <strong>manual</strong><br />
search function, preset / delete stations and FM record.<br />
Provides a little bit of fun.<br />
Game<br />
Adjust player’s setting; Set time, OSD languages, Display light up time<br />
and brightness, Set power off mode and more……<br />
Settings<br />
General Icon / Button Function In Operation Interface<br />
Button / Icon Description<br />
Return to upper directory<br />
Browse particular application file<br />
Return to desktop menu<br />
Delete file or file folder<br />
Return to previous operation interface<br />
M Button Exit application and back to desktop menu<br />
Button Volume up<br />
Button Volume down
7. Music Mode<br />
• Tap the “Music” icon; you will now enter the music mode menu as below.<br />
Play / Pause / Stop Music file<br />
• To play music, tap / icon and icon will change into , the music is playing.<br />
• To pause the play, tap icon and it will change into , the music is pause.<br />
• The icon will change into after songs playing are finished as per your default setting.<br />
Change Next / Previous and Fast-Forward / Fast Backward<br />
• Tap icon to play next file.<br />
• Tap icon to play previous file.<br />
• Tap and hold icon to play fast-forward.<br />
• Tap and hold icon to play fast-backward.<br />
• Or, drag the playing progress bar to adjust the progress.<br />
Change Volume<br />
• Press or press and hold / button to increase / decrease volume levels.<br />
• Or, direct tag the volume bar to adjust the volume levels.<br />
Change Play Mode<br />
• Tap / icon to switch to the in-order play / shuffle play.<br />
Change EQ Mode<br />
• Tap / / / / / / icon to switch the EQ mode.<br />
Repeat Mode<br />
• Tap / / / / icon to switch the repeat mode.<br />
Note: Icon(s) = Repeat File Once, = Repeat File, = Repeat All, = Repeat
All Once,<br />
= Intro (10 seconds)<br />
Choose Songs in All Music / ID3 List / Play List / Tag List<br />
In music mode:<br />
• Tap icon, a submenu is appears to choose.<br />
• Tap “All Music” to enter the play list containing all audio files. Then choose a desired file to<br />
play.<br />
• Tap “ID3 List” > “Artist” to enter the play list sorted by artist. Tab on the artists name to<br />
display a playlist containing all songs from this artist. Then choose you desired file to play.<br />
• Tap “ID3 List” > “Album” to enter the play list sorted by the album name. Tab on the album<br />
name to display a playlist containing all songs from this album. Then choose you desired file to<br />
play.<br />
• Tap “ID3 List” > “Genre” to enter the play list sorted by the genre name. Tab on the genre<br />
name to display a playlist containing all songs from this album. Then choose you desired file to<br />
play.<br />
• Tap “Play List” then choose “My Music List 1 / 2 / 3 / 4 / 5” to enter to your desired play list<br />
which you have created and then choose a file to start the play. Those songs in play list will<br />
play one by one.<br />
• Tap “Tag List”, your tag music / voice file list is appears for choose, and then choose your<br />
desired file to play.<br />
Note: “All Music” and “ID3 List” functions are works only for music file(s) which have stored at<br />
(Main Dir) internal memory.<br />
Change / Choose Music Folder (From Flash / Card Memory)<br />
• Tap icon, a sub-menu is appears to choose.<br />
• Tap “Main Dir / Card Dir”, a list screen appears to use. Choose a folder name which contains<br />
music file and choose your desired file to play. If you choose a folder name which have no<br />
supported music file, then the list will be show blank. Choose another folder.<br />
• And then choose a file you want to play.<br />
• Tap icon to back to music mode.<br />
Note: “Card Dir” will not show folder and file when the Micro SD card is not installed to player.<br />
Add Play List<br />
This player allows you to add the current playing music, if you want to put it group together,<br />
into the play list. Then you can play this group in next when you choose song(s) by using the tag list<br />
function which is mentioned above.<br />
• Tap icon, a sub-menu is appears to choose.<br />
• Tap “Add List” and then choose “My Music List 1 / 2 / 3 /4 /5” where you like them to group.
The submenu will disappears and the music is stored into you desired list number.<br />
Add Tag List<br />
This player also allows you to add tag in the current playing music / voice, if you want to mark<br />
the track time, into the tag list. Then you can playback and recall the marked track time of music /<br />
voice file(s) in next when you choose song(s) by using the play list function which is mentioned<br />
above.<br />
• Tap icon, a sub-menu is appears to choose.<br />
• Tap “Add Tag”, a “marked” pop up window appears for 1 – 2 seconds. The playing file name<br />
with track time is marked and saved into tag list. And now you can add another tag in same<br />
song or add tag for other play song if you want.<br />
View File Information<br />
• Tap icon, an information screen is appears to view, all the information of file will<br />
displayed if they have included in file.<br />
• Tap icon to back to music mode.<br />
Lyric / Artist and Album info Display<br />
This player can be display the lyrics at the middle area of the TFT screen if the playing music<br />
file is included lyrics information. However, the Artist and Album information will be displayed if<br />
no lyrics are available in the playing music.<br />
8. Video Mode<br />
Play Video<br />
• Tap “Video” icon to enter video mode. Tap “Main Dir / Card Dir” which will appears, when<br />
the Micro SD Card is in used. A list screen appears to use. Choose a file to start the play. Or,<br />
• Choose a folder name which contains Video file and choose your desired file to play. If you<br />
choose a folder name which have no supported Video file, then the list will be show blank.<br />
Choose another folder.<br />
• Tap a video file to start the play.<br />
Video Mode Interface
To Call the Video Tools Menu<br />
• Tap any where on the touch screen, the video tools menu will display to use for 3 seconds.<br />
• Tap icon to back to file list screen.<br />
Use Play / Pause<br />
In video tools menu:<br />
• To pause the play, tap icon and it will change into , the video is pause.<br />
• To play the video again, tap icon and icon will change into , the video is continues<br />
to play.<br />
Change Next / Previous and Fast-Forward / Fast Backward<br />
In video tools menu:<br />
• Tap icon to play next file.<br />
• Tap icon to play previous file.<br />
• Tap and hold icon to play fast-forward.<br />
• Tap and hold icon to play fast-backward.<br />
• Or, drag the playing progress bar to adjust the progress.<br />
Change Volume<br />
• Press or press and hold / button to increase / decrease volume levels and the video tools<br />
menu also is appear in screen to use for 3 seconds.<br />
• You also can direct tag the volume bar to adjust the volume levels<br />
before the video tools menu is disappear.<br />
In video tools menu:<br />
• Tap icon, then direct tag the volume bar to adjust the volume<br />
levels before the video tools menu is disappear.<br />
Change Folder<br />
• Tap icon, a sub-menu is appears to choose.<br />
• Tap “Main Dir / Card Dir”, a list screen appears to use. Choose a folder name which contains<br />
video file and choose your desired file to play. If you choose a folder name which have no<br />
supported video file, then the list will be show blank. Choose another folder.<br />
Note: “Card Dir” will not show folder and file when the Micro SD card is not installed to player.<br />
Add Tag List<br />
• Tap icon, a “marked” pop up window appears for 1 – 2 seconds. The playing file name<br />
with track time is marked and saved into tag list. And now you can add another tag in same<br />
song or add tag for other play song if you want.
Play Tag List<br />
• Tap icon, a sub-menu is appears to choose.<br />
• Tap “Tag List”, your tag video file(s) list is appears for choose, and then choose your desired<br />
file to play.<br />
9. Photo Mode<br />
• Tap “Photo” icon to enter to photo browse mode. Tap “Main Dir / Card Dir” which will<br />
appears, when the Micro SD Card is in used. A list screen appears to use. Choose a file to start<br />
the play. Or,<br />
• Choose a folder name which contains Photo file and choose your desired file to play. If you<br />
choose a folder name which have no supported photo file, then the list will be show blank.<br />
Choose another folder.<br />
• Tap a file to start the play.<br />
• Tap icon to change icon view list to file list view list, this will get the quicker<br />
response to list out all photo file by name for choose.<br />
Icon View<br />
File List View<br />
• Tap and hold on the lower / upper side position in list screen, the list files will move down / up<br />
one by one. Chose a desired file to play.<br />
To Call the Photo Tools Menu<br />
• Tap any where on the touch screen of TFT display, the photo tools menu will display to use for<br />
3 seconds.<br />
• Tap icon to back to file list screen.<br />
Change Next / Previous photo file<br />
In photo tools menu:<br />
• In photo browsing mode, tap screen to call up the photo tools menu.<br />
• Tap icon to play next file.<br />
• Tap icon to play previous file.
Use Slide Show and Set Slide Show Time<br />
In photo tools menu:<br />
• Tap screen to call up the photo tools menu, tap icon to enter to slide show function and the<br />
icon will change into icon. Tap icon to back to <strong>manual</strong> change mode.<br />
• To set slide show time, tap icon, a list screen appears and then choose “1s / 2s / 3s / 4s /<br />
5s” you want to use.<br />
Move Up / Down List Page<br />
• Tap / icon to move the list page down / up.<br />
• Or, drag the progress bar to adjust the page down / up, the bar dot will move to the<br />
progress bar where you have drag.<br />
10. Text / EBook Mode<br />
• Tap “Text” icon to enter the mode. Tap “Main Dir / Card Dir” which will appears, when the<br />
Micro SD Card is in used. A list screen appears to use. Choose a file to start the play. Or,<br />
• Choose a folder name which contains Text file and choose your desired file to play. If you<br />
choose a folder name which have no supported text file, then the list will be show blank.<br />
Choose another folder.<br />
• Tap a desired file to start Text browsing.<br />
File List<br />
Text Browsing<br />
Change Next / Previous Page<br />
• In Text browsing mode.<br />
• Tap icon to play next page.<br />
• Tap icon to play previous page.<br />
• Or, tap at the lower / upper side position, in Text browsing screen, the page will move once<br />
down and up. Tap and hold the page will move quickly down / up.<br />
Change Folder<br />
• Tap icon, a sub-menu is appears to choose.
• Tap “Main Dir / Card Dir”, a list screen appears to use. Choose a folder name which contains<br />
Text file and choose your desired file to play. If you choose a folder name which have no<br />
supported Text file, then the list will be show blank. Choose another folder.<br />
• And then choose a file you want to play.<br />
• Tap icon to back to music mode.<br />
Note: “Card Dir” will not show folder and file when the Micro SD card is not installed to player.<br />
Use Skip to Page<br />
• Tap icon to show “Skip to” dialogue box, and then selects the skip percentage (0% –<br />
100%) by using the / icon.<br />
• Tap outside area of the “Skip to” box to confirm and exit. Then the page is jump to your<br />
desired percentage of page.<br />
Use Auto Page and Set Auto Page Time<br />
• Tap icon to enter to auto page function and the icon will change into icon. Tap<br />
icon to back to <strong>manual</strong> page mode.<br />
• To set slide show time, tap icon, a list screen appears and then choose “10s / 15s / 20s /<br />
25s / 30s” you want to use.<br />
Use Save Tag / Pick Tag<br />
• Tap icon to show the tag setting box.<br />
Tag Setting Box<br />
• To save tag, tap any one item of “empty” box, in Save tag, to save the current page into the tag<br />
list, and then you will see the page is tag and exist in the list of save tag and pick tag at the<br />
same time.<br />
• To pick tag, tap any one item of “” box to save the current page into the tag list, and then you<br />
will see the page is tag and exist in the list of save tag and pick tag at the same time.<br />
• Tap icon to exit from the tag setting box. Or, tap the outside area of the “Save tag” and<br />
“Pick tag” box to confirm and exit from the tag setting box.
Note: The save tag can be overwritten by the new save tag when all “empty” item is in used.<br />
11. Record Mode<br />
• Tap “Record” icon to enter to voice recorder mode.<br />
To Recording and Pause Recording<br />
• To start recording, tap icon and it will change into .<br />
• To pause the recording, tap icon to pause the recording and icon will change into .<br />
To Save Record Voice File<br />
• Tap icon to save the current recording voice file into memory, the “Saving File…”<br />
dialogues box appears for few seconds. The file is saved.<br />
To Review and Playback Voice File<br />
• Tap icon, a files list appears; all the recorded voice file(s) are show for view. Tap a<br />
desired voice file to play if you want it to.<br />
Change Record Setting (Quality and Volume)<br />
• To change record quality, tap icon, a submenu list appears to choose, and then tap<br />
“Qual:”, then choose “High / Medi / Low” you want to use.<br />
• To change record volume, tap “Volume:”, then choose “+1 / +2 / +3” you want to use.<br />
12. Use Explorer Menu<br />
Explorer function is a file manager; let you know very well that all types of file and folder<br />
inside the player, also you can easy manage all types of file, to play or delete them, at those folders<br />
• To use explorer function, from desktop menu, tap “Explorer” icon, and then tap “Main Dir /<br />
Card Dir” icon, a list screen will appear to choose.<br />
• Choose folder(s) and file(s) by tapping the / icon to move the list page down / up. Or,<br />
drag the progress bar to adjust the page down / up, the bar dot will move to the progress
ar where you have drag.<br />
Note: Only “Main Dir” will show to choose, when the Micro SD card is not in used.<br />
To Play Media File<br />
• Tap any type of media file to play and it will go direct to the necessary mode to open and play<br />
the selected file.<br />
To Delete Media File / Folder<br />
• Choose a media file or folder which you want to delete, then tap icon, a dialogue<br />
box appear and then tap “Yes / No” to confirm.<br />
Note: The folder, all files in folder, will be deleted once “Yes” is confirmed.<br />
13. Game Mode<br />
Player comes with a game named “Mine”. To play game:<br />
• Tap “Game” > “Mine” icon, the game screen appear for play<br />
• Tap “Easy / Hard” icon to switch the game level.<br />
• Tap “Mine” icon to switch to “Sign” mode, and then you can mark the mines with flags, tap it<br />
again to return to “Mine”.<br />
• Tap icon to re-start for a new game .<br />
• Tap “Exit” icon to back to game menu and then tap icon to back to desktop menu.<br />
• Or, press “M” button to direct back to desktop menu.<br />
14. Use Radio<br />
• Tap “Radio” icon, a Radio Receiving Screen appears to use.<br />
Radio Receiving Screen<br />
Set Radio Region:<br />
To change radio region, tap icon, and then tap “CHN / JPN / ERU / USA” you want.
Note:<br />
• CNH = China, JPN = Japan, ERU = Europe, USA = USA<br />
• All stored stations may be deleted when every time the region has set or changed.<br />
Tune Station:<br />
You can tune the radio stations by using “Auto Search” or “Manual Search”.<br />
Auto Search and Save Station:<br />
• Tap icon to enter to auto search and auto preset mode. The radio will searching stations in<br />
the range of frequency “76 – 92MHz / 87 – 108MHz”, all found radio stations will be stored<br />
into “Channel List” table to use. The radio search will stop and show the first received radio<br />
station to listening.<br />
Manual Search and Save Station:<br />
• Tap icon to enter to <strong>manual</strong> search mode.<br />
• To tune your desired radio frequency, tapping or icon to change the frequency<br />
Down or Up <strong>manual</strong>ly. (0.1MHz by down or up)<br />
• Once you desired radio frequency have selected, the station is receiving, by using <strong>manual</strong><br />
search function, then tap icon to enter save channel mode. A save channel dialog box<br />
appears to confirm.<br />
• Tap “Ok” to save the receiving channel at “Channel List” table to use. Tap “Cancel” to abort.<br />
• Tapping or icon to change the frequency to tune and save another desired radio<br />
frequency.<br />
Note: Total 20 stations, CH01 – CH20, can be preset in channel list for use.<br />
Use Channel List and Change Next Station<br />
• Tap icon to show all saved radio frequency channels by “Auto Search” and “Manual<br />
Search”. A list screen appears to choose.<br />
• To select your desired radio station, tap / icon to move the list page down / up. Or,<br />
drag the progress bar to adjust the page down / up, the bar dot will move to the progress<br />
bar where you have drag.<br />
• Once selected, tap you desired radio channel / frequency, example “CH03 : 90:30 MHz”, to<br />
enter the radio station. The selected radio frequency is show and radio station is receiving.<br />
• To change another stations, tap icon again or direct tap or icon to change the<br />
station(s) down and up according to channel list.<br />
To Delete Station:<br />
• Select the receiving the unwanted station by tapping or icon, and then tap icon,<br />
a delete station dialog box appears to confirm. Choose “Ok” confirm the delete or choose
“Cancel” to abort. Or,<br />
• Tap icon to enter to channel list, and then select the channel station you want to delete, tap<br />
icon and choose “Ok” to confirm.<br />
Change Volume<br />
• Press or press and hold / button to increase / decrease volume levels.<br />
• Or, direct tag the volume bar to adjust the volume levels.<br />
Mute Radio<br />
• To mute the radio, tap icon and it will change into , the sound is mute.<br />
• To un-mute, tap icon and icon will change into , the sound is up again.<br />
Note: Turn Off the FM stereo function when radio station signal strength is in weak and the<br />
background noise issues appear.<br />
Use FM Record<br />
• Select you desired station, tap icon to enter to record mode.<br />
Start Recording and Pause Recording<br />
• To start recording, tap icon and it will change into .<br />
• To pause the recording, tap icon to pause the recording and icon will change into .<br />
To Save Record Voice File<br />
• Tap icon to save the current recording voice file into memory, the “Saving File…”<br />
dialogues box appears for few seconds. The file is saved.<br />
To Review and Playback Voice File<br />
• Tap icon, a files list appears; all the recorded voice file(s) are show for view. Tap a<br />
desired voice file to play if you want it to.<br />
Change Record Setting (Quality and Volume)<br />
• To change record quality, tap icon, a submenu list appears to choose, and then tap<br />
“Qual:”, then choose “High / Medi / Low” you want to use.<br />
• To change record volume, tap “Volume:”, then choose “+1 / +2 / +3” you want to use.
15. Use Settings<br />
• Tap “Setting” icon to enter to setup interface.<br />
Settings Interface<br />
Player Information<br />
• Tap “Player Information” icon to view relevant read-only product information, such as version,<br />
memory and files information…etc.<br />
Note: Tap<br />
icon to back to setting interface.<br />
Set Time<br />
• Tap “Set time” to enter date and time setup interface.<br />
• Tap and icon to set those relevant numbers to the current year, month, day and time.<br />
• Tap icon to back to setting interface and the date and time will be updated at system<br />
clock display icon at the top left corner of the screen.<br />
Set Language<br />
This player can use difference languages.<br />
• To set the languages, tap “Language” icon and then choose your desired OSD language.<br />
Set Display<br />
• Tap “display” icon to enter to display setup menu.<br />
• Tap and icon to choose “0s / 5s / 10s / 15s / 30s / 1m / 5mi / 15m / 30m” for item<br />
“BLight Time”. (Display backlight time)<br />
Note: S = second and m = minute<br />
• Tap “ to ” icon to choose the backlight bright levels for item “Brightness”.<br />
Calibrate
In some circumstances, such as electrostatic discharge voltage, you might need to calibrate the<br />
touch allocation on screen for the touch function misplaced if happens.<br />
• To calibration the touch panel, tap “Calibrate” icon, a calibration marker “ ” appear on the<br />
left top corner on screen, and then touch the center of this “ ” to start the calibration.<br />
Follow to touch the marker which appears in difference location until calibration is done.<br />
Set Power Off<br />
• Tap “Power Off” icon > choose “OFF, 10 minutes, 15 minutes, 30 minutes, 60 minutes and 120<br />
minutes” as you desired by tapping the and icon.<br />
Note: The setting will change to the default value “OFF” if re-start the player.<br />
Default Setting<br />
• Tap “Default” icon, the player will prompt “WARNING” about whether to restore system<br />
default setting or not.<br />
• Tap “Yes” to restore factory default settings. Tap “No” to abandon this restoration.<br />
Upgrade<br />
You might need to upgrade the firmware for advanced the player performance or firmware<br />
getting trouble or damaged in some circumstance, such as electrostatic voltage discharge issue<br />
happens. Please follow the instruction posted by the dealer (if any) or follow the instruction from<br />
System Utility Tools if provided. It is not recommended to do if the player is proper working.<br />
• Tap “Upgrade” icon to enter the firmware upgrade mode, a dialogue box with warning wills<br />
popup for action, and then you can insert USB and running the System Utility Tools with new<br />
firmware for upgrade with your computer.<br />
• Tap “NO” to abort the upgrade action.<br />
Use Lock / Unlock<br />
This player is allow you to lock the touch screen and all keys function to avoid careless button<br />
operation.<br />
• To lock, slide the power switch to “HOLD” position to lock the player, a lock icon will appear<br />
to notify for 2 - 3 second. All key’s function and touch operation are disabled.<br />
• To unlock: slide the power switch back to the original position, a unlock icon will appear to<br />
notify for 2 – 3 seconds. All key’s function and touch operation will be enabled again.<br />
Reset<br />
If the player encounters dead halt during use, press the “RESET” button by using the suitable<br />
object / tool, such as wooden tooth pick or plastic screw driver, to restart the player.
16. Use Micro SD Card Slot (T-Flash Card)<br />
This player allows you to play those support media files from a micro SD memory card<br />
(T-Flash).<br />
Insert / Remove the Micro SD card<br />
• To safe to insert / remove the micro SD memory card into/from the card slot. Please must turn<br />
Off the player.<br />
View / play the files on the micro SD Card<br />
• From desktop menu, tap “Video / Photo / Text / Explorer” icon, a list screen appears, tap<br />
“Main DIR / Card Dir” and then choose your desire folder(s) and media file to play.<br />
• For music mode, tap “Music” icon to music mode, and then tap icon, a list screen<br />
appears, and then tap “Main DIR / Card Dir” and then choose your desire folder(s) and media<br />
file to play.<br />
Notes: “Main DIR” is the internal memory of the player. “Card DIR” is the Micro SD Card that<br />
you have inserted into the player.<br />
17. Use Video Conversion Tool<br />
Video conversion tool is used to convert AV files into advanced AVI or WMV format,<br />
recommended video file format, to make them viewable on this player.<br />
What Format Files Can Be Converted<br />
This tool can converted the video files of the following formats:<br />
1) .AVI format files;<br />
2) .ASF and .WMV Windows Media format files;<br />
3) .MPG, .MPEG and .DAT MPEG1 format files;<br />
4) .RM, .RAM and .RMVB Real Play format files;<br />
5) .MOV Quick Time format files;<br />
6) .VOB MPEG2 format files;<br />
7) .SWF Flash format files (unable to convert into WMV files now);<br />
8) .AVI and .WMV files can be converted into .AVI files again;<br />
9) .AVI and .WMV files can be converted into .WMV files again.<br />
Important: For Video Converter, please make sure you have installed Microsoft DirectX 9.0 or<br />
above. When to convert Real Media, QuickTime, MPEG2 format video files, please install related<br />
DirectShow filter at first. Otherwise, AVI Converter can not work normally.<br />
For Media Manager in Windows XP and Windows 2003, please make sure you have installed<br />
Microsoft Media Player 10.0 or above, and Microsoft .NET framework 3.0.
Software Installation<br />
• To install this video conversion tool to your computer, click to open the folder named “Utilities<br />
> Video Conversion Software” in provided CD or stored in your Player’ flash memory.<br />
• Select “Setup” to start the install program, please follows instructions to click “next” button,<br />
and click “close” button when installation is completed successfully.<br />
Running the Video Conversion Tool<br />
• Click 【start】 button > 【program】 menu, select “Media Player Utilities 5.22” > “Video<br />
Converter” to enter the main interface.<br />
Adding AV files<br />
• Click button on the right side of the “Input File” column to add AV files to be converted,<br />
and a dialogue box will automatically pop out for adding one or more AV files.<br />
• After the file is added, the path of the AV file will be displayed in the “Input File” field as<br />
shown below; and, relevant information of the added file, such as the check box, file name and<br />
path, status and file length, will be displayed in the status column.
Input and Output AV file<br />
• Click button to choose the folder where to save the converted AV files, the “browse file<br />
folder” dialogue box will pop up, select the specified storage path and then click “confirm”<br />
button to complete.<br />
• Click button to select the folder where the original files are, a dialogue box will pop up<br />
for adding one or more AV files, the original file will show in the file window once selected.<br />
• Select with highlight the unprocessed AV files in the file window, the icon will be<br />
highlighted into . And then click icon and a dialog box will be shown.<br />
• Choosing pixels of AVI (Xvid) / WMV to “320x240” .<br />
• Frames per second to “Middle / High”<br />
• Frame Ratio to “Full Screen”<br />
• Click OK to confirm.<br />
• Click to start converting.<br />
• After conversion, the converted AV files will play automatically for preview.<br />
• And now the converted AV file is ready to transfer, you can simply copy and place those<br />
converted AMV files to the media player.<br />
Note: Only pixels in 320x240 can be supported, make sure 320x240 is selected.
18. Troubleshooting<br />
Play cannot turn ON Check battery is it charged with enough energy.<br />
No sound is heard from Check whether Volume is set “0” and connect the<br />
headphone.<br />
headphone plugs firmly.<br />
Check whether the headphone plug is dirty.<br />
Corrupted MP3 may make a static noise and the sound<br />
may cut off. Make sure that the music files are not<br />
corrupted.<br />
Key or touch function does not Check whether key lock switch is in locked position.<br />
work<br />
Characters in LCD are corrupted Check whether the right language has been selected.<br />
Download of music files fails. Check whether USB cable is damaged and is connected<br />
properly.<br />
Check whether driver is installed correctly.<br />
Check whether the player’s memory is in full.
19. Specifications<br />
Display<br />
Dimension<br />
Weight<br />
PC Connection<br />
Earphone Impedance<br />
Speaker Impedance<br />
External Memory<br />
Rechargeable Battery<br />
2.4 inches TFT, Resolution 320x240(RGB)<br />
83mm (L) x 50mm (W) x 14.5mm (H)<br />
60g<br />
USB 2.0 (High Speed)<br />
32 Ohm<br />
8 Ohm (Mono)<br />
Micro SD Memory Card; T-Flash (up to 8GB)<br />
Lithium: 3.7V, 700mAh<br />
Music playing time: > 8 hours (power save mode, 2/3 earphone output)<br />
Video playing time: > 3 hours<br />
Voice Recording format WAV<br />
32kbps / 64kbps / 192kbps<br />
Music Format<br />
MP3, WMA<br />
32kbps - 320kbps<br />
APE, FLAC, OGG<br />
Video Format AVI(Xvid), WMV, FLV, QVGA resolution 320x240, 30fps<br />
3GP, RM/RMVB,<br />
Photo Format<br />
JPEG, BMP, GIF, TIF, PNG<br />
eBook Format<br />
Audio<br />
TXT<br />
Earphone Output Power L: 150mVrms + R: 150mVrms (at 32Ohm)<br />
Frequency response<br />
20Hz – 20,000Hz<br />
Operation Temperature 0℃<br />
OSD Languages<br />
Operation Systems<br />
SNR<br />
Multi Languages<br />
40℃<br />
> 60dB<br />
Windows 2000 / XP / Vista, Mac OS 9.2 or above<br />
-<br />
20. DISCLAIMER<br />
Updates to Firmware and/or hardware components are made regularly. Therefore some of the<br />
instruction, specifications and pictures in this documentation may differ slightly from your<br />
particular situation. All items described in this guide for illustration purposes only and may not<br />
apply to particular situation. No legal right or entitlements may be obtained from the description<br />
made in this <strong>manual</strong><br />
21. RECYCLING<br />
If at any time in the future you should need to dispose of this product, please<br />
note that: Waste electrical products should not be disposed of with household waste.<br />
Please recycle where facilities exist. Check with your Local Authority or Retailer<br />
for recycling advice. (Waste Electrical and Electronic Equipment Directive)