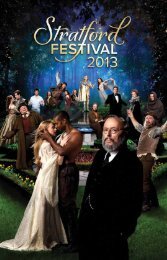
From left - Stratford Festival
From left - Stratford Festival
From left - Stratford Festival

Create successful ePaper yourself
Turn your PDF publications into a flip-book with our unique Google optimized e-Paper software.
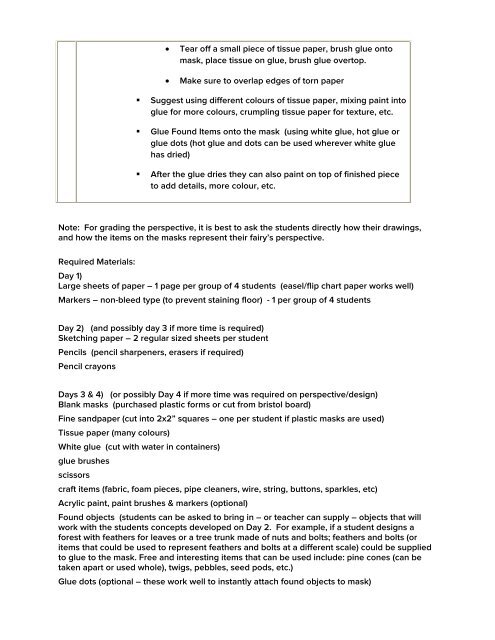
Tear off a small piece of tissue paper, brush glue onto<br />
mask, place tissue on glue, brush glue overtop.<br />
Make sure to overlap edges of torn paper<br />
• Suggest using different colours of tissue paper, mixing paint into<br />
glue for more colours, crumpling tissue paper for texture, etc.<br />
• Glue Found Items onto the mask (using white glue, hot glue or<br />
glue dots (hot glue and dots can be used wherever white glue<br />
has dried)<br />
• After the glue dries they can also paint on top of finished piece<br />
to add details, more colour, etc.<br />
Note: For grading the perspective, it is best to ask the students directly how their drawings,<br />
and how the items on the masks represent their fairy’s perspective.<br />
Required Materials:<br />
Day 1)<br />
Large sheets of paper – 1 page per group of 4 students (easel/flip chart paper works well)<br />
Markers – non-bleed type (to prevent staining floor) - 1 per group of 4 students<br />
Day 2) (and possibly day 3 if more time is required)<br />
Sketching paper – 2 regular sized sheets per student<br />
Pencils (pencil sharpeners, erasers if required)<br />
Pencil crayons<br />
Days 3 & 4) (or possibly Day 4 if more time was required on perspective/design)<br />
Blank masks (purchased plastic forms or cut from bristol board)<br />
Fine sandpaper (cut into 2x2” squares – one per student if plastic masks are used)<br />
Tissue paper (many colours)<br />
White glue (cut with water in containers)<br />
glue brushes<br />
scissors<br />
craft items (fabric, foam pieces, pipe cleaners, wire, string, buttons, sparkles, etc)<br />
Acrylic paint, paint brushes & markers (optional)<br />
Found objects (students can be asked to bring in – or teacher can supply – objects that will<br />
work with the students concepts developed on Day 2. For example, if a student designs a<br />
forest with feathers for leaves or a tree trunk made of nuts and bolts; feathers and bolts (or<br />
items that could be used to represent feathers and bolts at a different scale) could be supplied<br />
to glue to the mask. Free and interesting items that can be used include: pine cones (can be<br />
taken apart or used whole), twigs, pebbles, seed pods, etc.)<br />
Glue dots (optional – these work well to instantly attach found objects to mask)