Extreme Networks Summit WM-Series Wireless Controller - Wavelink
Extreme Networks Summit WM-Series Wireless Controller - Wavelink
Extreme Networks Summit WM-Series Wireless Controller - Wavelink

Create successful ePaper yourself
Turn your PDF publications into a flip-book with our unique Google optimized e-Paper software.
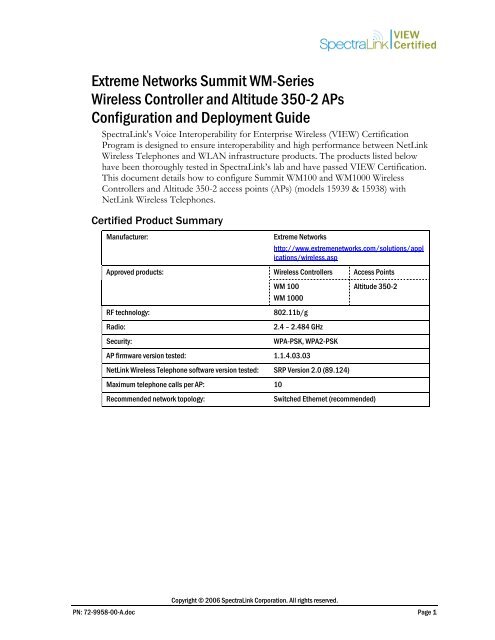
<strong>Extreme</strong> <strong>Networks</strong> <strong>Summit</strong> <strong>WM</strong>-<strong>Series</strong><br />
<strong>Wireless</strong> <strong>Controller</strong> and Altitude 350-2 APs<br />
Configuration and Deployment Guide<br />
SpectraLink's Voice Interoperability for Enterprise <strong>Wireless</strong> (VIEW) Certification<br />
Program is designed to ensure interoperability and high performance between NetLink<br />
<strong>Wireless</strong> Telephones and WLAN infrastructure products. The products listed below<br />
have been thoroughly tested in SpectraLink’s lab and have passed VIEW Certification.<br />
This document details how to configure <strong>Summit</strong> <strong>WM</strong>100 and <strong>WM</strong>1000 <strong>Wireless</strong><br />
<strong>Controller</strong>s and Altitude 350-2 access points (APs) (models 15939 & 15938) with<br />
NetLink <strong>Wireless</strong> Telephones.<br />
Certified Product Summary<br />
Manufacturer:<br />
<strong>Extreme</strong> <strong>Networks</strong><br />
http://www.extremenetworks.com/solutions/appl<br />
ications/wireless.asp<br />
Approved products: <strong>Wireless</strong> <strong>Controller</strong>s Access Points<br />
RF technology:<br />
Radio:<br />
Security:<br />
<strong>WM</strong> 100<br />
<strong>WM</strong> 1000<br />
802.11b/g<br />
2.4 – 2.484 GHz<br />
WPA-PSK, WPA2-PSK<br />
AP firmware version tested: 1.1.4.03.03<br />
NetLink <strong>Wireless</strong> Telephone software version tested: SRP Version 2.0 (89.124)<br />
Maximum telephone calls per AP: 10<br />
Recommended network topology:<br />
Altitude 350-2<br />
Switched Ethernet (recommended)<br />
Copyright © 2006 SpectraLink Corporation. All rights reserved.<br />
PN: 72-9958-00-A.doc Page 1
Network Topology<br />
The following topology was tested during VIEW Certification. It is important to note<br />
that these do not necessarily represent all "certified" configurations. The access points<br />
were powered through a mid-span POE adaptor.<br />
<strong>Summit</strong> <strong>WM</strong>-<strong>Series</strong><br />
Test Setup<br />
SUB-NET A<br />
192.168.110.X<br />
15939 AP<br />
192.168.110.11<br />
255.255.255.0<br />
<strong>Summit</strong> <strong>WM</strong> 1000<br />
ES0 192.168.110.10:5825<br />
255.255.255.0<br />
<strong>Extreme</strong> Switch<br />
15939 AP<br />
192.168.110.12<br />
255.255.255.0<br />
*Phones DHCP<br />
192.168.121.X<br />
DHCP<br />
192.168.121.X<br />
Handed out by<br />
SVP SERVER192.168.110.5<br />
Gateway 192.168.110.15<br />
Router<br />
Port 0/0<br />
192.168.110.15<br />
255.255.255.0<br />
PRI GATEWAY 192.168.110.5<br />
Gateway: 192.168.110.15<br />
SUB-NET B<br />
192.168.123.X<br />
Port 0/1<br />
192.168.123.15<br />
255.255.255.0<br />
WIRED TEST PC DHCP 192.168.110.9<br />
WIRELESS TEST PC DHCP on SSID ‘DATA’,<br />
Subnet 192.168.122.X<br />
15938 AP<br />
192.168.123.11<br />
255.255.255.0<br />
* Phones DHCP 192.168.121.X<br />
*All Clients are on their own “Virtual Subnet”, Per SSID<br />
Copyright © 2006 SpectraLink Corporation. All rights reserved.<br />
PN: 72-9958-00-A.doc Page 2
Product Limitations<br />
1. Beacons are sent from the AP inconsistently; therefore you may see decreased<br />
battery life on the handsets.<br />
2. A hex-key is not supported with both WPA-PSK and WPA2-PSK. You must use a<br />
passphrase for each.<br />
3. Because the <strong>Controller</strong> configures a virtual subnet, broadcast data cannot be sent to<br />
the handsets.<br />
Installing Software & Configuration<br />
1. If software upgrades are required, contact <strong>Extreme</strong> <strong>Networks</strong> Customer Support for<br />
the latest version of software and instructions.<br />
2. The current version of software installed can be found by opening a telnet session of<br />
the AP, and typing the command ‘version’, or by looking at the configuration GUI<br />
under <strong>Wireless</strong> APs then selecting the general tab for the AP in the field ‘s/w<br />
version’.<br />
If you encounter difficulties or have questions regarding the configuration process,<br />
please contact your <strong>Extreme</strong> <strong>Networks</strong> representative or visit the web site<br />
http://www.extremenetworks.com/solutions/applications/wireless.asp.<br />
Initial Setup<br />
1. The following instructions are for configuring a wireless controller and a number of<br />
access points with no prior configuration.<br />
2. All of the initial setup is done via a web interface. Connect a ‘Cross-Over’ Ethernet<br />
cable directly from the Management Port of the controller to a PC’s Ethernet port.<br />
3. Log onto the controller by opening a web browser and connect to<br />
https://192.168.10.1:5825/. The default username is ‘admin’; the default password is<br />
‘abc123’.<br />
4. Do this step only if it is necessary to reset the controller back to its factory default<br />
configuration. Browse to <strong>WM</strong>-AD Configuration and select System Maintenance screen. Select<br />
Reset database to factory default and reboot and click Apply. This will reset the database and<br />
cause the controller to reboot. It will take three to four minutes before the controller<br />
is finished.<br />
Copyright © 2006 SpectraLink Corporation. All rights reserved.<br />
PN: 72-9958-00-A.doc Page 3
<strong>Controller</strong> Setup<br />
The setup steps described below refer to the network topology diagram shown in this<br />
document. Make sure all the access points are disconnected from the system if<br />
configuring the system for the first time.<br />
Assigning an IP Address to a <strong>Wireless</strong> <strong>Controller</strong><br />
1. Log onto the controller by opening a web browser and connect to<br />
https://192.168.10.1:5825/. The default username is ‘admin’; the default password is<br />
‘abc123’.<br />
2. Navigate to <strong>Summit</strong> Switch and select IP Addresses from the left hand side of the screen.<br />
3. Change the value of esa0 to 192.168.110.10 and 255.255.255.0 for the IP Address and<br />
Subnet mask. Click the checkbox for Mgmt and SLP for this port only (thus turning it<br />
on). Leave them unchecked (off) for the other ports. For Function, select Host Port if<br />
static routing is used. Otherwise, select Dynamic Port if OSPF is being used for routing<br />
and routing advertisements. Enter esa0 for Multicast Support. Refer to the screen shot<br />
shown below.<br />
<br />
This is for topologies where the SpectraLink gateway(s) and SVP Servers<br />
are located adjacent to the esa0 port, as was done in this certification test.<br />
In topologies where the setup is different this multicast setting should be<br />
configured to be whichever port the SpectraLink servers are adjacent to.<br />
This setting permits proper wired replication of multicast data from the<br />
wireless subnet.<br />
4. Save the settings using the Save button.<br />
Copyright © 2006 SpectraLink Corporation. All rights reserved.<br />
PN: 72-9958-00-A.doc Page 4
Copyright © 2006 SpectraLink Corporation. All rights reserved.<br />
PN: 72-9958-00-A.doc Page 5
Assigning Routing Protocols to <strong>Summit</strong> <strong>WM</strong> <strong>Series</strong> <strong>Controller</strong><br />
1. Select Routing Protocols from the left-hand side of the <strong>Summit</strong> Switch screen.<br />
2. Enter 0.0.0.0 for the Destination Address and 0.0.0.0 for the Subnet Mask. Add the<br />
appropriate address for the Gateway.<br />
If dynamic routing (OSPF) is being used, then the default route should be<br />
set automatically. However, it is always recommended that you assign a<br />
temporary static route in dynamic environments to allow the device to<br />
operate immediately without having to wait for the initial updates. Be sure<br />
to clear the checkbox for Override dynamic routes. This will allow dynamic<br />
routes to be the default once they arrive.<br />
3. Save the settings using the Save button.<br />
Copyright © 2006 SpectraLink Corporation. All rights reserved.<br />
PN: 72-9958-00-A.doc Page 6
WAP Registration<br />
1. Navigate to the Altitude APs tab and select WAP Registration on the left-hand side of the<br />
screen.<br />
2. Enter all information for your APs (see screen shot below). Make sure the setting for<br />
Security Mode is selected to Allow all Altitude APs to Connect.<br />
This setting allows new APs to be added to the system automatically.<br />
Once the addition of APs is complete it is recommended to switch this<br />
setting back to Allow only approved <strong>Wireless</strong> APs to connect.<br />
3. Save the settings using the Save button.<br />
Copyright © 2006 SpectraLink Corporation. All rights reserved.<br />
PN: 72-9958-00-A.doc Page 7
WAP Maintenance<br />
1. Select WAP Maintenance on the left-hand side of the Altitude APs menu.<br />
2. Select the proper image file in the WAP Images box and click Set as default.<br />
3. Under Upgrade Behavior select Upgrade when WAP connects using settings from Controlled<br />
Upgrade. Check Upgrade Behavior, Do not upgrade WAP images if current image version = upgrade<br />
version and check Downgrade Behavior, Automatically downgrade WAP to default image if WAP is<br />
at later release number (major/minor rev).<br />
4. Save the settings using the Save button.<br />
Copyright © 2006 SpectraLink Corporation. All rights reserved.<br />
PN: 72-9958-00-A.doc Page 8
Setting up SSID, Security and QOS<br />
1. Go to the <strong>WM</strong>-AD Configuration menu and select the Topology tab.<br />
2. Assign a subnet for clients for a specific SSID.<br />
3. Under DHCP Settings, enter the appropriate address for the Gateway. For Mask enter<br />
255.255.255.0. The address range should default to 192.168.121.2 – 192.168.121.254.<br />
Change this if you want a limited range of addresses assigned to this subnet. No<br />
DNS Servers or WINS is required.<br />
4. Set the Timeout Idle pre and post to 2.<br />
5. Under Next Hop Routing, set the OSPF Route Cost to 50000.<br />
6. Enter an SSID name.<br />
7. Check b/g for all Altitude APs<br />
8. Save the settings using the Save button.<br />
Copyright © 2006 SpectraLink Corporation. All rights reserved.<br />
PN: 72-9958-00-A.doc Page 9
Filtering<br />
1. From the <strong>WM</strong>-AD Configuration menu select the Filtering tab.<br />
2. Select Default from the Filter ID drop down box. Select all 3 options, In, Out and Allow.<br />
Leave the IP:Port as *.*.*.*.<br />
3. Select Non-Authenticated in the Filter ID drop down box. Select all 3 options, In, Out and<br />
Allow. Leave the IP:Port as *.*.*.*.<br />
4. Save the settings using the Save button.<br />
A more secure setup for this topology might be:<br />
Allow 192.168.121.* UDP<br />
Allow 192.168.110.* UDP<br />
Allow 192.168.123.* UDP<br />
Disallow *.*.*.* N/A T<br />
Copyright © 2006 SpectraLink Corporation. All rights reserved.<br />
PN: 72-9958-00-A.doc Page 10
Multicast Configuration<br />
1. From the <strong>WM</strong>-AD Configuration menu, select the Multicast tab.<br />
2. Select the Enable Multicast Support check box.<br />
3. In the Defined Group dropdown field, select or enter Spectralink SVP (224.0.1.116) and click<br />
the Add button.<br />
4. Enable <strong>Wireless</strong> Replication for the multicast selection by selecting the checkbox for the<br />
entry.<br />
5. Save the settings using the Save button.<br />
Copyright © 2006 SpectraLink Corporation. All rights reserved.<br />
PN: 72-9958-00-A.doc Page 11
Security<br />
1. From the <strong>WM</strong>-AD Configuration menu, select the Privacy tab.<br />
2. For WPA2 AES-CCKM, select WPA-PSK, deselect WPA v.1, then select WPA v.2.<br />
3. For WPA TKIP, select WPA-PSK, deselect WPA v.2, then select WPA v.1<br />
4. Enter the appropriate pass phrase in the Pre-shared key field.<br />
5. Save the settings using the Save button.<br />
There is no hex key available at this time.<br />
Copyright © 2006 SpectraLink Corporation. All rights reserved.<br />
PN: 72-9958-00-A.doc Page 12
Quality of Service<br />
1. From the <strong>WM</strong>-AD Configuration menu, select the Policy tab.<br />
2. For the Quality of Service drop down box, select Voice <strong>WM</strong>-AD w/o <strong>WM</strong>M; this is required for<br />
SpectraLink handsets.<br />
3. Save the settings using the Save button.<br />
Setting up Other SSIDs<br />
1. Repeat the above steps, starting at step 1.<br />
2. Create a new SSID and DHCP pool as before. Each SSID has its own sub-net.<br />
3. Use the same filtering settings as before.<br />
4. Set up privacy as required.<br />
5. If creating a sub-net for data, select Best Effort in the Policy page.<br />
Make sure the proper SSID is selected on each page as it is being configured.<br />
Copyright © 2006 SpectraLink Corporation. All rights reserved.<br />
PN: 72-9958-00-A.doc Page 13
Connecting Access Points to the <strong>Controller</strong><br />
1. Navigate to the Reports menu.<br />
2. Make sure the controller is configured to accept new APs (this is selected by default).<br />
3. Physically connect the access points to the system one at a time. Once an AP is<br />
connected to the system, it will show up in the Active Altitude APs page of the Reports<br />
menu. Press F5 to refresh the screen.<br />
Copyright © 2006 SpectraLink Corporation. All rights reserved.<br />
PN: 72-9958-00-A.doc Page 14
<strong>Wireless</strong> APs Address Assignment<br />
1. After all the APs have been connected and discovered by the controller, go to the<br />
Altitude APs tab and select Static Configuration. Select an AP to configure. The AP’s name<br />
will default to their MAC address.<br />
2. Under IP Address Assignment select either Use DHCP or Static Values. If selecting Static Values,<br />
assign the proper values.<br />
3. Under <strong>Summit</strong> Switch Search List add the IP address of the controller port.<br />
4. Repeat steps 4 and 5 for each access point.<br />
5. Save your settings using the Save button.<br />
Copyright © 2006 SpectraLink Corporation. All rights reserved.<br />
PN: 72-9958-00-A.doc Page 15
For each AP, follow the steps in the following sections.<br />
AP Properties<br />
1. In the Altitude APs menu, select WAP Properties. Select an AP to configure. Here you can<br />
assign a meaningful name to each AP.<br />
2. Enable Telnet Access. This is useful for troubleshooting the setup and configuring<br />
security settings.<br />
Copyright © 2006 SpectraLink Corporation. All rights reserved.<br />
PN: 72-9958-00-A.doc Page 16
802.11b/g Settings<br />
1. In the Altitude APs menu, select the 802.11 b/g tab.<br />
2. Select an AP to configure.<br />
3. Under Basic Settings, set the DTIM Period to 3, set the Beacon Period to 100, set the<br />
RTS/CTS Threshold to 2346, and set the Frag. Threshold to 2346.<br />
4. For Enable Radios, select 802.11b.<br />
5. Under Radio Settings, select the appropriate channel and Tx Power Level. (Note: DRM<br />
values will override this setting, if enabled). Set the Diversity to Best, the Min Basic Rate to<br />
1 Mbps, the Max Basic rate to 11Mbps, the Max Operational Rate to 11Mbps, and the Preamble to<br />
Short (note that the value Long works as well).<br />
6. Save settings using the Save button.<br />
Copyright © 2006 SpectraLink Corporation. All rights reserved.<br />
PN: 72-9958-00-A.doc Page 17
Enable the Radio<br />
1. Go back to <strong>WM</strong>-AD Configuration menu, and select the Topology tab.<br />
2. Enable each AP’s b/g radio for each SSID.<br />
3. Set No. of Retries for Voice VO to adaptive (multi-rate) and No. of Retries for Turbo Voice TVO to 2.<br />
4. Save all settings.<br />
After the controller and access points are set up, the Management port is<br />
no longer required. The <strong>Controller</strong> can now be managed through the<br />
Host Port, or the esa0 port in this configuration. Open a browser and<br />
connect to https://:5825.<br />
Copyright © 2006 SpectraLink Corporation. All rights reserved.<br />
PN: 72-9958-00-A.doc Page 18