OESD Magic Box - Embroidery Online
OESD Magic Box - Embroidery Online
OESD Magic Box - Embroidery Online

You also want an ePaper? Increase the reach of your titles
YUMPU automatically turns print PDFs into web optimized ePapers that Google loves.
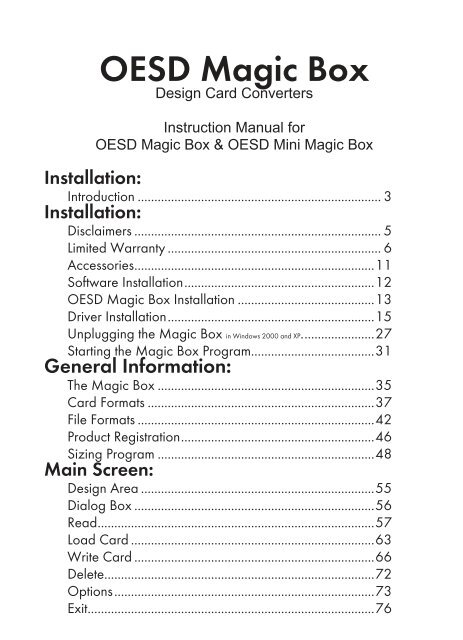
<strong>OESD</strong> <strong>Magic</strong> <strong>Box</strong><br />
Design Card Converters<br />
Instruction Manual for<br />
<strong>OESD</strong> <strong>Magic</strong> <strong>Box</strong> & <strong>OESD</strong> Mini <strong>Magic</strong> <strong>Box</strong><br />
Installation:<br />
Introduction ......................................................................... 3<br />
Installation:<br />
Disclaimers .......................................................................... 5<br />
Limited Warranty ................................................................ 6<br />
Accessories........................................................................11<br />
Software Installation.........................................................12<br />
<strong>OESD</strong> <strong>Magic</strong> <strong>Box</strong> Installation .........................................13<br />
Driver Installation..............................................................15<br />
Unplugging the <strong>Magic</strong> <strong>Box</strong> in Windows 2000 and XP......................27<br />
Starting the <strong>Magic</strong> <strong>Box</strong> Program.....................................31<br />
General Information:<br />
The <strong>Magic</strong> <strong>Box</strong> .................................................................35<br />
Card Formats ....................................................................37<br />
File Formats .......................................................................42<br />
Product Registration..........................................................46<br />
Sizing Program .................................................................48<br />
Main Screen:<br />
Design Area ......................................................................55<br />
Dialog <strong>Box</strong> ........................................................................56<br />
Read...................................................................................57<br />
Load Card .........................................................................63<br />
Write Card ........................................................................66<br />
Delete.................................................................................72<br />
Options..............................................................................73<br />
Exit......................................................................................76
Color Editor:<br />
Introduction..................................................................................... 78<br />
File................................................................................................... 79<br />
Print.................................................................................................. 80<br />
Options ........................................................................................... 81<br />
Quick Start:<br />
Lesson 1: Reading and writing designs<br />
from a CD-ROM...................................................................... 85<br />
Lesson 2: Loading and writing designs<br />
from a design card by browsing the<br />
card .......................................................................................... 92<br />
Lesson 3: Loading and writing a design<br />
from a design card using index ...........................................100<br />
Lesson 4: Using Color Editor to adjust the<br />
colors in a design and then writing the<br />
design to magic card ............................................................106
Mini <strong>Magic</strong> <strong>Box</strong> - Design Card Converter<br />
Software Manual<br />
Introduction<br />
About This Manual<br />
Introduction<br />
The Mini <strong>Magic</strong> <strong>Box</strong> software gives the user the unique ability<br />
to convert favorite designs from one card to another. This<br />
manual is not only fi lled with information about how to use the<br />
program, but it also includes many timesaving tips.<br />
Why the Mini <strong>Magic</strong> <strong>Box</strong><br />
Is a Good Choice<br />
The Mini <strong>Magic</strong> <strong>Box</strong> enables the user to transfer designs from<br />
most Bernina-Deco, Bernina-artista, Brother, Viking, Babylock,<br />
Simplicity, Janome 10000 and Pfaff pre-written design cards<br />
to a compatible re-writable <strong>Magic</strong> Card quickly and easily.<br />
It will also give the ability to read designs in the HUS, CSD,<br />
PES, PCS, EXP, PEC and DST formats and save them to a<br />
<strong>Magic</strong> Card.<br />
3<br />
Table of Contents<br />
Introduction<br />
Installation<br />
Main Screen<br />
Quick Start<br />
General Information<br />
Color Editor
Installation<br />
Table of Contents<br />
Introduction<br />
Installation<br />
Main Screen<br />
Quick Start<br />
General Information<br />
Color Editor<br />
4<br />
<strong>Magic</strong> <strong>Box</strong> - Design Card Converter<br />
Software Manual<br />
Installation<br />
Items Found in This Section:<br />
1. Disclaimers<br />
2. Limited Warranty<br />
3. Accessories<br />
4. Software Installation<br />
5. <strong>Magic</strong> <strong>Box</strong> Installation<br />
6. Driver Installation<br />
7. Unplugging the <strong>Magic</strong> <strong>Box</strong> in Windows 2000 and XP.<br />
8. Starting the <strong>Magic</strong> <strong>Box</strong> Program
<strong>Magic</strong> <strong>Box</strong> - Design Card Converter<br />
Software Manual<br />
Disclaimers<br />
Installation<br />
o This product is not to be used to violate copyright, trademarks<br />
or other rights of third parties.<br />
o The converter box will not read manufacturers’ alphabet<br />
memory cards.<br />
o All designs must fi t inside the sewing hoop capabilities of the<br />
embroidery machine. Reducing the design to fi t inside the<br />
hoop may affect the sewability.<br />
o Some designs may have stitches that cannot be read correctly<br />
into the converter box.<br />
o The converter box cannot warranty the quality of third party<br />
digitizers.<br />
o Any user of the converter box should adhere to applicable<br />
license agreements of all third parties of the designs.<br />
o This product will only save designs to an offi cial <strong>Magic</strong> <strong>Box</strong><br />
card.<br />
o Inserting the wrong card type or any foreign object other than<br />
an embroidery memory card into the correct slot could bend<br />
connector pins and damage the converter box. Connector pins<br />
are not covered under the Limited Warranty.<br />
o Each card will access 120,000 to 180,000 stitches. It is<br />
possible that some designs could have more stitches than a<br />
card will allow.<br />
o Not all designs will work on all machines due to machine<br />
capabilities.<br />
o Colorizing the design may be necessary through Color Editor<br />
so that the color displays correctly on the machine’s LCD<br />
screen, if applicable.<br />
5<br />
Table of Contents<br />
Introduction<br />
Installation<br />
Main Screen<br />
Quick Start<br />
General Information<br />
Color Editor
Installation<br />
Table of Contents<br />
Introduction<br />
Installation<br />
Main Screen<br />
Quick Start<br />
General Information<br />
Color Editor<br />
6<br />
Limited Warranty<br />
<strong>Magic</strong> <strong>Box</strong> - Design Card Converter<br />
Software Manual<br />
1. All parts, other than connector pins, are warranted to be free<br />
from defects for a period of one year and will be, at the<br />
manufacturer’s option, replaced or repaired at no charge<br />
to you, the consumer, for a period of one year from date<br />
of original purchase, provided said parts or machine are<br />
returned, transportation prepaid.<br />
2. There is no charge for covered parts or labor when a <strong>Magic</strong><br />
Converter <strong>Box</strong> is returned within 90 days of the original<br />
purchase. Proof of purchase date (a copy of the sales receipt)<br />
must be included with the machine. The machine will be<br />
returned to you, the consumer, prepaid.<br />
3. A fl at fee of $50.00 will be charged for service of nonwarranted<br />
parts when returned after 90 days and before 365<br />
days from the date of original purchase. Proof of purchase<br />
date, and a check or money order for $50.00, must be<br />
included with the machine.<br />
Make checks or money orders payable to:<br />
<strong>OESD</strong> TECH AUTHORIZED SERVICE CENTER,<br />
12101 I-35 Service Road<br />
Oklahoma City, OK 73131<br />
The <strong>Magic</strong> Converter <strong>Box</strong> will be returned to you, the consumer,<br />
freight prepaid.<br />
4. This warranty does not cover bent connector pins.<br />
5. This warranty does not cover postage, transportation to a<br />
service center, or service provided by anyone other than<br />
<strong>OESD</strong> Tech Service Centers.
<strong>Magic</strong> <strong>Box</strong> - Design Card Converter<br />
Software Manual<br />
Installation<br />
6. After one year, service may be obtained by contacting any<br />
local sewing machine repair center, or returning the <strong>Magic</strong><br />
Converter <strong>Box</strong> to <strong>OESD</strong> Tech Service Center for an estimate of<br />
repair charges to the address below.<br />
7. THIS LIMITED WARRANTY IS THE EXCLUSIVE WARRANTY<br />
AND ALL OTHER WARRANTIES, WHETHER EXPRESSED<br />
OR IMPLIED, ARE HEREBY DISCLAIMED, INCLUDING<br />
WITHOUT LIMITATION, THE IMPLIED WARRANTIES OF<br />
MERCHANTABILITY AND FITNESS FOR A PARTICULAR<br />
PURPOSE.<br />
8. This warranty is in effect provided the <strong>Magic</strong> Converter <strong>Box</strong><br />
is used only for normal household sewing purposes and<br />
not commercial use, and given reasonably good care. The<br />
manufacturer is also not to be held responsible for damage,<br />
normal wear, accident, abuse, neglect, acts of God, or if the<br />
<strong>Magic</strong> Converter <strong>Box</strong> has been repaired (worked on) by<br />
unauthorized personnel.<br />
9. Any machine returned:<br />
A. Must be packed securely to avoid damage in shipping.<br />
We suggest using the original carton and non-static styrofoam<br />
packing.<br />
B. Shipping charges are to be paid by sender.<br />
C. To protect against damage in shipment, the <strong>Magic</strong><br />
Converter <strong>Box</strong> should be insured for full value.<br />
D. Proof of purchase (a copy of the sales receipt) must be<br />
included.<br />
E. Be sure to include sender’s name and address (yours) on<br />
outside and inside of carton.<br />
F. Please specify problem.<br />
7<br />
Table of Contents<br />
Introduction<br />
Installation<br />
Main Screen<br />
Quick Start<br />
General Information<br />
Color Editor
Installation<br />
Table of Contents<br />
Introduction<br />
Installation<br />
Main Screen<br />
Quick Start<br />
General Information<br />
Color Editor<br />
8<br />
<strong>Magic</strong> <strong>Box</strong> - Design Card Converter<br />
Software Manual<br />
10. Warranty only applies to the Converter <strong>Box</strong>. Warranty does<br />
not apply to incidental or consequential damages including<br />
but not limited to embroidery cards, embroidery machines,<br />
garments, or other soft goods.<br />
11. This warranty is not transferable and extends only to the<br />
original purchaser when new and when purchased from<br />
a duly authorized dealer. This warranty is in lieu of all<br />
other warranties. The manufacturer is not responsible for<br />
any representation, expressed or implied, other than those<br />
contained herein.<br />
This warranty gives you specifi c legal rights, and you may also<br />
have other rights which vary from state to state.<br />
This warranty disclaims liability for incidental, or consequential<br />
damages, which apply during and after the warranty period.<br />
Some states do not allow the exclusion or limitation of<br />
incidental or consequential damages, so the above limitation<br />
or exclusion may not apply to you.<br />
If you have any questions or comments concerning this product,<br />
please feel free to contact the manufacturer at the address<br />
below:<br />
<strong>OESD</strong> Tech<br />
12101 I-35 Service Road<br />
Oklahoma City, OK 73131<br />
888-223-6943<br />
support@embroideryonline.com
<strong>Magic</strong> <strong>Box</strong> - Design Card Converter<br />
Software Manual<br />
Important Information: Regulations<br />
Federal Communications Commission<br />
Compliance Notice (for U.S.A. only)<br />
This equipment has been tested and found to comply with the<br />
limits for a Class B digital device pursuant to Part 15 of the<br />
FCC Rules. These limits are designed to provide reasonable<br />
protection against harmful interference in a residential<br />
installation. This equipment generates, uses and can radiate<br />
radio frequency energy and, if not installed and used<br />
in accordance with the instructions, may cause harmful<br />
interference to radio communications. However, there is<br />
no guarantee that interference will not occur in a particular<br />
installation. If this equipment does cause interference to radio<br />
or television reception, which can be determined by turning<br />
the equipment off and on, the user is encouraged to try to<br />
correct the interference by one or more of the following<br />
measures:<br />
- Reorient or relocate the receiving antenna.<br />
- Increase the separation between the equipment and receiver.<br />
- Connect the equipment into an outlet on a circuit different from<br />
that to which the receiver is connected.<br />
- Consult the dealer or an experienced radio/TV technician for<br />
help.<br />
Installation<br />
Important - About the Interface Cable<br />
This equipment has been certifi ed to comply with FCC standards,<br />
which are applied to the U.S.A. only. A shielded interface<br />
cable should be used according to FCC 15.27 (C)<br />
Caution: Changes or modifi cations not expressly approved by the<br />
manufacturer or local sales distributor could void the user’s<br />
authority to operate the equipment.<br />
9<br />
Table of Contents<br />
Introduction<br />
Installation<br />
Main Screen<br />
Quick Start<br />
General Information<br />
Color Editor
Installation<br />
Table of Contents<br />
Introduction<br />
Installation<br />
Main Screen<br />
Quick Start<br />
General Information<br />
Color Editor<br />
10<br />
<strong>Magic</strong> <strong>Box</strong> - Design Card Converter<br />
Software Manual<br />
Canadian Department of Communication<br />
Compliance Statement (for Canada only)<br />
This digital apparatus does not exceed the Class B limits for<br />
radio noise emission from digital apparatus as set out in the<br />
interference causing equipment standard entitled “Digital<br />
Apparatus”, ICES-003 of the Department of Communications<br />
Radio Interference (220-240V are only)<br />
This machine complies with EN55022 (CISPER Publication 22)/<br />
Class B.
<strong>Magic</strong> <strong>Box</strong> - Design Card Converter<br />
Software Manual<br />
Accessories<br />
Included with the factory packaging:<br />
1 <strong>Magic</strong> Converter <strong>Box</strong><br />
1 USB Cable<br />
1 (Blank) <strong>Magic</strong> card for your specifi c machine must be<br />
obtained from your dealer.<br />
1 Program Software on CD ROM<br />
1 Sizing <strong>Magic</strong>ian and Design Catalog on CD ROM<br />
Additional <strong>Magic</strong> cards are available from your dealer or order<br />
through www.embroideryonline.com.<br />
Computer Requirements<br />
Pentium Processor<br />
32 megabytes RAM<br />
5 MB hard drive space<br />
Windows 98SE/ME/2000/XP<br />
CD ROM Drive<br />
Display 800 x 600 or better<br />
USB Port<br />
Microsoft Compatible Mouse<br />
Installation<br />
11<br />
Table of Contents<br />
Introduction<br />
Installation<br />
Main Screen<br />
Quick Start<br />
General Information<br />
Color Editor
Installation<br />
<strong>Magic</strong> <strong>Box</strong> - Design Card Converter<br />
Software Manual<br />
Software Installation<br />
1. From the Windows desktop close all open programs.<br />
2. Place the <strong>Magic</strong> <strong>Box</strong> Program Disk CD in the CD-ROM drive.<br />
Wait a few seconds. If the program begins to install, skip to step 7.<br />
3. From the Windows desktop, click on the Start button.<br />
4. Click on the Run button.<br />
5. At the Run prompt you will need to type the letter of your CD-<br />
ROM Drive followed by Setup. (Ex: D:\SETUP or E:\SETUP.)<br />
You may also press the Browse button and click on the CD-<br />
ROM drive then click on setup.exe fi le. Once the setup.exe fi le<br />
is highlighted press Open. This will copy the command to the<br />
command prompt. Press the Enter key.<br />
6. This will activate the installation.<br />
7. Click Next.(Fig. Inst-1 Below)<br />
8. Click “I accept”& then click next. (Fig. Inst-2 Below)<br />
Table of Contents<br />
Introduction<br />
Installation<br />
Main Screen<br />
Quick Start<br />
General Information<br />
Color Editor<br />
12<br />
Fig. Inst-1<br />
Fig. Inst-2
<strong>Magic</strong> <strong>Box</strong> - Design Card Converter<br />
Software Manual<br />
9. Click Install. (Fig. Inst-3 Below) 10. Click Finish. (Fig. Inst-4)<br />
Fig. Inst-3<br />
<strong>Magic</strong> <strong>Box</strong> Installation<br />
Installation<br />
The <strong>Magic</strong> <strong>Box</strong> software MUST be installed before connecting the<br />
USB <strong>Magic</strong> Converter <strong>Box</strong> to the computer.<br />
The <strong>Magic</strong> <strong>Box</strong> will connect directly and be powered by an<br />
available USB port on the computer. The computer supplies all<br />
the power that the <strong>Magic</strong> <strong>Box</strong> will need.<br />
Connecting the <strong>Magic</strong> <strong>Box</strong> to the computer is very simple. Take the<br />
square end of the USB cable (Fig. Inst-5A Below), and plug it into<br />
the USB port on the <strong>Magic</strong> <strong>Box</strong> (Fig. Inst-5B Below).<br />
Next, take the fl at end of the USB cable (Fig. Inst-6 Below), and plug it<br />
Fig. Inst-5A<br />
Fig. Inst-5<br />
Fig. Inst-4<br />
Fig. Inst-5B<br />
13<br />
Table of Contents<br />
Introduction<br />
Installation<br />
Main Screen<br />
Quick Start<br />
General Information<br />
Color Editor
Installation<br />
Table of Contents<br />
Introduction<br />
Installation<br />
Main Screen<br />
Quick Start<br />
General Information<br />
Color Editor<br />
14<br />
<strong>Magic</strong> <strong>Box</strong> - Design Card Converter<br />
Software Manual<br />
into any available USB port on the computer (Fig. Inst-7 Below).<br />
NOTE: Some computers have USB ports on the front and/or the<br />
back. Use any available USB port.<br />
After plugging the <strong>Magic</strong> <strong>Box</strong> into the USB port, the computer will<br />
automatically begin looking for drivers for the <strong>Magic</strong> <strong>Box</strong>.<br />
Fig. Inst-6<br />
Fig. Inst-7
<strong>Magic</strong> <strong>Box</strong> - Design Card Converter<br />
Software Manual<br />
Installing the Drivers<br />
Now that the Mini <strong>Magic</strong> <strong>Box</strong> software and hardware have been<br />
installed, the drivers will need to be installed. First determine the<br />
Windows operating system the computer is running and then<br />
follow the instructions below that correspond to that version.<br />
Windows XP or 2000 Driver installation:<br />
Installation<br />
1. Once the Mini <strong>Magic</strong> <strong>Box</strong> is plugged in, the Hardware<br />
Installation Wizard activates and begins searching for the USB<br />
Mini <strong>Magic</strong> <strong>Box</strong> drivers (USB <strong>Embroidery</strong> Conversion <strong>Box</strong> fi les).<br />
Windows XP will automatically search for the correct drivers. Click<br />
“Next” and skip to Step 8.<br />
Windows 2000 may also search for the drivers automatically. If it<br />
does, skip to Step 8.<br />
If it does NOT search automatically, go to Step 2.<br />
2. If the Hardware Installation Wizard Window does NOT open<br />
when the Mini <strong>Magic</strong> <strong>Box</strong> is plugged in, right-click on the “My<br />
Computer” icon (found on the Desktop, Start Menu or Windows<br />
Explorer). Then, left-click on “Properties” to open the System<br />
Properties window.<br />
15<br />
Table of Contents<br />
Introduction<br />
Installation<br />
Main Screen<br />
Quick Start<br />
General Information<br />
Color Editor
Installation<br />
Table of Contents<br />
Introduction<br />
Installation<br />
Main Screen<br />
Quick Start<br />
General Information<br />
Color Editor<br />
16<br />
<strong>Magic</strong> <strong>Box</strong> - Design Card Converter<br />
Software Manual<br />
3. Go to the “Hardware” tab and click on “Device Manager”.<br />
4. Find the listing for “Other devices”. Locate the “USB <strong>Embroidery</strong><br />
Conversion <strong>Box</strong>” underneath and right-click on it. (If “Other<br />
devices” is not listed, skip to Step 6).
<strong>Magic</strong> <strong>Box</strong> - Design Card Converter<br />
Software Manual<br />
5. Click on “Properties”:<br />
Installation<br />
6. If “Other devices” is not listed, go to the bottom of the Device<br />
Manager list, to the “Universal Serial Bus controllers” and click the<br />
+ sign. It may be listed as “Unknown device” or “USB <strong>Embroidery</strong><br />
Conversion <strong>Box</strong>” under this heading. Right-click on this listing and<br />
then left-click on “Properties”.<br />
17<br />
Table of Contents<br />
Introduction<br />
Installation<br />
Main Screen<br />
Quick Start<br />
General Information<br />
Color Editor
Installation<br />
Table of Contents<br />
Introduction<br />
Installation<br />
Main Screen<br />
Quick Start<br />
General Information<br />
Color Editor<br />
18<br />
<strong>Magic</strong> <strong>Box</strong> - Design Card Converter<br />
Software Manual<br />
7. The Properties window opens. Click on “Reinstall Driver”. (If<br />
there is not a “Reinstall Driver” option, click “Update Driver” from<br />
the “Driver” tab.) This will then activate the Update Wizard.<br />
8. Click “Install from a list or specifi c location {Advanced}” and<br />
click “Next”.
<strong>Magic</strong> <strong>Box</strong> - Design Card Converter<br />
Software Manual<br />
NOTE: Windows 2000 may present the window below when the USB Mini<br />
<strong>Magic</strong> <strong>Box</strong> is fi rst plugged in.<br />
Installation<br />
Click OK from this window and a window should open that looks<br />
like the one below. Just click and swipe the “Copy fi les from:” line<br />
and type in the CD-ROM location (example- D:). Remember, the<br />
CD-ROM letter on the computer may vary, so be sure to check to<br />
see what letter the CD-ROM drive is.<br />
19<br />
Table of Contents<br />
Introduction<br />
Installation<br />
Main Screen<br />
Quick Start<br />
General Information<br />
Color Editor
Installation<br />
Table of Contents<br />
Introduction<br />
Installation<br />
Main Screen<br />
Quick Start<br />
General Information<br />
Color Editor<br />
20<br />
<strong>Magic</strong> <strong>Box</strong> - Design Card Converter<br />
Software Manual<br />
9. Choose “Search for the best driver in these locations” and<br />
check the “Search removable media” option. Click “Next”.<br />
10. The dialog may state, “This driver is not digitally signed”. This<br />
window asks whether to stop the installation or continue. Click the<br />
“Continue Anyway” button to proceed. This will not harm the USB<br />
Mini <strong>Magic</strong> <strong>Box</strong> or system in any way.
<strong>Magic</strong> <strong>Box</strong> - Design Card Converter<br />
Software Manual<br />
Installation<br />
11. The Installation Wizard will continue to copy the appropriate<br />
fi les to the proper location. A meter bar will fi ll from the left to the<br />
right as the information is copied.<br />
12. Once the fi les are copied, the completed window will open.<br />
Click “Finish” to complete the process.<br />
21<br />
Table of Contents<br />
Introduction<br />
Installation<br />
Main Screen<br />
Quick Start<br />
General Information<br />
Color Editor
Installation<br />
Table of Contents<br />
Introduction<br />
Installation<br />
Main Screen<br />
Quick Start<br />
General Information<br />
Color Editor<br />
22<br />
<strong>Magic</strong> <strong>Box</strong> - Design Card Converter<br />
Software Manual<br />
Win 98 or ME Driver install:<br />
1. Windows 98 and Windows ME may automatically begin<br />
searching for the drivers when the USB cable is plugged in. If they<br />
do NOT, specify where to look on the computer to fi nd the drivers<br />
and then follow the instructions in the previous section, Steps 2-8.<br />
2. When the Add New Hardware Wizard opens, click “Next”.<br />
3. Windows will search for the drivers or will request the location<br />
where they are stored. Choose “Search for the best driver for your<br />
device” and click “Next”.
<strong>Magic</strong> <strong>Box</strong> - Design Card Converter<br />
Software Manual<br />
4. In the next window, uncheck any boxes that may already be<br />
checked. Check the CD-ROM drive from the list and click ‘Next’.<br />
Installation<br />
NOTE: If the drivers are NOT located, they will need to be downloaded from<br />
the Internet. Please click “Cancel” on the window below and skip to section<br />
titled, “What to do if the Drivers do not install” on page 23<br />
23<br />
Table of Contents<br />
Introduction<br />
Installation<br />
Main Screen<br />
Quick Start<br />
General Information<br />
Color Editor
Installation<br />
Table of Contents<br />
Introduction<br />
Installation<br />
Main Screen<br />
Quick Start<br />
General Information<br />
Color Editor<br />
24<br />
<strong>Magic</strong> <strong>Box</strong> - Design Card Converter<br />
Software Manual<br />
5. Windows may want to confi rm the fi les that are to be installed.<br />
If so, the window shown below will open. Click “Next”.<br />
6. Once the fi les are copied, the completed window will open.<br />
Click “Finish” to complete the process.
<strong>Magic</strong> <strong>Box</strong> - Design Card Converter<br />
Software Manual<br />
What to do if the Drivers do not install<br />
If the Drivers do not install, it will be necessary to download the<br />
drivers from the Internet.<br />
1. Log onto <strong>OESD</strong>’s <strong>Online</strong> Support Center with this address:<br />
http://embroideryonlinesupport.custhelp.com.<br />
2. Scroll down to the ANNOUNCEMENTS <strong>Box</strong> in the lower left<br />
corner.<br />
3. Locate the listing “Drivers for the USB Mini <strong>Magic</strong> <strong>Box</strong><br />
software” and click on the link.<br />
4. Scroll to the bottom of the page and click on the link to<br />
download the drivers.<br />
Installation<br />
25<br />
Table of Contents<br />
Introduction<br />
Installation<br />
Main Screen<br />
Quick Start<br />
General Information<br />
Color Editor
Installation<br />
Table of Contents<br />
Introduction<br />
Installation<br />
Main Screen<br />
Quick Start<br />
General Information<br />
Color Editor<br />
5. Click to “Save” this fi le to the computer.<br />
26<br />
<strong>Magic</strong> <strong>Box</strong> - Design Card Converter<br />
Software Manual<br />
6. Use the dropdown arrow to select the Desktop. Click “Save” to<br />
download the fi le.
<strong>Magic</strong> <strong>Box</strong> - Design Card Converter<br />
Software Manual<br />
Installation<br />
7. Once the download is complete, disconnect from the Internet<br />
and place a blank fl oppy into the A: Drive. Double-click the<br />
“Drivers for v33A MB.exe” icon on the Desktop. The following box<br />
will appear:<br />
8. Click the “Unzip” button. The message, “2 fi les successfully<br />
unzipped” will appear. Click OK and close the self-extractor<br />
window.<br />
9. Once the fi les are on the disk, determine the computer’s<br />
operating system, and follow the correct driver installation<br />
procedure above.<br />
27<br />
Table of Contents<br />
Introduction<br />
Installation<br />
Main Screen<br />
Quick Start<br />
General Information<br />
Color Editor
Installation<br />
Table of Contents<br />
Introduction<br />
Installation<br />
Main Screen<br />
Quick Start<br />
General Information<br />
Color Editor<br />
28<br />
<strong>Magic</strong> <strong>Box</strong> - Design Card Converter<br />
Software Manual<br />
Unplugging the USB Mini <strong>Magic</strong> <strong>Box</strong>:<br />
For Computers that use Windows XP or<br />
Windows 2000<br />
Microsoft has developed a special system for disconnecting<br />
a “plug and play” USB device from a Windows XP or 2000<br />
computer. Windows 98 and ME do not have this procedure. It is<br />
important to follow this system in order to ensure proper operation<br />
of the computer.<br />
How to Safely Unplug the USB Mini <strong>Magic</strong> <strong>Box</strong> in<br />
Windows XP or 2000<br />
1. When there is a device plugged into a USB port on a<br />
Windows XP computer, a “Safely Remove Hardware” icon<br />
will appear in the lower right corner. (Figure 1). Use this<br />
icon to unplug the Mini <strong>Magic</strong> <strong>Box</strong> from the PC. (Windows<br />
2000 may display the icon as well. Windows 98 and ME<br />
will not display the icon).<br />
Figure 1
<strong>Magic</strong> <strong>Box</strong> - Design Card Converter<br />
Software Manual<br />
Installation<br />
2. Before unplugging the USB cable, double left click the<br />
“Safely Remove Hardware” icon in the lower right corner.<br />
The “Safely Remove Hardware” window will appear.<br />
(Figure 2). The Mini <strong>Magic</strong> <strong>Box</strong> will be listed as USB<br />
<strong>Embroidery</strong> Conversion <strong>Box</strong>.<br />
Figure 2<br />
Note: If more than one USB device (i.e. Palm Pilot, digital camera, scanner,<br />
printer, etc.) is plugged in, those other devices may also be listed. It is important<br />
to select the correct device prior to disconnecting that device.<br />
3. Click the STOP button to tell the computer this is the device to be<br />
unplugged.<br />
29<br />
Table of Contents<br />
Introduction<br />
Installation<br />
Main Screen<br />
Quick Start<br />
General Information<br />
Color Editor
Installation<br />
Table of Contents<br />
Introduction<br />
Installation<br />
Main Screen<br />
Quick Start<br />
General Information<br />
Color Editor<br />
30<br />
<strong>Magic</strong> <strong>Box</strong> - Design Card Converter<br />
Software Manual<br />
4. After clicking STOP, the “Stop a Hardware device”<br />
window opens, confi rming the choice of device to be<br />
unplugged (Figure 3). Make sure the “USB <strong>Embroidery</strong><br />
Conversion <strong>Box</strong>” is listed and click OK.<br />
Figure 3<br />
5. A word balloon will appear in the lower right corner of the<br />
screen, stating: “Safe to Remove Hardware. The ‘USB<br />
<strong>Embroidery</strong> Conversion <strong>Box</strong>.’ device can now be safely<br />
removed from the system” (Figure 4). It is now safe to<br />
unplug the USB Mini <strong>Magic</strong> <strong>Box</strong> cable from the computer’s<br />
USB port.<br />
Figure 4
<strong>Magic</strong> <strong>Box</strong> - Design Card Converter<br />
Software Manual<br />
Installation<br />
Windows 98 and ME do not require this procedure because they<br />
do not have the capabilities of Windows 2000 or XP. When<br />
the USB Mini <strong>Magic</strong> <strong>Box</strong> cable is inserted or removed from a<br />
Windows 98 or ME computer, the mouse cursor will change to<br />
the busy icon (spinning hourglass). Once the change in device is<br />
detected, the cursor will revert back to the normal arrow icon.<br />
Start Program<br />
Follow the steps below in order to run the <strong>Magic</strong> <strong>Box</strong>.<br />
To start the program:<br />
Double click on the <strong>Magic</strong> <strong>Box</strong> Icon that has been placed on the<br />
desktop.<br />
OR<br />
1. Go to Start<br />
2. Click on PROGRAMS<br />
3. Click on <strong>OESD</strong><br />
4. Click on <strong>Magic</strong> <strong>Box</strong><br />
<strong>Magic</strong> <strong>Box</strong> appears on the screen as shown. The <strong>Magic</strong> <strong>Box</strong> and software are<br />
properly installed and are ready to be used.<br />
If an error is shown when loading the <strong>Magic</strong> <strong>Box</strong>’s software, contact the<br />
Software Support Department at 1-888-223-6943 between Mon.-Fri. 8am-6pm<br />
Central Time.<br />
31<br />
Table of Contents<br />
Introduction<br />
Installation<br />
Main Screen<br />
Quick Start<br />
General Information<br />
Color Editor
General Information<br />
Table of Contents<br />
Introduction<br />
Installation<br />
Main Screen<br />
Quick Start<br />
General Information<br />
Color Editor<br />
Mini <strong>Magic</strong> <strong>Box</strong> - Design Card Converter<br />
General Information<br />
Items found in this Section:<br />
1. The Mini <strong>Magic</strong> <strong>Box</strong><br />
2. Card Formats<br />
3. File Formats<br />
4. Product Registration<br />
5. Sizing Program<br />
32<br />
Software Manual
Mini <strong>Magic</strong> <strong>Box</strong> - Design Card Converter<br />
Software Manual<br />
General Information<br />
The <strong>Magic</strong> <strong>Box</strong> (Fig. GI-1 Below)<br />
Fig. GI-1A Upper Left Card Slot #1<br />
This is the correct card slot for the Bernette-Deco,<br />
Brother, Viking, Babylock and Simplicity Cards.<br />
Fig. GI-1B Lower Left Card Slot #2<br />
This is the correct card slot for Bernina artista, Janome<br />
10000 and Pfaff Cards.<br />
Fig. GI-1C Upper Right Card Slot #3<br />
This is the correct card slot for Singer Cards.<br />
NOTE: The <strong>Magic</strong> <strong>Box</strong> cannot read a pre-programmed Singer XL1000 Card.<br />
Fig. GI-1D Lower Right Card Slot #4<br />
This is the card slot for Janome 8000 and 9000, Elna,<br />
New Home and Kenmore Cards.<br />
Fig. GI-1E Red Light<br />
The red light is the activity light. It indicates that the<br />
<strong>Magic</strong> <strong>Box</strong> is either Reading, Loading or Writing a<br />
card.<br />
WARNING! Do not remove the card or attempt to perform another<br />
function when the red light is on.<br />
33<br />
Table of Contents<br />
Introduction<br />
Installation<br />
Main Screen<br />
Quick Start<br />
General Information<br />
Color Editor
General Information<br />
Table of Contents<br />
Introduction<br />
Installation<br />
Main Screen<br />
Quick Start<br />
General Information<br />
Color Editor<br />
34<br />
Mini <strong>Magic</strong> <strong>Box</strong> - Design Card Converter<br />
Software Manual<br />
Fig. GI-1F Green Light<br />
The green light indicates that the <strong>Magic</strong> <strong>Box</strong> is ON,<br />
and available for use.<br />
A. USB port<br />
Fig. GI-2 shows the USB connection for the <strong>Magic</strong> <strong>Box</strong>.<br />
This is the input and output port that allows the <strong>Magic</strong><br />
box to communicate with the computer.<br />
B. USB Cable<br />
Fig. GI-3 shows the USB cable. The cable plugs into<br />
the back or front (on some models) of the computer as<br />
shown in Fig. GI-4.
Mini <strong>Magic</strong> <strong>Box</strong> - Design Card Converter<br />
Software Manual<br />
General Information<br />
The Mini <strong>Magic</strong> <strong>Box</strong> (Fig. GIA-1)<br />
NOTE: The Mini <strong>Magic</strong> <strong>Box</strong> is a smaller version of the <strong>Magic</strong> <strong>Box</strong> and has two slots instead of four.<br />
Fig. GIA-1A Right Card Slot #1<br />
This slot is the correct card slot for Bernette-Deco,<br />
Brother, Viking, Babylock and Simplicity Cards.<br />
Fig. GIA-1B Left Card Slot #2<br />
This is the correct card slot for Bernina artista, Janome<br />
10000 and Pfaff Cards.<br />
Fig. GIA-1C Red Light<br />
The red light is the activity light. It indicates that<br />
the <strong>Magic</strong> <strong>Box</strong> is either Loading or Writing a card.<br />
WARNING! Do not remove the card or attempt to<br />
perform another function when the red light is on.<br />
Fig. GIA-1D Green Light<br />
The green light indicates that the <strong>Magic</strong> <strong>Box</strong> is ON,<br />
and is available for use.<br />
35<br />
Table of Contents<br />
Introduction<br />
Installation<br />
Main Screen<br />
Quick Start<br />
General Information<br />
Color Editor
General Information<br />
Table of Contents<br />
Introduction<br />
Installation<br />
Main Screen<br />
Quick Start<br />
General Information<br />
Color Editor<br />
36<br />
Mini <strong>Magic</strong> <strong>Box</strong> - Design Card Converter<br />
Software Manual<br />
A. USB Port<br />
Fig. GIA-2 shows the USB connection for the Mini<br />
<strong>Magic</strong> <strong>Box</strong>. This is the input and output port that allows<br />
the Mini <strong>Magic</strong> <strong>Box</strong> to communicate with the computer.<br />
B. USB Cable<br />
Fig. GIA-3 shows the USB cable. The cable plugs into<br />
the back or front (on some models) of the computer as<br />
shown in Fig. GIA-4.
Mini <strong>Magic</strong> <strong>Box</strong> - Design Card Converter<br />
Software Manual<br />
General Information<br />
Card Formats<br />
The <strong>Magic</strong> <strong>Box</strong> can read original manufacturers’ cards but<br />
can only write to cards made especially for the <strong>Magic</strong> <strong>Box</strong>. For<br />
more information on purchasing additional cards, please contact<br />
your local dealer or visit www.embroideryonline.com.<br />
37<br />
Table of Contents<br />
Introduction<br />
Installation<br />
Main Screen<br />
Quick Start<br />
General Information<br />
Color Editor
General Information<br />
Table of Contents<br />
Introduction<br />
Installation<br />
Main Screen<br />
Quick Start<br />
General Information<br />
Color Editor<br />
38<br />
Mini <strong>Magic</strong> <strong>Box</strong> - Design Card Converter<br />
Software Manual<br />
<strong>Magic</strong> <strong>Box</strong> Upper Left Card #1 (Fig. GI-5 Below) OR Mini <strong>Magic</strong><br />
<strong>Box</strong> Right Card #1 (Fig. GI-5A Below)<br />
Fig. GI-5 shows the special <strong>Magic</strong> Card that can be used in the<br />
upper left card slot of the <strong>Magic</strong> <strong>Box</strong>. Fig GI-5A shows<br />
the same card inserted into the right card slot on the<br />
Mini <strong>Magic</strong> <strong>Box</strong>. This card is compatible with Bernette-<br />
Deco, Brother, Viking #1+, Rose, Iris, Babylock and<br />
Simplicity embroidery machines. The <strong>Magic</strong> <strong>Box</strong><br />
cannot read Brother Disney series design cards.<br />
Fig. GI-5A<br />
Fig. GI-5
Mini <strong>Magic</strong> <strong>Box</strong> - Design Card Converter<br />
Software Manual<br />
General Information<br />
<strong>Magic</strong> <strong>Box</strong> Bottom Left Card #2 (Fig. GI-6 Below) OR Mini <strong>Magic</strong><br />
<strong>Box</strong> Left Card #2 (Fig. GI-6A Below)<br />
Fig. GI-6 shows the <strong>Magic</strong> Cards that can be used in the bottom<br />
left card slot of the <strong>Magic</strong> <strong>Box</strong>. The same <strong>Magic</strong> cards<br />
can be used in the Left card slot on the Mini <strong>Magic</strong><br />
<strong>Box</strong>. The blue card is compatible with Bernina artista<br />
and Pfaff embroidery machines. The purple card is<br />
compatible with the Janome 10000 machine.<br />
Fig. GI-6A<br />
Fig. GI-6<br />
39<br />
Table of Contents<br />
Introduction<br />
Installation<br />
Main Screen<br />
Quick Start<br />
General Information<br />
Color Editor
General Information<br />
Table of Contents<br />
Introduction<br />
Installation<br />
Main Screen<br />
Quick Start<br />
General Information<br />
Color Editor<br />
<strong>Magic</strong> <strong>Box</strong> Upper Right Card #3 (Fig. GI-7 Below)<br />
40<br />
Mini <strong>Magic</strong> <strong>Box</strong> - Design Card Converter<br />
Software Manual<br />
Fig. GI-7 shows the <strong>Magic</strong> Card that can be used in the upper<br />
right card slot of the <strong>Magic</strong> <strong>Box</strong>. This card is compatible with the<br />
Singer XL100 and XL1000 machines. The <strong>Magic</strong> <strong>Box</strong> cannot<br />
read pre-programmed Singer XL1000 design cards.<br />
Fig. GI-7
Mini <strong>Magic</strong> <strong>Box</strong> - Design Card Converter<br />
Software Manual<br />
<strong>Magic</strong> <strong>Box</strong> Bottom Right Card #4 (Fig. GI-8 Below)<br />
General Information<br />
Fig. GI-8 shows the <strong>Magic</strong> Card that can be used in the bottom<br />
right card slot of the <strong>Magic</strong> <strong>Box</strong>. This card is compatible with<br />
Janome 5000/8000/9000, Elna, New Home and Kenmore<br />
embroidery machines.<br />
WARNING: Do not put a Janome 10000 card into slot #4, this card<br />
fi ts into slot #2. (Note: The #4 <strong>Magic</strong> Card reads in the Janome<br />
10000 Card Reader attachment.)<br />
Fig. GI-8<br />
41<br />
Table of Contents<br />
Introduction<br />
Installation<br />
Main Screen<br />
Quick Start<br />
General Information<br />
Color Editor
General Information<br />
Table of Contents<br />
Introduction<br />
Installation<br />
Main Screen<br />
Quick Start<br />
General Information<br />
Color Editor<br />
42<br />
Mini <strong>Magic</strong> <strong>Box</strong> - Design Card Converter<br />
Software Manual<br />
File Formats and Hoop Limits<br />
There are many different fi le formats that the <strong>Magic</strong> <strong>Box</strong> software<br />
will open. You will fi nd them listed below.<br />
CSD (*.csd), DST (*.dst), EXP (*.exp), HUS (*.hus), PCS (*.pcs),<br />
PES (*.pes), PEC (*.pec), SEW (*.sew), PSW (*.xxx), JEF (*.jef)<br />
or ZIP archives (*.zip) containing one of the above formats.<br />
Baby Lock/Brother/Deco/Simplicity [*.PES]<br />
Split at 64 colors - Split at 30,000 stitches<br />
Hoop sizes:<br />
DECO 500 100mm x 100mm max (4” x 4”)<br />
DECO 600 100mm x 100mm max (4” x 4”)<br />
BL ES 100mm x 100mm max (4” x 4”)<br />
BL ESI2 100mm x 100mm max (4” x 4”)<br />
BL EM1 100mm x 100mm max (4” x 4”)<br />
BL EM2 100mm x 100mm max (4” x 4”)<br />
BL EAC 100mm x 100mm max (4” x 4”)<br />
BR 260 160mm x 260mm max (6.29” x 10.24”)<br />
BR PE150 100mm x 100mm max (4” x 4”)<br />
BR PE100 100mm x 100mm max (4” x 4”)<br />
BR PE200 100mm x 100mm max (4” x 4”)<br />
BR PE300S 100mm x 100mm max (4” x 4”)<br />
BR PE7500 100mm x 100mm max (4” x 4”)<br />
WHITE W3300 100mm x 100mm max (4” x 4”)<br />
SIM SE1 100mm x 100mm max (4” x 4”)<br />
SIM SE2 100mm x 100mm max (4” x 4”)<br />
SIM SE3 100mm x 100mm max (4” x 4”)<br />
BL ESE 130mm x 180mm max (5.11” x 7.08”)<br />
BL ES2 130mm x 180mm max (5.11” x 7.08”)
Mini <strong>Magic</strong> <strong>Box</strong> - Design Card Converter<br />
Software Manual<br />
General Information<br />
BR 6500 130mm x 180mm max (5.11” x 7.08”)<br />
BR 8200 130mm x 180mm max (5.11” x 7.08”)<br />
BR 8500 130mm x 180mm max (5.11” x 7.08”)<br />
BL 260 160mm x 260mm max (6.29” x 10.24”)<br />
BL Ellageo 160mm x 260mm max (6.29” x 10.24”)<br />
BL Ellageo2 160mm x 260mm max (6.29” x 10.24”)<br />
BL Ellageo3 160mm x 260mm max (6.29” x 10.24”)<br />
BR ULT 160mm x 260mm max (6.29” x 10.24”)<br />
BR 2002D 160mm x 260mm max (6.29” x 10.24”)<br />
BR 2002 160mm x 260mm max (6.29” x 10.24”)<br />
A “PES” fi le is an expanded fi le format that works with Bernette Deco Wizard, Baby Lock Palette,<br />
and Brother PE-Design software.<br />
Viking [*.HUS]<br />
Split at 12 colors - Split at 30,000 stitches<br />
Hoop size:<br />
Viking Rose 100mm x 100mm max (4” x 4”)<br />
Viking 1+ 100mm x 100mm max (4” x 4”)<br />
Viking IRIS 100mm x 100mm max (4” x 4”)<br />
An “HUS” fi le is an expanded fi le format that works with Viking DOS Customizer and Viking<br />
Customizer 95.<br />
Pfaff [*.PCS]<br />
Split at 16 colors - Split at 14,000 stitches<br />
Hoop size:<br />
Pfaff 7570 115mm x 120mm max (4.52” x 4.72”)<br />
Pfaff 7560 115mm x 120mm max (4.52” x 4.72”)<br />
A “PCS” fi le is an expanded fi le format that works with Pfaff PC-Designer v2.0 (PC), and Pfaff PC-<br />
Designer v2.1 (PC).<br />
43<br />
Table of Contents<br />
Introduction<br />
Installation<br />
Main Screen<br />
Quick Start<br />
General Information<br />
Color Editor
General Information<br />
Table of Contents<br />
Introduction<br />
Installation<br />
Main Screen<br />
Quick Start<br />
General Information<br />
Color Editor<br />
44<br />
Mini <strong>Magic</strong> <strong>Box</strong> - Design Card Converter<br />
Software Manual<br />
Singer XL1000 [*.XXX]<br />
Split at 24 colors - Split at 30,000 stitches<br />
Hoop size 130mm x 240mm max (5.1” x 9.4”)<br />
An “XXX” fi le is an expanded fi le format that works with Singer PSW software.<br />
Singer XL150 [*.XXX]<br />
Split at 24 colors - Split at 30,000 stitches<br />
Hoop size 130mm x 240mm max (5.1” x 9.4”)<br />
An “XXX” fi le is an expanded fi le format that works with Singer PSW software.<br />
Singer XL100<br />
Split at 24 colors - Split at 30,000 stitches<br />
Hoop size 112mm x 80mm max (4.4” x 3.15”)<br />
Janome 10000 [*.SEW or *.JEF]<br />
Split at 16 colors - Split at 18,000 stitches<br />
Hoop size 140mm x 200mm max (5.5” x 7.8”)<br />
A “SEW” fi le is an expanded fi le format that works with Janome Scan-n-Sew PC and other<br />
software. The “JEF” format is an additional expanded format that is used by more recent versions of<br />
Janome software.<br />
Janome 8000-9000/ Elna/New Home/ Kenmore [*.SEW]<br />
(<strong>Magic</strong> <strong>Box</strong> Only)<br />
Split at 16 colors - Split at 18,000 stitches<br />
Hoop size<br />
JAN 8000 80mm x 70mm max (3.15” x 2.75”)<br />
ELNA 9006 80mm x 70mm max (3.15” x 2.75”)<br />
ELNA CE20 122mm x 88mm max (4.8” x 3.4”)<br />
ELNA 8007 122mm x 88mm max (4.8” x 3.4”)<br />
ELNA 8006 122mm x 88mm max (4.8” x 3.4”)<br />
JAN 9000 122mm x 88mm max (4.8” x 3.4”)<br />
JAN 5700 122mm x 88mm max (4.8” x 3.4”)
Mini <strong>Magic</strong> <strong>Box</strong> - Design Card Converter<br />
Software Manual<br />
General Information<br />
JAN 5000 122mm x 88mm max (4.8” x 3.4”)<br />
KEN 19000 122mm x 88mm max (4.8” x 3.4”)<br />
KEN 19001 122mm x 88mm max (4.8” x 3.4”)<br />
An “SEW” fi le is an expanded fi le format that works with Janome Scan-n-Sew PC and<br />
Elna Envision Scan PC.<br />
Bernina artista<br />
Hoop Size:<br />
artista 165 152mm x 198mm max (6” x 7.7”)<br />
artista 170 152mm x 198mm max (6” x 7.7”)<br />
artista 180 152mm x 198mm max (6” x 7.7”)<br />
A “CSD” fi le is an expanded fi le format that works with DOS HuskyGram, Toyota POEM and<br />
Singer <strong>Embroidery</strong> Unlimited,<br />
A “DST” fi le is one of the expanded fi le formats that works with the Tajima embroidery machines,<br />
and some home machines.<br />
An”EXP” fi le is one of the expanded fi le formats that works with the <strong>Magic</strong> <strong>Box</strong>.<br />
An expanded format is any format that will not regenerate new stitches when resized. This means<br />
that if an expanded design is reduced, the stitch count will not change. The stitches will get closer<br />
together and thread/needle breaks and/or damage to your garment could occur.<br />
NOTE: The <strong>Magic</strong> <strong>Box</strong> software does not read the ART (*.art) format. Use the sizing software that<br />
is included with your <strong>Magic</strong> <strong>Box</strong> to convert ART designs to another format before Reading them to<br />
the <strong>Magic</strong> <strong>Box</strong>. The free <strong>OESD</strong> designs in the <strong>Magic</strong>ian Sizing by Simon Software and the “100<br />
Free Designs” CD that you will receive when you send in your registration card are in the ART<br />
format.<br />
45<br />
Table of Contents<br />
Introduction<br />
Installation<br />
Main Screen<br />
Quick Start<br />
General Information<br />
Color Editor
General Information<br />
Table of Contents<br />
Introduction<br />
Installation<br />
Main Screen<br />
Quick Start<br />
General Information<br />
Color Editor<br />
Product Registration<br />
46<br />
Mini <strong>Magic</strong> <strong>Box</strong> - Design Card Converter<br />
Software Manual<br />
If you have not registered your <strong>Magic</strong> <strong>Box</strong>, please do so as it will<br />
make you eligible for technical support. When <strong>OESD</strong> receives<br />
your registration, we will mail you a “100 Free Designs” CD. If<br />
you have sent in the registration card, but have not received the<br />
“100 Free Designs” CD, please call 1-888-223-6943 Mon.-Fri.<br />
8AM-6PM Central time. You can also register online at www.emb<br />
roideryonline.com, under the “<strong>Magic</strong> <strong>Box</strong> Information” link.
Mini <strong>Magic</strong> <strong>Box</strong> - Design Card Converter<br />
Software Manual<br />
Notes<br />
General Information<br />
47<br />
Table of Contents<br />
Introduction<br />
Installation<br />
Main Screen<br />
Quick Start<br />
General Information<br />
Color Editor
General Information<br />
Table of Contents<br />
Introduction<br />
Installation<br />
Main Screen<br />
Quick Start<br />
General Information<br />
Color Editor<br />
<strong>Magic</strong>ian Sizing Software<br />
<strong>Magic</strong>ian Sizing is a free program that is included<br />
with the Mini <strong>Magic</strong> <strong>Box</strong>. Install it from the <strong>OESD</strong><br />
Digital Catalog CD (Fig. H-CD) that is located in the<br />
Product Guide (Fig. H-PG) that came with the Mini<br />
<strong>Magic</strong> <strong>Box</strong>. This program can be used to size,<br />
mirror image and rotate ART designs.<br />
Use this software to convert ART designs to another<br />
format before Reading them to the Mini <strong>Magic</strong> <strong>Box</strong><br />
(see page #36).<br />
Place the <strong>OESD</strong> Digital Design Gallery CD-ROM<br />
into the CD-ROM drive and wait for it to open.<br />
Follow the instructions to install the <strong>Magic</strong>ian Sizing<br />
Software.<br />
Open <strong>Magic</strong>ian Sizing by clicking the desktop icon<br />
or going to Start, Programs.<br />
When the program opens, click File, Open and<br />
Look in: <strong>OESD</strong> Designs. (Fig. MS-1)<br />
48<br />
Mini <strong>Magic</strong> <strong>Box</strong> - Design Card Converter<br />
Software Manual<br />
Fig. H-CD<br />
Fig. H-PG<br />
Fig. MS-1
Mini <strong>Magic</strong> <strong>Box</strong> - Design Card Converter<br />
Software Manual<br />
Select a design and click Open (Fig. MS-3)<br />
Click File and Save As (Fig. MS-4)<br />
General Information<br />
Fig. MS-3<br />
Fig. MS-4<br />
49<br />
Table of Contents<br />
Introduction<br />
Installation<br />
Main Screen<br />
Quick Start<br />
General Information<br />
Color Editor
General Information<br />
Table of Contents<br />
Introduction<br />
Installation<br />
Main Screen<br />
Quick Start<br />
General Information<br />
Color Editor<br />
50<br />
Mini <strong>Magic</strong> <strong>Box</strong> - Design Card Converter<br />
Software Manual<br />
Click Save As Type and choose another format. In this exercise,<br />
we will use the .pes format. (Fig. MS-5)<br />
Fig. MS-5
Mini <strong>Magic</strong> <strong>Box</strong> - Design Card Converter<br />
Software Manual<br />
General Information<br />
Click Save and choose the hoop size, if applicable. (Fig. MS-6)<br />
Fig. MS-6<br />
51<br />
Table of Contents<br />
Introduction<br />
Installation<br />
Main Screen<br />
Quick Start<br />
General Information<br />
Color Editor
General Information<br />
Table of Contents<br />
Introduction<br />
Installation<br />
Main Screen<br />
Quick Start<br />
General Information<br />
Color Editor<br />
52<br />
Mini <strong>Magic</strong> <strong>Box</strong> - Design Card Converter<br />
Software Manual<br />
The design is now saved in the .pes format. Convert the<br />
remaining designs if desired. Note that the 100 free designs CD-<br />
ROM that you will receive when you send in your registration<br />
card are in the .art format and must be converted with <strong>Magic</strong>ian<br />
Sizing before writing them to the Mini <strong>Magic</strong> <strong>Box</strong>.<br />
For information on editing ART designs, refer to <strong>Magic</strong>ian Sizing’s<br />
<strong>Online</strong> Manual, under the Help menu.
Mini <strong>Magic</strong> <strong>Box</strong> - Design Card Converter<br />
Software Manual<br />
MAIN SCREEN<br />
(Converter <strong>Box</strong> window)<br />
Main Screen<br />
53<br />
Table of Contents<br />
Introduction<br />
Installation<br />
Main Screen<br />
Quick Start<br />
General Information<br />
Color Editor
Main Screen<br />
Table of Contents<br />
Introduction<br />
Installation<br />
Main Screen<br />
Quick Start<br />
General Information<br />
Color Editor<br />
54<br />
Mini <strong>Magic</strong> <strong>Box</strong> - Design Card Converter<br />
Software Manual<br />
Main Screen (converter box window) (fi g. MS-2 below)<br />
A. Design Area (Fig. MS-2a below)<br />
B. Dialog <strong>Box</strong> (Fig. MS-2b below)<br />
C. Read (Fig. MS-2c below)<br />
D. Load (Fig. MS-2d below. Clickable when a proper<br />
card is inserted)<br />
E. Write Card (Fig. MS-2e below. Clickable when a<br />
proper card is inserted)<br />
F. Delete (Fig. MS-2f below. Clickable when a design is<br />
present and selected in Fig. MS-2a)<br />
G. Options (Fig. MS-2g below)<br />
H. Exit (Fig. MS-2h below)<br />
Fig. MS-2
Mini <strong>Magic</strong> <strong>Box</strong> - Design Card Converter<br />
Software Manual<br />
Main Screen<br />
A. Design Area (Fig. MS-3 Below)<br />
Six designs can be placed onto a <strong>Magic</strong> Card at one time,<br />
depending on the size, stitch count and/or color changes in the<br />
design. The six boxes allow a preview of the designs before they<br />
are written to a <strong>Magic</strong> Card. Fig. MS-3 below shows the fi ve free<br />
designs from the <strong>Magic</strong>ian Sizing software in the Design Area.<br />
There is still one empty box available to Read a design.<br />
Fig. MS-3<br />
55<br />
Table of Contents<br />
Introduction<br />
Installation<br />
Main Screen<br />
Quick Start<br />
General Information<br />
Color Editor
Main Screen<br />
Table of Contents<br />
Introduction<br />
Installation<br />
Main Screen<br />
Quick Start<br />
General Information<br />
Color Editor<br />
56<br />
Mini <strong>Magic</strong> <strong>Box</strong> - Design Card Converter<br />
Software Manual<br />
B. Dialog <strong>Box</strong> (Noted in Fig. MS-2b)<br />
Moving the mouse over the different buttons on the Main Screen<br />
will display information about that feature in the Dialog <strong>Box</strong>.
Mini <strong>Magic</strong> <strong>Box</strong> - Design Card Converter<br />
Software Manual<br />
C. Read Noted in Fig. MS-2c, (page 52)<br />
The Read function opens designs from a computer’s hard drive,<br />
a fl oppy disk or a CD-ROM. Choose either the “Standard<br />
Windows” or the “Browse by Icon” viewing options from the<br />
Options menu, which is located to the right on the Main Screen.<br />
Fig. MS-2cc<br />
Main Screen<br />
57<br />
Table of Contents<br />
Introduction<br />
Installation<br />
Main Screen<br />
Quick Start<br />
General Information<br />
Color Editor
Main Screen<br />
Table of Contents<br />
Introduction<br />
Installation<br />
Main Screen<br />
Quick Start<br />
General Information<br />
Color Editor<br />
58<br />
Mini <strong>Magic</strong> <strong>Box</strong> - Design Card Converter<br />
Software Manual<br />
Standard Windows Option<br />
To set the <strong>Magic</strong> <strong>Box</strong> to Read using the Standard Window option,<br />
click on Options (See fi g.MS-2c, page 52). The Standard Windows<br />
option (See fi g. MS-2cc above) functions like the Windows<br />
Operating System, making it easy to fi nd fi le on the computer.<br />
Read using Standard Windows<br />
Click the Read button to open a standard window.<br />
Click on the desired design and click Open.<br />
The design will appear on the Main Screen in the fi rst empty space<br />
in the Design Area.
Mini <strong>Magic</strong> <strong>Box</strong> - Design Card Converter<br />
Software Manual<br />
Main Screen<br />
Browse by Icon Option<br />
To use the Browse by Icon option, click on Options (See fi g. MS-<br />
2g, page 52) to open the Options window. Choose Browse by<br />
Icon from the “File Open Preference” section of the window. This<br />
option allows the viewer to see thumbnails of the designs in a<br />
directory.<br />
Read using Browse by Icon<br />
Click the Read button to open the Select by Icons window. The<br />
“Sort By” function sorts designs by name or by fi le extension.<br />
Click on the arrow under Directory to show the listing of the<br />
subdirectories on the computer. Select the Directory that contains<br />
the desired designs (note the image below).<br />
59<br />
Table of Contents<br />
Introduction<br />
Installation<br />
Main Screen<br />
Quick Start<br />
General Information<br />
Color Editor
Main Screen<br />
Table of Contents<br />
Introduction<br />
Installation<br />
Main Screen<br />
Quick Start<br />
General Information<br />
Color Editor<br />
60<br />
Mini <strong>Magic</strong> <strong>Box</strong> - Design Card Converter<br />
Software Manual<br />
If there are designs in this Directory, thumbnail icons of the designs<br />
will appear on screen (note image below).
Mini <strong>Magic</strong> <strong>Box</strong> - Design Card Converter<br />
Software Manual<br />
Main Screen<br />
Click on a design and click OK or double-LEFT click on the design<br />
to be loaded into the Design Area of the Converter <strong>Box</strong> window.<br />
61<br />
Table of Contents<br />
Introduction<br />
Installation<br />
Main Screen<br />
Quick Start<br />
General Information<br />
Color Editor
Main Screen<br />
Table of Contents<br />
Introduction<br />
Installation<br />
Main Screen<br />
Quick Start<br />
General Information<br />
Color Editor<br />
62<br />
Mini <strong>Magic</strong> <strong>Box</strong> - Design Card Converter<br />
Software Manual
Mini <strong>Magic</strong> <strong>Box</strong> - Design Card Converter<br />
Software Manual<br />
D. Load (Noted in Fig. MS-2d, page 52)<br />
Load is used to open designs from a purchased memory card or<br />
<strong>Magic</strong> Card. There is only one button that makes up the Load<br />
function. When a card is inserted, clicking Load will cause the<br />
software to search and recognize the card. The Read Design<br />
dialog box will open. (fi g. MS-6a below). For the following<br />
exercise, an <strong>OESD</strong> design card was used.<br />
1. Type in the desired design number (fi g. MS-6a Below).<br />
Main Screen<br />
2. After typing in the design number, click on OK and the design<br />
will load.<br />
63<br />
Table of Contents<br />
Introduction<br />
Installation<br />
Main Screen<br />
Quick Start<br />
General Information<br />
Color Editor
Main Screen<br />
Table of Contents<br />
Introduction<br />
Installation<br />
Main Screen<br />
Quick Start<br />
General Information<br />
Color Editor<br />
64<br />
Mini <strong>Magic</strong> <strong>Box</strong> - Design Card Converter<br />
Software Manual<br />
3. Clicking browse will view a directory of all the designs on the<br />
card (fi g. MS-7 below)<br />
Fig MS-7<br />
a) As many as six designs will show at one time<br />
depending on the number of designs on the card.<br />
b) Clicking on one of the six shown designs and then
Mini <strong>Magic</strong> <strong>Box</strong> - Design Card Converter<br />
Software Manual<br />
Main Screen<br />
clicking on “Load” will take the design to the <strong>Magic</strong><br />
<strong>Box</strong>’s Main Screen.<br />
c) Clicking on the “Next Page” button will show the next<br />
six designs that are on the card.<br />
d) Clicking on the “Prev Page” button will show the<br />
previous six designs that are on the card.<br />
e) Clicking on “OK” will return to the <strong>Magic</strong> <strong>Box</strong>’s Main<br />
Screen. (Fig. MS-8 below)<br />
Fig. MS-8<br />
65<br />
Table of Contents<br />
Introduction<br />
Installation<br />
Main Screen<br />
Quick Start<br />
General Information<br />
Color Editor
Main Screen<br />
Table of Contents<br />
Introduction<br />
Installation<br />
Main Screen<br />
Quick Start<br />
General Information<br />
Color Editor<br />
66<br />
Mini <strong>Magic</strong> <strong>Box</strong> - Design Card Converter<br />
Software Manual<br />
E. Write Card (Noted in Fig. MS-2e, page 52)<br />
The Write Card function saves designs to a <strong>Magic</strong> Card.<br />
There are 3 buttons that make up the Write Card function (Fig.<br />
MS-9a below)<br />
These buttons are waiting to be assigned a card type. They will<br />
recognize a card when it has been inserted into its proper slot in<br />
the <strong>Magic</strong> <strong>Box</strong>.<br />
Slot 1: This slot is for the magic card compatible with Bernette-<br />
Deco, Brother, Babylock, Viking and Simplicity<br />
machines.<br />
Slot 2: This slot is for the magic cards compatible with Pfaff, artista<br />
and Janome 10000 machines.
Mini <strong>Magic</strong> <strong>Box</strong> - Design Card Converter<br />
Software Manual<br />
Main Screen<br />
Slot 3: This slot is for the magic card compatible with Singer<br />
machines (Does not apply to the Mini <strong>Magic</strong> <strong>Box</strong>).<br />
Slot 4: This slot is for the magic card compatible with Janome<br />
8000 or 9000 machines (Does not apply to the Mini<br />
<strong>Magic</strong> <strong>Box</strong>).<br />
With the <strong>Magic</strong> Card inserted, click one of the 3 “Unknown”<br />
buttons under the Write Card section. After one of the “Unknown”<br />
buttons is selected, a prompt window will open requesting the<br />
machine type the card will be written for. (See fi gure MS-9b)<br />
Fig MS-9b<br />
Click the drop down menu arrow to choose the machine. The<br />
type of card that is inserted will dictate what machines will be<br />
available from the list. Below is a chart listing the machines that<br />
are available for each card slot:<br />
67<br />
Table of Contents<br />
Introduction<br />
Installation<br />
Main Screen<br />
Quick Start<br />
General Information<br />
Color Editor
Main Screen<br />
Table of Contents<br />
Introduction<br />
Installation<br />
Main Screen<br />
Quick Start<br />
General Information<br />
Color Editor<br />
68<br />
SLOT #1 SLOT #2 SLOT #3<br />
(<strong>Magic</strong> <strong>Box</strong> only)<br />
Mini <strong>Magic</strong> <strong>Box</strong> - Design Card Converter<br />
Software Manual<br />
SLOT #4<br />
(<strong>Magic</strong> <strong>Box</strong> only)<br />
DECO 500 JAN 10000 XL100 JAN 8000<br />
DECO 600 Pfaff 7570 XL150 Jan 9000<br />
BL ESI Pfaff 7560 XL1000 Elna 9006<br />
BL ESI2 artista 165 Elna CE20<br />
BL EM1 artista 170 Elna 8007<br />
BL EM2 artista 180 Elna 8006<br />
BL EAC JAN 5700<br />
BR PE150 JAN 5000<br />
BR PE100 KEN 19000<br />
BR PE200 KEN 19001<br />
BR PE300S<br />
BR PE7500|<br />
WHITE W3300<br />
SIM SE1<br />
SIM SE2<br />
SIM SE3<br />
BL ESE|<br />
BL ES2<br />
BR 6500<br />
BR 8200<br />
BR 8500<br />
BL 260<br />
BR 260<br />
BL Ellageo<br />
BL Ellageo2<br />
BL Ellageo3<br />
BR ULT<br />
BR 2002D<br />
BR 2002<br />
Viking Rose<br />
Viking 1+<br />
Viking IRIS
Mini <strong>Magic</strong> <strong>Box</strong> - Design Card Converter<br />
Software Manual<br />
Main Screen<br />
From the drop down list, choose the machine that the card is to be<br />
written for. As shown in the fi gure below, when writing designs for<br />
a Deco machine, choose DECO from the menu and click OK.<br />
A warning box will appear indicating that the card in the slot is<br />
about to be erased (Fig MS-10 Below)<br />
69<br />
Table of Contents<br />
Introduction<br />
Installation<br />
Main Screen<br />
Quick Start<br />
General Information<br />
Color Editor
Main Screen<br />
Table of Contents<br />
Introduction<br />
Installation<br />
Main Screen<br />
Quick Start<br />
General Information<br />
Color Editor<br />
Fig MS-10<br />
70<br />
Mini <strong>Magic</strong> <strong>Box</strong> - Design Card Converter<br />
Software Manual<br />
Remember, the software will recognize the card that is inserted<br />
and will offer the choices for that card in the Write Selection<br />
Menu. A soft click should be felt when inserting the card,<br />
signalling that it is properly seated.<br />
After the card is written to, the “Unknown” button will change to<br />
the machine type that was selected from the menu. The software<br />
allows three types of machines to be selected and remembered<br />
at one time. (Fig. MS-10a). The user can go into the Options and<br />
change the type of machine selected for each button as desired.
Mini <strong>Magic</strong> <strong>Box</strong> - Design Card Converter<br />
Software Manual<br />
Fig. MS-10a<br />
Main Screen<br />
71<br />
Table of Contents<br />
Introduction<br />
Installation<br />
Main Screen<br />
Quick Start<br />
General Information<br />
Color Editor
Main Screen<br />
Table of Contents<br />
Introduction<br />
Installation<br />
Main Screen<br />
Quick Start<br />
General Information<br />
Color Editor<br />
72<br />
Mini <strong>Magic</strong> <strong>Box</strong> - Design Card Converter<br />
Software Manual<br />
F. Delete (Noted in Fig. MS-2f, page 52)<br />
This function deletes a design from the Main Screen (Converter<br />
<strong>Box</strong> window). Click on a design to select it and then click on the<br />
delete button. In the Figure MS-11, the fi rst and second design<br />
were deleted. (Note that this deletes the design from the Main<br />
Screen, NOT from the <strong>Magic</strong> Card.)<br />
Fig MS-11
Mini <strong>Magic</strong> <strong>Box</strong> - Design Card Converter<br />
Software Manual<br />
G. Options (Noted in Fig. MS-2g, page 52)<br />
Fig. MS-11a USB Port <strong>Magic</strong> <strong>Box</strong><br />
Options Window<br />
Main Screen<br />
Use the drop down arrow in the Write Button Preferences area to<br />
choose the machine type for the <strong>Magic</strong> Card that is to be written<br />
to. When a card is inserted into the <strong>Magic</strong> <strong>Box</strong> for the fi rst time,<br />
the “Unknown” button will be matched to the machine type by the<br />
user. After that fi rst use, the button is then labeled for that machine.<br />
73<br />
Table of Contents<br />
Introduction<br />
Installation<br />
Main Screen<br />
Quick Start<br />
General Information<br />
Color Editor
Main Screen<br />
Table of Contents<br />
Introduction<br />
Installation<br />
Main Screen<br />
Quick Start<br />
General Information<br />
Color Editor<br />
74<br />
Mini <strong>Magic</strong> <strong>Box</strong> - Design Card Converter<br />
Software Manual<br />
However, the machine can be changed in the Options when<br />
desired. In fi g. MS-11c below, “Deco” appears in the Write Button<br />
Preferences because it was chosen when writing to the Deco card.<br />
Fig. MS-11c<br />
To change the machine that has been assigned to a button, click<br />
the menu arrow and choose a machine from the list (see fi g. MS-<br />
11d below). All machine types that are compatible with the USB<br />
<strong>Magic</strong> <strong>Box</strong>es will be listed. It is possible to open the Options and<br />
assign machines to the three buttons before writing to a <strong>Magic</strong><br />
Card for the fi rst time.
Mini <strong>Magic</strong> <strong>Box</strong> - Design Card Converter<br />
Software Manual<br />
Main Screen<br />
After making changes to the Options window, click OK. Clicking<br />
Cancel will exit the Options window WITHOUT changes being<br />
made to the any of the preferences.<br />
75<br />
Table of Contents<br />
Introduction<br />
Installation<br />
Main Screen<br />
Quick Start<br />
General Information<br />
Color Editor
Main Screen<br />
Table of Contents<br />
Introduction<br />
Installation<br />
Main Screen<br />
Quick Start<br />
General Information<br />
Color Editor<br />
76<br />
Mini <strong>Magic</strong> <strong>Box</strong> - Design Card Converter<br />
Software Manual<br />
H. EXIT (Noted in Fig. MS-2h, page 52)<br />
Click the Exit button from the Converter <strong>Box</strong> window to close the<br />
<strong>Magic</strong> <strong>Box</strong> software.
Mini <strong>Magic</strong> <strong>Box</strong> - Design Card Converter<br />
Software Manual<br />
NOTES<br />
Main Screen<br />
77<br />
Table of Contents<br />
Introduction<br />
Installation<br />
Main Screen<br />
Quick Start<br />
General Information<br />
Color Editor
Color Editor<br />
Table of Contents<br />
Introduction<br />
Installation<br />
Main Screen<br />
Quick Start<br />
General Information<br />
Color Editor<br />
78<br />
Mini <strong>Magic</strong> <strong>Box</strong> - Design Card Converter<br />
Software Manual<br />
Color Editor<br />
This section of the manual explains other features of the Color<br />
Editor. To use the color changing feature, see Quick Start Lesson 4<br />
on page 106.<br />
Introduction:<br />
The Color Editor is a program provided as part of the Mini <strong>Magic</strong> <strong>Box</strong> program<br />
for the sole purpose of adding color information to the designs that are to be<br />
written to <strong>Magic</strong> Cards. To input correct color information for the Bernette<br />
Deco, Viking, Baby Lock, Elna 9000, Janome, Kenmore, Singer or Brother<br />
models which store color information, use the Color Editor program. Some<br />
machine formats (Bernina artista, Pfaff, Elna 8006, Janome 5006) and some fi le<br />
formats (EXP and DST) do not store color information, but the user may want to<br />
use the Color Editor for customizing the sewing colors of the designs.<br />
NOTE:<br />
The Mini <strong>Magic</strong> <strong>Box</strong> is packaged with another program, <strong>Magic</strong>ian Sizing by<br />
Simon, that sizes, mirror images, rotates and converts ART fi les. See page 48 for<br />
information about this program.
Mini <strong>Magic</strong> <strong>Box</strong> - Design Card Converter<br />
Software Manual<br />
File<br />
Color Editor<br />
Open<br />
Click on “Open” to open a design. These designs can be from the<br />
hard drive of the computer, a fl oppy disk or a CD-ROM.<br />
After selecting a design, it appears in the<br />
“File name” box. Click on “Open” to load the design. Click the<br />
“Cancel” button to cancel the Open command.<br />
Save<br />
Click on “Save” to save color changes. The Save command<br />
automatically places the design in one of the six windows of the<br />
Main Screen for writing to the <strong>Magic</strong> Card with the color changes<br />
selected. The Save command does not save the fi le to the computer<br />
or anywhere else except the Mini <strong>Magic</strong> <strong>Box</strong> Main Screen.<br />
Save As<br />
Save As works the same as the Save Icon. This will save the<br />
design to one of the six windows in the Mini <strong>Magic</strong> <strong>Box</strong> Main<br />
Screen to write to a <strong>Magic</strong> card.<br />
79<br />
Table of Contents<br />
Introduction<br />
Installation<br />
Main Screen<br />
Quick Start<br />
General Information<br />
Color Editor
Color Editor<br />
Table of Contents<br />
Introduction<br />
Installation<br />
Main Screen<br />
Quick Start<br />
General Information<br />
Color Editor<br />
Print<br />
Click “Print” to print a copy of<br />
a design to a piece of paper. The<br />
design will print out, and will show<br />
the fi le name of the design, the size,<br />
number of stitches and number of<br />
colors.<br />
Print Preview<br />
Click on “Print Preview” to display<br />
the printed page. On the right side<br />
of the screen the File Name, size of<br />
design in millimeters & inches, stitch<br />
count, number of colors and thread<br />
chart are displayed.<br />
The “Print” button<br />
will send the instruction sheet to the<br />
printer.<br />
The<br />
“Next Page” button will display the<br />
instructions from the second page (if<br />
applicable).<br />
The “Prev Page” will return to the<br />
previous page (if applicable).<br />
Click the “Two Page”<br />
button to view a preview of both<br />
pages.<br />
80<br />
Mini <strong>Magic</strong> <strong>Box</strong> - Design Card Converter<br />
Software Manual
Mini <strong>Magic</strong> <strong>Box</strong> - Design Card Converter<br />
Software Manual<br />
image.<br />
image.<br />
screen.<br />
Color Editor<br />
Click the “Zoom In” button to enlarge the preview<br />
Click the “Zoom Out” button to reduce the preview<br />
Click the “Close” button to close the Print Preview<br />
Click the “One Page” button to bring the Print<br />
Preview screen back to one page.<br />
Quick Start General Info. Main Screen Introduction Installation Troubleshoot Color Editor<br />
Exit<br />
Exit will close the Color Editor.<br />
Quick Start General Info. Main Screen Introduction Installation Troubleshoot Color Editor<br />
OPTIONS<br />
Hoop Size<br />
Click on “Hoop Size” to<br />
open the dialog box for choosing<br />
the machine and hoop size for<br />
the design to be sewn.<br />
The workspace grid will shrink or enlarge to show the workable<br />
area available for that particular machine and size.<br />
81<br />
Table of Contents<br />
Introduction<br />
Installation<br />
Main Screen<br />
Quick Start<br />
General Information<br />
Color Editor
Color Editor<br />
Table of Contents<br />
Introduction<br />
Installation<br />
Main Screen<br />
Quick Start<br />
General Information<br />
Color Editor<br />
82<br />
Mini <strong>Magic</strong> <strong>Box</strong> - Design Card Converter<br />
Software Manual<br />
Preferences<br />
Click on “Preferences” to bring up a dialog box. Several options<br />
can be set, depending on what kind of sewing machine is being<br />
used.<br />
First is the setting for Viking/Husqvarna machines. This option will<br />
split the design at every 12th color change.<br />
Note: When a design is split, the fi le name will be renamed with an A,<br />
B, C etc. at the end of the fi le name. For example, if a design named<br />
FL222.hus has 13 color changes in it, the fi le will be saved as FL222_<br />
A.hus and FL222_B.hus.
Mini <strong>Magic</strong> <strong>Box</strong> - Design Card Converter<br />
Software Manual<br />
Last is the setting for Pfaff PCS. The fi rst option will make PCS<br />
fi les 100% compatible Pfaff PCS. The second option will split the<br />
design at every 16th color change.<br />
Color Editor<br />
Note: When a design is split, the fi le name will be renamed with an A, B, C<br />
etc. at the end of the fi le name. For example: a design named FL222.pcs<br />
that has 18 color changes will be saved as FL222_A.pcs, FL222_B.pcs<br />
and FL222_C.pcs.<br />
Click OK to set the preferences.<br />
Click Cancel to close the dialog box without<br />
making any changes to the preferences.<br />
Density Icon<br />
The density icon is grayed out and not available. This will<br />
only work with .gnc fi les.<br />
Note: <strong>Magic</strong>ian Sizing by Simon is the best way to change designs.<br />
<strong>Magic</strong>ian Sizing by Simon, included with this package, will scale, mirror<br />
and rotate .art fi les. This is the format of choice for sizing, mirroring or<br />
rotating designs. Order .art fi les from www.embroideryonline.com.<br />
Zoom In Icon<br />
Click on the “Zoom In” icon to zoom in on the design and<br />
get a closer look.<br />
Zoom Out Icon<br />
Click on the “Zoom Out” icon to zoom out and make the<br />
design look further away.<br />
83<br />
Table of Contents<br />
Introduction<br />
Installation<br />
Main Screen<br />
Quick Start<br />
General Information<br />
Color Editor
Quick Start<br />
Table of Contents<br />
Introduction<br />
Installation<br />
Main Screen<br />
Quick Start<br />
General Information<br />
Color Editor<br />
Quick Start<br />
Items found in this Section:<br />
84<br />
Mini <strong>Magic</strong> <strong>Box</strong> - Design Card Converter<br />
Software Manual<br />
Lesson 1: Reading and writing a design from a CD-ROM<br />
Lesson 2: Loading and writing designs from a design card by<br />
browsing the card.<br />
Lesson 3: Loading and writing a design from a design card using<br />
the index.<br />
Lesson 4: Using Color Editor to adjust the colors in a design and<br />
then writing the design to a <strong>Magic</strong> Card.
Mini <strong>Magic</strong> <strong>Box</strong> - Design Card Converter<br />
Software Manual<br />
Quick Start<br />
Quick Start Lesson 1<br />
This lesson will demonstrate how to Read designs from a CD-ROM<br />
and Write them to a <strong>Magic</strong> Card.<br />
In this lesson we will use <strong>OESD</strong>’s “Home Grown” Premium Design<br />
CD.*<br />
*(Neither this CD-ROM nor any of the designs on this CD-ROM<br />
are included with the <strong>Magic</strong> <strong>Box</strong>. This CD is also available<br />
as an embroidery card. See a local <strong>OESD</strong> dealer or visit<br />
www.embroideryonline.com for more information. Projects for<br />
<strong>OESD</strong> designs can be downloaded from the website.)<br />
Notes:<br />
• Designs can also be Read from the computer’s hard drive and from a fl oppy disk.<br />
• All clicks of the mouse are LEFT clicks unless otherwise noted as right clicks.<br />
• These directions are for the Standard Windows setting from the Options Menu.<br />
85<br />
Table of Contents<br />
Introduction<br />
Installation<br />
Main Screen<br />
Quick Start<br />
General Information<br />
Color Editor
Quick Start<br />
Table of Contents<br />
Introduction<br />
Installation<br />
Main Screen<br />
Quick Start<br />
General Information<br />
Color Editor<br />
86<br />
Mini <strong>Magic</strong> <strong>Box</strong> - Design Card Converter<br />
Software Manual<br />
1. Launch the <strong>Magic</strong> <strong>Box</strong> Program:<br />
Double click the <strong>Magic</strong> <strong>Box</strong> icon from the Desktop of your PC<br />
or<br />
• Click on Start<br />
• Go to Programs<br />
• Go to <strong>OESD</strong><br />
• Click <strong>Magic</strong> <strong>Box</strong><br />
2. The <strong>Magic</strong> <strong>Box</strong> software will open. Click OK from the ABOUT<br />
window. (Fig. QS-2)<br />
Fig. QS-2
Mini <strong>Magic</strong> <strong>Box</strong> - Design Card Converter<br />
Software Manual<br />
3. Click the Read button. (Fig. QS-3)<br />
Fig. QS-3<br />
4. Click the drop-down arrow from the Open box and choose<br />
the CD-ROM (Fig. QS-4)<br />
Fig. QS-4<br />
Quick Start<br />
87<br />
Table of Contents<br />
Introduction<br />
Installation<br />
Main Screen<br />
Quick Start<br />
General Information<br />
Color Editor
Quick Start<br />
Table of Contents<br />
Introduction<br />
Installation<br />
Main Screen<br />
Quick Start<br />
General Information<br />
Color Editor<br />
88<br />
Mini <strong>Magic</strong> <strong>Box</strong> - Design Card Converter<br />
Software Manual<br />
5. Open the Designs Folder by double clicking on the listing.<br />
(Or single click on the Designs folder and then click Open.) (Fig.<br />
QS-5)<br />
Fig. QS-5<br />
6. Click on the desired design and click Open. (Fig. QS-6)<br />
Fig. QS-6
Mini <strong>Magic</strong> <strong>Box</strong> - Design Card Converter<br />
Software Manual<br />
7. The design will appear on the Main Screen in the fi rst empty<br />
space in the Design Area (Fig. QS-7)<br />
Fig. QS-7<br />
8. Continue Reading designs, as in Steps 3-6, until the desired<br />
designs are on the Main Screen. A maximum of six designs can<br />
be written to a <strong>Magic</strong> Card at one time. (Fig. QS-8)<br />
Fig. QS-8<br />
Quick Start<br />
89<br />
Table of Contents<br />
Introduction<br />
Installation<br />
Main Screen<br />
Quick Start<br />
General Information<br />
Color Editor
Quick Start<br />
Table of Contents<br />
Introduction<br />
Installation<br />
Main Screen<br />
Quick Start<br />
General Information<br />
Color Editor<br />
90<br />
Mini <strong>Magic</strong> <strong>Box</strong> - Design Card Converter<br />
Software Manual<br />
9. Insert the correct <strong>Magic</strong> Card into the appropriate colorcoded<br />
and numerically identical slot on the <strong>Magic</strong> <strong>Box</strong>. In this<br />
lesson, a #1 (Brother/Deco/Babylock/Simplicity/Viking) <strong>Magic</strong><br />
Card is being used. It fi ts into slot #1 (Fig. QS-9)<br />
Fig. QS-9<br />
Warning: Some embroidery design cards can be erased or overwritten. ALWAYS remove<br />
any design cards before writing to a <strong>Magic</strong> Card.<br />
10. Click any one of the 3 “Unknown” buttons under the Write<br />
Card section of the Converter <strong>Box</strong> window. (Fig. QS-10)<br />
Fig. QS-10
Mini <strong>Magic</strong> <strong>Box</strong> - Design Card Converter<br />
Software Manual<br />
Quick Start<br />
11. The Write Selection box will open. Click the drop down<br />
menu and choose the machine this card is being written for. Click<br />
OK to accept this machine. (Figures QS-11 & QS-11a)<br />
Fig. QS-11<br />
Fig QS-11a<br />
12. A Warning <strong>Box</strong> will appear, explaining that the card will be<br />
erased. Click Yes. (Fig. QS-12)<br />
Fig. QS-12<br />
91<br />
Table of Contents<br />
Introduction<br />
Installation<br />
Main Screen<br />
Quick Start<br />
General Information<br />
Color Editor
Quick Start<br />
Table of Contents<br />
Introduction<br />
Installation<br />
Main Screen<br />
Quick Start<br />
General Information<br />
Color Editor<br />
92<br />
Mini <strong>Magic</strong> <strong>Box</strong> - Design Card Converter<br />
Software Manual<br />
13. The Writing Block dialog box will appear. After writing<br />
is complete, the “Success” dialog window will be displayed,<br />
indicating that the card is ready for use. Click OK. (fi g. QS-13)<br />
Fig. QS-13<br />
The <strong>Magic</strong> Card is now ready for use in the embroidery machine.<br />
Quick Start Lesson 2<br />
This lesson will demonstrate how to Load designs from a preprogrammed<br />
design card by Browsing the card. It will also<br />
demonstrate how to Write the designs to a <strong>Magic</strong> Card.<br />
In this lesson, we will use <strong>OESD</strong>’s “Sunfl owers” Premium Design<br />
Card.*
Mini <strong>Magic</strong> <strong>Box</strong> - Design Card Converter<br />
Software Manual<br />
Notes:<br />
• Designs can also be Loaded from a <strong>Magic</strong> Card once designs have been written to that<br />
<strong>Magic</strong> Card.<br />
• All clicks of the mouse are LEFT clicks unless otherwise noted as right clicks.<br />
1. Launch the <strong>Magic</strong> <strong>Box</strong> program:<br />
Double click the <strong>Magic</strong> <strong>Box</strong> icon on the Desktop or<br />
• Click on Start<br />
• Go to Programs<br />
• Go to <strong>OESD</strong><br />
• Click <strong>Magic</strong> <strong>Box</strong><br />
*(Neither this card nor any of the designs on this card<br />
are included with the <strong>Magic</strong> <strong>Box</strong>. This card is also<br />
available as a CD-ROM. See a local <strong>OESD</strong> dealer or visit<br />
www.embroideryonline.com for more information. Projects for<br />
<strong>OESD</strong> designs can be downloaded from the website.)<br />
Quick Start<br />
2. The <strong>Magic</strong> <strong>Box</strong> software will open. Click OK from the ABOUT<br />
window.<br />
93<br />
Table of Contents<br />
Introduction<br />
Installation<br />
Main Screen<br />
Quick Start<br />
General Information<br />
Color Editor
Quick Start<br />
Table of Contents<br />
Introduction<br />
Installation<br />
Main Screen<br />
Quick Start<br />
General Information<br />
Color Editor<br />
94<br />
Mini <strong>Magic</strong> <strong>Box</strong> - Design Card Converter<br />
Software Manual<br />
2. The <strong>Magic</strong> <strong>Box</strong> software will open. Click OK from the ABOUT<br />
window.<br />
4. Insert the design card into the correct card slot on the<br />
<strong>Magic</strong> <strong>Box</strong>. In this lesson, a Bernina artista “Sunfl owers” Design<br />
Card is being used. It fi ts into slot #2.<br />
5. Click the Load button from the right hand side of the Converter<br />
<strong>Box</strong> window.
Mini <strong>Magic</strong> <strong>Box</strong> - Design Card Converter<br />
Software Manual<br />
6. The Read Design window will appear. Click the Browse<br />
button to view the designs on the entire card. Wait while the<br />
<strong>Magic</strong> <strong>Box</strong> reads the design card.<br />
7. The fi rst page of the Card’s Directory will open.<br />
Quick Start<br />
95<br />
Table of Contents<br />
Introduction<br />
Installation<br />
Main Screen<br />
Quick Start<br />
General Information<br />
Color Editor
Quick Start<br />
Table of Contents<br />
Introduction<br />
Installation<br />
Main Screen<br />
Quick Start<br />
General Information<br />
Color Editor<br />
96<br />
Mini <strong>Magic</strong> <strong>Box</strong> - Design Card Converter<br />
Software Manual<br />
8. Click on the fi rst design and click Load (or double-LEFT click<br />
on the design). The design will disappear from the Directory<br />
screen but it will NOT be removed from the original design card.<br />
Do not click the OK button until all of the desired designs have<br />
been loaded. Remember, six designs can be loaded to a <strong>Magic</strong><br />
Card at one time.<br />
9. Click “Next Page” and click on a design. Click Load and the<br />
design will disappear from the Directory screen.
Mini <strong>Magic</strong> <strong>Box</strong> - Design Card Converter<br />
Software Manual<br />
10. Continue loading until six designs have been selected.<br />
Click OK and the designs will appear in the Design Area of the<br />
Converter <strong>Box</strong> window.<br />
11. Remove the design card from the <strong>Magic</strong> <strong>Box</strong>.<br />
Quick Start<br />
12. Insert the correct <strong>Magic</strong> Card into the appropriate colorcoded<br />
and numerically identical card slot on the <strong>Magic</strong> <strong>Box</strong>. In<br />
this lesson, a #3 (Singer XL100, XL150, XL1000) <strong>Magic</strong> Card is<br />
being used. It fi ts into slot #3. If using the Mini <strong>Magic</strong> <strong>Box</strong>, choose<br />
a card appropriate for slots 1 or 2 instead.<br />
97<br />
Table of Contents<br />
Introduction<br />
Installation<br />
Main Screen<br />
Quick Start<br />
General Information<br />
Color Editor
Quick Start<br />
Table of Contents<br />
Introduction<br />
Installation<br />
Main Screen<br />
Quick Start<br />
General Information<br />
Color Editor<br />
Mini <strong>Magic</strong> <strong>Box</strong> - Design Card Converter<br />
Software Manual<br />
Warning: Some embroidery design cards can be erased or overwritten. Always remove any<br />
design cards before writing to a <strong>Magic</strong> Card.<br />
13. Click any of the “Unknown” buttons under the Write Card<br />
section of the Converter <strong>Box</strong> window.<br />
14. The Write Selection window will open. Click the drop down<br />
menu and choose the machine this card is being written for. Click<br />
OK to accept this machine.<br />
98
Mini <strong>Magic</strong> <strong>Box</strong> - Design Card Converter<br />
Software Manual<br />
15. A Warning <strong>Box</strong> will appear, explaining that the card will be<br />
erased. Click Yes.<br />
16. The Writing Block dialog box will appear. After writing<br />
is complete, the “Success” dialog window will be displayed,<br />
indicating that the card is ready for use. Click OK.<br />
Quick Start<br />
The <strong>Magic</strong> Card is now ready for use in the embroidery machine.<br />
99<br />
Table of Contents<br />
Introduction<br />
Installation<br />
Main Screen<br />
Quick Start<br />
General Information<br />
Color Editor
Quick Start<br />
Table of Contents<br />
Introduction<br />
Installation<br />
Main Screen<br />
Quick Start<br />
General Information<br />
Color Editor<br />
100<br />
Mini <strong>Magic</strong> <strong>Box</strong> - Design Card Converter<br />
Software Manual<br />
Quick Start Lesson 3<br />
This lesson will demonstrate how to Load designs from a preprogrammed<br />
design card by using the Index function. It will also<br />
demonstrate how to Write the designs to a <strong>Magic</strong> Card.<br />
In this lesson will use <strong>OESD</strong>’s “Animal Instincts” Premium Design<br />
Card.*<br />
Notes:<br />
• Designs can also be Loaded from a <strong>Magic</strong> Card once designs have been written to that<br />
<strong>Magic</strong> Card.<br />
• All clicks of the mouse are LEFT clicks unless otherwise noted as right clicks.<br />
1. Launch the <strong>Magic</strong> <strong>Box</strong> program:<br />
Double click the <strong>Magic</strong> <strong>Box</strong> icon on the Desktop or<br />
• Click on Start<br />
• Go to Programs<br />
• Go to <strong>OESD</strong><br />
• Click <strong>Magic</strong> <strong>Box</strong>
Mini <strong>Magic</strong> <strong>Box</strong> - Design Card Converter<br />
Software Manual<br />
*(Neither this card nor any of the designs on this card<br />
are included with the <strong>Magic</strong> <strong>Box</strong>. This card is also<br />
available as a CD-ROM. See a local <strong>OESD</strong> dealer or visit<br />
www.embroideryonline.com for more information. Projects for<br />
<strong>OESD</strong> designs can be downloaded from the website.)<br />
Quick Start<br />
2. The <strong>Magic</strong> <strong>Box</strong> software will open. Click OK from the ABOUT<br />
window.<br />
3. The Main Screen of the <strong>Magic</strong> <strong>Box</strong> will appear.<br />
101<br />
Table of Contents<br />
Introduction<br />
Installation<br />
Main Screen<br />
Quick Start<br />
General Information<br />
Color Editor
Quick Start<br />
Table of Contents<br />
Introduction<br />
Installation<br />
Main Screen<br />
Quick Start<br />
General Information<br />
Color Editor<br />
102<br />
Mini <strong>Magic</strong> <strong>Box</strong> - Design Card Converter<br />
Software Manual<br />
4. Insert the design card into the correct card slot on the<br />
<strong>Magic</strong> <strong>Box</strong>. In this lesson, a Brother/Babylock/Deco compatible<br />
“Animals Instincts” Design Card is being used. It fi ts into slot #1.<br />
5. Click the Load button from the right hand side of the<br />
Converter <strong>Box</strong> window.<br />
6. The Read Design window will appear. Click in the Index<br />
Number box and type in the number of the desired design. (The<br />
design number is found on the embroidery card thread chart.)<br />
Click OK. Wait while the <strong>Magic</strong> <strong>Box</strong> reads the design card.
Mini <strong>Magic</strong> <strong>Box</strong> - Design Card Converter<br />
Software Manual<br />
Quick Start<br />
7. The design will appear on the Main Screen in the fi rst empty<br />
space in the Design Area.<br />
8. Remove the design card from the <strong>Magic</strong> <strong>Box</strong>.<br />
9. Insert the correct <strong>Magic</strong> Card into the appropriate colorcoded<br />
and numerically identical card slot on the <strong>Magic</strong> <strong>Box</strong>. In<br />
this lesson, a #2 (Pfaff, artista) <strong>Magic</strong> Card is being used. It fi ts<br />
into slot #2.<br />
Warning: Some embroidery design card can be erased or overwritten. Always remove any<br />
design cards before writing to a <strong>Magic</strong> Card.<br />
103<br />
Table of Contents<br />
Introduction<br />
Installation<br />
Main Screen<br />
Quick Start<br />
General Information<br />
Color Editor
Quick Start<br />
Table of Contents<br />
Introduction<br />
Installation<br />
Main Screen<br />
Quick Start<br />
General Information<br />
Color Editor<br />
104<br />
Mini <strong>Magic</strong> <strong>Box</strong> - Design Card Converter<br />
Software Manual<br />
10. Click any of the “Unknown” buttons under the Write Card<br />
section of the Converter <strong>Box</strong> window.<br />
11. The Write Selection window will open. Click the drop down<br />
menu and choose the machine this card is being written for. Click<br />
OK to accept this machine.
Mini <strong>Magic</strong> <strong>Box</strong> - Design Card Converter<br />
Software Manual<br />
Quick Start<br />
12. A Warning <strong>Box</strong> will appear, explaining that the card will be<br />
erased. Click Yes.<br />
13. The Writing Block dialog box will appear. After writing<br />
is complete, the “Success” dialog window will be displayed,<br />
indicating that the card is ready for use. Click OK.<br />
The <strong>Magic</strong> Card is now ready for use in the embroidery<br />
machine.<br />
105<br />
Table of Contents<br />
Introduction<br />
Installation<br />
Main Screen<br />
Quick Start<br />
General Information<br />
Color Editor
Quick Start<br />
Table of Contents<br />
Introduction<br />
Installation<br />
Main Screen<br />
Quick Start<br />
General Information<br />
Color Editor<br />
106<br />
Mini <strong>Magic</strong> <strong>Box</strong> - Design Card Converter<br />
Software Manual<br />
Quick Start Lesson 4<br />
This lesson will demonstrate how to use the Color Editor to adjust<br />
the colors in a design and how to Write the design to a <strong>Magic</strong><br />
Card.<br />
In this lesson we will use the “Fanciful Frogs by Stephanie Stouffer”<br />
Premium Design Card.*<br />
Notes:<br />
• Designs can also be Loaded from a <strong>Magic</strong> Card once designs have been written to that<br />
<strong>Magic</strong> Card.<br />
• All clicks of the mouse are LEFT clicks unless otherwise noted as right clicks.<br />
1. Launch the <strong>Magic</strong> <strong>Box</strong> program:<br />
Double click the <strong>Magic</strong> <strong>Box</strong> icon on the Desktop or<br />
• Click on Start<br />
• Go to Programs<br />
• Go to <strong>OESD</strong><br />
• Click <strong>Magic</strong> <strong>Box</strong><br />
*(Neither this card nor any of the designs on this card<br />
are included with the <strong>Magic</strong> <strong>Box</strong>. This card is also<br />
available as a CD-ROM. See a local <strong>OESD</strong> dealer or visit<br />
www.embroideryonline.com for more information. Projects for<br />
<strong>OESD</strong> designs can be downloaded from the website.)
Mini <strong>Magic</strong> <strong>Box</strong> - Design Card Converter<br />
Software Manual<br />
2. The <strong>Magic</strong> <strong>Box</strong> software will open. Click OK from the<br />
ABOUT window.<br />
3. The Main Screen of the <strong>Magic</strong> <strong>Box</strong> will appear.<br />
Quick Start<br />
107<br />
Table of Contents<br />
Introduction<br />
Installation<br />
Main Screen<br />
Quick Start<br />
General Information<br />
Color Editor
Quick Start<br />
Table of Contents<br />
Introduction<br />
Installation<br />
Main Screen<br />
Quick Start<br />
General Information<br />
Color Editor<br />
108<br />
Mini <strong>Magic</strong> <strong>Box</strong> - Design Card Converter<br />
Software Manual<br />
4. Insert the design card into the correct card slot on the <strong>Magic</strong><br />
<strong>Box</strong>. In this lesson, a Bernina artista compatible “Fanciful Frogs by<br />
Stephanie Stouffer” Design Card is being used. It fi ts into slot #2.<br />
5. Click the Load button from the right hand side of the<br />
Converter <strong>Box</strong> window.
Mini <strong>Magic</strong> <strong>Box</strong> - Design Card Converter<br />
Software Manual<br />
Quick Start<br />
6. The Read Design window will appear. Click in the Index<br />
Number box and type in the number of the desired design. (The<br />
design number is found on the embroidery card thread chart.)<br />
Click OK. Wait while the <strong>Magic</strong> <strong>Box</strong> reads the design card.<br />
7. The design will appear on the Main Screen in the fi rst empty<br />
space in the Design Area.<br />
109<br />
Table of Contents<br />
Introduction<br />
Installation<br />
Main Screen<br />
Quick Start<br />
General Information<br />
Color Editor
Quick Start<br />
Table of Contents<br />
Introduction<br />
Installation<br />
Main Screen<br />
Quick Start<br />
General Information<br />
Color Editor<br />
110<br />
Mini <strong>Magic</strong> <strong>Box</strong> - Design Card Converter<br />
Software Manual<br />
8. Remove the design card from the <strong>Magic</strong> <strong>Box</strong>. Open the<br />
Color Editor program:<br />
Double click the Color Editor icon on the Desktop or<br />
• Click Start<br />
• Go to Programs<br />
• Go to <strong>OESD</strong><br />
• Click Color Editor<br />
9. The License box appears. Click OK<br />
10. The Color Editor’s Main Screen opens.
Mini <strong>Magic</strong> <strong>Box</strong> - Design Card Converter<br />
Software Manual<br />
11. Return to the <strong>Magic</strong> <strong>Box</strong> Converter <strong>Box</strong> window by clicking<br />
on the converter box icon on the task bar at the bottom of the<br />
Windows screen. OR hold down the ALT key on the keyboard<br />
and press the TAB key at the same time to switch between the<br />
screens.<br />
*Holding ALT and pressing TAB alternates your windows on your desktop.<br />
12. Double click on the design from the Design Area in the<br />
Converter <strong>Box</strong> window and it will be sent to the Color Editor<br />
Quick Start<br />
111<br />
Table of Contents<br />
Introduction<br />
Installation<br />
Main Screen<br />
Quick Start<br />
General Information<br />
Color Editor
Quick Start<br />
Table of Contents<br />
Introduction<br />
Installation<br />
Main Screen<br />
Quick Start<br />
General Information<br />
Color Editor<br />
112<br />
Mini <strong>Magic</strong> <strong>Box</strong> - Design Card Converter<br />
Software Manual<br />
13. There are 14 colors in this design. They appear at the<br />
bottom of the screen. The thread color chart shows the following<br />
colors:<br />
14. Click the fi rst color box from the group of color blocks at the<br />
bottom of the screen. The color palette opens.
Mini <strong>Magic</strong> <strong>Box</strong> - Design Card Converter<br />
Software Manual<br />
Quick Start<br />
15. Click the Palette Type drop down arrow to choose palettes<br />
for different machines. In this lesson, the Babylock/Bernina Deco/<br />
Brother palette will be selected.<br />
16. Click the Light Brown color button and click OK.<br />
113<br />
Table of Contents<br />
Introduction<br />
Installation<br />
Main Screen<br />
Quick Start<br />
General Information<br />
Color Editor
Quick Start<br />
Table of Contents<br />
Introduction<br />
Installation<br />
Main Screen<br />
Quick Start<br />
General Information<br />
Color Editor<br />
17. Color 1 (eyes) of the frog changes to Brown.<br />
114<br />
Mini <strong>Magic</strong> <strong>Box</strong> - Design Card Converter<br />
Software Manual<br />
18. Click the second box and choose the color that is next in<br />
the Thread Color Chart. Continue this process until the frog is recolored<br />
to match the thread chart.
Mini <strong>Magic</strong> <strong>Box</strong> - Design Card Converter<br />
Software Manual<br />
Quick Start<br />
19. When fi nished, click the Save icon on the top of the tool bar.<br />
20. The design will appear on the <strong>Magic</strong> <strong>Box</strong> Main Screen with<br />
the colors that were selected in the Color Editor.<br />
21. Insert the correct <strong>Magic</strong> Card into the appropriate colorcoded<br />
and numerically identical card slot on the <strong>Magic</strong> <strong>Box</strong>. In<br />
this lesson, a #4 (JAN 8000, JAN 9000) <strong>Magic</strong> Card is being<br />
used. It fi ts into slot #4. (Is using the Mini <strong>Magic</strong> <strong>Box</strong>, choose a<br />
card appropriate for slots 1 or 2 instead).<br />
Warning: Some embroidery design card can be erased or overwritten. Always remove any design<br />
cards before writing to a <strong>Magic</strong> Card.<br />
115<br />
Table of Contents<br />
Introduction<br />
Installation<br />
Main Screen<br />
Quick Start<br />
General Information<br />
Color Editor
Quick Start<br />
Table of Contents<br />
Introduction<br />
Installation<br />
Main Screen<br />
Quick Start<br />
General Information<br />
Color Editor<br />
116<br />
Mini <strong>Magic</strong> <strong>Box</strong> - Design Card Converter<br />
Software Manual<br />
22. Click any of the “Unknown” buttons under the Write Card<br />
section of the Converter <strong>Box</strong> window.<br />
23. The Write Selection window will open. Click the drop down<br />
menu and choose the machine this card is being written for.<br />
Click OK to accept this machine.
Mini <strong>Magic</strong> <strong>Box</strong> - Design Card Converter<br />
Software Manual<br />
24. A Warning <strong>Box</strong> will appear, explaining that the card will be<br />
erased. Click Yes.<br />
25. The Writing Block dialog box will appear. After writing<br />
is complete, the “Success” dialog window will be displayed,<br />
indicating that the card is ready for use. Click OK.<br />
Quick Start<br />
The <strong>Magic</strong> Card is now ready for use in the embroidery machine.<br />
117<br />
Table of Contents<br />
Introduction<br />
Installation<br />
Main Screen<br />
Quick Start<br />
General Information<br />
Color Editor
Notes
Notes