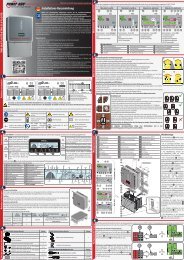
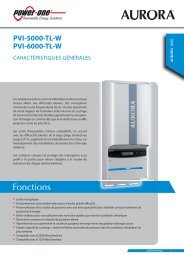
Single Phase String Inverters - Power-One
Single Phase String Inverters - Power-One
Single Phase String Inverters - Power-One

Create successful ePaper yourself
Turn your PDF publications into a flip-book with our unique Google optimized e-Paper software.
SINGLE PHASE STRING<br />
INVERTER WEBINAR<br />
AURORA® ACADEMY<br />
1
Training Objectives<br />
<strong>Power</strong>-<strong>One</strong> Residential Product Overview<br />
UNO/PVI Series<br />
• Key advantages and specs<br />
• Design<br />
• <strong>String</strong> Sizing<br />
• <strong>Single</strong>/Dual MPPTs<br />
• Isolated and Transformerless<br />
• Grounding methods<br />
• Installation and Configuration<br />
General Trouble Shooting<br />
2
Product Mapping<br />
<br />
UNO-7.6-TL<br />
UNO-8.6-TL<br />
<br />
Residential Segment<br />
<br />
<br />
Commercial Segment<br />
<br />
Utility Segment<br />
<br />
<br />
3
<strong>Single</strong> <strong>Phase</strong> <strong>String</strong> <strong>Inverters</strong> Overview<br />
From 2 kW to 6 kW<br />
Product Series Uno PVI-TL PVI-I PVI-TL<br />
Sizes 2, 2.5 kW 3, 3.6, 4.2 kW 3.8, 4.6 kW 5, 6 kW<br />
Isolation Isolated Transformer-less Isolated Transformer-less<br />
Integrated DC<br />
Disconnect<br />
NEMA 4X<br />
<br />
<br />
<br />
<br />
<br />
<br />
<br />
<br />
4
<strong>Single</strong> <strong>Phase</strong> <strong>String</strong> <strong>Inverters</strong> Overview<br />
Micro<br />
<strong>String</strong><br />
250W / 300W<br />
ISOLATED<br />
NEMA 4X<br />
2KW / 2.5KW<br />
ISOLATED<br />
NEMA 4X<br />
3KW / 3.6KW / 4.2kW (-<br />
S)<br />
Transformerless<br />
w/DC Switch<br />
NEMA 4X<br />
3.8KW / 4.6kW (-S)<br />
ISOLATED<br />
w/DC switch<br />
NEMA 4X<br />
5KW / 6kW (-S)<br />
Transformerless<br />
w/DC Switch<br />
NEMA 4X<br />
<strong>Single</strong> MPPT<br />
Dual MPPT<br />
5
UNO-2.0/2.5-I-OUTD-US<br />
<strong>Single</strong> <strong>Phase</strong><br />
HF - Transformer<br />
<strong>String</strong> <strong>Inverters</strong>
Higher Efficiency & Faster Installation<br />
High Efficiency<br />
• 97.5% CEC Efficiency; Operating near peak<br />
efficiency regardless of output power<br />
• MPPT Efficiency is >99% across entire input<br />
range & majority of power output conditions<br />
Faster Installation<br />
• Integrated DC Disconnect switch & wiring box<br />
• Lifting cover for easy access to connection area<br />
• Installer friendly wall connection system<br />
9
10<br />
Highly Reliable Design
Innovative Thermal Design<br />
Structure: the front cover has<br />
three layers. An external cover, a<br />
thermal insulator and a die-cast<br />
aluminum layer.<br />
The profile of the die-cast cover<br />
with the opening at the top and<br />
bottom creates a “chimney<br />
effect” and an “air cushion”<br />
which improves thermal<br />
insulation.<br />
If the inverter is exposed to<br />
direct sunlight, the thermal<br />
insulator and “air cushion”<br />
reduce heat transfer to the<br />
internal enclosure enabling more<br />
reliable energy harvest(*).<br />
(*) Real world tests demonstrate this<br />
solution reduces inverter internal<br />
temperature by 8°C when the cover is<br />
subjected to direct solar irradiation.<br />
11
UNO-2.0/2.5-I-OUTD<br />
Mechanical Characteristics: installer-friendly construction<br />
• Easy and quick installation thanks to the “T” mounting<br />
bracket.<br />
• The cover can be opened by lifting it up to access to<br />
the wiring compartment.<br />
12
UNO-2.0/2.5-I-OUTD<br />
Switch Box Can Be<br />
Mounted Separately<br />
13
UNO-2.0/2.5-I-OUTD<br />
Neg / Pos<br />
Ground Connection<br />
AC Grid<br />
Adjustment<br />
DC Terminal<br />
Block<br />
Com Board<br />
RS 485<br />
GFD Fuse<br />
AC Terminal<br />
Block<br />
DC Disconnect<br />
14
NEW Graphic Display<br />
Active communication<br />
ports<br />
Graphic<br />
representation of<br />
produced power<br />
Actual power<br />
“Classic” 2x16<br />
digits display:<br />
statistics, info,<br />
settings<br />
Daily energy and total<br />
energy harvesting<br />
The display functionalities and the<br />
communication capabilities are<br />
continuously available: the inverter<br />
is powered by the grid (stand-by<br />
consumption
UNO-2.0/2.5-I-OUTD : configuration 3/5<br />
Field configuration of inverter for PV array grounding<br />
NG<br />
Grounding of the Negative DC<br />
Terminal (Default)<br />
16
UNO-2.0/2.5-I-OUTD : configuration 4/5<br />
Field configuration GROUNDING of inverter OF DC INPUT for PV array grounding<br />
PG<br />
Grounding of the Positive DC<br />
Terminal<br />
17
UNO-2.0/2.5-I-OUTD : Installation<br />
Installation position<br />
Multiple installations<br />
18
PVI-X.X – Series<br />
<strong>Single</strong> <strong>Phase</strong><br />
I – High FrequencyTransformer<br />
and<br />
TL - Transformerless
Product Portfolio: Grid-Tied PV <strong>Inverters</strong><br />
Residential<br />
Light Commercial<br />
3KW / 3.6KW / 4.2kW<br />
Transformerless<br />
NEMA 4X<br />
3KW / 3.6KW / 4.2kW (-S)<br />
Transformerless<br />
w/DC Switch<br />
NEMA 4X<br />
3.8KW / 4.6kW (-S)<br />
ISOLATED<br />
w/DC switch<br />
NEMA 4X<br />
5KW / 6kW (-S)<br />
Transformerless<br />
w/DC Switch<br />
NEMA 4X<br />
10KW / 12kW (-S)<br />
ISOLATED<br />
TRUE 3-PHASE<br />
w/DC Switch<br />
NEMA 4X<br />
UL 1741/IEEE 1547/CSA22.2#107.1-01<br />
20
<strong>Single</strong>-<strong>Phase</strong> <strong>String</strong> <strong>Inverters</strong>: Key Advantages<br />
21<br />
Profitable<br />
• High CEC Efficiency<br />
• Fast Installation – Integrated DC Disconnect<br />
Dependable<br />
• Convection Cooling removes failure points<br />
• NEMA 4X Enclosure Rating<br />
Flexible<br />
• Dual independent MPPT<br />
• Wide DC input voltage window<br />
Connected<br />
• Equipped with Aurora Vision Monitoring<br />
• Wireless monitoring solution
Switch Box Design Change Summary<br />
• <strong>Power</strong>-<strong>One</strong> is introducing a Product Design Change to the<br />
following <strong>String</strong> <strong>Inverters</strong><br />
o<br />
o<br />
o<br />
o<br />
o<br />
PVI-3.0-OUTD-S-US<br />
PVI-3.6-OUTD-S-US<br />
PVI-4.2-OUTD-S-US<br />
PVI-5000-OUTD- US<br />
PVI-6000-OUTD- US<br />
• The DC disconnect switch will be moved to the front of the DC<br />
switch wiring box<br />
• Front facing Switch offers higher visibility and easier access to the<br />
DC disconnect switch<br />
• Wiring Terminals will be changed from the screw-type to pressure<br />
clamp type – MAINTENANCE FREE<br />
22
Switch Box Changes for PVI- X.X-TL-OUTD<br />
SWITCH BOX APPEARANCE<br />
OLD DESIGN<br />
NEW DESIGN<br />
Models Affected:<br />
PVI-3.0<br />
PVI-3.6<br />
PVI-4.2<br />
PVI-5.0<br />
PVI-6.0<br />
23
TL WIRING BOX CHANGES<br />
No P/N Change<br />
No Functional Change<br />
OLD DESIGN<br />
NEW DESIGN<br />
24
Selecting the Inverter<br />
• <strong>String</strong> Sizing & the <strong>Power</strong>-<strong>One</strong> <strong>Inverters</strong><br />
• <strong>String</strong>s do not need to be equal when connected to <strong>Power</strong>-<strong>One</strong> <strong>Inverters</strong>.<br />
• Two separate MPPT channels for different tilts and different number of<br />
modules in each string.<br />
• Double verify max amperages and voltages of string design<br />
25
Industry Leading MPP Tracking<br />
Dual MPPT Channels<br />
Dual independent MPPT channels for<br />
improved design flexibility<br />
Mpp1<br />
Mpp2<br />
Operates as a single channel for two<br />
independent channels<br />
Responsive & Accurate MPPT<br />
Shade resistant - Algorithm scans the<br />
whole input voltage range looking for the<br />
real MPP<br />
MPP seek time
27<br />
Array & <strong>String</strong> Sizing<br />
http://stringsizer.power-one.com/
Advantages of Dual MPPTs<br />
N<br />
MPPT #1 MPPT #2<br />
28<br />
EACH AURORA INVERTER COMES STANDARD WITH 2 SEPARATE MPPT CHANNELS<br />
FOR DIFFERENT ORIENTATIONS- IT'S LIKE HAVING 2 INVERTERS IN ONE!
Dual Independent MPPT: High Design Flexibility<br />
It is like 2 <strong>Inverters</strong> in 1!<br />
‒ Fully independent MPPs are managed separately for improved energy harvest<br />
Dual independent MPPT channels for improved design flexibility<br />
MPPT #1<br />
1 <strong>String</strong> of<br />
10 modules<br />
MPPT #2<br />
2 <strong>String</strong>s of<br />
10 modules<br />
29
<strong>Power</strong> <strong>One</strong> Distinctive Product Differentiators<br />
Rugged NEMA 4X Construction<br />
• The only true outdoor string inverter available on the market<br />
with waterproof NEMA 4X casing for unrestricted and maintenancefree<br />
use in hostile environments<br />
5 KW<br />
6 KW<br />
Extended Temperature Range<br />
• True convection cooling system and thermal design to assure full<br />
power operation at or above 50°C.<br />
• Low temperature operation down to -25°C<br />
(storage temp. -40°C)<br />
Reliability<br />
• Reduced number of electrolytic capacitors<br />
• Free convection cooling design<br />
• Watertight IP65/NEMA4X enclosure<br />
3.0 KW<br />
3.6 KW<br />
4.2 KW<br />
3.8 KW<br />
4.6 KW<br />
ISOLATED<br />
30
Aurora PV <strong>String</strong> <strong>Inverters</strong><br />
LCD Display and Key PAD<br />
• LED’s<br />
• LED1 <strong>Power</strong><br />
• LED2 ALARM<br />
• LED3 GFI<br />
• Display Key Operation:<br />
• UP / DOWN keys scroll through items.<br />
• ESC key return to the previous screen.<br />
• ENTER to open the selected submenu.<br />
31
Aurora Solar <strong>String</strong> <strong>Inverters</strong>…Isolated<br />
• Isolation<br />
• ISOLATED INVERTERS have an internal isolation transformers ,<br />
which provide galvanic isolation<br />
• TRANSFORMERLESS INVERTERS do not have (or need) galvanic<br />
isolation between input and output<br />
3.8KW / 4.6kW (-S)<br />
ISOLATED<br />
w/DC switch<br />
NEMA 4X<br />
10KW / 12kW (-S)<br />
ISOLATED<br />
TRUE 3-PHASE<br />
w/DC Switch<br />
NEMA 4X<br />
32
Aurora Solar <strong>String</strong> <strong>Inverters</strong>…Transformerless<br />
Transformerless (-TL) vs. Isolated: What are the differences<br />
(1) -Efficiency<br />
• TL <strong>Inverters</strong> are more efficient than Isolated <strong>Inverters</strong> because they<br />
do not have losses associated with an isolation transformer.<br />
3KW / 3.6KW / 4.2KW<br />
Transformerless<br />
NEMA 4X<br />
3KW / 3.6KW / 4.2KW (-<br />
S)<br />
Transformerless<br />
w/DC Switch<br />
NEMA 4X<br />
5KW / 6KW (-S)<br />
Transformerless<br />
w/DC Switch<br />
NEMA 4X<br />
33
Aurora Solar <strong>String</strong> <strong>Inverters</strong><br />
Transformerless vs. Isolated: What are the differences<br />
(2) Panel Choices<br />
• TL <strong>Inverters</strong><br />
• All solar modules must be provisioned with double insulated<br />
lead wire per UL4703, or “PV wire” per NEC<br />
• Cannot support solar modules requiring positive grounding ,<br />
e.g., Sunpower, and Thin Film Technology<br />
• Isolated <strong>Inverters</strong> support all panel types<br />
(3) Weight<br />
• Transformerless <strong>Inverters</strong> – contain no heavy transformer<br />
• <strong>Power</strong>-<strong>One</strong> Isolated inverters utilize light-weight, HF (18kHz)<br />
transformers<br />
• 60 Hz TF weighs roughly 5 times more than a HF 18 kHz xfmr.<br />
34
Aurora Solar <strong>String</strong> Isolated <strong>Inverters</strong><br />
Example: HF vs. LF weight and CEC efficiency<br />
(HF) <strong>Power</strong>-<strong>One</strong> 4.6kW =<br />
61 lbs, CEC 96% @ 208 Vac / 96.5% @ 240V/277 Vac<br />
VS.<br />
(LF)PVP 4.6kW = 100 lbs heavier<br />
162lbs, CEC 95.5% @ 208 Vac<br />
35
Aurora Solar <strong>String</strong> <strong>Inverters</strong>…Transformerless<br />
• Wiring methods –<br />
• Separation of NEG (-) conductor from Grounding conductor<br />
• (No Grounded System Conductor)<br />
• NEC Article 200 (Grounded Conductor Identification)<br />
• NEC Article 250 (Grounding Conductor Identification)<br />
• Lightning Protection –<br />
• MOV/SOV – UL Listed Recognized<br />
• Gas Actuated - Inert Gas =Poor Conductor, voltage surges<br />
ionize the gas, making it a very effective conductor. It passes<br />
on current to the ground line until the voltage reaches normal<br />
levels, and then becomes inert again.<br />
36
Grounding Methods<br />
DC -<br />
DC +<br />
Isolated<br />
Inverter<br />
AC<br />
SES<br />
Grid<br />
In an transformer based inverter, there is a bond<br />
between ground and the grounding conductor. In this<br />
example the grounding conductor is the negative pole.<br />
DC +<br />
DC -<br />
AC<br />
SES<br />
Grid<br />
TL<br />
Inverter<br />
37
38<br />
Mounting The <strong>Inverters</strong>
Aurora PVI-X.X - 1Ø <strong>String</strong> <strong>Inverters</strong><br />
Do not mount the AURORA Inverter where exposed to direct sun radiation<br />
or any other heat source. When the ambient temperature rises above<br />
113°F/ 45°C the inverter may self-derate the output power. For full power<br />
of AURORA Inverter (no derating), be sure the airflow through the heat<br />
sink is clear. Blockages will result in less than expected power output.
Mounting The <strong>Inverters</strong><br />
The Choice of the Place of Installation – Outdoor Versions<br />
40<br />
•The IP65 protection level allows outdoor installation:<br />
•Direct solar radiation protection is recommended! (Mount on North side of exterior)<br />
•The natural convection cooling mechanism requires good air circulation around<br />
the unit<br />
Pay attention to passing clearance!<br />
Pay attention to the mutual position of the inverters!
41<br />
Mounting The <strong>Inverters</strong>
Aurora PV <strong>String</strong> <strong>Inverters</strong><br />
• Film instead of electrolytic<br />
capacitors on DC power bus: usable<br />
life extended to 30 years.<br />
•High immunity to input surges:<br />
robust structure and immune to<br />
transient surges produced by indirect<br />
discharges or bad contacts on the<br />
photovoltaic generator.<br />
•Input voltage up to 1000Vdc to<br />
optimize the configuration<br />
All <strong>Power</strong>-<strong>One</strong> <strong>Inverters</strong> Utilize Film<br />
Capacitors - ELECTROLYTIC-FREE!<br />
42<br />
42
Aurora PV <strong>String</strong> <strong>Inverters</strong><br />
Dual MPPT DC Wiring Method (older versions)<br />
(Connection shown for product versions without integral DC switch)<br />
• Remove four cover screws<br />
• Connect DC Cable for Individual MPPT tracking Note:<br />
• Select switch S1 to IND (independent) setting The Dual MPPT connection<br />
shown is not available on<br />
Isolated <strong>Inverters</strong> models when<br />
connected to a positively (+)<br />
grounded array.<br />
43
Aurora PV <strong>String</strong> <strong>Inverters</strong><br />
Dual MPPT DC Wiring Method (NEWER versions)<br />
(Connection shown for product versions without integral DC switch)<br />
• Connect DC Cable for Individual MPPT tracking<br />
• Select switch S1 to IND (independent) setting<br />
S1 switch is located<br />
in the upper<br />
enclosure of the<br />
inverter<br />
44
Aurora PV <strong>String</strong> <strong>Inverters</strong><br />
<strong>Single</strong> MPPT DC Wiring Method<br />
• Remove four cover screws<br />
• Connect DC Cable for Parallel MPPT tracking<br />
• Select switch S1 to PAR selection<br />
• Jumpers are used in specified applications when strings are combined on<br />
the roof<br />
45
Aurora PV <strong>String</strong> <strong>Inverters</strong><br />
Dual MPPT DC Wiring Method (NEWER versions)<br />
(Connection shown for product versions without integral DC switch)<br />
• Connect DC Cable for Individual MPPT tracking<br />
• Select switch S1 to IND (independent) setting<br />
S1 switch is located<br />
in the upper<br />
enclosure of the<br />
inverter<br />
46
Aurora PV <strong>String</strong> <strong>Inverters</strong><br />
Complete Inverter Wiring Cabling<br />
(Shown for product versions without integral DC switch)<br />
INPUT CABLE<br />
OUTPUT CABLE<br />
ALARM CABLE<br />
GROUND CABLE<br />
RS485 CABLE<br />
47
Aurora PV <strong>String</strong> <strong>Inverters</strong><br />
Complete Inverter Wiring Cabling with (older) Switch Box<br />
Switch box<br />
Input Terminals<br />
Note: 4- terminal Input<br />
block is not rated for<br />
multiple wires – only<br />
one wire per terminal<br />
is allowed by NEC<br />
Switch box<br />
Grid Terminals<br />
48
Aurora PV ISOLATED <strong>String</strong> <strong>Inverters</strong><br />
3.8kW & 4.6kW Grid Voltage Configuration<br />
Left selector Right selector Grid standard Display language<br />
0 0 Default North America<br />
0 2 UL - 208 <strong>Single</strong> <strong>Phase</strong> North America<br />
0 3 UL - 240 Split <strong>Phase</strong> North America<br />
0 4 UL - 277 <strong>Single</strong> <strong>Phase</strong> North America<br />
You have 24 hrs to change this setting!<br />
49
Aurora PV <strong>String</strong> <strong>Inverters</strong><br />
Output Functions: Grid Connections II: <strong>Single</strong> <strong>Phase</strong> Output<br />
Various GRID connections are easily programmed via the front panel<br />
KEY PAD or a laptop and with supplied software.<br />
Available configurations are shown below:<br />
2<br />
L1<br />
1<br />
Aurora<br />
240V Split Ø<br />
L1<br />
2<br />
1<br />
L3<br />
1<br />
2<br />
2<br />
L2<br />
208 or 240V<br />
3Ø-Δ, 3W<br />
1<br />
3<br />
2<br />
L1 N L2<br />
Factory Default Setting<br />
2<br />
L3<br />
1<br />
1<br />
N<br />
1<br />
2<br />
L2<br />
480/277V<br />
3Ø-Y/4W<br />
50
Changing the V Grid Setting<br />
1<br />
2<br />
3<br />
4<br />
5<br />
6<br />
51
Local Monitoring- PVI-USB-RS485-232<br />
• Lowest cost monitoring - ~$100<br />
• Connects DIRECTLY to homeowner’s<br />
laptop or desktop via adapter<br />
• Free Aurora Communicator software<br />
• Rich data set:<br />
• Voltage/current for each MPPT block<br />
• Lifetime, Today, Last 7 days, Last 30<br />
Days, Last 365 Days<br />
• Grid voltage, current, frequency<br />
• <strong>Power</strong> transferred to the grid<br />
• Serial Number/Week Code<br />
• Firmware revision code
Local Monitoring- PVI DESKTOP<br />
• 3½” color touch screen display , table-top or wall<br />
mount<br />
• Inverter setup, diagnostics<br />
• Daily, Weekly, Monthly and Yearly energy<br />
production<br />
• 300 ft indoor, 900ft open field operating range<br />
• Communication with up to 6 string inverters<br />
• Can be wired or wireless Bluetooth<br />
53
Remote Residential Monitoring<br />
Aurora Vision<br />
30-days of local data buffering<br />
10 years monitoring included<br />
Applications requiring revenuegrade<br />
meter or weather stations<br />
need to use commercial kits<br />
<strong>Power</strong> Supply<br />
Eth 0<br />
Internet<br />
CAT5 Belden #3106A or equivalent<br />
Access to all recorded<br />
data is via web-based<br />
interface with enhanced<br />
productivity tools<br />
Inverter<br />
monitoring –<br />
up to 5 inverter<br />
54
Example<br />
Usage<br />
Define Daisy Chain<br />
+<br />
-<br />
+<br />
-<br />
+<br />
-<br />
+<br />
-<br />
+<br />
-<br />
+<br />
-<br />
+ -<br />
+ -<br />
+ -<br />
Series Parallel Daisy Chain<br />
Modules in a<br />
<strong>String</strong>s in a<br />
Data<br />
string<br />
Combiner Communication<br />
55
Aurora PV Inverter Monitoring Wire<br />
RS-485 data connection<br />
The cable used must be shielded with<br />
twisted pair (MIN. #22AWG)<br />
impedance Z0=120Ohm.<br />
Shield must be continuous and<br />
terminated ONLY at ONE end point<br />
Signal Symbol Pair<br />
POSITIVE DATA +T/R A<br />
NEGATIVE DATA -T/R A<br />
GROUND<br />
REFERENCE<br />
RTN<br />
B<br />
• Connect RS-485 in a Daisy Chain configuration (“in-out”)<br />
• Set a different RS-485 address on each inverter for every<br />
inverter of the chain in the inverter configuration menu.<br />
• NO INVERTERS SHOULD HAVE “Auto” AS AN ADDRESS.<br />
• The communication length should be no longer than 1000m<br />
56
2<br />
Data Communications; Addressing the inverter<br />
4 5<br />
6 7<br />
1<br />
3<br />
When multiple inverters<br />
are connected in a<br />
daisy chain, it is<br />
necessary to assign a<br />
different RS-485<br />
address to each unit.<br />
Selecting the address<br />
menu enables the<br />
modbus addresses to<br />
be set to an appropriate<br />
value. Address values<br />
are assigned manually<br />
using any value in the<br />
range [2 to 64]. Press<br />
the UP and DOWN keys<br />
to scroll numbers.<br />
NOTE: Maximum 32<br />
inverters in a line.<br />
8 Etc.<br />
57
•Activate the termination resistor in the<br />
LAST inverter on the communication line by<br />
switching the dedicated dip-switch inside<br />
the inverter<br />
• Depending on the type of computer<br />
used, the cable line adaptor can be<br />
RS485-RS232 or RS485 to USB.<br />
58
Easy Installation<br />
Connect to internet<br />
(CAT5)<br />
Wire RS485 to inverter<br />
Belden #3106A or equivalent<br />
Connect and Plug into AC outlet
Easy Installation<br />
Connect to internet<br />
(CAT5)<br />
Connect to laptop<br />
for configuration<br />
(CAT5)<br />
Belden #3106A or equivalent<br />
Secondary RS485 is default set to<br />
Aurora Protocol<br />
Wire RS485 to inverter<br />
Connect and Plug into AC outlet
Easy Installation (example)<br />
Secondary RS485 is default set to Aurora Protocol
Local Logger Configuration and set-up<br />
Connect to internet<br />
(CAT5)<br />
Connect to laptop<br />
for configuration<br />
(CAT5)<br />
Wire RS485 to inverter<br />
Connect and Plug into AC outlet
Commissioning Process – Local Interface<br />
Put the following Aurora Logger Setup Tool into your internet browser bar: 172.17.17.1<br />
• Add device(s) and set Modbus address<br />
• Check device data<br />
• Confirm communication with Aurora<br />
Vision Server<br />
• Setup the meter, if included<br />
• Modbus address, CT Voltage, CT size, …<br />
• Setup Aurora Vision web interface<br />
• Plant properties, alarms, users, …
Possible Issues on Connection and Commissioning Logger<br />
Red Circle next to:<br />
• Credentials: call <strong>Power</strong>-<strong>One</strong> Tech Support to reset logger credentials<br />
• Server Login or Data transfer: Ensure the local internet security allows for data<br />
transfer, firewall protections, contact network administrator. Also consider using<br />
a static IP address<br />
64
Setting a Static IP Address:<br />
Most sites will not require<br />
this, usually more secured<br />
locations.<br />
Obtain Static IP address information for the site.<br />
• Select the Network tab.<br />
• Set the Type (Network Connection Type) field to<br />
Static.<br />
• The page will allow you to type in the following<br />
information:<br />
IP address<br />
Subnet Mask<br />
Gateway<br />
DNS<br />
• Press Update at the bottom of the page.<br />
65
Commission Data Logger<br />
Aurora Logger Setup Tool at 172.17.17.1<br />
If it does not detect inverters:<br />
• Wait a few minutes, “refresh”<br />
browser<br />
• Check individual inverter<br />
addresses inverter (ensure<br />
they are not the same)<br />
• Check termination resistor<br />
position<br />
• Check wiring connections<br />
Automatically detects<br />
P1 <strong>Inverters</strong>
Add Modbus RTU Devices<br />
Adding devices such as weather stations or non-P1 inverters<br />
• Select SunSpec Alliance Modbus Interchange as the Device Type from<br />
the pull-down menu.<br />
• Set the Slave Id field to the Modbus address of the weather station. Note<br />
that for the VSN-ENVIRO-ENTRY and VSN-ENVIRO-CMML weather<br />
station models the default Modbus address is 60.<br />
• Enter a Description to help you identify the device if you need to change<br />
configurations later.
Logger Registration to Aurora Vision<br />
IF Plant is already set-up on Aurora Vision website, then simply click on the<br />
Logger Registration tab to directly go to<br />
68
Aurora Vision Web Portal Overview<br />
1<br />
2<br />
Site 1<br />
1<br />
Login brings user to Portfolio page<br />
Summarizes aggregate plant information<br />
3<br />
2<br />
3<br />
4<br />
Assets<br />
Navigate and analyze devices and performance details<br />
Events<br />
Navigate and manage events for individual sites<br />
Reports<br />
Generates standard or custom reports for billing, operations and financial tracking<br />
4
Common Issues<br />
Locked Display<br />
A padlock symbol indicates that the display has<br />
been locked from scrolling. To enable scrolling,<br />
press the “enter” button. When scrolling is enabled,<br />
a double arrows symbol will appear.<br />
70
W003- Grid Fail or Grid out of range<br />
TL Models<br />
ISOLATED Models<br />
• Verify wiring<br />
• Use menu to select correct grid parameters<br />
Left selector Right<br />
selector<br />
Grid standard Display<br />
language<br />
0 0 Defa<br />
ult<br />
North<br />
America<br />
0 2 UL - 208 <strong>Single</strong><br />
<strong>Phase</strong><br />
North<br />
America<br />
0 3 UL - 240 Split <strong>Phase</strong> North<br />
America<br />
0 4 UL - 277 <strong>Single</strong><br />
<strong>Phase</strong><br />
North<br />
America<br />
• Completely power down unit, restart<br />
71
E013- Wrong Mode<br />
Dual MPPT DC Wiring Method<br />
• (Connection shown for product versions without integral DC switch)<br />
• <strong>Power</strong> down the inverter completely<br />
• Move switch back and forth several times<br />
• Select switch S1 to IND (independent) setting<br />
• Verify NO Jumpers are installed<br />
72
E013- Wrong Mode<br />
<strong>Single</strong> MPPT DC Wiring Method<br />
• <strong>Power</strong> down the inverter completely<br />
• Verify switch S1 to PAR-parallel selection<br />
• Move switch back and forth several times<br />
• Jumpers are used in specified applications when strings are combined on<br />
the roof<br />
73
Ground Faults<br />
Using multi-meter:<br />
• Verify voltages to ground.<br />
• Ensure wires are removed from the<br />
inverter and checked in “open air”<br />
*take all necessary precautions as<br />
there will be voltages present on<br />
these wires<br />
• System w/ no leakage should start with<br />
indication of Voc/2, then voltage should<br />
bleed to/near 0.<br />
74
Indications of a ground fault<br />
If voltages do not drop to zero and<br />
stabilize at a certain value, then there<br />
is indication of a ground fault.<br />
These values can be used to<br />
determine approximate location.<br />
75
RISO Low<br />
Insulation Resistance can be affected by environmental conditions (wet, damp).<br />
Measurements should be taken immediately after the fault.<br />
76
<strong>Single</strong> <strong>Phase</strong> <strong>String</strong> <strong>Inverters</strong>: Summary<br />
Uno<br />
UNO-2.0-I<br />
UNO-2.5-I<br />
PVI<br />
PVI-3.8-I<br />
PVI-4.6-I<br />
PVI-3.0-TL<br />
PVI-3.6-TL<br />
PVI-4.2-TL<br />
PVI-5000-TL<br />
PVI-6000-TL<br />
Profitable<br />
• High CEC Efficiency<br />
• Fast & Precise MPP Tracking<br />
Algorithm<br />
Reliable<br />
• Natural Convection Cooling<br />
• NEMA 4X Enclosure Rating<br />
Flexible<br />
• Dual independent MPPT<br />
• Wide DC input voltage window<br />
Connected<br />
• Wireless monitoring solution<br />
77
Thank You!<br />
Technical Training<br />
<strong>Power</strong> 78 <strong>One</strong> of North America<br />
training@power-one.com