Owner Manual - AVR 158 (English EU) - Harman Kardon
Owner Manual - AVR 158 (English EU) - Harman Kardon
Owner Manual - AVR 158 (English EU) - Harman Kardon

You also want an ePaper? Increase the reach of your titles
YUMPU automatically turns print PDFs into web optimized ePapers that Google loves.
<strong>AVR</strong> <strong>158</strong> Set Up the <strong>AVR</strong>, continued<br />
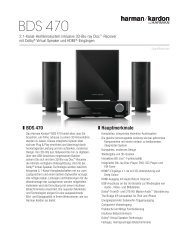
After you return to the Speaker Setup menu, navigate to the distance line and press the<br />
ok button to display the distance menu.<br />
18<br />
FL : 10FT<br />
CEN : 10FT<br />
FR : 10FT<br />
SR : 10FT<br />
* DISTANCE *<br />
SL : 10FT<br />
SUB : 10FT<br />
DELAY RESET : OFF<br />
UNIT : FEET<br />
A/V SYNC DELAY : 0mS<br />
BACK TO SPEAKER SETUP<br />
enter the distance from each speaker to the listening position that you measured in Step<br />
two and recorded in table A4 in the Appendix (see page 27). Select a speaker, then use<br />
the left/right buttons to change the measurement. You can enter distances between 0<br />
and 30 feet (9.1m). the default distance for all speakers is 10 feet (3m).<br />
the default unit of measurement is feet. to change the unit to metres, scroll down to the<br />
unit line and press the left/right buttons.<br />
when you have finished entering the settings, select back to Speaker Setup.<br />
Step Four – Setting Channel Output Levels <strong>Manual</strong>ly<br />
For a conventional stereo AVr, a simple balance control adjusts the stereo imaging by<br />
varying the relative loudness of the left and right channels. In a home theatre system<br />
with up to seven main channels plus a subwoofer, achieving proper imaging becomes<br />
both more critical and more complex. the goal is to ensure that each channel is heard<br />
at the listening position with equal loudness (when signals of equal loudness are played<br />
through them).<br />
After you return to the Speaker Setup menu, navigate to the level Adjust line and press<br />
the ok button to display the level Adjust menu.<br />
* LEVEL ADJUST*<br />
FL : 0dB<br />
CEN: 0dB<br />
FR : 0dB<br />
SR : 0dB<br />
SL : 0dB<br />
SUB: 0dB<br />
CHANNEL RESET: OFF<br />
TEST TONE SEQ: MANUAL<br />
TEST TONE : OFF<br />
BACK TO SPEAKER SETUP<br />
All of the system’s speakers will appear with their current level settings. You can adjust<br />
each speaker’s level between –10db and +10db in 1db increments.<br />
while making adjustments, you can measure the channel levels in one of these ways:<br />
• preferably, use a handheld Spl metre set to the c-weighting, slow scale. Adjust each<br />
speaker so that the metre reads 75db when the AVr’s built-in test noise is playing.<br />
• by ear. Adjust the levels so that the test tone sounds equally loud to you when it plays<br />
through each speaker.<br />
to set your levels using the AVr’s internal test tone, select the menu’s test tone Seq<br />
line and use the left/right buttons to select between Auto and <strong>Manual</strong>. After selecting<br />
Auto or <strong>Manual</strong>, move the cursor to the test tone line and use the left/right buttons to<br />
change the setting to on.<br />
Auto: the test tone will automatically circulate to all speakers, as indicated by the<br />
highlight bar. use the left/right buttons to adjust the level for any speaker when the<br />
test tone is paused there. use the up/down buttons to move the cursor to another line,<br />
and the test tone will follow the cursor. to stop the test tone, use the up/down buttons<br />
to move the cursor out of the screen’s speaker-listings area.<br />
<strong>Manual</strong>: the test tone will stay on the current speaker until you use the up/down<br />
buttons to move it to another speaker. use the left/right buttons to adjust the level for<br />
the speaker through which the test tone is playing.<br />
If you are using an external source to set your output levels, set test tone to off, use the<br />
up/down buttons to navigate to each speaker, and use the left/right buttons to adjust<br />
the speaker’s level while the source plays. NOTE: If you are using a handheld Spl metre<br />
with external source material, such as a test disc or an audio selection, play it and<br />
adjust the AVr’s master volume control until the metre measures 75db. then adjust the<br />
individual speaker levels.<br />
Channel Reset: to reset all channel levels to their factory defaults of 0db, select this<br />
line and press the left/right buttons.<br />
when you have finished adjusting the speaker levels, record the settings in table A6 in<br />
the Appendix. then select the back to Speaker Setup option in the oSd.<br />
Notes on Setting Speaker Volumes in Home Theatre Systems:<br />
while setting your system’s individual speaker volume levels is ultimately up to your<br />
personal taste, here are some ideas you may find helpful:<br />
• For films and video-music programs, your overall goal should be to create an<br />
enveloping, realistic sound field that draws you into the film or music program without<br />
drawing your attention away from the action on the screen.<br />
• For multichannel music recordings, some music producers will create a sound field<br />
that places the musicians all around you; others will create a sound field that places<br />
the musicians in front of you, with more subtle ambience in the surround speakers (as<br />
you would experience in a concert hall).<br />
• In most 5.1-channel film soundtracks, the surround speakers are not intended to be<br />
as loud or as active as the front speakers. Adjusting the surround speakers so they are<br />
always as loud as the front speakers could make dialogue difficult to understand and<br />
will make some sound effects sound unrealistically loud.<br />
Notes on Setting Subwoofer Volume:<br />
• Sometimes the ideal subwoofer volume setting for music is too loud for films, while<br />
the ideal setting for films is too quiet for music. when setting the subwoofer volume,<br />
listen to both music and films with strong bass content and find a “middle ground”<br />
volume level that works for both.<br />
• If your subwoofer always seems too loud or too quiet, you may want to place it in a<br />
different location. placing the subwoofer in a corner will always tend to increase its<br />
bass output, while placing it away from any walls or corners will always tend to lessen<br />
its bass output.<br />
Assign the Digital Audio Connectors<br />
1. review the input connections you listed on the Input connections and Source buttons<br />
table, on page 13. note which source devices you connected to the digital audio<br />
connectors. (If you did not connect any source devices to the digital audio connectors,<br />
you can skip this section.)<br />
2. turn on your tV and select the tV input where you connected the AVr in connect Your<br />
tV or Video display, on page 13.<br />
3. press the remote control’s oSd button. the AVr’s on-screen display (oSd) Master<br />
Menu will appear on the tV.<br />
** MASTER MENU **<br />
INPUT SETUP<br />
SURROUND SELECT<br />
SPEAKER SETUP<br />
SYSTEM SETUP<br />
4. use the remote’s arrow and ok buttons to select “Input Setup.” the Input Setup menu<br />
will appear.<br />
* INPUT SETUP *<br />
SOURCE : DVD<br />
TITLE:<br />
AUDIO IN : ANALOG<br />
AUTO POLL : OFF<br />
BXR : OFF<br />
TONE : IN<br />
BASS : 0<br />
TREBLE : 0<br />
BACK TO MASTER MENU