Owner Manual - AVR 158 (English EU) - Harman Kardon
Owner Manual - AVR 158 (English EU) - Harman Kardon
Owner Manual - AVR 158 (English EU) - Harman Kardon

Create successful ePaper yourself
Turn your PDF publications into a flip-book with our unique Google optimized e-Paper software.
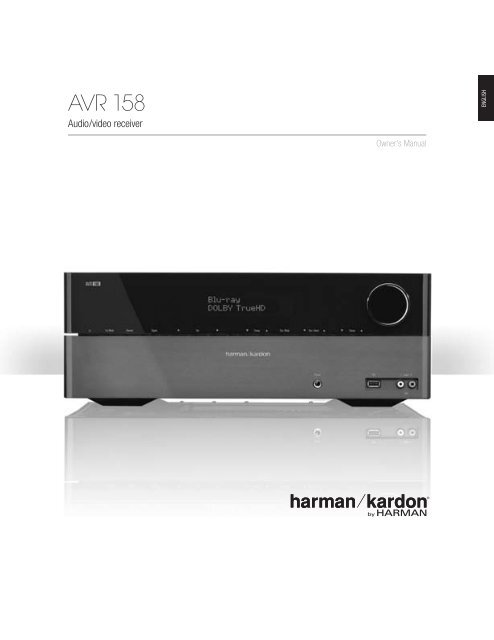
<strong>AVR</strong> <strong>158</strong><br />
Audio/video receiver<br />
<strong>Owner</strong>’s <strong>Manual</strong><br />
ENGLISH
<strong>AVR</strong> <strong>158</strong> Table of Contents<br />
IntroductIon 3<br />
SupplIed AcceSSorIeS 3<br />
IMportAnt SAFetY InForMAtIon 3<br />
plAce the AVr 3<br />
Front-pAnel controlS 4<br />
reAr-pAnel connectorS 6<br />
SYSteM reMote control FunctIonS 8<br />
IntroductIon to hoMe theAtre 10<br />
2<br />
tYpIcAl hoMe theAtre SYSteM 10<br />
MultIchAnnel AudIo 10<br />
Surround ModeS 10<br />
plAce Your SpeAkerS 10<br />
plAcIng the leFt, centre And rIght SpeAkerS 10<br />
plAcIng the Surround SpeAkerS 10<br />
plAcIng the SubwooFer 10<br />
tYpeS oF hoMe theAtre SYSteM connectIonS 11<br />
SpeAker connectIonS 11<br />
SubwooFer connectIonS 11<br />
Source deVIce connectIonS 11<br />
VIdeo connectIonS 12<br />
rAdIo connectIonS 12<br />
uSb port 12<br />
MAkIng connectIonS 13<br />
connect Your SpeAkerS 13<br />
connect Your SubwooFer 13<br />
connect Your tV or VIdeo dISplAY 13<br />
connect Your Source deVIceS 13<br />
connect the rAdIo AerIAlS 15<br />
connect the 12V trIgger output 15<br />
connect to Ac power 15<br />
Set up the reMote control 15<br />
InStAll the bAtterIeS In the reMote control 15<br />
progrAM the reMote to control Your Source<br />
deVIceS And tV 16<br />
Set up the AVr 16<br />
turn on the AVr 16<br />
uSIng the on-Screen Menu SYSteM 16<br />
conFIgure the AVr For Your SpeAkerS 17<br />
ASSIgn the dIgItAl AudIo connectorS 18<br />
AddItIonAl Input Setup Menu IteMS 19<br />
operAtIng Your AVr 19<br />
controllIng the VoluMe 19<br />
MutIng the Sound 19<br />
lIStenIng through heAdphoneS 19<br />
SelectIng A Source 19<br />
VIdeo troubleShootIng tIpS 19<br />
lIStenIng to FM And AM rAdIo 20<br />
SelectIng A Surround Mode 20<br />
AdVAnced FunctIonS 20<br />
AudIo proceSSIng And Surround Sound 20<br />
SYSteM Setup 22<br />
AdVAnced reMote control progrAMMIng 22<br />
recordIng 22<br />
Sleep tIMer 23<br />
reSettIng the reMote 23<br />
proceSSor reSet 23<br />
MeMorY 23<br />
troubleShootIng 24<br />
SpecIFIcAtIonS 25<br />
AppendIx 26
<strong>AVR</strong> <strong>158</strong><br />
Introduction<br />
Thank you for choosing this <strong>Harman</strong> <strong>Kardon</strong> product!<br />
For more than fifty years, the harman kardon mission has been to share a passion for music<br />
and entertainment, using leading-edge technology to achieve premium performance.<br />
Sidney harman and bernard kardon invented the receiver, a single component designed<br />
to simplify home entertainment without compromising performance. over the years,<br />
harman kardon products have become easier to use while offering more features and<br />
sounding better than ever.<br />
the AVr <strong>158</strong> 5.1-channel digital audio/video receiver (AVr) continues this tradition with<br />
some of the most advanced audio and video processing capabilities yet and a wealth of<br />
listening and viewing options.<br />
to obtain the maximum enjoyment from your new AVr, please read this manual and<br />
refer back to it as you become more familiar with its features and their operation.<br />
If you have any questions about this product, its installation or its operation, please<br />
contact your harman kardon retailer or custom installer, or visit our web site at<br />
www.harmankardon.com.<br />
Supplied Accessories<br />
the following accessory items are supplied with your AVr. If any of these items are<br />
missing, please contact your harman kardon dealer, or harman kardon customer service<br />
at www.harmankardon.com.<br />
• System remote control<br />
• AM loop aerial<br />
• FM wire aerial<br />
• three AAA batteries<br />
• Ac power cord<br />
Introduction, Supplied Accessories,<br />
Important Safety Information and Place the <strong>AVR</strong><br />
IMPORTANT SAFETY INFORMATION<br />
Verify Line Voltage Before Use<br />
the AVr <strong>158</strong> has been designed for use with 220 – 240-volt alternating current (Ac).<br />
connection to a line voltage other than that for which your AVr is intended can create<br />
a safety and fire hazard, and may damage the unit. If you have any questions about<br />
the voltage requirements for your specific model or about the line voltage in your area,<br />
contact your selling dealer before plugging the unit into a wall outlet.<br />
Do Not Use Extension Cords<br />
to avoid safety hazards, use only the power cord supplied with your unit. we do not<br />
recommend that extension cords be used with this product. As with all electrical devices,<br />
do not run power cords under rugs or carpets, or place heavy objects on them. damaged<br />
power cords should be replaced immediately by an authorised service centre with a cord<br />
meeting factory specifications.<br />
Handle the AC Power Cord Gently<br />
when disconnecting the power cord from an Ac outlet, always pull the plug; never<br />
pull the cord. If you do not intend to use your AVr for any considerable length of time,<br />
disconnect the plug from the Ac outlet.<br />
Do Not Open the Cabinet<br />
there are no user-serviceable components inside this product. opening the cabinet may<br />
present a shock hazard, and any modification to the product will void your warranty. If<br />
water or any metal object such as a paper clip, wire or staple accidentally falls inside<br />
the unit, disconnect it from the Ac power source immediately, and consult an authorised<br />
service centre.<br />
Place the <strong>AVR</strong><br />
• place the AVr on a firm and level surface. be certain that the surface and any mounting<br />
hardware can support the AVr’s weight.<br />
• provide proper space above and below the AVr for ventilation. If you install the AVr in<br />
a cabinet or other enclosed area, provide cooling air within the cabinet. under some<br />
circumstances, a fan may be required.<br />
• do not obstruct the ventilation slots on the top of the AVr or place objects directly<br />
over them.<br />
• do not place the AVr directly on a carpeted surface.<br />
• do not place the AVr in moist or humid locations, in extremely hot or cold locations, in<br />
areas near heaters or heat registers, or in direct sunlight.<br />
3<br />
ENGLISH
<strong>AVR</strong> <strong>158</strong> Front-Panel Controls<br />
Front-Panel Controls<br />
power<br />
Indicator<br />
4<br />
power<br />
button<br />
tuning Mode<br />
button<br />
Ir<br />
Sensor<br />
channel<br />
level control<br />
button<br />
digital Input<br />
button<br />
Set<br />
button<br />
left/right<br />
buttons<br />
Message<br />
display<br />
up/down buttons/<br />
tuning buttons<br />
Surround-Mode<br />
category button<br />
Surround Mode<br />
Select buttons<br />
headphone Jack<br />
Source Select<br />
buttons<br />
uSb<br />
port<br />
Volume<br />
knob<br />
Aux Analogue<br />
Audio Input<br />
connector
<strong>AVR</strong> <strong>158</strong><br />
Front-Panel Controls, continued<br />
Power indicator: this led has three possible modes:<br />
• led is off: Indicates that the AVr is unplugged or the rear-panel Main power switch<br />
is off.<br />
• led glows amber: Indicates that the AVr is in the Standby mode.<br />
• led glows white: Indicates that the AVr is turned on.<br />
IMPORTANT NOTE: If the protect message ever appears on the AVr’s front-panel<br />
Message display, turn off the AVr and unplug it from the Ac outlet. check all speaker<br />
wires for a possible short circuit (the “+” and “–” conductors touching each other<br />
or both touching the same piece of metal). If a short circuit is not found, bring the<br />
unit to an authorised harman kardon service centre for inspection and repair before<br />
using it again.<br />
IR sensor: this sensor receives infrared (Ir) commands from the remote control. It is<br />
important to ensure that the sensor is not blocked.<br />
Set button: press this button to select the currently highlighted menu item.<br />
Message display: Various messages appear in this two-line display in response to<br />
commands and changes in the incoming signal. In normal operation, the current source<br />
name appears on the upper line, while the surround mode is displayed on the lower line.<br />
when the on-screen display menu system (oSd) is in use, the current menu settings<br />
appear.<br />
Surround-Mode Select buttons: After you have selected the desired surround-mode<br />
category, press these buttons to select a specific mode within the category, such as to<br />
change from dolby ® pro logic ® II Movie mode to logic 7 ® Movie mode. Surround-mode<br />
availability depends on the nature of the source input signal, i.e., digital versus analogue,<br />
and the number of channels encoded within the signal.<br />
Volume knob: turn this knob to raise or lower the volume.<br />
Front-Panel Controls, continued<br />
Power button: press this button to turn the AVr on or to place it in the Standby mode.<br />
Tuning Mode button: this button toggles between manual (one frequency step at a<br />
time) and automatic (seeks frequencies with acceptable signal strength) tuning mode. It<br />
also toggles between stereo and mono modes when an FM station is tuned in.<br />
Channel Level Control button: press this button to activate the channel-level adjustment<br />
feature. After pressing this button, use the up/down buttons to select the channel for<br />
adjustment and use the left/right buttons to adjust the channel’s level.<br />
Digital Input button: press this button to change the audio input for the current source.<br />
use the left/right buttons to cycle through the available inputs. Although you can assign<br />
any digital audio input to any source, the analogue audio inputs are all permanently<br />
dedicated to the source with which they are labeled.<br />
Left/Right buttons: use these buttons to navigate the AVr’s menus.<br />
Up/Down buttons/Tuning buttons: use these buttons to navigate the AVr’s menus.<br />
when the radio is the active source, use these buttons to tune stations according to the<br />
setting of the tuning Mode button (see above).<br />
Surround-Mode Category button: press this button to select a surround-sound<br />
category. each press changes the surround-mode category: Auto Select, Virtual, Stereo,<br />
Movie, Music and Video game. to change the specific surround-sound mode within the<br />
category, use the Surround Mode Select buttons. See Audio processing and Surround<br />
Sound, on page 20, for more information on surround modes.<br />
Headphone jack: connect a 1/4" stereo headphone plug to this jack for private<br />
listening.<br />
Source Select buttons: press these buttons to select the active source.<br />
USB port: You can use this port to perform software upgrades that may be offered in<br />
the future. do not connect a storage device, a peripheral product or a pc here, unless<br />
instructed to do so as part of an upgrade procedure.<br />
Aux Analogue Audio Input connector: connect an auxiliary source component that<br />
will be used only temporarily, such as a camcorder, portable music player or game<br />
console, here.<br />
5<br />
ENGLISH
<strong>AVR</strong> <strong>158</strong> Rear-Panel Connectors<br />
Rear-Panel Connectors<br />
6<br />
radio Aerial<br />
connectors<br />
hdMI ®<br />
Monitor out<br />
connector<br />
Subwoofer<br />
connector<br />
hdMI Input<br />
connectors<br />
Analogue Audio<br />
Input/output<br />
connectors<br />
Speaker<br />
connectors<br />
composite Video<br />
Monitor output<br />
connector<br />
dVd component<br />
Video Input<br />
connector<br />
digital Audio<br />
Input connectors<br />
Video 2 out<br />
connector<br />
composite<br />
Video Input<br />
connectors<br />
Main power<br />
Switch<br />
12V trigger<br />
connector<br />
Ac Input<br />
connector
<strong>AVR</strong> <strong>158</strong><br />
Rear-Panel Connectors, continued<br />
Radio Aerial connectors: connect the included AM and FM aerials to their respective<br />
terminals for radio reception.<br />
HDMI Monitor Out connector: If your tV has an hdMI connector and you have hdMI or<br />
component video source devices, use an hdMI cable (not included) to connect it to the<br />
AVr’s hdMI Monitor out connector.<br />
Notes on using the HDMI Monitor Out connector:<br />
• when connecting a dVI-equipped display to the hdMI Monitor out connector, use<br />
an hdMI-to-dVI adapter and make a separate audio connection.<br />
• Make sure the hdMI-equipped display is hdcp-compliant. If it isn’t, do not connect<br />
it via hdMI; use an analogue video connection instead and make a separate audio<br />
connection.<br />
HDMI Input connectors: the hdMI (high-definition Multimedia Interface ® ) feature is<br />
a connection for transmitting digital audio and video signals between devices. If your<br />
source devices have hdMI connectors, using them will provide the best possible video<br />
and audio performance quality. Since the hdMI cable carries both digital video and<br />
digital audio signals, you do not have to make any additional audio connections for<br />
devices you connect via hdMI connections. See connect Your Source devices, on page<br />
13, for more information.<br />
Composite Video Monitor Out connector: If your tV or video display does not have<br />
an hdMI connector, or if your tV does have an hdMI connector but you are connecting<br />
some source devices with only composite video connectors, use a composite video<br />
cable (not included) to connect the AVr’s composite Video Monitor out connector to your<br />
tV’s composite video input connector.<br />
DVD Component Video Input connector: If your blu-ray disc or dVd player does<br />
not have an hdMI connector but does have a component video connector, using the<br />
component video connector will provide superior video performance. You will also need<br />
to make an audio connection from the player to the AVr.<br />
Digital Audio Input connectors: If your non-hdMI source devices have digital outputs,<br />
connect them to the AVr’s digital audio connectors. NOTE: Make only one type of<br />
digital connection (hdMI, optical or coaxial) from each device. See connect Your Source<br />
devices, on page 13, for more information.<br />
Rear-Panel Connectors, continued<br />
Video 2 Out connector: connect an analogue video recorder’s video input connector to<br />
the AVr’s Video 2 out connector. You can record any composite video input signal. NOTE:<br />
to record the audio and video from the source device, connect the AVr’s Video 2 out<br />
Analogue output connectors to the analogue video recorder’s audio inputs.<br />
Composite Video Input connectors: use composite video connectors for video source<br />
devices that don’t have hdMI or component video connectors. You will also need to<br />
make an audio connection from the source device to the AVr. See connect Your Source<br />
devices, on page 13, for more information.<br />
Subwoofer connector: connect this jack to a powered subwoofer with a line-level<br />
input. See connect Your Subwoofer, on page 13, for more information.<br />
Analogue Audio Input/Output connectors: use the AVr’s Analogue Audio Input/output<br />
connectors for source devices that don’t have hdMI or digital audio connectors. use the<br />
Video 2 out and tape out connectors to connect to the audio inputs of a Vcr and tape<br />
deck. See connect Your Source devices, on page 13, for more information.<br />
Speaker connectors: use two-conductor speaker wire to connect each set of terminals<br />
to the correct speaker. See connect Your Speakers, on page 13, for more information.<br />
Main Power switch: this mechanical switch turns the AVr’s power supply on or off. It is<br />
usually left on and cannot be turned on or off using the remote control.<br />
12V Trigger connector: this connector provides 12V dc whenever the AVr is on. It can<br />
be used to turn on and off other devices such as a powered subwoofer.<br />
AC Input connector: After you have made all other connections, plug the supplied Ac<br />
power cord into this receptacle and into an unswitched wall outlet.<br />
7<br />
ENGLISH
<strong>AVR</strong> <strong>158</strong> System Remote Control Functions<br />
System Remote Control Functions<br />
8<br />
Ir transmitter lens<br />
program Indicator led<br />
power on button<br />
power off button<br />
AVr button<br />
test tone button<br />
Sleep/ch up/down buttons<br />
oSd button<br />
channel level control button<br />
digital Input button<br />
tuning Mode button<br />
direct Station entry button<br />
tuning up/down buttons<br />
tone control button<br />
night Mode button<br />
track Skip up/down buttons<br />
Mute button<br />
Source Selector buttons<br />
Volume up/down buttons<br />
Speaker Setup buttons<br />
ok button<br />
delay button<br />
left/right/up/down buttons<br />
number buttons<br />
Memory button<br />
clear button<br />
preset Station up/down buttons<br />
rdS button<br />
Macro buttons<br />
display dimmer button<br />
transport control buttons
<strong>AVR</strong> <strong>158</strong><br />
System Remote Control Functions, continued<br />
In addition to controlling the AVr, the AVr remote is capable of controlling eight other<br />
devices. during the installation process, you may program the codes for each of your<br />
source components into the remote. (See program the remote to control Your Source<br />
devices and tV, on page 16, for programming information.) to operate a component,<br />
press its Source Selector button to change the remote’s control mode.<br />
A button’s function depends on which component is being controlled. See table A10 in<br />
the Appendix for listings of the functions for each type of component. Most of the buttons<br />
on the remote have dedicated functions, although the precise codes transmitted vary<br />
depending on the specific device being controlled. due to the wide variety of functions<br />
for various source devices, we have included only a few of the most often-used functions<br />
on the remote: alphanumeric keys, transport controls, television-channel control, menu<br />
access and power on and off. to return the remote to the AVr control mode at any time,<br />
press the AVr button.<br />
IR Transmitter lens: As buttons are pressed on the remote, infrared codes are emitted<br />
through this lens.<br />
Program Indicator LED: this led lights up to indicate various procedures when the<br />
remote is in the programming mode.<br />
Power On/Off buttons: press these buttons to turn the AVr or the device being controlled<br />
on and off. the Main power switch on the AVr’s rear panel must be on for this button to<br />
turn the AVr on and off.<br />
Mute button: press this button to mute the AVr’s speaker-output connectors and<br />
headphone jack. to restore the sound, press this button or adjust the volume.<br />
<strong>AVR</strong> button: press this button to switch the remote’s control mode to operate the AVr.<br />
Source Selector buttons: press one of these buttons to select a source device, e.g.,<br />
dVd, AM/FM radio, etc. this action will also turn on the AVr and switch the remote’s<br />
control mode to operate the selected source device. NOTE: the first press of the radio<br />
Source Selector button switches the AVr to the last-used tuner band (AM or FM). each<br />
successive press changes the band.<br />
Test Tone button: press this button to activate the test tone for calibrating channel<br />
volume levels by ear.<br />
Sleep button/Channel Up/Down buttons: press the Sleep button to activate the sleep<br />
timer, which turns off the AVr after a programmed period of time of up to 90 minutes. the<br />
channel up/down buttons have no effect on the AVr but are used to change channels on<br />
tVs and some video sources.<br />
Volume Up/Down buttons: press these buttons to raise or lower the volume.<br />
OSD button: press this button to activate the on-screen display menu system.<br />
Channel Level Control button: press this button to activate the individual channel-level<br />
adjustment. It lets you easily change the channel balance to suit different programs or<br />
seating arrangements. See configure the AVr for Your Speakers, on page 17, for more<br />
information.<br />
Speaker Setup button: press this button to configure which speakers are included<br />
in your system. See configure the AVr for Your Speakers, on page 17, for more<br />
information.<br />
OK button: this button is used to select items from the menu system.<br />
Digital Input button: press this button to select the specific digital audio input (or<br />
analogue audio input) to which the current source is connected.<br />
Delay button: pressing this button lets you adjust two different types of delay settings<br />
(use the up/down buttons to cycle through the settings):<br />
• A/V Sync: this setting lets you resynchronise the audio and video signals from a source<br />
to eliminate a “lip sync” problem. lip-sync issues can occur when the video portion<br />
of a signal undergoes additional processing in either the source device or the video<br />
display. use the left/right buttons to delay the audio by up to 180ms.<br />
• Front l/centre/Front r/Surr r/Surr l/Subwoofer: these settings let you set the delay<br />
for each speaker to compensate for the different distances they may be from the<br />
listening position. use the up/down buttons to cycle through each of the system’s<br />
speakers, and use the left/right buttons to set the distance each speaker is from<br />
the listening position. See configure the AVr for Your Speakers, on page 17, for more<br />
information.<br />
System Remote Control Functions, continued<br />
Left/Right/Up/Down buttons: these buttons are used to navigate the menu system.<br />
Number buttons: use these buttons to enter numbers for radio-station frequencies or<br />
to select station presets.<br />
Tuning Mode button: press this button to toggle the radio between manual (one<br />
frequency step at a time) and automatic (seeks frequencies with acceptable signal<br />
strength) tuning mode. It also toggles between stereo and mono modes when an FM<br />
station is tuned in.<br />
Memory button: to save the currently tuned radio station as a preset, press this button,<br />
then a number button.<br />
Direct Station Entry button: press this button before using the number buttons to enter<br />
a radio station frequency.<br />
Clear button: press this button to clear a radio station frequency you have started to<br />
enter.<br />
Tuning Up/Down buttons: press these buttons to tune a radio station. depending on<br />
whether the tuning mode has been set to manual or automatic, each press will either<br />
change one tuning frequency increment at a time or seek the next higher or lower<br />
station with acceptable signal strength.<br />
Preset Station Up/Down buttons: press these buttons to cycle through your preset<br />
radio stations.<br />
Tone Control button: press this button to access the bass and treble controls. use the<br />
ok button to select an adjustment and use the up/down buttons to change the settings.<br />
RDS button: when listening to an FM radio station that broadcasts rdS information, this<br />
button activates the various rdS functions.<br />
Night Mode button: press this button to activate night mode with specially encoded<br />
dolby digital discs or broadcasts. night mode compresses the audio so that louder<br />
passages are reduced in volume to avoid disturbing others, while dialogue remains<br />
intelligible. each press of the button advances through the following settings:<br />
• off: no compression is applied. loud passages in the program remain as they were<br />
recorded.<br />
• Mid: loud passages in the program are reduced moderately in volume.<br />
• Max: loud passages in the program are reduced more in volume.<br />
Macro buttons: these buttons may be programmed to execute a series of up to 19<br />
commands with a single button press. they are useful for programming the command<br />
to turn on or off all of your components or for accessing specialised functions for a<br />
different component from the one that you are currently operating. See programming<br />
Macro commands, on page 22, for information about programming macros.<br />
Track Skip Up/Down buttons: these buttons have no effect on the AVr but are used<br />
with many source components to change tracks or chapters.<br />
Display Dimmer button: press this button to dim the AVr’s front-panel display partially<br />
or fully.<br />
Transport Control buttons: these buttons have no effect on the AVr but are used to<br />
control many source components. by default, when the remote is operating the AVr,<br />
these buttons will control a harman kardon blu-ray disc player or dVd player.<br />
9<br />
ENGLISH
<strong>AVR</strong> <strong>158</strong><br />
10<br />
Introduction to Home Theatre<br />
this introductory section will help you to familiarise yourself with some basic concepts<br />
unique to multichannel surround-sound AVrs, which will make it easier for you to set<br />
up and operate your AVr.<br />
Typical Home Theatre System<br />
A home theatre typically includes an audio/video receiver (AVr), which controls<br />
the system and supplies amplification for the loudspeakers; a disc player; a source<br />
component for television broadcasts (cable box, satellite dish AVr, hdtV tuner or aerial<br />
connected to the tV); a tV or video display; and multiple loudspeakers.<br />
Multichannel Audio<br />
the main benefit of a home theatre system is its ability to produce “surround sound.”<br />
Surround sound uses multiple speakers and amplifier channels to immerse you in the<br />
audio/video presentation for a dramatically increased sense of realism.<br />
Your AVr can have up to five main speakers connected directly to it, plus a subwoofer.<br />
each main speaker is powered by its own amplifier channel inside the AVr. A system<br />
with more than two speakers is called a multichannel system. the different main<br />
speaker types in a home theatre system are:<br />
• Front Left and Right: the front left and right speakers are used as in a two-channel<br />
system. In many surround-sound modes, these speakers are secondary, while the<br />
main action, especially dialogue, is reproduced by the centre speaker.<br />
• Centre: when you are watching movies and television programs, the centre speaker<br />
reproduces most of the dialogue and other soundtrack information that occurs on the<br />
screen, anchoring it with the picture. when you are listening to a musical program, the<br />
centre speaker helps to create a seamless front soundstage, creating a more realistic<br />
“you-are-there” listening experience.<br />
• Surround Left and Right: the surround left and right speakers produce ambient<br />
sounds that help create a realistic and immersive surround-sound environment. they<br />
also help recreate directional sound effects such as aircraft flyovers.<br />
Many people expect the surround speakers to play as loudly as the front speakers.<br />
Although you will calibrate all of the speakers in your system to sound equally loud<br />
at the listening position, most artists use the surround speakers for ambient effects<br />
only, and they create their programs to steer relatively little sound to these speakers.<br />
• Subwoofer: A subwoofer is designed to play only the lowest frequencies (the deep<br />
bass). It augments smaller, limited-range main speakers that are usually used for<br />
the other channels. Many digital-format programs, such as movies recorded in dolby<br />
digital, contain a low-frequency effects (lFe) channel that is directed to the subwoofer.<br />
the lFe channel packs the punch of a rumbling train or airplane, or the power of an<br />
explosion, adding realism and excitement to your home theatre. Some people use two<br />
subwoofers for additional power and for even distribution of the sound.<br />
Surround Modes<br />
there are different theories as to the best way to present surround sound and to distribute<br />
the individual channel information to the surround-sound system’s speakers. A variety<br />
of algorithms have been developed in an effort to recreate the way we hear sounds in<br />
the real world, resulting in a rich variety of options. Several companies have developed<br />
different surround-sound technologies, all of which can be accurately reproduced by<br />
your AVr:<br />
• Dolby Laboratories: dolby truehd, dolby digital plus, dolby digital, dolby digital ex,<br />
dolby pro logic II.<br />
® • DTS : dtS-hd high resolution Audio, dtS-hd Master Audio , dtS, dtS 96/24 .<br />
• HARMAN International: logic 7, hArMAn virtual speaker, hArMAn headphone.<br />
• Stereo Modes: two-channel stereo and five-channel stereo.<br />
Appendix table A9, on page 30, contains detailed explanations of the different surroundsound<br />
options available on your AVr. digital surround-sound modes, such as dolby<br />
digital and dtS systems, are available only with specially encoded programs, such<br />
as those available via hdtV, dVd and blu-ray disc media and digital cable or satellite<br />
television. other surround modes may be used with digital and analogue signals to<br />
create a different surround presentation or to use a different number of speakers.<br />
Surround-mode selection depends upon the number of speakers in your system, the<br />
programs you are watching or listening to, and your personal tastes.<br />
Place Your Speakers<br />
Introduction to Home Theatre<br />
and Place Your Speakers<br />
determine the locations for your system’s speakers according to their manufacturer’s<br />
directions and the layout of your listening room. use the illustration below as a guide for<br />
5.1-channel systems.<br />
to create the most realistic surround-sound environment possible, you should place<br />
your speakers in a circle with the listening position at its centre. You should angle each<br />
speaker so it directly faces the listening position. use the diagram below as a guide.<br />
tV<br />
c<br />
Fl Fr<br />
Sub<br />
Sl Sr<br />
Placing the Left, Centre and Right Speakers<br />
place the centre speaker either on top of, below or mounted on the wall above or below<br />
the tV or video-display screen. place the front left and right speakers along the circle,<br />
about 30 degrees from the centre speaker and angled toward the listener.<br />
place the front left, front right and centre speakers at the same height, preferably at<br />
about the same height as the listener’s ears. the centre speaker should be no more than<br />
2 feet (0.6m) above or below the left/right speakers. If you’re using only two speakers<br />
with your AVr, place them in the front left and front right positions.<br />
Placing the Surround Speakers<br />
You should place the left and right surround speakers approximately 110 degrees from<br />
the centre speaker, slightly behind and angled toward the listener. Alternatively, you can<br />
place them behind the listener, with each surround speaker facing the opposite-side<br />
front speaker. You should place the surround speakers 2 feet – 6 feet (0.6m – 1.8m)<br />
higher than the listener’s ears.<br />
NOTE: Your <strong>AVR</strong> will sound its best when the same model or brand of<br />
loudspeaker is used for all positions.<br />
Placing the Subwoofer<br />
because a room’s shape and volume can have a dramatic effect on a subwoofer’s<br />
performance, it is best to experiment with placement so that you will find the location<br />
that produces the best results in your particular listening room. with that in mind, these<br />
rules will help you get started:<br />
• placing the subwoofer next to a wall generally will increase the amount of bass in<br />
the room.<br />
• placing the subwoofer in a corner generally will maximise the amount of bass in the<br />
room.<br />
• In many rooms, placing the subwoofer along the same plane as the left and right<br />
speakers can produce the best integration between the sound of the subwoofer and<br />
that of the left and right speakers.<br />
• In some rooms, the best performance could even result from placing the subwoofer<br />
behind the listening position.<br />
A good way to determine the best location for the subwoofer is by temporarily placing<br />
it in the listening position and playing music with strong bass content. Move around<br />
to various locations in the room while the system is playing (putting your ears where<br />
the subwoofer would be placed), and listen until you find the location where the bass<br />
performance is best. place the subwoofer in that location.
<strong>AVR</strong> <strong>158</strong><br />
Types of Home Theatre System Connections<br />
there are different types of audio and video connections used to connect the AVr to your<br />
speakers, your tV or video display, and your source devices. the consumer electronics<br />
Association has established the ceA ® colour-coding standard.<br />
Connection Colour Guide Table<br />
Analogue Audio Connection Colour<br />
Front left/right white/red<br />
centre green<br />
Surround left/right blue/gray<br />
Subwoofer purple<br />
Digital Audio Connection Colour<br />
coaxial (input or output) orange<br />
optical Input black<br />
Analogue Video Connection Colour<br />
component Video red/green/blue<br />
composite Video Yellow<br />
Speaker Connections<br />
Speaker cables carry an amplified signal from the AVr’s speaker terminals to each<br />
loudspeaker. each cable contains two wire conductors, or leads, that are differentiated<br />
in some way, such as with colours or stripes.<br />
the differentiation helps you maintain proper polarity, without which your system’s lowfrequency<br />
performance can suffer. each speaker is connected to the AVr’s speakeroutput<br />
terminals using two wires, one positive (+) and one negative (–). Always connect<br />
the positive terminal on the speaker, which is usually coloured red, to the positive<br />
terminal on the AVr, which is coloured as indicated in the connection colour guide<br />
table, above. the negative terminals on the speakers and the AVr are black.<br />
Your AVr uses binding-post speaker terminals that can accept bare-wire cables or<br />
banana plugs. bare-wire cables are installed as shown below:<br />
1. unscrew cap 2. Insert bare wire 3. tighten cap<br />
banana plugs are inserted into the hole in the middle of the terminal cap, as shown<br />
below:<br />
A. tighten cap b. Insert banana connector<br />
into hole in cap<br />
Always connect the coloured (+) terminal on the AVr to the (+) terminal on the speaker<br />
(usually red), and the black (–) terminal on the AVr to the (–) terminal on the speaker<br />
(usually black).<br />
IMPORTANT: Make sure the ( + ) and ( – ) bare wires do not touch each other or<br />
the other terminal. Touching wires can cause a short circuit that can damage your<br />
<strong>AVR</strong> or amplifier.<br />
Types of Home Theatre System Connections<br />
Subwoofer Connections<br />
the subwoofer is a speaker dedicated to reproducing only the low (bass) frequencies,<br />
which require more power. to obtain the best results, most speaker manufacturers offer<br />
powered subwoofers that contain their own amplifiers. use a single rcA audio cable<br />
(not included) to make a line-level (non-amplified) connection from the AVr’s Subwoofer<br />
connector to a corresponding input jack on the subwoofer.<br />
Although the AVr’s purple subwoofer output looks similar to a full-range analogue audio<br />
jack, it is filtered so that only the low frequencies pass through it. don’t connect this<br />
output to any device other than a subwoofer.<br />
Source Device Connections<br />
Audio and video signals originate in source devices (components where a playback<br />
signal originates) such as your blu-ray disc or dVd player, cd player, dVr (digital video<br />
recorder) or other recorder, tape deck, game console, cable or satellite television tuner<br />
or Mp3 player. the AVr’s FM/AM tuner also counts as a source, even though no external<br />
connectors are needed other than the AVr’s FM and AM aerials. Separate connectors are<br />
required for the audio and video portions of the source device’s signal, except for digital<br />
hdMI connectors. the types of connectors you use will depend upon the capabilities of<br />
the source device and of your tV or video display.<br />
Digital Audio Connections – HDMI<br />
there are two types of audio connections – digital and analogue. digital audio signals<br />
are required for listening to sources encoded with digital surround modes, such as dolby<br />
digital and dtS, or for uncompressed pcM digital audio. Your AVr has three types of<br />
digital audio connectors: hdMI, coaxial and optical. do not use more than one type<br />
of digital audio connector for each source device. however, it’s okay to make both<br />
analogue and digital audio connections to the same source.<br />
Your AVr is equipped with four rear-panel hdMI input connectors and one hdMI monitor<br />
output connector. hdMI technology enables digital audio and video information to be<br />
carried using a single cable, delivering the highest quality picture and sound. If your tV<br />
or video-display device has an hdMI input connector, make a single hdMI connection<br />
from each source device to the AVr. usually, a separate digital audio connection is not<br />
required.<br />
the hdMI connector is shaped for easy plug-in (see illustration, below), and hdMI cable<br />
runs are limited to about 10 feet (3m). If your video display has a dVI input and is<br />
hdcp-compliant, use an hdMI-to-dVI adapter (not included), and make a separate audio<br />
connection.<br />
Digital Audio Connections – Coaxial<br />
coaxial digital audio jacks are usually colour-coded orange. Although they look like<br />
standard rcA-type analogue jacks, you should not connect coaxial digital audio outputs<br />
to analogue inputs or vice versa.<br />
11<br />
ENGLISH
<strong>AVR</strong> <strong>158</strong><br />
Digital Audio Connections – Optical<br />
optical digital audio connectors are normally covered by a shutter to protect them from<br />
dust. the shutter opens as the cable is inserted.<br />
Analogue Audio Connections<br />
two-channel analogue connections require a stereo audio cable, with one connector for<br />
the left channel (white) and one for the right channel (red). these two connectors are<br />
attached to each other.<br />
For source devices that have both digital and analogue audio outputs, you may make<br />
both connections.<br />
the analogue connections also feed the Analogue record output connectors. You may<br />
record materials from blu-ray disc recordings, dVds or other copy-protected sources<br />
using only analogue connections. remember to comply with all copyright laws if you<br />
choose to make a copy for your own personal use.<br />
Video Connections<br />
Many source devices output both audio and video signals (e.g., blu-ray disc, dVd<br />
player, cable television box, hdtV tuner, satellite box, Vcr, dVr). In addition to an audio<br />
connection as described above, make a video connection for each of these source<br />
devices. Make only one type of video connection for each device.<br />
Digital Video Connections<br />
If you have already connected a source device to one of the AVr’s hdMI input connectors,<br />
you have automatically made a video connection for that device, since the hdMI cable<br />
carries both digital audio and digital video signals.<br />
Analogue Video Connections – Composite Video<br />
Your AVr uses two types of analogue video connections: composite video and component<br />
video.<br />
composite video is the basic connection most commonly available. both the chrominance<br />
(colour) and the luminance (intensity) components of the video signal are transmitted<br />
using a single cable. the jack is usually colour-coded yellow and looks like an analogue<br />
audio jack. do not connect a composite video jack to an analogue audio or coaxial digital<br />
audio jack, or vice versa.<br />
12<br />
Types of Home Theatre System<br />
Connections, continued<br />
Analogue Video Connections – Component Video<br />
component video separates the video signal into three components – one luminance<br />
(“Y”) and two sub-sampled colour signals (“pb” and “pr”) – that are transmitted using<br />
three separate cables that are colour-coded green (Y), blue (pb) and red (pr). component<br />
video cables that join three separate green, blue and red connectors into a single cable<br />
are sold separately.<br />
If your tV or video display has an hdMI connector, we recommend it for the best quality<br />
connection. Your AVr converts component analogue video input signals to the hdMI<br />
format, upscaling them to high-definition 1080p resolution.<br />
Radio Connections<br />
Your AVr uses separate terminals for the included FM and AM aerials. the FM aerial uses<br />
a 75-ohm F-connector.<br />
the AM aerial connector uses spring-clip terminals. After assembling the aerial as<br />
shown below, press the levers to open the connectors, insert the bare wires into the<br />
openings, and release the levers to secure the wires. the aerial wires are not polarised,<br />
so you can insert either wire into either connector.<br />
USB Port<br />
the uSb port on your AVr is used for firmware upgrades. If an upgrade for the AVr’s<br />
operating system is released in the future, you will be able to download it to the AVr<br />
using this port. complete instructions will be provided at that time.<br />
IMPORTANT: Do not connect a PC or other USB host/controller to the <strong>AVR</strong>’s USB<br />
port, or you may damage both the <strong>AVR</strong> and the other device.
<strong>AVR</strong> <strong>158</strong><br />
Making Connections<br />
CAUTION: Before making any connections to the <strong>AVR</strong>, ensure that the <strong>AVR</strong>’s AC<br />
cord is unplugged from the <strong>AVR</strong> and the AC outlet. Making connections with<br />
the <strong>AVR</strong> plugged in and turned on could damage the speakers.<br />
Connect Your Speakers<br />
After you have placed your loudspeakers in the room as explained in place Your Speakers,<br />
on page 10, connect each speaker to its colour-coded terminal on the AVr as explained<br />
in Speaker connections, on page 11. connect the speakers as shown in the illustration.<br />
Sl<br />
Connect Your Subwoofer<br />
Fl<br />
use a single rcA audio cable to connect the AVr’s Subwoofer pre-out connector to your<br />
subwoofer. consult your subwoofer’s user manual for specific information about making<br />
connections to it.<br />
AVr<br />
Subwoofer<br />
pre-out connector<br />
Single<br />
rcA Audio cable<br />
(not supplied)<br />
c<br />
Fr<br />
Sr<br />
powered<br />
Subwoofer<br />
Connect Your TV or Video Display<br />
Making Connections<br />
HDMI Monitor Out connector<br />
If your tV has an hdMI connector and you have hdMI or component video source<br />
devices, use an hdMI cable (not included) to connect your tV to the AVr’s hdMI Monitor<br />
out connector. It will provide the best possible picture quality.<br />
AVr hdMI<br />
Monitor out<br />
connector<br />
hdMI cable<br />
(not supplied)<br />
Composite Video Monitor Out connector<br />
If your tV does not have an hdMI connector, or if your tV does have an hdMI connector<br />
but you are connecting some source devices with only composite video connectors,<br />
use a composite video cable (not included) to connect the AVr’s composite Monitor out<br />
connector to your tV’s composite video connector.<br />
AVr composite<br />
Monitor out<br />
connector<br />
composite Video cable<br />
(not supplied)<br />
Connect Your Source Devices<br />
Source devices are components where a playback signal originates, such as a<br />
blu-ray disc or dVd player, or a cable, satellite or hdtV tuner. Your AVr has several<br />
different types of input connectors for your audio and video source devices: hdMI,<br />
component video, composite video, optical digital audio, coaxial digital audio and<br />
analogue audio. the connectors are labeled for the types of source devices you are most<br />
likely to connect.<br />
each of your AVr’s source buttons is assigned to an hdMI connector or an analogue<br />
audio input connector (listed in the “AVr Source button/Analogue Audio connector”<br />
column of the table below). to provide you flexibility for connecting and configuring your<br />
system, we have designed the AVr so that you can assign the digital audio inputs to any<br />
of the video AVr sources.<br />
As you connect your various source components, fill out the “Source device connected”<br />
column in the following table – it will make it easier for you to assign the digital audio<br />
input connectors and component video connector later in the setup process.<br />
<strong>AVR</strong> Source<br />
Button/<br />
Analogue Audio<br />
Connector<br />
Recommended Source<br />
Device Type<br />
Video 1 cable or Satellite tuner<br />
Video 2 dVd recorder or Vcr<br />
dVd blu-ray disc or dVd player<br />
cd cd player<br />
tape<br />
cassette deck or Audio<br />
recorder<br />
Aux portable Media palyer<br />
<strong>AVR</strong> Source<br />
Button/ HDMI<br />
_ _ _ _<br />
Connector<br />
hdMI 1 _ _ _ _<br />
hdMI 2 _ _ _ _<br />
hdMI 3 _ _ _ _<br />
Input connections and Source buttons<br />
Source Device<br />
Connected<br />
Source Device<br />
Connected<br />
tV<br />
tV<br />
Digital Audio Input<br />
Connector Assigned<br />
Digital Audio Input<br />
Connector Assigned<br />
13<br />
ENGLISH
<strong>AVR</strong> <strong>158</strong> Making Connections, continued<br />
HDMI devices<br />
If any of your source devices have hdMI connectors, using those connectors will provide<br />
the best possible video and audio performance quality. Since the hdMI cable carries<br />
both digital video and digital audio signals, you do not have to make any additional audio<br />
connections for devices you connect via hdMI cables, although you can assign one of<br />
the digital audio connectors to one of the hdMI inputs.<br />
14<br />
AVr<br />
hdMI connectors<br />
hdMI cable<br />
(not supplied)<br />
hdMI-equipped<br />
Source device<br />
to hdMI<br />
output<br />
Component video devices<br />
If your blu-ray disc or dVd player does not have an hdMI connector but does have a<br />
component video connector, using the component video connector will provide superior<br />
video performance. You will also need to make an audio connection from the player to<br />
the AVr.<br />
AVr dVd component<br />
Video connectors<br />
component Video<br />
cable (not supplied)<br />
to component<br />
Video outputs<br />
component Video-equipped<br />
blu-ray disc or dVd player<br />
Composite video devices<br />
You will need to make composite video connections from your source devices that do<br />
not have hdMI or component video connectors. You will also need to connect the source<br />
device’s analogue audio outputs to the AVr’s corresponding analogue audio connectors.<br />
IMPORTANT: If you connected your blu-ray disc or dVd player to the AVr’s dVd<br />
component Video Input connectors, do not connect a source device to the AVr’s dVd<br />
composite Video Input connector.<br />
AVr composite<br />
Video connectors<br />
composite Video<br />
cable (not supplied) to composite<br />
Video output<br />
composite Video-equipped<br />
Source device<br />
Optical digital audio devices<br />
If your source devices have optical digital outputs, connect them to the AVr’s optical<br />
digital Audio connectors. NOTE: Make only one type of digital connection (hdMI, optical<br />
or coaxial) from each device.<br />
AVr digital Audio<br />
connectors<br />
optical digital Audio<br />
cable (not supplied)<br />
to optical digital<br />
Audio output<br />
optical digital-equipped<br />
Source device<br />
Coaxial digital audio devices<br />
If your source devices have coaxial digital outputs, connect them to the AVr’s coaxial<br />
digital Audio connectors. NOTE: Make only one type of digital connection (hdMI, optical<br />
or coaxial) from each device.<br />
AVr digital Audio<br />
connectors<br />
coaxial digital Audio<br />
cable (not supplied)<br />
to coaxial<br />
digital output<br />
coaxial digital-equipped<br />
Source device<br />
Analogue audio devices<br />
Make analogue audio connections from your source devices that do not have hdMI or<br />
digital audio connectors. If you’re connecting video sources to the dVd, Video 1 or Video<br />
2 audio inputs, you must also connect the source device’s composite video output to the<br />
corresponding composite video connector.<br />
AVr Analogue<br />
Audio connectors<br />
Stereo Audio cable<br />
(not supplied)<br />
Analogue Source device<br />
to Stereo Analogue<br />
Audio output
<strong>AVR</strong> <strong>158</strong><br />
Audio recorders<br />
connect an analogue audio recorder’s inputs to the AVr’s analogue audio tape out<br />
connectors. You can record any analogue audio input signal.<br />
AVr Analogue Audio<br />
recorder connectors<br />
Stereo Audio cable<br />
(not supplied) to Stereo Analogue<br />
record Inputs<br />
Analogue recording device<br />
Video recorders<br />
connect an analogue video recorder’s video input connector to the AVr’s Video 2 out<br />
composite Video connector, and its audio input connectors to the AVr’s Video 2 out<br />
Analogue Audio connectors. You can record any composite video signal.<br />
AVr Analogue<br />
Audio connectors<br />
AVr Analogue<br />
Video connectors<br />
Analogue Audio/Video<br />
cable (not supplied)<br />
Analogue Video<br />
recording device<br />
to Analogue Audio/<br />
Video record Inputs<br />
Connect the Radio Aerials<br />
• connect the supplied FM aerial to the AVr’s FM 75Ω<br />
radio Aerial connector. For the<br />
best reception, extend the FM aerial as far as possible.<br />
• bend and fold the base of the supplied AM aerial as shown and connect the aerial<br />
wires to the AVr’s AM and gnd connectors. (You can connect either wire to either<br />
connector.) rotate the aerial as necessary to minimise background noise.<br />
AVr radio Aerial<br />
connectors<br />
AM Aerial<br />
(supplied)<br />
FM Aerial (supplied)<br />
bend and fold base<br />
Connect the 12V Trigger Output<br />
Making Connections, continued,<br />
and Set Up the Remote Control<br />
If your system has equipment that can be controlled by a dc trigger signal, connect it to<br />
the AVr’s 12V trigger connector with a mono 1/8-inch (3.5mm) mini-plug interconnect<br />
cable. the AVr will supply a 12V dc (100mA) trigger signal at this connection whenever<br />
it is powered on.<br />
AVr<br />
device with trigger<br />
in connector<br />
Mono 1/8-inch<br />
(3.5mm)<br />
Mini-plug<br />
Interconnect<br />
(not supplied)<br />
Connect to AC Power<br />
connect the Ac power cord to the AVr’s Ac Input connector and then to a working Ac<br />
power outlet.<br />
AVr Ac<br />
Input connector<br />
Set Up the Remote Control<br />
power cord<br />
(supplied)<br />
Install the Batteries in the Remote Control<br />
Ac power<br />
outlet<br />
remove the remote control’s battery cover, insert the three supplied AAA batteries as<br />
shown in the illustration, and replace the battery cover.<br />
NOTE: remove the protective plastic from the AVr’s front panel to keep it from reducing<br />
the remote control’s effectiveness.<br />
15<br />
ENGLISH
<strong>AVR</strong> <strong>158</strong><br />
Program the Remote to Control Your Source Devices and TV<br />
In addition to using the remote to control the AVr itself and the AM/FM radio, you can<br />
program the remote to control up to eight additional audio/video source devices plus<br />
your tV.<br />
once you have programmed the remote, you can switch the remote’s control mode to<br />
access the functions for a particular source device by pressing the remote’s Source<br />
Selector button for that device. to control the AVr, press the remote’s AVr button.<br />
before you begin programming the remote, review the connections you filled in on the<br />
Input connections and Source buttons table on page 13. the Source Selector buttons<br />
are assigned to the components that you listed in the table’s “Source device connected”<br />
column.<br />
1. turn on the source device you want to program the remote to control.<br />
2. look up the code numbers for the device in tables A11 – A17 in the Appendix. write<br />
all the applicable code numbers in a convenient place.<br />
3. press and hold the Source Selector button for that source device until the program<br />
Indicator led on the remote starts to flash, then release it. (this procedure places the<br />
remote in the programming mode.)<br />
note: If you’re programming one of the four hdMI source buttons, after pressing the<br />
hdMI button you must also press the Source Selector button for the type of device that<br />
will be controlled:<br />
• press dVd to control a dVd player.<br />
• press VId1 to control a Vcr, dVr or harman kardon digital media centre.<br />
• press VId2 to control a cable or satellite set-top box.<br />
4. Aim the remote at the source device and use the remote’s number buttons to enter a<br />
code number from Step 2, above.<br />
a) If the device turns off, press the Source Selector button again to save its code. the<br />
Source Selector button will flash, and the remote will exit the programming mode.<br />
b) If the device does not turn off, enter another code number.<br />
c) If you run out of code numbers for a device, you can search through all of the codes<br />
in the remote’s library for devices of its type by pressing the up or down button<br />
repeatedly until the device turns off. when it does, press the Source Selector button<br />
to save the code.<br />
5. check that other functions control the device correctly. Sometimes manufacturers<br />
use the same power code for several models, while other function codes vary. repeat<br />
this process until you’ve programmed a satisfactory code set that operates most of<br />
the device’s functions.<br />
6. If you searched through the remote’s code library to find the code, you can find<br />
out which code number you have programmed by pressing and holding the Source<br />
Selector button to re-enter the programming Mode. then press the remote’s ok<br />
button, and the program Indicator led will flash in the code sequence. one flash<br />
represents “1,” two flashes represent “2,” and so forth. A series of quick flashes<br />
represents “0.” record the code number programmed for each device in table A7 in<br />
the Appendix.<br />
repeat Steps 3 – 6 for each source device you want to control with the AVr remote.<br />
In general, the label for each button on the remote describes the button’s function when<br />
used to control the AVr. however, the button may perform a very different function when<br />
used to control another device. refer to the remote control Function list, table A10 in<br />
the Appendix, for each button’s functions with the various product types.<br />
You can also program the remote to perform Macros (preprogrammed code sequences<br />
that execute many code commands with a single button press) and “punch-through”<br />
programming (allowing the remote to operate a device’s channel or transport controls<br />
when the remote is in another device’s mode). See Advanced remote control<br />
programming, on page 22, for instructions on these functions.<br />
16<br />
Set Up the <strong>AVR</strong><br />
Turn On the <strong>AVR</strong><br />
Set Up the Remote Control, continued,<br />
and Set Up the <strong>AVR</strong><br />
1. Set the rear-panel Main power switch to “on.” (the front-panel power indicator will<br />
glow amber.)<br />
2. press the front-panel power button.<br />
Main power<br />
Switch<br />
power<br />
button<br />
unless you will not be using the AVr for an extended period of time, leave the Main<br />
power switch set to “on.” when the Main power switch is turned off, any settings you<br />
have programmed will be preserved for up to four weeks.<br />
IMPORTANT NOTE: If the PROTECT message ever appears in the Message<br />
display, turn off the <strong>AVR</strong> and unplug it. Check all speaker wires for a short<br />
circuit (“+” and “–” wires touching). If none is found, bring the unit to an<br />
authorised <strong>Harman</strong> <strong>Kardon</strong> service centre for inspection and repair before<br />
using it again.<br />
Using the On-Screen Menu System<br />
Although it’s possible to configure the AVr using only the remote and the front-panel<br />
Message display, it is easier to use the on-screen menu system.<br />
to access the menu system, press the oSd button on the remote. the Master menu will<br />
appear.<br />
** MASTER MENU **<br />
INPUT SETUP<br />
SURROUND SELECT<br />
SPEAKER SETUP<br />
SYSTEM SETUP<br />
the Master menu consists of four submenus: Input Setup, Surround Mode, Speaker<br />
Setup and System Setup.<br />
use the up/down/left/right buttons on the remote to navigate the menu system, and<br />
press the ok button to select a menu or setting line, or to enter a new setting.<br />
the current menu, setting line or setting will appear in the front-panel Message display,<br />
as well as on screen.<br />
to return to the previous menu, navigate to the “back to Master Menu” line and press the<br />
ok button. to exit the menu system, press the oSd button.<br />
Most users should follow the instructions in this Set up the AVr section to configure<br />
a basic home theatre system. You may return to these menus at any time to make<br />
additional adjustments, such as those described in the Advanced Functions section, on<br />
pages 20 through 23.<br />
before you begin initial setup, all loudspeakers, a video display and all source devices<br />
should be connected to the AVr. You should be able to turn on the AVr and view the<br />
Master menu when you press the oSd button. If necessary, reread the Making<br />
connections section and the beginning of this section before continuing.
<strong>AVR</strong> <strong>158</strong><br />
Configure the <strong>AVR</strong> for Your Speakers<br />
Your AVr is flexible and may be configured to work with most speakers and to<br />
compensate for the acoustic characteristics of your room.<br />
before beginning, place your loudspeakers as explained in the place Your Speakers<br />
section, on page 10, and connect them to the AVr. consult the owner’s guide for the<br />
speakers or the manufacturer’s web site for their frequency-range specification. Although<br />
you may set the AVr’s individual channel levels “by ear,” an Spl (sound-pressure level)<br />
metre purchased at a local electronics store will provide greater accuracy.<br />
record your configuration settings in tables A4 and A6 in the Appendix for easy re-entry<br />
after a system reset or after the AVr’s Master power switch has been turned off or the<br />
unit has been unplugged for more than four weeks.<br />
Step One – Determine Your Speakers’ Crossover Frequencies<br />
consult the technical specifications for all of your speakers and locate the frequency<br />
response, usually given as a range, e.g., 100hz – 20khz (±3db). write down the lowest<br />
frequency that each of your speakers is capable of playing (100hz in the above example)<br />
as the crossover in table A6 in the Appendix. NOTE: this frequency is not the same as<br />
the crossover frequency listed in the speaker’s specifications.<br />
For the subwoofer, write down the transducer size. the AVr’s bass management<br />
determines which speakers will be used to play back the low-frequency (bass) portion<br />
of the source program. Sending the lowest notes to small satellite speakers will result<br />
in bad sound and may even damage the speakers. the highest notes may not be heard<br />
at all through the subwoofer.<br />
with proper bass management, the AVr divides the source signal at a crossover point.<br />
All information above that crossover point is played through your system’s speakers,<br />
and all information below the crossover point is played through the subwoofer. this way,<br />
each loudspeaker in your system will perform at its best, delivering a more powerful and<br />
enjoyable sound experience.<br />
Step Two – Measure the Speaker Distances<br />
Ideally, all of your speakers would be placed in a circle, with the listening position at the<br />
centre. however, you may have had to place some speakers a little farther away from the<br />
listening position than others. Sounds that are supposed to arrive simultaneously from<br />
different speakers may blur, due to different arrival times.<br />
Your AVr provides a distance adjustment that compensates for these real-world<br />
speaker-placement differences.<br />
Measure the distance from each speaker to the listening position, and write it down<br />
in table A4 in the Appendix. even if all of your speakers are the same distance from<br />
the listening position, enter your speaker distances as described in Set the Speaker<br />
distances, on this page.<br />
Step Three – Speaker Setup Menu<br />
now you are ready to program the AVr. Sit in your usual listening position, and make the<br />
room as quiet as possible.<br />
with the AVr and video display turned on, press the oSd button to display the menu<br />
system and select Speaker Setup. the Speaker Setup menu will appear:<br />
* SPEAKER SETUP *<br />
NUMBER OF SPEAKERS<br />
SUB MODE : SUB<br />
CROSSOVER<br />
DISTANCE<br />
LEVEL ADJUST<br />
BACK TO MASTER MENU<br />
NOTE: All of the speaker setup submenus include a “back to…” option. to save the<br />
current settings, select the back to… option.<br />
For best results, adjust the submenus in this order: number of Speakers, crossover, Sub<br />
Mode, distance and level Adjust.<br />
Number of Speakers<br />
this selection lets you program the correct setting for each speaker group. the settings<br />
in this menu affect the remainder of the speaker-setup process and the availability of<br />
various surround modes at any time.<br />
Set Up the <strong>AVR</strong>, continued<br />
Select on when the speakers are present in the system; select oFF for positions where<br />
no speakers are installed. the Front left & right setting is always on and may not be<br />
disabled.<br />
* NUMBER OF SPEAKERS *<br />
LEFT/RIGHT : ON<br />
CENTER : ON<br />
SURROUND : ON<br />
SUBWOOFER : ON<br />
BACK TO SPEAKER SETUP<br />
when you have finished, select back to Speaker Setup.<br />
Crossover (Size)<br />
After you return to the Speaker Setup menu, navigate to the crossover line and press the<br />
ok button to display the crossover menu.<br />
* CROSSOVER *<br />
LEFT/RIGHT : 100Hz<br />
CENTER : 100Hz<br />
SURROUND : 100Hz<br />
SUBWOOFER : 10inch<br />
BACK TO SPEAKER SETUP<br />
refer to table A6 for each speaker’s crossover frequency.<br />
NOTE: the AVr will let you adjust settings only for those speaker groups you set to on<br />
in the number of Speakers menu.<br />
For each speaker group, select one of these eight crossover frequencies: lArge, 40hz,<br />
60hz, 80hz, 100hz, 120hz, 150hz or 200hz. If the speaker’s crossover frequency is<br />
below 40hz, select the first option, lArge. this setting doesn’t refer to the speaker’s<br />
physical size but to its frequency response, which is also called “full range.”<br />
Specify the size of the subwoofer’s transducer as 8, 10, 12 or 15 inches. the AVr always<br />
sets the subwoofer crossover to 100hz but uses the transducer size for equalisation.<br />
write down the settings in table A6 in the Appendix.<br />
when you have finished entering the settings, select back to Speaker Setup.<br />
Sub Mode<br />
After you return to the Speaker Setup menu, navigate to the Sub Mode line and press<br />
the ok button to display the Sub Mode menu. this setting depends upon the crossover<br />
setting you selected for the front left and right speakers.<br />
• If you set the front speakers to a numeric crossover frequency, the subwoofer setting<br />
will always be Sub. All low-frequency information will always be sent to the subwoofer.<br />
If you don’t have a subwoofer, either upgrade to full-range front left and right speakers<br />
or add a subwoofer at the earliest opportunity.<br />
• If you set the front speakers to lArge, select one of the three following settings for<br />
the subwoofer:<br />
l/r+lFe: this setting sends all low-frequency information to the subwoofer, including<br />
a) information that would normally be played through the front left and right speakers<br />
and b) the special low-frequency effects (lFe) channel information.<br />
oFF: Select this setting when no subwoofer is in use. All low-frequency information<br />
will be sent to the front left and right speakers.<br />
lFe: this setting plays low-frequency information contained in the left and right<br />
program channels through the front left and right speakers, and directs only the lFechannel<br />
information to the subwoofer.<br />
when you have finished entering the settings, select back to Speaker Setup.<br />
Set the Speaker Distances<br />
As described above in Step two, when you measured the distances from each of your<br />
speakers to the listening position, your AVr provides an adjustment that compensates<br />
for the different distances so that the sound from each speaker will reach the listening<br />
position at the proper time. this process will improve the clarity and detail of the<br />
sound.<br />
17<br />
ENGLISH
<strong>AVR</strong> <strong>158</strong> Set Up the <strong>AVR</strong>, continued<br />
After you return to the Speaker Setup menu, navigate to the distance line and press the<br />
ok button to display the distance menu.<br />
18<br />
FL : 10FT<br />
CEN : 10FT<br />
FR : 10FT<br />
SR : 10FT<br />
* DISTANCE *<br />
SL : 10FT<br />
SUB : 10FT<br />
DELAY RESET : OFF<br />
UNIT : FEET<br />
A/V SYNC DELAY : 0mS<br />
BACK TO SPEAKER SETUP<br />
enter the distance from each speaker to the listening position that you measured in Step<br />
two and recorded in table A4 in the Appendix (see page 27). Select a speaker, then use<br />
the left/right buttons to change the measurement. You can enter distances between 0<br />
and 30 feet (9.1m). the default distance for all speakers is 10 feet (3m).<br />
the default unit of measurement is feet. to change the unit to metres, scroll down to the<br />
unit line and press the left/right buttons.<br />
when you have finished entering the settings, select back to Speaker Setup.<br />
Step Four – Setting Channel Output Levels <strong>Manual</strong>ly<br />
For a conventional stereo AVr, a simple balance control adjusts the stereo imaging by<br />
varying the relative loudness of the left and right channels. In a home theatre system<br />
with up to seven main channels plus a subwoofer, achieving proper imaging becomes<br />
both more critical and more complex. the goal is to ensure that each channel is heard<br />
at the listening position with equal loudness (when signals of equal loudness are played<br />
through them).<br />
After you return to the Speaker Setup menu, navigate to the level Adjust line and press<br />
the ok button to display the level Adjust menu.<br />
* LEVEL ADJUST*<br />
FL : 0dB<br />
CEN: 0dB<br />
FR : 0dB<br />
SR : 0dB<br />
SL : 0dB<br />
SUB: 0dB<br />
CHANNEL RESET: OFF<br />
TEST TONE SEQ: MANUAL<br />
TEST TONE : OFF<br />
BACK TO SPEAKER SETUP<br />
All of the system’s speakers will appear with their current level settings. You can adjust<br />
each speaker’s level between –10db and +10db in 1db increments.<br />
while making adjustments, you can measure the channel levels in one of these ways:<br />
• preferably, use a handheld Spl metre set to the c-weighting, slow scale. Adjust each<br />
speaker so that the metre reads 75db when the AVr’s built-in test noise is playing.<br />
• by ear. Adjust the levels so that the test tone sounds equally loud to you when it plays<br />
through each speaker.<br />
to set your levels using the AVr’s internal test tone, select the menu’s test tone Seq<br />
line and use the left/right buttons to select between Auto and <strong>Manual</strong>. After selecting<br />
Auto or <strong>Manual</strong>, move the cursor to the test tone line and use the left/right buttons to<br />
change the setting to on.<br />
Auto: the test tone will automatically circulate to all speakers, as indicated by the<br />
highlight bar. use the left/right buttons to adjust the level for any speaker when the<br />
test tone is paused there. use the up/down buttons to move the cursor to another line,<br />
and the test tone will follow the cursor. to stop the test tone, use the up/down buttons<br />
to move the cursor out of the screen’s speaker-listings area.<br />
<strong>Manual</strong>: the test tone will stay on the current speaker until you use the up/down<br />
buttons to move it to another speaker. use the left/right buttons to adjust the level for<br />
the speaker through which the test tone is playing.<br />
If you are using an external source to set your output levels, set test tone to off, use the<br />
up/down buttons to navigate to each speaker, and use the left/right buttons to adjust<br />
the speaker’s level while the source plays. NOTE: If you are using a handheld Spl metre<br />
with external source material, such as a test disc or an audio selection, play it and<br />
adjust the AVr’s master volume control until the metre measures 75db. then adjust the<br />
individual speaker levels.<br />
Channel Reset: to reset all channel levels to their factory defaults of 0db, select this<br />
line and press the left/right buttons.<br />
when you have finished adjusting the speaker levels, record the settings in table A6 in<br />
the Appendix. then select the back to Speaker Setup option in the oSd.<br />
Notes on Setting Speaker Volumes in Home Theatre Systems:<br />
while setting your system’s individual speaker volume levels is ultimately up to your<br />
personal taste, here are some ideas you may find helpful:<br />
• For films and video-music programs, your overall goal should be to create an<br />
enveloping, realistic sound field that draws you into the film or music program without<br />
drawing your attention away from the action on the screen.<br />
• For multichannel music recordings, some music producers will create a sound field<br />
that places the musicians all around you; others will create a sound field that places<br />
the musicians in front of you, with more subtle ambience in the surround speakers (as<br />
you would experience in a concert hall).<br />
• In most 5.1-channel film soundtracks, the surround speakers are not intended to be<br />
as loud or as active as the front speakers. Adjusting the surround speakers so they are<br />
always as loud as the front speakers could make dialogue difficult to understand and<br />
will make some sound effects sound unrealistically loud.<br />
Notes on Setting Subwoofer Volume:<br />
• Sometimes the ideal subwoofer volume setting for music is too loud for films, while<br />
the ideal setting for films is too quiet for music. when setting the subwoofer volume,<br />
listen to both music and films with strong bass content and find a “middle ground”<br />
volume level that works for both.<br />
• If your subwoofer always seems too loud or too quiet, you may want to place it in a<br />
different location. placing the subwoofer in a corner will always tend to increase its<br />
bass output, while placing it away from any walls or corners will always tend to lessen<br />
its bass output.<br />
Assign the Digital Audio Connectors<br />
1. review the input connections you listed on the Input connections and Source buttons<br />
table, on page 13. note which source devices you connected to the digital audio<br />
connectors. (If you did not connect any source devices to the digital audio connectors,<br />
you can skip this section.)<br />
2. turn on your tV and select the tV input where you connected the AVr in connect Your<br />
tV or Video display, on page 13.<br />
3. press the remote control’s oSd button. the AVr’s on-screen display (oSd) Master<br />
Menu will appear on the tV.<br />
** MASTER MENU **<br />
INPUT SETUP<br />
SURROUND SELECT<br />
SPEAKER SETUP<br />
SYSTEM SETUP<br />
4. use the remote’s arrow and ok buttons to select “Input Setup.” the Input Setup menu<br />
will appear.<br />
* INPUT SETUP *<br />
SOURCE : DVD<br />
TITLE:<br />
AUDIO IN : ANALOG<br />
AUTO POLL : OFF<br />
BXR : OFF<br />
TONE : IN<br />
BASS : 0<br />
TREBLE : 0<br />
BACK TO MASTER MENU
<strong>AVR</strong> <strong>158</strong><br />
5. For each source device you connected to a digital audio input:<br />
a) use the remote’s up and down arrow buttons to select “Source.” use the left<br />
and right arrow buttons to change the listed source to one of the sources you<br />
connected to a digital audio input connector.<br />
b) use the remote’s down arrow button to select “Audio In.”<br />
* INPUT SETUP *<br />
SOURCE : DVD<br />
TITLE:<br />
AUDIO IN : OPT 1<br />
AUTO POLL : ON<br />
BXR : OFF<br />
TONE : IN<br />
BASS : 0<br />
TREBLE : 0<br />
BACK TO MASTER MENU<br />
c) use the remote’s left and right arrow buttons to select the digital audio input<br />
where you connected the source device.<br />
Additional Input Setup Menu Items<br />
You can also adjust the following settings independently for each source:<br />
Title: You may change the display name for any source (except the radio). this feature<br />
may help you to select the correct source device even when you have forgotten which<br />
physical connections you used.<br />
1. Move the cursor to the title line and press the ok button. A block cursor will blink.<br />
2. use the up/down buttons to scroll through the alphabet in upper and lower case,<br />
the numbers and many punctuation marks. when you have selected the desired<br />
character, press the right button to move to the next space. press the right button<br />
twice to leave a blank space.<br />
3. press the ok button when you have finished.<br />
Auto Poll: the Auto poll feature is used when both an analogue audio and a digital<br />
audio connection have been made for one source device. If no digital signal is available,<br />
the AVr will automatically switch to the analogue input for the source. this situation<br />
can occur with some cable or satellite television broadcasts, where some channels are<br />
broadcast with digital audio and others with analogue audio, or when a dVd player is<br />
paused or stopped.<br />
For some sources such as dVd players, the Auto poll feature is unnecessary and may be<br />
undesirable. to turn Auto poll off, move the cursor to the Auto poll line and press the left/<br />
right buttons until off appears. with Auto poll turned off, the AVr will check for a signal<br />
only at the audio input assigned to the source.<br />
the remaining Input Setup menu items adjust the AVr’s audio performance for that<br />
source and may be skipped at this time. For most listening, we recommend leaving<br />
these settings at their factory defaults, allowing you to enjoy the sound mix created by<br />
your favourite movie and music artists.<br />
BXR: enhances bass performance when playing Mp3 tracks. Select on, or leave it at the<br />
default off setting for non-Mp3 audio sources.<br />
Tone: this setting determines whether the treble and bass controls are active. when this<br />
line is set to off, the tone controls are out of the circuit, with no changes to the sound.<br />
when this line is set to on, the bass and treble frequencies are boosted or cut, depending<br />
upon the bass and treble settings (see below).<br />
Bass and Treble: boost or cut the low or high frequencies by up to 10db by using the<br />
left/right buttons to change the setting by 2db at a time.<br />
when you’re finished, press the remote’s oSd button to turn off the on-screen menu.<br />
Operating Your <strong>AVR</strong><br />
Set Up the <strong>AVR</strong>, continued,<br />
and Operating Your <strong>AVR</strong><br />
now that you have installed your components and completed a basic configuration, you<br />
are ready to begin enjoying your home theatre system.<br />
Controlling the Volume<br />
Adjust the volume either by turning the front-panel Volume knob (clockwise to increase<br />
volume or counterclockwise to decrease volume) or by pressing the Volume up/down<br />
buttons on the remote. the volume is displayed as a negative number of decibels (db)<br />
below the 0db reference point.<br />
0db is the maximum recommended volume for your AVr. Although it’s possible to turn<br />
the volume to a higher level, doing so may damage your hearing and your speakers. For<br />
certain more dynamic audio materials, even 0db may be too high, allowing for damage<br />
to equipment. use caution with regard to volume levels.<br />
Muting the Sound<br />
to mute all speakers and the headphones, press the Mute button on the remote. Any<br />
recording in progress will not be affected. the Mute message will appear in the frontpanel<br />
display as a reminder. to restore the sound, press the Mute button again, or adjust<br />
the volume.<br />
Listening Through Headphones<br />
plug the 1/4-inch stereo plug on a pair of headphones into the front-panel phones<br />
jack for private listening. the default headphone bypass mode delivers a conventional<br />
two-channel signal to the headphones. press the Surround Modes button on the front<br />
panel or use the remote and oSd to switch to hArMAn headphone virtual surround<br />
processing, which emulates a 5.1-channel speaker system. no other surround modes<br />
are available for the headphones.<br />
Selecting a Source<br />
there are two different ways to select a source:<br />
• press the front-panel Source Select buttons.<br />
• directly select any source by pressing its Source Selector button on the remote.<br />
the AVr selects the audio and video inputs assigned to the source and any other<br />
settings you made during setup.<br />
the source name, the audio and video inputs assigned to the source, and the surround<br />
mode will appear on the front panel.<br />
Video Troubleshooting Tips<br />
If there is no picture:<br />
• check the source selection.<br />
• check all connections for a loose or incorrect connection.<br />
• check the video-input selection on the tV/display device.<br />
Additional Tips for Troubleshooting HDMI Connections<br />
• turn off all devices (including the tV, the AVr and any source components).<br />
• unplug the hdMI cables, starting with the cable between the AVr and the tV, and<br />
continuing with the cables between the AVr and each source device.<br />
• carefully reconnect the cables from the source devices to the AVr. connect the<br />
cable from the AVr to the tV last.<br />
• turn on the devices in this order: tV, AVr, source devices.<br />
NOTE: Depending upon the particular components involved, the complexity of<br />
the required communication between HDMI components may cause delays of<br />
up to a minute in the completion of some actions, such as input switching or<br />
switching between SD and HD channels.<br />
19<br />
ENGLISH
<strong>AVR</strong> <strong>158</strong><br />
20<br />
Listening to FM and AM Radio<br />
Select the AM/FM source. use the tuning up/down buttons to tune a station, which will<br />
be shown on the front-panel display and the tV screen.<br />
the AVr defaults to automatic tuning, meaning each press of the tuning up/down<br />
buttons scans until a station with acceptable signal strength is found. to switch to<br />
manual tuning, in which each press of a tuning button steps through a single frequency<br />
increment, press the tuning Mode button. each press of the tuning Mode button toggles<br />
between the automatic and manual tuning modes.<br />
once you have tuned an FM station, toggling the tuning Mode setting also switches the<br />
radio between stereo and monaural reception. (Mono reception may improve reception<br />
of weaker stations.)<br />
Preset Stations<br />
A total of 30 stations (AM and FM combined) may be stored as presets. when the desired<br />
station has been tuned in, press the Memory button on the remote, and two dashes will<br />
flash on the front-panel Message display. use the number buttons to enter the desired<br />
preset number.<br />
to tune a preset station, press the preset up/down buttons or enter the preset number<br />
using the number buttons.<br />
Selecting a Surround Mode<br />
Selecting a surround mode can be as simple or sophisticated as your individual system<br />
and tastes. Feel free to experiment, and you may find a few favourites for certain sources<br />
or program types. You can find more detailed information on surround modes in Audio<br />
processing and Surround Sound, on this page.<br />
to select a surround mode, press the oSd button on the remote to display the Master<br />
menu:<br />
** MASTER MENU **<br />
INPUT SETUP<br />
SURROUND MODE<br />
MANUAL SETUP<br />
SYSTEM SETUP<br />
use the up/down and ok buttons to select Surround Mode. the Surround Mode menu<br />
will appear:<br />
* MODE : MUSIC *<br />
DOLBY PLII MUSIC<br />
CENTER WIDTH :3<br />
DIMENSION :0<br />
PANORAMA :Off<br />
BACK TO MASTER MENU<br />
use the up/down and ok buttons to select the desired surround-mode category.<br />
Auto Select: For a digital program, such as a movie recorded with a dolby digital or<br />
dtS soundtrack, the AVr will automatically use the soundtrack’s native surround format.<br />
For two-channel analogue and pcM programs, the AVr uses the logic 7 Movie, logic 7<br />
Music or logic 7 game mode, depending on the source.<br />
Virtual Surround: when only two main speakers are present in the system, you can<br />
use hArMAn virtual surround to create an enhanced sound field that virtualises the<br />
missing speakers.<br />
Stereo: when you want two-channel playback, select the number of speakers you want<br />
to use for playback:<br />
• “2 ch Stereo” uses two speakers.<br />
• “5 ch Stereo” plays the left-channel signal through the front left and surround left<br />
speakers, the right-channel signal through the front right and surround right speakers,<br />
and a summed mono signal through the centre speaker.<br />
Operating Your <strong>AVR</strong>, continued,<br />
and Advanced Functions<br />
Movie: Select from the following when you want a surround mode for movie playback:<br />
logic 7 Movie or dolby pro logic II Movie.<br />
Music: Select from the following when you want a surround mode for music playback:<br />
logic 7 Music or dolby pro logic II Music. the dolby pro logic II Music mode provides<br />
some additional settings. See Audio processing and Surround Sound, on this page, for<br />
more information.<br />
Video Game: Select from the following when you want a surround mode for game<br />
playback: logic 7 game or dolby pro logic II game.<br />
After you select the surround-mode category, the Mode menu will appear:<br />
* MODE : MUSIC *<br />
DOLBY PLII MUSIC<br />
CENTER WIDTH :3<br />
DIMENSION :0<br />
PANORAMA :Off<br />
BACK TO MASTER MENU<br />
use the left/right buttons to change the surround mode.<br />
You can also select surround modes using the AVr’s front-panel buttons:<br />
1. press the Surr Mode button. the Message display will show the surround-mode<br />
category and surround mode.<br />
2. to change the surround mode within the surround-mode category, press the Surround<br />
Select up/down buttons. each press will change to the next surround mode.<br />
3. to change the surround-mode category, press the Surr Mode button. each press will<br />
change to the next surround-mode category.<br />
Advanced Functions<br />
Much of the adjusting and configuration your AVr requires is handled automatically, with<br />
little intervention required on your part. You can also customise your AVr to suit your<br />
system and your tastes. In this section, we will describe some of the more advanced<br />
adjustments available to you.<br />
Audio Processing and Surround Sound<br />
Audio signals can be encoded in a variety of formats that can affect not only the quality<br />
of the sound but also the number of speaker channels and the surround mode. You may<br />
also manually select a different surround mode, when available.<br />
Analogue Audio Signals<br />
Analogue audio signals usually consist of two channels – left and right. Your AVr offers<br />
two options for analogue playback:<br />
DSP Surround Off Mode: the dSp Surround off mode digitises the incoming signal and<br />
applies the bass-management settings, including speaker configuration, delay times<br />
and output levels. Select this mode when your front speakers are small, limited-range<br />
satellites and you are using a subwoofer. to select this mode, use a digital audio input or<br />
turn the tone control setting off, then select 2 ch Stereo mode.<br />
Analogue Surround Modes: Your AVr is able to process two-channel audio signals to<br />
produce multichannel surround sound, even when no surround sound has been encoded<br />
in the recording. Among the available modes are the dolby pro logic II, hArMAn virtual<br />
speaker, logic 7 and 5 ch Stereo modes. to select one of these modes, see Selecting a<br />
Surround Mode, on this page.<br />
Digital Audio Signals<br />
digital audio signals offer greater flexibility and capacity than analogue signals and<br />
allow the encoding of discrete channel information directly into the signal. the result is<br />
improved sound quality and startling directionality, since each channel’s information is<br />
transmitted discretely. high-resolution recordings sound extraordinarily distortion-free,<br />
especially in the high frequencies.
<strong>AVR</strong> <strong>158</strong><br />
Surround Modes<br />
Surround-mode selection depends upon the format of the incoming audio signal as well<br />
as your personal taste. Although there is never a time when all of the AVr’s surround<br />
modes are available, there is usually a wide variety of modes available for a given<br />
input. table A9 in the Appendix, on page 30, offers a brief description of each mode and<br />
indicates the types of incoming signals or digital bitstreams the mode may be used with.<br />
Additional information about the dolby and dtS modes is available on the companies’<br />
web sites: www.dolby.com and www.dtsonline.com<br />
when in doubt, check the jacket of your disc for more information on which surround<br />
modes are available. usually, nonessential sections of the disc, such as trailers, extra<br />
materials or the disc menu, are available only in dolby digital 2.0 (two-channel) or<br />
pcM two-channel mode. If the main title is playing and the display shows one of these<br />
surround modes, look for an audio or language setup section in the disc’s menu. Also,<br />
make sure your disc player’s audio output is set to the original bitstream rather than<br />
two-channel pcM. Stop play and check the player’s output setting.<br />
the channels included in a typical 5.1-channel recording are front left, front right, centre,<br />
surround left, surround right and lFe (low-frequency effects). the lFe channel is denoted<br />
as “.1” to represent the fact that it is limited to the low frequencies.<br />
digital formats include dolby digital 2.0 (two channels only), dolby digital 5.1, dolby<br />
digital ex (6.1), dolby digital plus (7.1), dolby truehd (7.1), dtS-hd high-resolution<br />
Audio (7.1), dtS-hd Master Audio (7.1), dtS 5.1, dtS 96/24 (5.1), two-channel pcM<br />
modes in 32khz, 44.1khz, 48khz or 96khz, and 5.1 or 7.1 multichannel pcM. (Your<br />
AVr will downmix the discrete surround back-channel information in 6.1-channel and<br />
7.1-channel recordings into your system’s surround left and surround right channels.)<br />
when the AVr receives a digital bitstream, it detects the encoding method and the<br />
number of channels, which is displayed briefly as three numbers, separated by slashes<br />
(e.g., “3/2/.1”).<br />
the first number indicates the number of front channels in the signal: “1” represents<br />
a monophonic recording (usually an older program that has been digitally remastered<br />
or, more rarely, a modern program for which the director has chosen mono as a special<br />
effect). “2” indicates the presence of the left and right channels but no centre channel.<br />
“3” indicates that all three front channels (left, right and centre) are present.<br />
the second number indicates whether any surround channels are present: “0” indicates<br />
that no surround information is present. “1” indicates that a matrixed surround signal<br />
is present. “2” indicates discrete surround left and right channels. (bitstreams with<br />
discrete surround back left and right channel signals will be indicated by a “4,” although<br />
the AVr downmixes the surround back-channel information into the surround left and<br />
right channels.)<br />
the third number is used for the lFe channel: “0” indicates no lFe channel. “.1”<br />
indicates that an lFe channel is present.<br />
dolby digital 2.0 signals may include a dolby Surround flag indicating dS-on or dS-oFF,<br />
depending on whether the two-channel bitstream contains only stereo information or a<br />
downmix of a multichannel program that can be decoded by the AVr’s dolby pro logic<br />
decoder. by default, these signals are played in dolby pro logic II Movie mode.<br />
when a pcM signal is received, the pcM message and the sampling rate (32khz,<br />
44.1khz, 48khz or 96khz) will appear.<br />
when only two channels – left and right – are present, the analogue surround modes<br />
may be used to decode the signal into multiple channels. If you would prefer a different<br />
surround format than the native signal’s digital encoding, press the Surround Modes<br />
button to display the Surround Modes menu (see Selecting a Surround Mode, on page<br />
20).<br />
the Auto Select option sets the surround mode to the native signal’s digital encoding,<br />
e.g., dolby digital, dtS, dolby truehd or dtS-hd Master Audio. For analogue twochannel<br />
materials, the AVr defaults to the logic 7 Movie mode. For dolby digital 2.0<br />
programs, the AVr defaults to the dolby pro logic II Movie mode, which creates a<br />
5.1-channel surround-sound presentation from the two-channel program. If you prefer<br />
a different surround mode, select the surround-mode category: Virtual Surround, Stereo,<br />
Movie, Music or Video game. press the ok button to change the mode.<br />
Advanced Functions, continued<br />
each surround-mode category is set to a default surround mode:<br />
• Virtual Surround: hArMAn virtual speaker.<br />
• Stereo: 5-ch Stereo.<br />
• Movie: logic 7 Movie.<br />
• Music: logic 7 Music.<br />
• Video game: logic 7 game.<br />
You may select a different mode for each category. below is a complete list of available<br />
surround modes. (the actual surround modes available will depend on the number of<br />
speakers in your system.)<br />
• Virtual Surround: hArMAn virtual speaker.<br />
• Stereo: 2-ch Stereo or 5-ch Stereo.<br />
• Movie: logic 7 Movie, dolby pro logic II Movie.<br />
• Music: logic 7 Music, dolby pro logic II Music.<br />
• Video game: logic 7 game, dolby pro logic II game.<br />
once you have programmed the surround mode for each type of audio, select the line<br />
from the Surround Modes menu to override the AVr’s automatic surround-mode selection.<br />
the AVr will use the same surround mode the next time the source is selected.<br />
please refer to table A9 in the Appendix for more information on which surround modes<br />
are available with different bitstreams.<br />
Dolby Pro Logic II Music Mode Adjustments<br />
when you select dolby pro logic II as the music surround mode, additional adjustments<br />
become available:<br />
* MODE : MUSIC *<br />
DOLBY PLII MUSIC<br />
CENTER WIDTH :3<br />
DIMENSION :0<br />
PANORAMA :Off<br />
BACK TO MASTER MENU<br />
Center Width: this setting affects how vocals sound through the three front speakers.<br />
A lower number focuses the vocal information tightly on the centre channel. higher<br />
numbers (up to 7) broaden the vocal soundstage. use the left/right buttons to adjust<br />
this setting.<br />
Dimension: this setting affects the depth of the surround presentation, allowing you to<br />
“move” the sound toward the front or rear of the room. the setting of “0” is a neutral<br />
default. Setting “F-3” moves the sound toward the front of the room, while setting “r-3”<br />
moves the sound toward the rear. use the left/right buttons to adjust it.<br />
Panorama: with the panorama mode turned on, some of the sound from the front<br />
speakers is moved to the surround speakers, creating an enveloping “wraparound”<br />
effect. each press of the ok button toggles the setting on or off.<br />
21<br />
ENGLISH
<strong>AVR</strong> <strong>158</strong> Advanced Functions, continued<br />
22<br />
System Setup<br />
the AVr’s System Setup menu lets you customise in what way many of the AVr’s<br />
features operate. press the oSd button and navigate to the System Setup line. press the<br />
ok button to display the System Setup menu.<br />
VFD Fade Time Out: Some people find the brightness of the AVr’s front-panel display<br />
distracting during movies or listening sessions. It’s possible to dim the front-panel<br />
display completely using the remote’s display dimmer button (see System remote<br />
control Functions, on pages 8 and 9). the VFd Fade time out sets the display to remain<br />
dark most of the time, lighting up only when a button is pressed or a remote command<br />
is received, and going dark again five seconds after the last command. the feature also<br />
causes the display to light up only when a button is pressed but the display immediately<br />
begins to fade to dark. this setting allows you to program the length of the fade time.<br />
Select a time-out period of between three and ten seconds, or select off if you prefer to<br />
leave the displays on at all times or to use the display dimmer button.<br />
Volume Default and Default Volume Set: these two settings are used together to<br />
program the volume level when you turn on the AVr. Set Volume default to on, and then<br />
set the default Volume Set to the desired turn-on volume. when Volume default is set<br />
to off, the AVr will turn on at the last-used volume setting from the previous listening<br />
session.<br />
HDMI Audio To TV: this setting determines whether hdMI audio signals are passed<br />
through the hdMI Monitor out connector to the video display. In normal operation, leave<br />
this setting at off, as audio will be played through the AVr. to use the tV by itself, without<br />
the home theatre system, turn this setting to on. In this case, you will need to mute the<br />
tV’s speakers (or switch the setting to off) when using the AVr for audio.<br />
Semi OSD Time Out: program the amount of time (2 to 5 seconds) the two-line semioSd<br />
status messages remain on screen, or deactivate the semi-oSd display altogether<br />
if you find it distracting. these messages will continue to appear on the front panel of<br />
the AVr.<br />
Full OSD Time Out: program the amount of time (20, 30, 40 or 50 seconds) the full oSd<br />
menus remain visible on screen. the full oSd system may not be deactivated. NOTE: It<br />
isn’t possible to view video sources while the full oSd menus are displayed.<br />
HDMI Link: this setting allows the communication of control information among the<br />
hdMI devices in your system. turn this setting to on to allow control communication<br />
among the hdMI devices; turn the setting to off to forbid control communication.<br />
Advanced Remote Control Programming<br />
Remote Channel-Control Punch-Through<br />
the punch-through feature allows you to operate one component while setting certain<br />
groups of controls to operate another component. For example, while using the AVr<br />
controls for surround modes and other audio functions, you may also use the remote<br />
to operate the transport controls of your blu-ray disc player. or while using the remote<br />
to control video functions on your tV, you may also use the remote to change channels<br />
on your cable box.<br />
to program punch-through control while operating any device:<br />
1. For three seconds, press and hold the Source Selector button (or the AVr button) for<br />
the main device the remote will be operating. the program Indicator led will flash,<br />
indicating that the remote is in program mode and that you may release the button.<br />
2. Select the type of punch-through programming.<br />
a) to program volume-control punch-through, press the Volume up button.<br />
b) to program channel-control punch-through, press the Volume down button.<br />
c) to program transport-control punch-through, press the play transport-control<br />
button.<br />
3. press the Source Selector button for the device whose volume, channel or transportcontrols<br />
you will use while operating the device selected in the first step. the program<br />
Indicator led will flash to confirm.<br />
to undo punch-through programming, follow the same steps as above, but press the<br />
same Source Selector button in Steps 1 and 3.<br />
You may reassign the transport-control punch-through programming for the AVr, VId2<br />
and VId3 devices to another device, such as a cd player. If you wish to remove transportcontrol<br />
punch-through altogether for the AVr, VId2 or VId3 device, follow the same<br />
procedure as for programming punch-through, but in Step 3 press either of the other<br />
two of these three special selector buttons. For example, to remove transport-control<br />
punch-through from the VId3 device so that pressing any of the transport controls will<br />
have no effect, press and hold the VId3 button until the program Indicator led flashes,<br />
then press the play button, followed by either the AVr or VId2 button.<br />
Programming Macro Commands<br />
each of the AVr remote’s four Macro buttons and the power on button (see System<br />
remote control Functions, on pages 8 and 9) can be programmed to send out up to<br />
19 commands at one time from a single button push. Any AVr remote control button’s<br />
function from any mode (except the Mute button, the dim button and the channel up/<br />
down buttons) can be programmed into a macro.<br />
NOTE: use caution when programming complicated macros. It isn’t possible to program<br />
a pause or delay before sending additional commands after a “power on” command,<br />
and the component may not be ready to respond to commands immediately after<br />
powering on.<br />
to program a macro:<br />
1. Simultaneously press one of the four Macro buttons, or the power on button, and the<br />
Mute button to enter the programming mode.<br />
2. press in up to 19 commands that you want stored in that Macro button. press the<br />
Source Selector button for each device (or AVr button for the AVr itself) before you<br />
enter individual commands. this step counts as one of the 19 commands allowed for<br />
each Macro.<br />
3. For the power on command, do not press the power on button. press the Mute<br />
button instead.<br />
4. press the power off button to program the power off command.<br />
5. press the Sleep button to end the programming process.<br />
It isn’t possible to “edit” a command within a macro. however, you may erase the macro<br />
as follows:<br />
1. Simultaneously press and hold the Mute button and the Macro button containing the<br />
macro until the program Indicator led flashes.<br />
2. press the channel down button to erase the macro.<br />
to execute a macro, press the Macro button (or the power on button) into which you<br />
programmed the macro.<br />
Recording<br />
two-channel analogue audio signals, as well as composite video signals, are normally<br />
available at the appropriate recording output connectors. to make a recording, connect<br />
your audio or video recorder to the appropriate AVr output connectors as described in<br />
the Making connections section, insert blank media in the recorder and make sure the<br />
recorder is turned on and recording while the source is playing. refer to the recording<br />
device’s instructions for complete information about making recordings.<br />
NOTES:<br />
1. the AVr does not convert digital signals to analogue signals.<br />
2. hdMI and component video sources are not available for recording.<br />
3. please make certain that you are aware of any copyright restrictions on any material<br />
you record. unauthorised duplication of copyrighted materials is prohibited by law.
<strong>AVR</strong> <strong>158</strong><br />
Sleep Timer<br />
the sleep timer sets the AVr to play for up to 90 minutes and then turn off automatically.<br />
press the Sleep button on the remote, and the time until turn-off will be displayed on the<br />
front-panel Message display and on a connected tV. each additional press of the Sleep<br />
button decreases the play time by 10 minutes, with a maximum of 90 minutes. the<br />
Sleep oFF setting disables the sleep timer.<br />
when the sleep timer has been set, the front-panel display will automatically dim to<br />
half brightness.<br />
If you press the Sleep button after the timer has been set, the remaining play time will<br />
be displayed. press the Sleep button again to change the play time.<br />
Resetting the Remote<br />
to reset the remote to its factory-default condition, simultaneously press and hold any<br />
Source Selector button and the “0” number button. when the program Indicator led<br />
flashes amber, enter the code “333.” when the green led goes out, the remote control<br />
will be reset.<br />
Processor Reset<br />
If the AVr behaves erratically after a power surge, first turn off the rear-panel Main<br />
power switch and unplug the Ac power cord for at least 3 minutes. plug the cord back<br />
in and turn the AVr on. If this procedure doesn’t help, reset the AVr’s processor as<br />
described below.<br />
NOTE: A processor reset erases all user configurations, including video resolution,<br />
speaker and level settings, and tuner presets. After a reset, reenter all of these settings<br />
from your notes in the Appendix worksheets.<br />
To reset the <strong>AVR</strong>’s processor:<br />
1. press the front-panel Standby/on switch to place the unit in the Standby mode (the<br />
power Indicator led will turn amber).<br />
2. press and hold the front-panel Surround Mode button for at least 5 seconds until the<br />
reSet message appears on the front-panel Message display.<br />
If the AVr does not function correctly after a processor reset, contact an authorised<br />
harman kardon service centre for assistance. Authorised service centres may be located<br />
by visiting our web site at www.harmankardon.com.<br />
Memory<br />
If the AVr is unplugged or experiences a power outage, it will retain your user settings<br />
for up to four weeks.<br />
Advanced Functions, continued<br />
23<br />
ENGLISH
<strong>AVR</strong> <strong>158</strong> Troubleshooting<br />
Troubleshooting<br />
24<br />
Symptom Cause Solution<br />
unit does not function when Main power switch is<br />
turned on<br />
Front-panel Message display lights, but there's no<br />
sound or picture<br />
no sound from any speaker; protect message<br />
appears on Message display<br />
• no Ac power<br />
• ensure that the power cord is plugged into a live Ac<br />
power outlet<br />
• check if the Ac outlet is switch-controlled<br />
• Intermittent input connection<br />
• Mute is on<br />
• Volume control is turned down<br />
• Amplifier is in protection mode due to possible short<br />
circuit<br />
• Amplifier is in protection mode due to internal problems<br />
no sound from centre or surround speakers • Incorrect surround mode<br />
• program material is monophonic<br />
• Incorrect speaker configuration<br />
• program material is stereo<br />
unit does not respond to remote control commands • weak batteries in remote<br />
• AVr not selected<br />
• remote sensor is obscured<br />
• Secure all input and speaker connections<br />
• press Mute button<br />
• turn up Volume control<br />
• check all speaker wires at speaker and AVr<br />
connections for crossed wires<br />
• contact your local harman kardon service centre<br />
• Select a surround mode other than stereo<br />
• Mono programs contain no surround information<br />
• check the speaker configuration in the setup menu<br />
• the surround decoder may not create centre- or<br />
surround-channel information from nonencoded stereo<br />
programs<br />
• change batteries in remote<br />
• press the Setup/AVr button<br />
• ensure that the AVr’s front-panel remote sensor is in<br />
the line of sight of the remote<br />
Intermittent buzzing in tuner • local interference<br />
• Move the AVr or aerial away from computers,<br />
fluorescent lights, motors or other electrical appliances<br />
unable to activate remote control programming mode • Source Selector button is not held for at least 3 seconds • be sure to hold the Source Selector button for at least<br />
3 seconds<br />
Additional information on troubleshooting possible problems with your AVr and installation-related issues may be found in the list of “Frequently Asked Questions,” which is located in the product<br />
Support section of our web site: www.harmankardon.com
<strong>AVR</strong> <strong>158</strong><br />
Specifications<br />
Audio Section<br />
Stereo power: 70w per channel,<br />
two channels driven @ 8 ohms,<br />
1khz,
<strong>AVR</strong> <strong>158</strong><br />
Appendix – Default settings, worksheets, remote product codes<br />
Table A1 – Recommended Source Component Connections<br />
26<br />
Device Type <strong>AVR</strong> Source Audio Connections Video Connections<br />
cable tV, Satellite, hdtV or other device that<br />
delivers television programs<br />
Table A2 – Source Setting Defaults<br />
Source DVD HDMI 1 HDMI 2 HDMI 3 Video 1 Video 2 Aux 1 Aux 2 CD Tape Tuner TV<br />
title tuner<br />
Audio Input coAx 1 hdMI hdMI hdMI AnAlogue optIcAl 1 AnAlogue AnAlogue AnAlogue AnAlogue Int. tuner optIcAl 1<br />
Auto poll on oFF oFF oFF oFF on oFF oFF oFF on – – oFF<br />
Surround Mode<br />
logIc 7<br />
MoVIe<br />
logIc 7<br />
MoVIe<br />
logIc 7<br />
MoVIe<br />
Video 1 • Video 1 Analogue inputs<br />
logIc 7<br />
MoVIe<br />
• optical 1 Input (if not in use with hdMI 3<br />
Vcr, dVr, pVr, or other audio/video recorder Video 2 • Video 2 Analogue (inputs and outputs)<br />
dVd player, blu-ray disc player dVd or hdMI<br />
(for blu-ray disc)<br />
hdMI-capable disc player, game console or<br />
other audio/video device<br />
hdMI-capable disc player, game console or<br />
other audio/video device<br />
hdMI-capable disc player, game console or<br />
other audio/video device<br />
• Any one available coaxial or optical digital audio<br />
input with corresponding coax digital output<br />
• dVd Analogue Inputs<br />
• coax 1 Input<br />
logIc 7<br />
MoVIe<br />
logIc 7<br />
MoVIe<br />
logIc 7<br />
MoVIe<br />
logIc 7<br />
MoVIe<br />
composite Video 1 Input<br />
• composite Video 2 Input<br />
• For recording, use composite Video 2 output<br />
• dVd component Video Input<br />
hdMI 1 • hdMI 1 Input<br />
• hdMI 1 Input<br />
hdMI 2 • hdMI 2 Input<br />
• hdMI 2 Input<br />
hdMI 3 • hdMI 3 Input<br />
• hdMI 3 Input<br />
portable audio device Aux 1 or Aux 2 • Aux inputs on front and rear panels<br />
• not required<br />
cd player cd • cd Analogue Inputs<br />
• Any one available coaxial or optical digital<br />
audio input<br />
cd-r, Minidisc, cassette tape • tape Analogue (inputs and outputs)<br />
• Any one available coaxial or optical digital<br />
audio input<br />
• use corresponding optical digital output<br />
• not required<br />
• not required<br />
Note: the AVr is equipped with a total of three digital audio inputs. certain digital audio connections are recommended simply because those digital audio inputs are assigned to those sources by<br />
default at the factory. but any digital audio input may be reassigned to any source. Since you may not be using all of the AVr's sources, you may reassign a digital audio input that is recommended<br />
for a source you aren’t using to another device. table A1 is a guideline; you may need to make adjustments to fit your system.<br />
logIc 7<br />
MoVIe<br />
logIc 7<br />
MoVIe<br />
logIc 7<br />
MoVIe<br />
Appendix<br />
logIc 7<br />
MoVIe
<strong>AVR</strong> <strong>158</strong><br />
Table A3 – Speaker/Channel Setting Defaults<br />
Source All Sources<br />
left/right Speaker on<br />
centre Speaker on<br />
Surround Speaker on<br />
Surround back Speaker on<br />
Subwoofer on<br />
left/right Speaker crossover 100hz<br />
centre Speaker crossover 100hz<br />
Surround Speaker crossover 100hz<br />
Surround back Speaker crossover 100hz<br />
lFe preSent<br />
Sub Mode Sub<br />
Table A4 – Distance Settings<br />
Speaker Positions Your Distances From Speaker to Listening Position<br />
Front left<br />
centre<br />
Front right<br />
Surround right<br />
Surround left<br />
Subwoofer<br />
A/V Sync delay 0mS<br />
Appendix<br />
27<br />
ENGLISH
<strong>AVR</strong> <strong>158</strong><br />
Table A5 – Source Settings<br />
28<br />
Source DVD HDMI 1 HDMI 2 HDMI 3 Video 1 Video 2 Aux 1 Aux 2 CD Tape Tuner<br />
title Int. tuner<br />
Video Input<br />
component<br />
Video Input<br />
n/A n/A n/A n/A n/A n/A n/A n/A n/A n/A<br />
digital Audio Input n/A n/A n/A<br />
Analogue Audio<br />
Input<br />
dVd VIdeo 1 VIdeo 2<br />
Aux<br />
(FrontpAnel)<br />
Aux<br />
(reArpAnel)<br />
cd tApe tuner<br />
Auto poll n/A n/A n/A<br />
Table A6 – Speaker/Channel Settings<br />
number of Speakers on<br />
crossover<br />
distance<br />
channel level Adjust<br />
Appendix<br />
Front Left Front Right Centre Surround Left Surround Right Subwoofer
<strong>AVR</strong> <strong>158</strong><br />
Table A7 – Remote Control Codes<br />
Source Input Product Type (circle one) Remote Control Code<br />
Video 1 Vcr, pVr, dMc<br />
Video 2 cable, Satellite<br />
hdMI 1 dVd, blu-ray disc player, Vcr/pVr/dMc, cable/Satellite<br />
hdMI 2 dVd, blu-ray disc player, Vcr/pVr/dMc, cable/Satellite<br />
hdMI 3 dVd, blu-ray disc player, Vcr/pVr/dMc, cable/Satellite<br />
dVd dVd, blu-ray disc player, Vcr/pVr/dMc, cable/Satellite<br />
cd cd, cd-r<br />
tape cassette, cd-r<br />
Table A8 – System Settings<br />
Feature Default Setting Your Setting<br />
VFd Fade time-out oFF<br />
Volume default oFF<br />
default Vol Set –25db<br />
hdMI Audio to tV oFF<br />
Semi-oSd time-out 5 Seconds<br />
Full-oSd time-out 20 Seconds<br />
hdMI link oFF<br />
Appendix<br />
29<br />
ENGLISH
<strong>AVR</strong> <strong>158</strong><br />
Table A9 – Surround Modes<br />
30<br />
Surround Mode Description Incoming Bitstream or Signal<br />
dolby digital provides up to five separate main audio channels and a dedicated low-frequency<br />
effects (lFe) channel.<br />
dolby digital plus An enhanced version of dolby digital encoded more efficiently, dolby digital plus<br />
has the capacity for additional discrete channels and for streaming audio from the<br />
Internet, all with enhanced audio quality. Source material may be delivered via an<br />
hdMI connection or decoded to dolby digital or pcM and transmitted via coaxial or<br />
optical digital audio.<br />
dolby truehd dolby truehd is an expansion of Mlp lossless audio, the same format used on<br />
dVd-Audio discs. dolby truehd adds the features found in dolby digital, such as<br />
night mode settings, while delivering fully lossless audio that is a true reproduction<br />
of studio master recordings.<br />
• dolby digital 1/0/.0 or .1, 2/0/.0 or .1, 3/0/.0 or .1,<br />
2/1/.0 or .1, 2/2/.0 or .1, 3/2/.0 or .1<br />
• dolby digital ex (played as 5.1)<br />
• dolby digital plus decoded and delivered via coaxial or<br />
optical connection<br />
• dolby digital plus via hdMI connection (source device decodes<br />
to dolby digital when a coaxial or optical connection is used)<br />
• blu-ray disc or hd-dVd encoded with dolby truehd, delivered<br />
via hdMI<br />
dolby digital Stereo delivers a 2-channel downmix of dolby digital materials. • dolby digital 1/0/.0 or .1, 2/0/.0 or .1, 3/0/.0 or .1,<br />
2/1/.0 or .1, 2/2/.0 or .1, 3/2/.0 or .1<br />
• dolby digital ex<br />
dolby pro logic II<br />
Mode group<br />
dolby pro logic II<br />
Movie<br />
dolby pro logic II<br />
Music<br />
dolby pro logic II<br />
game<br />
Analogue decoder that derives five full-range, discrete main audio channels from<br />
matrix surround-encoded or two-channel analogue sources. Four variants are<br />
available.<br />
See below<br />
Variant of dolby pro logic II that is optimised for movie and television programs. • dolby digital 2.0 or 2.1<br />
• Analogue (two-channel)<br />
• tuner<br />
• pcM (32khz, 44.1khz, 48khz, 96khz)<br />
Variant of dolby pro logic II that is optimised for music selections. Allows<br />
adjustment of sound-field presentation in three dimensions:<br />
• Centre Width (adjusts width of vocal soundstage)<br />
• Dimension (adjusts depth of soundstage)<br />
• Panorama (adjusts wraparound surround effect)<br />
Variant of dolby pro logic II that emphasises use of the surround channels and<br />
subwoofer for total immersion in the video gaming experience.<br />
dolby pro logic original version of dolby pro logic that steered a mono signal containing<br />
information below 7khz to the surround channels.<br />
harman Virtual Speaker Simulates 5.1 channels when only two speakers are present or a more enveloping<br />
sound field is desired.<br />
• dolby digital 2.0 or 2.1<br />
• Analogue (two-channel)<br />
• tuner<br />
• pcM (32khz, 44.1khz, 48khz, 96khz)<br />
• dolby digital 2.0 or 2.1<br />
• Analogue (two-channel)<br />
• tuner<br />
• pcM (32khz, 44.1khz, 48khz, 96khz)<br />
• dolby digital 2.0 or 2.1<br />
• Analogue (two-channel)<br />
• tuner<br />
• pcM (32khz, 44.1khz, 48khz, 96khz)<br />
• dolby digital<br />
• Analogue (two-channel)<br />
• tuner<br />
• pcM (32khz, 44.1khz or 48khz)<br />
Appendix
<strong>AVR</strong> <strong>158</strong><br />
Table A9 – Surround Modes (cont.)<br />
Surround Mode Description Incoming Bitstream or Signal<br />
dtS digital using a different encoding/decoding method from dolby digital, dtS digital<br />
also provides up to five discrete main channels, plus an lFe channel.<br />
dtS-hd dtS-hd is a high-definition audio format that complements the high-definition video<br />
found on blu-ray disc and hd-dVd discs. It is transmitted using a dtS core with<br />
high-resolution extensions. even when only dtS 5.1 surround sound is desired (or<br />
available, if the multizone system is in use), the higher capacity of high-resolution<br />
discs serves up dtS at twice the bit rate used on dVd-Video discs.<br />
dtS-hd Master Audio dtS-hd Master Audio technology delivers bit-for-bit reproductions of studio master<br />
recordings for an incredibly accurate performance.<br />
dtS Stereo delivers a two-channel downmix of dtS digital materials or presents a matrixencoded<br />
surround presentation.<br />
logic 7<br />
Mode group<br />
logic 7<br />
Movie<br />
logic 7<br />
Music<br />
logic 7<br />
game<br />
A hArMAn proprietary technology, logic 7 technology enhances two-channel<br />
and matrix-encoded recordings by deriving separate information for the surround<br />
back channels. It provides more accurate placement of sound, improves panning<br />
and expands the sound field, even when used with 5.1-channel systems. logic 7<br />
technology uses 96khz processing and is available in 5.1 mode. three variants are<br />
available.<br />
especially suited to two-channel sources containing dolby Surround or matrix<br />
encoding, logic 7 Movie mode increases centre-channel intelligibility.<br />
the AVr is programmed at the factory to default to this mode for twochannel<br />
signals. logic 7 Music mode is well suited to conventional twochannel<br />
music recordings.<br />
• dtS 1/0/.0 or .1, 2/0/.0 or .1, 3/0/.0 or .1, 3/1/.0 or<br />
.1, 2/2/.0 or .1, 3/2/.0 or .1<br />
• dtS-eS Matrix (played as 5.1)<br />
• dtS-eS discrete (played as 5.1)<br />
Appendix<br />
• blu-ray disc or hd-dVd discs encoded with dtS-hd modes,<br />
delivered via hdMI connection<br />
• blu-ray disc or hd-dVd discs encoded with dtS-hd Master<br />
Audio technology, delivered via hdMI connection<br />
• dtS 1/0/.0 or .1, 2/0/.0 or .1, 3/0/.0 or .1, 3/1/.0<br />
or .1, 2/2/.0 or .1, 3/2/.0 or .1<br />
• dtS 96/24<br />
• dtS-eS Matrix<br />
See below<br />
• Analogue (two-channel)<br />
• tuner<br />
• pcM (32khz, 44.1khz, 48khz, 96khz)<br />
• Analogue (two-channel)<br />
• tuner<br />
• pcM (32khz, 44.1khz, 48khz, 96khz)<br />
use logic 7 game mode to enhance enjoyment of video-game consoles. • Analogue (two-channel)<br />
• tuner<br />
• pcM (32khz, 44.1khz, 48khz, 96khz)<br />
5-channel Stereo useful for parties, the left- and right-channel information is played through both<br />
the front and surround speakers on each side, while the centre speaker plays a<br />
summed mono mix.<br />
2-channel Stereo turns off all surround processing and plays a pure two-channel signal or a<br />
downmix of a multichannel signal. the signal is digitised and bass management<br />
settings are applied, making it appropriate when a subwoofer is used.<br />
• Analogue (two-channel)<br />
• tuner<br />
• pcM (32khz, 44.1khz, 48khz, 96khz)<br />
• Analogue (two-channel; dSp downmix available for multichannel)<br />
• tuner<br />
• pcM (32khz, 44.1khz, 48khz, 96khz)<br />
31<br />
ENGLISH
<strong>AVR</strong> <strong>158</strong> Appendix<br />
32<br />
refer to the numbered buttons when using the remote control Function list
<strong>AVR</strong> <strong>158</strong><br />
Table A10 – Remote Control Function List<br />
No. Button Name <strong>AVR</strong> Function DVD CD/CD-R Tape VCR (VID1) TiVo ® (VID1)<br />
DMC (VID 1/<br />
HDMI 1/2/3)<br />
CBL (VID2) SAT (VID2)<br />
01 power on power on power on power on power on power on/off power on power on power on power on<br />
02 power off power off power off power off power off tV power power off power off power off power off<br />
03 Mute Mute Mute Mute Mute Mute Mute Mute Mute Mute Mute<br />
04 AVr AVr Select AVr Select AVr Select AVr Select AVr Select AVr Select AVr Select AVr Select AVr Select AVr Select<br />
05 dVd dVd Select dVd Select dVd Select dVd Select dVd Select dVd Select dVd Select dVd Select dVd Select dVd Select<br />
06 VId 1 (Vcr) Video 1 Select Vcr Select Vcr Select Vcr Select Vcr Select Vcr Select Vcr Select Vcr Select Vcr Select Vcr Select<br />
07 hdMI 1 hdMI 1 Select hdMI 1 Select hdMI 1 Select hdMI 1 Select hdMI 1 Select hdMI 1 Select hdMI 1 Select hdMI 1 Select hdMI 1 Select hdMI 1 Select<br />
08 tape tape Select tape Select tape Select tape Select tape Select tape Select tape Select tape Select tape Select tape Select<br />
09 cd cd Select cd Select cd Select cd Select cd Select cd Select cd Select cd Select cd Select cd Select<br />
10 VId 2 (cbl/SAt) Video 2 Select cbl/SAt Select cbl/SAt Select cbl/SAt Select cbl/SAt Select cbl/SAt Select cbl/SAt Select cbl Select SAt Select cbl/SAt Select<br />
11 hdMI 2 hdMI 2 Select hdMI 2 Select hdMI 2 Select hdMI 2 Select hdMI 2 Select hdMI 2 Select hdMI 2 Select hdMI 2 Select hdMI 2 Select hdMI 2 Select<br />
12 Aux 1 Aux 1 Select Aux 1 Select Aux 1 Select Aux 1 Select Aux 1 Select Aux 1 Select Aux 1 Select Aux 1 Select Aux 1 Select Aux 1 Select<br />
13* Aux 2 Aux 2 Select Aux 2 Select Aux 2 Select Aux 2 Select Aux 2 Select Aux 2 Select Aux 2 Select Aux 2 Select Aux 2 Select Aux 2 Select<br />
15* hdMI 3 hdMI 3 Select hdMI 3 Select hdMI 3 Select hdMI 3 Select hdMI 3 Select hdMI 3 Select hdMI 3 Select hdMI 3 Select hdMI 3 Select hdMI 3 Select<br />
16 Sleep/ch+ Sleep Audio channel + channel + Audio channel + channel + channel +<br />
17 test tone test tone Find<br />
18 AM/FM tuner Select tuner Select tuner Select tuner Select tuner Select tuner Select tuner Select tuner Select tuner Select tuner Select<br />
19 Vol up Volume up Volume up Volume up Volume up Volume up title Volume up Volume up Volume up<br />
20 ch-<br />
disc Menu or<br />
title<br />
HDMI<br />
1/2/3<br />
cd-r Select channel - channel - Info channel - channel - channel -<br />
21 oSd oSd program oSd live tV oSd oSd oSd<br />
22 t/V<br />
tV/dVd or V.<br />
oFF<br />
Input Select tV/Vcr tV Input tV/cbl tV/SAt tV/Video<br />
23 Vol down Volume down Volume down Volume down Volume down Volume down Volume down Volume down Volume down<br />
24 ch./guide channel trim title or disc Menu continuous play guide disc Menu Info/guide Info/guide guide<br />
25 Speaker Menu Speaker Adjust Menu or Setup Intro Scan Menu Menu Setup Menu Menu Menu<br />
26 up Move/Adjust up up up up up up up up<br />
27 left Move/Adjust left left left left left left left left<br />
28 ok ok enter enter Select enter enter enter Set/enter<br />
29 right<br />
Move/Adjust<br />
right<br />
right right right right right right right<br />
30 down Move/Adjust down down down down down down down down<br />
31 digital/exit digital Input Select open/close return/exit open/close<br />
32 delay/prev. ch. delay Adjust return or Status open/close Status prev channel prev channel prev channel<br />
33 1 1 1 1 1 1 1 1 1 1<br />
34 2 2 2 2 2 2 2 2 2 2<br />
35 3 3 3 3 3 3 3 3 3 3<br />
36 4 4 4 4 4 4 4 4 4 4<br />
37 5 5 5 5 5 5 5 5 5 5<br />
* NOTE: there is no button #14<br />
Appendix<br />
33<br />
ENGLISH
<strong>AVR</strong> <strong>158</strong><br />
Table A10 – Remote Control Function List (cont.)<br />
34<br />
No. Button Name <strong>AVR</strong> Function DVD CD/CD-R Tape VCR (VID1) TiVo ® (VID1)<br />
DMC (VID 1/<br />
HDMI 1/2/3)<br />
CBL (VID2) SAT (VID2)<br />
38 6 6 6 6 6 6 6 6 6 6<br />
39 7 7 7 7 7 7 7 7 7 7<br />
40 8 8 8 8 8 8 8 8 8 8<br />
41 tun-M tuner Mode chapter+ or Zoom repeat Zoom<br />
42 9 9 9 9 9 9 9 9 9 9<br />
43 0 0 0 0 0 0 0 0 0 0<br />
44 Memory Memory Audio or playlist time<br />
Source<br />
(dMc250 only)<br />
45 tuning up tuning up next chapter track direct cancel ppV cancel<br />
46 direct<br />
direct tuner<br />
entry<br />
Angle random play Angle FAV FAV Angle/FAV<br />
47 clear clear clear clear clear clear clear bypass next<br />
48 preset up preset tune up Slow Forward +10 Music Alt<br />
49 tuning down tuning down prev chapter track Increment<br />
50 tone tone mode V-off<br />
51 rdS rdS disc Skip disc Skip Skip play Mode<br />
52 preset down<br />
preset tune<br />
down<br />
Slow rev<br />
53 M1 Macro 1 Macro 1 Macro 1 Macro 1 Macro 1 Macro 1 Macro 1 Macro 1 Macro 1 Macro 1<br />
54 M2 Macro 2 Macro 2 Macro 2 Macro 2 Macro 2 Macro 2 Macro 2 Macro 2 Macro 2 Macro 2<br />
55 M3 Macro 3 Macro 3 Macro 3 Macro 3 Macro 3 Macro 3 Macro 3 Macro 3 Macro 3 Macro 3<br />
56 M4 Macro 4 Macro 4 Macro 4 Macro 4 Macro 4 Macro 4 Macro 4 Macro 4 Macro 4 Macro 4<br />
57 night night Mode Select Subtitle on/off cdp Select Subtitle<br />
58 Skip down Skip – (dVd) Step – Skip – Scan – thumbs down Skip – Skip – (dVd) Skip – (dVd)<br />
59 Skip up Skip + (dVd) Step + Skip + Scan + thumbs up Skip + Skip + (dVd) Skip + (dVd)<br />
60 dim dimmer dimmer dimmer<br />
61 rewind G<br />
r. Search<br />
(dVd)<br />
r. Search r. Search rewind rewind r. Search r. Search<br />
62 play B play (dVd) play play r. play/F. play play play play play (dVd) play (dVd) play<br />
63 FF H<br />
F. Search<br />
(dVd)<br />
F. Search F. Search Fast Fwd Fast Fwd F. Search F. Search<br />
64 record record record/pause record record record<br />
65 Stop Stop (dVd) Stop Stop Stop Stop Stop Stop Stop (dVd) Stop (dVd) Stop<br />
66 pause pause (dVd) pause pause pause pause pause pause (dVd) pause (dVd) pause<br />
* NOTE: there is no button #14<br />
r. Search<br />
(dVd)<br />
F. Search<br />
(dVd)<br />
r. Search<br />
(dVd)<br />
F. Search<br />
(dVd)<br />
Appendix<br />
Note: when any of the transport controls are pressed while the remote is in AVr or Video 2 mode, the remote will automatically switch to dVd mode, and the command will be applied<br />
to the dVd player. If you then press a button native to the original mode, e.g., Volume down for the AVr, the remote will revert to the original mode. See remote-channel control<br />
punch-through, on page 22, for more information.<br />
HDMI<br />
1/2/3<br />
r. Search<br />
F. Search
<strong>AVR</strong> <strong>158</strong><br />
Table A11 – Remote Control Product Codes: TV<br />
TV Manufacturer/Brand Setup Code Number<br />
AdMIrAl 192<br />
AnAM 045 106 109 112 122<br />
Aoc 037 122 123 128<br />
AudIoVox 012<br />
blAupunkt 084<br />
brokSonIc 205 206<br />
cItIZen 045 123 128 132<br />
contec 045<br />
crAIg 045 157 <strong>158</strong> 159<br />
crown 045 132<br />
curtIS MAtheS 123 128 132<br />
dAewoo 045 087 102 105 106 108 111 114 116 119 127 128 132<br />
dAYtron 128 132<br />
dYnAtech 063<br />
dYnex 014<br />
electrohoMe 115 132<br />
eMerSon 045 123 128 132 139 157 <strong>158</strong> 159 162 205<br />
FunAI 045<br />
FuJItSu 041 042<br />
Futuretech 045<br />
ge 029 087 121 123 128 133 145 159 163<br />
grundIg 193<br />
hAllMArk 128<br />
hArMAn kArdon 201<br />
hItAchI 123 128 132 144 147<br />
hYtek 016<br />
Inkel 120<br />
Jc penneY 115 123 128 132 145<br />
JenSen 019<br />
JVc 079 087 134<br />
kec 045<br />
klh 006<br />
TV Manufacturer/Brand Setup Code Number<br />
ktV 045 123 132 162<br />
lg/goldStAr 002 013 101 110 122 128 132<br />
lloYtron 172 173<br />
lodgenet 069<br />
lxI 077 145 148<br />
MAgnAVox 030 040 123 128 132 145 148<br />
MArAntZ 115 123 148<br />
MeMorex 069 128<br />
MetZ 084<br />
MgA 115 123 128<br />
MItSubIShI 077 115 123 128 160 167 168<br />
Mtc 175 176<br />
nAtIonAl 148 177 179 180 181 182<br />
nec 010 115 121 123 125<br />
oleVIA 007<br />
optonIcA 007<br />
orIon 207 208 209 210 211<br />
pAnASonIc 087 148 169<br />
phIlco 045 115 123 128 132 148<br />
phIlIpS 033 034 035 036 123 128 132 145 148<br />
pIoneer 024 123 128<br />
polAroId 003 004 005 006 043<br />
portlAnd 128 132<br />
proScAn 133<br />
proton 008 059 122 128 132 165<br />
QuASAr 032 087<br />
rAdIo ShAck 045 128 132 180 196 197<br />
rcA 021 115 123 128 133 145 161 163<br />
reAlIStIc 045 167 196<br />
runco 044 046 152 153<br />
SAMpo 059 123 128<br />
SAMSung 020 022 124 128 132 145<br />
Appendix<br />
35<br />
ENGLISH
<strong>AVR</strong> <strong>158</strong><br />
36<br />
Table A11 – Remote Control Product Codes: TV (cont.)<br />
TV Manufacturer/Brand Setup Code Number<br />
SAnYo 026 054<br />
Scott 045 128 132<br />
SeArS 128 132 145<br />
ShArp 077 128 132<br />
SIeMenS 084<br />
SIgnAture 069<br />
SonY 028 031 117 130 136 194 212<br />
SoundeSIgn 045 128<br />
SYlVAnIA 025 123 128 145 148<br />
SYMphonIc 184<br />
tAndY 077<br />
tAtung 063<br />
technIcS 181<br />
techwood 128<br />
teknIkA 045 069 115 123 128 132<br />
telerent 069<br />
terA 156<br />
thoMSon 190 191<br />
tIVo 051 052 and See table A12<br />
tMk 128<br />
toShIbA 063 129 202<br />
toteVISIon 132<br />
VIdeo conceptS 160<br />
VIdtech 128<br />
VIewSonIc 011 038 039 047<br />
VIZIo 001 002<br />
wArdS 069 128 132 148<br />
weStInghouSe 017 018 023<br />
YAMAhA 123 128<br />
York 128<br />
ZenIth 069 090<br />
Table A12 – Remote Control Product Codes: VCR<br />
VCR Manufacturer/Brand Setup Code Number<br />
AIwA 040<br />
AkAI 048 108 109 126<br />
Apple tV 016<br />
AudIo dYnAMIcS 018 048<br />
brokSonIc 110 147<br />
cAnon 135 140<br />
cApehArt 094<br />
cItIZen 134<br />
crAIg 045 116<br />
dAewoo 017 094 104<br />
dAYtron 094<br />
dbx 018 048<br />
dYnAtech 040<br />
eMerSon 013 040 042 110 112<br />
FISher 017<br />
FunAI 040<br />
ge 076 095 124<br />
hArMAn kArdon 002 003 018 049<br />
hItAchI 040 048<br />
Jc penneY 018 045<br />
JenSen 048<br />
JVc 018 048 111 132<br />
kenwood 020 048<br />
lg/goldStAr 018 107<br />
lloYd 040<br />
lxI 020 040<br />
MAgnAVox 040<br />
MArAntZ 018<br />
MeMorex 017 020 040 052 053 054 076 142<br />
MgA 049<br />
MItSubIShI 049 131<br />
MultItech 040<br />
Appendix
<strong>AVR</strong> <strong>158</strong><br />
Table A12 – Remote Control Product Codes: VCR (cont.)<br />
VCR Manufacturer/Brand Setup Code Number<br />
SYlVAnIA 040<br />
SYMphonIc 040<br />
tAndY 017 040<br />
teAc 040 048<br />
teknIkA 040<br />
thoMAS 040<br />
tiVo 004 005 006 007 008 009 011 012<br />
tMk 013<br />
toShIbA 112 155<br />
toteVISIon 045<br />
unItech 045<br />
Vector reSeArch 018<br />
VIdeo conceptS 018 040<br />
VIdeoSonIc 045<br />
wArdS 040 045 112<br />
YAMAhA 018 040 048<br />
ZenIth 040 050 076 083<br />
Table A13 – Remote Control Product Codes: CD<br />
CD Manufacturer/Brand Setup Code Number<br />
AdcoM 063 069<br />
AIwA 072 111 118 156 170<br />
AkAI 050 177 184<br />
AudIo technIcA 053<br />
AudIoAcceSS 125<br />
AudIoFIle 211<br />
bSr 044<br />
cAlIFornIA AudIo 109<br />
cApetronIc 070<br />
cArrerA 087<br />
cArVer 136 140 141 143 144 145 185 186<br />
cASIo 117 166<br />
Table A13 – Remote Control Product Codes: CD (cont.)<br />
CD Manufacturer/Brand Setup Code Number<br />
clArInette 166<br />
denon 187 188 213<br />
eMerSon 052 093 108<br />
FISher 055 095<br />
FunAI 126<br />
ge 164<br />
hAItAI 099 214<br />
hArMAn kArdon 001 002 025 054 190<br />
hItAchI 093<br />
Inkel 216<br />
Jc penneY 098 147<br />
JenSen 153<br />
JVc 176 195 196<br />
kenwood 030 062 078 079 148 151 176 178 181<br />
lg/goldStAr 016 087<br />
lotte 108<br />
luxMAn 077 102<br />
lxI 164<br />
MAgnAVox 039 113<br />
MArAntZ 058 084 191 192 193<br />
McIntoSh 194<br />
McS 080 098<br />
MItSuMI 152<br />
ModulAIre 166<br />
nAd 013 074 197 198<br />
nAkAMIchI 199 200 201<br />
nec 069<br />
nIkko 053 055<br />
onkYo 037 038 045 046 171 175 202 203<br />
optIMuS 065 089 091 092 099 104 212<br />
pAnASonIc 075 109 119 <strong>158</strong> 183 204<br />
phIlIpS 039 138 149 209<br />
pIoneer 071 094 100 112 123 131 161 162 215<br />
Appendix<br />
37<br />
ENGLISH
<strong>AVR</strong> <strong>158</strong><br />
38<br />
Table A13 – Remote Control Product Codes: CD (cont.) Table A14 – Remote Control Product Codes: DVD (cont.)<br />
CD Manufacturer/Brand Setup Code Number<br />
proton 210<br />
rAdIo ShAck 126 166 213<br />
rcA 024 081 093 150<br />
reAlIStIc 058 093 095 104 105 108 164 166<br />
SAnSuI 047 081 134 157 172<br />
SAnYo 033 082 095<br />
Scott 108<br />
ShArp 058 105 114 151 159 167 180 181<br />
Sherwood 003 041 058 105 133<br />
SonY<br />
SoundStreAM 124<br />
SYMphonIc 059 110<br />
tAekwAng 177<br />
103 115 116 118 132 139 163 205 206 207 208<br />
212 217<br />
teAc 011 058 085 086 106 107 110 121 137 146 154<br />
thetA dIgItAl 039<br />
toShIbA 013 074 097 151 155 173<br />
Vector reSeArch 087<br />
VIctor 120 130<br />
wArdS 095<br />
YAMAhA 019 031 053 061 135 169<br />
York 166<br />
Table A14 – Remote Control Product Codes: DVD<br />
DVD Manufacturer/Brand Setup Code Number<br />
Apex dIgItAl 061<br />
denon 019 020 051<br />
ge 004 103<br />
hArMAn kArdon 001 002 003<br />
JVc 006<br />
lg/goldStAr 005 010 055 064 066<br />
MAgnAVox 056<br />
MArAntZ 059<br />
DVD Manufacturer/Brand Setup Code Number<br />
MItSubIShI 023<br />
nAd 062<br />
onkYo 009 048<br />
pAnASonIc 008 024 030 044<br />
phIlIpS 016 056<br />
pIoneer 018 027 041 065<br />
proceed 060<br />
proScAn 004 103<br />
rcA 004 103<br />
SAMSung 017 053 054<br />
ShArp 028<br />
SonY 011 012 015 043 045<br />
thoMSon 004 103<br />
toShIbA 009 058 067<br />
YAMAhA 030 063<br />
ZenIth 005 055 064<br />
Table A15 – Remote Control Product Codes: SAT<br />
SAT Manufacturer/Brand Setup Code Number<br />
bIrdVIew 425<br />
chAnnel MASter 320 321 325 361<br />
chApArrAl 315 316 451<br />
cItoh 360<br />
dIrectV 309 310 314<br />
dISh network 364<br />
drAke 313 317 318 413 481<br />
dx AntennA 331 352 379 483<br />
echoStAr 364 395 397 452 453 463 477 478 484 485<br />
electro hoMe 392<br />
FuJItSu 324 329 334<br />
generAl InStruMent 303 311 323 365 403 454 468 474<br />
hItAchI 304 455<br />
houSton trAcker 463<br />
Appendix
<strong>AVR</strong> <strong>158</strong><br />
Table A15 – Remote Control Product Codes: SAT (cont.)<br />
SAT Manufacturer/Brand Setup Code Number<br />
hugheS 305 306 437 489<br />
JAnIel 366<br />
Jerrold 454 468 484<br />
legend 453<br />
MAcoM 317 365 369 370 371<br />
MAgnAVox 461 473<br />
MeMorex 453<br />
MItSubIShI 307<br />
MotorolA 312 319<br />
nextwAVe 423<br />
norSAt 373<br />
optIMuS 466<br />
pAce 328 487<br />
pAnASonIc 353 366 457 469<br />
pAnSAt 420<br />
perSonAl cAble 418<br />
phIlIpS 375<br />
pIco 407<br />
preSIdent 381 404<br />
rcA 301 358 439 458 465 490<br />
reAlIStIc 349 480<br />
SAMSung 322 326 442<br />
SAtellIte SerVIce co 335 388<br />
ScIentIFIc AtlAntA 339 356<br />
SonY 362 405<br />
StAr choIce dbS 459<br />
StArcASt 347<br />
Super guIde 327 423<br />
telecoM 330 333 390 391 393 409<br />
toShIbA 302 426 460 461 462 470<br />
unIden<br />
323 332 348 349 350 351 354 355 381 383 389<br />
403 466 479 480<br />
ZenIth 359 384 385 387 394 419 488<br />
Table A16 – Remote Control Product Codes: Tape<br />
Cassette Deck<br />
Manufacturer/Brand<br />
hArMAn kArdon 001<br />
Setup Code Number<br />
Table A17 – Remote Control Product Codes: Cable<br />
Cable Manufacturer/Brand Setup Code Number<br />
Abc 001 011<br />
Allegro 111<br />
AMerIcASt 212<br />
Archer 112<br />
belcor 113<br />
cAble StAr 033 113<br />
cItIZen 111<br />
coMcASt 007<br />
dIgI-lInk 114<br />
eAgle 186<br />
eAStern 066 070<br />
eMerSon 112<br />
generAl InStruMent 001 011 017 096 097 210<br />
gc electronIcS 113<br />
geMInI 032 060<br />
hAMlIn 056 099 100 101 117 175 208<br />
hItAchI 001 188<br />
JASco 111<br />
Jerrold 001 002 011 017 073 096 097 162 188 210<br />
lInSAY 118<br />
MAcoM 191<br />
MAgnAVox 017 019 068<br />
MoVIetIMe 035 039<br />
nSc 035 190<br />
oAk 197 220<br />
pAce 179<br />
pAnASonIc 053 176 177 189 214<br />
pAnther 114<br />
Appendix<br />
39<br />
ENGLISH
<strong>AVR</strong> <strong>158</strong><br />
Table A17 – Remote Control Product Codes: Cable (cont.)<br />
40<br />
Cable Manufacturer/Brand Setup Code Number<br />
phIlIpS 013 019 020 085 090<br />
pIoneer 001 041 119 171 209 215 216<br />
rAdIo ShAck 111 112 213<br />
rcA 053 214<br />
recoton 116<br />
regAl 056 099 100 101 208<br />
reMbrAndt 032<br />
SAMSung 003 072 186<br />
ScIentIFIc AtlAntA 183 203 221 222<br />
SeAM 121<br />
SIgnAture 001 188<br />
Sprucer 053 081 177 189<br />
StArcoM 002 011 163<br />
StArgAte 120<br />
tAndY 024<br />
telecApAtIon 028<br />
texScAn 036<br />
tFc 122<br />
tIVo 029 030 and See table A12<br />
tocoM 170 205<br />
unIted cAble 011<br />
unIVerSAl 033 034 039 042 113<br />
VIdeowAY 124 211<br />
VIewStAr 019 025 053 086 089 190<br />
ZenIth 065 125 211 219<br />
Appendix
hArMAn consumer, Inc.<br />
8500 balboa boulevard, northridge, cA 91329 uSA<br />
© 2011 hArMAn International Industries, Incorporated. All rights reserved.<br />
harman kardon and logic 7 are trademarks of hArMAn International Industries, Incorporated, registered in the united States and/or<br />
other countries.<br />
Apple, iphone, ipod, ipod touch, ipod nano and ipod classic are trademarks of Apple Inc., registered in the u.S. and other countries.<br />
blu-ray disc is a trademark of the blu-ray disc Association.<br />
ceA is a registered trademark of the consumer electronics Association.<br />
Manufactured under license from dolby laboratories. dolby, the double-d symbol and pro logic are registered trademarks of<br />
dolby laboratories. Mlp lossless is a trademark of dolby laboratories.<br />
Manufactured under license under u.S. patent #’s 5,451,942; 5,956,674; 5,974,380; 5,978,762; 6,226,616; 6,487,535; 7,003,467<br />
and other u.S. and worldwide patents issued and pending. dtS is a registered trademark, and dtS 96/24, dtS-hd and dtS-hd<br />
Master Audio are trademarks, of dtS, Inc. © 1996-2007 dtS, Inc. All rights reserved.<br />
hdMI, the hdMI logo and high-definition Multimedia Interface are registered trademarks of hdMI licensing llc in the united States<br />
and other countries.<br />
tiVo is a registered trademark of tiVo Inc.<br />
Features, specifications and appearance are subject to change without notice.<br />
www.harmankardon.com