TELTONIKA ModemUSB/H7.2 (U3G150; U3G15L; U3G15S modems)
TELTONIKA ModemUSB/H7.2 (U3G150; U3G15L; U3G15S modems)
TELTONIKA ModemUSB/H7.2 (U3G150; U3G15L; U3G15S modems)

You also want an ePaper? Increase the reach of your titles
YUMPU automatically turns print PDFs into web optimized ePapers that Google loves.
Address: Žirmūnų g. 27, Vilnius LT-09105,<br />
Tel.: +370 5 2127472,<br />
Fax: +3705 276 1380, E-mail: info@teltonika.lt<br />
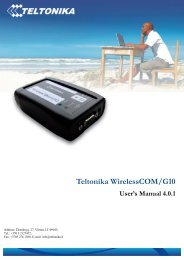
<strong>TELTONIKA</strong><br />
<strong>ModemUSB</strong>/<strong>H7.2</strong> (<strong>U3G150</strong>;<br />
<strong>U3G15L</strong>; <strong>U3G15S</strong> <strong>modems</strong>)<br />
User Manual v0.2
<strong>ModemUSB</strong>/<strong>H7.2</strong><br />
User Manual<br />
TABLE OF CONTENTS<br />
TABLE OF CONTENTS.................................................................................................................2<br />
1. ATTENTION...........................................................................................................................3<br />
2. FOR YOUR SAFETY .............................................................................................................3<br />
3. USER‘S SERVICE ..................................................................................................................5<br />
4. BASIC INFORMATION.........................................................................................................6<br />
4.1 Introduction......................................................................................................................6<br />
4.2 Legal Notice.....................................................................................................................6<br />
4.3 Contacts............................................................................................................................6<br />
4.4 Acronyms.........................................................................................................................6<br />
5. PACKAGE CONTENTS.........................................................................................................7<br />
6. TECHNICAL SPECIFICATION ............................................................................................7<br />
6.1 Data transferring ..............................................................................................................7<br />
6.2 Indication .........................................................................................................................9<br />
6.3 Operating parameters.......................................................................................................9<br />
6.4 Mechanical characteristics .............................................................................................10<br />
7. HOW TO START ................................................................................................................11<br />
7.1 Driver and Software Installation on Windows XP ........................................................11<br />
7.2 Driver and Software Installation on Windows 2000......................................................12<br />
7.3 Driver and Software Installation on Windows Vista OS...............................................12<br />
7.4 Uninstall of the Driver and Software .............................................................................13<br />
7.5 Software description ......................................................................................................13<br />
7.5.1 Modem Control Tool Preparation to Work............................................................13<br />
7.5.2 Connecting to Internet............................................................................................14<br />
7.5.3 Sending SMS .........................................................................................................18<br />
7.5.4 Settings of <strong>ModemUSB</strong>/<strong>H7.2</strong> ................................................................................19<br />
7.6 Uninstalling <strong>ModemUSB</strong>/<strong>H7.2</strong>......................................................................................21<br />
8. TECHNICAL SUPPORT ......................................................................................................22<br />
9. ENDING ................................................................................................................................22<br />
2
<strong>ModemUSB</strong>/<strong>H7.2</strong><br />
User Manual<br />
1. ATTENTION<br />
All wireless devices for data transferring are susceptible to<br />
interference, which could affect performance<br />
Only qualified personnel may install or repair this product<br />
The device is not water-resistant. Keep it dry.<br />
IMPORTANT NOTES!<br />
IT IS MANDATORY TO READ THE NOTES AND<br />
MANUAL CAREFULLY BEFORE STARTING TO USE<br />
THE DEVICE.<br />
2. FOR YOUR SAFETY<br />
In this document you will be introduced how to use <strong>ModemUSB</strong>/<strong>H7.2</strong> (<strong>U3G150</strong>; <strong>U3G15L</strong>;<br />
<strong>U3G15S</strong>) devices safely, later in the manual will be used only <strong>ModemUSB</strong>/<strong>H7.2</strong> name. We suggest<br />
you to adhere to following recommendations so as to avoid any damage to person or property.<br />
You have to be familiar with the safety requirements before starting to use the device!<br />
Installation and technical support of the device can be<br />
performed only by a qualified personnel or a person who has<br />
enough knowledge about this device and safety requirements.<br />
The PC to which the <strong>ModemUSB</strong>/<strong>H7.2</strong> device is to be connected must have a USB port applied to<br />
USB 2.0 standards. Modem is supplied from +V5 USB port.<br />
The PC and power supply source to which the device is<br />
connected should satisfy LST EN 60950-1 standard.<br />
<strong>ModemUSB</strong>/<strong>H7.2</strong> modem can be used on first (Personal<br />
Computer) or second (Notebook) computer safety class.<br />
3
<strong>ModemUSB</strong>/<strong>H7.2</strong><br />
User Manual<br />
To avoid mechanical damage of the device, it is recommended to transport the device<br />
packed in damage-proof pack.<br />
While using the device, place it such that the LEDs are visible to the user. It’s because these<br />
LEDs provide information about the working modes and condition of the device.<br />
Signal level of the modem depends on the environment in which it is working.<br />
If the device fails to work properly only qualified personnel may repair this product. We<br />
recommend to forward device to repair centre or to the manufacturer. The modem does not contain<br />
any parts which can be replaced.<br />
In the installation place and supply circuits should be tool up protective devices (bipolar<br />
release device) which will protect from short-circuit and wrong ground installation. The power of<br />
connected device should satisfy power of release device. The interstice between contacts should be<br />
no less than 3mm. Power supply network should be installed near device on easy accessible place<br />
2.1.pic. Device release circuit.<br />
To turn off the modem, unplug it from the USB port of the PC<br />
or unplug the PC from the power supply.<br />
4
<strong>ModemUSB</strong>/<strong>H7.2</strong><br />
User Manual<br />
IT IS MANDATORY TO READ THE NOTES PRESENTED BELOW<br />
CAREFULLY BEFORE STARTING TO USE THE DEVICE<br />
U should install the drivers from the CD provided with modem before connecting device to<br />
your PC or connect it when prompted<br />
SIM card is mandatory for setting up connection to the GSM network. However the<br />
manufacturer of this equipment does not supply the SIM card. The SIM card can be<br />
purchased from your GSM (mobile) service provider!<br />
For APN, user name and password please contact your GSM (mobile) service provider.<br />
The modem must be unplugged from the PC while inserting or taking out the SIM card. If<br />
the SIM card will be inserted or taken out from the modem while it is still plugged to the PC<br />
– it may cause damage to the modem or the SIM card.<br />
The modem can be unplugged from the PC only if it is disconnected from the Internet and<br />
the MTC is properly closed.<br />
If the modem is unplugged properly from the PC wait for at least 10 seconds before plugging<br />
it back to the PC.<br />
3. USER‘S SERVICE<br />
Then the device is not working or working bad the technical service of device can perform<br />
only qualified personnel. The strongly recommended to hand the modem over to repairer or<br />
manufacturer. No exchangeable parts inside of modem.<br />
Do not mount or serve device during a thunderbolt<br />
5
<strong>ModemUSB</strong>/<strong>H7.2</strong><br />
User Manual<br />
4. BASIC INFORMATION<br />
4.1 Introduction<br />
Basically <strong>ModemUSB</strong>/<strong>H7.2</strong> is a device designed for data transmission via GSM Network.<br />
There are few tipes of the <strong>ModemUSB</strong>/<strong>H7.2</strong>, differences are described in 6.1 chapter. The userfriendly<br />
design allows you to directly connect the device to one of the USB ports of your<br />
PC/laptops. Once a SIM card is inserted in the modem and the device is connected to the PC, you<br />
would be able to send SMS, access internet via UMTS/GSM networks (mobile networks).<br />
“<strong>ModemUSB</strong>/<strong>H7.2</strong>” supports the following data-bearers: HSDPA, EDGE, GPRS, CSD, and SMS.<br />
4.2 Legal Notice<br />
Copyright © 2007 <strong>TELTONIKA</strong> Ltd. All rights reserved. Reproduction, transfer,<br />
distribution or storage of part or all of the contents in this document in any form without the prior<br />
written permission of <strong>TELTONIKA</strong> Ltd is prohibited.<br />
Other product and company names mentioned herein may be trademarks or trade names of<br />
their respective owners.<br />
4.3 Contacts<br />
If you face any problems related to the device, which you are not able to solve by yourself,<br />
you are always welcome to address our technical support department by e-mail support@teltonika.lt.<br />
We will be very glad to help you.<br />
4.4 Acronyms<br />
APN<br />
CSD<br />
CSF<br />
EDGE<br />
FDD<br />
GPRS<br />
GSM<br />
HSCSD<br />
IMEI<br />
ISP<br />
PIN<br />
SIM<br />
SMS<br />
TCP/IP<br />
USB<br />
WCDMA<br />
HSDPA<br />
Access Point Name.<br />
Circuit Switched Data.<br />
Circuit Switched Fax.<br />
Enhanced Data rates for GSM Evolution.<br />
Frequency Division Duplex.<br />
General Packet Radio Service.<br />
Global System for Mobile communications.<br />
High Speed Circuit Switched Data.<br />
International Mobile Equipment Identity.<br />
Internet Service Provider.<br />
Personal Identification Number.<br />
Subscriber Identity Module.<br />
Short Message Service.<br />
Transmission Control Protocol/Internet Protocol.<br />
Universal Serial Bus.<br />
Wideband Code Division Multiple Access.<br />
High Speed Downlink Packet Access.<br />
6
<strong>ModemUSB</strong>/<strong>H7.2</strong><br />
User Manual<br />
5. PACKAGE CONTENTS<br />
<strong>ModemUSB</strong>/<strong>H7.2</strong> modem is packed in a box and contains all the accessories required for<br />
normal operation:<br />
<strong>ModemUSB</strong>/<strong>H7.2</strong> (<strong>U3G150</strong>; <strong>U3G15L</strong> or <strong>U3G15S</strong> type).<br />
CD with User Manual and drivers.<br />
“USB A jack ↔ USB A socket“connection cable.<br />
Leaflet “Quick Start Guide”.<br />
Note: The manufacturer does not supply the SIM card, which is mandatory for setting up a connection to<br />
the GSM network! The SIM card may be purchased from your GSM(mobile) service provider!!<br />
If any of the components is missing, please contact your local distributor.<br />
6. TECHNICAL SPECIFICATION<br />
6.1 Data transferring<br />
The data type and data transfer speed depends on the service provided by your GSM<br />
operator. <strong>ModemUSB</strong>/<strong>H7.2</strong> supports the following data-bearers depending on the modem type<br />
(<strong>U3G150</strong>; <strong>U3G15L</strong> or <strong>U3G15S</strong>).<br />
MODEM<br />
TYPE<br />
<strong>U3G150</strong><br />
HSDPA/UMTS<br />
850/1900/2100 MHz<br />
Power Class 3 (+24dBm).<br />
Supports UL and DL compressed<br />
modes.<br />
HSDPA 7.2: categories 1-4, 11 and<br />
12.<br />
HSDPA 3.6: categories 5 and 6.<br />
HSDPA 7.2: category 7 and 8 (SW<br />
upgrade).<br />
Rx diversity. Equalization<br />
UMTS: 384 kbps operation in<br />
downlink and uplink.<br />
CSD: 64.0, 14.4 and 9.6 kbps.<br />
EGPRS/GPRS/CSD<br />
EDGE 850/900/1800/1900<br />
MHz<br />
GSM Power Class 4 (2W) for<br />
850/900 bands.<br />
GSM Power Class 1 (1W) for<br />
1800/1900 bands.<br />
EDGE class E2 (+27 dBm in<br />
850/900 bands, +26 dBm in<br />
1800/1900 bands).<br />
GPRS/EGPRS Multislot Class<br />
12 (4 slots Rx, 4 slots Tx).<br />
GPRS/EGPRS Class B Type 1<br />
MT.<br />
GPRS CS1-CS4; EGPRS<br />
MCS1-MCS9.CSD: 14.4 and<br />
9.6 kbps.<br />
7
<strong>ModemUSB</strong>/<strong>H7.2</strong><br />
User Manual<br />
MODEM<br />
TYPE<br />
<strong>U3G15L</strong><br />
<strong>U3G15S</strong><br />
2100 Mhz<br />
HSDPA/UMTS<br />
Power Class 3 (+24 dBm). HSDPA<br />
modes:<br />
HSDPA 1.8: Categories 1-4, 11 and<br />
12<br />
HSDPA 3.6: Categories 5 and 6<br />
HSDPA 7.2: Category 7 and 8 (SW<br />
upgrade).<br />
Equalization<br />
UMTS: 384 Kbps operation in<br />
downlink, 384 Kbps in uplink.<br />
Support UL and DL Compressed<br />
Modes.<br />
Circuit-switched data: 64, 14.4 and<br />
9.6 Kbps<br />
850 / 1900 / 2100<br />
2100 MHz Rx diversity (MO 0301)<br />
Power Class 3 (+24 dBm)<br />
HSUPA mode: 2Mbps: Category 5<br />
HSDPA modes:<br />
HSDPA 1.8: Categories 1-4, 11 and<br />
12<br />
HSDPA 3.6: Categories 5 and 6.<br />
HSDPA 7.2: Category 7 and 8.<br />
Equalization and Rx Diversity at<br />
the same time.<br />
UMTS: 384 Kbps operation in<br />
downlink, 384 Kbps in uplink.<br />
Support UL and DL Compressed<br />
Modes.<br />
Circuit-switched data: 64, 14.4 and<br />
9.6 Kbps<br />
EGPRS/GPRS/CSD<br />
850 / 900 / 1800 / 1900 MHz<br />
EDGE<br />
GSM Power Class 4 (2W) for<br />
850 / 900 bands, GSM.<br />
Power Class 1 (1W) for 1800 /<br />
1900 bands.<br />
EDGE class E2 (+27 dBm in<br />
850 / 900 bands, +26 dBm in<br />
1800 / 1900 bands).<br />
GPRS / EDGE Multislot Class<br />
12 (4 slots Rx, 4 slots Tx).<br />
GPRS / EDGE Class B Type 1<br />
MT. GPRS CS1-CS4; EDGE<br />
MCS1-MCS9.<br />
Circuit-switched data: 14.4 and<br />
9.6 Kbps<br />
Circuit-switched voice calls<br />
over GSM / WCDMA air<br />
interfaces, MO and MT<br />
850 / 900 / 1800 / 1900 MHz<br />
GSM Power Class 4 (2W) for<br />
850 / 900 bands,<br />
GSM Power Class 1 (1W) for<br />
1800 / 1900 bands<br />
EDGE class E2 (+27 dBm in<br />
850 / 900 bands, +26 dBm in<br />
1800 / 1900 bands)<br />
GPRS / EDGE Multislot Class<br />
12 (4 slots Rx, 4 slots Tx)<br />
PRS / EDGE Class B Type 1<br />
MT<br />
GPRS CS1-CS4; EDGE<br />
MCS1-MCS9<br />
Circuit-switched data: 14.4 and<br />
9.6 Kbps<br />
8
<strong>ModemUSB</strong>/<strong>H7.2</strong><br />
User Manual<br />
6.2 Indication<br />
Two LED indicators (“Power“and “Status“) are located on the side of <strong>ModemUSB</strong>/<strong>H7.2</strong><br />
These LEDs indicate the operating mode and failure conditions of the modem. Modem operating<br />
modes are described in Table 3.2.1.<br />
Table 6.2.1. Modem operating modes<br />
LED Status<br />
Description<br />
„Power“ LED is On Modem power supply is on.<br />
„Status“ LED is blinking Not inserted SIM card or need PIN code.<br />
„Status“ LED is On Modem is ready for data transferring.<br />
6.3 Operating parameters<br />
<strong>ModemUSB</strong>/<strong>H7.2</strong> modem derives +5V power from the USB port, therefore, the PC<br />
must have a USB port conforming to the USB 2.0 standards. The device does not require any<br />
external power supply for its operation.<br />
Table 6.3.1. Modem operating parameters<br />
Parameter Minimal Nominal Maximal Units<br />
Power supply voltage 4.5 5.0 5.5 V<br />
Power consumption 34 360 mA<br />
Marginal operating<br />
temperature<br />
-10 +55 ºC<br />
Storage temperature -40 +65 ºC<br />
Modem weight 51 g<br />
Reliative air humidyti 85 %<br />
Note: modem may malfunction if the environment conditions do not conform to<br />
those provided in the Table!<br />
9
<strong>ModemUSB</strong>/<strong>H7.2</strong><br />
User Manual<br />
6.4 Mechanical characteristics<br />
<strong>ModemUSB</strong>/<strong>H7.2</strong> modem housing is made of plastic. External view and measurements (in<br />
mm) of the device are shown in Figure 6.4.1.<br />
42.0<br />
85.5<br />
15.1<br />
Figure 6.4.1. External view of <strong>ModemUSB</strong>/<strong>H7.2</strong><br />
10
<strong>ModemUSB</strong>/<strong>H7.2</strong><br />
User Manual<br />
7. HOW TO START<br />
In order to install <strong>ModemUSB</strong>/<strong>H7.2</strong> drivers and software, do the following:<br />
<strong>ModemUSB</strong>/<strong>H7.2</strong> modem can only be connected after the driver installation has finished.<br />
Unplug the device <strong>ModemUSB</strong>/<strong>H7.2</strong> from USB port of the PC (if it is plugged)! Otherwise,<br />
the PC will have to be restarted after completion of driver installation.<br />
Insert the CD into CD-ROM.<br />
Click Install in automatically opened window. If the window did not appear, run autorun.exe<br />
file located on the CD. The installation procedure of the <strong>ModemUSB</strong>/<strong>H7.2</strong> modem will<br />
begin.<br />
7.1 Driver and Software Installation on Windows XP<br />
Step 1<br />
Step 2<br />
Step 3<br />
Step 4<br />
Step 5<br />
Step 6<br />
Step 7<br />
1<br />
Step 8 Step 9<br />
11
<strong>ModemUSB</strong>/<strong>H7.2</strong><br />
User Manual<br />
7.2 Driver and Software Installation on Windows 2000<br />
Installation procedure is same as on Windows XP.<br />
7.3 Driver and Software Installation on Windows Vista OS<br />
12
<strong>ModemUSB</strong>/<strong>H7.2</strong><br />
User Manual<br />
7.4 Uninstall of the Driver and Software<br />
How to Un-Install:<br />
1) Remove the modem from the USB port of the PC, and go to<br />
• StartProgramsTeltonika Modem USB <strong>H7.2</strong> click on “Uninstall”, and<br />
then please follow instructions.<br />
2) Or alternatively you can remove “Modem Control Tool” program from “Add or Remove<br />
Programs”<br />
Start Settings Control Panel Add or Remove Programs & remove Modem USB <strong>H7.2</strong><br />
7.5 Software description<br />
This section provides the main information about MCT (Modem Control Tool), its settings and<br />
features.<br />
7.5.1 Modem Control Tool Preparation to Work<br />
Before start working with Modem Control Tool, make sure that:<br />
You have a GSM SIM card with activated data transfer service;<br />
<strong>ModemUSB</strong>/<strong>H7.2</strong> is set to work – drivers and software are installed, SIM card is inserted,<br />
modem is connected to the PC, LEDs “Status” and “Power” is on.<br />
To run the Modem Control Tool, double click the MCT pictogram located on the desktop,<br />
or go to Start → Programs → Teltonika <strong>ModemUSB</strong>/<strong>H7.2</strong> → Modem Control Tool USB <strong>H7.2</strong>. If<br />
the program is run for the first time or there are more than one <strong>modems</strong> installed, a window asking<br />
to select modem from the list will appear, click OK in this window. In the opened window choose<br />
Teltonika 3G Modem Interface and click Set As Current Modem, and OK.<br />
13
<strong>ModemUSB</strong>/<strong>H7.2</strong><br />
User Manual<br />
If PIN code request is active in your SIM card, a window for inserting the PIN code will appear.<br />
If you will enter wrong PIN code three times in a row, the program will ask to enter the<br />
PUK code! When the required data inserted correctly, click OK and the main Modem Control Tool<br />
window will open.<br />
7.5.2 Connecting to Internet<br />
Five profiles for the user to set are available; this is very suitable if you are using more than<br />
one SIM card for your Modem. You can set up connection parameters for each SIM card (Operator)<br />
in these profiles and rename them in manner you like. This feature available in Settings/Profiles tab.<br />
By clicking on the Profile settings you are able quickly review and edit all parameters of the<br />
available profiles.<br />
14
<strong>ModemUSB</strong>/<strong>H7.2</strong><br />
User Manual<br />
In the Main menu you can select modem and set Automatic or Manual operator selection<br />
option.<br />
It is advisable to use automatic Operator selection, manual operator selection is usable for<br />
the roaming usually.<br />
If you are using more than one modem – it is possible to automatically connect via other<br />
available modem if current become unavailable.<br />
One of the following connecting types can be used in order to connect to the Internet using<br />
the <strong>ModemUSB</strong>/<strong>H7.2</strong> modem:<br />
GPRS/EDGE/HSDPA. In this case, you have to know the APN, and sometimes user name<br />
and password;<br />
CSD/HSCSD. In this case you have to know the phone number of the dial-up server.<br />
Note: APN, user name and password are provided by the GSM operator.<br />
15
<strong>ModemUSB</strong>/<strong>H7.2</strong><br />
User Manual<br />
In order to connect to the Internet, enter the required data in Connection window. In the<br />
main MCT window click Settings → Connection. Enter connection data as shown below. To save<br />
the entered data, click Update.<br />
One of the four connection types can be chosen in the Connection window:<br />
GPRS only. Only GPRS and EDGE (depends upon the operator) technology will be used<br />
for connection to the Internet. If the operator does not provide these services, modem will<br />
not be able to connect to the Internet.<br />
GPRS preferred. Modem will always use GPRS/EDGE whenever it will be possible. If the<br />
operator does not provide this service, another high speed connection type will be used.<br />
HSDPA only. Only HSDPA technology will be used, if the operator does not provide this<br />
service, the modem will not be able to connect the Internet.<br />
HSDPA preferred. Modem will always use HSDPA whenever it will be possible. When<br />
GPRS is not provided, another high speed connection type will be used.<br />
Before connecting to the Internet, check the GSM signal quality (see the indicator located on<br />
the right side of the Modem Control Tool program). Also check if the Network indicator is green. If<br />
the signal indicator shows low signal quality, place the modem to more open place, where the signal<br />
will not be blocked by thick walls or ceilings. Placing the device near window may also help.<br />
Modem will start connecting to the Internet after the Connect picture is clicked in the main<br />
MCT window (if the APN, user name and password were entered correctly).<br />
16
<strong>ModemUSB</strong>/<strong>H7.2</strong><br />
User Manual<br />
If the <strong>ModemUSB</strong>/<strong>H7.2</strong> modem connects to the Internet, red indicator denoted as<br />
Disconnected on the left corner of MCT window turns green and will be denoted as Connected.<br />
In order to disconnect from the Internet, click Disconnect in the main Modem Control<br />
Tool window.<br />
In application tab – you can select preferred language of MCT and check statistic of the<br />
transferred data.<br />
17
<strong>ModemUSB</strong>/<strong>H7.2</strong><br />
User Manual<br />
7.5.3 Sending SMS<br />
With <strong>ModemUSB</strong>/<strong>H7.2</strong> you can send and receive SMS messages and browse in the Internet<br />
at the same time! In order to send SMS, click SMS in the main MCT window. A Short message<br />
service window will open.<br />
In the opened window, enter the receiver’s phone number in the Phone number field. “+“is<br />
entered automatically. The message text is entered in the Message text field. Message can be of 160<br />
characters. If you tick the Use extended character set, you will be able to use specific symbols in<br />
your message, but the number of characters will be reduced to 70.<br />
If you want to look for received, read or sent SMS messages, click Unread, Read or Sent in<br />
the Short message service window. If you want to forward or reply, double click on the message. A<br />
Message window will appear.<br />
To make a reply to the message, click Reply. To close the window – Close.<br />
18
<strong>ModemUSB</strong>/<strong>H7.2</strong><br />
User Manual<br />
7.5.4 Settings of <strong>ModemUSB</strong>/<strong>H7.2</strong><br />
There are few profiles available for the user to set<br />
To set <strong>ModemUSB</strong>/<strong>H7.2</strong> modem parameters or to change them, click Settings in the main<br />
Modem Control Tool window. If you click Main in the Settings window, you will be able to choose<br />
a modem from the list of <strong>modems</strong> installed in your PC.<br />
If you click Connection in the Settings window, you will be able to change the<br />
<strong>ModemUSB</strong>/7.2 modem Internet connection parameters.<br />
If you click Settings → Security, a Security window will open where you can enable or<br />
disable PIN code query. To set <strong>ModemUSB</strong>/<strong>H7.2</strong> modem parameters or to change them, click<br />
Settings in the main Modem Control Tool window. If you click Main in the Settings window, you<br />
will be able to choose a modem from the list of <strong>modems</strong> installed in your PC.<br />
If you click Connection in the Settings window, you will be able to change the<br />
<strong>ModemUSB</strong>/7.2 modem Internet connection parameters.<br />
If you click Settings → Security, a Security window will open where you can enable or<br />
disable PIN code query.<br />
To enable PIN code query, choose PIN Code Query Enabled in Security State frame and<br />
click Update. A pop-up window will appear. Enter the PIN code of your SIM card in the Insert<br />
Pin Code field and click OK.<br />
Now, the Modem Control Tool program will ask for the PIN code each time you connect<br />
the <strong>ModemUSB</strong>/<strong>H7.2</strong> modem to your PC USB port<br />
To disable PIN code query, choose PIN Code Query Disabled in Security State frame<br />
and click Update.<br />
19
<strong>ModemUSB</strong>/<strong>H7.2</strong><br />
User Manual<br />
SMS center number is shown in Settings → SMS.<br />
To change Modem Control Tool program language, go to Settings → Application. In<br />
Application window choose the language from Set Language field and click Update Language.<br />
Click About to see the Modem Control Tool program version and other Information.<br />
20
<strong>ModemUSB</strong>/<strong>H7.2</strong><br />
User Manual<br />
7.6 Uninstalling <strong>ModemUSB</strong>/<strong>H7.2</strong><br />
To uninstall <strong>ModemUSB</strong>/<strong>H7.2</strong> modem, plug it off from the USB port of the PC, and go to<br />
Start → Programs → Teltonika <strong>ModemUSB</strong>/<strong>H7.2</strong> → Uninstall. A uninstall window will<br />
appear.<br />
Unplug the MdemUSB, and click OK button. The<br />
uninstallation session will be canceled if the<br />
<strong>ModemUSB</strong> will not be unpluged.<br />
3<br />
1<br />
2<br />
Now the <strong>ModemUSB</strong>/<strong>H7.2</strong> modem is completely removed from the operating system of your PC.<br />
4<br />
21
<strong>ModemUSB</strong>/<strong>H7.2</strong><br />
User Manual<br />
8. TECHNICAL SUPPORT<br />
Problem: “Modem Control Tool” does not detect the modem.<br />
Step 1: Check if the device is connected to the PC and its “Power” and “Status” LEDs are ON.<br />
Step 2: Reboot the PC.<br />
Step 3: Uninstall and then install the modem again by following all the steps described in this manual<br />
carefully<br />
2. Cannot connect to the Internet.<br />
Step 1: Check if the SIM card is inserted properly. If the “Status“ LED is on and not blinking, check<br />
if the correct network parameters are set in Modem Control Tool program (Settings → Connection<br />
APN, user name, and password).<br />
Step 2: Reboot the PC.<br />
Step 3: Uninstall and then install the modem again by following all the steps described in this manual<br />
carefully<br />
For further information, please read “<strong>ModemUSB</strong>/<strong>H7.2</strong>” Users Manual, on the CD, or on the<br />
WEB site (www.teltonika.com). If you face any problems related to the device, which you are not<br />
able to solve by yourself, please contact your local distributor they would be glad to help you.<br />
9. ENDING<br />
This sign on the package means that it is necessary to read the User Manual, which<br />
is on the CD, before starting using the device.<br />
This sign on the package means that used electronic and electric equipment should<br />
be stored separately.<br />
22