PLATINOR® G4 - Heimerle + Meule
PLATINOR® G4 - Heimerle + Meule
PLATINOR® G4 - Heimerle + Meule

Create successful ePaper yourself
Turn your PDF publications into a flip-book with our unique Google optimized e-Paper software.
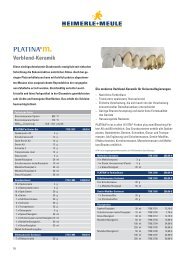
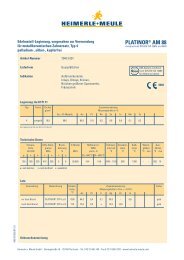
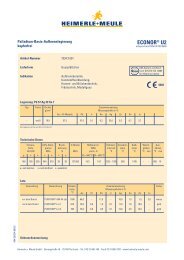
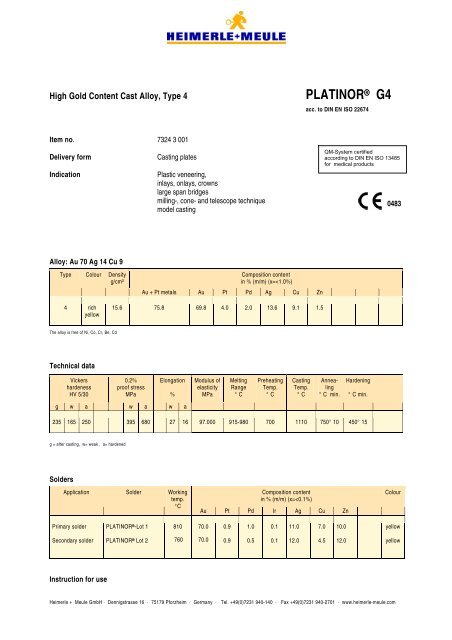
High Gold Content Cast Alloy, Type 4<br />
PLATINOR ® <strong>G4</strong><br />
acc. to DIN EN ISO 22674<br />
Item no. 7324 3 001<br />
Delivery form<br />
Indication<br />
Casting plates<br />
Plastic veneering,<br />
inlays, onlays, crowns<br />
large span bridges<br />
milling-, cone- and telescope technique<br />
model casting<br />
QM-System certified<br />
according to DIN EN ISO 13485<br />
for medical products<br />
0483<br />
Alloy: Au 70 Ag 14 Cu 9<br />
Type Colour Density<br />
g/cm³<br />
Composition content<br />
in % (m/m) (x=
Instruction for use PLATINOR ® G 4<br />
1. Modelling<br />
Create an anatomically reduced wax model, considering the<br />
planned facing. Sharp edges are to be avoided, soft level<br />
crossings are to be striven at.<br />
Due to stability reasons, care has to be taken at bridge frames<br />
to achieve solid modulation of the connections and in the case<br />
of larger spans to create palatal and interdental strength of<br />
the connecting parts. Wall thickness of the modelled (waxed)<br />
single crowns at least 0.4 (0.3) mm, bridge pillar crowns at least<br />
0.5 (0.4) mm.<br />
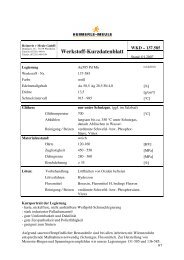
2. Spruing System<br />
Single crown:<br />
Direct spruing with casting channel<br />
From 2 single crowns on and bridges:<br />
Running bars or rings with<br />
object spruing<br />
running bars/rings<br />
casting channels<br />
at least Ø 3.5 mm<br />
3.0 x Ø 3.0 mm<br />
Ø 4.0 – Ø 5.0 mm<br />
Ø 3.5 – Ø 4.0 mm<br />
3. Position of the Wax Model in the Investment Mould<br />
Distance from the mould wall: The units should have at<br />
least 5-10 mm distance from the mould wall.<br />
Distance from the mould bottom: Direct spruing<br />
between wax units and mould bottom a<br />
distance of 10 – 15 mm has to be kept.<br />
Investment of running bars or rings: the<br />
middle of the running bar or ring should<br />
cover the middle of the mould.<br />
4. Investment<br />
Cover investment mould with investment ring spacer.<br />
Investment mould X1 / X3: 1 layer<br />
Investment mould X6 / X9: 1 – 2 layers<br />
Cast bonded as well as phosphate bonded investment material<br />
can be used. The investment material manufacturer’s instructions<br />
for use have to be complied with.<br />
5. Burnout / Preheating<br />
Conventional heating: the first preheating step at approx. 280 °C<br />
has to be hold according to the mould size for respectively<br />
30/40/50/60 min.; further heating steps in compliance with the<br />
investment material manufacturer’s instruction for use. After<br />
reaching the final temperature (see data sheet), the holding<br />
time is according to the mould size respectively 20/30/45/60 min.<br />
If handling a greater number of moulds, the preheating time has<br />
to be extended accordingly.<br />
Speed heating: The instructions of the manufacturer of the<br />
investment material have to be complied with strictly.<br />
6. Crucible Material<br />
Graphite and ceramic crucibles can be used.<br />
7. Casting Units<br />
All common melting and casting units can be used.<br />
9. Casting Residues<br />
In order to preserve the alloy characteristics and the casting<br />
quality, no more than 50 % cleaned casting residues should be<br />
used.<br />
The weight used is calculated from: wax weight x alloy density<br />
(see <strong>Heimerle</strong> + <strong>Meule</strong> calculation sheet).<br />
10. Cooling and Divestment<br />
Let mould cool down to hand temperature and carefully divest.<br />
This avoids deviations in fitting, change of alloy characteristics,<br />
and hot fissures. Sandblast with white corundum (approx.<br />
100 µm) or with an market pickling agent to remove the<br />
investment material.<br />
11. Finishing and Cleaning<br />
Finish frame with tungsten carbide burs and ceramic bonded<br />
milling tools with only little pressure; then sandblast surface with<br />
aluminium oxide (approx. 100 µm) at low pressure ( max.2 bar),<br />
then polish it. Polishing residues must be completely removed,<br />
e.g. steamclean and degrease it with a suitable pickling agent<br />
(e.g. AMISUL). During grinding sufficient protection against dust<br />
inhalation has to be taken<br />
12. Soldering<br />
Soldering areas have to be sufficiently big and should be<br />
considered during modulation already.<br />
Soldering areas have to be metallically blank.<br />
The solder gap should be 0.05 – 0.2 mm.<br />
Recommended soldering<br />
investment material: DUROCONT L<br />
Recommended flux material: Universal soldering paste ARGOFLUX<br />
Primary solder: PLATINOR ® Lot 1 810 °C<br />
Secondary solder: PLATINOR ® Lot 2 760 °C<br />
Slowly cool down the soldering object.<br />
13. Hardening<br />
After casting or soldering the alloy shows a sufficiently high<br />
density for its area of indication. If required, the maximum<br />
hardening can be reached through final tempering in accordance<br />
to the data sheet.<br />
14. Pickling<br />
Remove flux residues or oxides by pickling in AMISUL at<br />
about 80 °C or by sandblasting. Then flush the object with water.<br />
15. Veneering with plastic<br />
For the veneering with plastic please observe the instructions of<br />
the manufacturer of the plastic.<br />
16. Polishing<br />
Final Polishing can be effected with pastes, brushes, buffing<br />
wheels and felt.<br />
8. Casting<br />
Check data sheet for casting temperatures.<br />
Further heating times after reaching the liquidus temperature<br />
according to the quantity of material used and unit output.<br />
Resistance heating 20 – 60 sec.<br />
High frequency<br />
5 – 10 sec.<br />
Propane / oxygen torch 5 – 10 sec.<br />
In the case of torch melting, pay attention to the correct<br />
setting of the torch (danger of carbon damage) and<br />
melt with the reduced zone.<br />
Our recommendations and instructions for use are based on our experience. They do not, however, replace professional knowledge and experience of dentists an dental<br />
technicians who hold sole responsibility for their decisions to select and process particular alloys. Our customer service is a non mandatory service not establishing any liability.<br />
Warranty and damage claims are limited to the contracted contents of our General Terms and Condition.