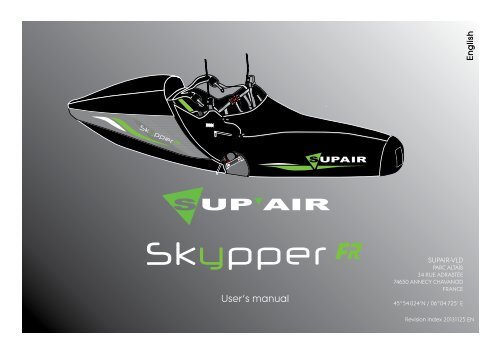
User's manual - Sup'Air
User's manual - Sup'Air
User's manual - Sup'Air

Create successful ePaper yourself
Turn your PDF publications into a flip-book with our unique Google optimized e-Paper software.
English<br />
User’s <strong>manual</strong><br />
SUPAIR-VLD<br />
PARC ALTAÏS<br />
34 RUE ADRASTÉE<br />
74650 ANNECY CHAVANOD<br />
FRANCE<br />
45°54.024’N / 06°04.725’ E<br />
Revision index 20131125 EN
Thank you for your choice of a SKYPPER FR ! We are proud to join you on your journey in<br />
our common passion : paragliding.<br />
SUP’AIR has been designing, producing, and selling accessories for free flying activities<br />
since 1984. By choosing a SUP’AIR product you benefit from almost thirty years of expertise<br />
innovation and listening. This is also our philosophy : working endlessly to develop better<br />
products and maintain a high quality production in Europe.<br />
We trust that you will find this user’s <strong>manual</strong> comprehensive explicit and hopefully pleasant<br />
to read. Please scroll through it carefully !<br />
You will find the most recently updated product informationat www.supair.com. If you have<br />
any further questions, feel free to ask one of our retailers. And of course, the entire SUP’AIR<br />
team is at your disposal through info@supair.com<br />
We wish you many safe flights, enjoyable hours , and happy landings<br />
The SUP’AIR team<br />
Photo / Pilot : Charles CAZAUX<br />
SUP’AIR manufactures its products in Europe. Most of the components used are Made in Europe. SUP’AIR _SKYPPERFR Page 2
Table of contents<br />
Introduction 4<br />
Technical information 5<br />
Technical specifications 5<br />
Size choice 6<br />
Nomenclature 7<br />
Harness overview 8<br />
Pockets and portability 9<br />
BUMPAIR assembly 10<br />
Installing the cockpit 11<br />
Reserve parachute pocket : characteristics. 12<br />
Connecting the handle to the POD. 12<br />
Reserve parachute installation. 12<br />
Placing the parachute in its pocket. 13<br />
Connecting the « Y » risers. 14<br />
Connecting the standard risers. 15<br />
Installing the accelerator. 16<br />
Adjustments 17<br />
Adjusting the SpeedBag angle and length. 18<br />
Adjusting the backrest angle. 18<br />
Adjusting the shoulder straps. 18<br />
Inflight harness behavior. 19<br />
Pre-Flight check. 20<br />
Take-off 21<br />
SpeedBag installation. 22<br />
In flight 23<br />
Speed-bar use 23<br />
Landing 24<br />
Using the reserve parachute. 24<br />
Complements/Accessories 25<br />
Washing and harness maintenance. 26<br />
Storage and transport. 26<br />
Product longevity. 26<br />
Maintenance 26<br />
Repair 27<br />
Materials 27<br />
Recycling 27<br />
Warranty 28<br />
Disclaimer 28<br />
Pilot’s gear 28<br />
Service Book 29<br />
Photo : SUP’AIR<br />
SUP’AIR manufactures its products in Europe. Most of the components used are Made in Europe. SUP’AIR _SKYPPERFR Page 3
Introduction<br />
Welcome to the SKYPPER FR world: one of performance, comfort, and piloting precision. You now<br />
own a fully equipped harness targetting high level competition pilots and long distance records<br />
seekers... Perfectly seated in an integrated streamlined profile, you will be able to feel with great<br />
accuracy, every movement your wing will send to the SKYPPER FR, during long efficient high speed<br />
flights !<br />
After reading this <strong>manual</strong>, we will recommend checking your harness during a hang-test before<br />
flying.<br />
N.B : Three important icons will help you while reading this <strong>manual</strong>.<br />
Advice Caution ! Danger !!<br />
SUP’AIR manufactures its products in Europe. Most of the components used are Made in Europe. SUP’AIR _SKYPPERFR Page 4
Technical specifications<br />
A<br />
B<br />
C<br />
D<br />
A<br />
B<br />
C<br />
D<br />
E<br />
F<br />
Backrest height (cm)<br />
Reclined seating height (cm)<br />
Seat length (cm)<br />
Seat width (cm)<br />
Carabiners height (cm)<br />
Hauteur du dos<br />
Hauteur réglage de<br />
l'inclinaison du<br />
dossier<br />
Longueur d'assise<br />
Largeur d'assise<br />
E<br />
F<br />
Hauteur des points<br />
Carabiners distance (cm)<br />
Distance entre les<br />
points<br />
Model<br />
SKYPPER FR<br />
S<br />
SKYPPER FR<br />
M<br />
SKYPPER FR<br />
L<br />
SKYPPER FR<br />
XL<br />
Pilot size 160-170 170-180 180-190 190-200<br />
Pilot weight (cm) 60-75 70-85 80-100 80-110<br />
Harness weight (+ carabiners + speedbar) 7.45 7.57 7.69 7.81<br />
Designed for<br />
Paragliding only<br />
Backrest height (cm) 70 72 75 78<br />
Seat length (cm) 42 42 42 44<br />
Seat width (cm) 33 33 33 33<br />
Carabiners height (cm) 48<br />
Carabiners distance (cm) 36-46<br />
Speedbar length ( cm ) 78 81 85 89<br />
Impact damping system : Airbag (Volume)<br />
No<br />
Impact damping system : Bumpair (Thickness)<br />
Certification<br />
Flight : tandem (Pilot- Passenger)<br />
Flight : acrobatic flying<br />
Take-off : Winching - towing<br />
Quick-out carabiners compatibility<br />
Yes- 15 cm<br />
EN 1651 - LTF<br />
No - No<br />
No<br />
Yes<br />
Yes<br />
F<br />
E<br />
A<br />
B<br />
D<br />
C<br />
SUP’AIR manufactures its products in Europe. Most of the components used are Made in Europe. SUP’AIR _SKYPPERFR Page 5
Size choice<br />
Choosing your harness size is important. You will find below a measurement chart to help with your<br />
selection. Nonetheless we will advise you to try the harness in various sizes during a hang-test at<br />
one of our retailers to find your correct fitting size.<br />
For a complete list of our retailers, please click here : www.supair.com<br />
Size<br />
Weight<br />
50<br />
55<br />
60<br />
65<br />
70<br />
75<br />
80<br />
85<br />
90<br />
95<br />
100<br />
105<br />
110<br />
1m45 1m50 1m55 1m60 1m65 1m70 1m75 1m80 1m85 1m90 1m95 2m 2m05<br />
S<br />
S/M<br />
M<br />
M/L<br />
L<br />
L/ XL<br />
XL<br />
SUP’AIR manufactures its products in Europe. Most of the components used are Made in Europe. SUP’AIR _SKYPPERFR Page 6
Nomenclature<br />
1<br />
4<br />
2 3<br />
1<br />
SKYPPER FR harness.<br />
5<br />
2<br />
3<br />
1 BUMPAIR 15 cm.<br />
30 mm self-locking carabiners (x2).<br />
6<br />
4<br />
Reserve parachute handle for pod located<br />
beneath the seat ( ref : E2 ) x2.<br />
9<br />
5<br />
6<br />
Triple stage speedbar for 29 mm Harken pulleys.<br />
XC carbon fiber seat plate (36x33).<br />
7<br />
7<br />
Speedbag carbon fiber seat plate (SML) oder (XL).<br />
8<br />
Removable Cockpit and its<br />
instrument support.<br />
8<br />
11<br />
9 Dyneema reserve parachute risers ( 1 pair ).<br />
10<br />
11<br />
6 mm x 2 Maillon Rapide®.<br />
O ring ( x4 ).<br />
10<br />
12<br />
Rear profile.<br />
12<br />
SUP’AIR manufactures its products in Europe. Most of the components used are Made in Europe. SUP’AIR _SKYPPERFR Page 7
Harness overview<br />
This illustration will help you understanding the user’s <strong>manual</strong>.<br />
8<br />
4<br />
1<br />
2<br />
1<br />
2<br />
Chest strap quick release buckle.<br />
Safe-T-strap.<br />
3<br />
Leg strap quick release buckle.<br />
4<br />
Chest strap adjustment.<br />
7<br />
5<br />
6<br />
Backrest tilt adjustment.<br />
Lower back support.<br />
17<br />
7<br />
8<br />
9<br />
10<br />
11<br />
Shoulder straps adjustment.<br />
Dorsal storage pocket.<br />
Sliding guide system diagram.<br />
Adjusting the SpeedBag angle.<br />
Adjusting the Speedbag length.<br />
13<br />
12<br />
Foot-plate.<br />
3<br />
11<br />
10<br />
13<br />
14<br />
Speedbag closing buckles.<br />
Reserve parachute handle;<br />
12<br />
15<br />
Reserve parachute container;<br />
5<br />
16<br />
Harken® pulley.<br />
6<br />
16 14<br />
15<br />
17<br />
9<br />
Rear profile.<br />
SUP’AIR manufactures its products in Europe. Most of the components used are Made in Europe. SUP’AIR _SKYPPERFR Page 8
Pockets and portability<br />
1 2<br />
1<br />
2<br />
3<br />
Dorsal storage pocket.<br />
Inner water pocket.<br />
Inner (10 liter) water ballast pocket.<br />
3<br />
4<br />
Side storage pocket.<br />
7<br />
5<br />
Ballast dumping valve passage.<br />
6<br />
Drag-Chute compartment.<br />
4<br />
5<br />
7<br />
Cockpit.<br />
6<br />
SUP’AIR manufactures its products in Europe. Most of the components used are Made in Europe. SUP’AIR _SKYPPERFR Page 9
Installing the seat plate<br />
1<br />
2<br />
3<br />
SUP’AIR manufactures its products in Europe. Most of the components used are Made in Europe. SUP’AIR _SKYPPERFR Page 10
BUMPAIR assembly<br />
1<br />
The Bumpair is installed in place permanently. There is no need to remove<br />
it from its location except in case of severe impact, when it would<br />
be necessary to inspect it for possible damage.<br />
2<br />
1<br />
2<br />
3<br />
Open the zipped pocket.<br />
Open the internal zip ( green ) of the<br />
« U » shaped pocket.<br />
Push the Bumpair forward while checking<br />
the following points :<br />
The Bumpair must be pushed all the<br />
way in, sandwiched beneath the seating<br />
area and the supporting wall stitched<br />
along the green seam marker.<br />
The Bumpair will set itself in this compartment,<br />
resting against the reserve<br />
parachute pockets.<br />
4<br />
4<br />
The upper Bumpair section must be<br />
inserted inside the « hood » beneath<br />
the backrest straps.<br />
3<br />
SUP’AIR manufactures its products in Europe. Most of the components used are Made in Europe. SUP’AIR _SKYPPERFR Page 11
Installing the cockpit<br />
The cockpit is installed on the right side of the harness and Speedbag.<br />
Wen entering and seating inside the harness, the Cockpit automatically<br />
finds its correct location and positioning, for optimal and<br />
direct instrument visibility. Easily removable, it is nevertheless equipped<br />
with a detachable velcroed supporting instrument platform to<br />
carry away to briefings if needed.<br />
Installing the cockpit in the<br />
compartment inside the<br />
Speeedbag.<br />
1<br />
2<br />
2<br />
When ready to seat inside the harness<br />
after locking the plastic leg<br />
and chest straps buckles, close<br />
the plastic Speebag buckles,<br />
then fold the Velcro strap over the<br />
Cockpit.<br />
1<br />
For better instrument visibility and<br />
need to straighten the Cockpit,<br />
it can simply be done by raising<br />
the velcro central location.<br />
1<br />
2<br />
3<br />
SUP’AIR manufactures its products in Europe. Most of the components used are Made in Europe. SUP’AIR _SKYPPERFR Page 12
Reserve parachute pocket : characteristics<br />
Reserve assembly<br />
Thank you for carefully reading the following! We advise you to have<br />
the initial rescue parachute installation done by someone knowledgeable<br />
with the process.<br />
• 2 side pockets with 4 flaps. One to the right and one to the left,<br />
symettrically located.<br />
• Cable locking system.<br />
• Volume : 3 to 8 liters.<br />
• Compatible with the SUPAIR LIGHT or X-TRALITE reserve parachutes<br />
as well other solo models.<br />
Handle to POD connection.<br />
1 2<br />
1. Attach the handle to the POD central webbing passage and make a<br />
loop to loop configuration.<br />
2. Tighten the loop to loop connection, then check the overall integrity of<br />
the assembly.<br />
Connecting the Dyneema risers to the reserve parachute.<br />
Connecting each of the 2 reserve parachutes<br />
Dyneema riser sets with a loop to loop configuration.<br />
x2<br />
The handle must be connected to<br />
the central POD loop.<br />
SUP’AIR manufactures its products in Europe. Most of the components used are Made in Europe. SUP’AIR _SKYPPERFR Page 13
Installing the reserve parachutes<br />
Installing the reserve parachutes in their respective pockets.<br />
Reserve risers beneath the<br />
POD, guided through the<br />
sleeve to the shoulders. The<br />
shoulder connection should<br />
preferably be made last.<br />
POD, handle pointing upward.<br />
Extendable flaps.<br />
Right handed pilots will install and connect<br />
the left reserve parachute first. The reverse<br />
will apply to left handed pilots.<br />
Insert the reserve parachute in its receiving<br />
pocket with the flaps extented outward. The<br />
handle must be pointing upward.<br />
Push the reserve parachute risers through<br />
the risers guiding sleeve ( the risers must be<br />
positioned behind the parachute ).<br />
Thank you for carefully<br />
reading the<br />
following! We advise<br />
you to have the initial<br />
rescue parachute<br />
installation done by<br />
someone knowledgeable<br />
with the<br />
process.<br />
1<br />
2 3 4<br />
Push the cord through the elasticated<br />
loop 1.<br />
Push the cord through grommet<br />
2.<br />
5 7<br />
6<br />
Push the cord through grommet<br />
3.<br />
Push the cord through grommet 4, and insert<br />
the yellow handle cable in the loop. Carefully<br />
remove the cord, and tuck away the end of<br />
the handle under the outer end pockets.<br />
8<br />
Still using the cord, push the elasticated<br />
loop 5 through grommet 6.<br />
Push the cord through grommet 7.<br />
Push cord through grommet 8. Insert<br />
Tuck away the end of the handle<br />
the yellow handle cable in the loop.<br />
under the outer end pockets.<br />
Carefully remove the cord.<br />
SUP’AIR manufactures its products in Europe. Most of the components used are Made in Europe. SUP’AIR _SKYPPERFR Page 14
Installing the reserve parachutes.<br />
Rigid internal<br />
flaps.<br />
Inner rigid flaps.<br />
Neoprene lining.<br />
You can only install<br />
one reserve parachute<br />
to the right or the left<br />
for a total of 2 parachutes<br />
between the two<br />
containers.<br />
Rescue parachute riser connection.<br />
Each Dyneema riser connects<br />
to the harness via a Maillon<br />
Rapides®, and is kept in<br />
place with a toric joint.<br />
Two rigid flaps are to be closed<br />
on the inside of the Speedbag.<br />
Close the two rigid flaps between<br />
the stiffened panel and the neoprene<br />
lining.<br />
Once the installation<br />
has been completed,<br />
gently pull on the<br />
reserve parachute<br />
handle to check and<br />
validate the proper<br />
extraction sequence (<br />
POD + handle ). Repeat<br />
installation procedure<br />
afterward.<br />
Connecting the left, then<br />
right reserve parachutes.<br />
The risers are connected to<br />
the same Maillons Rapides®<br />
joining the right and left<br />
reserve parachutes.<br />
Connecting the left reserve parachute risers.<br />
Connecting the right reserve parachute risers<br />
over the left reserve parachute risers.<br />
Left reserve<br />
parachute risers.<br />
Right reserve<br />
parachute risers.<br />
SUP’AIR manufactures its products in Europe. Most of the components used are Made in Europe. SUP’AIR _SKYPPERFR Page 15
Installing the accelerator.<br />
A<br />
B<br />
A<br />
5 mm accelerator Dyneema line.<br />
B<br />
Speedbag elasticated connection.<br />
1<br />
2<br />
SUP’AIR manufactures its products in Europe. Most of the components used are Made in Europe. SUP’AIR _SKYPPERFR Page 16
Using a flexible drinking water pouch – Camelback like.<br />
1 2 3<br />
Place the pouch inside the receptacle located<br />
inside the dorsal storage pocket. Push<br />
the drinking tube through the green zip accessing<br />
the Bumpair.<br />
Push the drinking tube through the guiding<br />
zip located underneath the reserve parachute<br />
risers sleeve.<br />
Close the risers guide flaps while placing<br />
the drinking tube between the velcros.<br />
4<br />
Overall view of the shoulder straps with the drinking tube.<br />
SUP’AIR manufactures its products in Europe. Most of the components used are Made in Europe. SUP’AIR _SKYPPERFR Page 17
Adjusting the seating posture.<br />
Adjusting the harness prior takeoff is extremely important.<br />
B<br />
1<br />
Speedbag adjustment buckles<br />
beneath the seat.<br />
2<br />
3<br />
Speedbag lateral adjustment<br />
buckles.<br />
Speedbag lateral tension adjustment<br />
strap buckles.<br />
9<br />
9<br />
8<br />
8<br />
A<br />
4<br />
Backrest angle adjustment loosening<br />
strap.<br />
4<br />
6<br />
5<br />
7<br />
2<br />
3<br />
5<br />
Tightening loop-cord ( backrest<br />
angle adjustment ).<br />
1<br />
1<br />
2<br />
3<br />
9<br />
6<br />
Lumbar loosening adjustment support<br />
strap.<br />
B<br />
C<br />
9<br />
8<br />
7<br />
Tightening loop-cord ( lumbar support).<br />
9<br />
4<br />
5<br />
7<br />
8<br />
Shoulder tightening loop-cord (<br />
shoulder strap ).<br />
9<br />
8<br />
6<br />
8<br />
9 Shoulder loosening strap.<br />
5<br />
4<br />
7<br />
SUP’AIR manufactures its products in Europe. Most of the components used are Made in Europe. SUP’AIR _SKYPPERFR Page 18
A Adjusting the Speedbag angle and length.<br />
Using the two lateral buckles and the two buckles underneath<br />
the seat, modify the Speedbag angle around the horizontal axis.<br />
B Adjusting the backrest angle.<br />
B<br />
Modify the angle by pulling on the cord ( to become closer to the<br />
vertical axis ), or the black strap ( to pull away from the vertical<br />
axis ).<br />
Tighten<br />
The lumbar support can be tightened/increased or loosened<br />
with the strap or the loop-cord.<br />
Loosen<br />
C<br />
C Adjusting the shoulder straps.<br />
Tighten the shoulder straps by pulling the the loop-cord forward.<br />
Loosen by pulling the tubular strap rearward.<br />
Resting against the shoulder straps enhances comfort ; the adjustment<br />
must be precisely done.<br />
Loosen<br />
Tighten<br />
SUP’AIR manufactures its products in Europe. Most of the components used are Made in Europe. SUP’AIR _SKYPPERFR Page 19
Inflight behavior<br />
The SKYPPER is a XC and competition harness. Efficient and stable, it transmits precisely the wing’s output to the pilot.<br />
Keep in mind that we want to see you practice this specialty with peace of mind and for as long as possible. The best gear will<br />
not protect you against over confidence or a cascade of mishaps.<br />
SUP’AIR manufactures its products in Europe. Most of the components used are Made in Europe. SUP’AIR _SKYPPERFR Page 20
Pre-Flight check.<br />
• Check that the harness and the carabiners are not damaged.<br />
• Check thoroughly that the rescue handle cable has not come out of the snapper flaps<br />
• Check that your personal settings have not been modified.<br />
• Check that all zippers and buckles are properly closed.<br />
• Check that the speed-bar is properly adjusted and connected to the wing ( refer to page 20 ).<br />
• Check that no rigging line or other object comes in contact with the rescue parachute handle.<br />
After a thorough weather conditions analysis, when the decision to fly has been taken, put your<br />
harness on :<br />
• Carefully close and lock the leg-straps, Safe-T strap, and chest strap buckles.<br />
4<br />
4<br />
4<br />
3<br />
4<br />
3<br />
1<br />
1<br />
1<br />
2<br />
Thigh strap quick-release buckles (female).<br />
Thigh strap quick-release buckles (male).<br />
1<br />
1<br />
2<br />
2<br />
3<br />
Chest strap quick-release buckles (female).<br />
2<br />
2<br />
4<br />
Safe-T-Bar.<br />
SUP’AIR manufactures 1 Boucle automatique its products de cuissardes in Europe. Most of the components used are Made in Europe. SUP’AIR _SKYPPERFR Page 21<br />
(femelle)<br />
Boucle automatique de cuissarde
Take-off<br />
After being properly connected, lock the Speedbag’s left buckle (1) fastened to a line, then connect the Cockpit supporting<br />
velcro (2), and lock the Speedbag’s second buckle (3) to the right.<br />
Keep an upright posture while taking off ( do not try to immediately seat in your harness ) distance yourself from the ground<br />
first, then backpedal to reach and grab the Speedbag. Push yourself all the way into the harness by using the foot-rest to<br />
reach a comfortable seating posture.<br />
Note that it is easier to backpedal and grab the Speedbag while standing upright inside the harness, and inversely, more<br />
difficult when already seated.<br />
Do not let go your toggles from your hands when flying close to the terrain.<br />
2<br />
1<br />
3<br />
SUP’AIR manufactures its products in Europe. Most of the components used are Made in Europe. SUP’AIR _SKYPPERFR Page 22
In flight<br />
Once in flight, the SKYPPER FR’s behavior is intuitive and precis.<br />
Please set the distance between the two carabiners according to aerology conditions and to the wing manufacturer’s<br />
recommendations.<br />
Tightening provides more stability but less harness piloting efficiency. Beware of the increased risk of riser twisting. On the<br />
contrary loosening the strap provides more efficiency but can be dangerous in turbulent aerology (increased risk of falling<br />
towards the collapsed side of your glider).<br />
Speed-bar use<br />
Seat<br />
We recommend a careful use of the speed-bar due to the increased<br />
risk a possible frontal collapse. Please carefully read your glider’s operation<br />
<strong>manual</strong>.<br />
The SKYPER FR accelerator is equipped with three stages (3 bars). The<br />
first bar rides beneath the ballast pocket. When the ballast pocket is<br />
empty, be certain to tighten it and decrease its volume to enable the<br />
accelerator to operate smoothly.<br />
When this pocket is empty: the ballast pouch must be fully tightened to<br />
diminish its volume, and enable the accelerator to operate smoothly.<br />
SUP’AIR manufactures its products in Europe. Most of the components used are Made in Europe. SUP’AIR _SKYPPERFR Page 23
Landing<br />
Approaching landing, take your legs out of the Speedbag early enough. Straighten your body, adopt an upright posture<br />
and be ready to run to dissipate the horizontal speed to a stop.<br />
Do not land whilst still seated position, this is dangerous.<br />
Using the reserve parachute.<br />
We strongly advise you to frequently check the reserve parachute handle location to lowering your right hand following<br />
the risers. This movement should become second nature to maximize your chance of rapide and successful extractions in<br />
case of an emergency.<br />
Evaluate your height over the ground. If you have a lot of altitude it may be better to attempt a wing recovery to normal<br />
flight. If in doubt then deploy you reserve parachute.<br />
Deploying a rescue parachute should only be done as an emergency.<br />
With a strong, lateral and then vertical tug pull the handle towards you and then throw the whole parachute (including<br />
the bag and handle) as hard as hard as possible away from the harness and an unobstructed trajectory. As soon as the<br />
parachute deploys, haul down the glider by pulling as symmetrically as possible on the risers (C or D) lines.<br />
Be prepared to land by adopting an upright position.<br />
The second reserve parachute must only be deployed when subsequent problems occur with the main and first rescue<br />
system sequence.<br />
SUP’AIR manufactures its products in Europe. Most of the components used are Made in Europe. SUP’AIR _SKYPPERFR Page 24
Using the Drag-Chute.<br />
The SKYPPER FR was designed to use a Drag-Chute.<br />
If the Drag-Chute was to be used in flight, it can be found stowed away inside the left pocket along the Speedbag. This pocket is large<br />
and open enough for an easy chute extraction.<br />
SUP’AIR manufactures its products in Europe. Most of the components used are Made in Europe. SUP’AIR _SKYPPERFR Page 25
Maintenance<br />
Washing and harness maintenance.<br />
It is a good idea to wash your harness from time to time. We recommend using a soft solvent (such as soap), a brush and<br />
rinse thoroughly.<br />
DO NOT use chemicals such as aggressive detergents or strong solvents as they may deteriorate the webbing, stitching and<br />
harness fabrics. The zip fasteners should be lubricated from time to time, using a silicon spray only.<br />
Storage and transport.<br />
When not using your harness, store it inside your paragliding rucksack, in a dry, cool and clean place, protected from UV<br />
exposure. If your harness is wet, dry it thoroughly before storing.<br />
During transport, protect the harness from any mechanical or UV deterioration (use a bag). Avoid long transports in wet or<br />
humid conditions.<br />
Product longevity.<br />
Independently from the pre-flight checks, you must open and unfold your rescue parachute once every 6 months.<br />
Once every 2 years, you need to perform a complete harness check :<br />
• webbings (no wear, tear or material unraveling, no unwanted folds).<br />
The threads making the webbing and fabrics used in the ACRO3 have been selected to offer the best possible light weight<br />
to longevity ratio. Nonetheless, in some conditions, after long term exposure to UV and/or significant abrasion or exposure<br />
to chemicals, it is compulsory to have your harness’s integrity checked at a certified repair centre. Your safety depends on it.<br />
These carabiners must never be used for anything else than paragliding (not for climbing, nor towing, etc.).<br />
Carabiners must be replaced by new ones every five ( 5 ) years by identical models or models recommended by the<br />
manufacturer ( SUPAIR ).<br />
SUP’AIR manufactures its products in Europe. Most of the components used are Made in Europe. SUP’AIR _SKYPPERFR Page 26
Repair<br />
In spite of using the highest quality materials, it is possible for your harness to eventually deteriorate through general use.<br />
If showing any signs of significant wear and tear, you should check it and have it repaired at a certified repair centre if<br />
necessary.<br />
SUP’AIR also offers the possibility for its products to be repaired beyond the end of the warranty period. Please contact us<br />
either by telephone or by E-mail sav@supair.com in order to receive a quotation.<br />
Materials<br />
Fabrics<br />
DYNEEMA® RIPSTOP<br />
CORDURA®<br />
CORDURA® RIPSTOP<br />
Speedbag<br />
LYCRA<br />
Webbings<br />
Polyamide 20 mm (500 DaN)<br />
Polyester 25 mm (1250 DaN)<br />
Under the seat parachute risers<br />
Dyneema® (1350 N)<br />
Recycling<br />
All our materials are selected for their technical and environmentally friendly characteristics. None of thre components<br />
found in them will harm the environment, and most are recyclable.<br />
If you estimate that your harness has reached the end of its lifespan, you can then separate the plastic from the metallic<br />
parts and apply up-to-date sorting rules in effect in your community. As for the fabric parts, we will advise you to contact<br />
your local specialized recycling center(s).<br />
SUP’AIR manufactures its products in Europe. Most of the components used are Made in Europe. SUP’AIR _SKYPPERFR Page 27
Warranty<br />
SUP’AIR takes the greatest care in the design and production of its product line, hence, offers a five (5) years limited warranty<br />
from the purchase date against any manufacturing defect or design issues occurring during normal use. Any damage<br />
or degradation resulting from incorrect or abusive use, abnormal exposure to aggressive factors, including, but not limited<br />
to; high temperature, intense sun exposure, high humidity etc., will invalidate this warranty<br />
Disclaimer<br />
Paragliding is an activity requiring, skills, specific knowledge and sound judgement. Be safe by learning in certified schools,<br />
subscribe and obtain an adequate insurance policy as well as a flying license while always making sure your flying skills<br />
are up to the task in various weather flying conditions. SUP’AIR cannot be held responsible for your paragliding decisions<br />
or activities.<br />
This SUP’AIR product has been designed exclusively for paragliding. Any other activity such as skydiving or BASE jumping<br />
is absolutely forbidden.<br />
Pilot’s gear<br />
It is essential to wear a helmet, suitable boots and clothing. Carrying a reserve parachute suitable for your weight and<br />
correctly connected to your harness is also very important.<br />
SUP’AIR manufactures its products in Europe. Most of the components used are Made in Europe. SUP’AIR _SKYPPERFR Page 28
Maintenance <strong>manual</strong><br />
This page will help you to record all the life stages of your ACRO3 harness.<br />
Serial number :<br />
Purchase date<br />
Owner’s name<br />
Care<br />
Resale<br />
Date<br />
Workshop’s name/ Buyer’s name<br />
Care<br />
Resale<br />
Date<br />
Workshop’s name/ Buyer’s name<br />
Name and stamp of the shop<br />
Care<br />
Resale<br />
Date<br />
Workshop’s name/ Buyer’s name<br />
Care<br />
Resale<br />
Date<br />
Workshop’s name/ Buyer’s name<br />
SUP’AIR manufactures its products in Europe. Most of the components used are Made in Europe. SUP’AIR _SKYPPERFR Page 29
SUPAIR-VLD<br />
PARC ALTAÏS<br />
34 RUE ADRASTÉE<br />
74650 ANNECY CHAVANOD<br />
FRANCE<br />
45°54.024’N / 06°04.725’ E