Model PS3003 High Voltage Power Supply Instruction ... - Biometra
Model PS3003 High Voltage Power Supply Instruction ... - Biometra
Model PS3003 High Voltage Power Supply Instruction ... - Biometra

Create successful ePaper yourself
Turn your PDF publications into a flip-book with our unique Google optimized e-Paper software.
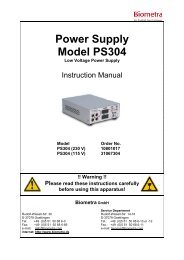
<strong>Model</strong> <strong>PS3003</strong><br />
<strong>High</strong> <strong>Voltage</strong> <strong>Power</strong> <strong>Supply</strong><br />
<strong>Instruction</strong> Manual<br />
Order No 10553003 (230 V)<br />
Order No 31063003 (115 V)<br />
!! Warning !!<br />
Please read these instructions carefully<br />
before using this apparatus!<br />
<strong>Biometra</strong> GmbH<br />
Service Department<br />
Rudolf-Wissell-Str. 30 Rudolf-Wissell-Str. 14-16<br />
D-37079 Goettingen D-37079 Goettingen<br />
Tel: +49 (0)5 51 50 68 6-0 Tel.: +49 (0)5 51 50 68 6-10 or -12<br />
Fax: +49 (0)5 51 50 68 6-66 Fax.: +49 (0)5 51 50 68 6-11<br />
e-mail: Info@biometra.com e-mail: Service@biometra.com<br />
internet: http://www.biometra.de
This document describes the state at the time of publishing. It needs not necessarily agree<br />
with future versions.<br />
Subject to change!<br />
<strong>PS3003</strong> HV <strong>Power</strong> <strong>Supply</strong>, 2011/03
1 Contents<br />
1 CONTENTS ....................................................................................................................1<br />
2 INTRODUCTION.............................................................................................................2<br />
3 NOTICE TO CUSTOMER...............................................................................................2<br />
4 SAFETY..........................................................................................................................4<br />
4.1 DEFINITION OF SYMBOLS ..............................................................................................4<br />
4.2 SAFETY INSTRUCTIONS .................................................................................................4<br />
4.3 ENVIRONMENTAL SAFETY CONDITIONS..........................................................................6<br />
5 SPECIFICATIONS..........................................................................................................7<br />
6 DELIVERY PARTS.........................................................................................................8<br />
6.1 CONTENT......................................................................................................................8<br />
6.2 UNPACK AND CHECK ....................................................................................................8<br />
6.3 LOCATION.....................................................................................................................8<br />
6.4 CONNECTION WITH THE AC MAINS ................................................................................8<br />
7 OPERATING INSTRUCTIONS.......................................................................................9<br />
7.1 CONTROL ELEMENTS....................................................................................................9<br />
7.2 INSTALLATION.............................................................................................................10<br />
7.3 OPERATION IN CONSTANT VOLTAGE............................................................................10<br />
7.4 OPERATION IN CONSTANT CURRENT ...........................................................................11<br />
7.5 OPERATION IN CONSTANT WATTS ...............................................................................11<br />
7.6 CHOOSING SAFE OPERATING LIMITS ...........................................................................12<br />
7.7 AUTOMATIC CROSSOVER ............................................................................................13<br />
7.8 USER PROTECTION AND SAFETY .................................................................................13<br />
7.9 POWER FAILURE DURING THE RUN..............................................................................13<br />
8 MAINTENANCE AND CLEANING ...............................................................................14<br />
8.1 MAINTENANCE ............................................................................................................14<br />
8.2 CLEANING ..................................................................................................................14<br />
9 TROUBLESHOOTING GUIDE .....................................................................................15<br />
10 SERVICE ......................................................................................................................16<br />
11 EQUIPMENT DECONTAMINATION CERTIFICATE....................................................17<br />
12 NOTE FOR DISPOSAL OF ELECTRIC/ELECTRONIC WASTE.................................19<br />
13 NOTICES ......................................................................................................................20<br />
14 EC - DECLARATION OF CONFORMITY.....................................................................21<br />
15 WARRANTY .................................................................................................................22
2 Introduction<br />
The <strong>Biometra</strong> <strong>Model</strong> <strong>PS3003</strong> <strong>High</strong> <strong>Voltage</strong> <strong>Power</strong> <strong>Supply</strong> is recommended for DNA-<br />
Sequencing, Isoelectric Focusing and Polyacrylamide Gel Electrophoresis. Additional it can be<br />
used for Agarose Gel Electrophoresis. The use for Semi-dry and Tank blotting may be limited.<br />
The <strong>Model</strong> <strong>PS3003</strong> <strong>High</strong> <strong>Voltage</strong> <strong>Power</strong> <strong>Supply</strong> is intended for use with any electrophoresis<br />
applications designed to operate below 3,000 volts and 300 milliamps DC. Two sets of outputs<br />
operate in parallel to provide 10 to 3,000 volts, 1 to 300 milliamps and 1 to 300 watts in<br />
constant voltage, constant current or constant power mode. <strong>Voltage</strong> setting is adjustable in 10<br />
V steps. Current and power setting is adjustable in steps of 1mA and 1W.<br />
Three separate displays provide output voltage, current and power readings.<br />
3 Notice to Customer<br />
Read and carefully follow manual instructions.<br />
Do not alter equipment. Failure to adhere to these directions could result in<br />
personal and/or laboratory hazards, as well as invalidate equipment warranty.<br />
This power supply is authorized for laboratory research use only. The product<br />
has not been qualified or found safe and effective for any human or animal<br />
diagnostic or therapeutic application. Uses for other than the labeled intended<br />
use may be a violation of applicable law.<br />
The model <strong>PS3003</strong> <strong>High</strong> <strong>Voltage</strong> <strong>Power</strong> <strong>Supply</strong> is equipped with an automatic restart<br />
system in case of mains failure.<br />
When the power returns, an audible alarm sounds for 10 seconds and the power<br />
automatically restarts with the previous set values.<br />
If during the power failure the electrophoresis unit is disconnected from the power<br />
supply, the alarm still sounds when the mains supply returns. Because no load is<br />
connected the power supply will immediately shutdown and set the output to zero.<br />
Direct reading of programmed set values and actual values before and during the<br />
cycle.<br />
Volt, mA and Watts adjustable during a cycle.<br />
Stabilisation and automatic crossover between the parameters according to the set<br />
limitation values and when output limits are reached. 3 Red LED indicate the constant<br />
mode.<br />
2<br />
<strong>PS3003</strong> HV <strong>Power</strong> <strong>Supply</strong> <strong>Instruction</strong> Manual, Version 2011/03
3 operating modes: constant voltage - constant current – constant power<br />
Settings by tactile switches and moisture resistant membrane panel<br />
Battery-backed memory feature "save" last output set values in the event of a power<br />
failure or when the run is terminated and the unit is turned off.<br />
3 red LED Displays for set and output Volt, Current and power values.<br />
3 recessed safety output jacks allow simultaneous operation of 3 electrophoresis<br />
units.<br />
Fault detection and 500μA current leakage detection or no load automatically shuts<br />
down output and indicates the fault by yellow LED blinking.<br />
<strong>PS3003</strong> HV <strong>Power</strong> <strong>Supply</strong> <strong>Instruction</strong> Manual, Version 2011/03 3
4 Safety<br />
4.1 Definition of Symbols<br />
Symbol<br />
Definition<br />
Caution: Read these operating instructions carefully before use and pay<br />
particular attention to sections containing this symbol.<br />
Danger! <strong>High</strong> <strong>Voltage</strong>!<br />
Fragile!<br />
4.2 Safety <strong>Instruction</strong>s<br />
Read these operating instructions carefully before use:<br />
DANGER! HIGH VOLTAGE! This power supply has been designed for use as a<br />
source of DC power for electrophoresis. It is capable of generating lethal currents. This<br />
unit should always be operated only by qualified and trained personell and with<br />
extreme caution. Careless handling could result in electrical shock.<br />
• Take care as the mode of operation of the <strong>Power</strong> <strong>Supply</strong> is continuous.<br />
• Use only as specified by the operating instructions, or the intrinsic protection may be<br />
impaired.<br />
• Never operate damaged equipment. Do not use the unit without the cover in place or<br />
with any possible short circuit. If the power supply emits smoke or continually blows<br />
the main fuses, turn off the power supply and disconnect the AC line and power cord.<br />
• For additional information, please call the <strong>Biometra</strong> Technical Service Deaprtment or<br />
your local distributor. Never attempt to remove the outer casing or make any repairs to<br />
the unit.<br />
• The unit must be earthed. Use only the line cord supplied with the unit for safe<br />
operation. (Connect the device to a properly grounded outlet only!)<br />
4<br />
<strong>PS3003</strong> HV <strong>Power</strong> <strong>Supply</strong> <strong>Instruction</strong> Manual, Version 2011/03
• Check the mains plug of the line cord to make sure it is equipped with a protection fuse<br />
not exceeding 3 A. The use of a line cord other than this or the one supplied by<br />
<strong>Biometra</strong> may result in user hazard.<br />
• The AC power cord has a three-pronged plug which must be connected to a grounded<br />
line voltage receptacle. Do not use a two-wire receptacle with an adapter. This could<br />
create a serious electrical hazard for persons using the unit.<br />
• Use the correct voltage AC power outlet for the power supply. Be sure to always plug a<br />
110 VAC power supply into a 105/125-VAC, 50/60 Hz line, and use a 210/250-VAC,<br />
50/60 Hz line with a 240V unit.<br />
• For connection between the power supply and the electrophoresis equipment, use only<br />
the safety output power cords equipped with black and red recessed plugs as supplied<br />
with the <strong>Biometra</strong> electrophoresis equipment or power cords that meet the legal<br />
requirements.<br />
• Check the power cords and the black and red recessed safety jacks periodically to<br />
make sure that they are in good condition. Do not use cords which are cracked, nicked<br />
or in otherwise poor condition.<br />
• Always turn off the power supply before connecting or removing the power cords or<br />
moving an electrophoresis apparatus.<br />
• Handle one power cord at a time, with one hand only, when connecting or removing<br />
DC power cords at the power output terminals.<br />
• It is also recommended to use electrophoresis equipment that can only be connected<br />
when the safety lids are closed.<br />
• Never place any objects other than high voltage connectors rated to 3,000V into the<br />
output jacks.<br />
• Site the unit such that the rear panel has at least 20 cm of clearance to provide for<br />
adequate unit ventilation.<br />
• Make sure the power supply is located in a safe and dry place, in proximity to the<br />
electrophoresis devices powered. Keep away from liquids. Should a liquid penetrate<br />
the <strong>Power</strong> <strong>Supply</strong>, disconnect the device immediately.<br />
• Ensure that the mains switch is easily accessible during use.<br />
• Before moving, disconnect at the power supply socket.<br />
• After transport or storage in humid conditions, dry out the unit before connecting it to<br />
the supply voltage. During drying out the intrinsic protection may be impaired.<br />
Do not operate the unit in a damp, humid atmosphere or in a fashion where condensed<br />
moisture may short out electrical components.<br />
<strong>PS3003</strong> HV <strong>Power</strong> <strong>Supply</strong> <strong>Instruction</strong> Manual, Version 2011/03 5
• Before using any cleaning or decontamination method except those recommended in<br />
this manual, check with the <strong>Biometra</strong> Service Department that the proposed method<br />
will not damage the equipment.<br />
4.3 Environmental Safety Conditions<br />
The <strong>Model</strong> <strong>PS3003</strong> <strong>High</strong> <strong>Voltage</strong> <strong>Power</strong> <strong>Supply</strong> is designed for the following<br />
conditions:<br />
• Indoor use<br />
• Altitude up to 2000 m<br />
• Temperature 10 °C – 40 °C<br />
• Maximum relative humidity 80 % for temperature up to 31 °C decreasing<br />
linearly to 50 % relative humidity at 40 °C<br />
6<br />
<strong>PS3003</strong> HV <strong>Power</strong> <strong>Supply</strong> <strong>Instruction</strong> Manual, Version 2011/03
5 Specifications<br />
Mains supply voltage fluctuations not to exceed ± 10% of the normal voltage<br />
Mains supply, 110V model :<br />
Mains supply, 220V model :<br />
Fuse value in the mains plug (UK):<br />
Rated input power/current<br />
V - mA – W setting and regulation<br />
range<br />
V - mA – Watts display range<br />
Mode of operation<br />
Switching frequency<br />
Output regulation stability<br />
Minimum no regulated output<br />
Minimum regulated output<br />
Value display accuracy<br />
Mains failure during the run :<br />
Fault detection<br />
Fault status<br />
Earth leakage detection level<br />
Output to earth impedance<br />
Size<br />
Weight<br />
90 – 130 V; 50 – 60 Hz; T4A fuses<br />
180 – 260 V; 50 – 60 Hz; T2A fuses<br />
3 A<br />
400 VA<br />
10 - 3000 Volts ; 10 Volt step<br />
1 - 300 mA; 1 mA step<br />
1 – 300 Watts; 1 watt step<br />
0 - 3000 Volts ; 10 Volt step<br />
0 - 300 mA; 1 mA step<br />
0 – 300 Watts<br />
Continuous<br />
23 kHz<br />
± 0,2% FS ± ½ digit<br />
5 Volts; 15μA; 0,6 Watts<br />
10 Volts; 1 mA; 1 Watts<br />
(load >10 kOhms)<br />
± 0,2 FS ± ½ digit<br />
Buzzer, then automatic restart with<br />
previous set values<br />
Output supply stop, buzzer<br />
Yellow LED flashing<br />
Output to earth leakage<br />
Output open circuit<br />
Output short circuit<br />
No regulation (Overheating, power<br />
circuit fault)<br />
500 μA<br />
10Mõ min bypassed by 1nF max<br />
34 cm x 27 cm x 11 cm<br />
( D x W x H )<br />
5 kg<br />
<strong>PS3003</strong> HV <strong>Power</strong> <strong>Supply</strong> <strong>Instruction</strong> Manual, Version 2011/03 7
6 Delivery parts<br />
6.1 Content<br />
• <strong>Model</strong> <strong>PS3003</strong> <strong>High</strong> <strong>Voltage</strong> <strong>Power</strong> <strong>Supply</strong><br />
• Manual<br />
• <strong>Power</strong> Cord<br />
6.2 Unpack and Check<br />
Unpack and carefully examine the <strong>Model</strong> <strong>PS3003</strong> <strong>High</strong> <strong>Voltage</strong> <strong>Power</strong> <strong>Supply</strong>. Report any<br />
damage to BIOMETRA or your local distributor.<br />
Save all packing material if damage is found.<br />
Do not attempt to operate this device if physical damage is present.<br />
If you would like to send the unit back to us, please read the return instructions.<br />
6.3 Location<br />
Make sure that the unit is set up in a location where it is protected from physical damage,<br />
moisture, corrosive agents, and extreme temperatures. Make sure that the fan at the rear is<br />
not obstructed; leave about 10-cm space behind the unit. The unit should be readily<br />
accessible for safe operation.<br />
6.4 Connection with the AC Mains<br />
Connect the unit to the AC mains carrying the appropriate specified voltage (V) in accordance<br />
with the rating label affixed to the back of the unit. Ensure that the main receptacle and the<br />
power supply plug both have the proper three-wire (grounded or earthed) connections.<br />
8<br />
<strong>PS3003</strong> HV <strong>Power</strong> <strong>Supply</strong> <strong>Instruction</strong> Manual, Version 2011/03
7 Operating <strong>Instruction</strong>s<br />
In order to achieve the greatest efficiency and effectiveness from this unit, read this section in<br />
its entirety before setting up or operating the power supply unit and carefully review the<br />
following figure to ascertain the location of the power supply’s controls and features.<br />
7.1 Control Elements<br />
2 3 4 5 6 7 8<br />
Preset<br />
1<br />
14<br />
10<br />
11<br />
12<br />
13 15 9<br />
No. DESCRIPTION FUNCTION<br />
1 Main power switch Turns on unit (located on the right side)<br />
2 <strong>Voltage</strong> output LED Displays actual output in Volts<br />
3 Current output LED Didplays actual output in mA<br />
4 <strong>Power</strong> output LED Displays actual output in Watts<br />
5 STOP switch Terminates output<br />
6 START switch Begins output<br />
7 STOP LED Indicated STOP ouput<br />
8 START LED Indicated START output<br />
9 Fault LED Indicated ground leakage, no load or short circuit<br />
10 Volt LED Indicates constant voltage mode<br />
11 mA LED Indicated constant current mode<br />
12 Watt LED Indicated constant power mode<br />
13 Setting switches Increase/decrease set point<br />
14 <strong>High</strong> <strong>Voltage</strong> output jacks Red = positive ; Black = negative<br />
15 PRESET switch Displays output preset values<br />
<strong>PS3003</strong> HV <strong>Power</strong> <strong>Supply</strong> <strong>Instruction</strong> Manual, Version 2011/03 9
7.2 Installation<br />
1. Connect the AC line cord to a grounded, 3-prong wall outlet.<br />
2. Connect the power supply to an electrophoresis device using the power cords supplied.<br />
3. Press the main POWER switch to turn the power supply on. The STOP LED (red) will<br />
illuminate, and the output LEDs will display zeros.<br />
7.3 Operation in Constant <strong>Voltage</strong><br />
1. Place the power supply on a sturdy, level surface in a safe, dry place away from laboratory<br />
traffic. Controls must be easily accessible and sufficient space must be available nearby for<br />
the electrophoresis unit(s) to be used with the power supply. The fan intake in the back and<br />
exhaust on the bottom must remain unobstructed.<br />
Note: Allow at least 8 h for the unit to equilibrate if it is moved into or out of a cold room. It<br />
must be completely dry before using.<br />
2. The electrophoresis chamber should be set up, than filled with buffer, before plugging the<br />
chamber’s leads into the appropriate positive and negative 4-mm sockets on the power supply<br />
unit.<br />
Note: Sample can be added before or after adjusting power supply settings.<br />
3. Switch on the power supply using the <strong>Power</strong> On/Off switch. The Volts display, Milliamps<br />
display, and Watts display will all indicate zero.<br />
Notes on General Operation: The output of the unit is controlled by three separate operating<br />
parameters. An operating limit, with a value above zero, must be set for voltage, milliamps,<br />
and watts to generate an output. When the power supply unit is activated, the output of the<br />
power supply will steadily increase until an operating limit is reached. Once an operating limit<br />
is reached, one of the three red At Limit lights will illuminate. The light will indicate which<br />
operating limit has been reached first and which mode of control has been established.<br />
4. Using the Volts setting switch, select the operating voltage limit by using the ▲ or ▼<br />
adjustment switch until the desired value appears on the Volts display. Using the ▲ switch will<br />
increase the displayed value in 10-V increments. Using the ▼ switch will reduce the displayed<br />
value in the same manner.<br />
As soon as one of these adjustment switches is activated, the output LED will display output<br />
set values rather than actual output values. When they are released, the output LED will<br />
display output set values for 3 seconds, and then will display actual output (All zero since<br />
output has not yet be started).<br />
Note: The DC output must be off to change the output settings.<br />
5. Using the Milliamps adjustment switches and Watts adjustment switches, select the desired<br />
operating limits for milliamps and watts, respectively. The method used to select these values<br />
is the same method used to select the operating voltage limit.<br />
Warning: The <strong>Model</strong> PS 3003 <strong>High</strong> <strong>Voltage</strong> <strong>Power</strong> <strong>Supply</strong> is capable of producing output<br />
levels well in excess of the maximum safe operating limits for most electrophoresis chambers.<br />
It is important to determine the safe operating limits for milliamps and watts. Section<br />
“Choosing Safe Operating Limits” has been included to guide the user in selecting proper<br />
operating parameters.<br />
6. Press the START switch. The START LED (green) will illuminate, and the output LED’s will<br />
display the actual values simultaneously. The DC output, as indicated by the three displays,<br />
10<br />
<strong>PS3003</strong> HV <strong>Power</strong> <strong>Supply</strong> <strong>Instruction</strong> Manual, Version 2011/03
should rapidly increase until the operating voltage limit is reached. At this point the <strong>Voltage</strong><br />
mode LED will illuminate, indicating the parameter controlling output.<br />
7. Slight increases or decreases in output readings for those parameters not "limiting" will<br />
occur as the experiment progresses. These changes accurately represent changes in the<br />
resistive load ( electrophoresis unit ) due to changes in temperature, buffer capacity, etc. This<br />
is to be expected.<br />
8. To view the output set values during the run, press the PRESET switch. The LED’s will<br />
display the output set values as long as this switch is pressed. Once the PRESET switch is<br />
released, the led will display the output set values for three seconds, and then switch back to<br />
displaying the actual output values.<br />
9. It is impossible to change the values during the run without pressing the STOP switch.<br />
During the run, as soon as one of these adjustment switches is activated, the output LED’s will<br />
display output set values.<br />
10. To change the output set values during the run, press the STOP switch. Increase or<br />
decrease with the adjustment switches until the appropriate output set value is reached. In<br />
START status, when the PRESET switch is depressed, the LEDs will display the output set<br />
values during three seconds and then switch back to displaying the actual output values.<br />
11. If the non-controlling output set values is reached during the course of the run, the power<br />
supply will automatically crossover to the new mode and control output relative to that mode.<br />
The appropriate mode LED will illuminate.<br />
12. If automatic crossover is desired during the run, adjust the output set value of the second<br />
controlling parameter to the desired setting. When actual output relative to the second<br />
controlling parameter equals its output set value, the output will cross over from the first<br />
controlling parameter to the second.<br />
13. At the end of electrophoresis, turn off the power supply using the DC Output STOP key.<br />
Wait one minute before disconnecting the leads.<br />
Note: Turn the main power switch off when the unit is not in us<br />
7.4 Operation in Constant Current<br />
The method used to set the power supply in constant current is the same as the method used<br />
for constant voltage. The only difference involves the selection of an operating limit for current<br />
which, as the output increases, is attained before the operating limits for voltage or watts.<br />
7.5 Operation in Constant Watts<br />
The method used to set the power supply in constant watts is the same as the method used to<br />
set constant voltage with one notable difference. The difference involves the selection of an<br />
operating limit for watts which, as the output increases, is attained before the operating limits<br />
for voltage or current.<br />
<strong>PS3003</strong> HV <strong>Power</strong> <strong>Supply</strong> <strong>Instruction</strong> Manual, Version 2011/03 11
7.6 Choosing Safe Operating Limits<br />
Electrophoresis chambers are generally designed for a relatively specific purpose. For<br />
example, submarine chambers use agarose gels to separate DNA or RNA fragments, while a<br />
DNA sequencing chamber is almost always used to separate DNA in a denaturing<br />
polyacrylamide gel. In each case, the voltage, milliamp, and wattage requirements are well<br />
defined within a reasonable range of values. In cases such as these, the user can safely<br />
assume that the manufacturer has designed the chamber to withstand the voltage and heat<br />
energy necessary to perform the electrophoretic separation when standard protocols are<br />
followed.<br />
Some types of electrophoresis chambers are specifically designed to be multipurpose<br />
devices. For example, a vertical slab gel chamber could be used for anything from DNA<br />
sequencing to isoelectric focusing, depending on the gel type and buffer system used.<br />
Choosing safe operating limits for a chamber of this type requires a higher degree of caution.<br />
Chamber manufacturers normally rate their product for maximum voltage and/or maximum<br />
wattage. Whenever possible, contact the manufacturer and request this information.<br />
Whether you use special purpose or multipurpose chambers, the maximum operating<br />
temperature the chambers will withstand is a critical aspect of safe operation. Most<br />
electrophoresis chambers (with a few notable exceptions) are made of acrylic and plastic and<br />
should operate below a temperature of 35°C. If there is a lack of information about the<br />
capabilities of the chamber being used, regular monitoring of the operating temperature is<br />
recommended. This should be accomplished without coming into physical contact with the<br />
chamber when voltage is applied. Use the procedure listed below to select operating<br />
parameters.<br />
1. Set voltage as described in steps 1–4 for operation in Section 7.3 “Operation in Constant<br />
<strong>Voltage</strong>”<br />
2. Using the Milliamps and Watts adjustment switches, select the maximum operating limits of<br />
300 mA and 300 W, respectively.<br />
3. Press the START key. The Start LED (green) should illuminate and the DC output, as<br />
indicated by the three displays, should rapidly increase until the operating voltage limit is<br />
reached. At this point the <strong>Voltage</strong> mode LED should illuminate and should be the only ‘at limit’<br />
light illuminated.<br />
4. Once the power supply has reached the operating voltage limit, note the actual number of<br />
milliamps and watts displayed and press the DC Output STOP key.<br />
5. Add 15 mA and 10 W to the actual values noted earlier. Using the adjustment switches, set<br />
the operating limits to the new values.<br />
6. Press the DC Output START key. The Start LED (green) should illuminate and the DC<br />
output displays should rapidly increase until the operating voltage limit is reached. At this point<br />
the <strong>Voltage</strong> mode LED should illuminate and should be the only ‘at limit’ light illuminated.<br />
Note: It may be necessary to readjust the watt or milliamp operating limit during<br />
electrophoresis to ensure that the entire procedure is performed at a constant voltage. This<br />
readjustment, if necessary, is required to compensate for large changes in resistance which<br />
occur during certain types of electrophoresis (see Section 7.7 “Automatic Crossover”).<br />
Note: To view the output settings during electrophoresis, press the preset key. The LED’s will<br />
display the set output values as long as the key is pressed. Once released, the LED’s will<br />
display the set values for 3 seconds and then switch to the actual output values.<br />
12<br />
<strong>PS3003</strong> HV <strong>Power</strong> <strong>Supply</strong> <strong>Instruction</strong> Manual, Version 2011/03
7.7 Automatic Crossover<br />
For some electrophoresis conditions, a function of this power supply unit known as automatic<br />
crossover will occur. Automatic crossover is the ability of the unit to change the mode of<br />
operation during the course of an experiment. As conditions of buffers and gels change during<br />
a run, a constant voltage run may, for example, become limited by current or power if the limit<br />
for either of these other values is reached. This automatic crossover process is used to<br />
protect both the experiment and equipment.<br />
7.8 User Protection and Safety<br />
A yellow LED indicates a fault situation and cut off the power supply:<br />
1. Overload.<br />
2. Output to earth leakage<br />
3. Output open circuit<br />
4. Chamber lead (s) disconnected or defective.<br />
5. Output short circuit.<br />
Press STOP to resume and look for the wrong situation.<br />
Press START to run again.<br />
7.9 <strong>Power</strong> Failure During the Run<br />
The power supply automatically RESTARTS when the power is operating again after a power<br />
failure or repetitive micro failures during a cycle.<br />
When the mains is operating again after the failure, an audible alarm rings and the STOP LED<br />
blinks for 10 seconds.<br />
Then the power supply RESTARTS automatically with respect to the set values.<br />
<strong>PS3003</strong> HV <strong>Power</strong> <strong>Supply</strong> <strong>Instruction</strong> Manual, Version 2011/03 13
8 Maintenance and Cleaning<br />
8.1 Maintenance<br />
There are no internal operator serviceable parts in this <strong>Power</strong> supply.<br />
This power supply uses all solid-state components and should require no maintenance or<br />
recalibration under normal use. If the power should fail, the unit must be returned to the<br />
<strong>Biometra</strong> Technical Service or your local distributor.<br />
As with any laboratory instrument, adequate care ensures consistent and reliable<br />
performance.<br />
8.2 Cleaning<br />
The power supply may be cleaned as required when the main supply is<br />
isolated.<br />
The power supply must not be immersed in water. The unit can be wiped with a soft cloth,<br />
dampened with water or with tissues impregnated with 70% Iso-propyl alcohol.<br />
Do not allow water to enter the case.<br />
Abrasive cleaners, window sprays or rough cloths may damage the surface and should be<br />
avoided.<br />
Do not expose the surface to phenol, acetone, benzene, halogenated hydrocarbon solvents or<br />
undiluted laboratory alcohols.<br />
Avoid prolonged exposure of the power supply to UV light.<br />
A soft, dry cloth may be used to dry the unit.<br />
Before using any decontamination or cleaning method except that recommended, check with<br />
our Service Department that the proposed method will not damage the equipment.<br />
14<br />
<strong>PS3003</strong> HV <strong>Power</strong> <strong>Supply</strong> <strong>Instruction</strong> Manual, Version 2011/03
9 Troubleshooting Guide<br />
CONDITION PROBABLE CAUSE COMMENT<br />
Display fails to illuminate Fuses have blown See Warning below<br />
when the POWER switch<br />
is put on.<br />
The desired MODE is not One of the other Increase the output set<br />
flashing. parameters is value of the parameter<br />
limiting output.<br />
controlling output until<br />
the desired output<br />
mode is controlling.<br />
Two different modes are Settings for both Increase the set value<br />
blinking alternatively. parameters are too for the mode you do not<br />
close to the actual wish to be limiting.<br />
output.<br />
Under constant power mode Load, gel resistance are Disregard slight<br />
<strong>Voltage</strong> and current output changing. This usually fluctuations.<br />
are not stable. happens when pre- Displays will stabilize as gel<br />
runningthe gel.<br />
equilibrates.<br />
Increase or decrease W<br />
Set value by one or two<br />
Watts to stabilize.<br />
Warning:<br />
Never attempt to remove the outer casing or make any unit repairs.<br />
Should the power supply fail, DO NOT remove the outer case of the unit and attempt any<br />
repairs.<br />
Contact <strong>Biometra</strong> or your local distributor if the need for repair or servicing should arise.<br />
<strong>PS3003</strong> HV <strong>Power</strong> <strong>Supply</strong> <strong>Instruction</strong> Manual, Version 2011/03 15
10 Service<br />
Should you have any problems with this unit, please contact our service department or your<br />
local <strong>Biometra</strong> dealer:<br />
<strong>Biometra</strong> biomedizinische Analytik GmbH<br />
Service Department<br />
Rudolf-Wissell-Straße 14 - 16<br />
D-37079 Göttingen<br />
Germany<br />
Phone: +49 – (0)5 51 / 50 68 6 – 10 or -12<br />
Fax: +49 – (0)5 51 / 50 68 6 – 11<br />
e-mail: service@biometra.de<br />
Attention:<br />
If you would like to send the unit back to us, please read the following instructions.<br />
<strong>Instruction</strong>s for return shipment<br />
• Return only defective devices. Please contact the Technical Service Department at<br />
<strong>Biometra</strong> (Phone: ++49 – (0)5 51 / 50 68 6 – 10 or -12) to get an Return Authorization<br />
Number (RAN number).<br />
• Use the original box or a similarly sturdy one.<br />
• Label the outside of the box with “CAUTION! SENSITIVE INSTRUMENT!” and the RAN<br />
number sticker. Deliveries without RAN number cannot be accepted!<br />
• Please enclose a precise description of the fault, which also reveals during which<br />
procedures the fault occurred, if possible.<br />
Important:<br />
Clean all parts of the instrument from residues, and of biologically dangerous,<br />
chemical and radioactive contaminants. Please include a written<br />
confirmation that the device is free of biologically dangerous and radioactive<br />
contaminants in each shipment. If the device is contaminated, it is possible that<br />
<strong>Biometra</strong> will be forced to refuse to accept the device.<br />
• The sender of the repair order will be held liable for possible losses resulting from<br />
insufficient decontamination of the device.<br />
• Please enclose a note which contains the following:<br />
a) Sender’s name and address,<br />
b) Name of a contact person for further inquiries with telephone number.<br />
16<br />
<strong>PS3003</strong> HV <strong>Power</strong> <strong>Supply</strong> <strong>Instruction</strong> Manual, Version 2011/03
11 Equipment Decontamination Certificate<br />
To enable us to comply with German law (i.e. §§28 and 80 StrlSchV, §17 GefStoffV and §19<br />
ChemG) and to avoid exposure to hazardous materials during handling or repair, please<br />
complete this form, prior to the equipment leaving your laboratory:<br />
COMPANY / INSTITUTE _________________________________________________________<br />
ADDRESS<br />
_________________________________________________________<br />
PHONE NO ________________________ FAX NO__________________________<br />
E-MAIL _______________________________________________________________________<br />
EQUIPMENT <strong>Model</strong> Serial No<br />
______________<br />
______________<br />
______________<br />
______________<br />
______________<br />
______________<br />
______________<br />
______________<br />
If on loan / evaluation Start Date: __________________ Finish Date __________________<br />
Hazardous materials used with this equipment<br />
_______________________________________________________________________________<br />
_______________________________________________________________________________<br />
_______________________________________________________________________________<br />
Method of cleaning / decontamination<br />
_______________________________________________________________________________<br />
_______________________________________________________________________________<br />
_______________________________________________________________________________<br />
The equipment has been cleaned and decontaminated:<br />
NAME ___________________________________<br />
(HEAD OF DIV./ DEP./ INSTITUTE / COMPANY)<br />
SIGNED __________________________________<br />
POSITION _________________________<br />
DATE _____________________________<br />
PLEASE RETURN THIS FORM TO BIOMETRA GMBH OR YOUR LOCAL BIOMETRA<br />
DISTRIBUTOR TOGETHER WITH THE EQUIPMENT.<br />
PLEASE ATTACH THIS CERTIFICATE OUTSIDE THE PACKAGING. INSTRUMENTS WITHOUT<br />
THIS CERTIFICATE ATTACHED WILL BE RETURNED TO SENDER.<br />
<strong>PS3003</strong> HV <strong>Power</strong> <strong>Supply</strong> <strong>Instruction</strong> Manual, Version 2011/03 17
General Information for Decontamination:<br />
Please contact your responsible health & safety officer for details.<br />
Use of radioactive substances:<br />
Please contact your responsible person for details.<br />
Use of genetically change organism or parts of those:<br />
Please contact your responsible person for details.<br />
18<br />
<strong>PS3003</strong> HV <strong>Power</strong> <strong>Supply</strong> <strong>Instruction</strong> Manual, Version 2011/03
12 Note for Disposal of Electric/Electronic Waste<br />
This symbol (the crossed-out wheelie bin) means, that this product should be<br />
brought to the return systems and/or separate systems available to end-users<br />
according to yours country regulations, when this product has reached the end<br />
of its lifetime!<br />
For details, please contact your local distributor!<br />
This symbol applies only to the countries within the EEA*.<br />
*EEA = European Economics Area, comprising all EU-members plus Norway, Iceland<br />
and Liechtenstein.<br />
<strong>PS3003</strong> HV <strong>Power</strong> <strong>Supply</strong> <strong>Instruction</strong> Manual, Version 2011/03 19
13 Notices<br />
________________________________________________________________________________<br />
________________________________________________________________________________<br />
________________________________________________________________________________<br />
________________________________________________________________________________<br />
________________________________________________________________________________<br />
________________________________________________________________________________<br />
________________________________________________________________________________<br />
________________________________________________________________________________<br />
________________________________________________________________________________<br />
________________________________________________________________________________<br />
________________________________________________________________________________<br />
________________________________________________________________________________<br />
________________________________________________________________________________<br />
________________________________________________________________________________<br />
________________________________________________________________________________<br />
________________________________________________________________________________<br />
________________________________________________________________________________<br />
________________________________________________________________________________<br />
________________________________________________________________________________<br />
________________________________________________________________________________<br />
________________________________________________________________________________<br />
________________________________________________________________________________<br />
________________________________________________________________________________<br />
________________________________________________________________________________<br />
________________________________________________________________________________<br />
________________________________________________________________________________<br />
________________________________________________________________________________<br />
__________________________________________________________________________________<br />
20<br />
<strong>PS3003</strong> HV <strong>Power</strong> <strong>Supply</strong> <strong>Instruction</strong> Manual, Version 2011/03
14 EC - Declaration of Conformity<br />
EU - Konformitätserklärung<br />
December 2007<br />
im Sinne der EG-Richtlinie über elektrische Betriebsmittel zur Verwendung innerhalb bestimmter<br />
Spannungsgrenzen 73/23/EWG<br />
following the EC directive about electrical equipment for use within certain limits of voltage 73/23/EEC<br />
und / and<br />
im Sinne der EG-Richtlinie für die elektromagnetische Verträglichkeit 89/336/EWG.<br />
following the EC directive about the electromagnetic compatibility 89/336/EEC.<br />
Hiermit erklären wir, dass folgendes <strong>Power</strong> <strong>Supply</strong>,<br />
Herewith we declare that the following <strong>Power</strong> <strong>Supply</strong>,<br />
<strong>Model</strong> <strong>PS3003</strong> <strong>High</strong> <strong>Voltage</strong> <strong>Power</strong> <strong>Supply</strong><br />
Typ / type:<br />
Best.-Nr. / Order No. 10553003 (230 V), 31063003 (115 V)<br />
den grundlegenden Anforderungen der<br />
corresponds to the basic requirements of<br />
EG-Niederspannungsrichtlinie 73/23 EWG und der<br />
EC low voltage directive 73/23 EEC and the<br />
EG-Richtlinie über die elektromagnetische Verträglichkeit 89/336 EWG entsprechen.<br />
EC directive about the electromagnetic compatibility 89/336/EEC.<br />
Dr. Juergen Otte<br />
Quality Manager<br />
<strong>PS3003</strong> HV <strong>Power</strong> <strong>Supply</strong> <strong>Instruction</strong> Manual, Version 2011/03 21
15 Warranty<br />
This laboratory instrument is produced with the highest practical standards of materials,<br />
workmanship, and design. The design and manufacture of parts have been conceived with<br />
one purpose - to produce units which will give satisfactory service.<br />
<strong>Biometra</strong> GmbH guarantees this unit to be free from defects in materials or workmanship<br />
under normal use or service for 24 month from date of shipment.<br />
If, during this time, this unit proves defective in materials or workmanship, <strong>Biometra</strong> GmbH will<br />
repair or replace it free of charge if returned to us prepaid.<br />
This guarantee does not cover damage in transit, damage caused by carelessness, misuse or<br />
neglect, or unsatisfactory performance as a result of conditions beyond our control; or<br />
consequential losses as a result of failure of our product.<br />
<strong>Biometra</strong> GmbH<br />
Service Department<br />
Rudolf-Wissell-Str. 30 Rudolf-Wissell-Str. 14-16<br />
D-37079 Göttingen D-37079 Göttingen<br />
Germany<br />
Germany<br />
Phone: +49 – (0)5 51 / 50 68 6-0 Phone: +49 – (0)5 51 / 50 68 6-10 or -12<br />
Fax: +49 – (0)5 51 / 50 68 6-66 Fax.: +49 – (0)5 51 / 50 68 6-11<br />
e-mail: info@biometra.de<br />
e-mail: service@biometra.de<br />
internet: http://www.biometra.de<br />
22<br />
<strong>PS3003</strong> HV <strong>Power</strong> <strong>Supply</strong> <strong>Instruction</strong> Manual, Version 2011/03