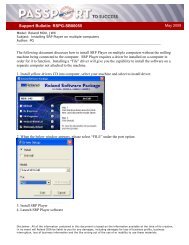
EGX-30/30A Hardware Setup Guide - Support
EGX-30/30A Hardware Setup Guide - Support
EGX-30/30A Hardware Setup Guide - Support

Create successful ePaper yourself
Turn your PDF publications into a flip-book with our unique Google optimized e-Paper software.
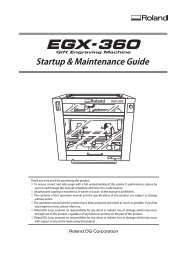
<strong>EGX</strong>-<strong>30</strong>/<strong>30</strong>A<br />
<strong>Hardware</strong> <strong>Setup</strong><br />
<strong>Guide</strong>
<strong>EGX</strong> Series <strong>Hardware</strong> <strong>Setup</strong><br />
<strong>Guide</strong><br />
This guide covers the basic setup for the<br />
Roland <strong>EGX</strong>-<strong>30</strong> or <strong>30</strong>A Light Duty Desktop<br />
Engraver.<br />
NOTES:<br />
The setup covers Plastic and Scribing setup.<br />
For additional details and information on a<br />
particular configuration always refer to the<br />
Users Manual for your engraver.
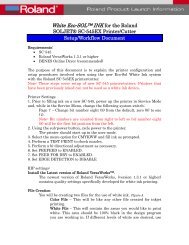
<strong>EGX</strong>-<strong>30</strong>A <strong>Hardware</strong> <strong>Setup</strong><br />
for Plastic Engraving
<strong>EGX</strong>-<strong>30</strong>A <strong>Setup</strong> for Plastic Engraving<br />
<br />
Power the unit on from the control panel. The<br />
machine is paused when powered on.<br />
NOTES:<br />
<br />
Press the PAUSE/VIEW button to initialize the<br />
unit.<br />
<br />
Once initialized the carriage will stop at the<br />
upper right corner of the table. Ensure that the<br />
unit is set to ENGRAVER mode via the SELECT<br />
button.<br />
<br />
Place the adhesive sheet (AS-10) in the lower<br />
left corner of the table and mount the material<br />
to be engraved on top.<br />
<br />
Using the arrow keys on the control panel move<br />
the tool to the front left corner of the loaded<br />
material.<br />
<br />
Press and hold down the SET ORIGIN POINT<br />
key until the LED lights up (about 2 seconds)<br />
and release. This will set the XY origin position.
<strong>EGX</strong>-<strong>30</strong>A <strong>Setup</strong> for Plastic Engraving<br />
<br />
Install the depth regulator nose to the bearing<br />
assembly (DRN-20).<br />
NOTES:<br />
<br />
Insert the depth regulator into the tool carriage<br />
and finger tighten the mounting screw. Do not<br />
over tighten the screw or else the cutter will<br />
have a hard time spinning.<br />
<br />
Ensure that the flat side of the depth regulator<br />
nose is facing the front of the unit (this will<br />
make adjusting the depth easier as it gives you<br />
a reference point.<br />
<br />
Remove the cutter from the cutter holder (brass<br />
knob) and install the cutter holder to the top of<br />
the spindle unit. Use the spanner wrench to<br />
tighten the cutter holder securely in place.
<strong>EGX</strong>-<strong>30</strong>A <strong>Setup</strong> for Plastic Engraving<br />
<br />
Press the SET SURFACE button to automatically<br />
lower the nose to the surface of the material.<br />
NOTES:<br />
<br />
Gently lower the cutter until the tip of the tool<br />
touches the surface.<br />
<br />
Tighten the cutter in place using the supplied<br />
hex wrench.<br />
<br />
Press the SET SURFACE button one more to lift<br />
the tool off the surface.<br />
<br />
Using the spanner wrench, adjust the depth<br />
regulator nose to expose the desired amount of<br />
tool for engraving. Each flat side of the nose is<br />
equal to 0.005” (0.125mm). One full turn is<br />
equal to 0.03” (0.75mm).<br />
<br />
The machine is now ready to rotary engrave.
<strong>EGX</strong>-<strong>30</strong>A <strong>Hardware</strong> <strong>Setup</strong><br />
for Scribing
<strong>EGX</strong>-<strong>30</strong>A <strong>Setup</strong> for Scribing<br />
<br />
Power the unit on from the control panel. The<br />
machine is paused when powered on.<br />
NOTES:<br />
<br />
Press the PAUSE/VIEW button to initialize the<br />
unit.<br />
<br />
Once initialized the carriage will stop at the<br />
upper right corner of the table. Ensure that the<br />
unit is set to SCORE mode via the SELECT<br />
button.<br />
<br />
Place the adhesive sheet (AS-10) in the lower<br />
left corner of the table and mount the material<br />
to be engraved on top.<br />
<br />
Using the arrow keys on the control panel move<br />
the tool to the front left corner of the loaded<br />
material.<br />
<br />
Press and hold down the SET ORIGIN POINT<br />
key until the LED lights up (about 2 seconds)<br />
and release. This will set the XY origin position.
<strong>EGX</strong>-<strong>30</strong>A <strong>Setup</strong> for Scribing<br />
<br />
Install the brass cutter guide into the tool carriage<br />
and tighten securely in place.<br />
NOTES:<br />
<br />
Remove the scribing tool (Diamond Scraper) from<br />
the cutter holder and install the cutter holder to<br />
the spindle unit.<br />
<br />
Insert the scribing tool until it protrudes from the<br />
bottom of the brass cutter guide about 1mm and<br />
tighten in place with the hex wrench.<br />
<br />
The machine is now ready to scribe (diamond<br />
drag).