Steinberg Cubase LE 4 Software Setup Guide Contents - Alesis
Steinberg Cubase LE 4 Software Setup Guide Contents - Alesis
Steinberg Cubase LE 4 Software Setup Guide Contents - Alesis
You also want an ePaper? Increase the reach of your titles
YUMPU automatically turns print PDFs into web optimized ePapers that Google loves.
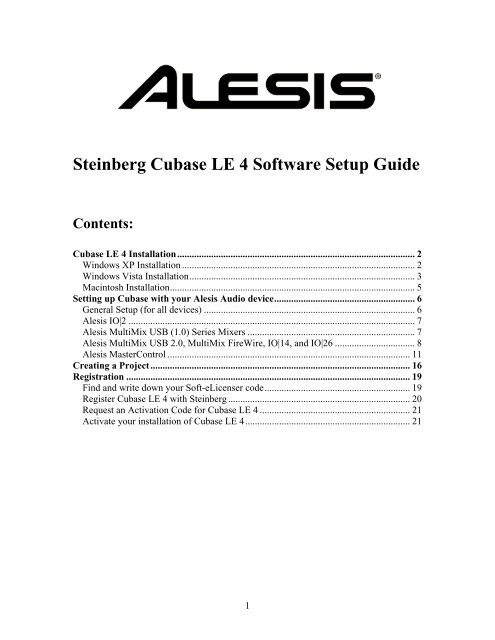
<strong>Steinberg</strong> <strong>Cubase</strong> <strong>LE</strong> 4 <strong>Software</strong> <strong>Setup</strong> <strong>Guide</strong><br />
<strong>Contents</strong>:<br />
<strong>Cubase</strong> <strong>LE</strong> 4 Installation.................................................................................................. 2<br />
Windows XP Installation ................................................................................................ 2<br />
Windows Vista Installation............................................................................................. 3<br />
Macintosh Installation..................................................................................................... 5<br />
Setting up <strong>Cubase</strong> with your <strong>Alesis</strong> Audio device.......................................................... 6<br />
General <strong>Setup</strong> (for all devices) ....................................................................................... 6<br />
<strong>Alesis</strong> IO|2 ...................................................................................................................... 7<br />
<strong>Alesis</strong> MultiMix USB (1.0) Series Mixers ..................................................................... 7<br />
<strong>Alesis</strong> MultiMix USB 2.0, MultiMix FireWire, IO|14, and IO|26 ................................. 8<br />
<strong>Alesis</strong> MasterControl .................................................................................................... 11<br />
Creating a Project........................................................................................................... 16<br />
Registration ..................................................................................................................... 19<br />
Find and write down your Soft-eLicenser code............................................................ 19<br />
Register <strong>Cubase</strong> <strong>LE</strong> 4 with <strong>Steinberg</strong> ........................................................................... 20<br />
Request an Activation Code for <strong>Cubase</strong> <strong>LE</strong> 4 .............................................................. 21<br />
Activate your installation of <strong>Cubase</strong> <strong>LE</strong> 4.................................................................... 21<br />
1
<strong>Cubase</strong> <strong>LE</strong> 4 Installation<br />
Windows XP Installation<br />
1. Insert the installation DVD into your computer’s drive.<br />
2. The installer program should automatically launch after a few moments. If it does not<br />
open automatically, perform the following:<br />
a. Double-click the My Computer icon on your desktop.<br />
b. In the window that opens, double-click the disk named, <strong>Cubase</strong> <strong>LE</strong> 4.<br />
c. In the next window, open the folder titled, <strong>Cubase</strong> <strong>LE</strong> 4 for Windows.<br />
d. Then, open the application titled, <strong>Setup</strong>.exe<br />
3. When the installer application opens, click the button labeled Install<br />
4. In the next window, read the End-User License Agreement, and then click the box<br />
titled I accept the terms in the License Agreement, then click Next.<br />
5. The next window, titled Install Location, allows you to select the location on your<br />
computer that <strong>Cubase</strong> <strong>LE</strong> 4 will be installed. In most cases, you should use the<br />
default settings which are already selected here, and simply click Next.<br />
6. Then, on the next screen, click Install.<br />
7. A progress bar will be displayed while the installation proceeds. When it is finished, a<br />
second installer, the Syncrosoft License Control <strong>Setup</strong> will open. This application<br />
installs the required product registration components onto your computer. When it<br />
appears, click Next to proceed.<br />
8. In the next window, read the End-User License Agreement, and then click the box<br />
titled I accept the license agreement, then click Next.<br />
9. In the window that appears after the software has been installed, click the box titled<br />
Start ‘License Control Center’ after installation. Then click Finish.<br />
10. The installation process will complete, and the License Control Center Application<br />
will open. Proceed to Step 2 of the Registration section below.<br />
2
Windows Vista Installation<br />
1. Insert the installation DVD into your computer’s drive.<br />
2. A window titled “AutoPlay” (Fig. 1) may appear. If it does, double-click Run<br />
Autorun.exe<br />
Fig. 1<br />
3. A window titled “User Account Control” (Fig. 2) may then appear reporting that An<br />
unidentified program wants access to your computer. Click Allow.<br />
Fig. 2<br />
4. In the window that opens, double-click the folder titled <strong>Cubase</strong> <strong>LE</strong> 4 for Windows.<br />
5. In the next window, double-click the program titled <strong>Setup</strong>.<br />
3
6. The <strong>Cubase</strong> <strong>LE</strong> 4 installation program will launch. In the window that opens, click<br />
Install.<br />
7. In the next window, read the End-User License Agreement, click I accept the terms<br />
in the License Agreement, then click Next.<br />
8. The next window, titled Install Location, allows you to select the location on your<br />
computer that <strong>Cubase</strong> <strong>LE</strong> 4 will be installed. In most cases, you should use the<br />
default settings which are already selected here, and simply click Next.<br />
9. Then, on the next screen, click Install.<br />
10. A progress bar will be displayed while the installation proceeds. When it is finished, a<br />
second installer, the Syncrosoft License Control <strong>Setup</strong> will open. This application<br />
installs the required product registration components onto your computer. When it<br />
appears, click Next to proceed.<br />
11. In the next window, read the End-User License Agreement, click the box titled I<br />
accept the license agreement, then click Next.<br />
12. A window titled Windows Security may appear, reporting that Windows can’t<br />
verify the publisher of this driver software. If this window appears, click Install<br />
this driver software anyway.<br />
13. In the window that appears after the software has been installed, click the box titled<br />
Start ‘License Control Center’ after installation. Then click Finish.<br />
14. The installation process will complete, and the License Control Center Application<br />
will open. Proceed to Step 2 of the Registration section below.<br />
4
Macintosh Installation<br />
1. Insert the installation DVD into your computer’s drive.<br />
2. On the DVD, locate and open the folder, <strong>Cubase</strong> <strong>LE</strong> 4 for Mac OS X. Inside, this<br />
folder, double-click the <strong>Cubase</strong> <strong>LE</strong> 4.mpkg installer package to begin the<br />
installation.<br />
3. The following message (Fig. 3) will appear on the screen. Click Continue<br />
Fig. 3<br />
4. This window will close, and Welcome to the <strong>Cubase</strong> <strong>LE</strong> 4 Installer will be<br />
displayed. Click Continue again.<br />
5. In the next window, read the <strong>Software</strong> License Agreement, and then click Continue,<br />
then click Agree.<br />
6. You will then be asked to select which hard drive you would like to install the <strong>Cubase</strong><br />
onto. Choose a drive, and click on its name to select it. If you only have only hard<br />
disk in your computer, only one option will be presented here.<br />
7. Click Continue, and then click Install.<br />
8. A window titled Authenticate will appear. Enter your Macintosh Username<br />
Password and click OK. For help with this password, click the icon in the<br />
bottom-left of the window.<br />
9. A progress bar will be displayed while the installation proceeds. When it is finished,<br />
the screen will read The <strong>Software</strong> was installed Successfully. Click the Close<br />
button.<br />
5
Setting up <strong>Cubase</strong> with your <strong>Alesis</strong> Audio device<br />
General <strong>Setup</strong> (for all devices)<br />
1. Connect your USB device to a USB port on your computer. Some <strong>Alesis</strong> USB audio<br />
devices have power cords, and some do not. If your device has a power cord, connect<br />
to an electrical outlet, and turn on the device.<br />
2. Launch the <strong>Cubase</strong> <strong>LE</strong> 4 application.<br />
• Windows XP and Vista: Navigate to the <strong>Cubase</strong> <strong>LE</strong> 4 application by using the<br />
Start menu at the bottom-left of your screen: select Start > Programs > <strong>Steinberg</strong><br />
<strong>Cubase</strong> <strong>LE</strong> 4 > <strong>Cubase</strong> <strong>LE</strong> 4.<br />
• Macintosh: The <strong>Cubase</strong> <strong>LE</strong> 4 application is located in the “Applications” folder<br />
on your Hard Disk. Double-click the program to open it.<br />
3. Depending on your computer configuration, the first time you launch <strong>Cubase</strong>, you<br />
may be presented with an error message indicating some problem with the sound<br />
setup. By going through this setup guide, and properly setting up <strong>Cubase</strong> <strong>LE</strong> 4, any<br />
such errors will be resolved. If an error is displayed at startup, click OK to continue.<br />
4. Once <strong>Cubase</strong> <strong>LE</strong> 4 is completely started up, select the Devices menu from the top of<br />
the screen and choose Device <strong>Setup</strong>.<br />
5. In the window that opens, select VST Audio System from the left-hand side of the<br />
screen.<br />
6. The ASIO Driver field on the right-hand side is where you select the audio<br />
input/output device that <strong>Cubase</strong> <strong>LE</strong> 4 will use. Below is a list of <strong>Alesis</strong> Audio<br />
interfaces, and the correct ASIO Driver selection for each device for Windows and<br />
Macintosh platforms. Make the appropriate ASIO Driver selection for your device.<br />
<strong>Alesis</strong> Audio Device Windows ASIO Driver Macintosh ASIO Driver<br />
MultiMix USB Series………... ASIO DirectX Full Duplex Driver.. USB Audio CODEC<br />
MultiMix USB 2.0 Series……. <strong>Alesis</strong> USB Audio Device………... <strong>Alesis</strong> USB Audio Device<br />
MultiMix FireWire Series…….<strong>Alesis</strong> FireWire…………………... <strong>Alesis</strong> 1394<br />
IO|14 and IO|26……………… <strong>Alesis</strong> FireWire…………………… <strong>Alesis</strong> 1394<br />
MasterControl...……………… <strong>Alesis</strong> FireWire…………………… <strong>Alesis</strong> 1394<br />
IO|2 …………………………... <strong>Alesis</strong> IO|2 USB ASIO…………… io|2<br />
When you change the selected ASIO Driver, a window which reads, Do you want to<br />
switch the ASIO driver? may appear. If it does, click Switch.<br />
6
<strong>Alesis</strong> IO|2<br />
If you are using the <strong>Alesis</strong> IO|2, click Apply (if available), then OK to close the Device<br />
<strong>Setup</strong> window. Then proceed to the Creating a project section below.<br />
<strong>Alesis</strong> MultiMix USB (1.0) Series Mixers<br />
If you are using a MultiMix USB Series Mixer on a Windows PC, and have selected<br />
ASIO DirectX Full Duplex Driver for the ASIO Driver in the General <strong>Setup</strong> section<br />
of this guide (see above), perform the following:<br />
1. Click ASIO DirectX Full Duplex Driver underneath VST Audio System on the<br />
left-hand side of the screen.<br />
2. Then, click the Control Panel button on the right-hand side of the screen.<br />
3. A window will open which has two white rectangular sections. Place an X next to<br />
USB Audio CODEC in both the upper and lower sections as (see Fig. 4).<br />
Fig. 4<br />
7. Click OK to close the window. Then, click Apply (if available), then OK to close<br />
the Device <strong>Setup</strong> window. Now proceed to the Creating a project section below.<br />
7
<strong>Alesis</strong> MultiMix USB 2.0, MultiMix FireWire, IO|14, and IO|26<br />
<strong>Cubase</strong> <strong>LE</strong> 4, by default, starts up with only two inputs enabled, even if you have an 18<br />
input sound card or interface. Before all the inputs will be available to your system, you<br />
need to set up your VST Connections. This section of the guide covers several products.<br />
Some of the names, titles and images may be slightly different from what you see on your<br />
screen, but the set up process remains the same.<br />
1. In <strong>Cubase</strong> <strong>LE</strong> 4, click on the Device menu at the top of the screen and select VST<br />
Connections. It should look like this (Fig. 5):<br />
Fig. 5<br />
2. Click on Inputs at the top of the window.<br />
You’ll notice that, under the Inputs, there are only two inputs showing up. You’ll<br />
need to create a new configuration.<br />
3. Click on the input titled under the Bus Name column and press the backspace key on<br />
your keyboard to delete it.<br />
The VST connections window should now be empty. Next, you will create Stereo and<br />
Mono Input Busses for all of the inputs on your interface.<br />
4. Click on the Add Bus button.<br />
8
5. Set Configuration to Stereo (Fig. 6).<br />
Fig. 6<br />
Below is a list of <strong>Alesis</strong> interfaces, and the total number of supported stereo inputs.<br />
<strong>Alesis</strong> Audio Device Stereo Input Busses<br />
MultiMix 8 USB 2.0 5<br />
MultiMix 16 USB 2.0 9<br />
MultiMix 8 FireWire 5<br />
MultiMix 12 FireWire 7<br />
MultiMix 16 FireWire 9<br />
I/O 14 7<br />
I/O 26 13<br />
6. Set the Count to match the total number of stereo inputs that your interface supports.<br />
Then click OK. Your screen will now look something like this (Fig. 7):<br />
Fig. 7<br />
9
Now you will configure the Mono inputs for <strong>Cubase</strong>.<br />
7. Click on Add Bus again.<br />
8. Set Configuration to Mono.<br />
Below is a list of <strong>Alesis</strong> interfaces, and the total number of supported mono inputs.<br />
<strong>Alesis</strong> Audio Device Mono Input Busses<br />
MultiMix 8 USB 2.0 10<br />
MultiMix 16 USB 2.0 18<br />
MultiMix 8 FireWire 10<br />
MultiMix 12 FireWire 14<br />
MultiMix 16 FireWire 18<br />
I/O 14 14<br />
I/O 26<br />
9. Set the Count to match the total number of mono inputs that your interface supports.<br />
Then click OK. If you like, you can rename the inputs in the VST Connections<br />
window.<br />
It is recommended that you save VST Connections settings so that they may be<br />
easily recalled.<br />
10. Click on the Add Preset button (indicated with a red circle below in Fig. 8) to add a<br />
preset<br />
Fig. 8<br />
11. Name the preset, and click OK (Fig. 9). Close the VST Connections window.<br />
Fig. 9<br />
Now, all the inputs on your interface will be available to audio tracks you create in<br />
<strong>Cubase</strong> <strong>LE</strong> 4.<br />
10
<strong>Alesis</strong> MasterControl<br />
Control surface setup<br />
<strong>Cubase</strong> uses the “Mackie Control” protocol to communicate with the MasterControl.<br />
This configuration must be set up before the MasterControl’s control surface will begin<br />
to work.<br />
1. Ensure that the “<strong>Cubase</strong> / Nuendo” preset is selected via the MasterControl’s LCD<br />
screen. Press Preset/Home on the MasterControl and turn the top-right encoder to<br />
make this selection.<br />
2. In <strong>Cubase</strong> <strong>LE</strong> 4, click on the Device menu and then choose Device <strong>Setup</strong>. From the<br />
top of the menu, click the “plus” sign. The screen should look like this, with the<br />
relevant portion highlit in red (Fig. 10):<br />
Fig. 10<br />
11
3. Now, choose the “Mackie Control.” (Do not choose “Mackie HUI.” HUI devices<br />
operate on a different protocol.) Once the “Mackie Control” is added, assign the<br />
“MIDI Input” and “MIDI Output” to “MasterControl Control Port” (Fig. 11):<br />
Fig. 11<br />
Once you do this, the MasterControl is ready for control surface operation.<br />
12
Audio configuration<br />
<strong>Cubase</strong> <strong>LE</strong> 4, by default, starts up with only two inputs enabled, even though the<br />
MasterControl allows for 26 simultaneous inputs. Before all the inputs will be available<br />
to your system, you need to set up your VST Connections.<br />
1. In <strong>Cubase</strong> <strong>LE</strong> 4, click on the Device menu at the top of the screen and select VST<br />
Connections. It should look like this (Fig. 12):<br />
Fig. 12<br />
2. Click on Inputs at the top of the window.<br />
You’ll notice that, under the Inputs, there are only two inputs showing up. You’ll<br />
need to create a new configuration.<br />
3. Click on the input titled under the Bus Name column and press the backspace key on<br />
your keyboard to delete it.<br />
The VST connections window should now be empty. Next, you will create Stereo and<br />
Mono Input Busses for all of the inputs on your interface.<br />
4. Click on the Add Bus button.<br />
5. Set Configuration to Stereo (Fig. 13).<br />
Fig. 13<br />
13
6. Set the Count to match the total number of stereo inputs that you want to use<br />
simultaneously. Then click OK. Your screen will now look something like this (Fig.<br />
14):<br />
Fig. 14<br />
Now you will configure the Mono inputs for <strong>Cubase</strong>.<br />
7. Click on Add Bus again.<br />
8. Set Configuration to Mono.<br />
9. Set the Count to match the total number of mono inputs that you want to use<br />
simultaneously. Then click OK. If you like, you can rename the inputs in the VST<br />
Connections window.<br />
It is recommended that you save VST Connections settings so that they may be<br />
easily recalled.<br />
14
10. Click on the Add Preset button (indicated with a red circle below in Fig. 15) to add a<br />
preset<br />
Fig. 15<br />
11. Name the preset, and click OK (Fig. 16). Close the VST Connections window.<br />
Fig. 16<br />
Now, all the inputs you want to use will be available to audio tracks you create in <strong>Cubase</strong><br />
<strong>LE</strong> 4.<br />
15
Creating a Project<br />
Note: This document is not intended to replace your <strong>Cubase</strong> Operation Manual (accessable from the Help menu at the<br />
top of the screen in <strong>Cubase</strong>). It is intended to get you started your very first time using <strong>Cubase</strong> <strong>LE</strong>, and to help you<br />
ensure that your <strong>Alesis</strong> interface is installed and set up properly. You will need to refer to this additional<br />
documentation to learn to make the most of your recording software.<br />
1. To begin using <strong>Cubase</strong>, select the File menu at the top of the screen and choose New<br />
Project.<br />
2. A screen will open asking you to create an Empty project or create one from an<br />
existing template. Choose Empty (Fig. 17).<br />
Fig. 17<br />
3. Another window will open asking you to “Set Project Folder” (Fig. 18). Use the<br />
mouse to choose the location on your hard drive where you would like to save the<br />
<strong>Cubase</strong> project you are about to create. If you would like to create a new folder for<br />
your project, click Create.<br />
Fig. 18<br />
4. With the desired location highlighted, click the OK button.<br />
16
You will be presented with a blank project window that is divided into sections.<br />
You should see two grey columns on the left and in the middle, and a timeline on<br />
the right, with a black ruler over the top. If there is only one grey column click on<br />
the first square button in the upper left of your screen to enable it (indicated by a<br />
red circle in Fig. 19).<br />
Fig. 19<br />
Hint: The <strong>Cubase</strong> user interface has many icons and buttons that are not labeled.<br />
If you hold your mouse over a button or icon for a few seconds, some text will<br />
appear that describes the button’s function.<br />
5. Select the Project menu from the top of the screen and choose Add Track and then<br />
Audio (Fig. 20).<br />
A new Audio track will be created.<br />
Fig. 20<br />
17
Each Audio or MIDI track you create in <strong>Cubase</strong> has an individual input setting<br />
(Figure 12). This setting selects which physical input on your Audio/MIDI<br />
interface will be recorded onto that track.<br />
Each track also has an individual “record enable” button (Fig. 21)<br />
6. On the left-hand panel of the <strong>Cubase</strong> window, select an input for your Audio track<br />
(Fig. 21)<br />
Fig. 21<br />
7. Once you have selected the input for your track (Fig. 21) and your track or tracks<br />
have been “record enabled,” you can begin recording by pressing the master Record<br />
button which located on the floating Transport Panel at the bottom of the screen (Fig.<br />
19).<br />
Important: After recording a track, you need to turn off “record enable” on that track<br />
before you will be able to hear what you have recorded. Having a track record enabled<br />
or monitor enabled will sometimes prevent audio that is already on that track<br />
from playing back.<br />
For further information on recording, mixing and exporting music from <strong>Cubase</strong>, please<br />
refer to the <strong>Cubase</strong> Operation Manual which was installed along with your <strong>Cubase</strong><br />
software. You can easily access this documentation from within <strong>Cubase</strong> by selecting the<br />
Help menu at the top of the screen, then Documentation, then choosing either Getting<br />
Started, or Operation Manual. The Getting Started guide has three excellent tutorials<br />
that will introduce you to many of the functions and operations of the program.<br />
18
Registration<br />
<strong>Cubase</strong> <strong>LE</strong> 4 requires online registration. After finishing installation, you have 30 days or<br />
3000 starts left before you have to register your product.<br />
Find and write down your Soft-eLicenser code<br />
1. Before you begin the registration process, you will need to locate, and write down<br />
your Soft-eLicenser number. Along with installing <strong>Cubase</strong> <strong>LE</strong> 4, the installer<br />
application installed a program called License Control on your computer. This<br />
program assigns and manages your Soft-eLicenser number for <strong>Cubase</strong> <strong>LE</strong> 4. Navigate<br />
to and open the License Control application:<br />
• Windows XP and Vista: Navigate to the License Control application by using<br />
the Start menu at the bottom-left of your screen: select Start > Programs ><br />
Syncrosoft > License Control Center.<br />
• Macintosh: The License Control application is located in the Applications<br />
folder on your Hard Disk. Double-click the program to open it.<br />
2. In the License Control Center application, the Soft-eLicenser is listed as shown in<br />
red in Fig. 20 below. Write down the 20 digit code. You will need it later on in the<br />
registration process. Once you have written the Soft-eLicenser code down, close the<br />
License Control Center application.<br />
Fig. 22<br />
19
Register <strong>Cubase</strong> <strong>LE</strong> 4 with <strong>Steinberg</strong><br />
1. Launch the <strong>Cubase</strong> <strong>LE</strong> 4 application.<br />
• Windows XP and Vista: Navigate to the <strong>Cubase</strong> <strong>LE</strong> 4 application by using the<br />
Start menu at the bottom-left of your screen: select Start > Programs > <strong>Steinberg</strong><br />
<strong>Cubase</strong> <strong>LE</strong> 4 > <strong>Cubase</strong> <strong>LE</strong> 4.<br />
• Macintosh: The <strong>Cubase</strong> <strong>LE</strong> 4 application is located in the Applications folder<br />
on your Hard Disk. Double-click the program to open it.<br />
2. When you launch <strong>Cubase</strong> <strong>LE</strong> 4 you will be prompted to register. If you have an<br />
internet connection, click Register Now. An internet connection is required to<br />
register <strong>Cubase</strong> <strong>LE</strong> 4. If the program is not registered, it will cease to function after<br />
30 days or 3000 starts.<br />
3. Clicking Register Now will open your web browser, taking you to <strong>Steinberg</strong>’s<br />
registration page for <strong>Cubase</strong> <strong>LE</strong> 4. Click the link titled Start <strong>Cubase</strong> <strong>LE</strong> 4<br />
activation now at the bottom of the page.<br />
4. On the next page, click the link titled Create user account.<br />
5. On the next page, select your country from the drop-down list and then click, Next.<br />
Fill in your contact information on the next page, making sure to complete all required<br />
fields with a “*” next to them. Click Create account now. The next page will read<br />
Account successfully created, an e-mail has been sent to your e-mail address.<br />
6. Check your email, and look for a new message from My<strong>Steinberg</strong> with the subject<br />
Log into My<strong>Steinberg</strong>. Open this email, scroll to the bottom, and click the link<br />
below the text Please activate your account by clicking on the link below.<br />
7. You will be taken back to the My<strong>Steinberg</strong> website. Enter the login and password<br />
information (which you chose when you created your My<strong>Steinberg</strong> account) and click<br />
Log In.<br />
8. On the next page, under the heading Register a product, click the link titled More.<br />
9. Again, on the next page, under the heading Register a product, click the link titled<br />
More.<br />
10. Select Product with <strong>Steinberg</strong> Key or Soft-eLicenser on the next page, and click<br />
Next.<br />
11. Enter the 20-Digit (case-sensitive) Soft-eLicenser code you wrote down earlier into<br />
the field titled number* (see Step 2 of the Find and write down your SofteLicenser<br />
code section above)<br />
12. Enter <strong>Cubase</strong> <strong>LE</strong> 4 into the field titled Please enter a name.<br />
13. Click the Register product(s) button.<br />
14. If you entered your code correctly, the next screen will read The <strong>Steinberg</strong> Key<br />
[YourCodeHere] has been registered, but does not contain any active licenses.<br />
20
Request an Activation Code for <strong>Cubase</strong> <strong>LE</strong> 4<br />
Note: If you are beginning this section of the guide, and are not already logged on to your<br />
My<strong>Steinberg</strong> account, visit https://www.steinberg.net/1069_1.html and log in using the<br />
username and password you selected in Steps 3-8 of the Registering <strong>Cubase</strong> <strong>LE</strong> 4 with<br />
<strong>Steinberg</strong> section above. Once logged in to your My <strong>Steinberg</strong> account, proceed with the<br />
steps below.<br />
15. Click the link titled Activation & Reactivation on the left-hand side of the page.<br />
16. Then click the link titled <strong>Cubase</strong> <strong>LE</strong> 4 on the left-hand side of the page.<br />
17. Under the heading Permanent Activation, click the link titled More.<br />
18. Enter the 20-Digit (case-sensitive) Soft-eLicenser code you wrote down in Step 2<br />
above into the filed titled Soft-eLicenser number<br />
19. In the field titled Hardware Manufacturer, select <strong>Alesis</strong> from the drop-down menu.<br />
20. Click Request Activation Code.<br />
21. If you entered your code correctly, the next page will read The Soft-Licenser<br />
number [YourCodeHere] you just have entered is correct.<br />
We have sent an Activation Code for <strong>Cubase</strong> <strong>LE</strong> 4 to the email address<br />
[YourEmailHere].<br />
22. Check your email, and look for a new message from <strong>Steinberg</strong> Media Technologies<br />
GmbH with the subject Activation Code – <strong>Cubase</strong> <strong>LE</strong> 4. Open this email.<br />
23. This email contains your <strong>Cubase</strong> <strong>LE</strong> Activation code. Print this email out for your<br />
records. You will also need to have this code handy to complete the registration<br />
process. Copy the Activation Code by highlighting the text the email with your<br />
mouse, then select the Edit menu at the top of the screen and choose Copy.<br />
Activate your installation of <strong>Cubase</strong> <strong>LE</strong> 4<br />
24. Launch the License Control application by following the instructions from Step 1 of<br />
the Registration Section above.<br />
25. Select the Wizards menu at the top of the screen, and choose License Download.<br />
26. When License Download Wizard opens, click Next.<br />
27. In the next window, enter the 32-Digit (case-sensitive) Activation code from the<br />
email you just received. If you copied the text from your email in Step 23 above, you<br />
can use the paste command to enter it all at once. Click on the first white field at the<br />
top of the screen, and type [Ctrl+V] on Windows, or [Apple+V] on the Macintosh<br />
to paste the text you copied earlier.<br />
28. Once the Activation code has been entered, click Enter, then lick Next.<br />
29. On the next page, click Start.<br />
30. The License Download process will begin, and a progress bar will be displayed on the<br />
screen. When the process is finished, a window will appear indicating that the<br />
process has completed. Click OK to close this window, then click Finish to close the<br />
License Download Wizard. You will be returned to the License Control Center.<br />
31. Close the License Control Center.<br />
7-51-0274-B. November 10, 2008. © <strong>Alesis</strong>, LLC. All rights reserved.<br />
21


