IPCMonitor User Manual - Agasio POE & Wireless IP Cameras
IPCMonitor User Manual - Agasio POE & Wireless IP Cameras
IPCMonitor User Manual - Agasio POE & Wireless IP Cameras

You also want an ePaper? Increase the reach of your titles
YUMPU automatically turns print PDFs into web optimized ePapers that Google loves.
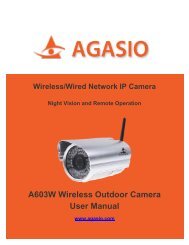
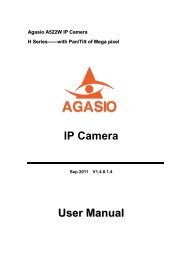
<strong>Agasio</strong> A501W <strong>IP</strong> Camera<br />
<strong>IP</strong> Camera Centralization<br />
Management<br />
Client Application<br />
(<strong><strong>IP</strong>CMonitor</strong>)<br />
May, 2011 Version 1.3<br />
<strong>User</strong> <strong>Manual</strong>
INDEX<br />
1 Introduction ...................................................................................................................... 3<br />
2 Computer Requirement.................................................................................................. 3<br />
3 Installation ........................................................................................................................ 3<br />
4 Device Management ...................................................................................................... 4<br />
4.1 Adding A Device ...................................................................................................... 4<br />
4.2 Adding Multiple Devices in LAN ............................................................................ 6<br />
4.3 Modifying Devices ................................................................................................... 6<br />
4.4 Deleting Device ........................................................................................................ 7<br />
4.5 Further Notifications for Device List Window ...................................................... 7<br />
5 Video view ........................................................................................................................ 7<br />
5.1 Start the Video ......................................................................................................... 8<br />
5.2 Alarm Trigger ............................................................................................................ 8<br />
5.3 Video Recording Trigger ........................................................................................ 9<br />
5.4 Stop the Video .......................................................................................................... 9<br />
6 Device Control ................................................................................................................. 9<br />
6.1 Base Operation ........................................................................................................ 9<br />
6.2 Device Control Panel ............................................................................................ 10<br />
7 Channel Management .................................................................................................. 10<br />
8 Other Settings ............................................................................................................... 11<br />
8.1 System Setting ....................................................................................................... 11<br />
8.2 History Log.............................................................................................................. 12<br />
9 Further Notifications ..................................................................................................... 12
1 Introduction<br />
<strong><strong>IP</strong>CMonitor</strong> is a centralization management software provided by the manufacturer. It<br />
provides the central control of monitoring, video capture, alarm testing, etc for multiple <strong>IP</strong><br />
cameras on LAN or WAN.<br />
Before using this software, please ensure the devices can be access by web browsers<br />
from LAN or WAN, please consult the user manual of the <strong>IP</strong> Camera to know the <strong>IP</strong><br />
Camera belongs to which series(support Q/B/H series products). This article provides a<br />
how-to on viewing the <strong>IP</strong> Camera's video by using this dedicated client application.<br />
2 Computer Requirement<br />
Using <strong><strong>IP</strong>CMonitor</strong>, your computer should meet the following configuration:<br />
‣ CPU: Dual-core CPU<br />
‣ RAM: 1GB or above<br />
‣ Hard disk: 160GB or above<br />
‣ OS: “Windows XP or higher<br />
‣ Resolution of display: ≧1024*768<br />
3 Installation<br />
Figure 1: Application <strong>User</strong> Interface<br />
Insert the bundled CD to the drive, double click <strong><strong>IP</strong>CMonitor</strong>, a pop-up window will be<br />
shown, please follow the instruction on the window to finish the software installation. After
a successful installation, run the application and the user interface will be shown as Figure<br />
1.<br />
4 Device Management<br />
The following steps are required before using this application:<br />
1) Plan and install the <strong>IP</strong> Camera(s) which intend to be monitored.<br />
2) Login to the <strong>IP</strong> Camera(s) by web browser and set the <strong>IP</strong> address, port, username &<br />
password, alarm setting, system time etc.<br />
3) DDNS setting is a plus whenever you intent to visit the devices by WAN.<br />
In this application, Device Management tab is shown as Figure 2:<br />
Figure 2: Devices Management<br />
4.1 Adding A Device<br />
1) Basic configuration<br />
Figure 3: Adding A Device tab<br />
Click the<br />
button shown on Figure 2, information of the device will be prompted to
input. As of Figure 3:<br />
• device name is unique (operation will be denied in case name conflicts) in Device<br />
Management, and once set, it is recommended not to be changed.<br />
• Choose the right product series(Required).<br />
• The fields 'Domain/<strong>IP</strong>', 'Port', 'Viewing <strong>User</strong>name', and ‘Viewing Password' are<br />
required. Test the connection from web browser. Since the device is connected<br />
to WAN, <strong>IP</strong> address can be instead by a domain name.<br />
2) Alarm Setting<br />
Alarm mode can be set by clicking on the Alarm Setting tab, as of Figure 4. Enabling the<br />
alarm, check the 'Enabled alarm' first.<br />
Figure 4: Alarm Setting<br />
Select “All time” or “Schedule armed”,then fill out the Trigger and Action blank.<br />
Note: Before alarm setting, please make sure the ip camera’s configuration is<br />
correct and it could detect the alarm. (refer to the ip camera user manual)<br />
During the armed period, alarm action like siren, snapshot or video recording will be taken<br />
once the trigger meets.<br />
3) Record Scheduling<br />
Video recording can be scheduled by clicking on the Record Scheduling tab. The device<br />
will perform video recording automatically according to the schedule, as of Figure 5.
Figure 5: Record Scheduling<br />
4.2 Adding Multiple Devices in LAN<br />
Multiple devices within the LAN can be added by clicking the<br />
button. A sample is<br />
shown in Figure 6.<br />
• Select the product series and click “Search”, the found devices will be listed.<br />
• Tick the checkbox on the device which going to be added, assign a name and set the<br />
viewing username and password.<br />
• Click “OK” , then the device is put in the device list.<br />
Figure 6: Add Multiple Devices<br />
NOTICE: In case a firewall is running on the computer, by the time clicking the<br />
“search” button, a window would pop-up asking whether block or unblock the<br />
application, please click 'unblock'.<br />
4.3 Modifying Devices<br />
Modify the setting of a device by selecting the device and click<br />
button. The<br />
modifying window is same as 'Adding A Device' window. It can change the device data,<br />
alarm setting and record setting. When modifying a device name, click the down arrow<br />
and select 'Modify device name' from the drop list. As of Figure 7.
Figure 7: drop list<br />
4.4 Deleting Device<br />
Delete a device by selecting it and click the<br />
button. When deleting all the devices,<br />
click the down arrow on the right side and select 'delete all devices' from the drop list.<br />
4.5 Further Notifications for Device List Window<br />
1) After adding a device, right click on the device and select open browser, a browser<br />
window will be opened and auto login to the device. In case the login fails, the device<br />
may be offline or the device info is incorrect.<br />
2) A icon will be shown on the right side of a device, in case alarm is enabled.<br />
3) A icon will be shown on the right side of a device, in case video recording is<br />
scheduled.<br />
4) If you double click and area, it will pop up the alarm and record setting window.<br />
5) The last column of the list is to display alarm,double click this area,It will present the<br />
device’s alarm.<br />
Figure 8 Device list<br />
5 Video view<br />
After adding devices, <strong><strong>IP</strong>CMonitor</strong> doesn't work until the related devices are started.<br />
<strong><strong>IP</strong>CMonitor</strong> provides the following operation/functions: display the devices video, arm the<br />
devices, and decide when to start a scheduled video recording, response to user's<br />
command.
5.1 Start the Video<br />
Video can be start by the following three methods:<br />
‣ Select and double click on a device needed to be started; a free channel will be taken<br />
to show up the video.<br />
‣ Select a device and click the button will start it as well. By clicking on the<br />
down arrow, start all the devices command can be found on the drop list.<br />
‣ Select a device, drag and drop it to a channel, it will show up the video in this<br />
channel.<br />
Device name will be shown in green on the status bar when it's started.<br />
In case the device is offline, or <strong>IP</strong> address, port, viewing username or password is wrong,<br />
the connection could not be established, and related information will be pop-up.<br />
5.2 Alarm Trigger<br />
1) After started a video, the application will detect the device to determine if there's any<br />
alarm occurred.<br />
2) Whenever an alarm is detected, the application will check the armed time, once the<br />
alarm is within an armed time, alarm action will be taken.<br />
3) When a icon twinkling on the device field, means an alarm action is being taken,<br />
click on the<br />
icon can stop the siren.<br />
4) When a appears but not twinkling, means there was an alarm, double click on<br />
the icon will pop-up a recent alarm list. The icon will disappear by closing<br />
the alarm list. The alarm list window is as Figure 9.<br />
Figure 9: Alarm List window<br />
5) Even the video alarm recording trigger is set, it will not take any effect in case it is<br />
taking a scheduled recording job or capturing a video manually by the time an alarm<br />
activated.<br />
6) In case snapshot trigger is set, the file name will be started with an A prefix following<br />
by the time stamp as the other part, the suffix is .JPG.<br />
7) Please refer to chapter 8.1 for the option of alarm action.
5.3 Video Recording Trigger<br />
1) The application can perform 3 types of video recording , the alarm video recording<br />
(set in Figure 4), scheduled recording (set in Figure 5) and manual recording (by<br />
clicking on the record button in Figure 10). The manual recording has top priority,<br />
scheduled recording takes second, then alarm recording. Example:<br />
‣ If a manual recording is initialed by the time an alarm is activated, the application<br />
will stop the alarm recording first then start the manual recording.<br />
‣ When performing a scheduled video recording, an alarm is activated, the<br />
application will not response to the alarm recording request.<br />
2) Prefix of A, M and S will be set to the file name according to alarm recording, manual<br />
recording and scheduled recording, time stamp will fill up the other part and ends up<br />
with .avi (H series products’ suffix is.asf)<br />
3) Whenever the recording time is longer than one hour for manual recording or<br />
scheduled recording, a new file will be created for each hour.<br />
5.4 Stop the Video<br />
A video can be stopped by the following two methods:<br />
1) Select a started device and click the button can stop it's video. All devices can<br />
be stopped by clicking on the down arrow and select “stop all video” from the drop list.<br />
2) Right click on a channel and select stop video from the pop-up menu to stop it.<br />
6 Device Control<br />
Select a video channel from the display area directly, and you can control the device of<br />
this channel.<br />
6.1 Base Operation<br />
1) Double click on a channel will stretch the video to full screen. By double clicking it<br />
again, the video will shrink back to its original size.<br />
2) Click and hold a channel can drag and drop it to another channel, in case the target<br />
channel is utilized, the two video channels will swap.<br />
3) By right clicking on a channel, user can perform some operations like stop video,<br />
stretch, etc from the pop-up menu.<br />
4) By clicking on the icons in the status bar for each channel, you can snapshot or<br />
record manually. Due to different functions, every series product has its own icon<br />
content. Status bar of B Series is as Figure 10, it displays the frame rate is 20.5, click<br />
these icons, talkback, sound intercepting, snapshot and manual video recording can
e performed accordingly.<br />
Figure 10: Channel Status Bar<br />
Note, the talkback icon is disabled in case another user is utilizing the talkback<br />
function. <strong>User</strong> can only talk to and intercept the sound from the device according to<br />
current channel.<br />
A window will pop-up after a snapshot, take more snapshot or delete snapshot can be<br />
performing within the window. The file name for manual snapshot will start with M,<br />
time stamp as the rest, then .JPG as ending.<br />
6.2 Device Control Panel<br />
Device control panel can be accessed by clicking on 'device control' at the lower right<br />
corner or pressing space.<br />
1) You can look up the current channel device information in the Device Control Panel,<br />
including: device name and device <strong>IP</strong> address.<br />
2) The Pan/Tilt can turn up, down, left, right by clicking on the arrows accordingly in the<br />
“PTZ Control” area. You also use keyboard to control Pan/Tilt, like as: ← → ↑ ↓;<br />
3) Part of H Series <strong>IP</strong> Camera, like High Speed Dome , to click can<br />
control Zoom;<br />
4) Part of H Series <strong>IP</strong> Camera, if it has connected a Pan/Tilt, to click:<br />
You will Set/Call the preset; and click auto, the Pan/Tilt will cruise according the<br />
preset; and click stop, the Pan/Tilt will stop cruise;<br />
5) A window will pop-up by clicking the 'advanced' button, for the purpose to set up the<br />
video compress parameter such as definition, bit rate control, etc<br />
7 Channel Management<br />
For the purpose of better video viewing, multiple channel switches are provided. There are<br />
switch buttons above the device and channel management panel, shown as Figure 11.<br />
Figure 11: Channel Switch Buttons<br />
The application can provide up to 16 channel videos; it can manage up to 64 devices<br />
simultaneously.
8 Other Settings<br />
On the top of “Device Management” and “ Device Control”, there are “System<br />
Setting”, ”History” and “About” three buttons.<br />
8.1 System Setting<br />
Figure 12: System Setting<br />
System Setting window is shown as Figure 12. Following are some notifications for this<br />
window.<br />
1) About alarm settings:<br />
• In the 'Alarm action settings' section, user can select other sound file (.wav) as<br />
siren sound. The default sound will be used in case this field is blank.<br />
• <strong>User</strong>s can also configure “Siren Duration, Snapshot Number, Record Duration”<br />
data.<br />
2) About storage location::<br />
• <strong>User</strong> can define the picture and video files storage location, leaving this field<br />
blank the default location is the application installation directory. Pictures and<br />
videos will be stored in. /snap, and. /record directory.<br />
• If tick “Delete the oldest files When the disk space is insufficient”, when the disk<br />
space is less than 500M, this programmer will automatically delete the first day's<br />
data and then realize the cycle record function, or it will stop recording.<br />
3) The other options:
• Play all the devices when running this software or not<br />
• Stretch video from all channels or not<br />
• Hide status bar or not<br />
• Prompt before shutting down this system or not<br />
8.2 History Log<br />
By clicking on the History Log, the video play will be opened, and enter the record<br />
directories, user can play the videos sorted by device name.<br />
9 Further Notifications<br />
1) Use administrator to login in your operating system, and then install the ipcmonitor<br />
software.<br />
2) Before using this software, please ensure the devices can be access by web<br />
browsers from LAN or WAN, please consult the user manual of the <strong>IP</strong> Camera<br />
3) When performing centralization monitoring, please open Windows Task Manager and<br />
check the percentage of CPU usage. If it take more than 80% of CPU usage, the<br />
CPU's performance may not be good enough, please refer to the third part in 6.2,<br />
click “advanced” and access video setting page to adjust the bitrates or resolution.