FI8910W User Manual - Agasio POE & Wireless IP Cameras
FI8910W User Manual - Agasio POE & Wireless IP Cameras
FI8910W User Manual - Agasio POE & Wireless IP Cameras
- No tags were found...

You also want an ePaper? Increase the reach of your titles
YUMPU automatically turns print PDFs into web optimized ePapers that Google loves.
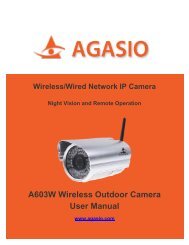
Foscam Digital Technologies LLC<br />
<strong>FI8910W</strong> <strong>User</strong> <strong>Manual</strong><br />
<strong>IP</strong> Wired / <strong>Wireless</strong> Camera<br />
www.foscam.us<br />
support@foscam.us Page | 0 1-800-930-0949
Thank You for Your Purchase!<br />
Foscam <strong>IP</strong> <strong>Cameras</strong> are designed and equipped primarily for local and<br />
remote purposes such as home or office security surveillance. We provide<br />
a variety of products suitable for any type of surveillance system setup,<br />
including wired/wireless <strong>IP</strong> outdoor bullet cameras, <strong>IP</strong> outdoor dome PTZ<br />
cameras, and <strong>IP</strong> Indoor PT cameras.<br />
Please check the packaging to make sure you have received all items<br />
including the camera accessories as follows:<br />
- Foscam <strong>IP</strong> Camera<br />
- Wi-Fi Antenna (If Wi-Fi compatible)<br />
- Network Cable<br />
- Warranty Card<br />
- Quick Installation Guides<br />
- Power Supply<br />
- Installation / Driver CD<br />
- Mounting Bracket<br />
Note: Please contact us immediately if there are any damaged items or if<br />
the package is short of any of the accessories listed above.<br />
If you have any additional questions or concerns, please feel free to contact<br />
us at support@foscam.us or call us at 1-800-930-0949.<br />
support@foscam.us Page | 1 1-800-930-0949
Table of Contents<br />
1. Product Introduction Page 3<br />
2. Product Specifications Page 3<br />
3. Product Views Page 4<br />
4. Software Installation Page 6<br />
5. Hardware Installation Page 8<br />
a. <strong>IP</strong> Camera Tool Page 9<br />
b. Camera Login Page 14<br />
c. Device Status Page 19<br />
d. For Visitor Page 20<br />
e. For Operator Page 22<br />
f. For Administrator Page 24<br />
6. Configuring Settings in Administrator Page 26<br />
a. Alias Settings Page 26<br />
b. Date & Time Settings Page 26<br />
c. <strong>User</strong> Settings Page 26<br />
d. Multi-Device Settings Page 28<br />
e. Basic Network Settings Page 29<br />
f. <strong>Wireless</strong> Settings Page 31<br />
g. ADSL Settings Page 34<br />
h. UPnP Settings Page 35<br />
i. DDNS Service Settings Page 35<br />
j. Mail Service Settings Page 37<br />
k. MSN Settings Page 38<br />
l. FTP Service Settings Page 40<br />
m. Alarm Service Settings Page 42<br />
n. PTZ Settings Page 44<br />
o. Upgrade Device Firmware Page 45<br />
p. Backup & Restore Settings Page 46<br />
q. Restore Factory Settings Page 46<br />
r. Reboot Device Page 46<br />
s. Log Page 47<br />
7. Video Setup Guides Page 48<br />
8. Frequently Asked Questions Page 49<br />
9. Technical Support Page 49<br />
support@foscam.us Page | 2 1-800-930-0949
1. Product Introduction<br />
The Foscam <strong>FI8910W</strong> <strong>Wireless</strong> Pan/Tilt Indoor <strong>IP</strong> Camera features high quality video and audio, wireless<br />
N connectivity, pan/tilt, remote internet viewing, motion detection, night vision, embedded IR-Cut filter, as<br />
well as a built in network video recording system. In addition, it is also smartphone compatible (iPhone,<br />
Android & Blackberry) as well as viewable over the internet using standard web-browsers. The camera<br />
functions well as an iPhone baby monitor or as part of a home or office security system with remote<br />
monitoring. It is also compatible with Synology, Blue Iris, and most other surveillance software programs<br />
and NVRs which accept standard MJPEG streams.<br />
2. Product Specifications<br />
- Powerful high-speed video protocol processor<br />
- High definition color CMOS sensor<br />
- 300k Pixels (640 x 480 maximum resolution)<br />
- IR Night vision (Range of 8 meters)<br />
- Panning ability of 300 degrees, Tilt ability of 120 degrees<br />
- Optimized MJPEG video compression for transmission<br />
- Multi-level user management and password definition<br />
- Wi-Fi compliant with wireless standards IEEE 802.11 b/g/n<br />
- Supports an IR-Cut filter for true colored video (no discoloration)<br />
- Supports Dynamic <strong>IP</strong> (DDNS, No-<strong>IP</strong>) and UPnP LAN and Internet (ADSL, Cable Modem)<br />
- Features motion detection and alarm triggering, alarm notifications sent via e-mail<br />
- Supports image snapshots<br />
- Supports multiple network protocols: HTTP, TCP/<strong>IP</strong>, UDP, SMTP, PPPoE, Dynamic DNS,<br />
DNS Client, SNTP, BOOTP, DHCP, FTP<br />
- Supports WEP/WPA/WPA2 wireless encryption<br />
- Supports Daylight Savings Time<br />
- Support G-mail for e-mail notifications<br />
- Supports one-way audio on Firefox and Chrome, audio supported on Safari via third party apps<br />
support@foscam.us Page | 3 1-800-930-0949
3. Product Views<br />
Front View<br />
Figure 3.1 – This model comes with 11 IR LEDs, a CMOS sensor, Wi-Fi antenna, and Built-In<br />
Speaker and Microphone<br />
Rear View<br />
Figure 3.2 – The rear of the <strong>FI8910W</strong>. Includes a DC 5V/2A power supply port, RJ-45/10-100 Base T<br />
port, power and network lights, and input/output audio jacks for external speakers or microphone<br />
support@foscam.us Page | 4 1-800-930-0949
Bottom View<br />
Figure 3.3 – The bottom of the camera shows the wired/wireless MAC addresses of the camera. It<br />
also shows the S/N number and has a reset button.<br />
If you ever need to reset your camera to default settings, you can use the reset button. Use a pin to push<br />
down the reset button for 30 seconds. Make sure the camera is plugged in and turned on. When the<br />
camera hard resets, it will start to pan and tilt automatically, this signifies that the camera has reset<br />
completely. You should be able to log in with the default username of “admin” with no password in the<br />
password field.<br />
Note: There are three stickers at the bottom of the camera; these stickers are an important feature of<br />
original Foscam cameras. If your camera does not have any of these three stickers, it may be nongenuine.<br />
Non-genuine cameras cannot use original firmware and are not eligible for warranty or technical<br />
services. Please make sure you only purchase from an authorized Foscam reseller!<br />
support@foscam.us Page | 5 1-800-930-0949
4. Software Installation<br />
Firstly, insert the CD into your CD drive, and then open the CD to see the files on your computer.<br />
Figure 4.1 – Double-click your CD/DVD Drive to browse the CD files<br />
Figure 4.2 – Double-click either the Windows OS or Mac OS folder, and then double-click the <strong>IP</strong><br />
Cam Setup file to install the software.<br />
support@foscam.us Page | 6 1-800-930-0949
Figure 4.3 – Proceed in installing the <strong>IP</strong> Camera Tool software on your computer.<br />
Once the installation is finished, the <strong>IP</strong> Camera Tool software icon installs to your desktop automatically,<br />
look for it on your desktop. If you are using Windows 7 and cannot find the icon on your desktop after<br />
installing the software, please check to see if the path of the camera is correct.<br />
For example, the software may have installed to another folder such as<br />
C:/Windows/System32/<strong>IP</strong>Camera.exe. If this is the case then fix this by moving or pointing the shortcut to<br />
the correct path, which would be C:/Windows/SysWOW64/<strong>IP</strong>Camera.exe.<br />
support@foscam.us Page | 7 1-800-930-0949
5. Hardware Installation<br />
Note: Before installing and using the Foscam <strong>IP</strong> camera, please remember to only use the power<br />
adapter that was supplied with the camera. Using other power supplies could potentially damage<br />
your <strong>IP</strong> camera. Make sure your <strong>IP</strong> camera is being installed in an indoor environment free from<br />
any type of water or weather effects, such as rain and snow. The camera is built as an indoor<br />
camera and thus cannot stand extremely high or low temperatures.<br />
If you would like to use your <strong>IP</strong> camera outdoors under a covering such as an eve, make sure<br />
there is no potential of rain or any other type of weather prone to hitting the camera. Also make<br />
sure the temperature is within the camera’s operational temperature range. The camera may<br />
malfunction if the temperature drops below 32 degrees F.<br />
1. Install the Wi-Fi antenna by twisting the antenna connector clockwise to the camera’s antenna port (for<br />
wireless models).<br />
2. Plug the power adapter into the camera’s power supply port. This may be external (outdoor models) or<br />
internal (indoor models) depending on which camera you purchased.<br />
3. Plug the network cable into the RJ-45 connecter which is found either on the external wiring (for<br />
outdoor cameras) or on the back of the camera (for indoor cameras), and plug in the other side of the RJ-<br />
45 cable to a port on your router/switch.<br />
4. It takes approximately 30 seconds to boot up the camera, you will see the camera swivel automatically<br />
a few seconds after it is plugged in, this indicates the camera has successfully powered on.<br />
5. When the camera is correctly powered on and the network cable is connected properly, the green LED<br />
on either the RJ-45 connector of the camera (for outdoor models) or the connector on the back of the<br />
camera (indoor models) will remain solid. The yellow LED should continue to flash.<br />
Figure 5.1 - Mount the antenna<br />
Figure 5.2 – Plug in the network cable<br />
support@foscam.us Page | 8 1-800-930-0949
5.1 – <strong>IP</strong> Camera Tool<br />
Double click the <strong>IP</strong> Camera Tool icon and the following screen should appear.<br />
Figure 5.3 –The <strong>IP</strong> Camera Tool<br />
The <strong>IP</strong> camera tool should find the camera’s <strong>IP</strong> address automatically after you plug in the network cable.<br />
If not, please make sure that DHCP is enabled on your router and that MAC address filtering, firewalls<br />
and anti-virus are disabled temporarily until the camera is set up.<br />
MJPEG cameras like the <strong>FI8910W</strong> will have an “M” next to the local <strong>IP</strong> address in the software. H.264<br />
compression cameras will have an “H” next to their local <strong>IP</strong> address.<br />
There are six different options that the <strong>IP</strong> Camera Tool has. Highlight a camera in the <strong>IP</strong> Camera Tool list<br />
and right click on it. The six options that appear are: Basic Properties, Network Configuration, Upgrade<br />
Firmware, Refresh Camera List, Flush Arp Buffer, and About <strong>IP</strong> Camera Tool.<br />
Figure 5.4 – <strong>IP</strong> Camera Tool showing six different options after right-clicking.<br />
support@foscam.us Page | 9 1-800-930-0949
Basic Properties<br />
Clicking this option shows some device information about the <strong>IP</strong> Camera, such as the Device ID, the<br />
Firmware version, and the Web UI version.<br />
If there are several cameras on the list such as above, you can choose basic properties to check the<br />
device ID and identify the <strong>IP</strong> address belonging to each <strong>IP</strong> camera you set up. For example, the device ID<br />
may be 000DC5D203BB. This is the same value seen on the sticker at the bottom of the camera where it<br />
reads “MAC ID.”<br />
Each camera has its own specific MAC ID. Sometimes, if your camera is not found in the <strong>IP</strong> Camera Tool<br />
software, it may still show up in the router if there is a firewall blocking it. You can add this MAC ID to your<br />
router to give it a fixed <strong>IP</strong> address. Note that there are two different MAC ID’s. One is for the camera<br />
when it is wired, and the other is for the camera when it is wirelessly connected.<br />
Figure 5.5 – Basic Properties in the <strong>IP</strong> Camera Tool.<br />
Network Configuration<br />
Clicking this option allows you to change the network parameters of your camera, such as the <strong>IP</strong> address,<br />
Subnet Mask, Gateway, and DNS Server. It also allows you to change the HTTP Port, which is needed<br />
when you want to see the camera remotely by port forwarding in your router.<br />
Obtain <strong>IP</strong> from DHCP Server: You also have the option to enable this, which allows the camera to have a<br />
dynamic <strong>IP</strong> address on the local network. This means that if you set up the camera this way, you may<br />
have an <strong>IP</strong> address of 192.168.1.3 for one day, if you unplug the camera and turn it on again, the <strong>IP</strong><br />
address will change. You will most likely not see the camera on the 192.168.1.3 <strong>IP</strong> address anymore.<br />
Due to this, it is usually, if not always recommended to set a static <strong>IP</strong> address for the camera.<br />
support@foscam.us Page | 10 1-800-930-0949
<strong>IP</strong> Address: This field allows you to change the <strong>IP</strong> address that the camera is operating at. The first three<br />
sections of the <strong>IP</strong> address must match your subnet, or in other words, the first three sections of your<br />
router’s <strong>IP</strong> address. The fourth section needs to be a number that is not already assigned to another<br />
device. In our example, “192.168.1” is the subnet, while “126” is the fourth section value. You can change<br />
this fourth value usually to anything from 10 – 200 if it is not being used by another device on your<br />
network. The first few numbers (1 – 9) may already be used by your router or devices attached to your<br />
network.<br />
It is important to note that you cannot have the same <strong>IP</strong> address for two different devices on your<br />
network. You can find out your network’s information by logging into your router or going to the Windows<br />
command prompt as seen below. Click Start > type CMD in the search field > push “Enter” > Then type<br />
“ipconfig” in the command prompt and push “Enter.”<br />
Figure 5.6 – Using “ipconfig” in our command prompt, we see that our own “subnet” is<br />
“192.168.1.” Our computer’s fourth section of the <strong>IP</strong> address is “111.”<br />
support@foscam.us Page | 11 1-800-930-0949
Subnet Mask: The default subnet mask of the LAN in this example is 255.255.255.0. You can find your<br />
subnet mask within your router or using the command prompt method seen on the previous page. Make<br />
sure you enter this information exactly as it is into the Network Configuration window.<br />
Gateway: This <strong>IP</strong> address is the address of your router. This is usually 192.168.0.1, 10.0.01,<br />
192.168.1.254, or 192.168.1.1. There are many different routers that use different <strong>IP</strong> addresses as their<br />
default gateway; you may have a default gateway that is none of the above. This value mostly depends<br />
on which router you have. As stated previously, you can find this out by logging into your router or using<br />
the command prompt. You can see in our example that it is 192.168.1.1.<br />
DNS Server: This <strong>IP</strong> address is the <strong>IP</strong> address of your ISP network provider. You can find the DNS<br />
server in your router or check the locally attached address of your computer like in the previous page<br />
using command prompt. Usually this is the same <strong>IP</strong> address as your gateway. For our example the DNS<br />
was the same as the Gateway, 192.168.1.1.<br />
HTTP Port: The default LAN port is usually 80. Another port is usually recommended to be set besides<br />
80, such as 8090, or as in our example, 8918. Keep in mind that every <strong>IP</strong> camera needs to be on its own<br />
port. Usually if you have multiple cameras, the best way to configure them is by making the ports<br />
ascending. For example, if you are starting from 8000, you would then use 8001, 8002, 8003, 8004, etc.<br />
<strong>User</strong>: The default username of the camera is admin. You will need to put in the correct administrator<br />
username in order to change the network configuration.<br />
Password: The default password of the camera is left blank; do not enter any characters in this field. You<br />
will need to put the correct password in order to change the network configuration.<br />
Note: If your network configuration is not set up properly, you may see a different message instead of an<br />
<strong>IP</strong> address in the <strong>IP</strong> Camera Tool. The most common message is “Subnet doesn’t match, dbclick to<br />
change!” This message means your network settings are not properly set, refer to the network<br />
configuration details above and make sure all 4 fields of <strong>IP</strong> address, Subnet Mask, Gateway, and DNS<br />
server are filled in correctly.<br />
support@foscam.us Page | 12 1-800-930-0949
Upgrade Firmware<br />
Clicking this option allows you to upgrade the firmware or the WebUI of the camera directly from <strong>IP</strong><br />
Camera Tool. Make sure to upgrade the firmware first, and then upgrade the WebUI.<br />
Refresh Camera List<br />
Clicking this allows you to refresh the camera list manually. If your camera is not showing up you can try<br />
using this option to refresh the cameras in the list.<br />
Flush Arp Buffer<br />
Clicking this allows you to refresh the camera list. Sometimes you may not be able to see the camera if<br />
both the wired and wireless <strong>IP</strong> addresses of the camera are fixed. Use this option to refresh the camera<br />
list. Once you have used this option, close the <strong>IP</strong> Camera Tool and then open it again.<br />
About <strong>IP</strong> Camera Tool<br />
This option shows information about your current version of <strong>IP</strong> Camera Tool.<br />
support@foscam.us Page | 13 1-800-930-0949
5.2 - Camera Login<br />
To log into the camera, double click on your camera in the <strong>IP</strong> Camera Tool software, it will open your<br />
default browser to the camera’s <strong>IP</strong> address.<br />
You can see below that our camera’s <strong>IP</strong> address is 192.168.1.125, and the port is 8910. If your port was<br />
set to 80, which is default, you will not see a colon or port at the end of the URL. For example, if our port<br />
was 80, we would only see: http://192.168.1.125.<br />
Figure 5.7 – The login page for the Foscam <strong>FI8910W</strong><br />
The default username to log into the camera is admin, the default password would be left blank, do not<br />
enter any characters into the password field.<br />
There are two different login buttons. Use the first login button if you are using Internet Explorer. Use the<br />
second login button if you are using Firefox, Chrome, or Safari.<br />
support@foscam.us Page | 14 1-800-930-0949
For Internet Explorer<br />
If you choose the first login button, you will be taken immediately to the live video page.<br />
Figure 5.8 – Click “Allow” to be able to see the live video.<br />
The first time you log into the camera, you may receive an ActiveX prompt, such as the one seen above.<br />
You should have the option to click “Allow” or “Run Add-on.”<br />
After doing this, you will need to login to the camera again, make sure to put in the default username and<br />
password and click on the first login button again.<br />
Note: If you still cannot see video even after running or allowing the ActiveX to configure correctly, try<br />
changing your port number to another port other than 80. Also make sure firewalls or antivirus is not<br />
blocking the download or installation of the addon.<br />
You may also see an error that reads “Windows has blocked this software because it can’t verify the<br />
publisher.” This error is related to the DVM_<strong>IP</strong>CAM2 ActiveX Control Module. To fix this, continue to the<br />
following steps.<br />
support@foscam.us Page | 15 1-800-930-0949
Open Internet Explorer if it is not already opened. Click on Tools, then click Internet Options.<br />
Next, click the Security tab, then click the Custom Level button.<br />
In the Custom Level settings, scroll down to the heading “ActiveX controls and plug-ins.”<br />
Ensure the following options are set to “Enable.”<br />
“Run ActiveX and plug-ins,”<br />
“Download Signed ActiveX Controls,”<br />
“Script ActiveX controls marked as safe for scripting.”<br />
Ensure the following options to “Prompt.”<br />
“Download unsigned ActiveX controls,”<br />
“Initialize and script ActiveX controls no marked as safe,”<br />
Click OK and then click Apply. Then click OK on the Internet Options main window. Make sure to restart<br />
the browser for the settings to take effect.<br />
support@foscam.us Page | 16 1-800-930-0949
One last setting you will want to check is in the Advanced tab. Click on the Advanced tab on the Internet<br />
Options main window. Scroll down to the Security section. Make sure to check the box that reads “Allow<br />
software to run or install even if the signature is invalid.”<br />
support@foscam.us Page | 17 1-800-930-0949
You should now be able to see live video in Internet Explorer! You should see a screen similar to the<br />
below picture:<br />
Figure 5.9 – The live video page in Internet Explorer<br />
For Firefox, Google Chrome, Safari, or any other standard browser:<br />
Click on the second login button on the login page. You will be taken to the device status page of the<br />
camera. It will then prompt you to enter the username and password in a separate window. Enter the<br />
default username of admin and leave the password field blank, then push Enter.<br />
Click on the Live Video button on the left of the page to go to the Live Video page.<br />
Figure 5.10 – The live video page in Chrome, Firefox, or Safari<br />
support@foscam.us Page | 18 1-800-930-0949
5.3 - Device Status<br />
For Internet Explorer<br />
If the camera is connected properly, the light under the device status heading will be green. If the light is<br />
showing a yellow color, check to see if the ActiveX is enabled, and also try changing the port number.<br />
If you would like to view the device information, choose “For Administrator” and then click “Device Info”<br />
Figure 5.11 – Device Info shows you the status of different camera settings, and also the firmware<br />
and Web UI versions of the camera.<br />
For Firefox, Chrome, and Safari:<br />
When you login to the camera using browsers other than Internet Explorer, you are automatically taken to<br />
the Device Status page by default. Device Status is the same as Device Info in Internet Explorer.<br />
support@foscam.us Page | 19 1-800-930-0949
5.4 – For Visitor<br />
For Internet Explorer<br />
Figure 5.12 – Options under the Visitor heading<br />
Multi-Device Window (Only available in IE) – This option can be used to see up to 4 or 9 cameras<br />
simultaneously on the same screen. You can set up multiple cameras inside the administrative panel by<br />
going to “For Administrator,” then clicking “Multi-Device Settings”<br />
OSD – OSD is used to add a timestamp on your video. You can choose from five different colors to<br />
display the timestamp in.<br />
Add Timestamp on Record – Check this option if you would like to add a timestamp on recordings.<br />
Alarm Sound Off – Check this option if you would like to turn off the beeping alarm when motion is<br />
detected.<br />
Audio Buffer – An audio buffer with units set as number of seconds.<br />
- This icon controls the pop-up folder feature. When a recording is complete, the software will<br />
automatically open up the folder that the recording was stored in. If you would like to turn this feature off<br />
and not have any folder pop-ups, just click this button.<br />
support@foscam.us Page | 20 1-800-930-0949
- This icon controls the live video. If the video has been stopped by using the Stop button, use this<br />
button to start the live video again.<br />
- This icon also controls live video. If you click this button, the video feed will stop and go black,<br />
without turning the camera off. You can use the Play button to start the live video feed again.<br />
- Use this icon to take a snapshot of the current live video. The snapshot will appear in a separate<br />
window along with a timestamp. You have the option of saving this snapshot as well.<br />
- These three icons are used for listening, talking, and recording manually. The headphone<br />
icon allows you to hear audio in the location of the camera. The microphone icon allows you to speak into<br />
your microphone connected to the computer, and have the audio come out through the camera speakers.<br />
The record icon allows you to record video manually in .avi format. Click the recording icon again to stop<br />
the recording. Recordings will be saved by default in C:/Documents and Settings/All <strong>User</strong>s/Documents.<br />
This path can be changed by going to “For Administrator” then clicking on “<strong>User</strong> Settings.” You can set<br />
the record path on this page for manual and alarm recordings.<br />
For Firefox, Chrome, and Safari:<br />
A few of the above features are not available in push browsers like Firefox, Chrome, or Safari.<br />
In these browsers however you are able to take snapshots of the live video feed and also use one-way<br />
audio by listening to the audio in the location of the camera. For Mac users, we recommend “uFoscam”<br />
and “<strong>IP</strong> Camera Viewer” from the Mac App store to use the above features in a standalone program.<br />
support@foscam.us Page | 21 1-800-930-0949
5.5 – For Operator<br />
For Internet Explorer<br />
Figure 5.13 – Options under the Operator heading<br />
Pan/Tilt Circle – Use this circular feature to pan and tilt the camera. You can click the blue area in the<br />
center of the circle to center the camera to its default position.<br />
- These buttons are used to cruise the camera either up and down, or side to side, as you can<br />
see from the icons. The first icon with arrows pointing up and down will tilt the camera to its maximum<br />
degree upwards and downwards. The second button will cruise the camera to its maximum degree from<br />
side to side. Use the stop buttons next to these icons to stop the cruise. The camera will only cruise once.<br />
- These icons turn the IR LEDs on or off, for night vision. The first button is used to turn the IR<br />
LEDs on. This will illuminate the camera’s video at night initially, and the picture should be in black and<br />
white in complete darkness. The second button turns off the IR LEDs, turning off all night vision<br />
completely. Having the IR LEDs on automatically allows the camera to turn the night vision on when<br />
darkness is detected. If the second icon is clicked, the camera will never switch into night vision.<br />
Flip – This option flips the video feed upside-down. Useful if you are mounting the camera upside-down<br />
from the ceiling.<br />
Mirror – This option flips the video feed horizontally. This is also useful if you are mounting the camera<br />
upside-down, having this option and the flip option checked will give you a normal view when your<br />
camera is mounted upside-down from the ceiling.<br />
support@foscam.us Page | 22 1-800-930-0949
Mode – There are three modes you can choose from, 50 HZ, 60 HZ, and Outdoor. Usually the differences<br />
for 50HZ and 60HZ depend on which country you reside in. In the United States, 60HZ is usually used.<br />
Sometimes you may experience a flicker in your camera, try switching the mode to another value to see if<br />
the flicker disappears. 50HZ is usually used in the UK. If using the camera for outdoor viewing, choose<br />
the Outdoor setting, you may need to also reboot the camera is selecting this setting.<br />
Brightness / Contrast – These values are used to adjust the quality of the video, you can choose to<br />
make the camera video darker or lighter depending on your preference.<br />
Preset – You can set a pre-defined location with this feature. Once you have determined a location that<br />
you would like to set as a preset, click the “Set” button after choosing which preset you would like to save<br />
to (you can choose from 1 – 8). If you need to call a preset, choose the saved preset from the drop down<br />
box and click “Go.” The camera will automatically pan and tilt to the saved preset. Make sure presets are<br />
enabled by going to “For Administrator” and clicking on “PTZ Settings.” Make sure the “disable preset”<br />
box is not checked.<br />
For Firefox, Chrome, and Safari:<br />
A few of the above features are not available in push browsers like Firefox, Chrome, or Safari.<br />
In these browsers however you are able to take snapshots of the live video feed and also use one-way<br />
audio by listening to the audio in the location of the camera. For Mac users, we recommend “uFoscam”<br />
and “<strong>IP</strong> Camera Viewer” from the Mac App store to use the above features in a standalone program.<br />
support@foscam.us Page | 23 1-800-930-0949
5.6 – For Administrator<br />
For Internet Explorer<br />
Figure 5.14 – Options seen when inside the Administrator panel<br />
When clicking “For Administrator” you will be taken automatically to the “Device Status” page. This page<br />
contains the Device ID, firmware version, Web UI version, and the status of other features.<br />
support@foscam.us Page | 24 1-800-930-0949
For Firefox, Chrome, and Safari:<br />
The identical option in server push browsers for the administrative panel is “Device Management.”<br />
Clicking this will take you to the administrative panel within server push browsers like Firefox, Chrome,<br />
and Safari. You will automatically see the Alias Settings page.<br />
Figure 5.15 – The Device Management page within server push browsers.<br />
support@foscam.us Page | 25 1-800-930-0949
6. Configuring Settings in Administrator<br />
6.1 – Alias Settings<br />
The default alias is anonymous. You can change the name of your camera to anything you would like.<br />
Usually it is a good idea to name each camera based on the location you are setting the camera in,<br />
especially if you have multiple cameras. Click Submit to save changes. Some examples are Kitchen<br />
Cam, Baby Cam, etc.<br />
6.2 – Date & Time Settings<br />
Here you can choose the time zone of your country. You can choose Sync with NTP Server or Sync<br />
with PC Time. Usually syncing with the PC time is the best option to choose. If your country is<br />
implementing Daylight Savings Time, such as in the US, you can set it for your camera here.<br />
6.3 – <strong>User</strong> Settings<br />
Here you can set permissions for visitors, operators, and administrators. Visitors have access to all<br />
features under the “Visitor” heading on the Live Video page. Operators have all the features available<br />
under the “Operators” heading as well as under the “Visitors” heading. Administrators have full access to<br />
all features as well as access to the administrator panel.<br />
support@foscam.us Page | 26 1-800-930-0949
On the <strong>User</strong> Settings page you can also set the location you would like video recordings to save. You<br />
can set the path for manual recordings, which is the option named “Set Record Path.” You can set the<br />
path for alarm recordings as well if you would like to a separate path, using the “Set AlarmRecord Path”<br />
option. Click “Browse” to choose the folder you would like to save recordings to. Note that you need to<br />
keep each camera open in a separate browser window to save recordings, even for alarm recordings.<br />
If you receive an error such as “Set the record path fail” when you try to select a path to save<br />
recordings, try configuring the following:<br />
Navigate to Tools, then Internet Options. Click on the Privacy tab at the top, then click “Sites.” You will<br />
need to add the camera as a trusted site. Insert the URL (<strong>IP</strong> address of the camera) in the trusted sites<br />
field and click “Allow” to add it. Push OK and Apply, then restart your browser.<br />
If you still have problems, navigate to Internet Options again, then under the “Security” tab, try<br />
unchecking the box which reads “Enable Protected Mode.” Click Apply, then OK, then try restarting the<br />
browser, logging into the camera, and setting the path again.<br />
support@foscam.us Page | 27 1-800-930-0949
6.4 – Multi-Device Settings<br />
The embedded camera software is able to support a maximum of 9 cameras simultaneously on the same<br />
screen. As long as the camera is of MJPEG compression, you will be able to add it as an additional<br />
camera and view its video using the multi-camera panes on the Live Video page.<br />
On the Multi-Device Settings page you will be able to see all the cameras currently present on your LAN<br />
(Local Area Network), meaning any cameras connected directly to the same router will be seen in this list.<br />
The 1 st Device on this page is referring to the camera you are currently logged into. If you would like to<br />
add a second camera, click the 2 nd Device and a list will expand, showing the Alias, Host, HTTP Port,<br />
and <strong>User</strong>/Password fields. If you want to add a camera from your LAN, click on a camera from the list,<br />
and it will automatically populate the Alias, Host, and HTTP Port fields. You will need to add the<br />
<strong>User</strong>name and Password individually. You can add up to 9 cameras this way.<br />
Once you finish adding a camera, click “Add.” You can then proceed to add additional cameras until you<br />
are finished. Once you have added all cameras, click the “Submit” button to save settings.<br />
Note that you will only be able to see the added cameras on your local network, if you try to access your<br />
cameras remotely, you will not be able to see them unless you change the Local <strong>IP</strong> addresses to External<br />
<strong>IP</strong> addresses (this is explained further in the Quick Installation Guide). If you would like to see the<br />
cameras remotely, instead of putting the LAN <strong>IP</strong> address of the camera, you will need to change this to<br />
your External <strong>IP</strong> address (which can be found at www.whatismyipaddress.com) or your DNS hostname if<br />
you are using a DNS service (make sure to exclude http:// from the hostname).<br />
support@foscam.us Page | 28 1-800-930-0949
Figure 6.1 – An example of 4 cameras set up using Multi-Device Settings<br />
6.5 – Basic Network Settings<br />
If you would like to set a static <strong>IP</strong> for the camera (highly recommended), you can do so in the Basic<br />
Network Settings page. Keep the camera in the same subnet of your router or computer. Our subnet in<br />
this example is “192.168.1.”<br />
You will notice that most of these settings are exactly the same as the settings seen in the <strong>IP</strong> Camera<br />
Tool software. You can use this method of changing the network information as an alternative to using <strong>IP</strong><br />
Camera Tool if you would like.<br />
If you are unsure of your subnet mask, gateway, or DNS server, you can always check by using the<br />
methods explained in Section 5.1 of this manual.<br />
support@foscam.us Page | 29 1-800-930-0949
An alternative way to find your network information (Windows 7) is by clicking Start, then clicking Control<br />
Panel. Once Control Panel opens up, click on “View Network Status and Tasks” or “Network Sharing<br />
Center.” This will take you to the network status screen. Where it reads “Connections,” click your<br />
connection to open the “Local Area Connection Status” page. Then click “Details.”<br />
Once the details screen pops up, you will see similar network information; use this information to fill or<br />
double-check the fields you have.<br />
Figure 6.2 – Use the Network Connection Details window to double check your network settings.<br />
Make sure you are looking at the fields that start with “<strong>IP</strong>v4.” You will see Subnet Mask, Default Gateway,<br />
and DNS Server as seen in the screenshot above. Check your subnet as well, for example, our subnet in<br />
the screenshot above is “192.168.1.”<br />
Note that the <strong>IP</strong> address seen in the network connection details is actually the <strong>IP</strong> address of our<br />
computer. Make sure the fourth section of your camera’s <strong>IP</strong> address does not match this <strong>IP</strong> address.<br />
Every device on your network must have its own separate <strong>IP</strong> address. As such, the camera cannot have<br />
the same <strong>IP</strong> address as your computer. Keeping this in mind, also remember that if you are setting up<br />
multiple cameras, they cannot have the same <strong>IP</strong> address or port number. Be sure to change both the<br />
address and the port if they are being shared by another camera.<br />
support@foscam.us Page | 30 1-800-930-0949
6.6 – <strong>Wireless</strong> Settings<br />
If you would like to setup the camera wirelessly, you can follow the steps below. Using a wireless<br />
connection for the camera allows you to move the camera anywhere in the location as long as the<br />
camera has a stable connection with your router. All you will need to do is plug it in with a power supply<br />
and the camera will connect wirelessly.<br />
1) When you are logged into the camera, click on the setting that reads “For Administrator.” You<br />
should be logged in as an administrator already with the default username and password.<br />
2) Next, click on the setting on the left side that reads “<strong>Wireless</strong> Settings.”<br />
3) On this screen you will see the wireless settings page. You can use the “Scan” button to scan<br />
for local wireless networks. If you choose this method, you can click on your wireless network<br />
and the fields will automatically populate except for the “Share Key” field. Enter your wireless<br />
network’s password in this field.<br />
4) Sometimes you may need to enter the wireless information manually. Check the box that states<br />
“Using <strong>Wireless</strong> LAN” for further options to drop down. You will see a few different fields. You<br />
should find and note down the following information about your wireless network:<br />
a) SSID – The name of your wireless network (Our example will be Foscam H264)<br />
b) Encryption method (e.g., WPA/WPA2/WEP)<br />
c) Encryption technique (e.g., TK<strong>IP</strong>/AES/TK<strong>IP</strong>-AES)<br />
d) Share key – This is the password you use to connect to your wireless network<br />
support@foscam.us Page | 31 1-800-930-0949
To find the above information you may need to log in to your wireless router. To do this, enter the <strong>IP</strong><br />
address of your router into your browser and press enter. You will be prompted to enter your router<br />
username and password. If you do not know the <strong>IP</strong> address of your router you can view it in <strong>IP</strong> Camera<br />
Tool by selecting and right clicking on your camera, selecting “Network Configuration”, and noting down<br />
the “Default Gateway” <strong>IP</strong> address. This Default Gateway <strong>IP</strong> address is the <strong>IP</strong> address of your router.<br />
Once logged in to your router look for an option called “<strong>Wireless</strong> Settings” or “<strong>Wireless</strong> LAN”. Once in the<br />
<strong>Wireless</strong> Settings look for and jot down what you have for the setting called “SSID”.<br />
Next, look under the “Security Settings” under “<strong>Wireless</strong> Settings’ and write down the “Encryption<br />
Method”, “Encryption Technique” and the “Shared Key”.<br />
support@foscam.us Page | 32 1-800-930-0949
If you are running Windows 7 and are connected to the same wireless network you are trying to set up,<br />
you can also find this information out by clicking on the <strong>Wireless</strong> icon in your task bar to bring up all<br />
wireless networks, right clicking your network, and clicking “Properties.”<br />
When you click on “Properties,” the network properties window will come up with the same information<br />
you need to enter under the “Security” tab, our example is below:<br />
support@foscam.us Page | 33 1-800-930-0949
5) Once you have the information about your network, on the wireless settings page, enter the<br />
information about your wireless network into the fields. You can see our example below:<br />
Make sure your camera has the wireless antenna plugged in. Push Submit to save the settings. The<br />
camera will start to countdown as it needs to reboot. Once it has come to a stop, you can unplug the<br />
Ethernet cable and you should start to see the green LED on the back of the camera flashing much faster<br />
after about 30 seconds. Open <strong>IP</strong> Camera Tool again and the camera should appear. It may be operating<br />
under a different <strong>IP</strong> address than what you had set before. Make sure to set a static <strong>IP</strong> address for the<br />
camera again just in case.<br />
6.6 – ADSL Settings<br />
You can connect the camera to the internet through ADSL directly. If you are using this method of<br />
installation, you can use this page to enter the ADSL username and password provided by your ISP.<br />
support@foscam.us Page | 34 1-800-930-0949
6.7 – UPnP Settings<br />
UPnP settings allow you to use the camera’s software to configure port forwarding rather than doing it<br />
manually within your router. If your router supports UPnP, you can check the box that reads “Using UPnP<br />
to Map Port.” The camera software will automatically try to configure port forwarding within your router for<br />
the port number you have assigned as “HTTP Port” under the “Basic Network Settings” page.<br />
To learn more about port forwarding, see the Quick Installation Guide.<br />
6.8 – DDNS Service Settings<br />
Dynamic DNS is a service used specifically for users who have Dynamic <strong>IP</strong> addresses. A Dynamic <strong>IP</strong><br />
address constantly changes several times a day, making it very difficult to track the <strong>IP</strong> address needed<br />
to view a camera, since you would need the external <strong>IP</strong> address to connect to the camera.<br />
Dynamic DNS is a feature already embedded in the camera software which can be set to a few third<br />
party DDNS services. The most popular DDNS provider is DynDNS.com (Dyn.com) and No-<strong>IP</strong>. Other<br />
DDNS services that are third party are also provided and set up for use within the camera (Oray,<br />
3322.org, etc.).<br />
To navigate to the Dynamic DNS Service Settings page, click “For Administrator” or “Device<br />
Management,” then click on “DDNS Service Settings on the left side of the page.<br />
support@foscam.us Page | 35 1-800-930-0949
This page allows you to choose the DDNS service, and then requires you to enter the username and<br />
password for the service you are using, along with your hostname.<br />
For example, in the following screenshot we are using the information from our No-<strong>IP</strong> DNS account:<br />
To receive a free DNS hostname, try using the DynDNS Trial Account at http://dyn.com/dns/dyndns-profree-trial/<br />
or the No-<strong>IP</strong> free hostname at http://www.no-ip.com/new<strong>User</strong>.php.<br />
When you create your account, remember to write down your username, password, and the host that you<br />
have set up for your account.<br />
Our host in this case was foscamusa1.no-ip.org. An example of a DynDNS host would be<br />
foscamusa1.dyndns.org.<br />
Once the DDNS settings are configured properly, head to the Device Status page to see if the DDNS<br />
status is correctly set up.<br />
Above you can see that under the “DDNS Status” field, we see “No-<strong>IP</strong> Succeed” with the hostname<br />
afterwards. This indicates that DDNS was set up properly. You can now access the camera using the<br />
hostname URL listed. In our case, this is http://foscamusa1.no-ip.org:8910<br />
Note that you will always need to add the port number with a colon after the initial hostname to point to<br />
your specific camera.<br />
support@foscam.us Page | 36 1-800-930-0949
6.9 – Mail Service Settings<br />
If you would like to receive e-mail notifications when motion is detected, you can set up Mail Service<br />
Settings and configure it to your e-mail address.<br />
To get started, make sure that the e-mail provider you are using supports SMTP. As seen above, you can<br />
send e-mails to up to 4 e-mail addresses. The SMTP port is usually set at 25 if there is no Transport<br />
Layer Security. Some SMTP servers have their own ports, such as 587 or 465. If using G-mail, set the<br />
Transport Layer Security to either TLS (use port 465) or STARTTLS (use port 25 or 587). The port you<br />
use will depend on the type of Transport Layer Security chosen. You can see an example of the G-mail<br />
settings we use above.<br />
Report Internet <strong>IP</strong> by Mail is a very useful tool to keep enabled; this feature will send you an e-mail<br />
when your external <strong>IP</strong> address changes. Usually if you have a dynamic <strong>IP</strong> address, this feature will let<br />
you know when the <strong>IP</strong> address has changed so you can connect to the camera<br />
Keep in mind that if you are only sending e-mails to one e-mail address, you can use the same e-mail for<br />
the sender and receiver, as seen above. Also to ensure you are receiving e-mails when there is motion<br />
detection, make sure “Send Mail on Alarm” is checked in the Alarm Service Settings page.<br />
Note: When setting up e-mail settings, push Submit first, and then push Test if you would like to test the<br />
e-mail settings. Test will not work unless the settings are submitted to the camera first.<br />
support@foscam.us Page | 37 1-800-930-0949
6.10 – MSN Settings<br />
This feature allows you to chat to your camera to find out the current <strong>IP</strong> address it is running at. To do<br />
this, enter the MSN Settings page in the camera as seen below:<br />
The first two fields are the username and password you will give to the camera. The camera will be<br />
logged on at all times to this specific username on MSN Messenger. Because of this, it is recommended<br />
to create a new username specifically for the camera.<br />
The MSN Friends List allows contact between the camera and yourself or any other accounts. Input as<br />
many MSN contacts here as needed. Any contacts listed here will be able to chat to the camera and ask<br />
for the camera’s URL, so take note of this.<br />
Once the username, password, and contacts are listed, push Submit.<br />
Next, you can open MSN Messenger on your computer, and log into your account. In this example, we<br />
would be logging into “example2@foscam.us.”<br />
Once logged in, the username the camera is logged in with will appear in the friends or contacts list. In<br />
our example, it would be the username associated with “example1@foscam.us.” You can then open a<br />
chat with the camera’s username, and type “url”<br />
Once you send this chat, the camera will send back the URL of the camera to you.<br />
support@foscam.us Page | 38 1-800-930-0949
You can see in the above screenshot that the camera (with the username “Raheel N” has sent back the<br />
URL of the camera after we asked for the URL, by typing “url” and sending the chat.<br />
The benefit of this is if you somehow lose the <strong>IP</strong> address of the camera and you are not near the camera<br />
location, you can always sign in to MSN Messenger and retrieve the <strong>IP</strong> address this way.<br />
Also note that if you have e-mail notifications enabled, you can check the box that states “Report Internet<br />
<strong>IP</strong> Address by Mail,” which will allow the <strong>IP</strong> address to be e-mailed to you every time the camera boots up<br />
or changes <strong>IP</strong> addresses.<br />
support@foscam.us Page | 39 1-800-930-0949
6.11 – FTP Service Settings<br />
This feature allows for FTP services to work with the Foscam camera. Using the FTP feature allows<br />
images to be uploaded to an FTP whenever motion is detected.<br />
You can enter your FTP server details in the above settings page, enter your FTP server, port, and<br />
upload folder. We recommend using your own FTP or a third party FTP service like www.cameraftp.com<br />
which we are using in the above screenshot.<br />
For the FTP Upload Folder, make sure you create this folder yourself, as the camera is not able to create<br />
folders on the FTP. Also make sure the folder can be erased.<br />
FTP Modes supported are PASV and POST modes, check with your FTP to see which mode it uses.<br />
The feature named Upload Image Now will upload images when this box is checked. If the box is not<br />
checked you will not receive any uploads.<br />
Enable Set Filename allows you to set a name for the uploaded image files, if you select this, the<br />
uploaded images will be named after the specific filename you set in the box below this.<br />
Filename allows you to fill in the name of the uploaded image to a specific name you would like to<br />
choose. This name is different from the alarm images that are uploaded; the alarm image names cannot<br />
be changed.<br />
The Upload Interval refers to the time between the current image and the next image that will be<br />
uploaded.<br />
Click Submit to save settings. Once you submit it you can click Test, which will show if the test succeeds.<br />
support@foscam.us Page | 40 1-800-930-0949
You may receive the following errors if the FTP information is not correct:<br />
Cannot connect to the server – Make sure the FTP server is correct<br />
Network Error – There may be a connection issue, try connecting again or try a little later.<br />
Server Error – This would also be an issue with FTP server connectivity, double check to see if all the<br />
FTP information is entered properly.<br />
Incorrect user or password – Make sure you are entering the correct credentials to log in.<br />
Cannot access the folder – Verify that the folder you specified is created correctly within the FTP.<br />
Error in PASV Mode – Check to see if your FTP server supports PASV.<br />
Error in PORT Mode – PASV mode should be selected if the camera is behind a NAT.<br />
Cannot upload files – Verify that your account is authorized on the FTP server.<br />
Also be sure to check your FTP parameters. The format of the image filename will usually be something<br />
similar to “00606E8C1930(user)_0_20100728114350_25.jpg”<br />
Make sure your FTP can support this type of file name.<br />
support@foscam.us Page | 41 1-800-930-0949
6.12 – Alarm Service Settings<br />
Alarm service settings allow you to enable motion detection. You can set motion detection on a certain<br />
schedule, and set up e-mail notification alerts here as well.<br />
The settings above are explained in detail below:<br />
Motion Detect Armed – This feature enables motion detection. If this is unchecked, motion detection is<br />
disabled and you will not receive any alerts.<br />
Motion Detect Sensitivity – This feature adjusts the sensitivity of the motion detection. The lower the<br />
number, the less sensitive the motion detection will be. If the number is higher, the motion detection will<br />
be very sensitive.<br />
Motion Compensation – This feature will help reduce any false alarms caused by quick light fluctuations<br />
or similar incidents.<br />
Send Mail on Alarm – If you would like to set up e-mail notifications, check this feature to have e-mails<br />
sent every time motion is detected. If this feature is not checked, you will not receive any e-mail alerts.<br />
Make sure your information on the Mail Service Settings page is filled in correctly.<br />
Upload Image on Alarm – This setting allows you to upload images using the FTP settings you have set<br />
in FTP Service Settings. You can set the upload interval here as well in seconds.<br />
support@foscam.us Page | 42 1-800-930-0949
Scheduler – The scheduler allows you to set certain time periods when you would like motion to be<br />
detected. You can use the scheduler to set times for all 7 days of the week, 24 hours a day. Each<br />
rectangular block in the schedule represents 15 minutes. You can use this system to specify when you<br />
would like to enable motion detection and keep it disabled.<br />
You have the option of not checking scheduler. If you uncheck scheduler, motion detection will be<br />
activated at all times, as long as motion detection is armed.<br />
Clicking the number (that corresponds to the hour) at the top of each column will set motion detection for<br />
that specific hour during the entire week. You can also clear the zones by clicking the number below the<br />
top number.<br />
For example, in the screenshot above you can see that during the entire week, at 3:00 AM – 4:00 AM,<br />
and from 5:00 AM – 6:00 AM, motion detection will be activated. At all other hours during the week,<br />
motion detection will be deactivated.<br />
You can click “Set All” at the top of the scheduler to set motion detection to all the zones easily. You can<br />
also use the button “Clear All” to clear the entire board of any activated zones.<br />
Be sure to click “Submit” when you are finished setting all motion detection settings.<br />
support@foscam.us Page | 43 1-800-930-0949
6.13 – PTZ Settings<br />
This page allows for changing any speeds of the camera’s pan/tilt abilities or default positioning of the<br />
camera.<br />
Disable Preset – This option will allow you to disable presets on the camera. If you would like to use<br />
presets, uncheck this box. If unchecked, the second feature “Go Center on Boot” will change to “Go to<br />
preset on boot.” What this feature does is allows you to choose whether you would like the camera to<br />
point a certain way when it reboots or is powered on again.<br />
To have the camera point to a preset, make sure disable presets is unchecked. Set a preset to preset #1<br />
on the live video page. Once you have set the preset, come back to the PTZ Settings page and check<br />
“Go to preset on boot.” Remember, this option will only be available if “disable preset” is unchecked.<br />
Go Center on Boot – This option makes the camera pan and tilt automatically once it is rebooted or<br />
restarted. Uncheck this box if you would like the camera to remain stationary when it is rebooting.<br />
PT Speed – This option allows you to control how fast or slow the pan and tilt speed is of the camera. A<br />
lower value here makes the camera faster. A higher value makes the camera move slower.<br />
Patrol speeds – For patrol speeds, the same concept applies. A lower value here will make the patrol<br />
speed faster, while a higher value will make the patrol speed slower.<br />
Patrol rounds – These settings allow you to control how many rounds the camera will pan or tilt on a<br />
horizontal or vertical cruise. If this value is set to 1, the camera will tilt or pan from the current position<br />
once to the right/top, then it will tilt or pan left/down, and then come back to the center.<br />
Remember to push Submit to save these settings; the camera may have to reboot depending on which<br />
settings are changed.<br />
support@foscam.us Page | 44 1-800-930-0949
6.14 – Upgrade Device Firmware<br />
This page allows for updating the camera’s firmware or WebUI. If you need to upgrade or reflash your<br />
firmware or WebUI, you can do so using this page. If you aren’t able to upgrade firmware or WebUI<br />
through the camera this way, you can always use the <strong>IP</strong> Camera Tool to do this as well.<br />
You can download the latest firmware for your camera from www.foscam.us/firmware. You can also send<br />
us an e-mail at sales@foscam.us or support@foscam.us if you aren’t able to identify your firmware<br />
version or if you aren’t able to locate an updated firmware.<br />
In the above example, we are updating the firmware to 11.37.2.46 for our camera. Push “Submit” to start<br />
the upgrade process, which may take a few minutes. The camera will reboot and restart with the newer<br />
firmware installed.<br />
Keep in mind that you can only update the WebUI after updating the firmware. Upgrade the firmware first,<br />
then upgrade the WebUI right afterwards.<br />
Note: Before you upgrade, be aware of updating the correct version of firmware with Foscam cameras.<br />
There are usually two different firmware versions for each Foscam camera. This is based on actual<br />
camera hardware and not software. The difference is that, if loading a newer camera firmware into your<br />
camera with older firmware, you have to be sure that the first four numbers are exactly the same before<br />
you upgrade. If they are not, you will most likely experience some issues (losing wireless capability) as<br />
certain firmware versions are made for certain camera hardware.<br />
For example if your current firmware starts with 11.22, you must make sure that the firmware you are<br />
upgrading to also starts in 11.22, the way you can see which firmware is newest is by looking at the last<br />
two digits, that should be greater than your current firmware.<br />
For the example above, we were upgrading from our old firmware, 11.37.2.44, to 11.37.2.46. This is the<br />
correct firmware version to update in this example.<br />
support@foscam.us Page | 45 1-800-930-0949
6.15 – Backup & Restore Settings<br />
This page allows you save your current settings in case you are going to hard reset the camera and lose<br />
your current settings to factory settings. If you back up your settings this way, you can hard reset the<br />
camera, come back to this page, and restore the settings so that you will have the camera back just as it<br />
was.<br />
If you click the “Submit” button next to “Backup.” The camera will create a backup file that your computer<br />
will automatically download, called “params.bin.”<br />
This is the backup file. If you would like to restore the camera back to these parameters, click “Choose<br />
File” next to the Restore field, and browse to the location of the file. Choose it, and then click “Submit.”<br />
The camera will submit the parameter information and will restore your settings from the file.<br />
6.16 – Restore Factory Settings<br />
Clicking on “Restore Factory Settings” in the administrative panel will prompt you if you would like to reset<br />
the camera back to default factory settings. This is similar to hard resetting the camera where the camera<br />
will lose all of its current information. Click “OK” to restore the camera back to default factory settings.<br />
6.17 – Reboot Device<br />
Clicking on “Reboot Device” in the administrative panel will prompt you if you would like to reboot the<br />
camera. Once you click this, you will be prompted to confirm rebooting the camera. Click “OK” to reboot<br />
the camera, which will take a minute or so. The camera should come back online after this period of time.<br />
support@foscam.us Page | 46 1-800-930-0949
6.18 – Log<br />
Clicking the “Log” button in the administrative panel takes you to the log page, which shows information<br />
such as users who are logging into the camera’s live video screen.<br />
The log can only be cleared by rebooting the camera. You can click the “Refresh” button to refresh the log<br />
in case there is any new information available.<br />
support@foscam.us Page | 47 1-800-930-0949
7. Video Setup Guides<br />
7.1 – For Windows<br />
We currently have video guides on our website for Windows users, you can use these setup guides for<br />
setting up the camera from scratch on Windows. These guides were recorded using Windows 7.<br />
You can access our guides by following the link: www.foscam.us/mjpeg-setup-videos<br />
You can also access these videos by using the QR code listed here:<br />
7.2 – For Mac<br />
We currently have video guides on our website for Mac users as well, you can use these setup guides for<br />
setting up the camera from scratch on Windows. These guides were recorded using Mac OSX Lion.<br />
You can access our guides by following the link: www.foscam.us/mjpeg-setup-videos-mac<br />
You can also access these videos by using the QR code listed here:<br />
support@foscam.us Page | 48 1-800-930-0949
8. Frequently Asked Questions<br />
For a list of frequently asked questions, you can visit our website at www.foscam.us/faq<br />
You can also use this QR code to access our FAQ page directly:<br />
9. Technical Support<br />
We hope your Foscam <strong>IP</strong> Camera is enjoyable and easy to set up and use. You may have some<br />
additional questions or concerns that were not expressed in this user manual. You can always contact us<br />
for any reason at sales@foscam.us or support@foscam.us if you need assistance.<br />
Please do not hesitate to contact us by phone, at our toll-free number: 1-800-930-0949<br />
We try to provide the best aftersales and technical support assistance available for our products. Give us<br />
a call and we’ll be more than happy to help!<br />
Foscam Digital Technologies LLC<br />
14027 Memorial Dr. #132, Houston, TX 77079<br />
Telephone: 1-800-930-0949<br />
Sales: sales@foscam.us Support: support@foscam.us<br />
support@foscam.us Page | 49 1-800-930-0949