User Manual Version 1 - Dish TV Technologies
User Manual Version 1 - Dish TV Technologies
User Manual Version 1 - Dish TV Technologies

You also want an ePaper? Increase the reach of your titles
YUMPU automatically turns print PDFs into web optimized ePapers that Google loves.
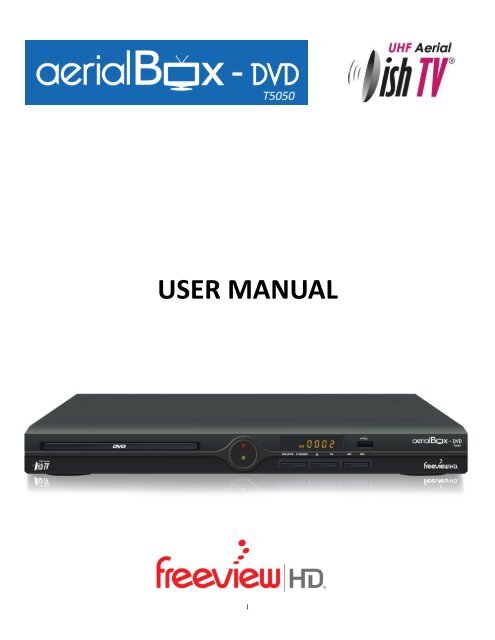
USER MANUAL<br />
1
CONTENTS<br />
Important Safety Instructions<br />
Precautions<br />
Identify Your Set Top Box<br />
Remote Control<br />
1. Initial Installation<br />
2. Main Menu<br />
2.1 Installation<br />
2.1.1 Channel Filter<br />
2.1.2 Auto search<br />
2.1.3 <strong>Manual</strong> Search<br />
2.2 Channel<br />
2.2.1 Channel manager<br />
2.2.2 Favorite list<br />
2.3 Preference<br />
2.4 Setting<br />
2.4.1Timers<br />
2.4.2 Parental Lock<br />
2.4.3 Date time<br />
2.4.4 Auto search in standby<br />
2.4.5 Factory reset<br />
2.4.6 Upgrade<br />
2.4.7 <strong>Version</strong><br />
2.4.8 Auto standby<br />
2.5 AV<br />
2.6 Game<br />
3. Media<br />
3.1 Movie<br />
3.2 ISO<br />
3.3 Music<br />
3.4 Photo<br />
3.5 Record Manager, Games, Disk Manager, Ebook<br />
4. Wi-Fi function<br />
4.1 Wireless connection<br />
4.2 Updated Media<br />
4.2.1 Network<br />
4.2.1.1 N32<br />
4.2.1.2 Photo<br />
4.2.1.3 Google Maps<br />
4.2.1.4 Weather<br />
4.2.2 Movie, ISO, Music, Game<br />
5. Convenient Functions<br />
5.1.Ways of selecting channels<br />
5.2 Program information<br />
5.3 EPG<br />
5.4 AUDIO<br />
5.5 SUBTITLE<br />
5.6 Teletext<br />
5.7 Recording<br />
DVD Player<br />
Troubleshooting<br />
2
Important Safety Instructions<br />
1. Read, follow and keep these instructions.<br />
2. Do not use this unit near water.<br />
3. Clean only with a damp cloth. Please unplug power prior to cleaning.<br />
4. Do not block any of the ventilation openings. Install in accordance with the manufacturer’s instructions.<br />
5. Do not install near any heat sources such as radiators, heat registers, stoves, or other apparatus (including<br />
amplifiers) that produce heat.<br />
6. Protect the power cord from being walked on or pinched particularly at the plug, receptacles and the point<br />
where they exit from the unit.<br />
7. Only use attachments/accessories included within this package.<br />
8. Unplug this unit during lighting storms or when unused for long periods of time.<br />
9. Refer all servicing to qualified service personnel. Servicing is required when the unit has been damaged in any<br />
way, such as when the power supply cord or plug is damaged, liquid has been spilled or objects have fallen<br />
into the unit, the unit has been exposed to rain or moisture, does not operate normally, or has been dropped.<br />
WARNING: To reduce the risk of fire or electric shock, do not expose this unit to rain or moisture.<br />
3
Precautions<br />
Please read these precautions before operating this unit.<br />
1. Power cord protection<br />
To avoid any malfunctions of the unit, and to protect against electric shock, fire or personal injury, please observe<br />
the following.<br />
Hold the plug firmly when connecting or disconnecting the AC power cord.<br />
Keep the AC power cord away from heating appliances.<br />
Never put any heavy object on the AC power cord.<br />
Do not attempt to repair the AC power cord in any way.<br />
Never make or change connections with the power switched on.<br />
2. Placement<br />
Avoid placing the unit in areas of:<br />
Direct sunlight or heating radiators<br />
High temperature (over 35℃) or high humidity (over 90%)<br />
Dust as the internal parts may be seriously damaged.<br />
3. Non-use periods<br />
When the unit is not being used, turn it off. When non used for a long period of time, the unit should be unplugged<br />
from the power source.<br />
4. No fingers or other objects inside<br />
<br />
<br />
<br />
Touching internal parts of this unit is dangerous, and may cause serious damage to the unit.<br />
Do not attempt to disassemble the unit.<br />
Do not put any foreign object inside this unit.<br />
5. Keep away from water<br />
Keep the unit away from flower vases, tubs, sinks, etc. if liquids are spilled into the unit, serious damage could<br />
occur.<br />
If the unit has been exposed to moisture do not operate the unit.<br />
4
IDENTIFY YOUR SET TOP BOX<br />
Front Panel:<br />
Rear Panel:<br />
5
Remote control :<br />
1. POWER: Turn on / off<br />
2.Number Key: <br />
3. DVB: Enter into DVB mode<br />
4. REC: Record <strong>TV</strong> program<br />
5. SUBTITLE: Subtitle<br />
6. Direction key:<br />
7. MENU: Enter main menu<br />
8. V+/V-: Volume Up/ Down<br />
9. MUTE: Turn Sound Off/ On<br />
10. Colour keys:<br />
Red key/ VIDEO: Video output selection<br />
Green key/ SETUP: Enter into setup menu<br />
Yellow key/ RANDOM: Random playback mode<br />
Blue key/ TITLE: DVD title menu playback<br />
11. Stop: Stop recording or playback of programs<br />
12. Play/ Pause/ Timeshift: Pause/ Play program or media file or to active<br />
TIMESHIFT Function<br />
13. FR: Rewind<br />
14. FF: Fast forward<br />
15. TTX : DVB teletext<br />
16. DEVICE: Press to view connected device list<br />
17. ZOOM: Set zoom mode in full-screen display<br />
18. ANGLE: Camera angle selection<br />
19. OPEN/ CLOSE: Open/ Close DVD tray<br />
20. DVD: Enter into DVD mode<br />
21. EPG: Electronic Program Guide<br />
22. AUDIO: Select available Audio mode<br />
23. <strong>TV</strong>/RADIO: Switch between <strong>TV</strong> and Radio mode<br />
24. OK: Confirm selection in menus<br />
25. EXIT: Exit: Go back directly to normal viewing mode<br />
26. INFO: Display program information<br />
27. CH+/CH-: Channel Up/Down<br />
28. MEDIA: Access menu for Media Playback<br />
29. Slow: Slow motion playback<br />
30. SETUP: Enter into setup menu<br />
31. PREW: Skip to the previous chapter or track<br />
32. NEXT: Skip to the next chapter or track<br />
33. GOTO: GOTO specific time in recorded program<br />
34. FAV/A.B: Show favourites list/A-B segment repeat mode<br />
35. PBC: Play back control<br />
36. RANDOM: Random playback mode<br />
6
CONNECTION TO ANTENNA AND <strong>TV</strong><br />
1. Connect aerial cable to the ANT IN interface of your receiver.<br />
2. Connect the receiver to <strong>TV</strong> with AV cable or HDMI cable.<br />
1. Initial Installing<br />
Following the On-Screen instructions to install channels.<br />
1. Plug in the receiver.<br />
2. Turn on your <strong>TV</strong> and select AV IN or the correct HDMI input.<br />
3. Select the correct data according to users setup by press and .<br />
4. Press “OK” to select “start search”, the receiver will then start to search channels.<br />
Note: After searching has finished, the receiver will display a channel at random.<br />
7
2. Main Menu<br />
Main Menu for operating functions.<br />
2.1 Installation<br />
Menu>Installation<br />
There are two ways to find channels: Auto search and manual search, before searching for channels, the user can<br />
change the other options on screen which are: Channel filter, Country and LCN.<br />
Press on remote control, press and enter the password 0000 to enter into “Installation” window.<br />
2.1.1 Channel Filter<br />
Menu>Installation>Channel Filter<br />
Here you have the option to filter out channels.<br />
8
2.1.2 Country<br />
Menu>Installation>Country<br />
Change the country option to match the country the user is located.<br />
2.1.3 LCN<br />
Menu>Installation>LCN(or Logical Channel Numbering)<br />
This option turned on or off the logical channel numbering according to the user’s preference.<br />
2.1.4. Auto search<br />
Menu>Installation>Auto Search<br />
1. Press to select “auto search”, a window will appear saying “ This will re-install channels. Select 'yes' to<br />
delete all channels”. Selecting “yes” will also begin the search.<br />
2. The unit will display a channel at random once the search has finished, press to go back to the normal<br />
<strong>TV</strong> viewing.<br />
2.1.5 <strong>Manual</strong> search<br />
Menu>Installation><strong>Manual</strong> Search<br />
Use this option to scan individual frequencies.<br />
1. Set the corresponding frequency and bandwidth.<br />
2. Select “start search” and press to start searching.<br />
9
2.2 Channel<br />
Channel>Manager><br />
2.2.1 Channel Manager<br />
Menu>Channel>Channel Manager<br />
Four functions are available for setting channels: Lock, Delete, Skip, Rename<br />
* LOCK: Press to select channel, press “red” key to set Lock status. (Default password is 0000 ).<br />
<strong>User</strong> will need to enter the correct password before watching locked channels.<br />
* DELETE: Press the key to set delete status, press it again to cancel selection. (Default password<br />
is 0000 ), a new window ”delete selected channels” would be displayed when user exits the current window,<br />
choose “YES” to delete it.<br />
* SKIP: Press the key to set skip status, press it again to cancel selection.<br />
* Rename : Press the key to enter editing window. You will have the option to rename the favorite list<br />
or change the name of a channel. A window will be displayed when the use presses the key, press<br />
to confirm and exit.<br />
10
2.2.2 Favorite list<br />
Menu>Channel>Favorite list<br />
Press the key to set channels into the first<br />
favourite list.<br />
Press the key to set channels into the<br />
second favourite list.<br />
Press the key to set channels into the<br />
third favourite list.<br />
Press the key to set channels into the<br />
forth favourite list.<br />
Note : After the user has finished setting favourite<br />
channels, user can press hot-key on remote<br />
control to find them quickly.<br />
2.3 Preference<br />
Menu>Preference><br />
OSD Language: Set on-screen language that will be displayed<br />
OSD Timeout: Set the length of time banners are displayed (Range between 1-6 Seconds)<br />
Time On OSD: Option to turn on or off a permanent clock on screen<br />
OSD Transparency: Select the transparency of the on-screen display (Range between 0%-60%)<br />
1 st preferred subtitle: Set the subtitle language the user would prefer to see<br />
2 nd preferred subtitle: Set the backup subtitle language in case a program does not have the 1 st preferred<br />
language<br />
1 st preferred Audio: Set the audio language user prefers to hear<br />
2 nd preferred Audio: Set the backup audio language in case program does not have the 1 st audio language.<br />
PVR Config. : Set recording data, like file format, file size, file storage position and time shift.<br />
11
2.4 Setting<br />
Menu>Setting><br />
2.4.1 Timers<br />
Menu>Setting>Timers<br />
This option is used for multi-timer recordings and setting a channel to be displayed at certain time and timer<br />
standby etc.<br />
Recording with this unit will require an external USB hard drive to be connected.<br />
Press the or key to enter the timer edit window (Menu>Setting>Timers>Timer Edit>).<br />
Date: Select the date you would like the timer to begin<br />
Program name: press to select the channel you like to recorded or displayed<br />
Start time: Select the time you would like the timer to start<br />
End time: This will automatically change according to the duration selected<br />
Duration: Select how long the timer duration will be<br />
Mode: Select how often you would like this recording to occur. The options are (once, daily, weekly or monthly)<br />
12
Type: This will give you the choice to select one of the following options:<br />
ON: When this is chosen the receiver will turn on at the time and date selected<br />
Recorder: When this is chosen the unit will start recording at the time and date selected<br />
Channel: When this is chosen the unit will change to the channel time and date selected<br />
Standby: When this is chosen the unit will turn itself on to standby at the time and date selected<br />
Subtitle Recorder: When this option is set to ON the subtitles will be included in the recording as long as the<br />
recorded has subtitle support. Press the key on the remote control to view the record subtitles during<br />
playback.<br />
Teletext Record: When this option is set to ON the Teletext will be included in the recording<br />
Note: Make sure the key is pressed to save the<br />
data or press the key to cancel setting<br />
the timer.<br />
The user can set the unit to standby mode and the unit<br />
will automatically turn on and start recording at the time<br />
and dates set.<br />
2.4.2 Parental Lock<br />
Menu>Setting>Parental Lock<br />
When entering into this option you will be prompted for the password. The default password is 0000.<br />
Parental Rating: The default is UNDEF (undefined); this means there is no parental lock.<br />
If there is a program with the rating selected (G, PG or AO) you will have to enter the password before the program<br />
will be able to be viewed<br />
Change Pin code: Change the password.<br />
13
2.4.3 Date Time<br />
Menu>Setting>Date Time<br />
Options under this menu include: Date timer mode, date, time, time zone and day light saving.<br />
In the Auto mode, the only options accessible are [Time Zone] and [ Day light Saving].<br />
In the <strong>Manual</strong> mode, the only options accessible are [Date] and [Time].<br />
2.4.4 Factory reset<br />
Menu>Setting>Factory Reset<br />
This will delete all settings and restore the unit back to the factory default parameter<br />
When entering this option you will be prompted for the password. The default password is 0000<br />
The user will then have to start to initial set up<br />
14
2.4.5 Upgrade<br />
Menu>Setting>Upgrade>USB upgrade<br />
Upgrade software by USB.<br />
Insert a USB device with new firmware/software installed.<br />
Select software file on the USB device to upgrade<br />
2.4.6 <strong>Version</strong><br />
Menu>Setting><strong>Version</strong><br />
This will show the information of the units<br />
software and hardware versions. These details<br />
are important for the user to check any new<br />
updates about software.<br />
2.4.7 Auto Standby<br />
Menu>Setting>Auto Standby<br />
This will give you the option to have the unit turn to standby automatically after the selected time. The options<br />
include 1hour, 2hours, or 3hour. If the selection is set to “off” the unit will not turn on to standby unless the<br />
button is pressed.<br />
15
2.5 AV<br />
Menu>AV><br />
In this menu, you can set the desired audio and video setting of your unit<br />
Contrast:: select the desired contrast.<br />
Brightness: select the desired brightness.<br />
Saturation: select the desired saturation.<br />
HUE: select the desired hue option.<br />
SPDIF: select the desired SPDIF option.<br />
Aspect ratio: set screen pic aspect ratio:<br />
• 16:9 PB: To view 4:3 programs on a 16:9 television<br />
• 4:3 LB: 4:3 Letterbox for use with 4:3 television<br />
• 4:3 PS: 4:3 Pan and Scan for use with 4:3 television<br />
• 16:9: For use with 16:9 television<br />
Video Resolution: In this section, you can set the correct video output resolution to suit the television. The<br />
options are of available: 576i, 576p, 720p,1080i,1080p.<br />
HDMI Color Space: select the desired HDMI Color Space option.<br />
HDMI Color Depth: select the desired HDMI Color Depth option.<br />
16
2.6 Game<br />
Menu>Game><br />
There are five games installed in the unit: Box Man, Tetris, Hit Rat, Go Bang, Sudoku.<br />
3. MEDIA<br />
Eight items are included in the media option: Movie,<br />
ISO, Music, Photo, Native32/NES Games, Ebook,<br />
Record manager and Disk Manager.<br />
Note: This option requires an external USB hard<br />
drive to be connected.<br />
When navigating through the media menu please<br />
remember these commands:<br />
Press the key to go back to the previous window.<br />
Press the key to go back to media main menu<br />
Press the key to go to live <strong>TV</strong><br />
17
3.1 Movie<br />
Select the hard drive you would like to access and browse through movies on the hard drive and select the movie.<br />
3.2 ISO<br />
This is called the "virtual DVD player" and can support .iso files.<br />
Copy the movie on the USB device from a DVD<br />
Insert the USB drive into the USB slot of the unit.<br />
Navigate to the inserted hard drive<br />
Press key to enter the hard drive’s contents.<br />
Choose the movie you would like to watch and press to play.<br />
18
3.3 Music<br />
Press to enter the hard driver’s music contents and press to play the selected track.<br />
Press to stop playing.<br />
3.4 Photo<br />
In full picture view, press < up/down/right/left > to turn over picture.<br />
Press the or keys to view the next or previous picture.<br />
Press the key to stop viewing the pictures and go back to the previous window.<br />
3.5 Record Manager, Games, Disk Manager, Ebook<br />
Press to play the selected file<br />
Press the key to delete the selected file<br />
Press the key to rename the selected file<br />
Press the key to move/ copy the selected file<br />
19
4. WI-FI Function<br />
4.1 Wireless connection<br />
Connect a USB wireless adapter to the USB interface of your unit. The unit will automatically add an "Ethernet<br />
Config" option to the settings.<br />
Menu>Setting>Ethernet Config>USB WiFi Config><br />
All available networks will be recognized and listed automatically.<br />
Press the key to re-search for WiFi signal<br />
The ”manual add” function can ba available by pressing the key separately.<br />
Select the WiFi the user wishes to connect to by pressing the key, this will bring up a “USB WIFI Config”<br />
window, enter the correct password and select “Link”. A message will appear saying “Network connection success”<br />
20
4.2 Updated Media<br />
After the network connection is successful, a "Network" item will be added in the Media function.<br />
4.2.1 Network<br />
Once entering into the interface four functions will be available. They are N32, Photo, Google Map and Weather.<br />
4..2.1.1 N32<br />
More games functions are supported after network connection has been successful. There will be two options after<br />
entering into N32, they are Download and Manager. (Note: The manager option is to be accessed after a game<br />
has been downloaded).<br />
21
4..2.1.2 Photo<br />
The user can choose which folder to search for photos by pressing a coloured key:<br />
Yupoo<br />
Picasa<br />
Flickr<br />
The user can browse through the thumbnails using the directional keys and can view the image in full screen by<br />
pressing on the selected image<br />
There will be 5 functions avilable, they are:<br />
Description: key<br />
Slider Show on: key<br />
Rotate: key<br />
Effect on: key<br />
Save: key<br />
Return: key<br />
22
4.2.1.3 Google Maps<br />
There are four different parameters to search google maps: State, country, Province and City.<br />
The user can also input a key word of a place in the “search box” to search the map information directly, and<br />
then the related map information will be showed on the right of the screen.<br />
Cursor move, Zoom functions with the indicated color keys at the bottom of the screen.<br />
Press the Blue key to save the current information.<br />
4.2.1.4 Weather<br />
With the "Weather" item, user can also check the daily weather information of the places where they preferred<br />
based on the selection in the "State", "Country", "Province" and "City" options, it will show the weather details<br />
about the next five days as well. To press the key to save the current information.<br />
4.2.2 Movie, ISO, Music, Game<br />
Media> Movie> Network> Storage> /smbao<br />
Media> ISO> Network Storage> /smbao<br />
Media> Music> Network Storage> /smbao<br />
Media> Game> Network Storage> smbao<br />
After the wireless connection has been successful, the user can browse the Network for movies, music and<br />
games.<br />
23
Press the key on the remote control to enter into “/smbao” window.<br />
This window will automatically display all available network/devices.<br />
After selecting the desired network/device a “Login” interface will be displayed, the user will have the option to<br />
input the correct account and password or login using a guest account.<br />
Navigate through the folder structure in the device and select the desired item by pressing the key on the<br />
remote control.<br />
5. Convenient Functions<br />
5.1 Ways of selecting channels<br />
Your <strong>Dish</strong><strong>TV</strong> receiver provides four ways to select channels.<br />
Press key to change to the next or previous channel.<br />
Press to select channel in program list.<br />
Press to select the channel from the Electronic Program Guide.<br />
Press to change to the corresponding channel.<br />
5.2 Program information<br />
To view the information of current program, press on remote control press again view detailed information,<br />
press to exit.<br />
24
5.3 EPG<br />
Press key on remote control.<br />
Press key to view next weeks info.<br />
Press key to move to previous day’s EPG info.<br />
Press key to move to next day’s EPG info.<br />
5.4 AUDIO<br />
Audio language selection.<br />
Press key on remote control to enter Multiaudio page.<br />
Press to switch among stereo, left, right.<br />
Press to confirm the selection and return to live <strong>TV</strong>.<br />
5.5 SUBTITLES (if broadcast)<br />
Display subtitles on screen.<br />
Press key on the remote control to enter subtitle page.<br />
Press to exit.<br />
5.6 Teletext (if broadcast)<br />
Press key on the remote control to enter Teletext page.<br />
Press to exit from Teletext page.<br />
25
5.7 Instant Recording<br />
Recording with this unit will require an external USB hard drive to be connected<br />
Set to record live <strong>TV</strong> program.<br />
Insert a USB device into USB socket, select a channel you would like to record and press the key on<br />
remote control to start recording the program that is playing.<br />
Press again to display the duration window, user can set duration time for the recording.<br />
Note: The maximum recording duration depends on the size(MB) of the USB device.<br />
To stop the recording press and select <br />
During recording, press on the remote control to view the recording information<br />
To review or edit recorded files, please go to “media” editing.<br />
26
DVD player<br />
Another unique feature of the <strong>Dish</strong><strong>TV</strong> T5050 is the DVD player.<br />
To access the DVD player press the DVD button on the remote control to enter DVD mode.<br />
The DVD player supports:<br />
Full 1080P up scaling so you always have the highest possible quality picture allowing your DVDs to be viewed<br />
in a higher resolution without the loss of quality.<br />
5.1 digital surround sound is available by connecting your digital decoder to compatible surround sound<br />
decoder via the HDMI Coaxial or Optical connectors.<br />
USB movie, music and picture playback<br />
DVD and CD media types: DVD, DVD+R, DVD-RW, DVD-R, CD, CD-R, CD-RW<br />
1.1 Playing DVDs, CDs and USB storage devices<br />
To play a DVD or VCD press the Open/Close button on the remote to open the DVD tray.<br />
Insert a disk then press the Open/Close button again to close the DVD tray.<br />
The Disk should automatically start playing.<br />
To play a USB storage device insert the device into the USB port then press the media button. A Menu will be<br />
displayed with the USB storage devices file structure.<br />
The following functions are available to access your disks features:<br />
Play: Play the currently inserted disk or selected menu option.<br />
Pause: Pause the current disk.<br />
Stop: Stop the current disk.<br />
FF: Fast forward the current track.<br />
REW: Fast rewind the current track.<br />
Next: Step forward to the next chapter or track.<br />
Prev: Step backwards to the previous chapter or track.<br />
The arrow keys can be used to navigate between the disks menu options.<br />
Angle mark: Displays a mark on the screen when multiple angle are available on selected DVDs.<br />
Subtitles: Turn captions on where available.<br />
SETUP: Enter into setup menu.<br />
27
1.2 DVD Menu Options<br />
To enhance your DVD viewing experience the UNIT has separate settings for the DVD player. To change the<br />
settings enter DVD mode (if you are in <strong>TV</strong> mode, press the DVD button on the remote) then press the setup button<br />
to enter the menu. The following is a list of menu options and their available functions.<br />
When you first enter the menu you will be presented with six options. Use the arrow keys on the remote control to<br />
navigate through the menu options:<br />
General<br />
<strong>TV</strong> SYSTEM: Set the type of input your <strong>TV</strong> requires. NTSC, PAL60, PAL or Auto.<br />
AUTO PLAY: On/ Off. Set the DVD to play automatically.<br />
VIDEO: Setup the output from the player. There are different types of output: CVBS, INTERLACE-YUV, and<br />
P-SCAN YpYbPr.<br />
RESOLUTION: Setup the output resolution: 480p/ 576p/ 720p/ 1080i/ 1080p.<br />
<strong>TV</strong> TYPE: Set the screen output type: 4:3PS/ 4:3LB/ 16:9. Some <strong>TV</strong>s are unable to display wide screen<br />
pictures without cutting the ends off. To prevent this, change this setting to PS or LB. If your <strong>TV</strong> supports a 16:9<br />
aspect ratio use the 16:9 setting.<br />
PASSWORD mode: Set a password for rated content. The default code is “1234”.<br />
RATING: Set a rating level that can be viewed without a password. There are 8 levels: from Kid Safe to Adults<br />
only.<br />
DEFAULT: Restore all options back to the defaults factory settings.<br />
Language Setup<br />
OSD language: Change the On Screen Display language.<br />
Audio: Select default audio language<br />
Subtitle: Select default subtitle language.<br />
Menu LANG: Set menu language<br />
Audio Setup<br />
AUDIO OUT: Setup the audio output, select PCM, RAW or off.<br />
KEY: Set up the key of audio output.<br />
28
Video Setup<br />
Brightness: Set the brightness level.<br />
Contrast: Set the contrast level<br />
Hue: Set the hue level<br />
Saturation: Set the saturation level<br />
Sharpness: Set the sharpness level.<br />
DOWNMIX Setup<br />
Down Mix: Switch the audio output between: LT/RT(Mono), Stereo and VSS (Virtual surround sound).<br />
Stereo Setup<br />
OP MODE: Setup it to Line out or RE REMOD<br />
DYNAMIC RANGE: Set the DYNAMIC range from OFF to FULL.<br />
DUAL MONO: Setup the output mode—Stereo/ Mono L/ Mono R/ Mix Mono.<br />
Technical Specifications<br />
Power Source: AC 90-240Volts, 50/60Hz<br />
Power Consumption: 7W<br />
Outputs: HDMI, YpbPr, AV, COAXIAL, ANTENNA, LOOP OUT<br />
29
Troubleshooting<br />
Fault<br />
solution<br />
NO Power<br />
The display on front panel does<br />
not light up<br />
No picture<br />
No signal or bad signal<br />
message appears<br />
Remote control does operate<br />
<strong>TV</strong> is showing a black and<br />
white picture<br />
<strong>TV</strong> shows a green picture<br />
Ensure the power has been turned on at the wall socket and the unit.<br />
Check that the power cord is plugged in and that the wall outlet is switched on.<br />
● Make sure that the product is in Operation Mode (Not in standby)<br />
● Make sure that the AV Cable or HDMI cable is correctly connected to the <strong>TV</strong> input<br />
● Make sure the <strong>TV</strong> is set to the correct input<br />
● Make sure the UHF antenna cable is correctly connected to the “ANT IN”<br />
● Check all antenna connections, or adjust the antenna position<br />
● Factory default unit and try to re-scan the channels<br />
● Check that there is a clear “line of sight” from the remote to the sensor on the front<br />
panel<br />
● Replace the batteries in the remote control and ensure the batteries are inserted<br />
correctly<br />
Refer to your <strong>TV</strong>s manual and change the signal type from NTSC to PAL.<br />
Press the <strong>TV</strong>-Mode button at the remote<br />
● Make sure there is nothing obstructing the UHF antenna<br />
● This could be due to bad interference in your area and you may need to install a filter to<br />
solve the issue<br />
Poor Picture & sound quality<br />
● Make sure you are using RGB coax to an outdoor antenna and connections are good<br />
● This signal strength in your area may be too low to receive a good picture, you may<br />
need to have a technician check your aerial system<br />
● Check the volume level of the <strong>TV</strong><br />
No sound or poor sound ● Check the mute status of the <strong>TV</strong> and the unit<br />
● Press the audio button to change the Sound Track type<br />
Because the unit only has 1 tuner this means you can only look at 1 channel group at a<br />
time so while you are recording 1 channel you can only watch other channels in the same<br />
group. (More details below)<br />
When recording 1 channel Freeview/ HD Channel Groups<br />
cannot go to another channel Frequency 1 <strong>TV</strong> One, <strong>TV</strong>2, <strong>TV</strong> One Plus 1<br />
Frequency 2 <strong>TV</strong>3, Four, <strong>TV</strong>3 plus 1, C4<br />
Frequency 3 Prime, Maori, Choice <strong>TV</strong>, Trackside, Parliament, C<strong>TV</strong>8 and the other<br />
regional channels<br />
DVD not playing<br />
● Check whether the DVD disc is available or not<br />
● Check whether the DVD Player Lens is dirty or not, and have a good clean at intervals.<br />
DVD player is making noises<br />
while playing a DVD<br />
● Make sure the DVDs are not defective and keep in a good condition<br />
● Try to clean the disc with an available cleaner<br />
30
If the problem cannot be solved by going through the Trouble Shooting Guide<br />
please contact Our Customer Care Centre for additional help.<br />
Visit www.dishtv.co.nz or call 0800 DISH<strong>TV</strong>.<br />
Warranty<br />
Please keep your receipt as proof of purchase. This product is warranted for any defect in<br />
materials or workmanship for one year after the original date of purchase. This product is for<br />
normal domestic use only. This warranty does not cover damage from misuse or neglect,<br />
accidental damage, vermin infestation, excessive voltages such as lightning or power surges or<br />
any alteration that affects the performance or reliability of the product. In the unlikely event that<br />
your product fails to work normally please contact your supplier and have your receipt of<br />
purchase on hand.<br />
This warranty is subject to the following provisions:<br />
● This warranty is only valid within New Zealand.<br />
● The product must be correctly connected and operated in accordance with the instruction contained<br />
in the manual.<br />
● This product must be used solely for domestic purposes.<br />
● The warranty does not cover accidental damage.<br />
● The warranty will be rendered invalid if the product is resold or has been damaged by unauthorised<br />
repair.<br />
● The manufacturer disclaims any liability for incidental or consequential damages.<br />
Please register your product to assist with warranty and product updates<br />
Please visit www.dishtv.co.nz and click on warranty & registration<br />
31