WLAN Planning in WinProp - AWE-Communications
WLAN Planning in WinProp - AWE-Communications
WLAN Planning in WinProp - AWE-Communications

You also want an ePaper? Increase the reach of your titles
YUMPU automatically turns print PDFs into web optimized ePapers that Google loves.
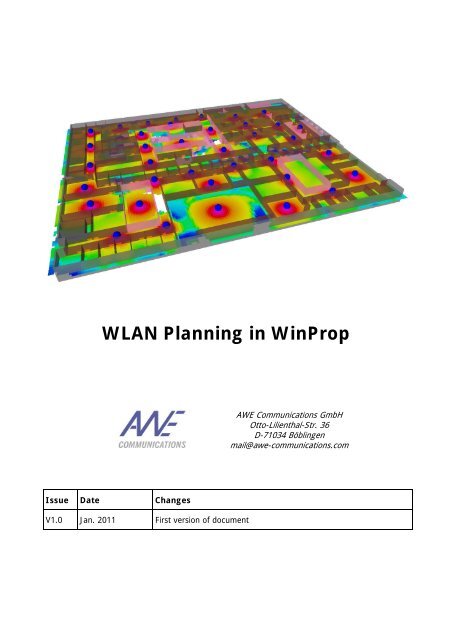
<strong>WLAN</strong> <strong>Plann<strong>in</strong>g</strong> <strong>in</strong> W<strong>in</strong>Prop<br />
Issue Date Changes<br />
V1.0 Jan. 2011 First version of document<br />
<strong>AWE</strong> <strong>Communications</strong> GmbH<br />
Otto-Lilienthal-Str. 36<br />
D-71034 Böbl<strong>in</strong>gen<br />
mail@awe-communications.com
<strong>WLAN</strong> <strong>Plann<strong>in</strong>g</strong> <strong>in</strong> W<strong>in</strong>Prop 1<br />
1 Introduction<br />
Wireless LANs have become popular <strong>in</strong> the home due to ease of <strong>in</strong>stallation, and the <strong>in</strong>creas<strong>in</strong>g<br />
popularity of laptop computers. Public bus<strong>in</strong>esses such as coffee shops and malls have begun to<br />
offer wireless access to their customers.<br />
The W<strong>in</strong>Prop software package <strong>in</strong>cludes a modul for the simulation of the 802.11 air <strong>in</strong>terface.<br />
Us<strong>in</strong>g this modul (called NET-L) the plann<strong>in</strong>g of <strong>WLAN</strong>s <strong>in</strong>side build<strong>in</strong>gs and <strong>in</strong> urban environments<br />
becomes possible.<br />
The 802.11 family <strong>in</strong>cludes over-the-air modulation techniques that use the same basic protocol.<br />
The most popular are those def<strong>in</strong>ed by the 802.11b and 802.11g protocols, which are<br />
amendments to the orig<strong>in</strong>al standard. But W<strong>in</strong>Prop supports all 802.11 protocols, such as:<br />
• 802.11a<br />
• 802.11b<br />
• 802.11g<br />
• 802.11n (with MIMO)<br />
The follow<strong>in</strong>g chapters give an <strong>in</strong>troduction <strong>in</strong> the usage of the W<strong>in</strong>Prop <strong>WLAN</strong> module on the<br />
basis of an <strong>in</strong>door example.<br />
© by <strong>AWE</strong> <strong>Communications</strong> GmbH January 2011
<strong>WLAN</strong> <strong>Plann<strong>in</strong>g</strong> <strong>in</strong> W<strong>in</strong>Prop 2<br />
2 Preparation of build<strong>in</strong>g vector database<br />
In the first step the vector database of the build<strong>in</strong>g is prepared for usage. There are several ways<br />
to generate the required <strong>in</strong>door vector build<strong>in</strong>g database with the WallMan tool.<br />
• Draw<strong>in</strong>g the build<strong>in</strong>g walls manually with a background image (e.g. scan from the build<strong>in</strong>g<br />
layout plans)<br />
• Convert<strong>in</strong>g a CAD file from popular file formats (e.g. AutoCAD) <strong>in</strong>to the W<strong>in</strong>Prop file<br />
format.<br />
Please refer to the WallMan manual for an explanation of how walls can be drawn <strong>in</strong> WallMan and<br />
how the conversion of CAD file is done.<br />
Figure 1: Build<strong>in</strong>g database of multi story office build<strong>in</strong>g.<br />
In Figure 1 the vector database of a multi story build<strong>in</strong>g is shown. This build<strong>in</strong>g was drawn<br />
manually <strong>in</strong> WallMan. Especially when deal<strong>in</strong>g with multi floor build<strong>in</strong>gs it if often reasonable to<br />
draw only one floor and copy the floor plan to the upper floors (if the layout of the walls is the<br />
same).<br />
WallMan allows the def<strong>in</strong>ition of Floor Levels which make it easy to access the <strong>in</strong>dividual floors<br />
dur<strong>in</strong>g the network plann<strong>in</strong>g stage. Floor levels can be def<strong>in</strong>ed <strong>in</strong> arbitrary heights, <strong>in</strong>dependent of<br />
the real floor heights. The usage of floor levels can be activated with the menu item Edit ><br />
Default Values > Automatic Mode.<br />
© by <strong>AWE</strong> <strong>Communications</strong> GmbH January 2011
<strong>WLAN</strong> <strong>Plann<strong>in</strong>g</strong> <strong>in</strong> W<strong>in</strong>Prop 3<br />
The def<strong>in</strong>ition of floor levels has to be done manually. Figure 2 shows the dialog box where the<br />
floor level heights can be entered by the user. This dialog box can be accessed with the menu item<br />
Objects > Floor Levels.<br />
Figure 2: Def<strong>in</strong>ition of floor levels <strong>in</strong> WallMan.<br />
After the def<strong>in</strong>ition of the floor levels is completed, the selection of a desired floor is very simple.<br />
WallMan provides a drop down box <strong>in</strong> the tool bar which is used to select the correspond<strong>in</strong>g floor<br />
height. This is shown <strong>in</strong> Figure 3.<br />
Figure 3: Selection of floor level <strong>in</strong> WallMan.<br />
In the next step the materials of the walls have to be def<strong>in</strong>ed or adapted. There is a material<br />
catalogue with various material properties available which can be obta<strong>in</strong>ed from <strong>AWE</strong><br />
<strong>Communications</strong>. The list with materials used <strong>in</strong> the vector database can be accessed with the<br />
menu item Edit > Materials used <strong>in</strong> database. The user can load, modify and save the<br />
materials <strong>in</strong> the material catalogue. This is shown <strong>in</strong> Figure 4.<br />
© by <strong>AWE</strong> <strong>Communications</strong> GmbH January 2011
<strong>WLAN</strong> <strong>Plann<strong>in</strong>g</strong> <strong>in</strong> W<strong>in</strong>Prop 4<br />
Figure 4: List with used materials <strong>in</strong> WallMan.<br />
An important issue is to know which material properties are really considered by the selected wave<br />
propagation model <strong>in</strong> a later stage of the network plann<strong>in</strong>g process. Not all propagation models<br />
consider all material parameters.<br />
Figure 5: Frequency dependent material properties.<br />
In Figure 5 the frequency depend<strong>in</strong>g properties for a material are shown. The dialog consists of<br />
two different sets of parameters:<br />
• Parameters for empirical <strong>in</strong>teraction model: These values can be used by all propagation<br />
models.<br />
• Parameters for Fresnel Coefficients and GTD/UTD (determ<strong>in</strong>istic model): These values can<br />
be used by some propagation models only.<br />
© by <strong>AWE</strong> <strong>Communications</strong> GmbH January 2011
<strong>WLAN</strong> <strong>Plann<strong>in</strong>g</strong> <strong>in</strong> W<strong>in</strong>Prop 5<br />
Which of the parameter sets (either empirical or determ<strong>in</strong>istic) is used depends on the sett<strong>in</strong>gs of<br />
the project <strong>in</strong> ProMan. More <strong>in</strong>formation about this can be found <strong>in</strong> the ProMan manual.<br />
Summary: The build<strong>in</strong>g vector database has to be drawn or converted <strong>in</strong> WallMan. Floor levels<br />
can be def<strong>in</strong>ed for multi story build<strong>in</strong>gs. The material properties have to be adapted.<br />
© by <strong>AWE</strong> <strong>Communications</strong> GmbH January 2011
<strong>WLAN</strong> <strong>Plann<strong>in</strong>g</strong> <strong>in</strong> W<strong>in</strong>Prop 6<br />
3 Sett<strong>in</strong>g up a network project <strong>in</strong> ProMan<br />
The next step is to set up the network project <strong>in</strong> ProMan. This can be done with the menu item<br />
File > New Project. In the dialog box two major selections have to be done:<br />
• Selection of air <strong>in</strong>terface: In the left column the air <strong>in</strong>terface must be selected. W<strong>in</strong>Prop<br />
offers predef<strong>in</strong>ed Wireless Standard Files which conta<strong>in</strong> already the correct parameters for<br />
the correspond<strong>in</strong>g air <strong>in</strong>terface. Wireless Standard Files (*.wst) can be obta<strong>in</strong>ed from <strong>AWE</strong><br />
<strong>Communications</strong>. For our example here we select the 802.11g protocol.<br />
• Selection of map data: In the right column the <strong>in</strong>door vector database has to be selected.<br />
In our case we select the multi story build<strong>in</strong>g created with the WallMan tool.<br />
ProMan displays the scenario on the screen. With the menu item Project > Edit Parameters all<br />
parameters of the new project can be displayed and adapted. The configuration dialog is shown <strong>in</strong><br />
Figure 6.<br />
Figure 6: Project sett<strong>in</strong>gs. Tab sheet “Air Interface” is shown.<br />
In the follow<strong>in</strong>g sections the tab sheets of the configuration dialog are briefly expla<strong>in</strong>ed. Detailed<br />
<strong>in</strong>formation about the sett<strong>in</strong>gs can be found <strong>in</strong> the ProMan manual.<br />
© by <strong>AWE</strong> <strong>Communications</strong> GmbH January 2011
<strong>WLAN</strong> <strong>Plann<strong>in</strong>g</strong> <strong>in</strong> W<strong>in</strong>Prop 7<br />
Air Interface<br />
This tab sheet offers various sett<strong>in</strong>gs about the air <strong>in</strong>terface. Normally there is no need to modify<br />
the parameters. The parameters displayed here are read from the Wireless Standard File at the<br />
moment the project is created. If the parameters are modified here, this has no <strong>in</strong>fluence on the<br />
orig<strong>in</strong>al Wireless Standard File.<br />
Simulation<br />
The tabsheet “Simulation” offers several sett<strong>in</strong>gs about prediction area, resolution and prediction<br />
heights. If floor levels are def<strong>in</strong>ed (see chapter 2) it is reasonable to select Prediction relative to<br />
floor heights. This means that the prediction height entered <strong>in</strong> the edit box is considered relative<br />
to all floor heights def<strong>in</strong>ed <strong>in</strong> the vector database.<br />
Figure 7: Selection of “Prediction relative to floor heights”.<br />
If no floor levels are def<strong>in</strong>ed the prediction height(s) have to be entered as absolute height values.<br />
More than one prediction height can be def<strong>in</strong>ed.<br />
Network<br />
On this page the available outputs of the simulator can be selected. There are different types of<br />
results available:<br />
• General results: These results are generally available, <strong>in</strong>dependent of the cell assignment<br />
and the transmission modes.<br />
• Transmission mode results: Theses results are available for each transmission mode<br />
def<strong>in</strong>ed for the air <strong>in</strong>terface.<br />
• Cell assignment results: These results are available for the cell assignment. The cell<br />
assignment is the first step <strong>in</strong> the network plann<strong>in</strong>g simulation. Dur<strong>in</strong>g the cell assignment<br />
for each receiver pixel the best cell (best server) will be selected.<br />
Propagation<br />
This tabsheet allows the configuration of the results of the wave propagation simulation.<br />
Sites<br />
In this tabsheet all sites/access po<strong>in</strong>ts are listed. The user can enable or disable several sites at<br />
the same time us<strong>in</strong>g the correspond<strong>in</strong>g buttons. Sites can also be added – but it is more<br />
convenient to add sites with the mouse tool (see next section).<br />
© by <strong>AWE</strong> <strong>Communications</strong> GmbH January 2011
<strong>WLAN</strong> <strong>Plann<strong>in</strong>g</strong> <strong>in</strong> W<strong>in</strong>Prop 8<br />
Database<br />
Sett<strong>in</strong>gs about the used vector database (here the multi story build<strong>in</strong>g) can be modified.<br />
Computation<br />
In this tabsheet the selection of the propagation model is done.<br />
Prediction Models for ord<strong>in</strong>ary antennas:<br />
• 3D Ray Optical Models: The usage of the 3D Intelligent Ray Trac<strong>in</strong>g requires a<br />
preprocess<strong>in</strong>g of the vector database. More <strong>in</strong>formation about this step can be found <strong>in</strong> the<br />
WallMan manual. In general ray optical models are very accurate but require a long<br />
prediction time. They should only be used <strong>in</strong> small environments or if channel impulse<br />
responses are required as an output.<br />
• Semi-determ<strong>in</strong>istic Models: These models are acurrate and the prediction time is good.<br />
Because of that these models are recommended for most scenarios.<br />
• Empirical Models: Empirical models are very short <strong>in</strong> prediction time but limited <strong>in</strong> accuracy.<br />
They should only be used for very large scenarios (if the other models are too slow).<br />
Prediction Models for radiat<strong>in</strong>g cables:<br />
• There are several models available for radiat<strong>in</strong>g cables/leaky feeder cables. More<br />
<strong>in</strong>formation about the models can be found <strong>in</strong> the ProMan manual.<br />
Selection of approach for determ<strong>in</strong>ation of signal level:<br />
• Fresnel Coefficients and GTD/UTD: In this case the determ<strong>in</strong>stic <strong>in</strong>teraction model is used<br />
for the determ<strong>in</strong>ation of the losses due to reflections, diffractions and transmissions. The<br />
physical parameters permittivity, permeability and conductivity are considered.<br />
• Empirical Losses: In this case the empirical material properties (e.g. transmission loss <strong>in</strong><br />
dB, reflection loss <strong>in</strong> dB) are taken <strong>in</strong>to account.<br />
The user has to take care select<strong>in</strong>g the correct <strong>in</strong>teraction model. This depends on how the<br />
material properties have been def<strong>in</strong>ed <strong>in</strong> WallMan.<br />
© by <strong>AWE</strong> <strong>Communications</strong> GmbH January 2011
<strong>WLAN</strong> <strong>Plann<strong>in</strong>g</strong> <strong>in</strong> W<strong>in</strong>Prop 9<br />
4 Def<strong>in</strong>ition of access po<strong>in</strong>ts/antennas<br />
After the def<strong>in</strong>ition of the project sett<strong>in</strong>gs is completed, the def<strong>in</strong>ition of the antennas can be<br />
done. ProMan offers a very simple way to place antennas <strong>in</strong> the layout plan. It is not necessary to<br />
connect the antennas to an amplifier or to def<strong>in</strong>e the cable<strong>in</strong>g <strong>in</strong> the build<strong>in</strong>g.<br />
Figure 8: Mouse tool for plac<strong>in</strong>g antennas <strong>in</strong> the layout plan.<br />
Figure 8 shows the mouse tool for the def<strong>in</strong>ition of antennas <strong>in</strong> the layout plan. When the user<br />
selects this tool a confirmation dialog appears and the user is asked to choose what type of<br />
antenna he wants to def<strong>in</strong>e next.<br />
Figure 9: Selection of floor level.<br />
If floor levels are def<strong>in</strong>ed <strong>in</strong> the vector database, the correspond<strong>in</strong>g floor height (where the<br />
antenna should be placed) must be selected <strong>in</strong> the drop down box <strong>in</strong> the toolbar (see Figure 9). It<br />
is important to know that only antennas on the current floor level are displayed. All other antennas<br />
are not displayed on the screen.<br />
Ord<strong>in</strong>ary antennas can be placed <strong>in</strong> the layout plan by click<strong>in</strong>g on the desired location. Radiat<strong>in</strong>g<br />
cables have to be drawn with a polyl<strong>in</strong>e. The coordiantes of the polyl<strong>in</strong>es can be modified layer,<br />
thus it is no problem if the l<strong>in</strong>es do not perfectly fit after draw<strong>in</strong>g with the mouse tool. The<br />
modification of the coord<strong>in</strong>ates of a radiat<strong>in</strong>g cable can be done <strong>in</strong> the transmitter dialog.<br />
After all antennas have been placed <strong>in</strong> the project, the carrier assignment can be done. Us<strong>in</strong>g the<br />
project sett<strong>in</strong>gs dialog (see section 3) the transmitter dialog for each antenna can be accessed<br />
(see Figure 10).<br />
© by <strong>AWE</strong> <strong>Communications</strong> GmbH January 2011
<strong>WLAN</strong> <strong>Plann<strong>in</strong>g</strong> <strong>in</strong> W<strong>in</strong>Prop 10<br />
Figure 10: Assignment of carrier to an antenna.<br />
By select<strong>in</strong>g Assign Carrier a channel can be assigned to the selected antenna. It is possible to<br />
assign only one carrier to an antenna.<br />
Other modification can also be made <strong>in</strong> this dialog, e.g. transmit power and antenna pattern can<br />
be def<strong>in</strong>ed by the user.<br />
© by <strong>AWE</strong> <strong>Communications</strong> GmbH January 2011
<strong>WLAN</strong> <strong>Plann<strong>in</strong>g</strong> <strong>in</strong> W<strong>in</strong>Prop 11<br />
5 Network simulation and results<br />
When the user is sure that all antennas have been placed and all carriers have been assigned the<br />
network simulation can be launched. ProMan uses a two step approach to compute the network<br />
results. In the first step the wave propagation is computed. This has to be done only once (expect<br />
the antenna configuration is modified, e.g. transmit power, location,..). In the second step the<br />
computation regard<strong>in</strong>g the air <strong>in</strong>terface is done based on the wave propagation results from step<br />
one.<br />
The wave propagation computation can be launched with the menu item Computation ><br />
Propagation: Compute All and afterwards the network computation should be started with the<br />
menu item Computation > Network: Compute Coverage.<br />
Figure 11: Display of results us<strong>in</strong>g the treeview.<br />
After the computation is completed, the results can be accessed us<strong>in</strong>g the tree view on the left<br />
side of the w<strong>in</strong>dow (see Figure 11). The results can also be loaded <strong>in</strong>dependent of the project.<br />
This can be done with the menu item File > Open Result.<br />
Remark: The network optimizer modul of W<strong>in</strong>Prop can be used for the automatic selection of<br />
relevant sites and automatic assignment of carriers. More <strong>in</strong>formation can be found <strong>in</strong> the<br />
application note “Network Optimizer <strong>in</strong> W<strong>in</strong>Prop”<br />
© by <strong>AWE</strong> <strong>Communications</strong> GmbH January 2011