university of california, san diego histology shared resources
university of california, san diego histology shared resources
university of california, san diego histology shared resources
You also want an ePaper? Increase the reach of your titles
YUMPU automatically turns print PDFs into web optimized ePapers that Google loves.
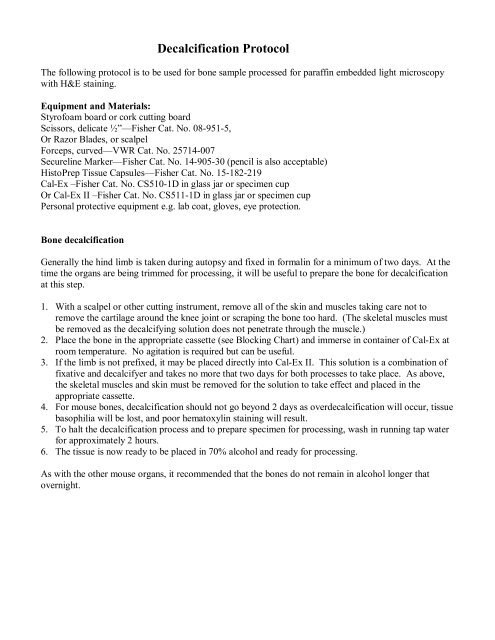
Decalcification Protocol<br />
The following protocol is to be used for bone sample processed for paraffin embedded light microscopy<br />
with H&E staining.<br />
Equipment and Materials:<br />
Styr<strong>of</strong>oam board or cork cutting board<br />
Scissors, delicate ½”—Fisher Cat. No. 08-951-5,<br />
Or Razor Blades, or scalpel<br />
Forceps, curved—VWR Cat. No. 25714-007<br />
Secureline Marker—Fisher Cat. No. 14-905-30 (pencil is also acceptable)<br />
HistoPrep Tissue Capsules—Fisher Cat. No. 15-182-219<br />
Cal-Ex –Fisher Cat. No. CS510-1D in glass jar or specimen cup<br />
Or Cal-Ex II –Fisher Cat. No. CS511-1D in glass jar or specimen cup<br />
Personal protective equipment e.g. lab coat, gloves, eye protection.<br />
Bone decalcification<br />
Generally the hind limb is taken during autopsy and fixed in formalin for a minimum <strong>of</strong> two days. At the<br />
time the organs are being trimmed for processing, it will be useful to prepare the bone for decalcification<br />
at this step.<br />
1. With a scalpel or other cutting instrument, remove all <strong>of</strong> the skin and muscles taking care not to<br />
remove the cartilage around the knee joint or scraping the bone too hard. (The skeletal muscles must<br />
be removed as the decalcifying solution does not penetrate through the muscle.)<br />
2. Place the bone in the appropriate cassette (see Blocking Chart) and immerse in container <strong>of</strong> Cal-Ex at<br />
room temperature. No agitation is required but can be useful.<br />
3. If the limb is not prefixed, it may be placed directly into Cal-Ex II. This solution is a combination <strong>of</strong><br />
fixative and decalcifyer and takes no more that two days for both processes to take place. As above,<br />
the skeletal muscles and skin must be removed for the solution to take effect and placed in the<br />
appropriate cassette.<br />
4. For mouse bones, decalcification should not go beyond 2 days as overdecalcification will occur, tissue<br />
basophilia will be lost, and poor hematoxylin staining will result.<br />
5. To halt the decalcification process and to prepare specimen for processing, wash in running tap water<br />
for approximately 2 hours.<br />
6. The tissue is now ready to be placed in 70% alcohol and ready for processing.<br />
As with the other mouse organs, it recommended that the bones do not remain in alcohol longer that<br />
overnight.


