university of california, san diego histology shared resources
university of california, san diego histology shared resources
university of california, san diego histology shared resources

You also want an ePaper? Increase the reach of your titles
YUMPU automatically turns print PDFs into web optimized ePapers that Google loves.
Nissi M. Varki M.D.,<br />
Director. Email:<br />
nvarki@ucsd.edu Phone:<br />
858-534-5611<br />
UNIVERSITY OF CALIFORNIA, SAN DIEGO<br />
HISTOLOGY SHARED RESOURCES<br />
9500 Gilman Drive, Mail Code 0687, La Jolla, CA 92093-0687<br />
Phone: 858-822-1011. FAX: 858-534-5611<br />
Program in Vascular<br />
and Blood<br />
Glycosylation. Contact:<br />
858-534-2945 Lisa<br />
Wiggleton BS EMT.<br />
Email:<br />
LWiggleton@ucsd.edu<br />
Consortium for<br />
Functional Glycomics<br />
Contact: Y.Lucie Kim BS<br />
HTL Email:<br />
ylkim@ucsd.edu<br />
Cancer Center<br />
Histology: Contact:<br />
MaryAnnLawrence HT<br />
Laarni Gapuz MT<br />
Sabrina Schuck<br />
Wess Jordan<br />
Gastroenterology /<br />
Mucosal Immunology<br />
Program: Contact:<br />
858-534-4625<br />
Steve Shenouda BS<br />
sshenouda@ucsd.edu<br />
Figure Legend: The figure depicts the recommended arrangement <strong>of</strong> tissues harvested<br />
from littermate controls and from genetically altered animals, on slides for microscopic<br />
examination in order to visualize and digitally photomicrograph if histo-pathologic<br />
abnormalities are observed.
Tissues and cell types screened during histopathologic analysis:<br />
I. Brain: gray and white matter, endothelium, choroid plexus, pituitary, ventricles olfactory lobes, corpus<br />
callosum, hippocampus, midbrain, cerebellum, choroid plexus, pia mater<br />
II. Heart and circulatory system: cardiomyocytes endothelium and vessels, pericardium <strong>of</strong> right ventricle,<br />
interventricular septum, cardiac muscle, valves, endothelium.<br />
III. Lungs: bronchiolar epithelium, vessels and endothelium, stroma, mesothelial layer<br />
IV. GastroIntestinal Tract:<br />
A. Liver: hepatocytes, Kupffer cells, bile ducts, portal triads and central veins<br />
B. Pancreas: acini, Islets (endocrine), ducts, blood vessels and lobules<br />
C. Salivary glands, nerves, ganglions, stroma<br />
D. Intestines: all areas: mucosal epithelial cells, smooth muscle layers,<br />
ganglion cells, blood vessels,<br />
a. Esophagus: in addition :<br />
squamous and glandular epithelial mucosal layers<br />
b. Stomach: in addition :mucosal epithelial cell types<br />
c. Duodenum: in addition : Brunners glands<br />
d. Ileum: in addition : villi, goblet cells, Peyer’s Patches<br />
e. Colon: in addition : goblet cells, Peyer’s Patches<br />
V. GenitoUrinaryTract<br />
A. Kidney: Cortex/medulla---Glomeruli, tubules—<br />
proximal/distal, blood vessels<br />
B. Bladder: epithelium, muscle, blood vessels<br />
C. Ovaries/Uterus/Fallopian tubes<br />
D. Placenta<br />
E. Prostate: tubulo-alveolar glands fibromuscular stroma<br />
F. Testis, seminiferous tubules, Sertoli cells and germ cells with mature sperm,<br />
Leydig cells, vessels, epididymis,<br />
VI. Hematopoietic system:<br />
A. Spleen: lymphoid nodules, red pulp, macrophages, megakaryocytes, vessels<br />
B. Thymus: Cortex, medulla, blood vessels<br />
C. Lymph nodes: cortex, medulla, blood vessels, HEVs<br />
D. Bone Marrow<br />
VII. Endocrine: Adrenal, islets in Pancreas, Parathyroid, Thyroid<br />
VIII. Skin and Integument<br />
A. Epidermis, dermis with sweat glands, sebaceous glands and hair follicles<br />
B. Breast: lobules and ducts<br />
C. Bone/ cartilage and fat and skeletal muscle
Tissue Fixation Procedure for Paraffin Processing<br />
The following protocol is to be used for tissue sample processed for light microscopy.<br />
Tissue fixation<br />
1. The tissue removed from the animal should be placed into marked cassettes and them immediately<br />
placed into a container <strong>of</strong> 10% neutral buffered formalin.<br />
2. Cassettes are to be specially marked with Secureline marker or pencil exclusively as all other marking<br />
can be removed from solvents during processing.<br />
3. The volume <strong>of</strong> fixative must be 15-20 times over the sample volume and the tissue must be<br />
completely immersed in the solution.<br />
4. Tissue can remain in fixative at ambient temperature up to 48 hours. No agitation is required<br />
5. Check for clarity <strong>of</strong> formalin solution day to day. If solution is cloudy, change out the old solution<br />
with fresh, especially if tissues will not be processed immediately.<br />
6. The recommended duration <strong>of</strong> fixation for general mouse tissue that is no larger than 1.5 cm thick is<br />
24- 48 hours. Larger tissue sections should be monitored and fixed for longer periods <strong>of</strong> time.<br />
7. If glycogen studies are to be made on liver specimens, the fixation time are to be closely monitored or<br />
cytoplasmic vacuolation may be conspicuous.<br />
8. Prior to cassetting or prior to processing, tissue samples are to be trimmed for optimal processing and<br />
embedding. This size restriction is confined to a maximum height <strong>of</strong> 3mm and tissue must be in the<br />
tissue cassette loosely for ample penetration <strong>of</strong> paraffin during the processing schedule.<br />
9. Up to one day prior to processing, the tissues can be immersed in 70% alcohol. This step<br />
will halt formalin fixation and acclimatize tissue to the first stage <strong>of</strong> the dehydrating process.<br />
However, prolonged exposure to 70% alcohol may have a drying effect on small specimens.<br />
10. Spleen and pancreas should be enclosed between cassette sponges, in cassettes, before fixation to<br />
ensure even fixation and sectioning<br />
11. Embryos <strong>of</strong> differing sizes require specific fixation protocols. Please contact the <strong>histology</strong> personnel<br />
for help prior to harvesting embryos for microscopic examination<br />
Recommended Materials:<br />
Securline Marker—Fisher Cat. No. 14-905-30<br />
Buffered Formaldefresh—Fisher Cat. No. SF93-4<br />
Freshly prepared 4% paraformaldehyde<br />
Bouin’s solution: Sigma Cat. No. H10-1-32 should be used to fix opened embryos and other small slices<br />
<strong>of</strong> organs that need good morphologic analysis.<br />
Fix for 6- 8 hours and then transfer to 70% alcohol to “wash out” the yellow before submitting to<br />
<strong>histology</strong> for automated dehydration, paraffin embedding, sectioning and staining.<br />
ZincFormaldehyde fixative: to fix organs that will be used for immunohistochemistry stains. Fix thin<br />
slices in this fixative obtained from American Master Tech Phone: 209-368-4031. Cat. No. FXZFO
Dissection Protocol<br />
Equipment and Materials:<br />
Styr<strong>of</strong>oam board or cork cutting board and pins, flat for cutting<br />
Scissors, delicate ½”—Fisher Cat. No. 08-951-5<br />
Bell jar with lid<br />
200ul Pipetman and pipets<br />
Kimwipes, Lab liners, paper towels<br />
Forceps, curved—VWR Cat. No. 25714-007<br />
Secureline Marker—Fisher Cat. No. 14-905-30<br />
1ml syringe—Fisher Cat. No.<br />
Vacutainer 23G ¾ --Fisher Cat. No.0266539<br />
HistoPrep Tissue Capsules—Fisher Cat. No. 15-182-219<br />
Peristaltic Pump<br />
Phosphate Buffered Saline<br />
Is<strong>of</strong>lurane—MWI Cat. No. 012497<br />
10% Neutral buffered formalin (Buffered Formaldefresh)--Fisher Cat. No. SF93-4<br />
labeled specimen cups<br />
Personal protective equipment eg. lab coat, gloves, eye protection.<br />
Check out this website: www.eulep.org for photographs and other details<br />
Before Autopsy:<br />
1. Determine which organs will be harvested and formalin fixed or frozen.<br />
2. Gather materials and label all necessary cassettes or capsules (see Blocking Chart Protocol.)<br />
3. Record the identifying data on each animal including its appearance and behavior.<br />
4. Record the weight <strong>of</strong> the animal, the individual organs, any abnormal gross pathology, and the<br />
carcass after the organs are removed. (Relative organ weights can be found on page_____.) If<br />
skeletal defects are suspected save the carcass and obtain a radiograph <strong>of</strong> the skeleton. The carcass<br />
may be “cleared” using potassium hydroxide and stained with Alizarin Red and Alcian Blue,<br />
following established protocols.<br />
5. Anesthetize and euthanize animals humanely according to animal welfare guidelines.<br />
6. Wet the animals' fur with 70% ethanol to minimize contamination with hair and lay upon a clean<br />
paper towel. Pin extremities to styr<strong>of</strong>oam or cork board. Dedicated scissors are recommended for<br />
cutting skin and bone.<br />
7. Start from the abdomen and make and a Y-shaped incision should be made to open up the thorax<br />
and abdomen. The ribcage should be opened bilaterally, exposing the underling thymus, heart and<br />
lungs.<br />
8. If the plan is to perfuse the entire animal, canulate the left ventricle <strong>of</strong> the heart with the catheter<br />
connected to the peristaltic pump and secure the catheter with alligator clips..<br />
9. Make an incision in the right atrium to allow the circulating fluids to exit the right atrium.<br />
10. Pump PBS through the circulatory system, using a peristaltic pump. This will flush out blood.<br />
Adequate perfusion is indicated when the liver and kidneys become pale.<br />
11. Follow the PBS flush with freshly made 4% paraformaldehyde for 15 min.<br />
12. Just before finishing the perfusion, insert a formalin filled syringe into the trachea just above the<br />
lungs until full. Then tie <strong>of</strong>f the trachea to keep the fixative in the alveoli<br />
13. Once perfusion is complete, remove the organs listed below in the order listed. This will ensure<br />
that all the necessary structures are collected.
14. While harvesting the organs, place smaller specimens and the spleen, between sponges in labeled<br />
cassettes before placing them in formalin.<br />
15. The larger structures such as brain, lung, liver, can be placed directly into the fixative. (The brain<br />
needs to be divided into three parts after fixation, so it is recommended that it is placed directly in<br />
fixative, after removal.)<br />
EMBRYOS: Specific fixation methods are recommended for examination <strong>of</strong> embryos<br />
Please contact personnel in the core lab to plan optimal methods. Really small embryos should be oriented<br />
and embedded in 1% agarose, before being fixed in freshly prepared paraformaldehyde for processing<br />
into paraffin<br />
Older embryos should be dissected open along the abdominal wall so that fixative will enter. Bouins’<br />
fixative is preferred for fixation <strong>of</strong> older embryos<br />
Any age <strong>of</strong> embryo may be frozen using the method given here, for frozen sections and<br />
immunohistochemistry.<br />
ADULT ANIMAL necropsy and gross examination:<br />
Remove:<br />
Salivary Glands: located just below the skin under the chin, above the thorax. Lift to take both lobes<br />
whole including attached lymph nodes and place in fixative.<br />
Lymph nodes: The adjacent lymph nodes may be harvested at this time and placed in a cassette along<br />
with the adrenals—the small sized organs process and cut easier this way. Dissect lymph nodes from<br />
behind the elbow, from the mesenteric fat and also from the hilar region <strong>of</strong> the lungs<br />
Thymus: The thymus has two lobes and sits on the superior and ventral aspect <strong>of</strong> the heart, just under the<br />
ribcage. It involutes in older animals and becomes increasingly surrounded by fat (older than 3 months).<br />
Be sure to detach and place between sponges in a cassette before fixing so it will fix without curling<br />
around the edges.<br />
Spleen: Is found on the left lateral aspect <strong>of</strong> the body, below the ribcage, as an elongated dark red-brown<br />
structure. Be sure to detach and place between sponges in a cassette before fixing so it will fix without<br />
curling around the edges<br />
Lungs: The trachea is exposed and the fixative is infused so that both sides <strong>of</strong> the lungs inflate well. After<br />
fixation, the lobes <strong>of</strong> the lungs are dissected away from each other and laid out in labeled cassettes so that<br />
sections through each lobe can be made for histopathologic examination.<br />
The trachea, hilar lymph nodes, thyroid and parathyroid may be left to be fixed to be submitted in<br />
additional cassettes<br />
Heart: The distal half <strong>of</strong> the heart is to be sliced and that portion is to be embedded flat, in order to be<br />
able to compare the thickness <strong>of</strong> the heart muscle from each ventricle.<br />
Adrenals: The adrenals should be on the superior pole <strong>of</strong> each kidney and look like little pyramids <strong>of</strong><br />
pinkish fat. Detach the each kidney with the adrenals intact and place in a cassette. (The adrenals may<br />
also be removed but care must be taken to place them between two sponges in a tissue cassette before<br />
placing in fixative.)<br />
Pancreas: Is attached to the spleen and may be harvested when removing the spleen.
Liver: Take a large lobe <strong>of</strong> the liver with gall bladder and slice it flat and fix whole<br />
Ovaries, Uterus, Vagina, Bladder: The uterus can be identified from the two horns which extend up from<br />
the cervix into the pelvis and ends with the ovaries that are just below each kidney. Cut across the cervix<br />
and lift out the uterus with forceps.<br />
Testes: Testes should be located and taken out whole as gently as possible so as to prevent them from<br />
rupturing. The epididymis may be taken along with them especially if the study requires their analysis.<br />
Prostate: The prostate is just underneath the bladder in the males. It can be taken whole with the bladder<br />
to be fixed together for easy identification at the time <strong>of</strong> trimming for tissue processing.<br />
Intestinal Tract (Stomach, Ileum, Cecum, Colon, Rectum): Grasp the abdominal end <strong>of</strong> the esophagus<br />
and begin to disembowel the GI tract until the rectum is reached. Care should be taken not to stretch out<br />
the mesenteric fat so that harvesting <strong>of</strong> the mesenteric lymph nodes can be possible after fixation.<br />
The small intestine should be sectioned into 4-5 parts before immersion fixation.<br />
The COLON is dissected away from the rest <strong>of</strong> the bowel and opened along the anti-mesenteric aspect.<br />
Taking a swab stick, roll up the FRESHLY opened colon onto the stick so that a compact roll is the end<br />
result.<br />
DO NOT TRY TO ROLL after rinsing the gut in PBS, it will not stick together to make a good roll.<br />
Always use the same method to roll, anal end first always OR small intestine end first, on the inside <strong>of</strong> the<br />
roll.<br />
Fix the rolled up colon on the stick, in a 15 ml tube with fixative and submit for histologic embedding<br />
and sectioning.<br />
rolled up colon<br />
on a stick<br />
to be immersed<br />
in fixative<br />
Mammary tissue: The inguinal and axillary mammary glands are visible as yellow fat pads adherent to the<br />
underside <strong>of</strong> the skin beneath a fascial plane. They should be dissected away from the overlying skin.<br />
Skeletal muscle: A small piece <strong>of</strong> the abdominal wall may be sectioned. If fixing entire carcass, it can be<br />
left intact and a piece can be cut during trimming.<br />
Bone: Turn the mouse over onto its ventral surface. Using forceps and scissors (scalpel is also acceptable)<br />
lift the skin <strong>of</strong>f the left hind and snip <strong>of</strong>f. This will make the bicep femoris and adductor muscles more<br />
readily visible. Cut the limb <strong>of</strong>f right at the juncture <strong>of</strong> the hip socket and ankle. Repeat this procedure<br />
with the right limb.<br />
Skin: A snip <strong>of</strong> one <strong>of</strong> the ears at least half way down to the juncture <strong>of</strong> the scalp will be sufficient.<br />
Brain: FOR OPTIMAL MORPHOLOGY< it is best to perfuse the animal with freshly prepared 4%<br />
paraformaldehyde before removing the brain for further fixation, before processing into paraffin blocks.<br />
Grasp scalp on the crown <strong>of</strong> the head with forceps and snip <strong>of</strong>f skin to see skull clearly (see page 9 and 10<br />
<strong>of</strong> Atlas). While grasping the orbital <strong>of</strong> each eye with forceps, move scissors slightly underneath the skull<br />
, and run tip <strong>of</strong> scissors between skull and brain, keeping scissors horizontal, along the plane <strong>of</strong> the cutting
oard, on both sides <strong>of</strong> the skull. This will loosen and separate the calvarium from the brain, which can<br />
now be lifted <strong>of</strong>f. Gently lift the brain <strong>of</strong>f the base <strong>of</strong> the skull with blunt scalpel, carefully making sure<br />
not to rupture the integrity <strong>of</strong> the brain. (Remove in one piece the cerebrum, cerebellum and as much <strong>of</strong><br />
the hind brain as possible.) The pituitary may also be removed for examination at this time. Eyes may be<br />
examined and other parts if necessary.<br />
If desired, the rest <strong>of</strong> the mouse carcass can now be immersed whole into the formalin solution to retrieve<br />
finer structures during trimming e.g. lymph nodes.<br />
If bone and cartilage are to be examined further, it may be necessary to treat the adult carcass, after<br />
removal <strong>of</strong> skin, with potassium hydroxide and stain with Alizarin Red/ Alcian Blue, following<br />
established protocols. 2<br />
1. 1 A Color Atlas <strong>of</strong> Sectional Anatomy <strong>of</strong> the Mouse, Takamasa Iwaki, Hiroshi Yamashita,<br />
Toshiyuki Hayakawa<br />
2. Manipulating the Mouse Embryo. Hogan, Beddington, Constantini, Lacy. Cold Spring<br />
Harbor Laboratory Press<br />
Others<br />
a) Pathology <strong>of</strong> the mouse. Ed. Robert R. Maronpot. Cache River Press<br />
ISBN: 1-889899-02X<br />
b) di Fiore’s Atlas <strong>of</strong> Histology. Victor P. Eroschenko Lee and Febiger<br />
c) Histology. A text and Atlas. Ross, Romrell and Kaye. Williams and Wilkins<br />
ISBN: 0-683-07369-9<br />
d) Human Histology. Stevens and Lowe. Mosby. ISBN: 0-7234-2485-3<br />
e) An Atlas <strong>of</strong> Histology. Zhang. Springer. ISBN: 0-387-94954-2<br />
f) Pathologic Basis <strong>of</strong> disease. Robbins,Kumar and Collins. Saunders.<br />
ISBN: 0-7216-7335-X<br />
g) The Laboratory Mouse. Suckow, Danneman, Brayton. CRC Press<br />
ISBN: 0-8493-0322-2<br />
h) A Color Atlas <strong>of</strong> Sectional Anatomy <strong>of</strong> the mouse. Iwaki, Yamashita, Hayakawa.<br />
Braintree Scientific Inc. ISBN: 4-900659-58-4<br />
i) The Atlas <strong>of</strong> Mouse development. Kaufman. Academic Press.<br />
ISBN 0-12-402035-6<br />
j) The House Mouse. Atlas <strong>of</strong> Embryonic development. Theiler. Springer-Verlag<br />
ISBN: 0-387-05940-7<br />
k) Manipulating the mouse embryo, a laboratory manual. Hogan, Beddington, Costantini,<br />
Lacy. Cold Spring Harbor Laboratory Press ISBN: 0-87969-384-3
Decalcification Protocol<br />
The following protocol is to be used for bone sample processed for paraffin embedded light microscopy<br />
with H&E staining.<br />
Equipment and Materials:<br />
Styr<strong>of</strong>oam board or cork cutting board<br />
Scissors, delicate ½”—Fisher Cat. No. 08-951-5,<br />
Or Razor Blades, or scalpel<br />
Forceps, curved—VWR Cat. No. 25714-007<br />
Secureline Marker—Fisher Cat. No. 14-905-30 (pencil is also acceptable)<br />
HistoPrep Tissue Capsules—Fisher Cat. No. 15-182-219<br />
Cal-Ex –Fisher Cat. No. CS510-1D in glass jar or specimen cup<br />
Or Cal-Ex II –Fisher Cat. No. CS511-1D in glass jar or specimen cup<br />
Personal protective equipment e.g. lab coat, gloves, eye protection.<br />
Bone decalcification<br />
Generally the hind limb is taken during autopsy and fixed in formalin for a minimum <strong>of</strong> two days. At the<br />
time the organs are being trimmed for processing, it will be useful to prepare the bone for decalcification<br />
at this step.<br />
1. With a scalpel or other cutting instrument, remove all <strong>of</strong> the skin and muscles taking care not to<br />
remove the cartilage around the knee joint or scraping the bone too hard. (The skeletal muscles must<br />
be removed as the decalcifying solution does not penetrate through the muscle.)<br />
2. Place the bone in the appropriate cassette (see Blocking Chart) and immerse in container <strong>of</strong> Cal-Ex at<br />
room temperature. No agitation is required but can be useful.<br />
3. If the limb is not prefixed, it may be placed directly into Cal-Ex II. This solution is a combination <strong>of</strong><br />
fixative and decalcifyer and takes no more that two days for both processes to take place. As above,<br />
the skeletal muscles and skin must be removed for the solution to take effect and placed in the<br />
appropriate cassette.<br />
4. For mouse bones, decalcification should not go beyond 2 days as overdecalcification will occur, tissue<br />
basophilia will be lost, and poor hematoxylin staining will result.<br />
5. To halt the decalcification process and to prepare specimen for processing, wash in running tap water<br />
for approximately 2 hours.<br />
6. The tissue is now ready to be placed in 70% alcohol and ready for processing.<br />
As with the other mouse organs, it recommended that the bones do not remain in alcohol longer that<br />
overnight.
MOUSE ORGAN HARVEST and FREEZING<br />
TO FREEZE TISSUES FOR FROZEN SECTIONS:<br />
1. Get dry ice<br />
2. Get plastic bag with tag to dispose <strong>of</strong>f animal when done<br />
3. Get instruments ready and small plastic jar with water to rinse them out in<br />
4. Label plastic bags to be used to contain frozen blocks<br />
5. Lay out vinyl molds as needed with label<br />
6. Make 1:1 OCT: PBS for tracheal infiltration to inflate lungs before freezing<br />
7. Get bench area ready with absorbent material, styr<strong>of</strong>oam board and needles to pin down<br />
8.<br />
9. In a small styr<strong>of</strong>oam flat container, make a slurry with small bits <strong>of</strong> dry ice and 2 methyl<br />
butane. This will be the freezing mixture which will freeze the organs in OCT for frozen<br />
sections<br />
10. Lay euthanized animal on dissecting board<br />
11. Use an inverted Y-shaped incision to open under the skin<br />
12. Harvest lymph nodes from cervical area and elbow and inguinal , pat dry on paper towel<br />
13. Expose trachea and infiltrate lungs with OCT/PBS mixture. Remove entire block and place on paper<br />
towel to drain before freezing flat in vinyl mold with OCT<br />
14. Harvest tissues and place in sequence onto paper towels to dry <strong>of</strong>f tissue fluids before placing into<br />
vinyl molds, flat on the bottom and then fill with OCT. This keeps the tissues all at the same level:<br />
A. spleen/thymus, lymph nodes. Adrenal<br />
B. Liver, pancreas, kidney<br />
C. Heart, OCT inflated and drained lungs<br />
D. GI (small intestine, colon, stomach) and GU (Bladder, prostate, testis, ovary, uterus)<br />
E. Skin, skeletal muscle, salivary glands, mammary glands, (decalcified femur for blocks)<br />
F. Brain<br />
IT IS BETTER TO KEEP THESE AS SHOWN. CAN COMBINE A,B,C and D,E,F WHEN<br />
CUTTING FROZEN SECTIONS SO THAT YOU WILL GET 2 SLIDES PER ANIMAL<br />
15. Place plastic molds containing organs and OCT into dry ice/ isopentane slurry till OCT turns white<br />
16. Remove plastic molds with frozen organs from dry ice/ 2 methyl butane and let them sit for a minute<br />
or so on paper towels, snap <strong>of</strong>f the plastic molds and place frozen blocks into labeled bags for storage<br />
in boxes in the second container <strong>of</strong> dry ice. All boxes will be stored at minus 70.<br />
SUPPLIES:<br />
1. OCT Compound: VWR Cat No: 25608-930<br />
2. Vinyl molds: Fisher Cat. No 15-182-501D<br />
3. Frozen sample write-on bags: Fisher Cat. No: 01-812-6B<br />
4. 2 methyl butane: Fisher Cat. No. 03551-4
Hematoxylin and Eosin staining <strong>of</strong> Frozen sections:<br />
1. Fix frozen sections in 10% buffered formalin (Fisher SF93-4) for 20 minutes and wash in water<br />
2. stain nuclei by immersing in GILL II HEMATOXYLIN (Surgipath 01522) for 3 minutes.<br />
3. wash in water and immerse in blueing agent (Fisher CS410-4) for 30 seconds, and wash in water<br />
4. Immerse in 95% ethanol briefly<br />
5. Stain cytoplasm by immersing in EOSIN (Surgipath 01602) for 3 minutes and dip once quickly in<br />
water<br />
6. dehydrate by immersing in 1 changes <strong>of</strong> 95% ethanol for 1 min, and then in 3 changes <strong>of</strong> 100%<br />
ethanol (Fisher A962p) for 10 dips each.<br />
7. Immerse in 3 changes <strong>of</strong> Citrosol (Fisher 22-143-975) for 2 minutes each<br />
8. Mount slides with Cytoseal 60 (VWR 48212-154) using glass coverslips (Surgipath 00145)<br />
Hematoxylin / Eosin staining <strong>of</strong> PARAFFIN sections:<br />
1. Deparaffinize by immersing successively, in 2 changes <strong>of</strong> xylene (Fisher X3P) for 10 minutes each<br />
2. Rehydrate by immersing in decreasing concentrations <strong>of</strong> ethanol (Fisher A962p) :<br />
100% for 5 minutes<br />
100% for 5 minutes<br />
95% for 5 minutes<br />
95% for 5 minutes<br />
3. Immerse in water for 5 minutes<br />
4. Follow steps 2 through 8 above.<br />
1. Hematoxylin and eosin stain on frozen sections for Laser Capture microscopy<br />
(American Journal <strong>of</strong> Pathology February 2000 page 446):<br />
1. Thaw frozen sections ( on plain untreated glass slides) one at a time to decrease degradation<br />
2. Fix with 70% ethanol for 10 seconds<br />
3. wash in deionized water<br />
4. immerse in fresh MAYERS hematoxylin for 30 seconds<br />
5. wash in water<br />
6. Immerse in blueing solution for 30 seconds<br />
7. wash in 70% ethanol<br />
8. immerse in eosin for 90 seconds<br />
9. dehydrate sections with two 10 second washes in 95% ethanol and two 10 second washes with<br />
100% ethanol<br />
10. place in xylene for 30 seconds
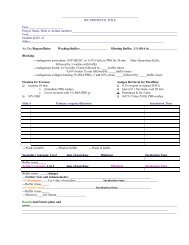
Date:<br />
Immunohistochemistry checks<br />
Aim:<br />
Positive control:<br />
Negative control:<br />
Positive reagent control:<br />
Negative reagent control:<br />
Tissue sections: Frozen Paraffin<br />
Fixation:<br />
Deparaffinization<br />
A. Acetone 10 minutes<br />
Immediate PBS washes Antigen retrieval: Yes No<br />
Cover sections with 1% BSA/PBS<br />
B. 4% fresh paraformaldehyde 0.1%trypsin or trypsinEDTA<br />
heat in O.1M citrate, cool 20 minutes<br />
0.01% TritonX100, PBS washes<br />
---Blocking:<br />
-endogenous peroxidase: 0.03% 0.3% H 2 O 2 in PBS for 20 minutes,<br />
followed by PBS washes<br />
-endogenous biotin: 0.1% avidin 10 minutes, wash;<br />
0.01% biotin 10 minutes, wash<br />
---Block endogenous collagen binding: 1% BSA/PBS;--- add 10% serum<br />
---Primary reagents: Dilutions time incubation<br />
1._____________________________________________________<br />
2_____________________________________________________<br />
3._____________________________________________________<br />
4. ____________________________________________________<br />
5.._____________________________________________________<br />
6. ____________________________________________________<br />
-----Wash in buffer x3<br />
---Secondary reagents Dilutions time incubation<br />
Catalog number and lot number<br />
-----Wash in buffer x3<br />
---Tertiary reagents: Dilutions time incubation<br />
Catalog number and lot number<br />
-----Wash in buffer x3<br />
-----Further tiers and enhancements: Describe<br />
------Chromagen or Fluorescence marker used :<br />
------Wash in buffer x3<br />
------Mayers hematoxylin or nuclear fast red or none:<br />
-----Wash in buffer x3<br />
------Aquamount with or without diluted DAPI