2. Operation Guide
2. Operation Guide
2. Operation Guide

Create successful ePaper yourself
Turn your PDF publications into a flip-book with our unique Google optimized e-Paper software.
English<br />
R<br />
DJ MINGLE<br />
DM-16<br />
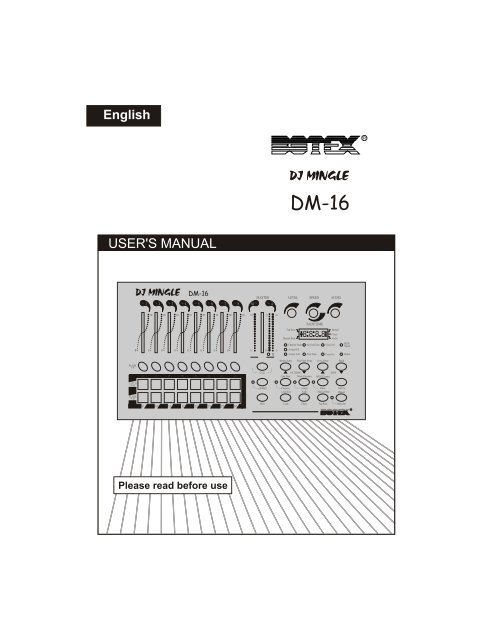
USER'S MANUAL<br />
DJ MINGLE<br />
DM-16<br />
8888<br />
0<br />
R<br />
Please read before use
Contents<br />
Features 1<br />
General Instructions 2<br />
1. Overview 3<br />
1.1 Front View 3<br />
1.2 Rear View 7<br />
<strong>2.</strong> <strong>Operation</strong> <strong>Guide</strong> 8<br />
<strong>2.</strong>1 Programming 8<br />
<strong>2.</strong>1.1 Programmable Patterns 8<br />
<strong>2.</strong>1.2 Assign Programming 11<br />
<strong>2.</strong>1.3 Delete a Pattern 12<br />
<strong>2.</strong>2 Running 13<br />
<strong>2.</strong><strong>2.</strong>1 Chase Mode 13<br />
<strong>2.</strong><strong>2.</strong>2 Manual Mode 13<br />
<strong>2.</strong><strong>2.</strong>3 Audio Mode 14<br />
<strong>2.</strong><strong>2.</strong>4 Loop Mode 14<br />
<strong>2.</strong><strong>2.</strong>5 Cross Mode 15<br />
DJ MINGLE<br />
DM-16<br />
Improvement and changes to<br />
specifications, design and this<br />
manual, may be made at any time<br />
without prior notice.<br />
R<br />
<strong>2.</strong>3 Patch Mode 18<br />
<strong>2.</strong>4 Blind Mode 20<br />
<strong>2.</strong>5 Manual <strong>Operation</strong> 21<br />
<strong>2.</strong>6 MIDI <strong>Operation</strong> 21<br />
<strong>2.</strong>6.1 MIDI Channel Setting 21<br />
<strong>2.</strong>6.2 MIDI Implementation 22<br />
<strong>2.</strong>7 Initialization 23<br />
Technical Specifications 24<br />
All rights reserved.
Features<br />
Thank you for your purchase of this BOTEX product.<br />
This DM-16 features include:<br />
16 DMX channels<br />
30 fixed patterns(31-60)<br />
30 programmable patterns(01-30)<br />
Each programmable pattern consists of a maximum of 99 scenes<br />
The chase of patterns with Manual/Chase/Audio/Cross<br />
Built-in microphone for Music triggering<br />
MIDI control over patterns, scenes, Full On and Stand By<br />
Power failure memory<br />
NOTE:<br />
A knowledge of MIDI and DMX is required to fully utilize this unit.<br />
1
General Instructions<br />
Read the instruction in this manual carefully and thoroughly, as they give important<br />
information regarding safety during use and maintenance. Keep this manual with<br />
the unit, in order to consult it in the future. If the unit is sold or given to another<br />
operator, make certain that it always has its manual, to enable the new owner to<br />
read about its operation and relative instructions.<br />
Warnings<br />
DO NOT make any inflammable liquids, water or metal objects enter the unit.<br />
Should any liquid be spilled on the unit, DISCONNECT the power supply to the unit<br />
immediately.<br />
STOP using the unit immediately In the event of serious operation problems and<br />
either contact your local dealer for a check or contact us directly.<br />
DO NOT open the unit--there are no user serviceable parts inside.<br />
NEVER try to repair the unit yourself. Repairs by unqualified people could cause<br />
damage or faulty operation. Contact your nearest dealer.<br />
Cautions<br />
This unit is NOT intended for home use.<br />
After having removed the packaging check that the unit is NOT damaged in any way.<br />
If in doubt, DON'T use it and contact an authorized dealer.<br />
Packaging material (plastic bags, polystyrene foam, nails, etc.) MUST NOT be left<br />
within children's reach, as it can be dangerous.<br />
This unit must only be operated by adults. DO NOT allow children to tamper or play<br />
with it.<br />
NEVER use the unit under the following conditions:<br />
In places subject to excessive humidity.<br />
In places subject to vibrations or bumps.<br />
In places with a temperature of over 45 C /113 F or less than 2 C/35.6 F.<br />
Protect the unit from excessive dryness or humidity (ideal conditions are between<br />
35% and 80%).<br />
DO NOT dismantle or modify the unit.<br />
2
DJ MINGLE<br />
DM-16<br />
8888<br />
0<br />
R<br />
1. Overview<br />
1.1 Front View<br />
1<br />
2<br />
3<br />
45<br />
6<br />
7 8 9 10<br />
12 13<br />
14<br />
15<br />
17 19 20<br />
16 18<br />
11<br />
26<br />
25<br />
24<br />
21<br />
22<br />
23<br />
3
1. Overview<br />
1.1 Front View<br />
1. Channel LEDs 1-8<br />
<strong>2.</strong> Channel Sliders<br />
3. Flash Buttons 1-8<br />
4. Channel LEDs 9-16<br />
5. Latch Buttons 9-16<br />
6. Flash Buttons 9-16<br />
7. Master Slider<br />
8. Level Knob<br />
9. Speed/Fade Time Knob<br />
10. Audio Knob<br />
11. Segment Display<br />
1<strong>2.</strong> Cross Button<br />
13. Shift Button<br />
Show the current intensity of the relevant channel<br />
numbered from 1 to 8.<br />
These 8 sliders are used to control the intensity of<br />
channels 1 to 8.<br />
These buttons are used to bring an individual or a group<br />
of channels to full intensity.<br />
Show the current intensity of the relevant channel<br />
numbered from 9 to 16.<br />
These 8 buttons are used for activating any of the 8<br />
programmed scenes or programs.<br />
These buttons are used to bring an individual or a group<br />
of channels to full intensity.<br />
This slider controls the output of channels 1-8, the M LED<br />
shows the current intensity.<br />
This slider is also used to advance the programs step by<br />
step, the A & B LEDs show the activity of the program.<br />
This knob controls the output of programs activated by the<br />
Latch buttons.<br />
This knob controls the speed at which the programs chase.<br />
This knob also sets the initial fade in or out of programmed<br />
scenes.<br />
This knob controls the sensitivity of the audio input.<br />
This 4-digit Segment Display shows the current<br />
programming or function state.<br />
Activates Cross mode for the chase of the programs.<br />
A second tap will deactivate this function.<br />
This button doesn't work when not used with other buttons.<br />
4
1. Overview<br />
1.1 Front View<br />
14. Add/Kill Button<br />
15. Loop/Loop Exit Button<br />
16. Program/End<br />
Step Button<br />
17. Chase/Audio Button<br />
18. Assign/Delete<br />
Program Button<br />
19. Tap Sync/<br />
Manual Step Button<br />
20. Stand By/<br />
Manual Button<br />
21. Patch/<br />
MIDI Channel Button<br />
2<strong>2.</strong> Full On Button<br />
This button is used to change between Add and Kill mode.<br />
In Add mode, multiple scenes or Flash buttons are enabled<br />
to be on at a time.<br />
In Kill mode, pressing any Flash button will kill any other<br />
scenes or programs. The LED lights when Kill mode is active.<br />
Activates Loop mode for the chase of programs.<br />
Keep pressing the Shift button, tap this button to leave<br />
Loop mode.<br />
This button is used to activate Program mode.<br />
In Program mode, keep pressing the Shift button, tap the<br />
button to determine the end step of the program.<br />
This button is used to activate Chase mode.<br />
This button is also used to activate Audio mode when<br />
pressing the Shift button.<br />
This button is used to activate Assign mode.<br />
This button is also used to delete the program when used<br />
with the Shift button.<br />
This button is used to set the chase speed by tapping the<br />
button several times.<br />
This button is also used to manual run the programs step<br />
by step when used with the Shift button.<br />
This button is used to kill all output except those from<br />
Flash buttons.<br />
This button is also used to activate Manual mode when<br />
used with the Shift button.<br />
This button is used to activate Patch mode.<br />
This button is also used to activate the setup of MIDI<br />
channel when used with the Shift button.<br />
This button is used to bring a group of channels 1-8<br />
to full intensity regardless of the Stand by button.<br />
5
1. Overview<br />
1.1 Front View<br />
23. Pattern Down/<br />
Fade Time Setup<br />
24. Step Down/<br />
Blind button<br />
25. Step Up/<br />
Cross Setup<br />
26. Pattern Up/<br />
Button Setup<br />
This button is used to select the program in the order<br />
of 60-1.<br />
This button is also used to activate the setup of Fade Time<br />
when used with the Shift button.<br />
This button is used to select the step of the program.<br />
This button is also used to activate Blind mode when used<br />
with the Shift button.<br />
This button is used to select the step of the program.<br />
This button is also used to activate the setup of Cross when<br />
used with the Shift button.<br />
This button is used to select the program in the order<br />
of 1-60.<br />
This button is also used to activate the functions in the<br />
following order; Channel Flash, Assign Kill and Assign Add.<br />
6
2<br />
3<br />
1<br />
1. Overview<br />
1.2 Rear View<br />
PUSH<br />
DC INPUT:<br />
12-20VDC, 250mA Min.<br />
POWER<br />
1=Ground<br />
2=Data-<br />
3=Data+<br />
AUDIO<br />
DMX OUT MIDI THRU MIDI IN Line Input: 0.1V~1Vp-p FOOT CONTROL<br />
1 2 3 4 5 6 7<br />
1. DC Input<br />
<strong>2.</strong> Power Switch<br />
3. DMX Output<br />
4. MIDI Thru<br />
5. MIDI In<br />
6. Audio Input<br />
7. Foot Controller<br />
DC 12-20V, 250 mA min.<br />
This switch controls the turning on or off of the power.<br />
This connector sends DMX signal to the fixture.<br />
This connector sends MIDI signal to the MIDI sequencer.<br />
This connector receives MIDI signal.<br />
This jack accepts a line level audio input signal ranged<br />
from 100mV to 1Vpp.<br />
Provides Full On, Stand By and so on via the Foot<br />
Controller(sold separately).<br />
7
<strong>2.</strong> <strong>Operation</strong> <strong>Guide</strong><br />
<strong>2.</strong>1 Programming<br />
<strong>2.</strong>1.1 Programmable Patterns<br />
30(01-30) programmable patterns may be programmed using the Channel<br />
sliders 1-8 or Latch buttons 9-16.<br />
1. Press the Program button until its LED lights indicating Program mode is active.<br />
<strong>2.</strong> Tap the Program Up/Down button to select the pattern you want to program, the<br />
Segment Display shows the pattern you select.<br />
3. Create a desired scene using the Channel sliders 1-8 or Latch buttons 9-16.<br />
4. Once the scene is satisfactory, tap the Program button to program this scene<br />
into memory.<br />
5. Repeat steps 3-4 until the desired number of steps are programmed.<br />
6. Tap the Step Down button once.<br />
7. Keep pressing the Shift button, tap the End Step button to determine the<br />
end step of the pattern, now you've programmed this pattern.<br />
EXAMPLE: Program a pattern with channels 1-16 fully on in sequence<br />
into the 11th programmable pattern.<br />
1. Press the Program button until its LED lights<br />
indicating Program mode is active.<br />
Program<br />
8
<strong>2.</strong> <strong>Operation</strong> <strong>Guide</strong><br />
<strong>2.</strong>1.1 Programmable Patterns<br />
<strong>2.</strong> Tap the Pattern Up/Down button to select the 11th<br />
pattern, the Segment Display shows your selection.<br />
Pattern<br />
1<br />
3. Move the Channel slider 1 to the top position and<br />
Channel sliders 2-8 to the bottom.<br />
2<br />
3. Tap the Program button to program this scene into<br />
memory, the Segment Display shows the next step.<br />
Program<br />
4. Repeat steps 2-3 all channel sliders are programmed,<br />
the Segment Display shows "11:09".<br />
5. Tap the Latch button 9 until its LED lights.<br />
LATCH<br />
9-16<br />
9
<strong>2.</strong> <strong>Operation</strong> <strong>Guide</strong><br />
<strong>2.</strong>1.1 Programmable Patterns<br />
6. Tap the Program button to program this step.<br />
Program<br />
7. Repeat steps 5-6 until all Latch buttons are<br />
programmed, the Segment Display shows "11:17".<br />
6<br />
8. Tap the Step Down button once, the Segment<br />
Display shows "11:16".<br />
Step<br />
End Step<br />
9. Keep pressing the Shift button, tap the End Step<br />
button to determine the end step of this pattern.<br />
Shift<br />
Program<br />
10
<strong>2.</strong> <strong>Operation</strong> <strong>Guide</strong><br />
<strong>2.</strong>1.2 Assign Programming<br />
The Flash buttons can be used to assign the programming of patterns.<br />
1. Press the Assign button until its LED lights.<br />
<strong>2.</strong> Create a desired scene using the Channel sliders 1-8 or Latch buttons 9-16.<br />
3. Keep pressing the Assign button, tap the Flash button you wish to assign<br />
programming of the pattern, all channel LEDs will flash briefly.<br />
EXAMPLE: Program channels 1-4 fully on and channels 5-16 fully off<br />
into the Flash 1 button.<br />
1. Press the Assign button until its LED lights.<br />
Assign<br />
1 5<br />
<strong>2.</strong> Move the Channel sliders 1-4 to top and the other<br />
Channel sliders to bottom.<br />
FLASH<br />
1-9<br />
3. Keep pressing the Assign button, tap the Flash<br />
button 1 to assign programming of the pattern.<br />
Assign<br />
11
<strong>2.</strong> <strong>Operation</strong> <strong>Guide</strong><br />
<strong>2.</strong>1.3 Delete a Pattern<br />
1. Press the Program button until its LED lights<br />
indicating Program mode is active.<br />
Program<br />
<strong>2.</strong> Tap the Pattern Up/Down button to select the<br />
pattern you wish to delete, the Segment Display<br />
shows your selection.<br />
Pattern<br />
Delete Program<br />
3. Keep pressing the Shift button, tap the Delete<br />
Program button to delete this pattern.<br />
Shift<br />
Assign<br />
12
<strong>2.</strong> <strong>Operation</strong> <strong>Guide</strong><br />
<strong>2.</strong>2 Running<br />
<strong>2.</strong><strong>2.</strong>1 Chase Mode<br />
02<br />
Chase<br />
Tap the Chase button, the Chase indication in<br />
the Segment Display lights indicating Chase<br />
mode is active.<br />
Chase<br />
In Chase mode, the pattern will chase automatically<br />
once the pattern is selected. You can control the<br />
chase of pattern using the Level knob or Speed/<br />
Fade Time knob.<br />
Tap Sync<br />
0225<br />
Tap Sync<br />
Chase<br />
In Chase mode, repeatedly tapping the Tap Sync<br />
button establishes the chase speed. The last two<br />
taps determine the speed with a maximum of 5<br />
minutes and the Tap Sync indication in the Segment<br />
Display lights. Tap Sync will override any previous<br />
setting of the Speed/Fade Time knob unless you<br />
adjust the Speed/Fade Time knob again.<br />
<strong>2.</strong><strong>2.</strong>2 Manual Mode<br />
Manual Step<br />
05<br />
Manual Step<br />
Keep pressing the Shift button, tap the Manual Step<br />
button, the Manual Step indication in the Segment<br />
Display lights indicating Manual mode is active.<br />
Shift<br />
Tap Sync<br />
In Manual mode, you can manually run the pattern<br />
using the Step Up/Down buttons.<br />
13
<strong>2.</strong> <strong>Operation</strong> <strong>Guide</strong><br />
<strong>2.</strong><strong>2.</strong>3 Audio Mode<br />
05<br />
Audio<br />
Audio<br />
Keep pressing the Shift button, tap the Audio<br />
button, the Audio indication in the Segment<br />
Display lights indicating Audio mode is active.<br />
Shift<br />
Chase<br />
In Audio mode, the chase of patterns will be<br />
controlled by the external music rhythms.<br />
<strong>2.</strong><strong>2.</strong>4 Loop Mode<br />
In Chase mode, the Loop button allows you to continue the chase of<br />
several patterns in sequence.<br />
EXAMPLE: Continue the chase of pattern 31, 41 and 51 in sequence.<br />
1. Tap the Chase button to activate Chase mode.<br />
Chase<br />
<strong>2.</strong> Tap the Pattern Up/Down button to select<br />
pattern 31.<br />
Pattern<br />
14
<strong>2.</strong> <strong>Operation</strong> <strong>Guide</strong><br />
<strong>2.</strong><strong>2.</strong>4 Loop Mode<br />
3. Tap the Loop button.<br />
Loop<br />
4. Repeat steps 2-3 to select patter 41 and 51.<br />
Wait for about 10 seconds, the three patterns you've selected will<br />
continuously chase in sequence.<br />
<strong>2.</strong><strong>2.</strong>5 Cross Mode<br />
In Chase mode, the scenes of pattern may fade in or out subsequently<br />
using the Master Slider.<br />
EXAMPLE: Chase the pattern with channels 1-8 to fade in sequentially.<br />
Cross On<br />
Cross Setup<br />
1. Keep pressing the Shift button, tap the Cross<br />
Setup button until the Cross On LED lights.<br />
Shift<br />
15
<strong>2.</strong> <strong>Operation</strong> <strong>Guide</strong><br />
<strong>2.</strong><strong>2.</strong>5 Cross Mode<br />
<strong>2.</strong> Tap the Pattern Up/Down button to select<br />
the pattern you wish to run.<br />
Pattern<br />
3. Move the Master Slider to top, the M LED<br />
lights at full intensity.<br />
4. Tap the Cross button to activate Cross mode.<br />
Cross<br />
5. Turn the Level knob to maximum causing A LED<br />
lights at full intensity.<br />
16
<strong>2.</strong> <strong>Operation</strong> <strong>Guide</strong><br />
<strong>2.</strong><strong>2.</strong>5 Cross Mode<br />
6. Move the Master Slider slowly down, the A LED<br />
fades out and the B LED fades in, the channel 8<br />
fades down and the channel 1 fades up.<br />
When the Master Slider is fully down, the channel<br />
8 is fully off and the channel 1 is fully on.<br />
7. Move the Master Slider slowly up, the A LED<br />
fades in and the B LED fades out, the channel 1<br />
fades down and the channel 2 fades up.<br />
When the Master Slider is fully up, the channel<br />
1 is fully off and the channel 2 is fully on.<br />
8. Repeat steps 6-7 to manually run the pattern<br />
step by step.<br />
Cross Off<br />
Cross Setup<br />
9. Keep pressing the Shift button, tap the Cross<br />
Setup button until the Cross Off LED lights<br />
indicating Cross is deactivated.<br />
Shift<br />
17
<strong>2.</strong> <strong>Operation</strong> <strong>Guide</strong><br />
<strong>2.</strong>3 Patch Mode<br />
In Patch mode, you may easily allocate the outgoing channels(1-16) to<br />
your light fixtures(DMX channels 1-96), zero output or full output.<br />
EXAMPLE: Reverse outgoing channels 1-16 with DMX channels 16-1.<br />
1. Press the Patch button until its LED lights<br />
indicating Patch mode is active.<br />
Patch<br />
0<br />
Audio<br />
<strong>2.</strong> Tap the Step Up/Down button until the Segment<br />
Display shows "01" in the right two characters.<br />
Step<br />
6<br />
Audio<br />
3. Tap the Pattern Up/Down button until the Segment<br />
Display shows "16" in the left two characters.<br />
The channel 16 is allocated to the DMX channel 1.<br />
Pattern<br />
18
<strong>2.</strong> <strong>Operation</strong> <strong>Guide</strong><br />
<strong>2.</strong>3 Patch Mode<br />
0<br />
2<br />
Audio<br />
4. Tap the Step Up/Down button until the Segment<br />
Display shows "02" in the right two characters.<br />
Step<br />
5 2<br />
Audio<br />
5. Tap the Pattern Up/Down button until the Segment<br />
Display shows "15" in the left two characters.<br />
The channel 15 is allocated to the DMX channel <strong>2.</strong><br />
Pattern<br />
6. Repeat steps 4-5 until channel 1 is allocated to<br />
DMX channel 16.<br />
7. Press the Patch button until its LED goes out<br />
indicating Patch mode is deactivated.<br />
Patch<br />
19
<strong>2.</strong> <strong>Operation</strong> <strong>Guide</strong><br />
<strong>2.</strong>4 Blind Mode<br />
Blind<br />
Enable<br />
1. Keep pressing the Shift button, tap the Blind<br />
button until the Enable LED lights indicating<br />
Blind mode is active.<br />
Shift<br />
Shift<br />
FLASH<br />
1-8<br />
<strong>2.</strong> Keep pressing the Shift button, tap the desired<br />
Flash button, the corresponding channel will be<br />
off regardless of the chase of any pattern.<br />
Blind<br />
Enable<br />
3. Keep pressing the Shift button, tap the Blind<br />
button again causing the Enable LED goes<br />
out, Blind is deactivated.<br />
Shift<br />
20
<strong>2.</strong> <strong>Operation</strong> <strong>Guide</strong><br />
<strong>2.</strong>5 Manual <strong>Operation</strong><br />
0<br />
Shift<br />
2<br />
Manual<br />
Stand By<br />
Manual<br />
Keep pressing the Shift button, tap the Manual<br />
button until the Manual indication in the Segment<br />
Display lights indicating Manual is active.<br />
Now you can control the channel output temporarily<br />
using the Channel sliders , Flash buttons or Latch<br />
buttons.<br />
<strong>2.</strong>6 MIDI <strong>Operation</strong><br />
<strong>2.</strong>6.1 MIDI Channel Setting<br />
ch<br />
88<br />
MIDI Channel<br />
1. Keep pressing the Shift button, tap the MIDI<br />
Channel button until the Segment Display<br />
shows "CH:XX".<br />
Shift<br />
<strong>2.</strong> Tap the Step Up/Down button to select MIDI<br />
channel.<br />
Step<br />
3. Press both the Shift and MIDI Channel buttons<br />
again until the Segment Display doesn't show<br />
"CH" indicating this unit is out of MIDI Channel<br />
setting.<br />
21
<strong>2.</strong> <strong>Operation</strong> <strong>Guide</strong><br />
<strong>2.</strong>6.2 MIDI Implementation<br />
1. During receiving MIDI data, MIDI data will be dumped and the MIDI Signal LED<br />
will go out if there is no response within 10 minutes.<br />
<strong>2.</strong> Be sure to make a MIDI Channel adjustment according to the setting of the<br />
MIDI storage unit.<br />
3. All the patterns turned on by MIDI will chase synchronously and not controlled<br />
by the Level knob.<br />
4. This unit receives Note On/Off signals according to the following table:<br />
Note NO. Velocity Functions<br />
22-81 Pattern Master Turn On/Off patterns 1-60<br />
82-97<br />
99<br />
101<br />
102<br />
Channel Intensity Flash Buttons<br />
Full On<br />
Step<br />
Stand By<br />
22
<strong>2.</strong> <strong>Operation</strong> <strong>Guide</strong><br />
<strong>2.</strong>7 Initialization<br />
When malfunction or mess occurs, you may make a initialization to<br />
dump the memory.<br />
Shift<br />
Latch<br />
Buttons<br />
9 13 10 14 11 15 12 16<br />
Keep pressing the Shift button, tap the Latch buttons 9, 13, 10, 14, 11, 15, 12<br />
and 16 in sequence, all LEDs and the Segment Display will go out indicating<br />
this unit is initialized. Several latter, this unit recovers normal condition, now<br />
you can program the pattern again.<br />
NOTE: This operation does harm to the memory.<br />
23
Technical Specifications<br />
Power Input ............................................... DC 12-20V, 250 mA min.<br />
DMX Output .......................................................... 3 pin female XLR<br />
MIDI Signal ................................................. 5 pin standard interface<br />
Audio Input ................................................... By built-in microphone<br />
Audio Signal ................................................................ 100mV-1Vpp<br />
Dimensions ............................................................. 482x178x73mm<br />
Weight(appro.) ........................................................................ <strong>2.</strong>3 kg<br />
24
Rev <strong>2.</strong>2<br />
E-mail: info@botex.com<br />
R<br />
24-004-0108<br />
Web Site: www.botex.com