Issue 5 - Amazon Web Services
Issue 5 - Amazon Web Services
Issue 5 - Amazon Web Services

Create successful ePaper yourself
Turn your PDF publications into a flip-book with our unique Google optimized e-Paper software.
5<br />
ISSUE<br />
Sweet Dreams Minkee Throw<br />
Authentic Denim<br />
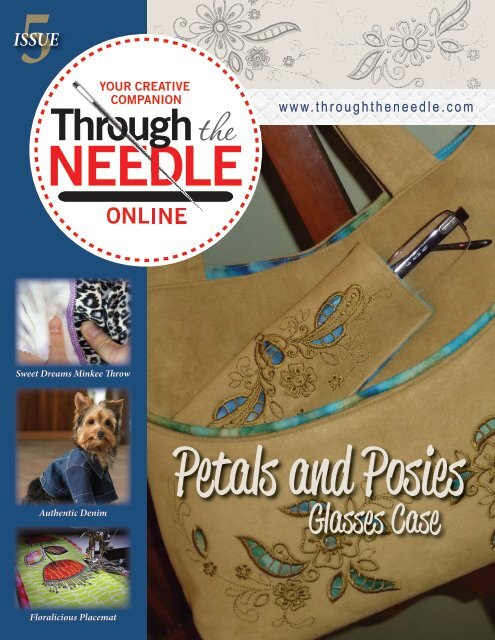
Petals and Posies<br />
Glasses Case<br />
Floralicious Placemat
2 • THROUGH THE NEEDLE ONLINE<br />
Table of Contents<br />
Sew Authentic Jeans – Machine Accessories Make It Easy<br />
4 What makes a pair of pants into “jeans” Rugged construction, typified by<br />
bulky seams and hems and double-stitched accents, is the key. With the<br />
right tools, and our tips & tricks, you can replicate these features on your<br />
home sewing machine.<br />
Petals & Posies Glasses Case<br />
8 Who says girls with glasses have to keep them in boring cases This beautiful<br />
cutwork case is stitched almost entirely on the embroidery machine. If you<br />
have the BERNINA CutWork Accessory, your machine will even do the fussy<br />
cutting for you!<br />
Sweet Dreams<br />
10 Use your serger and a pre-cut quilt-block kit to create a great baby shower<br />
gift in an afternoon! In this cuddly quilt, basic serger stitches are paired<br />
with decorative threads to produce seams that are attractive as well as<br />
functional.<br />
Floralicious Placemats & Napkins<br />
12 This pair of reversible placemats, featuring the coordinating Benartex fabric<br />
and OESD embroidery “Floralicious” collections, is a bright and cheery<br />
accent for spring.<br />
Floral Visions Heirloom Pillow<br />
16 The BERNINA 830 has the tremendous capability of bringing ALL sewing and<br />
decorative stitches into its embroidery system, and embroidering them<br />
instead of stitching them. Several of these “transformed” stitches were<br />
saved and transferred to BERNINA Embroidery Software, and then used<br />
to create perfectly proportioned stitches for the oval “frames” on this<br />
heirloom-inspired pillow.<br />
The Last Word<br />
20 Valuable coupons, a list of quick links, and a sneak peek inside the next<br />
issue of Through the Needle ONLINE.<br />
Managing Editor / Creative Director<br />
Jo Leichte<br />
Contributing Editor<br />
Barbara Weiland Talbert<br />
Graphic Artist<br />
Lisa Klingbeil<br />
Contributing Authors<br />
Elaine Cibelli<br />
Susan Fears<br />
Jo Leichte<br />
Through the Needle Online is published six<br />
times a year by BERNINA of America, Inc. for<br />
machine stitchers and embroiderers of all types<br />
and all skill levels.<br />
This publication may be shared and reproduced in<br />
its original format, with the stipulation that credit<br />
be given to Through the Needle Online.<br />
3702 Prairie Lake Court, Aurora, IL 60504<br />
berninausa.com<br />
throughtheneedle.com<br />
©BERNINA of America, Inc., 2011
ISSUE 5 • 3<br />
Needle Notes<br />
It’s spring! It may not feel like it in northern parts of the USA, but spring officially arrived in March regardless of<br />
the amount of snow still falling. Need some convincing Stitch up a set of our Floralicious Placemats and Napkins<br />
and you’ll be ready for al fresco dining on the patio, even if you have to clear away the snow before you set the<br />
table.<br />
Spring is also the perfect time to sew new items for your wardrobe — a great pair of jeans, for example.<br />
Shopping for jeans can be a two-fold challenge. Finding a pair that fits comes first, but often when you finally<br />
find a pair that does fit, the style is hopelessly wrong. If you make your own jeans ... well, that’s a different<br />
story. It’s easy to make authentic “jeans” when you use just the right collection of feet and accessories for<br />
sewing denim. Pair these with select sewing techniques and you’ll be wearing jeans that fit and look great in<br />
no time!<br />
Sunglasses, reading glasses, and regular old “need-em-to-see” spectacles — they all deserve a protective case<br />
that’s pretty as well as functional. And with Mother’s Day just around the corner, wouldn’t a custom-made<br />
case be a great gift for Mom The beautiful cutwork on this elegant accessory is from OESD’s Posies & Petals<br />
embroidery collection. All of the stitching and cutting can be done on your embroidery machine using the<br />
BERNINA CutWork Accessory. While your embroidery machine is stitching away, pull out your serger and make a<br />
snuggly Minkee patchwork quilt. Pre-cut blocks from Benartex and speedy serger seaming make construction<br />
oh-so-fast. You’ll only need your sewing machine for sewing on the buttons!<br />
I hope you enjoy this issue of Through the Needle ONLINE. I love hearing from our<br />
readers, so if you have suggestions for future issues, please send them to me at<br />
jo @ berninausa.com. Have a lovely spring, and watch for our next issue in June!<br />
Jo Leichte<br />
Editor<br />
Ruffled Scarf<br />
Design a ruffled scarf without ruffling<br />
a single feather. Create this unique,<br />
playful scarf so quickly and easily that<br />
you’ll want one for every outfit and<br />
season. With spring just around the<br />
corner, begin your collection with a<br />
light, breezy cotton scarf!<br />
Project by Ashley Johnston<br />
Visit sewingrepublic.com for more<br />
project instructions and sewing tips!
4 • THROUGH THE NEEDLE ONLINE<br />
Sew<br />
Authentic<br />
Jeans<br />
Machine Accessories Make it Easy<br />
by JO LEICHTE<br />
Nearly everyone has a denim garment in their wardrobe: a pair<br />
of jeans that fit just right, a pencil skirt with jeans detailing,<br />
or a well-worn jacket that goes with everything. From the first<br />
pair of hard-wearing denim pants stitched by Levi Strauss during<br />
the Gold Rush to the designer jeans of today, “blue jeans” are<br />
an American icon and a ubiquitous part of modern culture. What<br />
makes a pair of pants into “jeans” The rugged construction —<br />
typified by bulky seams and hems and double-stitched accents<br />
— is the key. Ready-made jeans are sewn on industrial machines<br />
that are specially designed to produce these features, but with<br />
the right tools, and these tips & tricks, you can replicate them<br />
on your home sewing machine.<br />
“5-Pocket Jeans” for<br />
BERNINA My Label 3D<br />
Fashion Pattern Software<br />
Kwik-Sew #3431<br />
Kwik-Sew #3504<br />
Kwik-Sew #3193
ISSUE 5 • 5<br />
The Basics: Stitches, Needles, and Thread<br />
• For construction, select a medium-long, straight<br />
stitch with a stitch length of 3mm and use a<br />
strong thread such as Mettler Metrosene Plus.<br />
Despite its fineness, this thread has a very high<br />
tensile strength and abrasion resistance, making<br />
it the ideal thread for sewing jeans.<br />
• For plain seaming on denim using constructionweight<br />
thread, select a size 80/12 or 90/14<br />
Jeans needle. Jeans needles have very sharp<br />
points and are able to penetrate thick, sturdy<br />
material easily.<br />
• Use a thick thread for contrast topstitching,<br />
such as Mettler Cordonnet or YLI JeansStitch,<br />
and lengthen the straight stitch length to 4mm.<br />
Get the look of ready-made jeans by using<br />
gold-colored threads such as Mettler Cordonnet<br />
colors #0261 and #0172 or YLI JeansStitch colors<br />
#8 (Topaz Gold) and #7 (Blue Jean Gold).<br />
• For contrast stitching with topstitching thread,<br />
select a size 90/14 or 100/16 Topstitch needle.<br />
The large eye and deep groove accommodate<br />
the thick thread and allow it to move easily<br />
through the fabric.<br />
• Use an overlock or<br />
overcast stitch with<br />
construction-weight<br />
thread for finishing raw<br />
edges, such as the fly<br />
facing. Alternatively,<br />
use a serger 4-thread<br />
overlock stitch<br />
with regular weight<br />
polyester serger<br />
thread such as Mettler<br />
Metrocor or YLI Elite<br />
Premium Serger<br />
Thread.<br />
Machine Accessories:<br />
Tools for Perfect Seams and Hems<br />
Height-Compensating Tool<br />
Skipped stitches and snapped needles With the<br />
Height-Compensating Tool you’ll sew quickly and<br />
easily over every seam. Simply sew as you normally<br />
do, stopping when the presser foot comes up against<br />
the cross seam. Adjust the number of strips to<br />
one, two, or three, depending on the thickness of<br />
the seam to be sewn over. With the needle down<br />
in the fabric, raise the presser foot and place the<br />
tool under the foot and behind the needle. This<br />
levels the sole, allowing it to continue pressing<br />
against the feed dog and feeding the fabric through<br />
the machine. Lower the presser foot and continue<br />
sewing into the bulky<br />
area, nudging the tool<br />
forward as you go.<br />
As the foot begins to<br />
move off the seam,<br />
move the tool to<br />
the side of the foot,<br />
keeping the sole level.<br />
Remove the tool when<br />
no longer needed.<br />
Jeans Foot<br />
Designed specifically for<br />
straight stitching over<br />
bulky seams, a jeans foot<br />
(BERNINA Jeans Foot #8/8D)<br />
supports the fabric around<br />
the needle and prevents it<br />
from pulling the fabric when<br />
it moves up and down. It is<br />
also engineered to prevent<br />
Jeans needles from flexing<br />
and breaking.<br />
Edgestitch Foot<br />
Contrast stitching gives the jeans style its distinctive<br />
appearance. Keeping those stitches perfectly parallel<br />
to the edges can be difficult, particularly when<br />
working with bulky fabrics like denim. An edgestitch<br />
foot, such as BERNINA Edgestitch Foot #10/10C/10D,<br />
will be your new BFF! (BERNINA Friend Forever!).<br />
Simply move the needle position a few clicks to the<br />
left and move the fabric edge along the guide in the<br />
center of the foot. Stitches will be placed just inside<br />
the edge.<br />
TIP: For perfect pocket<br />
points, stitch to a corner<br />
and stop with the needle<br />
down in the fabric. Raise<br />
the presser foot, pivot the<br />
fabric around the needle,<br />
lower the presser foot,<br />
and continue stitching. For<br />
faster and more efficient<br />
stitching, raise and lower<br />
the presser foot using the<br />
knee lever of the BERNINA Free Hand System — this<br />
lets you keep your hands on your project rather than<br />
on the lever.
6 • THROUGH THE NEEDLE ONLINE<br />
Seam Guide<br />
A double row of stitches along the side seams is<br />
another feature of jeans-style garments. After<br />
sewing the first row of<br />
stitches with an edgestitch<br />
foot, as above, attach<br />
an all-purpose foot and a<br />
seam guide to the machine.<br />
Shown here are BERNINA<br />
Reverse Pattern Foot #1D<br />
and the Adjustable Seam<br />
Guide. Adjust them as<br />
needed, then stitch, guiding<br />
the fabric easily along the<br />
edge.<br />
TIP: If your sewing machine has a dual-feed feature,<br />
such as the one on the BERNINA 8 Series machines,<br />
engage it when topstitching your denim seams.<br />
Automatic<br />
Buttonhole Foot<br />
Sew a test buttonhole<br />
through layers of scrap<br />
denim before stitching<br />
it on the project. For<br />
an accurate test, use<br />
the same layers of<br />
denim and interfacing<br />
as are in the waistband.<br />
Once the buttonhole<br />
is programmed into<br />
memory you are able to<br />
stitch as many identical buttonholes as needed for<br />
your project.<br />
Tip: The slit width of buttonholes on the BERNINA 8<br />
Series sewing machines can be adjusted as needed to<br />
accommodate thick-shank buttons.<br />
Belt Loops<br />
Instead of being drafted<br />
with seam allowances,<br />
belt loops are generally<br />
cut in a long strip just<br />
under three times the<br />
finished width. Finish<br />
one long edge with an<br />
overcasting stitch or<br />
serger overlock. Fold<br />
the strip in thirds, first<br />
turning the raw edge<br />
under, then covering it<br />
with the finished edge.<br />
Topstitch both long edges from the right side,<br />
then cut into shorter lengths as directed by the<br />
pattern instructions.<br />
TIP: As an alternative to edgestitching, sew<br />
along the center of the strip using a 4mm wide<br />
Double needle. Another option is a serger<br />
coverstitch. With these methods the underside<br />
of the beltloop is encased in stitches, so it is not<br />
necessary to finish one long edge before folding.<br />
Clear Foot<br />
An all-purpose presser foot<br />
with a clear sole (BERNINA<br />
Clear Foot #34/34C)<br />
provides increased visibility<br />
in the stitching area. This<br />
is especially helpful when<br />
sewing curves and corners.<br />
Zipper Foot<br />
Jeans typically have a fly zipper, which is basically<br />
a zipper with a flap behind it. A zipper foot allows<br />
stitching right at the edges of the foot, which makes<br />
it possible to stitch against the bulky areas, including<br />
zipper coils and the fly shield that lies underneath<br />
the zipper.<br />
Bartacks are the authentic way to attach belt<br />
loops and reinforce the stress points of pockets<br />
and fly zippers. Use Wonder Tape to hold the belt<br />
loops in place, then use the Height Compensating<br />
Tool to level the sole of the presser foot when<br />
stitching them in place.
ISSUE 5 • 7<br />
Flat-Felled Seams<br />
For authentic jeans style, sew the outer leg edges<br />
together with a flat-felled seam.<br />
Traditional Flat-Felled Seam<br />
Because it is stitched twice, this<br />
seam is very sturdy. Bulkier than a<br />
traditional seam, flat-felled seams<br />
are completely finished on both<br />
sides, having the raw edges tucked<br />
inside and stitched in place.<br />
• Pin the fabrics wrong sides<br />
together. Stitch, then press the<br />
seam allowances to one side.<br />
• Trim the lower seam allowance to<br />
half its width.<br />
• Fold the top seam allowance around the lower<br />
one; press.<br />
• Edgestitch the fold to hold it in place. In addition,<br />
edgestitch along the seam, creating parallel rows<br />
of stitching about ¼" apart.<br />
Felling Foot Seam<br />
A felling foot (BERNINA 8mm Lap Seam Foot #71)<br />
eliminates the tedious trimming and folding needed<br />
to produce traditional flat-felled seams, and is<br />
appropriate for light- to medium-weight denim.<br />
• Allow a total of ¾" for seam allowances: ½" for<br />
the folded piece + ¼" for the covered piece. Or<br />
— to make the math easy — just trim ¼" off each<br />
seam allowance; this will only slightly change the<br />
location of the seam.<br />
• Place fabric edges wrong sides together, with the<br />
longer piece underneath — ½" extends to the right<br />
and is folded over the inner edge.<br />
• Align the fold with inner edge of the right toe of<br />
the foot and adjust the needle position to the left<br />
as shown. Stitch; the fabric edge is automatically<br />
folded and held in place for stitching.<br />
• Position the fabric under the foot again; this time<br />
stitch along the fold line to create a second line of<br />
stitching along the folded edge.<br />
TIP: Sew a few stitches at the beginning of the seam to<br />
tack the fold in place before loading it into the foot.<br />
TIP: When stitching over bulky seams, remove the<br />
fabric from the foot just before the seam, stitch<br />
over the bulk, then reinsert the fabric and continue<br />
stitching.<br />
Faux Flat-Felled Seam<br />
This seam is simpler to sew than a true flat-felled<br />
seam. From the outside it looks like a flat-felled<br />
seam, but the seam allowances<br />
are visible on the inside of the<br />
garment.<br />
• Pin fabrics right sides together<br />
and stitch as for a plain ⅝"-<br />
wide seam.<br />
• Overcast (or serger overlock)<br />
the seam allowances together<br />
and press them toward the<br />
back of the garment.<br />
• From the right side,<br />
edgestitch close to the seam<br />
line. Topstitch about ¼" from<br />
the edgestitching; this stitching will hold the seam<br />
allowances in place.<br />
Resources<br />
Inspiration magazine, <strong>Issue</strong> #43, Spring 2009<br />
http: // www. bernina .com/naviinfo-n31-sEN.html<br />
“My Label Jeans” webinar, Debbi Lashbrook, May<br />
2009 (www. berninausa .com > Online Classes > My<br />
Label Classes) http: // www. berninausa. com/news_<br />
detail-n546-r0-i3545-sUS.html<br />
Feetures Volumes 1 & 2, Jo Leichte and Susan Beck,<br />
editors, ©BERNINA of America, Inc., 2002
8 • THROUGH THE NEEDLE ONLINE<br />
Visit www.berninausa.com<br />
to download instructions for<br />
a coordinating Pocket Full of<br />
Petals & Posies Purse.<br />
Who says girls with glasses have to keep<br />
them in boring cases This beautiful<br />
cutwork case is stitched almost entirely on<br />
the embroidery machine. If you have the<br />
BERNINA CutWork Accessory, your machine<br />
will even do the fussy cutting for you! (Or<br />
you can use sharp scissors to do the cutting<br />
yourself.) Instructions for both methods<br />
are included with OESD’s Petals & Posies<br />
Crafters Collection #011.<br />
Petals<br />
& Posies<br />
Glasses<br />
Case<br />
Supplies<br />
• Embroidery machine<br />
• Sewing machine<br />
• BERNINA CutWork compatible sewing machine<br />
(optional)<br />
• BERNINA CutWork Software and Accessory<br />
(optional)<br />
• BERNINA Embroidery Software 6<br />
• 7" x 11" rectangle of UltraSuede ®<br />
• 7" x 11" rectangle of batik fabric for lining<br />
• OESD BadgeMaster Stabilizer<br />
• Steam-A-Seam 2 double-stick fusible web<br />
• 505 Temporary Basting Spray<br />
• Isacord embroidery thread to blend with<br />
UltraSuede ®<br />
• Large oval hoop<br />
• Sharp embroidery scissors<br />
• Echo-Quilting and CutWork Foot #44<br />
• Edgestitch Foot #10/10C/10D<br />
In the Embroidery Software<br />
Select File > New.<br />
Right click on the Hoop icon and select artista<br />
255x145 Oval w/X-Y lines from the list of available<br />
hoops. Click OK.<br />
by ELAINE CIBELLI<br />
Left click on the Grid icon to turn on the grid.<br />
Create a fabric placement line: Select the Open<br />
Object tool and a straight stitch. Starting five grids<br />
spaces down and four grids spaces from the center,<br />
digitize the line using left and right clicks around the<br />
hoop. Press Enter.<br />
Create the tack-down stitches: Copy and Paste the<br />
line and change the color.<br />
Press Ctrl + A on<br />
the keyboard to<br />
Select All. Click on<br />
the Align Centers<br />
icon.<br />
Click on the Grid<br />
icon to remove<br />
the grid.
ISSUE 5 • 9<br />
Select File > Insert Design and navigate to the Petals<br />
and Posies design folder. Select BC01107_CWC for<br />
use with the BERNINA Cutwork Tool; otherwise<br />
select BC01107. Center the design inside the oval<br />
placement line and to the right of the hoop center<br />
line.<br />
With the design selected, click on the Mirror-Merge<br />
Horizontal icon to create a duplicate; use the center<br />
line of the hoop to help with positioning. Press Enter.<br />
After cutting,<br />
patch the stabilizer<br />
by spraying the<br />
underside of the<br />
hooped stabilizer<br />
with 505 Temporary<br />
Adhesive and<br />
covering the holes<br />
with a piece of BadgeMaster.<br />
To create the stitching line, select, copy, and paste<br />
the placement line, then change the color of the<br />
stitches. Change Outline to Triple stitch.<br />
Use Color Film to re-sequence the stitch objects:<br />
Hold down the Ctrl key and select the stitching line,<br />
then select the placement line and click on the Align<br />
Centers icon. Select Sequence to End.<br />
Reduce the number of thread changes by selecting<br />
Arrange > Stitch Sequence and clicking on Yes.<br />
Save the design as CutWork Glasses Case.<br />
Select the Write to Machine icon to send the design<br />
to the machine or a BERNINA Memory Stick.<br />
At the Embroidery Machine<br />
Hoop a piece of BadgeMaster stabilizer in the Large<br />
Oval Hoop.<br />
Stitch the first color—the fabric placement line—on<br />
the stabilizer.<br />
Spray the wrong side of the UltraSuede ® with 505<br />
Temporary Adhesive and smooth it into place over<br />
the stitched outline. Be sure to cover the outline<br />
completely.<br />
Stitch the next color of the design, the staystitching.<br />
Change to the BERNINA CutWork tool and follow the<br />
on-screen prompts to cut the fabric away from inside<br />
the lines. Alternatively, remove the hoop from the<br />
embroidery machine and use scissors for the cutwork<br />
following the instructions included with the design<br />
collection.<br />
Continue stitching the embroidery design.<br />
Place the lining fabric right side down on top of the<br />
hooped cutwork and embroider the triple stitching.<br />
Remove the project<br />
from the hoop<br />
and trim the seam<br />
allowances a scant ¼″<br />
from the stitching line.<br />
Turn the case right<br />
side out through the<br />
opening.<br />
Working from the<br />
lining side, carefully<br />
press the outer edge. Tuck a small piece of Steam-A-<br />
Seam 2 between the seam allowances; fuse to close<br />
the opening.<br />
Fold the case in half with the lining inside and<br />
the finished edges aligned. Attach Edgestitch Foot<br />
#10/10C/10D to the machine and move the needle<br />
position to the left. Align the edge of the glasses<br />
case with the guide in the center of the foot, then<br />
stitch the<br />
sides together<br />
along the<br />
long, curved<br />
edge only,<br />
leaving the<br />
top of the<br />
case open.
10 • THROUGH THE NEEDLE ONLINE<br />
Sweet Dreams<br />
Sergers can be used for so much more<br />
than just joining and overlocking<br />
seams. In this cuddly quilt, two basic<br />
serger seam operations are paired with<br />
decorative threads to produce seams<br />
that are attractive as well as functional.<br />
When using pre-cut squares from a<br />
Benartex quilt kit, this cozy and adorable<br />
blanket goes together very quickly! This<br />
project is a great canvas for machine<br />
embroidery—consider adding a large<br />
motif on one corner or scatter several<br />
randomly throughout the squares.<br />
by BRANDON GARBER<br />
Supplies<br />
• Sewing machine<br />
(BERNINA artista 630)<br />
• Serger (BERNINA 1300MDC)<br />
• 1 “Minkee Tween” or “Minkee Safari”<br />
quilt kit by Benartex<br />
• 2 yards of 44"-wide quilter’s cotton<br />
for backing (pre-washed)<br />
• 12 coordinating buttons, ¾" or ⅞" diameter<br />
• 3 spools of Pearl Crown Rayon by YLI<br />
• 1 spool of King Tut by Superior Threads<br />
• 1 spool of coordinating serger thread<br />
• Size 90/14 Topstitch needle<br />
• Button sew-on foot (BERNINA Button Sew-On Foot #18)
ISSUE 5 • 11<br />
Serge the Rows<br />
Thread the serger for a wide 3-thread flatlock with<br />
Pearl Crown Rayon in the upper looper, King Tut in<br />
the lower looper, and regular serger thread in the<br />
left needle. Make the following adjustments:<br />
• Upper Looper Tension = 3<br />
• Lower Looper Tension = 8<br />
• Left Needle Tension = 2<br />
• Right Needle = Removed<br />
• Stitch Length = 3<br />
• Differential Feed = N<br />
Join two squares by placing<br />
them wrong sides together<br />
and serging along one side,<br />
trimming only about ⅛" of fabric from the edge.<br />
Minkee is a knit fabric, so join the blocks forming<br />
the rows on the lengthwise grainline. The flatlocked<br />
seam will look like a regular overlock stitch as it<br />
comes off the machine.<br />
Grip each block close to the<br />
seam and pull the squares<br />
apart. The seam will open and<br />
lie flat, exposing the Pearl<br />
Crown Rayon on the quilt top<br />
and a ladder-like stitch on the<br />
wrong side.<br />
Working left to right and top to bottom, assemble<br />
rows of blocks using the diagram from the quilt kit as<br />
a guide.<br />
Join the Rows<br />
Serge the rows together<br />
in the same manner. It is<br />
helpful to pin periodically at<br />
this point, especially at seam<br />
intersections, to line up the<br />
rows correctly. Serge, always<br />
pulling out the pins before<br />
they reach the cutting knife.<br />
After serging, grip and pull these final four seams to<br />
flatten them.<br />
If desired, embroider one or more of the squares at<br />
this point. The design shown in the photo on page 10<br />
is the OESD “Paisleys 2” Embroidery Collect #12220,<br />
design #NB251_48.<br />
Finish the Edges<br />
Place the flatlocked patchwork<br />
piece on top of the backing<br />
fabric, wrong sides together.<br />
Placing pins parallel to the<br />
blanket edges, pin the quilt to<br />
the backing at each seam. Also<br />
pin each block to the backing<br />
in the center, halfway between each set of seams.<br />
Pin each of the twelve seam intersections as shown.<br />
Thread the serger for a 4-thread overlock stitch.<br />
Use new spools of Pearl Crown Rayon in the loopers<br />
so you won’t run out of thread in the middle of a<br />
long edge. Thread the left needle with King Tut.<br />
• Upper Looper Tension = 4<br />
• Lower Looper Tension = 4<br />
• Left Needle Tension = 4<br />
• Right Needle Tension = 4<br />
• Stitch Length = 3<br />
• Differential Feed = N<br />
Serge all four edges of the<br />
quilt, cutting off a scant ⅛"<br />
of the Minkee and always<br />
pulling out the pins before they reach the cutting<br />
knife.<br />
Finish the corners by knotting the thread tails and<br />
clipping or applying seam sealant.<br />
Attach the Buttons<br />
Note: If making the Sweet Dreams Quilt for infants<br />
or young children, omit the buttons and stitch the<br />
layers together without them.<br />
Insert a size 90/14<br />
Topstitch needle in the<br />
machine and attach the<br />
button sew-on foot.<br />
Thread the sewing machine<br />
with King Tut in the needle<br />
and bobbin.<br />
Select a Button Sew-On<br />
stitch (or a Universal stitch<br />
with stitch length turned<br />
to 0). Place a button over a seam intersection and<br />
stitch it in place. Repeat for the remaining buttons.<br />
Brandon Garber is from Iota, Louisiana, and holds a<br />
BS degree in Apparel Design & Merchandising. After<br />
college he worked for Dillard’s department stores<br />
as a Technical Designer for<br />
children’s sportswear. He<br />
says he’s sewn on every<br />
machine imaginable, but<br />
has always returned to<br />
his BERNINA! He moved to<br />
Dallas, Texas, in 2009 and<br />
ever since then has been<br />
working for BERNINA (“The<br />
best company ever!”). He<br />
is Store Manager for BERNINA Sewing Center 400 in<br />
Garland, Texas. In his spare time he enjoys sewing<br />
and playing electric guitar.
12 • THROUGH THE NEEDLE ONLINE<br />
Floralicious<br />
Placemats &<br />
Napkins<br />
by ELAINE CIBELLI<br />
The exclusive Floralicious<br />
Embroidery Collection will<br />
be available at your local<br />
authorized BERNINA Dealer<br />
in May 2011<br />
This pair of reversible placemats, made with fabrics from the<br />
Benartex “Floralicious” collection, are a bright and cheery<br />
accent for spring. Appliquéd flowers from the coordinating<br />
OESD “Floralicious” embroidery collection embellish the side<br />
panel and napkin sleeve. Serged napkins complete the set.<br />
Supplies<br />
• OESD “Floralicious” by Michele D’Amore<br />
Embroidery Collection #1103<br />
• BERNINA Embroidery Software (optional)<br />
• Benartex “Floralicious” fabrics<br />
— ½ yard Small All Over—Black Multi<br />
— ¼ yard Leaf Vine—Green Multi<br />
— ¼ yard Squiggle—Light Green<br />
— ¼ yard Plaid—Pink Multi (binding)<br />
— ¼ yard Tossed Flower—Yellow Multi<br />
— ¼ yard Squiggle—Orange<br />
— ½ yard Plaid—Pink Multi (napkins)<br />
— ½ yard Leaf Vine—Green Multi (napkins)<br />
• Assorted scraps for appliqué<br />
• Two 14" x 18" rectangles of batting<br />
• OESD Ultra Clean & Tear Stabilizer<br />
• 505 Temporary Adhesive Spray<br />
• Isacord Embroidery Thread (colors 0015, 0025,<br />
0112, 4174, 9406)<br />
• OESD Bobbin Thread<br />
• Organ Embroidery needles, size 80/12<br />
• Construction thread<br />
• One spool King Tut by Superior Threads, color #926<br />
• YLI Variations thread in color 0916, Tulip<br />
• Marking pencil or Chaco Liner<br />
• Fray Block<br />
• Olfa Rotary Circle Cutter (or ruler compass)<br />
• Appliqué scissors<br />
• Sewing and embroidery system<br />
• Serger<br />
• Mega Hoop (or your largest hoop)<br />
• Medium hoop<br />
• Edgestitch foot (BERNINA Edgestitch Foot<br />
#10/10C/10D)<br />
• ¼" foot (Patchwork Foot with Guide #57/57D)<br />
• BERNINA Stitch Regulator #42, or your favorite<br />
free-motion quilting foot<br />
• Binder Attachment (BERNINA Binder Attachment<br />
#84 with Foot #94 OR Binder Attachment #88 with<br />
Foot #95)
ISSUE 5 • 13<br />
Cut the Fabric<br />
Placemat Fronts—with Napkin Sleeve<br />
Cut from Small All Over—Black Multi<br />
• two 4½" x 14½" rectangles<br />
• two 13¾" x 14½" rectangles<br />
Cut from Squiggle—Light Green<br />
• two 6" x 16" rectangles<br />
• four 6" x 7" rectangles<br />
Cut from Leaf Vine—Green Multi<br />
• two 1½" x 14½" rectangles<br />
Placemat Backs—with Patchwork<br />
Cut from Small All Over—Black Multi<br />
• two 9½" x 7½" rectangles<br />
Cut six 4" x 5" rectangles from each fabric<br />
• Tossed Flower —Yellow Multi<br />
• Leaf Vine—Green Multi<br />
• Squiggle—Light Green<br />
• Squiggle—Orange<br />
Embroider the Napkin Sleeve<br />
Spray a piece of OESD Clean & Tear stabilizer with<br />
505 Temporary Adhesive Spray and adhere it to the<br />
back of one of the 6" x 7" pieces of Light Green<br />
Squiggle. Hoop them in the Medium Hoop.<br />
Open “Floralicious” design #110310. Stitch the<br />
appliqué placement line.<br />
Lightly spray the<br />
appliqué fabric with<br />
adhesive and place in<br />
position to cover the<br />
stitches.<br />
Stitch the tackdown<br />
stitches. Remove<br />
the hoop from the<br />
machine and trim the<br />
fabric from outside<br />
the tackdown stitching,<br />
taking care not to cut<br />
the stitches.<br />
Place embroidered napkin sleeve wrong sides<br />
together one of the plain 6" x 7" pieces of Light<br />
Green Squiggle. Trim both layers to 4½" x 5".<br />
Repeat for the second napkin sleeve.<br />
Embroider the Side Panel<br />
Open “Floralicious” design<br />
#110310 in BERNINA Embroidery<br />
Software or the embroidery<br />
machine.<br />
Select Mirror Horizontal and<br />
then duplicate the design two<br />
times. Place the copies in a<br />
vertical column within the<br />
bounds of the Mega Hoop,<br />
spaced evenly. Save.<br />
Hoop a piece of OESD Clean & Tear stabilizer in the<br />
Mega Hoop and spray it with 505 Temporary Adhesive<br />
Spray.<br />
Place one of the 6" x 16" pieces of Light Green<br />
Squiggle on the sticky stabilizer.<br />
Stitch a basting box around the design.<br />
Stitch the appliqué placement lines; then adhere the<br />
appliqué fabrics in place with 505 spray.<br />
Stitch the tackdown stitches; then trim the fabric<br />
from outside the stitching.<br />
Return the hoop to the machine. Continue stitching<br />
to complete the appliqué and embroidery.<br />
Tear away the excess stabilizer when embroidery is<br />
complete and trim panel to 4" x 4½".<br />
Repeat for the second side panel.<br />
Return the hoop to<br />
the machine. Continue<br />
stitching to complete<br />
the appliqué and<br />
embroidery. Tear away<br />
the excess stabilizer<br />
when embroidery is<br />
complete.
14 • THROUGH THE NEEDLE ONLINE<br />
Construct the Placemat<br />
Front—with Napkin Sleeve<br />
Cut scant 1⅛" bias strips from the Plaid—Pink Multi<br />
fabric.<br />
Install the binder<br />
attachment on the<br />
sewing machine.<br />
Bind the upper and<br />
lower edges of the<br />
napkin sleeve and<br />
the long sides of<br />
the embroidered<br />
panel following<br />
the instructions<br />
included with the<br />
binder.<br />
Center the embroidered panel on one of the 13¾" x<br />
14½" Small All Over—Black Multi fabric rectangles.<br />
Attach the edgestitch foot to the machine. Adjust<br />
the needle position to the left. Stitch along both<br />
sides of the embroidered panel to secure it to the<br />
placemat.<br />
Attach the quarter<br />
inch foot to the<br />
machine. Stitch<br />
the 1½" strips<br />
of Leaf Vine—<br />
Green Multi to<br />
the left side of<br />
the placemat<br />
using a ¼" seam<br />
allowance.<br />
Center the napkin sleeve on the right side of the<br />
placemat, embroidery side down.<br />
Place the 4½" x 14½"<br />
rectangle of Small All<br />
Over—Black Multi on top,<br />
sandwiching the napkin sleeve<br />
between the two placemat<br />
pieces. Stitch together using<br />
a ¼" seam allowance. Press<br />
seam allowances toward the<br />
sashing.<br />
Back—with Patchwork<br />
Stitch the 4" x 5" rectangles<br />
together using a ¼" seam<br />
allowance, following the piecing diagram.<br />
Sandwich the batting<br />
between the front and<br />
back placemat pieces<br />
(wrong sides toward the<br />
batting).<br />
Stitch around all four<br />
sides, leaving a 5"<br />
opening in the middle of<br />
one side for turning.<br />
Turn right side out. Turn the edges of the opening<br />
under ¼". Press.<br />
Attach the edgestitch<br />
foot to the sewing<br />
machine and adjust<br />
the needle position<br />
approximately ⅛" to<br />
the left. Stitch around<br />
all four sides of the<br />
placemat.<br />
Install the BERNINA<br />
Stitch Regulator<br />
#42 to the machine.<br />
Stipple quilt around<br />
the flowers on the<br />
embroidered panel.<br />
Construct the Napkin<br />
Lightly spray the wrong side of each fabric—Leaf<br />
Vine Green Multi and Plaid Pink Multi—with 505<br />
temporary fabric adhesive spray.<br />
Place the two fabrics wrong sides together.<br />
Use the Rotary Circle Cutter to cut two 18" circles<br />
(= 9" radius) from the layered fabrics.<br />
Place the threads on the serger in this order:<br />
• Isacord on the second spool pin<br />
• Variations one spool to the right<br />
• King Tut on the far right spool pin<br />
Thread the King Tut and Variations threads through<br />
the lower looper together; this will create a blended<br />
effect on the napkin edge.
ISSUE 5 • 15<br />
Thread the needle with Isacord. Set the serger for a<br />
2-thread rolled edge with the following settings:<br />
• Upper Looper = Adapter attached<br />
• Lower Looper = 4<br />
• Right Needle = 4<br />
• Left Needle = removed<br />
• Upper Knife = engaged<br />
• Stitch Length = 1.0<br />
• Differential Feed = N to 1.5<br />
• Cutting Width = 1.0<br />
• Roll Hem Selection Lever = engaged<br />
Test the stitch on a<br />
double layer of fabric.<br />
Adjust the settings in<br />
small increments.<br />
Serge around the first<br />
double-layer circle,<br />
trimming the edge<br />
slightly. Adjust the<br />
differential feed as<br />
needed if the edge<br />
becomes wavy.<br />
When nearly at the<br />
beginning of the stitching again, overlap the stitches<br />
about ½" rather than tapering off the edge. Raise<br />
the presser foot and gently release the threads.<br />
Carefully pull to the side to create a thread tail.<br />
Seal the overlapped stitched with Fray Block. Clip<br />
the thread tails when dry.
16 • THROUGH THE NEEDLE ONLINE<br />
Floral<br />
Visions<br />
Pillow<br />
by SUSAN FEARS<br />
The BERNINA 830 has the tremendous<br />
capability of bringing ALL sewing and<br />
decorative stitches into its embroidery<br />
system, and embroidering them instead of<br />
stitching them. Once a stitch is turned into<br />
an embroidery design in the embroidery<br />
system, it can also be saved as a design to<br />
a BERNINA Memory Stick and then used<br />
in the DesignerPlus BERNINA Embroidery<br />
Software 6. The BERNINA 830’s Endless<br />
Embroidery feature does an excellent job of<br />
using stitches in a linear fashion, but curved<br />
shapes are not as easily created. Expand<br />
your embroidery capabilities by combining<br />
two state-of-the-art BERNINA products<br />
– the BERNINA 830 and BERNINA<br />
DesignerPlus Embroidery Software 6 – as<br />
you create this lovely heirloom pillow.<br />
Supplies<br />
• BERNINA 830<br />
• Jumbo Hoop<br />
• OESD Floral Visions Embroidery Collection #001<br />
• BERNINA DesignerPlus Embroidery Software 6<br />
• OESD LightWeight Tear-Away Stabilizer<br />
• OESD Fuse & Fleece or Pellon Fusible Batting<br />
• Fabrics from the Flutter Collection by Benartex<br />
• 3 fat quarters Linen Texture Lichen Green for top & back<br />
• 5" x 7" piece Linen Texture Mossy Green for appliqué<br />
• ¼ yard of Garden Vine Olive Green for the ruffle<br />
• Isacord Embroidery Thread<br />
• Bottom Line in a neutral color for the bobbin<br />
• Hilos Le Espiga nylon cord in a coordinating color<br />
• Monofilament thread<br />
• Organ Titanium Embroidery needle, size 80/12<br />
• Double-curve embroidery scissors<br />
• 14" x 14" square pillow form<br />
• Ruffler #86<br />
• Freemotion Couching Foot #43
ISSUE 5 • 17<br />
Convert BERNINA 830 Stitches into<br />
DesignerPlus Pattern Run Stitches<br />
Turn a Sewing Machine Stitch into<br />
an Embroidery Object<br />
• Select decorative stitch #1118.<br />
• Touch the embroidery module icon.<br />
• Open the My Designs folder and select the stitch.<br />
• When the stitch appears on the screen, select the<br />
Save icon. Press the flashing file to save the stitch<br />
design to the USB stick.<br />
• Repeat for stitches #819, #523, and #1211.<br />
• A dialog box appears indicating that the pattern<br />
has been created successfully.<br />
• Repeat the Create Pattern process to transfer all<br />
of the captured BERNINA 830 stitches into the<br />
Pattern Run Library of the software.<br />
Note: The patterns are saved in the Pattern Run<br />
Library under the named file set, such as 830<br />
Stitches. To use these stitches, select Outline ><br />
Pattern Run. Creating new Pattern Run stitches<br />
creates unique opportunities for creating lines<br />
and shapes beyond the built-in features of the<br />
DesignerPlus software.<br />
Note: Sewing stitches can only<br />
be brought into embroidery one<br />
at a time. Create several at one<br />
time to make the transformation<br />
process more efficient.<br />
Take the Stitch Design into the<br />
BERNINA Embroidery Software<br />
• Open the DesignerPlus 6 software and insert the<br />
USB stick into the appropriate computer port.<br />
• Select File > Open and select one of the stitch files<br />
from the USB stick. These were saved as EXP files,<br />
so be sure to select Files of Type > EXP to enable<br />
the stitches to be listed.<br />
• Open the stitch file.<br />
Create a Pattern with the 830 Stitches<br />
• With the stitch pattern on the screen, use the<br />
Select Object tool to select it.<br />
• Select Settings ><br />
Create Pattern.<br />
In the dialog box,<br />
create a folder<br />
called 830 Stitches.<br />
• Select New Set and<br />
type the name, then<br />
click OK.<br />
• The prompt area in the lower left corner of the<br />
screen indicates that a start points needs to be<br />
identified; click on one end of the pattern to<br />
create one.<br />
Note: Drawing upper/lower or left/right for the<br />
beginning/ending points will cause the pattern to be<br />
drawn a different way when used.<br />
Embroider the Pillow Top<br />
Create the Floral Frame<br />
• From the OESD Floral Visions Collection, open<br />
design #BC00140, the little leaves border.<br />
• Select the design, and then left click on the Rotate<br />
C/CW icon two times.<br />
• Right click on the Hoop icon and select Jumbo<br />
Hoop #26.<br />
• Select File > Insert and select design #BC00128,<br />
little flowers border 2.<br />
• Click on the Mirror Image Vertical and Mirror Image<br />
Horizontal icons, and then arrange the designs to<br />
form a corner.<br />
• Resequence the stitching order by holding down<br />
the CTRL key, touching the flower border and<br />
then touching the leaves border. Select Arrange ><br />
Sequence as Selected. Alternatively, drag and drop<br />
the objects in Color File.<br />
• Select All, then Group the corner design.<br />
Tip: Select the Zoom tool for easier viewing.<br />
• With the corner design highlighted, select Edit ><br />
Duplicate.<br />
• Select Mirror Image Horizontal and drag the new<br />
corner to form the upper right corner of the floral<br />
frame. Select All and Group.
18 • THROUGH THE NEEDLE ONLINE<br />
• Select Edit > Duplicate. Select Mirror Image<br />
Vertical and drag the copy to form the lower half<br />
of the frame.<br />
• Select All, and then click on the Align Left Vertical<br />
icon.<br />
• Select All, then Group<br />
the design.<br />
• Check to make sure<br />
that all of the design<br />
elements fit inside<br />
the embroidery field<br />
of the Jumbo Hoop.<br />
Rescale if necessary.<br />
(The sample was<br />
reduced to 95%.)<br />
• Save the design as<br />
Floral Frame.<br />
Create the Ring Pattern<br />
• Click on the Grid icon to activate the grid.<br />
• Select the Circle/Oval tool and Outline > Satin.<br />
Draw an oval in the center of the hoop, about 4½<br />
squares tall and 4 squares across. Press Enter to<br />
set the Oval.<br />
• Press ESC to exit the<br />
tool.<br />
• With the oval<br />
selected, select the<br />
Outline Design icon.<br />
• In the dialog box,<br />
select Offset = 10mm,<br />
Line Count = 5,<br />
Outline Type = Single<br />
Stitch, and deselect Outline Holes. Press OK.<br />
Note: Each ring can be selected individually and a<br />
pattern run stitch substituted for the single stitch<br />
outline.<br />
• Save as Pillow 1.<br />
Use BERNINA 830<br />
Stitches as Pattern Runs<br />
• Select the outline<br />
closest to the satin<br />
oval. Click on the<br />
Object Properties icon<br />
and select the Outline<br />
Stitch tab.<br />
• Set the Stitch Type to<br />
Pattern Run.<br />
• Click on the Select button. In the Patterns drop<br />
down menu, select 830 Stitches > ST819. Click OK.<br />
• Set the Spacing at 42mm. Click Apply to audition<br />
the effect and keep the dialog box open, or click<br />
OK to set the stitch and close the dialog box. Move<br />
the dialog box for a better view of the stitches.<br />
• Select the second outline; select the<br />
Candlewicking outline.<br />
• Select the third outline;<br />
select Pattern Run<br />
#ST1118.<br />
• Select the fourth<br />
outline; select Pattern<br />
Run #ST523.<br />
• Select the fifth outline;<br />
select Pattern Run<br />
#ST1211.<br />
• Resize the outlines<br />
so that the last one<br />
intersects the floral frame.<br />
• To re-center the outline, Select All and click on the<br />
Align Centers icon.<br />
Create the Center Appliqué<br />
• Select the oval.<br />
• Select the<br />
Advanced<br />
Appliqué tool.<br />
Select Fabric ><br />
Benartex 2006 ><br />
Kaye’s Cottage ><br />
#1325-44. Select<br />
Back.<br />
• Select Set Stitch<br />
Types Manually<br />
and select the<br />
oval. Check the<br />
box for all options<br />
and set the Tack-Down Stitch to Zigzag.<br />
• Press Back and Close.<br />
Insert the Center Design<br />
• Select File > Insert Design > Floral Visions<br />
Embroidery Collection > #BC00130.<br />
• Position the design in the center of the oval.<br />
• Rearrange the stitching order by rearranging the<br />
color chips in Color Film.<br />
— Set the Pattern Outlines to stitch first<br />
— Set the Appliqué shape to stitch second<br />
— Set the Floral Frame to stitch third<br />
— Set the Flower in the oval to stitch last
ISSUE 5 • 19<br />
• Select Save As and save a copy of the design.<br />
• Note: It’s always a good idea to save a copy of a<br />
design so you’ll have a copy if you want to make<br />
any changes later.<br />
• Click on the Write to Machine icon to correctly<br />
transfer the design to the USB stick or directly to<br />
the BERNINA 830 via cable.<br />
Embroider the Pillow Top<br />
• If the Jumbo Hoop has not been calibrated since<br />
the last update, or it is a new hoop, calibrate it in<br />
Setup.<br />
• Select the design from the USB stick.<br />
• Prepare a fat quarter by fusing OESD Fuse & Fleece<br />
or Fusible Pellon to the wrong side. Hoop it with<br />
two layers of OESD Ultra Clean & Tear.<br />
• Stitch the design following the screen prompts.<br />
• Use Freemotion Couching Foot #43, monofilament,<br />
and a straight stitch to couch purchased cord<br />
around the embroidered area of the pillow front,<br />
filling the 16" square area.<br />
Construct the Pillow<br />
• Trim the pillow front to 15" x 15" square.<br />
• Make the ruffle:<br />
— Cut 2½" strips of the dark green fabric, piecing<br />
them together to make 2-3 yards.<br />
— Fold strip in half lengthwise and press.<br />
— Attach Ruffler #86 to the sewing machine and set<br />
the ruffler guide to 6.<br />
— Select a straight stitch and adjust the stitch<br />
length = 2 mm.<br />
— Guide the folded strip into the ruffler, raw edges<br />
to the right and the folded edge to the left of the<br />
needle, allowing the fabric to feed evenly.<br />
• Cut two 12" x 15" rectangles for the pillow back.<br />
Stitch a 1” double hem along one long side of each<br />
rectangle. With right sides facing up and the hems<br />
toward the center, overlap the two rectangles to<br />
form a 15" x 15" square. Baste them together.<br />
• Round the corners of the<br />
pillow front.<br />
• With raw edges even,<br />
stitch the ruffle to the<br />
right side of the pillow<br />
front, overlapping the<br />
ends and bending them<br />
perpendicular to the<br />
pillow edge to hide the<br />
raw ends.<br />
• Sew the pillow front and<br />
back right sides together.<br />
Trim excess fabric at<br />
corners.<br />
• Turn right side out and<br />
insert the pillow form.
20 • THROUGH THE NEEDLE ONLINE<br />
The Last Word<br />
A sneak peek at what’s coming in<br />
Through the Needle ONLINE, <strong>Issue</strong> #6:<br />
Striped Windows<br />
Designed by Liza Lucy, co-author of several quilting books with Kaffe<br />
Fassett, the beautiful coloration and rich texture of this striking wallhanging<br />
are created with Fassett’s yarn-dyed woven stripes. Don’t<br />
be fooled by its complex appearance—the quilt’s foundation-pieced<br />
blocks are easy to construct.<br />
Dimensional Flower Embroidery<br />
This exquisite 3D flower, digitized by Jeanine<br />
McWhorter, is simple to assemble and makes<br />
a stunning accessory. They’re so beautiful,<br />
you’ll want to experiment with different<br />
color combinations and create a bouquet of<br />
blossoms that’s uniquely your own.<br />
April 2011 Special<br />
FREE<br />
2.0 Double<br />
Needle<br />
with purchase of #46<br />
Clear Pintuck Foot<br />
May 2011 Special<br />
20% OFF<br />
Feet-ures Books<br />
(Volumes 1, 2, and 3)<br />
Make Perfect Pintucks!<br />
Stitch wide decorative designs<br />
between perfectly placed rows of<br />
pintucks easily and quickly!<br />
For April 2011 only, purchase a<br />
BERNINA #46 Clear Pintuck Foot<br />
and receive a 2.0 Double Needle<br />
FREE.<br />
Offer good April 2011 at participating BERNINA<br />
dealers in the USA and Canada.<br />
Expand your Foot Knowledge!<br />
Learn about settings and<br />
techniques for over a hundred<br />
BERNINA presser feet and<br />
accessories using these<br />
comprehensive reference books.<br />
For May 2011 only, get 20% OFF<br />
all Feet-ures Books. Coupon may<br />
be used for one or more volumes.<br />
Offer good May 2011 at participating BERNINA<br />
dealers in the USA and Canada. Only one May<br />
2011 Coupon may be used per person.<br />
Quick Links<br />
These are the main links featured in<br />
this issue; see the articles for links to<br />
specific products, projects, and technique<br />
information. Please visit our sponsors<br />
and contributors for more inspiration,<br />
information, and stitching fun!<br />
• http:/ /www. throughtheneedle.com<br />
• http:/ /www. berninaUSA.com<br />
• http:/ /www. benartex.com<br />
• http:/ /www. berninausablog.com<br />
• http:/ /www. embroideryonline.com<br />
• http:/ /www. bernina8series.com/EN/<br />
• http:/ /www. berninamylabel.com<br />
• http:/ /www. rickytims.com/seminars<br />
Until June ...<br />
As always, we hope this issue of Through<br />
the Needle ONLINE has inspired you to learn<br />
something new and make your own adaptations<br />
of our projects. We love seeing your creations;<br />
send e-mail and photos to jo @ berninausa.com.