M55FS Owner's Manual - Pine Tree Stove Shoppe
M55FS Owner's Manual - Pine Tree Stove Shoppe
M55FS Owner's Manual - Pine Tree Stove Shoppe

Create successful ePaper yourself
Turn your PDF publications into a flip-book with our unique Google optimized e-Paper software.
SHERWOOD INDUSTRIES IS AN ENVIRONMENTALLY RESPONSIBLE COMPANY. THIS MANUAL IS PRINTED ON RECYCLED PAPER.<br />
PLEASE KEEP THESE INSTRUCTIONS FOR FUTURE REFERENCE<br />
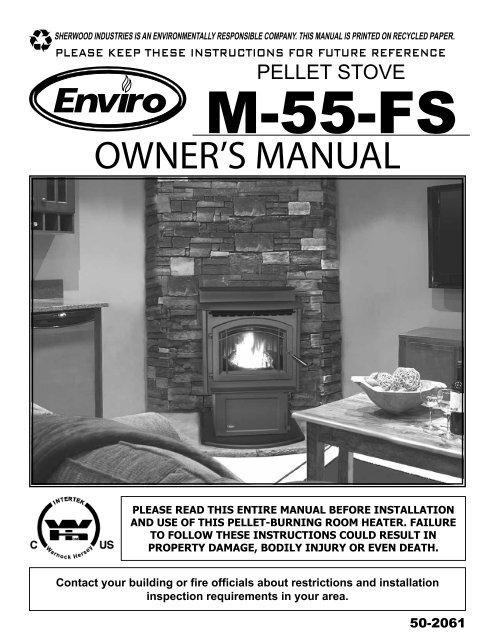
PELLET STOVE<br />
M-55-FS<br />
OWNER’S MANUAL<br />
PLEASE READ THIS ENTIRE MANUAL BEFORE INSTALLATION<br />
AND USE OF THIS PELLET-BURNING ROOM HEATER. FAILURE<br />
TO FOLLOW THESE INSTRUCTIONS COULD RESULT IN<br />
PROPERTY DAMAGE, BODILY INJURY OR EVEN DEATH.<br />
Contact your building or fire officials about restrictions and installation<br />
inspection requirements in your area.<br />
50-2061
Table of Contents<br />
Introduction........................................................................................3<br />
Rating Label Location................................................................3<br />
Fuel Quality...............................................................................3<br />
Safety Warnings & Recommendations....................................................4<br />
Operating Instructions..........................................................................6<br />
Dimensions & Specifications.......................................................6<br />
Control Board Functions.............................................................7<br />
Automatic Safety Features of Your Pellet <strong>Stove</strong>............................7<br />
Operating Your Pellet <strong>Stove</strong>........................................................7<br />
Turning Your Pellet <strong>Stove</strong> Off......................................................9<br />
Slider/Damper Set-Up................................................................9<br />
Routine Cleaning and Maintenance......................................................10<br />
Warranty...........................................................................................13<br />
Installation Data Sheet.......................................................................16<br />
2
Introduction<br />
* This manual is designed for the home owner in conjunction with the technical manual. *<br />
Rating Label Location:<br />
The rating label is located on the inside of the hopper.<br />
Fuel Quality:<br />
Fuel quality is important, please read the following:<br />
Your Enviro pellet stove has been designed to burn ¼” (6mm) dia wood pellets and other<br />
organic fuels. DO NOT use this appliance as an incinerator. DO NOT use unsuitable and non<br />
recommended fuels, including liquid fuels as this will void any warranties stated in this<br />
manual.<br />
The performance of your pellet stove is greatly affected by the type and quality of fuel being<br />
burned. As the heat output of various quality fuels differs, so will the performance and heat<br />
output of the pellet stove.<br />
Caution: It is important to select and use only fuel that are dry and free of dirt or any impurities<br />
such as high salt content. Dirty fuel will adversely affect the operation and performance of the unit<br />
and will void the warranty. The Pellet Fuel Industries (P.F.I.) has established standards for wood pellet<br />
manufacturers. We recommend the use of pellets that meet or exceed these standards. Ask your dealer<br />
for a recommended pellet type.<br />
ASH: The ash content of the fuel and operation of your stove will directly determine the frequency of<br />
cleaning. The use of high ash fuels may result in the stove needing to be cleaned daily. A low ash fuel<br />
may allow longer intervals between cleaning.<br />
CLINKERING: [clinkers are silica (sand) or other impurities in the fuel that will form a hard mass during<br />
the burning process]. This hard mass will block the air flow through the Burn Pot Liner and affect the<br />
performance of the stove. Any fuel, even approved types, may clinker. Check the Burn-Pot Liner daily to<br />
ensure that the holes are not blocked with clinkers. If they become blocked, remove the liner (when the<br />
unit is cold) and clean/scrape the clinkers out. Clean the holes with a small pointed object if required.<br />
Refer to the section Routine Cleaning and Maintenance.<br />
FUEL FEED RATES: Due to different fuel densities and sizes, fuel feed rates may vary. This may require<br />
an adjustment to the slider damper setting or to the auger feed trim setting.<br />
Since Sherwood Industries Ltd. has no control over the quality of fuel that you use, we assume no liability<br />
for your choice in fuels.<br />
FILLING FUEL HOPPER: Open lid on top of unit, check hopper for foreign objects, empty the bag into<br />
the hopper, and ensure hopper lid closes completely.<br />
Store fuels at least 36” (1 m) away from the pellet stove.<br />
WARNING: Parts of the appliance, especially the external surfaces, will be hot to touch<br />
when in operation so use due care.<br />
FLAMMABLE LIQUIDS: Never use gasoline, gasoline-type lantern fuel, kerosene, charcoal lighter<br />
fluid, or similar liquids to start or “freshen up” a fire in the heater. Keep all such liquids well away from<br />
the heater while it is in use.<br />
3
Safety Warnings & Recommendations<br />
Please read this entire Owner’s <strong>Manual</strong> before installing or operating your Enviro Pellet <strong>Stove</strong>.<br />
Failure to follow these instructions may result in property damage, bodily injury or even death.<br />
Any unauthorized modification of the appliance or use of replacement parts not recommended<br />
by the manufacturer is prohibited. All national and local regulations and shall be complied with<br />
when operating this appliance.<br />
Caution: Do not connect to any air distribution duct or system.<br />
Warning: Never place wood, paper, furniture, drapes or other combustible materials within 48” (122cm)<br />
of the front of the unit, 12” (30.5cm) from each side, and 4” (10cm) from the back of the unit. Do not let<br />
children or pets touch it when it is hot.<br />
To prevent the possibility of a fire, ensure that the appliance is properly installed by adhering to the<br />
installation instructions. An Enviro dealer will be happy to assist you in obtaining information with regards<br />
to your local building codes and installation restrictions.<br />
FIRE EXTINGUISHER AND SMOKE DETECTION: All homes with a pellet burning stove should have at<br />
least one fire extinguisher in a central location known to all in the household. Smoke detectors should be<br />
installed and maintained in the room containing the stove. If it sounds the alarm, correct the cause but do<br />
not deactivate. You may choose to relocate the smoke detection devise within the room; DO NOT REMOVE<br />
THE SMOKE DETECTOR FROM THE ROOM.<br />
CHIMNEY OR RUN AWAY FIRE: Call local fire department (or dial 911). Close the draft fully. Extinguish<br />
the fire in the burn pot liner with a cup of water and close the door. Examine the flue pipes, chimney, attic,<br />
and roof of the house, to see if any part has become hot enough to catch fire. If necessary, spray with fire<br />
extinguisher or water from the garden hose. IMPORTANT: Do not operate the stove again until you are<br />
certain the chimney and its lining have not been damaged.<br />
OPERATION: The door and ash drawer must be kept closed when the unit is in operation to prevent<br />
fume spillage and for proper and safe operation of the pellet stove. Also ensure all gaskets on the door<br />
are checked and replaced when necessary. Unit hot while in operation. Keep children, clothing and<br />
furniture away. Contact may cause skin burns.<br />
CAUTION: When operating during adverse weather, if the unit exhibits dramatic changes in combustion<br />
stop using the unit immediately.<br />
FUEL: This stove is designed and approved to only burn wood pellets of any quality, corn, wheat, barley,<br />
and grass. Dirty fuel will adversely affect the operation and performance of the unit and may void the<br />
warranty. Check with your dealer for fuel recommendations. THE USE OF CORDWOOD IS PROHIBITED<br />
BY LAW. Do not burn garbage or flammable fluids such as gasoline, naptha or engine oil.<br />
SOOT: Operation of the stove with insufficient combustion air will result in the formation of soot which will<br />
collect on the glass, the heat exchanger, the exhaust vent system, and may stain the outside of the house.<br />
Frequently check your stove and adjust the slider/damper as needed to ensure proper combustion. See:<br />
“Slider/Damper Setting”.<br />
CLEANING: There will be some build up of fly ash and small amounts of creosote in the exhaust. This will<br />
vary due to the ash content of the fuel used and the operation of the stove. It is advisable to inspect and<br />
clean the exhaust vent semi-annually or every two tons of pellets.<br />
The appliance, flue gas connector and the chimney flue require regular cleaning. Check them for blockage<br />
prior to re-lighting after a prolonged shut down period.<br />
ASHES: Disposed ashes should be placed in a metal container with a tight fitting lid. The closed container<br />
of ashes should be on a non-combustible surface, well away from all combustible materials pending final<br />
disposal. If the ashes are disposed of by burial in soil or otherwise locally dispensed, they should be retained<br />
in the closed container until all cinders have thoroughly cooled.<br />
4
Safety Warnings & Recommendations<br />
ELECTRICAL: The use of a surge protected power bar is recommended. The unit must be grounded.<br />
The grounded electrical cord should be connected to a standard 110-120 volts (4.2 Amps), 60 hertz electrical<br />
outlet and also must be accessible. If this power cord should become damaged, a replacement power cord<br />
must be purchased from the manufacturer or a qualified Enviro dealer. Be careful that the electrical cord is<br />
not trapped under the appliance and that it is clear of any hot surfaces or sharp edges. This unit’s maximum<br />
power requirement is 504 watts.<br />
When installing the stove in a mobile home, it must be electrically grounded to the steel chassis of the home<br />
and bolted to the floor.<br />
GLASS: Do not abuse the glass by striking or slamming the door. Do not attempt to operate the stove with<br />
broken glass. The stove uses ceramic glass. Replacement glass must be purchased from an Enviro dealer.<br />
Do not attempt to open the door and clean the glass while the unit is in operation or if glass is hot. To clean<br />
the glass, use a soft cotton cloth and mild window cleaner, gas or wood stove glass cleaner, or take a damp<br />
paper towel and dip into the fly ash. This is a very mild abrasive and will not damage the glass.<br />
KEEP ASH PAN FREE OF RAW FUEL. DO NOT PLACE UNBURNED OR NEW PELLET FUEL IN ASH PAN.<br />
A fire in the ash pan may occur.<br />
INSTALLATION: Contact your local building or fire official to obtain a permit and any information on<br />
installation restrictions and inspection requirements for your area.<br />
Be sure to maintain the structural integrity of your home when passing a vent through walls, ceilings, or<br />
roofs, and all construction meets local building codes. It is recommended that the unit be secured into its<br />
position in order to avoid any displacement. This appliance must be installed on a floor with an adequate<br />
load bearing capacity, if existing construction doesn’t meet load capacity, suitable measures (e.g. load<br />
distributing plate) must be taken to achieve it.<br />
DO NOT INSTALL A FLUE DAMPER IN THE EXHAUST VENTING SYSTEM OF THIS UNIT.<br />
DO NOT CONNECT THIS UNIT TO A CHIMNEY FLUE SERVING ANOTHER APPLIANCE.<br />
FRESH AIR: This unit uses large quantities of air for combustion; outside Fresh Air connection is strongly<br />
recommended. Fresh Air must be connected to all units installed in Mobile and “Air Tight Homes” (R2000)<br />
or where required by local codes.<br />
Consider all large air moving devices when installing your unit and provide room air accordingly. NOTE:<br />
Extractor fans when operating in the same room or space as the appliance may cause problems. Limited air<br />
for combustion may result in poor performance, smoking and other side effects of poor combustion.<br />
The stove’s exhaust system works with negative combustion chamber pressure and a slightly positive<br />
chimney pressure. It is very important to ensure that the exhaust system be sealed and airtight. The ash<br />
pan and viewing door must be locked securely for proper and safe operation of the pellet stove.<br />
Do not burn with insufficient combustion air. A periodic check is recommended to ensure proper combustion<br />
air is admitted to the combustion chamber. Setting the proper combustion air is achieved by adjusting the<br />
slider damper located on the left side of the stove.<br />
Soot or creosote may accumulate when the stove is operated under incorrect conditions such as a rich burn<br />
(black tipped, lazy orange flames).<br />
If you have any questions with regards to your stove or the above-mentioned information, please feel free<br />
to contact your local dealer for further clarification and comments.<br />
Since Sherwood Industries Ltd. has no control over the installation of your<br />
stove, SHERWOOD INDUSTRIES LTD. grants no warranty implied or stated for the<br />
installation or maintenance of your stove. Therefore, Sherwood Industries<br />
Ltd. assumes no responsibility for any consequential damage(s).<br />
SAVE THIS INSTRUCTION MANUAL FOR FUTURE REFERENCE.<br />
5
Specifications<br />
Dimensions:<br />
24 1 /4" (619mm)<br />
17 3 /4" (450mm)<br />
29"<br />
(736mm)<br />
23 3 /4" (601mm) 26" (664mm)<br />
29" (736mm)<br />
36 1 /2"<br />
(928mm)<br />
24 1 /4" (619mm)<br />
Specifications:<br />
Figure 1: Dimensions of M-55-FS.<br />
6<br />
Input rating when using: Wood Pellets/Corn - 55,000BTU (16.1KW•hr) & Wheat/Barley - 53,000BTU (15.5KW•hr).<br />
Description<br />
Residential Pellet Heater<br />
Table 1: M-55-FS Specifications.<br />
Fuel type<br />
6mm (¼”) dia. Pellets - wood, corn, wheat, & barley*<br />
Voltage Current Max Power<br />
110 - 120 V 4.2 Amps 504 Watts<br />
Frequency Hopper Capacity Consumption on Low<br />
60 Hz up to 80 lb (36.3 Kg) 1.5 lb/hr (0.68 Kg/hr)*<br />
Testing Standard Weight (with full hopper) Consumption on High<br />
ASTM 1509-04 395 lb (179.2 Kg) 6.5 lb/hr (2.95 Kg/hr)*<br />
*Note: Consumption will vary with the type of fuel used.
Control Board Functions:<br />
Operating Instructions<br />
1. ON/OFF BUTTON: Used to turn the unit ON and OFF manually.<br />
2. COMBUSTION AIR TRIM BUTTON: Increases or Decreases the Fan voltage by 2.5volts on all feed<br />
settings. When pressed all lights on Heat Level Indicator will come on except the one that is the set<br />
point. Hold Trim Button down and press the UP or DOWN Heat Level Arrow to adjust setting. #3 Light<br />
is the default setting.<br />
Depending on Fuel quality Ignition problems may occur at higher altitudes, this can be resolved by<br />
trimming the Combustion Fan to a higher setting.<br />
3. FUEL TYPE BUTTON: Used to switch between fuel type modes; Pellet (for all qualities of wood<br />
pellets) and Multifuel (for all fuels including wood<br />
pellets). When set on Multifuel it will run at a reduced<br />
High Feed Rate with wood pellets. NOTE: Fuel Type can<br />
Premium Pellets<br />
only be chnaged when the unit is cold.<br />
Regular Pellets<br />
Multi-Fuel<br />
4. THERMOSTAT SWITCH: Sets the unit’s control mode;<br />
5<br />
5 AUTO/OFF or HIGH/LOW (when using a Thermostat or<br />
4<br />
Timer) or MANUAL.<br />
3<br />
OPERATION MODE<br />
5. FUEL TYPE LIGHTS: Shows the present Fuel Type<br />
6<br />
AUTO/OFF<br />
2<br />
selected; Premium Pellets are Red, Regular Pellets are<br />
HIGH/LOW<br />
4<br />
1<br />
Green, and Multi-fuel is Yellow. The Light flashes during<br />
MANUAL<br />
start-up, and when the Thermostat is in control of the<br />
3 Unit. The Light stops flashing when the Exhaust Sensor<br />
FUEL TYPE<br />
closes.<br />
7<br />
HEAT LEVEL<br />
6. HEAT OUTPUT INDICATOR: Shows the present Heat<br />
2 Level output setting and the Feed Trim while it is being<br />
COMBUSTION<br />
AIR TRIM<br />
adjusted.<br />
8<br />
1 7. HEAT LEVEL ADJUSTMENT BUTTONS: Changes the<br />
FEED TRIM<br />
ON/OFF<br />
Heat Setting of the Unit from LO to HIGH. Press the<br />
Arrow Up button to increase Heat, and Arrow Down to<br />
decrease Heat.<br />
8. FEED TRIM BUTTON: Used in conjunction with the<br />
Heat Level Adjustment Buttons to adjust the Feed Trim.<br />
It can be increased by two (2) feed settings or it can be<br />
Figure 2: Circuit Board Control Panel Decal decreased by two (2) feed settings. The Feed Trim can<br />
only be adjusted one setting at a time.<br />
Automatic Safety Features of Your Pellet <strong>Stove</strong>:<br />
A. EXHAUST TEMPERATURE SWITCH: The stove will shut off when the fire goes out and the exhaust<br />
temperature drops below 49°C (120°F). It will display a #3 flash code.<br />
B. HIGH LIMIT SAFETY SWITCH: If the temperature on the hopper reaches 93°C (200°F), the auger will<br />
automatically stop, the stove will shut down, and it will display a #4 flash code. If this happens, call<br />
your local dealer to reset the 93°C (200°F) high limit switch. ALSO FIND THE REASONS WHY THE<br />
UNIT OVERHEATED.<br />
C. VACUUM SWITCH: Notifies when the unit has lost vacuum. This can be caused by either a combustion<br />
fan/vent failure, or simply the unit’s outer door, pedestal door, and/or hopper lid beening left open. It<br />
will display a #2 flash code.<br />
7
Operating Your Pellet <strong>Stove</strong>:<br />
Operating Instructions<br />
DO NOT OPERATE THE UNIT WITH THE DOOR OR ASH BOX OPEN. Keep hopper lid closed<br />
except during re-fuelling.<br />
CAUTION: When operating during adverse weather, such as high winds or freezing rain, if the unit exhibits<br />
dramatic changes in combustion stop using the unit immediately. Watch for blocked exhaust outlet.<br />
Premium Pellets<br />
PRE-BURN CHECK: The burn pot liner holes must be clear and the liner installed properly against Regular the Pellets<br />
Multi-Fuel<br />
ignitor tube and locked in place. Check the hopper for enough pellets to start the unit.<br />
5<br />
Note: To change fuel type, ensure the Thermostat Switch is set to <strong>Manual</strong> Mode. Press the Off button and<br />
4<br />
then press the Fuel Type button to cycle through the available fuel types.<br />
3<br />
OPERATION MODE<br />
The unit has an automatic cleaning cycle; every thirty (30) minutes the<br />
AUTO/OFF<br />
2<br />
agitator will turn continuously for one (1) minute to help clean out the burn<br />
HIGH/LOW<br />
1<br />
MANUAL<br />
pot liner.<br />
MANUAL MODE:<br />
FUEL TYPE<br />
All control of circuit board function is adjusted at the circuit board.<br />
Figure HEAT LEVEL 3: Thermostat Switch in<br />
MANUAL position.<br />
INITIAL START-UP: Press the ON / OFF button. The stove will turn<br />
on. The Fuel Type Light will flash (the Auger Feed Rate is pre-programmed during start-up). The COMBUSTION Heat Level<br />
AIR TRIM<br />
Indicator will show the Heat Level that the stove will run at after start-up.<br />
If this is the first time the unit has been started or the unit has run out of fuel, the auger may need to be<br />
primed. If there is no fuel in the burn pot after two (2) minutes the liner can be FEED primed TRIM with a handful ON/OFF of<br />
pellets .<br />
The agitator will not operate for the first five (5) minutes after the ON button has been pressed. After the five<br />
(5) minutes it will pulse at the same interval as the feed auger.<br />
When the start-up sequence is complete the unit will ramp up to its heat level setting, this may take up to<br />
fifteen (15) minutes.<br />
Once a fire has been established, the convection blower will turn on after ten (10) minutes.<br />
To OPERATE: Press the Heat Level buttons to change the desired Heat Level Output setting.<br />
The speed of the convection blower is controlled by the setting of the heat level.<br />
Premium Pellets<br />
The Feed Trim button pressed in conjunction with the Heat Level adjustment buttons to adjust the Regular Feed PelletsTrim.<br />
Multi-Fuel<br />
It can be increased by two (2) feed settings or it can be decreased by two (2) feed settings.<br />
5<br />
HIGH/LOW MODE: (Requires a Thermostat or Timer)<br />
4<br />
INITIAL START-UP: See MANUAL MODE above.<br />
OPERATION: When the thermostat calls for heat (contacts are closed) the<br />
stove settings are adjustable as per <strong>Manual</strong> Mode. When the thermostat<br />
contacts open, the HEAT LEVEL and Fans will drop down to the LOW setting<br />
until the thermostat contacts close again. The stove will come back to the<br />
previous HEAT LEVEL setting once the thermostat contacts close.<br />
AUTO/OFF MODE: (Requires a Thermostat or Timer)<br />
INITIAL START-UP: See MANUAL MODE above.<br />
OPERATION: When the thermostat contacts close, the unit will light<br />
automatically. Once up to temperature, the stove operates the same as in<br />
MANUAL. When the thermostat contacts open, the stove’s HEAT LEVEL and<br />
Fans will drop down to the LOW setting for 30 minutes. If the thermostat<br />
contacts close within the 30 minutes, the HEAT LEVEL will return to the<br />
3<br />
2<br />
1<br />
Premium Pellets<br />
Regular Pellets<br />
Multi-Fuel<br />
FUEL TYPE<br />
Figure HEAT 5 LEVEL 4: Thermostat Switch in<br />
HIGH/LOW position.<br />
4<br />
3<br />
2<br />
1<br />
FEED TRIM<br />
OPERATION MODE<br />
AUTO/OFF<br />
HIGH/LOW<br />
MANUAL<br />
OPERATION COMBUSTION MODE<br />
AIR TRIM<br />
AUTO/OFF<br />
HIGH/LOW<br />
MANUAL<br />
ON/OFF<br />
FUEL TYPE<br />
Figure HEAT LEVEL 5: Thermostat Switch in<br />
AUTO/OFF position.<br />
8<br />
COMBUSTION<br />
AIR TRIM
previous MANUAL setting. If the thermostat contacts remain open, the stove automatically begins its shutdown<br />
routine. The stove will re-light when the thermostat contacts close again.<br />
Turning Your Pellet <strong>Stove</strong> Off:<br />
• MANUAL and HI / LOW mode: To turn the unit OFF, simply press the ON / OFF button. This will stop the feed of<br />
pellets. The blowers will continue to operate and cool the stove down. When cool enough, the stove will turn off.<br />
• AUTO / OFF mode: To turn the unit OFF, turn the Thermostat down or Timer off.<br />
• On shut down the burn pot agitator will run continuosly for five (5) minutes on premium mode, one (1) minute on<br />
regular mode, and five (5) minutes on multi-fuel mode.<br />
DO NOT turn unit off during start-up or unplug unit while operating; this may lead to<br />
smoke escaping from the stove.<br />
Slider/Damper Set-Up:<br />
Operating Instructions<br />
This is used to regulate the airflow through the pellet stove.<br />
Convection<br />
Fan<br />
Slider<br />
Damper<br />
Exhaust<br />
Channel<br />
Note: The combustion<br />
blower, side panel, &<br />
back grill are removed<br />
for clarity.<br />
Slider Damper<br />
Set Screw with<br />
5/16" Hex Head<br />
Exhaust Sensor &<br />
Removable Plate<br />
Figure 6: Slider/Damper Plate in Unit.<br />
Figure 7: Efficient Flame.<br />
This unit is designed to operate within a negative pressure range of 0.15-0.17 inches of water column (37-42<br />
Pa). This can be measured using a Magnahelic pressure gauge once the unit has been running on heat level 5<br />
setting after one hour of burn time. This adjustment is necessary for varying venting configurations. The reading<br />
can be taken from the ⅛” hole located on the right side of the Pedestal.<br />
The Combustion Trim, Feed Trim and Fuel Type Functions can be used to compensate for varying fuel qualities.<br />
Refer to the Owners <strong>Manual</strong> for circuit board operation.<br />
If, after long periods of burning, the fire builds up or there is a build up of clinkers, this would be a sign that the<br />
fuel quality is poor - this requires more air.<br />
The easiest way to make sure that an efficient flame is achieved is to understand the characteristics of the fire.<br />
• A tall, lazy flame with dark orange tips requires more air.<br />
• A short, brisk flame, like a blowtorch, has too much air .<br />
• If the flame is in the middle of these two characteristics with a bright yellow/orange, active flame with no black<br />
tips then the air is set for proper operation, refer to Figure 7.<br />
SPECIAL NOTES:<br />
Fuel quality is a major factor in how the stove will operate. If the fuel has a high moisture content or ash content the<br />
fire will be less efficient and has a higher possibility of the fire building up and creating clinkers (hard ash build-up).<br />
9
Routine Cleaning and Maintenance<br />
The following list of components should be inspected and maintained routinely to ensure that the<br />
appliance is operating at its optimum and giving you excellent heat value. The appliance, flue gas<br />
connector and the chimney flue require regular cleaning. Check them for blockage prior to re-lighting<br />
after a prolonged shut down period.<br />
Check the Burn Pot Liner DAILY<br />
Weekly<br />
Bi-annually or 2 Tons of Fuel<br />
Burn Pot and Liner - Empty Exhaust Vent<br />
Agitator<br />
Fresh Air Intake Tube<br />
Heat Exchanger Tubes Blower Mechanisms<br />
Door Glass<br />
Heat Exchanger Tubes<br />
Ash Pan and Door Gaskets Behind Firebox Liners<br />
Inside Firebox<br />
All Hinges<br />
Door Latch<br />
Post Season Clean-up<br />
Ash Box<br />
TOOLS REQUIRED TO CLEAN<br />
UNIT:<br />
Torx T-20 Screwdriver, ¼”, 5 /16” ⅜”,<br />
& 7 /16” wrench and/or socket, Brush,<br />
Soft Cloth, and Vacuum with fine<br />
filter bag<br />
BURNER POT AND LINER (Checked Daily/Emptied Weekly)<br />
This is the ‘pot’ where the pellets are burned. Only clean when the unit is cold.<br />
Note: If, after long periods of burning, the fire continually builds up and overflows the burn pot or there<br />
is a build up of clinkers, this is an indication that the pellet fuel quality is poor or the stove may need<br />
cleaning. Check the stove for ash build up (clean if required) and adjust the slider / damper to produce<br />
the proper clean combustion.<br />
1. Open the door using the door handle located on the right-hand side of the stove.<br />
2. Lift the lever on burn pot to unlock the fire grate and remove it.<br />
3. The agitator locks at the right; rotate the top of the agitator towards the back of the firebox to unlock<br />
it, slide it to the left, and lift it out of the burn pot liner.<br />
4. Lift the burn pot liner out of the stove.<br />
5. Lift the burn pot from the firebox by gently lifting it up at the front of the burn pot, then slide it out<br />
from around the air intake tube and the ignitor cartridge. The ignitor is spring loaded to help with<br />
removal and installation.<br />
6. Remove any build up on the agitator (calcium build-ups are Fire Grate<br />
common when burning corn). Using a metal scrapper, remove<br />
material that has accumulated or is clogging the liner’s holes.<br />
Then dispose of the scrapped ashes from the liner and from Agitator<br />
inside the burn-pot.<br />
7. Place the burn-pot back into the stove, there are hooks at the<br />
Burn Pot<br />
front of the burn pot that sit in a mount in the firebox. Ensure<br />
Liner<br />
that the air intake tube and the ignitor cartridge. are properly<br />
inserted into the burn pot.<br />
Spring<br />
Loaded<br />
8. Place the liner back into the burn-pot, making sure that the Ignitor<br />
ignitor hole in the liner is aligned with the ignitor tube; push<br />
Air Intake<br />
the liner up against the ignitor tube.<br />
Tubes<br />
9. Slide the agitator back into place and turn rotate the top<br />
Burn Pot<br />
towards the front of the stove to lock it in.<br />
10. Set the fire grate in place, it should sit level on the front and<br />
back of the burn pot liner. Lock it in with the lever on the burn<br />
pot.<br />
11. Close the door Figure 8: M-55-FS Burn Pot Assembly.<br />
10
Routine Cleaning and Maintenance<br />
HEAT EXCHANGER TUBES (Weekly)<br />
The exchanger tube scraper rod handle is located above<br />
the firebox door. Move the handle all the way in and out<br />
a few times (ONLY WHEN THE UNIT IS COLD) in order<br />
to clean away any fly ash that may have collected on<br />
the heat exchanger tubes. As different types of pellets<br />
produce different amounts of ash, cleaning of the tubes<br />
should be done on a regular basis to enable the unit to<br />
run efficiently.<br />
DOOR GLASS CLEANING (Weekly)<br />
Cleaning of the glass must only be done when stove is<br />
cold. Open the door by lifting the handle. The glass can<br />
be cleaned by wiping down the outside and inside of the<br />
Figure 9: M-55-FS Heat Exchanger Cleaning.<br />
glass with a dry soft cloth.<br />
If the glass has build up that can not be removed with only the cloth, clean the glass using paper towel<br />
and a gas appliance glass cleaner, this may be purchased through most dealers. If a gas appliance glass<br />
cleaner is not available, use a damp paper towel dipped in fly ash to clean the glass. After the glass has<br />
been cleaned use the dry soft cloth to wipe down the outside and inside of the glass.<br />
ASH PAN AND DOOR GASKETS (Weekly)<br />
After extended use the gasketing may come loose. To repair this, glue the gasketing on using hightemperature<br />
fiberglass gasket glue available from your local dealer. This is important to maintain an<br />
airtight assembly.<br />
ASH BOX (Weekly)<br />
IMPORTANT: The unit must be OFF while the ash pan is removed.<br />
The ash box is located behind the lower door (see Figure 10). To remove the ash box, lift the latch on the<br />
right, open the ash box door, and lift it out.<br />
Dump the ashes into a metal container stored away from combustibles. Monitor the ash level every week.<br />
Remember that different pellet fuels will have different ash contents. Ash content is a good indication of<br />
fuel efficiency and quality. Refer to “Safety Warnings And Recommendations” for disposal of ashes. Vacuum<br />
the inside of the ash pan compartment inside the pedestal including the hole at the top back of the<br />
compartment. Insert the ash box fully and close ash box door.<br />
DO NOT PLACE UNBURNED OR RAW PELLET FUEL IN ASH PAN.<br />
EXHAUST VENT (Biannually)<br />
This vent should be cleaned every year or after two tons of pellets. We recommend contacting your<br />
dealer for professional cleaning. To clean the vent pipe, tap lightly on the pipe to dislodge any loose ash.<br />
Open the bottom of the “T” to dump the ash, then vacuum as much of the ash out of the vent pipe as<br />
possible.<br />
FRESH AIR INTAKE (Biannually)<br />
Inspect periodically to be sure that it is not clogged with any foreign materials.<br />
11
Routine Cleaning and Maintenance<br />
EXHAUST PASSAGES (Biannually)<br />
1. Open the firebox door by lifting the handle.<br />
2. Remove the burn pot assembly and clean all the parts.<br />
3. Lubricate all screws with<br />
penetrating oil.<br />
Firebox Baffle<br />
4. Lift the baffle, remove<br />
the firebox liner, and lift<br />
out the firebox lower. Firebox Liner<br />
Vacuum the firebox and<br />
firebox liner thoroughly.<br />
Firebox Lower<br />
5. Open the ash box door;<br />
remove the ash box and<br />
cleanout the cavity.<br />
6. Re-install the ash box,<br />
Ashpan<br />
firebox lower, firebox<br />
liner, burn pot, and burn<br />
pot liner<br />
7. Close the firebox and ash<br />
pan doors and secure.<br />
Burner System<br />
Figure 10: M-55-FS Exhaust Passages.<br />
BLOWER MECHANISMS (Annually)<br />
Unplug the stove then open the right and left side panels to access the two blowers. Remove the two (2)<br />
5 /16 hex head screws from the upper & lower edge located on the front edge of the panel. Vacuum all<br />
dust from motors. The blower motors has sealed bearings, DO NOT lubricate this motor. Check gaskets<br />
and replace if needed.<br />
POST SEASON CLEAN-UP<br />
Once you are finished using the pellet appliance for the season, unplug the stove for added electrical<br />
protection. It is very important that the stove be cleaned and serviced as stated above.<br />
CLEANING PAINTED SURFACES<br />
Please clean painted surfaces with a soft damp cloth.<br />
FIREBOX LINER<br />
The paint on the Firebox Liner may peel. This is due to extreme conditions applied to the paint and is in<br />
no way covered by warranty.<br />
DOOR GLASS REPLACEMENT<br />
It is recommended that your dealer replace the glass if broken. The door glass is made of high temperature<br />
PYRO CERAMIC. To replace the glass, unscrew and remove the six (6) retainer nuts using a 5 /16” socket.<br />
Remove the glass and any broken pieces. High temperature fiberglass tape should be used around the<br />
glass in the same location as the original fiberglass. Insert the glass into the retainer, screw the door to<br />
the retainer, and gently tighten nuts. The use of substitute materials is prohibited: #50-2025 Glass 14⅞”<br />
x 11⅜” (378mm x 289mm).<br />
12
Warranty<br />
Sherwood Industries Ltd. is the manufacturer of the Enviro line of heating products. At Sherwood<br />
Industries, our commitment to the highest level of quality and customer service is the most important<br />
thing we do. Each Enviro stove is built on a tradition of using only the finest materials and is backed by<br />
our Exclusive Lifetime Limited Warranty to the original purchaser. With Enviro, you’re not just buying a<br />
stove, you’re buying a company with years of unequalled performance and quality.<br />
Limited Lifetime Warranty:<br />
Under this warranty, Sherwood Industries Ltd. covers the fireplace or stove body and accessories<br />
against defects in materials and workmanship, for part repair or replacement for the first seven (7)<br />
years and limited labour for the first two (2) years to the original purchaser. This Warranty covers:<br />
Firebox, Heat Exchanger, Burn Pot, Firebox Panels, Ceramic Glass, Pedestals, Panels, Legs, and Door<br />
Assembly. Please see the exclusions and limitation section below as certain restrictions and exclusions<br />
apply to this warranty.<br />
Limited Three (3) Year Warranty<br />
Under this warranty, Sherwood Industries Ltd. covers the Burn Pot Liner and Log Sets against defects<br />
in materials and workmanship, for part repair or replacement for the first three (3) years and limited<br />
labour for the first two (2) years to the original purchaser. Please see the exclusions and limitation<br />
section below as certain restrictions and exclusions apply to this warranty.<br />
Limited Two (2) Year Warranty:<br />
Under this warranty, Sherwood Industries Ltd. covers: Ignitor, Auger Motor, Circuit Board, Timers, Temp<br />
Sensors, Blowers, Vacuum Switch and Wire Harness, against defects in materials and workmanship, for<br />
part repair or replacement for the first two (2) years and limited labour for the first two (2) years to<br />
the original purchaser. Please see the exclusions and limitation section below as certain restrictions and<br />
exclusions apply to this warranty.<br />
Limited One (1) Year Warranty:<br />
Under this warranty, Sherwood Industries Ltd. covers all exterior surface finishes against defects in<br />
materials and workmanship, for part repair or replacement and limited labour for the first (1) year to<br />
the original purchaser. Please see the exclusions and limitation section below as certain restrictions and<br />
exclusions apply to this warranty.<br />
Please Note - Burning Corn or Grains - Burning corn or other grains creates a harsher environment than burning wood pellets. The sugar in corn<br />
turns to acid during the combustion process and erodes certain components at a faster rate. The burn pot liner and the agitator in your Multi - Fuel<br />
stove is a consumable item when burning corn or other grains, and not covered under warranty. We expect that these components will last a couple<br />
of burn seasons but due to the wide variety and quality of grains we are not able to accurately predict how long they will last.<br />
Here is how our Warranty works<br />
If you have any concerns with your Enviro product please contact the dealer where you purchased the<br />
fireplace or stove. Your dealer shall make all claims under this warranty in writing.<br />
To the Dealer<br />
When filling out a warranty claim please complete the following information on an official warranty claim<br />
form: Customer information: Name, address and telephone number of purchaser and date of purchase.<br />
Dealer information: Date of installation, name of installer and dealer, serial number of the appliance,<br />
nature of complaint, defects or malfunction, description and part numbers of any parts replaced.<br />
To the Distributor<br />
Sign and verify that work and information are correct.<br />
13
Warranty<br />
Exclusions and Limitations:<br />
1. This Warranty does not cover tarnish, discoloration or wear on the plating or paint.<br />
2. This Warranty excludes wear and tear or breakage caused by cleaning, moving or service on log set.<br />
3. A qualified installer must install this stove or fireplace. This Limited Warranty covers defects in materials<br />
and workmanship only if the product has been installed in accordance with local building and fire codes;<br />
in their absence, refer to the owner’s manual. If the product is damaged or broken as a result of any<br />
alteration, willful abuse, mishandling, accident, neglect, or misuse of the product, the Limited Warranty<br />
does not apply.<br />
4. The stove must be operated and maintained at all times in accordance with the instructions in the<br />
Owner’s <strong>Manual</strong>. If the unit shows signs of neglect or misuse, it is not covered under the terms of this<br />
Warranty policy. Performance problems due to operator error will not be covered by the Limited Warranty<br />
policy.<br />
5. As this is a heating appliance some changes in colour of surface finishes may occur. This is not a flaw<br />
and as such is not covered under this warranty.<br />
6. Some minor expansion, contraction, or movement of certain parts and resulting noise, is normal and not<br />
a defect and, therefore, is not covered under this Limited Warranty.<br />
7. Misuse includes over-firing. Over-firing this appliance can cause serious damage and will nullify the<br />
Limited Warranty.<br />
8. The Limited Warranty will cover glass thermal breakage only and will not cover misuse of the stove glass,<br />
including but not limited to glass that is struck, has surface contaminates or has had harsh or abrasive<br />
cleaners used on it.<br />
9. This warranty does not cover products made or provided by other manufacturers and used in conjunction<br />
with the operation of this stove without prior authorization from Sherwood Industries Ltd. The use of<br />
such products may nullify the Limited Warranty on this stove. If unsure as to the extent of this Limited<br />
Warranty, contact your authorized Enviro dealer before installation.<br />
10. Sherwood Industries Ltd. will not be responsible for inadequate performance caused by environmental<br />
conditions.<br />
11. The Limited Warranty does not cover installation and operational related problems such as spillage<br />
caused by environmental conditions. Environmental conditions include but are not limited to nearby<br />
trees, buildings, roof tops, wind, hills, mountains, inadequate venting or ventilation, excessive offsets,<br />
negative air pressures or other influences caused by mechanical systems such as furnaces, fans, clothes<br />
dryers etc.<br />
12. The Limited Warranty is void if:<br />
a) The stove has been operated in atmospheres contaminated by chlorine, fluorine or other damaging<br />
chemicals.<br />
b) The stove is subject to submersion in water or prolonged periods of dampness or condensation.<br />
c) Any damage to the unit, combustion chamber or other components due to water, or weather damage<br />
which is the result of, but not limited to, improper chimney/venting installation.<br />
c) Salt air in coastal areas or high humidity can be corrosive to the finish; these environments can cause<br />
rusting. Damage caused by salt air or high humidity is not covered by the Limited Warranty.<br />
13. Exclusions to the Limited Warranty include: injury, loss of use, damage, failure to function due to<br />
accident, negligence, misuse, improper installation, alteration or adjustment of the manufacturer’s<br />
settings of components, lack of proper and regular maintenance, alteration, or act of God.<br />
14. The Limited Warranty does not cover damage caused to the fireplace or stove while in transit. If this<br />
occurs, do not operate the stove and contact your courier and/or dealer.<br />
15. The Limited Warranty does not extend to or include firebox paint, door or glass gaskets with damage<br />
caused by normal wear and tear, or exterior paint discoloration or chipping, worn gaskets, etc.<br />
16. The Limited Warranty does not include damage to the unit caused by abuse, improper installation, or<br />
modification of the unit.<br />
14
Warranty<br />
17. Damage to plated surfaces caused by fingerprints, scratches, melted items, or other external scores and<br />
residues left on the plated surfaces from the use of abrasive cleaners or polishes is not covered in this<br />
warranty.<br />
18. The Limited Warranty does not cover tarnish, discoloration or wear on the plated surfaces.<br />
19. The paint on the Metal Brick Liner may peel. This is due to the extreme conditions applied to the paint<br />
during normal usage. It is not a flaw and is not covered under warranty.<br />
20. Sherwood Industries Ltd. is free of liability for any damages caused by the fireplace or stove, as well as<br />
inconvenience expenses and materials. The Limited Warranty does not cover incidental or consequential<br />
damages.<br />
21. The Limited Warranty does not cover any loss or damage incurred by the use or removal of any<br />
component or apparatus to or from the Enviro fireplace or stove without the express written permission<br />
of Sherwood Industries Ltd. and bearing a Sherwood Industries Ltd. label of approval.<br />
22. Any statement or representation of Enviro products and their performance contained in Enviro<br />
advertising, packaging literature, or printed material is not part of the Limited Warranty.<br />
23. The Limited Warranty is automatically voided if the fireplace or stove’s serial number has been removed<br />
or altered in any way. If the stove is used for commercial purposes, it is excluded from the Limited<br />
Warranty.<br />
24. No dealer, distributor, or similar person has the authority to represent or warrant Enviro products beyond<br />
the terms contained within the Limited Warranty. Sherwood Industries Ltd. assumes no liability for such<br />
warranties or representations.<br />
25. Sherwood Industries Ltd. will not cover the cost of the removal or re-installation of the stove, hearth,<br />
facing, mantels, venting or other components.<br />
26. Labour to replace or repair items under this Limited Warranty will be covered per our warranty service<br />
fee reimbursement schedule. Labour rates are set per component and as such total labour costs may<br />
not be covered.<br />
27. Sherwood Industries Ltd. is not liable for freight or labour on any stove replaced in-field and is not liable<br />
for travel costs for service work. In the event of in-home repair work, the customer will pay any inhome<br />
travel fees or service charges required by the Authorized Dealer.<br />
28. At no time will Sherwood Industries Ltd. be liable for any consequential damages which exceed the<br />
purchase price of the unit. Sherwood Industries Ltd. has no obligation to enhance or modify any<br />
stove once manufactured (example: as a stove evolves, field modifications or upgrades will not be<br />
performed).<br />
29. This Limited Warranty is applicable only to the original purchaser and it is non-transferable.<br />
30. This warranty only covers Enviro products that are purchased through an authorized Enviro dealer.<br />
31. If for any reason any section of the Limited Warranty is declared invalid, the balance of the warranty<br />
remains in effect and all other clauses shall remain in effect.<br />
32. The Limited Warranty is the only warranty supplied by Sherwood Industries Ltd., the manufacturer<br />
of the stove. All other warranties, whether express or implied, are hereby expressly disclaimed and<br />
purchaser’s recourse is expressly limited to the Limited Warranty.<br />
33. Sherwood Industries Ltd. and its employees or representatives will not assume any damages, either<br />
directly or indirectly, caused by improper usage, operation, installation, servicing or maintenance of this<br />
stove.<br />
34. Sherwood Industries Ltd. reserves the right to make changes without notice. Please complete and mail<br />
the warranty registration card and have the installer fill in the installation data sheet in the back of the<br />
manual for warranty and future reference.<br />
35. Sherwood Industries Ltd. is responsible for stocking parts for a maximum of seven (7) years after<br />
discontinuing the manufacture or incorporation of the item into its products. An exception to this would<br />
be if an OEM supplier is not able to supply a part.<br />
15
Installation Data Sheet<br />
The following information must be recorded by the installer for warranty purposes and future reference.<br />
NAME OF OWNER:<br />
NAME OF DEALER:<br />
_________________________________________<br />
_________________________________________<br />
ADDRESS:<br />
_________________________________________<br />
_________________________________________<br />
_________________________________________<br />
ADDRESS:<br />
_________________________________________<br />
_________________________________________<br />
_________________________________________<br />
PHONE:___________________________________<br />
PHONE:___________________________________<br />
MODEL:___________________________________<br />
SERIAL NUMBER:___________________________<br />
DATE OF PURCHASE: _____________ (dd/mm/yyyy)<br />
DATE OF INSTALLATION:___________(dd/mm/yyyy)<br />
MAGNEHELIC AT INSTALL:___________________<br />
INSTALLER’S SIGNATURE:<br />
NAME OF INSTALLER:<br />
_________________________________________<br />
ADDRESS:<br />
_________________________________________<br />
_________________________________________<br />
_________________________________________<br />
_________________________________________<br />
PHONE:___________________________________<br />
MANUFACTURED BY:<br />
SHERWOOD INDUSTRIES LTD.<br />
6782 OLDFIELD RD. SAANICHTON, BC, CANADA V8M 2A3<br />
www.enviro.com<br />
April 15, 2011<br />
C-12142<br />
16