Manual - Pine Tree Stove Shoppe
Manual - Pine Tree Stove Shoppe
Manual - Pine Tree Stove Shoppe
- No tags were found...

Create successful ePaper yourself
Turn your PDF publications into a flip-book with our unique Google optimized e-Paper software.
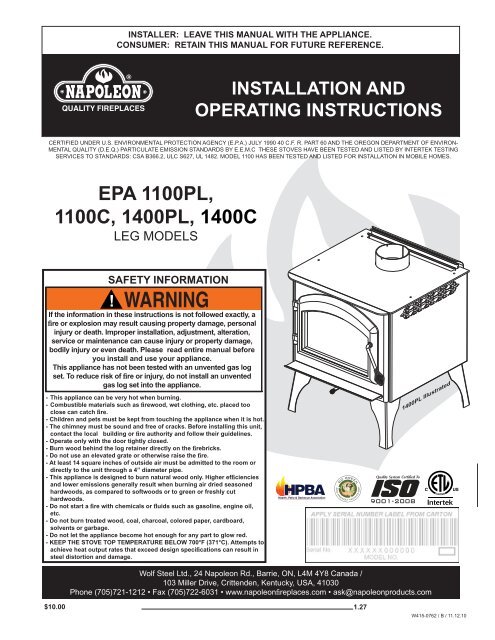
INSTALLER: LEAVE THIS MANUAL WITH THE APPLIANCE.CONSUMER: RETAIN THIS MANUAL FOR FUTURE REFERENCE.1INSTALLATION ANDOPERATING INSTRUCTIONSCERTIFIED UNDER U.S. ENVIRONMENTAL PROTECTION AGENCY (E.P.A.) JULY 1990 40 C.F. R. PART 60 AND THE OREGON DEPARTMENT OF ENVIRON-MENTAL QUALITY (D.E.Q.) PARTICULATE EMISSION STANDARDS BY E.E.M.C THESE STOVES HAVE BEEN TESTED AND LISTED BY INTERTEK TESTINGSERVICES TO STANDARDS: CSA B366.2, ULC S627, UL 1482. MODEL 1100 HAS BEEN TESTED AND LISTED FOR INSTALLATION IN MOBILE HOMES.EPA 1100PL,1100C, 1400PL, 1400CLEG MODELSSAFETY INFORMATION! WARNINGIf the information in these instructions is not followed exactly, afire or explosion may result causing property damage, personalinjury or death. Improper installation, adjustment, alteration,service or maintenance can cause injury or property damage,bodily injury or even death. Please read entire manual beforeyou install and use your appliance.This appliance has not been tested with an unvented gas logset. To reduce risk of fire or injury, do not install an unventedgas log set into the appliance.- This appliance can be very hot when burning.- Combustible materials such as firewood, wet clothing, etc. placed tooclose can catch fire.- Children and pets must be kept from touching the appliance when it is hot.- The chimney must be sound and free of cracks. Before installing this unit,contact the local building or fire authority and follow their guidelines.- Operate only with the door tightly closed.- Burn wood behind the log retainer directly on the firebricks.- Do not use an elevated grate or otherwise raise the fire.- At least 14 square inches of outside air must be admitted to the room ordirectly to the unit through a 4” diameter pipe.- This appliance is designed to burn natural wood only. Higher efficienciesand lower emissions generally result when burning air dried seasonedhardwoods, as compared to softwoods or to green or freshly cuthardwoods.- Do not start a fire with chemicals or fluids such as gasoline, engine oil,etc.- Do not burn treated wood, coal, charcoal, colored paper, cardboard,solvents or garbage.- Do not let the appliance become hot enough for any part to glow red.- KEEP THE STOVE TOP TEMPERATURE BELOW 700°F (371°C). Attempts toachieve heat output rates that exceed design specifications can result insteel distortion and damage.1400PL IllustratedWolf Steel Ltd., 24 Napoleon Rd., Barrie, ON, L4M 4Y8 Canada /103 Miller Drive, Crittenden, Kentucky, USA, 41030Phone (705)721-1212 • Fax (705)722-6031 • www.napoleonfireplaces.com • ask@napoleonproducts.com$10.001.27W415-0762 / B / 11.12.10
2TABLE OF CONTENTS1.0 INSTALLATION OVERVIEW 32.0 INTRODUCTION 42.1 DIMENSIONS 52.2 SPECIFICATIONS 52.3 GENERAL INSTRUCTIONS 62.4 GENERAL INFORMATION 72.5 RATING PLATE LOCATION 83.0 PRE-INSTALLATION PREPARATION 93.1 APPLIANCE PLACEMENT 93.2 CLEARANCE TO COMBUSTIBLES 93.3 ALCOVE INSTALLATION 93.4 FLOOR PROTECTION 103.5 OUTSIDE AIR 103.6 MOBILE HOME 114.0 INSTALLATION 124.1 CHIMNEY 134.1.1 CHIMNEY CONNECTION 144.1.2 ADDING SECTIONS 154.1.3 TYPICAL THROUGH THE CEILING 164.1.4 TYPICAL THROUGH THE WALL 174.1.5 TYPICAL EXISTING MASONRY 185.0 FINISHING 195.1 LEG INSTALLATION (1100PL / 1400PL) 195.2 DOOR REMOVAL / INSTALLATION (1100PL / 1400PL) 195.3 1100C/1400C DOOR REMOVAL / INSTALLATION 195.4 1400C CAST LID LEVELLING 205.5 DOOR HANDLE INSTALLATION 205.6 BRICKS AND BAFFLES INSTALLATION 216.0 OPTIONAL KIT INSTALLATIONS 226.1 OPTIONAL BLOWER INSTALLATION 226.2 OPTIONAL ASH DRAWER (1100PL/1400PL ONLY) 227.0 OPERATION 237.1 AIR CONTROL 247.2 FIRE EXTINGUISHERS / SMOKE DETECTORS 247.3 LIGHTING A FIRE 257.3.1 FLASH FIRE 257.3.2 EXTENDED FIRE 257.4 SMOKING 258.0 MAINTENANCE 268.1 ASH REMOVAL PROCEDURES 268.1.1 APPLIANCES WITHOUT ASH PAN (1100PL/1400PL ONLY) 268.1.2 APPLIANCES WITH ASH PAN 268.2 CREOSOTE FORMATION AND REMOVAL 268.3 RUNAWAY OR CHIMNEY FIRE 278.4 CHIMNEY CLEANING 278.5 GLASS REPLACEMENT 288.6 GASKET REPLACEMENT 288.7 CARE OF GLASS 298.8 CARE OF PLATED PARTS 298.9 WOOD 309.0 REPLACEMENTS 3110.0 TROUBLE SHOOTING 3311.0 WARRANTY 3412.0 SERVICE HISTORY 35NOTE: Changes, other than editorial, are denoted by a vertical line in the margin.W415-0762 / B / 11.12.10
31.0 INSTALLATION OVERVIEW1400PL ILLUSTRATEDRating Plate, see“RATING PLATEINFORMATION” section.Door, see “DOOR ANDHANDLE INSTALLATION”section.Blower, see “OPTIONALBLOWER KITINSTALLATION” section.Legs, see “LEGINSTALLATION”section.Draft, see “AIR CONTROL”section.Ash drawer, see “OPTIONALASH DRAWER KIT” section.W415-0762 / B / 11.12.10
42.0 INTRODUCTION! WARNING• THIS APPLIANCE IS HOT WHEN OPERATED AND CAN CAUSE SEVERE BURNS IF CONTACTED.• ANY CHANGES OR ALTERATIONS TO THIS APPLIANCE OR ITS CONTROLS CAN BE DANGEROUS ANDIS PROHIBITED.• Do not operate appliance before reading and understanding operating instructions. Failure to operate applianceaccording to operating instructions could cause fi re or injury.• Before installing this appliance, contact the local building or fi re authority and follow their guidelines.• This appliance must be installed by a qualifi ed installer.• Risk of burns. The appliance should be turned off and cooled before servicing.• Do not let the appliance become hot enough for any part to glow red.• Do not install damaged, incomplete or substitute components.• Risk of cuts and abrasions. Wear protective gloves and safety glasses during installation. Sheet metal edgesmay be sharp.• Young children should be carefully supervised when they are in the same room as the appliance. Toddlers,young children and others may be susceptible to accidental contact burns. A physical barrier is recommended ifthere are at risk individuals in the house. To restrict access to an appliance or stove, install an adjustable safetygate to keep toddlers, young children and other at risk individuals out of the room and away from hot surfaces.• Clothing or other fl ammable material should not be placed on or near the appliance. Objects placed in front ofthe appliance must be kept a minimum of 48” away from the front face of the appliance.• Due to high temperatures, the appliance should be located out of traffi c and away from furniture and draperies.• Ensure you have incorporated adequate safety measure to protect infants/toddlers from touching hot surfaces.• Even after the appliance is out, the glass and/or screen will remain hot for an extended period of time.• Check with your local hearth specialty dealer for safety screens and hearth guards to protect children from hotsurfaces. These screens and guards must be fastened to the fl oor.• Any safety screen or guard removed for servicing must be replaced prior to operating the appliance.• Under no circumstances should this appliance be modifi ed.• This appliance must not be connected to a chimney fl ue pipe servicing a seperate solid fuel burning appliance.• Do not operate the appliance with the glass door removed, cracked or broken. Replacement of the glass shouldbe done by a licensed or qualifi ed service person.• Do not strike or slam shut the appliance glass door.• Operate only with the doors tightly closed.• Only doors / optional fronts certifi ed with the unit are to be installed on the appliance.• Keep the packaging material out of reach of children and dispose of the material in a safe manner. As with allplastic bags, these are not toys and should be kept away from children and infants.• If the appliance is not properly installed, a house fi re may result. Do not expose the appliance to the elements(ex. rain, etc.) and keep the appliance dry at all times. Wet insulation will produce an odour when the applianceis used.• The chimney must be sound and free of cracks. Clean your chimney a minimum of twice a year and as required.• Do not start a fi re with chemicals or fl uids such as gasoline, engine oil, etc.• Your appliance requires periodic maintenance and cleaning. Failure to maintain your appliance may lead tosmoke spillage in your home.• Higher effi ciencies and lower emissions generally result when burning air dried seasoned hardwoods, ascompared to softwoods or too green or freshly cut hardwoods. Burning wet unseasoned wood can causeexcessive creosote accumulation. When this is ignited it can cause a chimney fi re that may result in a serioushouse fi re.• This appliance is designed to burn natural wood only. Do not burn treated wood, coal, charcoal, coloured paper,cardboard, solvents or garbage.• Burn wood directly on the fi rebricks. Do not elevate grate or otherwise raise the fi re.• Do not store wood within appliance installation clearances or within the space required for re-fueling and ashremoval.• Ashes must be disposed in a metal container with a tight lid and placed on a non-combustible surface well awayfrom the home or structure until completely cool.• Ensure clearances to combustibles are maintained when building a mantel or shelves above the appliance.Elevated temperatures on the wall or in the air above the appliance can cause melting, discolouration ordamage to decorations, a T.V. or other electronic components.3.17BW415-0762 / B / 11.12.10
52.1 DIMENSIONSBCADE1400PL ILLUSTRATED2.2 SPECIFICATIONSSpecifications Ref 1100PL 1100C 1400PL 1400CWIDTH A 25 1/2” 28” 25 1/2” 28”DEPTH B 22 1/2” 22 1/2” 27” 27”FLUE CENTER LINE TO REAR C 6 1/2” 6 3/4” 7 1/2” 6 3/4”FLUE CENTER LINE TO SIDE D 12 3/4” 14” 12 3/4” 14”HEIGHT LEG MODEL E 32” 28 1/2” 32” 28 1/2”CHAMBER (D.W.H) 13 1/2x18x12” 13 1/2x18x12” 18x18x12” 18x18x12”CAPACITY 1.7ft 3 1.7ft 3 2.25ft 3 2.25ft 3APPROX. AREA HEATED* 600-1500 ft 2 600-1500 ft 2 1000-2000 ft 2 1000-2000 ft 2HEAT OUTPUT (HIGH BURN) ** 55,000 BTU 55,000 BTU 70,000 BTU 70,000 BTUDURATION LOW FIRE* 7 Hours 7 Hours 9 Hours 9 HoursWEIGHT w/o BRICKS 215 lbs 215 lbs 250 lbs 305 lbsWEIGHT OF BRICKS 110 lbs 110 lbs 145 lbs 145 lbsIDEAL WOOD LENGTH 12” 12” 16” 16”* Figures will vary considerably with individual conditions.** Wolf Steel Ltd. estimated realistic BTU/h with hardwood logs and regular refueling.W415-0762 / B / 11.12.10
62.3 GENERAL INSTRUCTIONS! WARNINGALL WIRING SHOULD BE DONE BY A QUALIFIED ELECTRICIAN AND SHALL BE IN COMPLIANCE WITHLOCAL CODES. IN THE ABSENCE OF LOCAL CODES, USE THE CURRENT CSA22.1 CANADIANELECTRIC CODE IN CANADA OR THE CURRENT NATIONAL ELECTRIC CODE ANSI/NFPA NO. 70 INTHE UNITED STATES.THIS APPLIANCE HAS NOT BEEN TESTED WITH ANY VENTED OR UNVENTED GAS LOG SET. TOREDUCE RISK OF FIRE OR PREVENT INJURY, DO NOT INSTALL A VENTED OR UNVENTED GAS LOGSET INTO THE APPLIANCE.BURNING YOUR UNIT WITH THE ASH DUMP DOOR OPEN OR AJAR CREATES A FIRE HAZARD THATMAY RESULT IN DISCOLOURATION TO THE GOLD PLATED DOOR, INTERNAL DAMAGE TO THEAPPLIANCE OR A HOUSE CHIMNEY FIRE.DO NOT CONNECT THIS APPLIANCE TO A CHIMNEY FLUE SERVING ANOTHER APPLIANCE.THIS APPLIANCE AND IT’S COMPONENTS ARE DESIGNED TO BE INSTALLED AND OPERATED AS ASYSTEM. ANY ALTERATION TO OR SUBSTITUTION FOR ITEMS IN THIS SYSTEM, UNLESS ALLOWEDBY THESE INSTALLATION INSTRUCTIONS, WILL VOID THE LISTING AND MAY VOID THE PRODUCTWARRANTY. IT MAY ALSO CREATE A HAZARDOUS INSTALLATION. READ THROUGH THESEINSTRUCTIONS THOROUGHLY BEFORE STARTING YOUR INSTALLATION AND FOLLOW THEMCAREFULLY THROUGHOUT YOUR PROJECT.• Before beginning your installation, consult with your local building code agency or fi re offi cials andinsurance representative to ensure compliance.• Non-toxic smoke will be emitted during the paint curing process, to help dissipate the smoke open awindow near the appliance.• Remove any dust or debris off the top of the appliance before fi ring the appliance as the paint will becomesoft as the appliance heats up and will harden as the appliance cures. To cure the paint on yourappliance burn your appliance moderately hot during the fi rst few fi res.• To keep the gasket from sticking to the appliance as the paint is curing, periodically open the doorevery 5-10 minutes.• For the fi rst two weeks use generous amounts of fuel and burn the appliance with the damper wideopen for an hour as the appliance goes through a process of eliminating moisture in the steel and fi rebricks.The initial heat output will be reduced while the moisture is bring drawn from the appliance andit will be necessary to build several hot fi res to remove this moisture. DURING THIS PROCESS DONOT OVERFIRE THE APPLIANCE. REDUCE THE AMOUNT OF AIR COMING INTO THE APPLI-ANCE IF THE APPLIANCE OR CHIMNEY BECOMES RED.4.7W415-0762 / B / 11.12.10
2.4 GENERAL INFORMATION! WARNINGDO NOT OPERATE THIS APPLIANCE WITHOUT THE LEGS INSTALLED.Your appliance has been specifically designed over many months of research to meet the 1990 U.S.A. EPA particulateemission standards and have been extensively tested in Canadian and American laboratories. This system is the mostefficient, simple and trouble free we know and works as follows:The chimney vent system used on your wood burning appliance should be designed with the least amount ofrestriction possible to enable the exhaust products to easily fl ow through it. Chimney vent systems that aretoo short or too long can also have an adverse affect on the fl ow of exhaust through it. The wood burningappliance and chimney vent system also require a suffi cient supply of combustion air not only to support thecombustion in the combustion chamber but to replace the exhaust leaving it so it can fl ow freely up throughthe vent system and out into the atmosphere. It is the correct balance of combustion air and the chimney ventsystem that will ensure the appliance provides you with its optimum performance.7Combustion air enters through two holes in the bottom coveredby a single draft control. Air from the front hole goes upon either side of the door into a preheating airwash locatedacross the top and then down the window to feed the fireand also to ensure that the glass remains clean. Air fromthis hole also feeds directly into the combustion chamber athearth level. Secondary air from the rear hole travels up theback in the secondary air housing to the manifold located atthe top and shoots out laterally to oxidize the gases belowthe smoke exit.FLUE GLASSThe combustion chamber is lined with high temperaturefirebrick on 2 sides, the back and across the bottom, with alayer of fibre baffles at the top to maintain a high temperaturein the combustion chamber so that gases mixing with PRIMARY AIRthe preheated air from the secondary air manifold tube are SECONDARY AIReasily ignited and burned. The appliance sides and back areshielded to direct the heat upwards and forwards into the room.HOT SECONDARY AIRFIBRE BRICKSREFRACTORY2 SIDES, BACK& BOTTOMCERAMICGLASSAIR CONTROLOPEN CLOSEDCOMBUSTION AIRINTAKEBe sure to provide sufficient combustion air. There are many other appliances in your home competing for air such as:a kitchen range hood, forced air heating devices or a bathroom exhaust fan.Expansion / contraction noises during heating up and cooling down cycles are normal and to be expected.After extended periods of non-operation such as following a vacation or a warm weather season, the appliance mayemit a slight odour for a few hours. This is caused by dust particles on the firebox burning off. Open a window to sufficientlyventilate the room.CALIFORNIA PROP 65 WARNING:Use of this product may produce smoke which contains chemicalsknown to the State of California to cause cancer, birthdefects, or other reproductive harm.If optional ash drawer is purchased, ensure that the ash dumpdoor is tightly closed, allow the door to snap shut dislodging anything(ashes or pieces of coal) that may be stuck in the opening.We suggest that our woodburning hearth productsbe installed and serviced by professionals who arecertified in the U.S. by the National FireplaceInstitue® (NFI) as NFI Woodburning Specialists orwho are certified in Canada byWood Energy TechnicalTraining (WETT).If you experience smoking problems, you may been to open a door, a window or otherwise provide some method ofsupplying combustion air to the appliance.W415-0762 / B / 11.12.10
82.5 RATING PLATE LOCATIONFor rating plate location,see “INSTALLATIONOVERVIEW”LISTED SOLID FUEL BURNING SPACE HEATER /POÊLE À COMBUSTIBLE SOLIDE HOMOLOGUÉTESTED TO: / TESTÉ SELON : UL1482 / ULC S627 / CSA B366.2 (DEC 92)MODEL / MODÈLE - EPA 14001400 1400L 1402 1450 1400CThis illustration is for referenceonly. Refer to the ratingplate on the appliancefor accurate information.INSTALL AND USE ONLY INACCORDANCE WITH THEMANUFACTURER’SINSTRUCTIONS AND LOCALBUILDING CODES.MINIMUM CEILING HEIGHT:7FT (2.13m)HEARTH EXTENSION /COMBUSTIBLE FLOORPROTECTION: IF INSTALLEDON A COMBUSTIBLE FLOOR,UNIT MUST BE PLACED ON ANON-COMBUSTIBLE FLOORPROTECTOR EXTENDING 18”(455mm) IN FRONT AND 8”(205mm) TO THE SIDES ANDBACK.CHIMNEY TYPE: MINIMUM 6”(152mm) DIAMETERAPPROVED RESIDENTIALTYPE FOR MOBILE HOMEUSE A CHIMNEY LISTED TOULC S629 IN CANADA OR UL103HT IN THE USA.CHIMNEY CONNECTOR: 6”(152mm) DIAMETER MINIMUM24 GAUGE STEEL MINIMUMCLEARANCE FROMHORIZONTAL CONNECTORAND CEILING 18” (455mm).DO NOT OBSTRUCT SPACEUNDER HEATER.SPECIAL METHODS AREREQUIRED WHEN PASSING ACHIMNEY THROUGH A WALLOR CEILING. SEE INSTRUC-TIONS AND BUILDINGCODES.DO NOT CONNECT THIS UNITTO A CHIMNEY FLUESERVING ANOTHERAPPLIANCE.FUEL: FOR USE WITH WOODONLY. DO NOT USE GRATEOR ELEVATE FIRE. BUILDWOOD FIRE DIRECTLY ONHEARTH.WARNING: RISK OF SMOKESPILLAGE. OPERATE E ONLYWITH DOOR FULLY CLOSED.REPLACE GLASS ONLY WITHCERAMIC GLASS.DO NOT OVERFIRE. IFHEATER OR CHIMNEYCONNECTORS GLOW, YOUARE OVERFIRING. INSPECTAND CLEAN CHIMNEYFREQUENTLY. UNDERCERTAIN CONDITIONS OF USECREOSOTE BUILD-UP MAYOCCUR RAPIDLY.OPTIONAL BLOWER KIT:EP-62, 115V, 60HZ, 0.82AMP.ROUTE CORD AWAY FROMUNIT.DANGER: RISK OFELECTRICAL SHOCK.DISCONNECT POWERBEFORE SERVICING UNIT.INSERT: INSTALL AND USEONLY IN SOLID FUELBURNING FIREPLACES. DONOT REMOVE BRICKS ORMORTAR FROM SOLID FUELBURNING FIREPLACE.INSTALL WITH A POSITIVEFLUE CONNECTOR ANDFACEPLATE.POUR INSTALLATION ETUTILISATION CONFORMÉMENTAUX INSTRUCTIONS DUFABRICANT ET AUX CODESLOCAUX DU BÂTIMENT.HAUTEUR DE PLAFOND MINIMAL7PI (2,13m).PROLONGEMENTD’ÂTRE/PROTECTION DUPLANCHER COMBUSTIBLE: SIINSTALLÉ SUR UN PLANCHERCOMBUSTIBLE, L’APPAREIL DOITÊTRE PLACÉ SUR UNE PLAQUEPROTECTRICE INCOMBUSTIBLES’ÉTENDANT SUR 18” (455mm) ÀL’AVANT ET 8” (205mm) À L’ARRIÈREET SUR LES CÔTÉS.TYPE DE CHIMNÉE: DIAMÈTREMINIMAL DE 6” (152mm)APPROUVÉE POUR USAGERÉSIDENTIEL. MAISON MOBILEEMPLOYEZ UNE CHEMINÉEHOMOLOGUÉE ULC S629 AUCANADA OU UL 103HT AUXÉTATS-UNIS.RACCORD DE CHEMINÉE:DIAMÈTRE DE 6” (152mm) D’ACIERDE CALIBRE 24 MINIMUM. 18”(455mm) DE DÉGAGEMENTMINIMAL ENTRE LE RACCORDHORIZONTAL ET LE PLAFOND.NE RIEN ENTREPOSER SOUSL’APPAREIL.CONTACT LOCAL BUILDING FIRE OFFICIALS ABOUT RESTRICTIONS ANDINSTALLATION INSPECTION IN YOUR AREA. MODEL 1400 IS SUITABLE FOR USEIN MOBILE HOMES WHEN USED WITH OUTSIDE AIR INSTALLATION KIT (111KT). AMINIMUM CLEARANCE OF 18” (457mm) TO THE CHIMNEY CONNECTOR MAY BEREQUIRED BY THE AUTHORITY HAVING JURISDICTION.RENSEIGNEZ-VOUS AUPRÈS DES AUTORITÉS LOCALES DU BÂTIMENT ET DUSERVICE DES INCENDIES AU SUJET DES RESTRICTIONS ET DES INSPECTIONSD’INSTALLATION DANS VOTRE RÉGION. LES MODÈLES 1400 PEUVENT ÊTREINSTALLÉS DANS UNE MAISON MOBILE SI INSTALLÉS CONJOINTEMENT AVEC UNEPRISE D’AIR EXTÉRIEUR (111KT). UN DÉGAGEMENT MINIMAL DE 18” (457mm)JUSQU’AU RACCORD DE LA CHEMINÉE PEUT ÊTRE EXIGÉ PAR L’AUTORITÉ AYANTJURIDICTION.BACK WALL (M/A)BACK WALL (M/A)8"B"B45°8" 8"A"AC18"LEALCOVESIDE WALL (M/L)IF THE STOVE IS TO BE INSTALLED ON A COMBUSTIBLEFLOOR, IT MUST BEPLACED ON AN APPROVED PROVED NON-COMBUSTIBLE HEARTH PAD, THATEXTENDS 8” (200mm) 0mm) BEYOND THE STOVE SIDESAND BACK, AND 18”(455mm) TO THE FRONT.SI LE POÊLE EST INSTALLÉ SUR UN PLANCHER COMBUSTIBLE, IL DOIT ÊTRE PLACÉSUR UNE BASE DE PROTECTION INCOMBUSTIBLE CERTIFÉE QUI DOIT DÉPASSERLES CÔTÉS ET L’AMÉRE DU POÊLE DE 8” (200mm) ET SE PROLONGER DE 18”(455mm) SUR LE DEVANT.MINIMUM CLEARANCE TO COMBUSTIBLE MATERIAL WITH SINGLE WALLCHIMNEY CONNECTOR /DÉGAGEMENTS MINIMAUX AUX MATÉRIAUXCOMBUSTIBLES AVEC RACCORDDE CHEMINÉE À PAROI SIMPLE:FROM HEATER / DU POÊLERESIDENTIAL / RÉSIDENTIELDES MÉTHODES SPÉCIALES SONT1400REQUISES LORSQU’UNE12IN/PO (305 mm)CHEMINÉE TRAVERSE UN MUR OU12IN/PO (305 mm)UN PLAFOND. VOIR LES6IN/PO (150 mm)INSTRUCTIONS S ET LES CODES DUBÂTIMENT.USING DOUBLE WALL CONNECTOR/UTILISATIONNE PAS RACCORDER À LAD’UN CONDUIT DE RACCORDEMENT À MAISON / MOBILE HOME*CHEMINÉE E D’UN AUTRE APPAREIL.DOUBLE PAROICOMBUSTIBLE: BLE: POUR USAGE1400 1400AVEC LE BOIS SEULEMENT.10IN/PO (254 mm)10IN/PO (254 mm)N’UTILISEZ PAS DE CHENET OU NE6IN/PO (152 mm)6IN/PO (152 mm)SURÉLEVEZ PAS LE BOIS.4IN/PO (102 mm)4IN/PO (102 mm)PRÉPAREZ LE FEU DIRECTEMENT*MODEL 1400 MAY MAY BE INSTALLED INTO A MOBILE HOME IN THE UNITEDSUR L’ÂTRE.STATES ONLY.AVERTISSEMENT:RISQUED’ÉCHAPPEMENT DE FUMÉE. *LE MODÈLE 1400 NE PEUT ÊTRE INSTALLÉ QUE DANS UNE MAISONTENIR LA PORTE FERMÉEMOBILE AUX ÉTATS-UNIS SEULEMENT.LORSQUE LE POÊLE FONCTIONNE.REMPLACEZ LA VITRE PAR UNEVITRE EN CÉRAMIQUE SEULEMENT.NE SURCHAUFFEZ PASL’APPAREIL. SI L’APPAREIL OU LES LISTED SOLID FUEL BURNING FIREPLACE INSERT /RACCORDS ROUGEOIENT,L’APPAREIL SURCHAUFEE.ENCASTRÉ À COMBUSTIBLE SOLIDE HOMOLOGUÉINSPECTEZ ET NETTOYEZ LA TESTED TO / TESTÉ SELON :CHEMINÉE FRÉQUEMMENT. DANS ULC S628 / UL 1482EPI 1402CERTAINES CONDITIONS, DESDÉPÔTS DE CRÉOSOTE PEUVENTSE FORMER RAPIDEMENT.CEILING / PLAFONDSOUFFLERIE OPTIONNELLE:CLEARANCES TO COMBUSTIBLE CONSTRUCTION /EP-62, 115V, 60HZ, 0,82A. TENEZ LE DDÉGAGEMENTS AUX MATÉRIAUX COMBUSTIBLES:B CCORDON ÉLECTRIQUE LOIN DE(MEASURED TO UNIT / À PARTIR DE L’APPAREIL)L’APPAREIL.AA SIDE FACING / CÔTÉ1 IN/PO (25mm)*DANGER: RISQUE DE SECOUSSEFLOOR / PLANCHER B TOP FACING / DESSUS28 IN/PO (710mm)ÉLECTRIQUE. DÉBRANCHEZ AVANTC MANTEL / TABLETTE28 IN/PO (710mm)DE PROCÉDER À L’ENTRETIEN.D SIDE WALL / MUR LATÉRAL 17 IN/PO (430mm)ENCASTRÉ: INSTALLEZ ET UTILISEZSEULEMENT DANS UN FOYER À*CLEARANCE TO EDGE OF FLASHING / DÉGAGEMENT AUCOMBUSTIBLE SOLIDE. NEBORD DE LA FAÇADERETIREZ PAS DE MORTIER, NIBRIQUES DU FOYER À COMBUS-TIBLE SOLIDE.INSTALLEZ AVEC UNE GAINECONFORME ET UNE PLAQUE DERECOUVREMENT.CAUTION:HOT WHILE IN OPERATION. DO NOT TOUCH. KEEP CHILDREN,CLOTHING AND FURNITURE AWAY. CONTACT MAY CAUSESKIN BURNS.QUAND L’APPAREIL FONCTIONNE, L A SURFACE DEVIENTATTENTION: CHAUDE. NE PAS TOUCHER. TENIR LES ENFANTS, LESVÊTEMENTS T ET LES MEUBLES À L’ÉCART. LE CONTACT PEUTCAUSER DES BRÛLURES À LA PEAU.U.S. ENVIRONMENTAL PROTECTION AGENCY Certifié conforme à la norme d’émanation de particules de juillet 1992.WOLF STEEL LTD.24 Napoleon Rd. Barrie, Ontario L4M 4Y8 CanadaWOLF STEEL USA103 Miller Drive, Crittenden, Kentucky, USA, 410301400 SERIES RATING PLATE ILLUSTRATEDSAMPLEAMPLE MD’UMEPA1400SIDE WALL (M/L)LEB"EDATE CODE / DE DATEW385-0401 / GW415-0762 / B / 11.12.10
93.0 PRE-INSTALLATION PREPARATION3.1 APPLIANCE PLACEMENTHave an authorized dealer install the appliance. If you install the appliance yourself, have your dealer reviewyour installation plans and/or installation.Draw out a detailed plan of the installation including dimensions and verify the dimensions with the requirementslisted in this manual.You may wish to adjust the appliance position slightly to ensure the vent does not intersect with a framingmember. Appliance must be positioned so that no combustibles are within, or can swing within (e.g. drapes,doors), 48” of the front of the appliance.67.1A3.2 CLEARANCE TO COMBUSTIBLES! WARNINGDO NOT INSTALL INTO ANY AREA HAVING A HEIGHT LESS THAN 7 FEET (CEILING OF ENCLOSURETO APPLIANCE BOTTOM, EXCLUDING HEARTH HEIGHT).BACK WALLBACK WALLDCABSIDE WALLEESIDE WALLFPARALLEL & CORNER SINGLE WALL CONNECTOR DOUBLE WALL CONNECTOR1100PL / 1100C 1400PL / 1400C 1100PL / 1100C 1400PL / 1400CSIDEWALL (A) 12” 12” 10” 10”SIDEWALL TO FLUE (B) 21 3/4” 21 3/4” 19 3/4” 19 3/4”BACKWALL (C) 10” 12” 6” 6”BACKWALL TO FLUE (D) 13 1/2” 16 1/2” 9 1/2” 10 1/2”CORNER (E) 6” 6” 2” 4”CEILING (F) 84” 84” 84” 84”Clearances can be reduced with shielding acceptable to local authorities. Reduced installation must complywith NFPA 211 or CAN/CSA-B365.3.3 ALCOVE INSTALLATION1100 series only may be installed, using a listed double wall connector,such as Security DL6 in Canada, the Simpson Duravent Plus DVL inthe USA or an equivalent double wall connector, into an alcove havinga depth of no more than 4 feet and a height of at least 7 feet.The minimum clearances are as shown.9” 6”ALCOVE14"23"4 FOOTMAXW415-0762 / B / 11.12.10
103.4 FLOOR PROTECTIONIf the appliance is to be installed on top of a combustible fl oor, it must be placed on an approved non-combustiblehearth pad, that extends 8” beyond the appliance sides and back and 18” to the front. The reduced clearancefrom the back of the appliance may result in the appliance pad terminating shorter than 8” beyond theappliance.JKIJMINIMUM FLOOR PROTECTIONFRONT (I) SIDES (J) BACK (K)CANADA 18” 8” 8”USA 16” 8” 8”NOTE: If a section of horizontal chimney connector is used, floor protection isrequired under the chimney connector and 2” beyond each side.3.5 OUTSIDE AIR! WARNINGIF ROOM AIR STARVATION OCCURS BECAUSE THE FRESH AIR INTAKE IS BLOCKED WITH ICE,LEAVES, ETC., OR BECAUSE THE APPLIANCE DOOR WAS LEFT OPEN, OR DUE TO A STRONGEXHAUST FAN OPERATING ETC., DANGEROUS FUMES AND SMOKE FROM THE OPERATING APPLI-ANCE COULD BE DRAWN INTO THE ROOM.The following are signs that a outside air kit may be required:• When there is combustion present: Wood burns poorly, smoke spills, back-draft takes place and yourchimney does not draw steadily.• In the winter there is too much condensation on the windows.• Opening a window seems to alleviate the above symptoms.• A ventilation system is installed in the house.• Other devices are present that exhaust house air.• The house has tight fi tting windows and/or is equipped with a well-sealed vapour barrier.A. Connection from the appliance’s air intake to the outside ismandatory in mobile homes only, either through a hole in thewall or through the hole in the fl oor to line up with the knock outin the leg model or the hole in the pedestal base.B. Use a fresh air kit. Secure the aluminum liner by fl aring the endonce it is inserted through the hole in the base of the leg orpedestal model. If the air intake is through the fl oor, the hole inthe pedestal back must be covered with sheet metal to avoidcold air spillage into the room. A cover plate is available fromyour Wolf Steel Ltd. dealer. Avoid cutting away fl oor joists, wallstuds, electrical wires or plumbing. Seal around the outside pipewith insulation to prevent drafts.C. Attach the rear knockout plate (located inside the ash pan forshipping purposes).W415-0762 / B / 11.12.10
113.6 MOBILE HOME! WARNINGDO NOT INSTALL IN SLEEPING ROOM.THE STRUCTURAL INTEGRITY OF THE MOBILE HOME FLOOR, WALL AND CEILING/ROOF MUST BEMAINTAINED.THE APPLIANCE MUST BE PROVIDED WITH OUTSIDE COMBUSTION AIR.THE APPLIANCE MUST BE BOLTED TO THE FLOOR.INSTALL ACCORDING TO 24 CFR, PART 3280 (HUD).USE A CHIMNEY CERTIFIED FOR WOOD BURNING UL 103 S629, TYPE HT (2100°F).MODEL 1100PL, 1100C, 1400PL, and 1400C ARE APPROVED FOR INSTALLATION IN MOBILE HOMESIN THE UNITED STATES ONLY.For specifi c clearances, see “MINIMUMCLEARANCES TO COMBUSTIBLES” section.The appliance must be installed between ceilingjoists, with radiation shield and roof fl ashing, so thatthe structural strength, insulation and waterproofqualities of the home are not lessened. Seal withsilicone to maintain a vapour barrier at the chimneyand outside air pipe penetrations.RAIN CAPMOBILE HOMEROOF FLASHINGRADIATION SHIELDCEILING SUPPORTTRIM COLLARREMOVE TOALLOW FORTRANSPORATIONAPPLIANCEBOLTED TO FLOORHEARTH PADOUTSIDE AIR CONNECTIONTHROUGH WALL OR FLOORW415-0762 / B / 11.12.10
124.0 INSTALLATION! WARNINGWEAR GLOVES AND SAFETY GLASSES FOR PROTECTION.CAREFULLY FOLLOW THE INSTRUCTIONS FOR ASSEMBLY OF THE PIPE AND OTHER PARTSNEEDED TO INSTALL THE APPLIANCE. FAILURE TO DO SO MAY RESULT IN A FIRE, ESPECIALLY IFCOMBUSTIBLES ARE TOO CLOSE TO THE APPLIANCE OR CHIMNEY AND AIR SPACES AREBLOCKED, PREVENTING THE FREE MOVEMENT OF COOLING AIR.DO NOT DRAW OUTSIDE AIR FROM GARAGE SPACES. EXHAUST PRODUCTS OF GASOLINE ENGINES AREHAZARDOUS.DO NOT INSTALL OUTSIDE AIR DUCTS SUCH THAT THE AIR MAY BE DRAWN FROM ATTIC SPACES, BASEMENTSOR ABOVE THE ROOFING WHERE OTHER HEATING APPLIANCES OR FANS AND CHIMNEYS EXHAUST OR UTILIZEAIR. THESE PRECAUTIONS WILL REDUCE THE POSSIBILITY OF APPLIANCE SMOKING OR AIR FLOW REVERSAL.THE OUTSIDE AIR INLET MUST REMAIN CLEAR OF LEAVES, DEBRIS ICE AND/OR SNOW. IT MUST BE UNRE-STRICTED WHILE APPLIANCE IS IN USE TO PREVENT ROOM AIR STARVATION WHICH CAN CAUSE SMOKE SPILL-AGE AND AN INABILITY TO MAINTAIN A FIRE. SMOKE SPILLAGE CAN ALSO SET OFF SMOKE ALARMS.NEGATIVE PRESSURE WITHIN YOUR HOME MAY INADVERTENTLY AFFECT YOUR APPLIANCE.TO PREVENT CONTACT WITH SAGGING OR LOOSE INSULATION, THE APPLIANCE MUST NOT BE INSTALLEDAGAINST VAPOUR BARRIERS OR EXPOSED INSULATION. LOCALIZED OVERHEATING COULD OCCUR AND A FIRECOULD RESULT.DO NOT USE MAKESHIFT COMPROMISES DURING INSTALLATION. DO NOT BLOCK OR RESTRICT AIR, GRILLE ORLOUVRE OPENINGS. DO NOT ADD A HOOD.KEEP HAND TOOLS IN GOOD CONDITION, SHARPEN CUTTING EDGES AND MAKE SURE TOOL HANDLES ARESECURE.ALWAYS MAINTAIN THE MINIMUM AIR SPACE REQUIRED TO THE ENCLOSURE TO PREVENT FIRES.68.3AW415-0762 / B / 11.12.10
4.1 CHIMNEY! WARNINGNEVER INSTALL A SINGLE WALL SLIP SECTION OR SMOKE PIPE IN A CHASE STRUCTURE. THE HIGHERTEMPERATURE OF THIS SINGLE WALL PIPE MAY RADIATE SUFFICIENT HEAT TO COMBUSTIBLECHASE MATERIALS TO CAUSE A FIRE.DO NOT CONNECT THIS APPLIANCE TO A CHIMNEY SYSTEM SERVING ANOTHER APPLIANCE.TO AVOID DANGER OF FIRE, ALL INSTRUCTIONS MUST BE STRICTLY FOLLOWED, INCLUDING THEPROVISION OF AIR SPACE CLEARANCE BETWEEN CHIMNEY SYSTEM AND ENCLOSURE. TOPROTECT AGAINST THE EFFECTS OF CORROSION ON THOSE PARTS EXPOSED TO THE WEATHER, WERECOMMEND THAT THE CHASE TOP BE PAINTED WITH A RUST-RESISTANT PAINT.DO NOT FILL ANY FRAMED SPACE AROUND THE CHIMNEY WITH INSULATION OR ANY OTHER MATERIAL.INSULATION PLACED IN THIS AREA COULD CAUSE ADJACENT COMBUSTIBLES TO OVERHEAT.MAINTAIN A MINIMUM 2" AIR CLEARANCE TO ALL PARTS OF THE CHIMNEY SYSTEM AT ALL TIMES.FAILURE TO MAINTAIN THIS 2" AIR CLEARANCE WILL CAUSE A STRUCTURE FIRE. NEVER FILL THISSPACE WITH ANY TYPE OF MATERIAL.DO NOT CUT RAFTERS OR CEILING JOISTS WITHOUT FIRST CONSULTING A BUILDING OFFICIALTO ENSURE STRUCTURAL INTEGRITY IS NOT COMPROMISED.FIRESTOP SPACERS MUST BE USED WHENEVER THE CHIMNEY PENETRATES A CEILING/FLOOR AREA.THE TOTAL HORIZONTAL VENT LENGTH SHOULD NOT EXCEED 40% OF THE CHIMNEY HEIGHTABOVE THE STOVE. ALL HORIZONTAL SMOKE PIPE MUST SLOPE SLIGHTLY UPWARDS A MINIMUMOF 1/4” PER FOOT AND ALL CONNECTIONS MUST BE TIGHT AND SECURED BY THREE SHEETMETAL SCREWS EQUALLY SPACED. AN UNINSULATED SMOKE PIPE SHALL NOT PASS THROUGHAN ATTIC, ROOF SPACE, CLOSET OR SIMILAR CONCEALED SPACE, OR THROUGH A FLOOR,CEILING, WALL OR PARTITION, OR ANY COMBUSTIBLE CONSTRUCTIONS.DO NOT USE ANY MAKESHIFT MATERIALS DURING INSTALLATION.13Your appliance may be hooked up with a factory built or masonry chimney. If you are using a factory built chimney,it must comply with ULCS629 (Canada) or UL103 (USA) standards. It must therefore be a 6" HT Type(2100°F) chimney. It is extremely important that it be installed according to the manufacturer's specifi cations.The manufacturer's installation instructions and specifi ed clearances should always be followed in accordancewith local and national codes. In Canada the CSA B365 and the CSA C22.1 installation codes are to be followed.In the USA the ANSI NFPA 70 and ANSI NFPA 211 installation codes are to be followed.Chimney and chimney connector must be in good condition and kept clean.W415-0762 / B / 11.12.10
144.1.1 CHIMNEY CONNECTIONYour chimney connector and chimney must have the same diameter as the appliance’s exhaust fl ue outlet. Theappliance pipe must be made of aluminized or cold roll steel with a minimum 24 gauge thickness. It is strictlyforbidden to use galvanized steel.A 6” diameter single wall chimney connector, used to connect the appliance to the chimney, must be installed withthe crimped end toward the appliance. This will ensure that the moisture which condenses from the burning woodwill flow back into the fire chamber. Each joint in the chimney connector must be secured with at least three sheetmetal screws.For installation of your chimney connector, the following recommendations may be useful.• The chimney connector must be short and straight. For optimum performance it is recommended thatall horizontal runs have a minimum 1/4” rise per foot, with the upper end of the section toward thechimney. For safe and proper operation of the appliance, see “INSTALLATION” instructions.• To insure a good draft, the total horizontal length of the connector should never exceed 8’ to 10’. Inthe case of vertical installation, the total length of the connector can be longer and connected withoutproblem to the chimney at the ceiling level.• There should never be more than two 90° elbows in the entire connector and chimney system. Neverstart with a 90° elbow. Always go up vertically for at least 2 feet from the fl ue collar before using a 90°elbow.• The connector must not pass through any combustible material, nor may it pass through a concealedspace (such as an attic, roof space, or closet). If passing through a wall, ceiling, or into a masonrychimney, use either chimney components listed for that specifi c use, or means acceptable to localauthorities having jurisdiction over the installation.This appliance must be connected to:A. A chimney complying with the requirements for TypeHT chimneys in the Standard for Chimneys, Factory-Built, Residential Type and Building Heating Appliance,orB. A code-approved masonry chimney with a fl ue liner.Vent the stove into a masonry chimney or an approved,insulated solid-fuel stainless-steel chimneywith as short and straight a length of 6” diameterchimney connector as possible. Connection to a masonrychimney must be by a metal or masonry thimblecemented in place.TOWARDAPPLIANCEMALE END OFCONNECTOROR CHIMNEYPIPEFLUE GASDIRECTION58.1AW415-0762 / B / 11.12.10
154.1.2 ADDING SECTIONSAdd chimney sections, according to the manufacturers installation instructions. The chimney must extend atleast, 3 feet above its point of contact with the roof and at least 2 feet higher than any wall, roof, building orobstacle within 10 feet horizontally.LESS THAN10 FEET3 FTMIN2 FT MIN10 FT TONEARESTROOFLINERIDGE2 FTMIN3 FTMIN10 FT ORMORELESS THAN10 FT3 FTMIN3 FTMIN2 FTMINFLAT ROOFWALL59.1AW415-0762 / B / 11.12.10
164.1.3 TYPICAL THROUGH THE CEILINGA. Move the stove into position with the fl ue centered, midpoint between twojoists to prevent having to cut them. Use a plumb bob to line up the center.B. Cut and frame an opening in the ceiling to provide a 2” clearance betweenthe outside of the chimney and any combustible material. DO NOT FILL THISSPACE WITH ANY TYPE OF MATERIAL.Nail headers between the joist for extra support.Firestop spacers must be placed on the bottomof each framed opening in any fl oor orceiling that the chimney passes through.If your chimney system is enclosed withinthe attic area, a rafter radiation shield isrequired.C. Hold a plumb bob from the underside ofthe roof to determine where the opening inthe roof should be. Cut and frame the roofopening to maintain proper 2” clearances.HEADERSFIRESTOP SPACER -UNDERSIDE OF JOISTNOTE: The chimney must be supported at the ceiling or roof so that it’sweight does not rest on the appliance and must comply with it’smanufacturer’s instructions.TERMINALLISTEDCHIMNEYSPECIFIEDCLEARANCEMAINTAIN 2”CLEARANCELISTED CHIMNEYSTORMCOLLARFLASHINGROOFINSULATIONCEILINGSUPPORTCHIMNEYSUPPORTTO STOVECONNECTIONDETAILCHIMNEYCONNECTORFLOORPROTECTORCOMBUSTIBLEWALL60.1AW415-0762 / B / 11.12.10
174.1.4 TYPICAL THROUGH THE WALLIf possible, design the installation so that the connector does not pass through a combustible wall. If duringyour installation you must pass through a combustible wall, check with your building inspector before you begin.Also check with the chimney connector manufacturer for any specific requirements.Consult with your dealer regarding special connection components available for use for wall pass-throughs.Use only parts that have been tested and listed for use in a wall pass-through.SECTIONLISTEDCHIMNEY PIPETOSTOVETHIMBLECOMBUSTIBLEOUTSIDE WALLLISTEDCHIMNEY2”CLEARANCEINSULATED“T”WALLSUPPORTWALL SPACERFOR OUTSIDEWALLCONNECTIONDETAILROOFCOMBUSTIBLECEILINGCHIMNEYCONNECTORMAINTAIN 2”CLEARANCETHROUGH EAVETERMINALSTORMCOLLARFLASHINGFLOORPROTECTORCOMBUSTIBLEWALL61.1W415-0762 / B / 11.12.10
184.1.5 TYPICAL EXISTING MASONRYYou can also install your appliance using yourexisting masonry chimney. To do so, follow theguidelines below. You may want to use a factorybuiltthimble, or construct your own brick thimble.If you are using a masonry chimney, it isimportant that it be built in compliance withthe specifi cations of the Building Code inRAFTERyour region. It must normally be lined withfi re clay bricks, metal or clay tiles sealed CLEARANCE WITH FIRESTOPtogether with fi re cement. (Round fl ues arethe most effi cient). The maximum fl ue sizeis 8” x 8” square or 6” round.CEILING JOISTCOMBUSTIBLEWALLEAVECLEARANCECHIMNEYCONNECTORTHIMBLEFLOORPROTECTOR62.1W415-0762 / B / 11.12.10
195.0 FINISHING5.1 LEG INSTALLATION (1100PL / 1400PL)To avoid being damaged during shipping, the appliance has been bolted to the palletand must be unbolted before the appliance can be installed.A. Remove the 4 nuts and washers fromthe underside of the pallet.B. Lift the appliance up and away fromthe pallet to clear the threaded studssticking through the pallet. Placethe appliance on its back onto aprotective surface such as a carpet orblanket to avoid scratches during leginstallation.C. Remove the four additional nuts fromeach of the four studs.D. Use four of the nuts and washers removed above to install the legs as illustrated.E. Lift the appliance up and gently set down on all four legs. Do not pivot appliance up on its legs, as thiscould result in damage to the legs.5.2 DOOR REMOVAL / INSTALLATION (1100PL / 1400PL)A. Pivot the door open and lift up to clear thebushings. Do not pivot the door any further thannecessary.B. Carefully set the door aside and pull the pins outfrom the door bushings. Repeat in reverse order toinstall the door.PINS5.3 1100C/1400C DOOR REMOVAL / INSTALLATIONA. 1400C only: Remove the cast lid.B. Remove cast top.C. Pull pin from top door hinge. It is important to hold the door whileremoving the pin. Pivot the door to clear the top door hinge. Lift the dooroff of the lower pin. Do not pivot the door any further than necessary.Repeat in reverse order to install the door.DOOR ADJUSTMENT: Loosen screws of top door bracket and slide side to sideto adjust the door hinge. Close door against paper seal to ensure proper doorseal.W415-0762 / B / 11.12.10
205.4 1400C CAST LID LEVELLINGA. Loosen the clinching nut. (4 places)B. Tighten or loosen the levelling screwin the adjusting nut.C. Tighten the clinching nut.LEVELLINGSCREWADJUSTINGNUTHINGEBRACKETCAST TOP5.5 DOOR HANDLE INSTALLATION! WARNINGCLINCHINGNUTBURNING YOUR APPLIANCE WITH THE DOORS OPEN OR AJAR CREATES A FIRE HAZARD THATMAY RESULT IN A HOUSE AND OR CHIMNEY FIRE.DO NOT STRIKE OR SLAM DOOR.NEVER REMOVE THE DOOR WHEN THE APPLIANCE IS HOT.NOTE: DOOR MAY NOT BE ASILLUSTRATEDFRONT VIEWDOORDOOR HANDLELATCHLOCKWASHERNUTDOORHANDLESPRINGWASHERSPACERNOTE: Position ofdoor handle latch.W415-0762 / B / 11.12.1098.1
215.6 BRICKS AND BAFFLES INSTALLATION! WARNINGOPERATION OF THE APPLIANCE WITHOUT THE BAFFLES CAN RESULT IN EXCESSIVE TEMPERA-TURES THAT COULD DAMAGE THE APPLIANCE, CHIMNEY AND THE SURROUNDING ENCLOSURE.With appliance and chimney installation completed, move the bricks into place for your appliance aspreviously illustrated.A. Install the bottom bricks, working from the back of the appliance forward.B. Install fi ve (1100PL) or six (1400PL) bricks along both sides of the appliance. Before installing the backbricks, loosen the screw holding the retainer and ensure that it has been moved forward. Install thesix bricks along the back wall by pivoting the bricks up under the brick retainer. Retighten the screw.NOTE: Center bricks have been cut.C. Carefully pivot fi bre baffl e up onto the top of the side brick. Slide it over onto the fl ange of the manifold.Ensure that the top baffl es are pushed all the way to the rear of the fi rebox, leaving a minimum of a 1”gap along the front. This will allow the fl ue gases to escape the fi rebox.D. Install the 4 bricks along the front.NOTE: Do not operate if baffle and manifold shield are not in position.1 1 1/4” x 4 1/2” x 9” 6 1 1/4” x 1 1/2” x 4 1/2” 112 1 1/4” x 3” x 9” 71 1/4” x 4 1/2” x 9”(Light Weight)3 1 1/4” x 4 1/2” x 4 1/2” 8 1 1/4” x 2 1/4” x 9” 1341 1/4” x 4 1/2” x 9”(Notched)5 1 1/4” x 2 1/2” x 4 1/2” 109 1 1/4” x 2 1/2” x 6 1/8”9” x 1” x 12”(Fibre Baffl es)129” x 2” x 16 1/2”(Fibre Baffl es)9” x 1” x 9 3/4”(Front Fibre Baffl es)9” x 1” x 9 3/4”(Back Fibre Baffl es)1100PL / 1100C1400PL / 1400C10118311111141125126411310 11141114111112111121185111 61122911229111W415-0762 / B / 11.12.10
226.0 OPTIONAL KIT INSTALLATIONS6.1 OPTIONAL BLOWER INSTALLATION51.5Drywall dust will penetrate into the blower bearings, causing irreparable damage. Care must be taken to preventdrywall dust from coming into contact with the blower or its compartment. Any damage resulting from thiscondition is not covered by the warranty policy.Use of the blower increases the output of heat.! WARNINGRISK OF FIRE AND ELECTRICAL SHOCK.TURN OFF THE GAS AND ELECTRICAL POWER BEFORE SERVICING THIS APPLIANCE.USE ONLY WOLF STEEL APPROVED OPTIONAL ACCESSORIES AND REPLACEMENT PARTS WITHTHIS APPLIANCE. USING NON-LISTED ACCESSORIES (BLOWERS, DOORS, LOUVRES, TRIMS, GASCOMPONENTS, VENTING COMPONENTS, ETC.) COULD RESULT IN A SAFETY HAZARD AND WILLVOID THE WARRANTY AND CERTIFICATION.ENSURE THAT THE FAN’S POWER CORD IS NOT IN CONTACT WITH ANY SURFACE OF THEAPPLIANCE TO PREVENT ELECTRICAL SHOCK OR FIRE DAMAGE. DO NOT RUN THE POWERCORD BENEATH THE APPLIANCE.THE WIRE HARNESS PROVIDED IN THE BLOWER KIT IS A UNIVERSAL HARNESS. WHENINSTALLED, ENSURE THAT ANY EXCESS WIRE IS CONTAINED, PREVENTING IT FROM MAKINGCONTACT WITH MOVING OR HOT OBJECTS.NOTE: If the optional blower (EP62-1) is installed,the blower guard (W320-0011) mustbe installed. This guard is available fromyour Napoleon dealer.Attach the mounting bracket to the blowerassembly. Then attach the mounting bracketto the back of your appliance, push on the variablespeed knob and plug into any groundedelectrical outlet. See “BLOWER INSTALLA-TION” leafl et for detailed instructions.BLOWER GUARDMOUNTINGBRACKETBLOWERASSEMBLYVARIABLESPEEDSWITCH6.2 OPTIONAL ASH DRAWER (1100PL/1400PL ONLY)IMPROPER DISPOSAL OF ASHES RESULT IN FIRES. DO NOT DISCARD ASHES IN CARDBOARDBOXES, DUMP IN BACK YARDS, OR STORE IN GARAGES.IF USING A VACUUM TO CLEAN UP ASHES, BE SURE THE ASHES ARE ENTIRELY COOLED. USINGA VACUUM TO CLEAN UP WARM ASHES COULD CAUSE A FIRE INSIDE THE VACUUM.NEVER OPERATE YOUR APPLIANCE WITH THE ASH PLUG (IF APPLICABLE) REMOVED.FAILURE TO ACHIEVE A GOOD SEAL BETWEEN THE ASH OPENING, ASH PLUG OR ASH WELL DOORWILL RESULT IN AN OVER FIRE CONDITION THAT COULD CAUSE DAMAGE TO THE APPLIANCE.Provisions have been made on the appliance toinstall an optional ash drawer kit.The EPAD-KT kit allows for convenient removalof excess ash. This kit can be purchased throughyour authorized dealer / distributor.W415-0762 / B / 11.12.10! WARNING
237.0 OPERATION! WARNINGALWAYS OPERATE THIS APPLIANCE WITH THE DOOR CLOSED AND LATCHED EXCEPT DURINGSTART UP AND RE-FUELING OR WHEN USING THE SPARK SCREEN. ALWAYS WEAR GLOVES TOPREVENT INJURY. DO NOT LEAVE THE FIRE UNATTENDED WHEN THE DOOR IS UNLATCHED ORWHEN USING A SPARK SCREEN AS UNSTABLE WOOD COULD FALL OUT OF THE FIRE CHAMBERCREATING A FIRE HAZARD TO YOUR HOME.NEVER LEAVE CHILDREN UNATTENDED WHEN THERE IS A FIRE BURNING IN THE APPLIANCE.NEVER USE GASOLINE, GASOLINE-TYPE LANTERN FUEL, KEROSENE, CHARCOAL LIGHTER FLUID,OR SIMILAR LIQUIDS TO START OR ‘FRESHEN UP’ A FIRE IN THIS APPLIANCE. KEEP ALL SUCHLIQUIDS WELL AWAY FROM THE APPLIANCE WHILE IT IS IN USE.OBJECTS PLACED IN FRONT OF THE APPLIANCE SHOULD BE KEPT A MINIMUM OF 48” FROM THEFRONT FACE.ANY MODIFICATION OF THE APPLIANCE THAT HAS NOT BEEN APPROVED IN WRITING BY THE TEST-ING AUTHORITY IS CONSIDERED BREACHING CSA B365 (CANADA) AND ANSI NFPA 211 (USA).OPEN AIR CONTROL (AND DAMPER WHEN FITTED) BEFORE OPENING FIRING DOOR.HOT WHILE IN OPERATION, KEEP CHILDREN, CLOTHING AND FURNITURE AWAY. CONTACT MAYCAUSE SKIN BURNS. WEAR GLOVES TO OPERATE YOUR APPLIANCE.NEVER OPERATE THE STOVE WITH THE GRATE COVER REMOVED.Your Napoleon EPA listed product is a Hi-Tech appliance, designed with the most advanced technology. Theappliance is extremely airtight. It has an exclusive direct outside air supply (optional kit), a safety feature designedto prevent spillage, and to keep your house free of carbon monoxide, in case of a down drafting chimneyor an internal negative pressure.The fi rst fi re(s) in your appliance will be diffi cult to get going and keep going with little amount of heat beinggenerated. This is a result of the moisture being driven out of the fi re brick. Allow 30 to 40 hours of hot fi res(temperatures in excess of 500°F - 600°F) before your appliance will perform normally. During the break-inperiod (the fi rst 2 or 3 fi res) create only small, hot fi res using kindling; this will allow the fi rebrick to cure. Donot be alarmed if small hairline cracks develop in the fi rebrick. This is a normal occurrence and does not posea safety hazard. The paint may also smell a little for the fi rst few fi res as it cures and you may wish to open adoor or window to alleviate the smell.To start, a brisk fire is required. Place loosely crumpled paper on the floor of the appliance and cover with dry kindling.Open the draft control fully by pulling the lever forward. Light the paper and leave the door slightly ajar (oneinch) until all kindling is burning. To maintain a brisk fire, a hot coal bed must be established and maintained.Slowly add larger wood (2x4 size pieces). Lay the pieces lengthwise from side to side in the hot coal bed witha shallow trench between, so that the primary air can fl ow directly into this trench and ignite the fuel above.When the fi re seems to be at its peak, medium sized logs may be added. Once these logs have caught fi re,carefully close the door. (Closing the door too quickly after refuelling will reduce the fi rebox temperature andresult in an unsatisfactory burn.) Remember it is more effi cient to burn medium sized wood, briskly, and refuelfrequently than to load the appliance with large logs that result in a smouldering, ineffi cient fi re and dirty glass.As soon as the door is closed, you will observe a change in the fl ame pattern. The fl ames will get smaller andlazier because less oxygen is getting into the combustion chamber. The fl ames, however, are more effi cient.The fl ames will remain lazy but become larger again as soon as the fi rebricks have been heated thoroughlyand the chimney becomes heated and provides a good draft. At this point, the roaring fi re that you see whenthe door is opened is wastefully drawing heated room air up the chimney -- certainly not desirable. Alwaysoperate with the door fully closed once the medium sized logs have caught fi re.W415-0762 / B / 11.12.10
24You can now add larger pieces of wood and operate the appliance normally. Once the appliance is entirely hot,it will burn very effi ciently with little smoke from the chimney. There will be a bed of orange coals in the fi reboxand secondary fl ames fl ickering just below the top fi rebrick. You can safely fi ll the fi rebox with wood to the topof the door and will get best burns if you keep the appliance pipe temperatures between 250 degrees Fahrenheit(120 degrees Celsius) and 450 degrees Fahrenheit (270 degrees Celsius). A surface thermometer will helpregulate this.Without a appliance thermometer, you are working blindly and have no idea of how the appliance is operating!A appliance thermometer offers a guide to performance.Can’t get the fire going?Use more kindling and paper. Assuming the chimney and vent are sized correctly and there is suffi cient combustionair, the lack of suffi ciently dry quantities of small kindling is the problem. Thumb size is a good gaugefor small kindling diameter.Can’t get heat out of the appliance?One of two things may have happened. The appliance door may have been closed prematurely and the applianceitself has not reached optimum temperature. Reopen the door and/or draft control to re-establish a briskfi re. The other problem may have been wet wood. The typical symptom is sizzling wood and moisture beingdriven from the wood.7.1 AIR CONTROLDraft is the force which moves air from the fi rebox up through the chimney.The amount of draft in your chimney depends on the length and diameterof chimney, local geography, nearby obstructions and other factors includingthe amount of heat generated by the fi re which can be measured by anappliance thermometer.ASH LIPAdjusting the air control regulates the temperature. The draft can be adjustedfrom a low burn rate with the handle in fully, to a fast burn rate with thehandle fully out.Inadequate draft may cause back-puffi ng into the room through the appliance and chimney connector pointsand may cause plugging of the chimney. Too much draft may cause an excessive temperature in the appliance,glowing red appliance parts or chimney connectors or an uncontrollable burn which can lead to a chimneyfi re or permanent damage to the appliance.Do not operate your appliance for longer than 30 minutes with the draft control on “HIGH” (fully open).7.2 FIRE EXTINGUISHERS / SMOKE DETECTORSAll homes with a solid fuel burning appliance should have at least one fi re extinguisher in a central location,known to all, and at least one smoke detector in the room containing the appliance. If it sounds an alarm,correct the cause but do not de-activate or relocate the smoke detector.91.1W415-0762 / B / 11.12.10
257.3 LIGHTING A FIRE7.3.1 FLASH FIREA fl ash fi re is a small fi re burned quickly when you don't need muchheat. After your kindling has "caught", load at least 3 pieces of wood,stacked loosely. Burn with the draft control fully open or closed onlyslightly.7.3.2 EXTENDED FIRELoad your larger pieces of wood compactly, packed close enough to prevent the fl ames from penetrating itcompletely. After approximately 30 minutes, depending on the size of the load, close the draft control completelymaking sure that the fi re is not extinguished.DO NOT OVERFIRE THE APPLIANCE!Overfiring can occur by:A. Burning large amounts of smaller wood pieces such as furniture scraps, skids or treated wood;B. Vigorously burning large loads of wood with the draft control on “HIGH” (fully open) for long periods oftime (one or two hours).C. Operating the appliance with the ash dump door blocked open or a poor gasket seal on the main door.7.4 SMOKINGA properly installed appliance should not smoke. If yours does, check the following:• Has the chimney had time to get hot?• Is the smoke passage blocked anywhere in the appliance, chimney connector or chimney?• Is the room too airtight and the air intake not connected to the outside? Try with a window partly open.• Is the smoke flow impeded by too long a horizontal pipe or too many bends?• Is it a weak draft perhaps caused by a leaky chimney, a cold outside chimney, too large a diameter of achimney, too short a chimney, or a chimney too close to trees or a higher roof?82.183.193.1W415-0762 / B / 11.12.10
268.0 MAINTENANCE! WARNINGTURN OFF THE POWER BEFORE SERVICING THE APPLIANCE.APPLIANCE MAY BE HOT, DO NOT SERVICE UNTIL APPLIANCE HAS COOLED.DO NOT USE ABRASIVE CLEANERS.Check your chimney and chimney connector for creosote and soot buildup weekly until a safe frequency forcleaning is established. If accumulation is excessive, disconnect the appliance and clean both the chimney andthe appliance. You may want to call a professional chimney sweep to clean them. Both have to be cleaned atleast once a year or as often as necessary.Remove fi bre baffl es and clean above them once a year. Replace any broken bricks.8.1 ASH REMOVAL PROCEDURES! WARNINGIMPROPER DISPOSAL OF ASHES RESULT IN FIRES. DO NOT DISCARD ASHES IN CARDBOARDBOXES, DUMP IN BACK YARDS, OR STORE IN GARAGES.IF USING A VACUUM TO CLEAN UP ASHES, BE SURE THE ASHES ARE ENTIRELY COOLED. USINGA VACUUM TO CLEAN UP WARM ASHES COULD CAUSE A FIRE INSIDE THE VACUUM.NEVER OPERATE YOUR APPLIANCE WITH THE ASH PLUG (IF APPLICABLE) REMOVED.FAILURE TO ACHIEVE A GOOD SEAL BETWEEN THE ASH OPENING, ASH PLUG OR ASH WELL DOORWILL RESULT IN AN OVER FIRE CONDITION THAT COULD CAUSE DAMAGE TO THE APPLIANCE.Allow the ashes in your fi rebox to accumulate to a depth of two or three inches; they tend to burn themselvesup. When the fi re has burned down and cooled, remove any excess ashes but leave an ash bed approximately1 inch deep on the fi rebox bottom to help maintain a hot charcoal bed.8.1.1 APPLIANCES WITHOUT ASH PAN (1100PL/1400PL ONLY)Since some models will not have ash pans, shovel some ashes out through the door into a metal containerwith a tight fi tting lid. The ashes should be retained in the closed container until all cinders have thoroughlycooled. Cold wood ashes can be used on the garden or in the compost.8.1.2 APPLIANCES WITH ASH PANNOTE: Optional ash pans are not equipped with a cover or rear folding handle.A. To remove the ashes, clear the ash away from the ash plug.B. Remove the ash plug. It is recommended to use a poker.C. Rake the excess ash into the ash drawer. Do not overfi ll the ash drawer. Ash should not accumulatehigher than the sides of the drawer.D. Before removing the drawer, ensure that the area around the ash openingis clean. Tap the ash from the chute into the drawer, then place the ashplug back over opening.1100C/1400C only: To use your ash pan, pull the ash dump handle forward, rotateapproximately 90° counterclockwise to the open position. Rake the excess ashesinto the ash pan. Close the ash well.8.2 CREOSOTE FORMATION AND REMOVALTO OPEN:PULL AND ROTATEWhen wood is burned slowly, it produces tar and other organic vapours which combine with expelled moistureto form creosote. These vapours condense in the relatively cooler chimney fl ue of a slow burning fi re and whenignited, make an extremely hot fi re. So, the smoke pipe/chimney liner and chimney should be inspected monthlyduring the heating season to determine if a buildup has occurred. If creosote has accumulated it should beremoved to reduce the risk of a chimney fi re.84.1W415-0762 / B / 11.12.10
278.3 RUNAWAY OR CHIMNEY FIREA CHIMNEY FIRE CAN PERMANENTLY DAMAGE YOUR CHIMNEY SYSTEM. THIS DAMAGE CANONLY BE REPAIRED BY REPLACING THE DAMAGED COMPONENT PARTS. CHIMNEY FIRES ARENOT COVERED BY THE LIFETIME LIMITED WARRANTY.Runaway fi res can be the result of three major factors:• Using incorrect fuel, or small fuel pieces which wood normally be used as kindling.• Leaving the door ajar too long and creating extreme temperatures as the air rushes in the open door.• Burning your appliance with the ash plug not securely seated.SOLUTIONS:• Do not burn treated or processed wood, coal, charcoal, coloured paper or cardboard.• Be careful not to over-fi re the appliance by leaving the door open too long after initial start-up. A thermometeron the chimney connector and/or appliance top helps.• Always operate the appliance with the ash plug properly installed.IN CASE OF A CHIMNEY FIRE:• Have a well understood plan for evacuation and a place outside for everyone to meet. Prepare toevacuate to ensure everyone’s safety.• Close air control on appliance.• Call local fi re department. Have a fi re extinguisher handy. Contact local authorities for further informationon how to handle a chimney fi re.• After the chimney fi re is out, clean and inspect the chimney for stress and cracks prior to lighting anotherfi re. Also check combustibles around the chimney and the roof.85.18.4 CHIMNEY CLEANINGBoth the chimney and the appliance must be inspected and cleaned if necessary at least once a year.For serious wood burners, chimney cleaning must be done as needed to avoid chimney fi res; the ventingsystems for controlled combustion appliances may need cleaning as often as once a month. These rates,however, depend on the burning habits of the individual operating the appliance. For example, it is possible toclog a solid fuel appliance chimney in a few days if slow, smoldering fi res are burned and the chimney is cold.NOTE: Appliances burned consistently without hot fires may result in significant creosoteaccumulations in the chimney.Certain items and considerations are important in chimney cleaning:• Proper tools should be used, including a brush specifi cally designed for chimney cleaning.• The chimney connector and dampers as well as the chimney should be cleaned.• The appliance’s fi rebox and baffl e system should be cleaned if needed.• The chimney should be inspected and repairs made if needed, preferably by a qualifi ed chimneysweep or mason.86.1W415-0762 / B / 11.12.10
288.5 GLASS REPLACEMENT! WARNINGDO NOT USE SUBSTITUTE MATERIALS.GLASS MAY BE HOT, DO NOT TOUCH GLASS UNTIL COOLED.CARE MUST BE TAKEN WHEN REMOVING AND DISPOSING OF ANY BROKEN DOOR GLASS ORDAMAGED COMPONENTS. BE SURE TO VACUUM UP ANY BROKEN GLASS FROM INSIDE THEAPPLIANCE BEFORE OPERATION.DO NOT STRIKE, SLAM OR SCRATCH GLASS. DO NOT OPERATE APPLIANCE WITH GLASSREMOVED, CRACKED, BROKEN OR SCRATCHED.56.2A. When the appliance is cool, open thedoor and place the door frame downcareful not to scratch the paint.B. Remove the screws and bracketsholding the glass in place. Remove allbroken glass.C. Wrap the edges of the new glass witha U-shaped strip of fiberglass gasket,covering 1/4” on each side.D. Place the glass with the fiberglassgasket in position and replace thebrackets and screws. When finished,you should be able to move the glassslightly, horizontally and vertically.U-SHAPEDGLASSGASKET½” ROPEDOORGASKETNOTE: For replacement glass, size, thickness and specifications see “REPLACEMENTS” section.8.6 GASKET REPLACEMENTAt the end of each burning season inspect the shield and gasket below the manifold for warping or deterioration.Replace if necessary. Both are held to the manifold with machine screws. The shield and the 1/8” fi brecloth gasket are available from your Wolf Steel Ltd. dealer. At this time also check that the door gasket is notworn or loose. Replace with 1/2” high density fi breglass rope if necessary.The airwash gasket and shield above the door should also be inspected and replaced if deterioratedNOTE: Do not operate appliance if the manifold shield or fibre baffle is deteriorated or missing.W415-0762 / B / 11.12.10
8.7 CARE OF GLASSIf the glass is not kept clean permanent discolouration and / orblemishes may result. Normally a hot fire will clean the glass.The most common reasons for dirty glass include: not usingsufficient fuel to get the appliance thoroughly hot, using greenor wet wood, closing the draft so far that there is insufficient airfor complete combustion.If it is necessary to clean the glass, buff lightly with a clean drycloth and non-abrasive cleaner.! WARNINGHOT GLASS WILLCAUSE BURNS.DO NOT TOUCH GLASSUNTIL COOLED.NEVER ALLOW CHILDRENTO TOUCH GLASS.29DO NOT CLEAN GLASS WHEN HOT! Clean the glass after the fi rst 10 hours of operation with arecommended appliance glass cleaner. Thereafter clean as required.The glass is very strong but do not let burning fuel rest or fall against it and always close the door gently.NEVER FORCE IT SHUT!If the glass should ever crack or break while the fi re is burning, do not open the door until the fi re is out and donot operate the appliance again until the glass has been replaced, available from your Authorized dealer. DONOT SUBSTITUTE MATERIALS.5.38.8 CARE OF PLATED PARTSIf the appliance is equipped with plated parts, you must clean fi ngerprints or other marks from the platedsurfaces before operating the appliance for the fi rst time. Use a glass cleaner or vinegar and towel to clean.If not cleaned properly before operating for the fi rst time, the marks can cause permanent blemishes onthe plating. After the plating is cured, the fi ngerprints and oils will not affect the fi nish and little maintenanceis required, just wipe clean as needed. Prolonged high temperature burning with the door ajar may causediscolouration on plated parts.NOTE: The protective wrap on plated parts is best removed when the assembly is at roomtemperature but this can be improved if the assembly is warmed, using a hair dryer or similar heatsource.6.1W415-0762 / B / 11.12.10
308.9 WOODTHIS APPLIANCE IS DESIGNED TO BURN NATURAL WOOD ONLY. DO NOT BURN TREATEDWOOD, COAL, CHARCOAL, COLOURED PAPER, CARDBOARD, SOLVENTS OR GARBAGE. THISAPPLIANCE HAS NOT BEEN TESTED WITH AN UNVENTED GAS LOG SET. TO REDUCE RISK OF FIREOR INJURY, DO NOT INSTALL AN UNVENTED GAS LOG SET INTO THE APPLIANCE.HIGHER EFFICIENCIES AND LOWER EMISSIONS GENERALLY RESULT WHEN BURNING AIR DRIEDSEASONED HARDWOODS, AS COMPARED TO SOFTWOODS OR TOO GREEN OR FRESHLY CUTHARDWOODS.BURNING WET UNSEASONED WOOD CAN CAUSE EXCESSIVE CREOSOTE ACCUMULATION. WHENIGNITED IT CAN CAUSE A CHIMNEY FIRE THAT MAY RESULT IN A SERIOUS HOUSE FIRE.DO NOT STORE FUEL WITHIN THE CLEARANCE TO COMBUSTIBLES, OR IN THE SPACE REQUIREDFOR RE-FUELING AND ASH REMOVAL.BURNING WET, UNSEASONED WOOD CAN CAUSE EXCESSIVE CREOSOTE ACCUMULATION. WHENIGNITED IT CAN CAUSE A CHIMNEY FIRE THAT MAY RESULT IN A SERIOUS HOUSE FIRE.When loading the appliance, ensure that the upper fibre baffles are not forced out of position. For maximum efficiency, when theappliance is thoroughly hot, load it fully to the top of the door opening and burn at a medium low setting. The whiteness of thebricks and the cleanliness of the glass are good indicators of your operating efficiency. Not enough heat is produced when only afew pieces of wood are burned or the wood may not burn completely.Fuel for the appliance must not be stored closer than the required clearances to combustibles (heat sensitive material).NEVER STORE WOOD IN THE ASH PAN COMPARTMENT (if applicable).NOTE: When loading the appliance, ensure to keep fuel back from the glass. If coals are to accumulate on the front lip,there is a chance they will fall out when the door is opened.Burn only dry, clean unpainted wood that has been seasoned. It produces more heat and less soot or creosote. Freshly cutwood contains about 50% moisture while after proper seasoning only about 20% of the water remains. As wood is burned, thiswater boils off consuming energy that should be used in heating. The wetter the wood, the less heat is given off and the morecreosote is produced. Dry fi rewood has cracks in the end of the grain.Both hardwood and softwood burn equally well inthis appliance but hardwood is denser, will weighmore per cord and burn a little slower and longer.Firewood should be split, stacked in a mannerthat air can get to all parts of it and covered inearly spring to be ready for burning that fall. Dryfirewood has cracks in the end grain.Cut the wood so that it will fi t horizontally, frontto back, making for easier loading and less of a likelihood that the wood will rollonto the glass.DO’S• Build a hot fi re.• Use only dry wood.• Several pieces of medium sized wood are betterthan a few big pieces.• Clean chimney regularly.• Refuel frequently using medium sized wood.• “Fine Tune” the air settings for optimum performance.DONT’S• Take ash out immediately. Let it accumulate to adepth of at least one inch. A good ash layer providesfor a longer lasting and better burning fire.• Burn wet wood.• Close the door too soon or damper down too quickly.• Burn one large log rather than two or three smaller,more reasonably sized logs.• Burn at continually “low setting”, if glass door isconstantly blackened. This means the fireboxtemperature is too low.87.1AW415-0762 / B / 11.12.10
9.0 REPLACEMENTSContact your dealer or the factory for questions concerning prices and policies on replacement parts. Normallyall parts can be ordered through your Authorized dealer / distributor.FOR WARRANTY REPLACEMENT PARTS, A PHOTOCOPY OF THE ORIGINAL INVOICE WILL BEREQUIRED TO HONOUR THE CLAIM.When ordering replacement parts always give the following information:• Model & Serial Number of appliance• Installation date of appliance• Part number• Description of part• Finish* IDENTIFIES ITEMS WHICH ARE NOT ILLUSTRATED. FORFURTHER INFORMATION, CONTACT YOUR AUTHORIZED DEALER.COMPONENTSREF NO. 1100PL 1100C 1400PL 1400C DESCRIPTION1* W090-0001 W090-0001 W090-0001 W090-0001 BRICK - # 12* W090-0002 W090-0002 W090-0002 W090-0002 BRICK - # 23* W090-0003 W090-0003 N/A N/A BRICK - # 34* W090-0004 W090-0004 W090-0004 W090-0004 BRICK - # 4 LEFT5* W090-0005 W090-0005 W090-0005 W090-0005 BRICK - # 4 RIGHT6* W090-0016 W090-0016 W090-0016 W090-0016 BRICK - # 5! WARNINGFAILURE TO POSITION THE PARTSIN ACCORDANCE WITH THISMANUAL OR FAILURE TO USE ONLYPARTS SPECIFICALLY APPROVEDWITH THIS APPLIANCE MAYRESULT IN PROPERTY DAMAGE ORPERSONAL INJURY.7* W090-0017 W090-0017 W090-0017 W090-0017 BRICK - # 68* W090-0018 W090-0018 W090-0018 W090-0018 BRICK - # 89* W090-0019 W090-0019 W090-0019 W090-0019 BRICK - # 910* N/A W135-0278** N/A W135-0278** CASTING, ASH LIP11 W710-0013 N/A W710-0013 N/A ASH LIP12 W010-0347 W010-0347 W010-0347 W010-0347 AIRWASH GASKET & SHIELD13* W570-0007 W570-0007 W570-0007 W570-0007 SCREWS FOR MANIFOLD & SHIELD14* W018-0077 W018-0077 N/A N/A #10 FIBRE BAFFLE15* N/A N/A W018-0078 W018-0078 #11 FIBRE BAFFLE16* EP-11MS EP-11MS EP-14MS EP-14MS MANIFOLD SHIELD17 KB-35 KB-35 KB-35 KB-35 VARIABLE SPEED CONTROL C/W KNOB18* W580-0006 W580-0001 W580-0005 W580-0005 COMPLETE BRICK SET19 W510-0001 N/A W510-0001 N/A 5/16” PLUG20* W290-0087 N/A W290-0087 N/A GASKET, ASH OPENING21 N/A W135-0282** N/A W135-0442** CAST TOP22 N/A W135-0281** N/A W135-0443** CAST SIDES23 N/A W135-0280** N/A W135-0280** CAST LEG24 N/A W135-0279** N/A W135-0279** CAST DOOR25* N/A N/A N/A W135-0441 CAST LID26 W325-0045 W325-0045 W325-0045 W325-0045 SPRING HANDLE LARGE27 W325-0044 W325-0044 W325-0044 W325-0044 SPRING HANDLE SMALL** For available colours, add these letters to the base part number.41.131COLOURPorcelain BrownPainted Wrought IronFINISH- N- WIW415-0762 / B / 11.12.10
EM3030L-167 zr-2115V 60Hz 46WZ.P. Ins. ClassBSEL07332ACCESSORIESREF NO. 1100PL 1100C 1400PL 1400C DESCRIPTION28 H222-G N/A H222-G N/A GOLD PLATED DOOR28 H222 N/A H222 N/A BLACK DOOR28 H222SS N/A H222SS N/A BRUSHED STAINLESS STEEL DOOR - STANDARD ARCH29 H222W N/A H222W N/A BLACK DOOR - EARLY AMERICAN29 H222GW N/A H222GW N/A GOLD DOOR - EARLY AMERICAN29 H222SSW N/A H222SSW N/A BRUSHED STAINLESS STEEL DOOR - EARLY AMERICAN30 W010-1071 W010-1071 W010-1071 W010-1071 DOOR GLASS W/ GASKET31* W020-0043 W020-0043 W020-0043 W020-0043 DOOR GASKET32* W020-0050 W020-0050 W020-0050 W020-0050 GLASS GASKET33 EPAD-1KT N/A EPAD-1KT N/A ASH DRAWER KIT34* 115KT 115KT 115KT 115KT OUTSIDE AIR KIT35* N/A W470-0020 N/A W470-0020 MAJOLICA BROWN ENAMEL TOUCH UP AND BRUSH36 EP62-1 EP62-1 EP62-1 EP62-1 VARIABLE SPEED BLOWER37 EPA-RK N/A EPA-RK N/A SOLID BRASS RAILING KIT38* EPLK N/A EPLK N/A LOUVRES (BLACK)38* EPLG N/A EPLG N/A LOUVRES (GOLD)38* EPLSS N/A EPLSS N/A LOUVRES (BRUSHED STAINLESS STEEL)39 W320-0011 W320-0011 W320-0011 W320-0011 BLOWER GUARD40* EP36 EP36 EP36 EP36 THERMOSTATIC SENSOR CONTROL KIT41 200K N/A 200K N/A TRADITIONAL STEEL LEGS (BLACK)42 202CK N/A 202CK N/A ORNAMENTAL CAST IRON LEGS42 202CG N/A 202CG N/A ORNAMENTAL CAST IRON LEGS (GOLD PLATED)42 202CSS N/A 202CSS N/A ORNAMENTAL CAST IRON LEGS (BRUSHED STAINLESSSTEEL)21192212261117242713221023282930333736414239W415-0762 / B / 11.12.10
3310.0 TROUBLE SHOOTING! WARNINGTURN OFF THE ELECTRICAL POWER BEFORE SERVICING THE APPLIANCE.APPLIANCE MAY BE HOT, DO NOT SERVICE UNTIL APPLIANCE HAS COOLED.DO NOT USE ABRASIVE CLEANERS.WHEN CHECKING CONNECTIONS, INSTALLING JUMPER WIRES (FOR TEST PURPOSES ONLY) ORREPLACING COMPONENTS, UNPLUG HEATER FROM THE RECEPTACLE TO PREVENT ELECTRICALSHOCK OR DAMAGE TO THE COMPONENT.PROBLEMCan’t get the fi re started.Smokes when door isopen.Appliance emits odour.<strong>Stove</strong> doesn’t burnt hotenough.Wood burns too fast.Dirty glass.Blower does not run.SOLUTION- Not enough kindling / paper? Add more.- Not enough air? Ensure air control is fully open.- Cold air blockage? Burn a piece of paper to establish a draft.- Use dry seasoned wood.- Flue blockage? Inspect chimney.- Cold air blockage? Burn a piece of paper to establish a draft.- Insufficient draft? Add more pipe.- Let air stabilize before opening door.- Ensure baffl es are positioned correctly.- Negative pressure? Open a window near the appliance.- Paint curing. See “GENERAL INSTRUCTIONS” section.- Wood is too wet.- Insufficient draft? Add more pipe.- Not enough air? Ensure air control is fully open.- Air control may need to be adjusted down.- Check to see ash plug is properly seated (if equipped).- Check door gasket for adequate seal.- Wood may be extremely dry.- Air control may be closed too far.- Burn hotter, smaller fi res.- Use well seasoned wood.- Appliance may not be up to temperature.- Ensure blower has power.42.14AW415-0762 / B / 11.12.10
3411.0 WARRANTYNAPOLEON® products are manufactured under the strict Standard of the world recognized ISO 9001 : 2008 Quality AssuranceCertifi cate.NAPOLEON® products are designed with superior components and materials, assembled by trained craftsmen who take greatpride in their work. The complete appliance is again thoroughly inspected by a qualifi ed technician before packaging to ensurethat you, the customer, receives the quality product that you expect from NAPOLEON®.NAPOLEON® WOOD APPLIANCE PRESIDENT’S LIFETIME LIMITED WARRANTYThe following materials and workmanship in your new NAPOLEON® wood appliance are warranted against defects for as long asyou own the appliance. This covers: combustion chamber, heat exchanger, ceramic glass (thermal breakage only), gold plated partsagainst tarnishing, porcelainized enameled components, aluminum extrusion trims, vortex baffles, ash drawer and iron castings.Electrical (110V) components and wearable parts such as blowers, thermal switch, switches, wiring, firebrick, stainless steel baffl eretainer, secondary air tubes, and gasketing are covered and NAPOLEON® will provide replacement parts free of charge during thefi rst year of the limited warranty. *Labour related to warranty repair is covered free of charge during the first year. Repair work, however, requires the prior approval ofan authorized company official. Labour costs to the account of NAPOLEON® are based on a predetermined rate schedule and anyrepair work must be done through an authorized NAPOLEON® dealer.Parts such as firebricks and baffles should routinely be removed by the operator as part of the regular service and therefore, anywarranty replacement of these parts does not qualify for any labour allowances.* Construction of models vary. Warranty applies only to components included with your specific appliance.CONDITIONS AND LIMITATIONSNAPOLEON® warrants its products against manufacturing defects to the original purchaser only. Registering your warranty is not necessary. Simplyprovide your proof of purchase along with the model and serial number to make a warranty claim. Provided that the purchase was made through anauthorized NAPOLEON® dealer your appliance is subject to the following conditions and limitations:Warranty coverage begins on the date of original installation.This factory warranty is non-transferable and may not be extended whatsoever by any of our representatives.The wood appliance must be installed by an authorized service technician or contractor. Installation must be done in accordance with the installationinstructions included with the product and all local and national building and fire codes.This limited warranty does not cover damages caused by misuse, lack of maintenance, accident, alterations, abuse or neglect and parts installed fromother manufacturers will nullify this warranty.This limited warranty further does not cover any scratches, dents, corrosion or discoloring caused by excessive heat, abrasive and chemical cleaners norchipping on porcelain enamel parts, nor any venting components used in the installation of the appliance.This warranty extends to the repair or replacement of warranted parts which are defective in material or workmanship provided that the product has beenoperated in accordance with the operation instructions and under normal conditions.After the first year, with respect to the President’s Lifetime Limited Warranty, NAPOLEON® may, at its discretion, fully discharge all obligations with respectto this warranty by refunding to the original warranted purchaser the wholesale price of any warranted but defective part(s).After the first year, NAPOLEON® will not be responsible for installation, labour or any other costs or expenses related to the reinstallation of a warrantedpart, and such expenses are not covered by this warranty.Notwithstanding any provisions contained in the President’s Lifetime Limited Warranty, NAPOLEON’s responsibility under this warranty is defined asabove and it shall not in any event extend to any incidental, consequential or indirect damages.This warranty defi nes the obligations and liability of NAPOLEON® with respect to the NAPOLEON® wood appliance and any other warranties expressedor implied with respect to this product, its components or accessories are excluded.NAPOLEON® neither assumes, nor authorizes any third party to assume, on its behalf, any other liabilities with respect to the sale of this product.NAPOLEON® will not be responsible for: over-fi ring, downdrafts, spillage caused by environmental conditions such as rooftops, buildings, nearby trees,hills, mountains, inadequate vents or ventilation, excessive venting configurations, insufficient makeup air, or negative air pressures which may or may notbe caused by mechanical systems such as exhaust fans, furnaces, clothes dryers, etc.Any damages to appliance, combustion chamber, heat exchanger, plated trim or other component due to water, weather damage, long periods ofdampness, condensation, damaging chemicals or cleaners will not be the responsibility of NAPOLEON®.NAPOLEON® reserves the right to have its representative inspect any product or part thereof prior to honouring any warranty claim.All parts replaced under the President’s Limited Lifetime Warranty Policy are subject to a single claim.During the first 10 years NAPOLEON® will replace or repair the defective parts covered by the lifetime warranty at our discretion free of charge. From 10years to life, NAPOLEON® will provide replacement parts at 50% of the current retail price.All parts replaced under the warranty will be covered for a period of 90 days from the date of their installation.The manufacturer may require that defective parts or products be returned or that digital pictures be provided to support the claim. Returned products areto be shipped prepaid to the manufacturer for investigation. If a product is found to be defective, the manufacturer will repair or replace such defect.Before shipping your appliance or defective components, your dealer must obtain an authorization number. Any merchandise shipped withoutauthorization will be refused and returned to sender.Shipping costs are not covered under this warranty.Additional service fees may apply if you are seeking warranty service from a dealer.Warranty labour allowance is only for the replacement of the warranted part. Travel, diagnostic tests, shipping and other related charges are not coveredby this warranty.ALL SPECIFICATIONS AND DESIGNS ARE SUBJECT TO CHANGE WITHOUT PRIOR NOTICE DUE TO ON-GOING PRODUCTIMPROVEMENTS. NAPOLEON® IS A REGISTERED TRADEMARK OF WOLF STEEL LTD. PATENTS U.S. 5.303.693.801 - CAN.2.073.411, 2.082.915. © WOLF STEEL LTD.2.2AW415-0762 / B / 11.12.10
3512.0 SERVICE HISTORY43.1W415-0762 / B / 11.12.10
3613.0 NOTES44.1W415-0762 / B / 11.12.10