INSTRUCTION MANUAL FOR SEWING MACHINE - Singer - This Wiki
INSTRUCTION MANUAL FOR SEWING MACHINE - Singer - This Wiki
INSTRUCTION MANUAL FOR SEWING MACHINE - Singer - This Wiki
You also want an ePaper? Increase the reach of your titles
YUMPU automatically turns print PDFs into web optimized ePapers that Google loves.
i<br />
H<br />
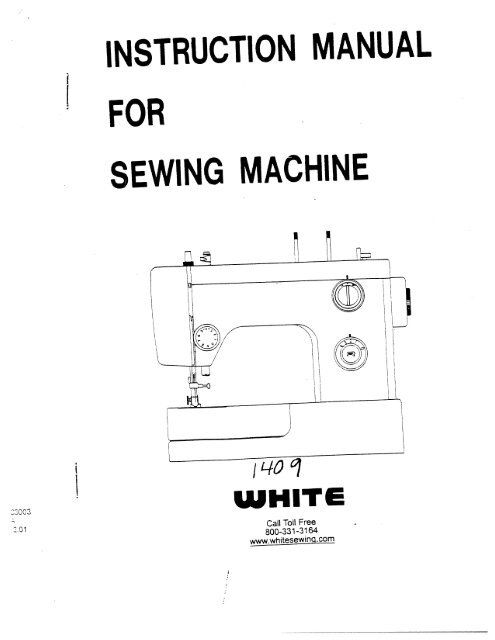
<strong>SEWING</strong> <strong>MACHINE</strong><br />
<strong>INSTRUCTION</strong> <strong>MANUAL</strong><br />
H<br />
/<br />
<strong>FOR</strong><br />
WHITE<br />
www.whftesewing.com<br />
800-331-3164<br />
Call Toll Free<br />
fli
followed, including the following:<br />
appliance from the electric outlet immediately after using and before cleaning.<br />
When using an electrical appliance, basic safety precautions should always be<br />
IMPORTANT SAFETY <strong>INSTRUCTION</strong>S<br />
Always unplug before relamping, Replace bulb with same type rated 15 watts.<br />
is used by or near children.<br />
2. Use this appliance only for its rntended use as described in this manual. Use only<br />
electric shock, or injury to persons:<br />
Read all instructions before using<br />
1. Do not allow to be used as a toy. Close attention is necessary when this appliance<br />
3. Never operate this appliance if it has a damaged cord or plug, if it is riot working<br />
4. Never operate the appliance with any air openings blocked, Keep ventilation open<br />
An appliance should never be left unattended when plugged in. Always unplug this<br />
5. Never drop or insert any object into any opening.<br />
6. Do not use outdoors.<br />
10. Keep fingers away from all moving parts. Special care is required around the sewing<br />
7. Do not operate where aerosol (spray) products are being used or where oxygen is<br />
8. To disconnect, turn all controls to the off (“0”) position, then remove plug from<br />
ii. Always use the proper needle plate. The wrong plate can cause the needle to break.<br />
12. Do not use bent needles.<br />
9. Do not unplug by pulling on cord. To unplug, grasp the plug, not the cord.<br />
attachments recommended by the manufacturer as contained in this manual.<br />
ii Do not pull or push fabric while stitching. It may deflect the needle causing it to<br />
14. Unplug the sewing machine when making any adjustments in the needle area,<br />
property, if it has been dropped or damaged, or dropped into water, Return the<br />
appliance to the nearest authorized dealer or service center for examination, repair<br />
15. Always unplug sewing machine from the electrical outlet when removing covers,<br />
electrical or mechanical ad!ustment.<br />
DANGER To reduce the risk of electric shock:<br />
dust, and loose cloth.<br />
ings of the sewing machine and foot controller free from the accumulation of lint,<br />
being administered.<br />
outlet.<br />
machine needle.<br />
WARNING To reduce the risk of burns, fire,<br />
break.<br />
such as threading needle, changing needle, threading bobbin, or changing<br />
presser foot, etc.<br />
lubricating, or when making any other user servicing adjustments mentioned in the<br />
instruction manual.<br />
SAVE THESE <strong>INSTRUCTION</strong>S<br />
(this sewing machine)
CONTENTS<br />
Names of Parts.......................................................... I & 2<br />
Accessories 3<br />
Before sewing (Power suoply and Sewing Lamp) $<br />
Take Out extension tabte, free arm sewing 5<br />
Winding the bobbin 6<br />
Removing bobbin case and boboin 7<br />
Inserting bobbin into bobbin case 7<br />
Inserting bobbin case Into shuttle race 3<br />
Threading ucper thread & Twin needle threaoing 9<br />
Drawing up boobin thread 10<br />
Changing sewing directions 10<br />
Control dial & Adjusting thread tension (1 & 12<br />
Regulating the presser toot pressure (3<br />
Drop feed 13<br />
Changing needle 14<br />
Fabric. Thread. Needle table (5<br />
To start sewing 16<br />
Toñnishseam 17<br />
Straight stitch 18<br />
Zigzag sewing<br />
Button sewing 19<br />
Zipper sewing 20<br />
Hemming 21<br />
Twin Needle 22<br />
Embroidery 22<br />
Quilter & Seam guide 23<br />
Buttonhole sewing 24<br />
Maintenance (Cleaning and oiling) 25<br />
Checking Performance Prootems WHAT TO DO 26<br />
/
NAME OF PARTS (FRONT VIEW)<br />
Sub-spool pin<br />
Top cover<br />
Presure Regulator<br />
Take up lever<br />
Thread tension dial<br />
Needle position knob<br />
Reverse button<br />
Stitch lengtfl aiai<br />
Presser foot<br />
Shuttle<br />
Extension table<br />
read guide for upper threading<br />
—1—
Hand wheel<br />
Motion knob<br />
Stop clamp<br />
Bobbin winder stopper<br />
(REAR VtEW)<br />
/<br />
—2—<br />
/ /<br />
Presser foot lever<br />
Needle clamp screw<br />
Upper ±i read guide<br />
Bobbin winder spindle
ACCESSORIES<br />
0<br />
Bobbin<br />
Spool pin felt<br />
Zigzag foot<br />
(On machine)<br />
Buttonhole foot<br />
Button attaching loot<br />
Macgine Qjj<br />
Zipper foot<br />
Buttonhole cutter<br />
Screw driver<br />
Needle<br />
#11 414<br />
—3-—<br />
/
BE<strong>FOR</strong>E <strong>SEWING</strong><br />
1. Fit plug into the macnine.<br />
2. Plug the macnine tc<br />
supply<br />
he<br />
power<br />
3. Sewing speed can be varied by<br />
the toot control.<br />
Sewing lamp<br />
REMOVE ORHNSTALL BULB<br />
1. Qoen face cover in direction of<br />
arrow.<br />
emove<br />
2.<br />
bulb by unscrew<br />
ing it counter-clockwise.<br />
3. install a new bulb screwing it<br />
in clockwise.<br />
y<br />
4. Use a screw type bulb with<br />
5W(Max).<br />
120/1<br />
lMPOTANT : When leaving the sewing macnine unattended, the<br />
plug must be removed from the socket outlet.<br />
When servicing the sewing machine, or wnen removing covers or<br />
changing amps, the macnine must ce disconnected from the supply<br />
by removing the plug from the socket outlet.<br />
—4—<br />
I
as shown at side.<br />
etc., more easily.<br />
converts to free arm macnine by<br />
arrow.<br />
1 Hold the left end of table<br />
FREE-ARM SEWiNG<br />
REMOVING EXTENSION TABLE<br />
—5—<br />
2. Especially useful for sewing<br />
1. <strong>This</strong> sewing machine can be used<br />
3. To sew tubular ust sliø the sleeve<br />
as a fiat bed machine out easily<br />
removing the extension table.<br />
sleeves, pal-it legs, tubular faDr:cs<br />
or leg of pants on to the free arm<br />
and pull out in dIrection or
I<br />
WINDING ThE BOBBIN<br />
1 .elease stop motion knob.<br />
2.Thread as shown.<br />
3.When bobbin s filled,<br />
tighten stop motion knob.<br />
5cm thread<br />
7’ThcbbIn N<br />
winder<br />
spindle -.<br />
Push bobbin winder spindle in<br />
direction of arrow.<br />
When bobbin winding is com<br />
pleted return spindle to<br />
original position.<br />
x<br />
;:j><br />
x<br />
When bobbin winding is in<br />
correct, release the screw of<br />
upper thread guide and ad<br />
Just U or down until bobbin<br />
winding is balanced.<br />
—6—
—.7—<br />
spnng<br />
slot.<br />
SLOT<br />
Hinged latch<br />
REMOVING BOBBIN CASE AND BOBBiN<br />
1 .Ralse needle to Its highest<br />
INSERTING BOBBIN INTO BOBBIN CASE<br />
1.Pull off 5cm of thread from<br />
position and open the<br />
shuttle race cover.<br />
bobbin and insert it into<br />
bobbin case as shown.<br />
3.elease the latch and bob<br />
3.Pull into slot and under<br />
bin will fail out easily.<br />
tension spring and draw<br />
out about 10cm of thread.<br />
2. Open hinged latch of bobbin<br />
2.Guide the end of thread into<br />
case and pull bobbin case<br />
out of machine.
—8—<br />
latch<br />
onto centre pin in shuttle and release<br />
2.Hoiding latch open, place bobbin case<br />
latch of bobbin case and hold it.<br />
pulling thread to the front, open the<br />
1 ,Rase needle to its highest position,<br />
INSERTiNG BOBBIN CASE INTO SHUTTLE RACE
THREADING UPPER THREAD<br />
Twin need’e tt,reading<br />
—9—<br />
/<br />
/
needle qoes down and<br />
slcwiy towards you until the<br />
I<br />
—10--<br />
as desired.<br />
needle to change direction<br />
pivot the fabric around the<br />
I Lower needle oown into<br />
fabric and raise presser foot.<br />
CHANGLNG SEWiNG DIRECTiONS<br />
4<br />
DRAWING UP BOBBIN ThREAD<br />
2. Lower presser foot and start<br />
to sew.<br />
(see page 16)<br />
4. Start to sow<br />
presser foot.<br />
foot from the front, lower<br />
3. Place fabric under presser<br />
machine.<br />
presser foot to the rear of<br />
place them together under<br />
2. Pull out both threads and<br />
up in a loop.<br />
lower thread will be brought<br />
the upper thread and the<br />
position. lightly araw up<br />
takeup lever is at its hignest<br />
hand wheel when the<br />
comes up. Then stop the<br />
hand, turn the hana wneel<br />
1. Hold upper thread with left
CONTROL DIAL<br />
1 Reverse button<br />
2 Zig-zaq wOth dia’<br />
3 Thread tensOfl daI<br />
4 Needle posiUofl knoo<br />
SutCh length dal<br />
—11—<br />
/
ADJUSTING THREAD TENSION<br />
Corec<br />
Weak<br />
Strong<br />
Upper thread<br />
Uoper thread tension<br />
may be aciusted by<br />
turning the thread<br />
tension dial.<br />
Bobbin thread<br />
ncorrect<br />
insice of fabric<br />
thread<br />
Upoer<br />
LOWER THREAD TENSION<br />
Lower thread tension can<br />
be adlusted by turning<br />
screw on bobbin case siight•<br />
ly to the right (clock-wise)<br />
to increase tension. Turn<br />
the screw (courter-clockwise)<br />
to the left to decrease ten<br />
sion.<br />
—12—
self.<br />
fabrics)<br />
A<br />
//<br />
REGULATING THE PRESSER FOOT PRESSURE<br />
There are a few times when you want to control me feeding of fabric by your<br />
for button sewing application — 13 —<br />
DROP FEED Note: Darning date can be purchased seoarateiy. N<br />
4 No pressure adjustment is required wnen darnrig<br />
or sewing embroidery.<br />
skipped stitcries, or difficulty in guiding the faoric.<br />
2. Push down outer ring to release pressure. (Heavy<br />
3. Insufficient pressure may cause poor feeding.<br />
(Light to medium fabrics)<br />
1 Push oown rifler pin (A)<br />
over needle plate aflgning two pins of darning plate with holes of needle piate<br />
Raise needle bar to its highest position and raise presser toot, place darning plate<br />
You may then deermine the movement of the fanric by yourself See daqe 19<br />
to increase pressure.
Needle clamp screw<br />
CHANGiNG NEEDLE<br />
2.Loosen needle camc screw and remove ore needle.<br />
3. With the lar sice of the needle facing away from you.<br />
4 Tighten the needle dame screw securely.<br />
aise needle oar to its nighest position.<br />
insert needle as tar up as 1 will go.<br />
—14—<br />
\Loosen<br />
Flat face slde<br />
away from you.<br />
Tigtteri
15 —<br />
Medium 60-80<br />
Jersey 50 S. Fiberl 11.14<br />
Tweed 150Sk 11.14<br />
0.5 —<br />
\<br />
\<br />
I .<br />
o.<br />
Ging nam Cotton<br />
1 4<br />
—<br />
a<br />
3O.5<br />
—4<br />
Heavy Denim so cotton 14.16<br />
IGaoardtne 60 lk<br />
\ Jerse’60 S. :ber<br />
1 1<br />
—<br />
1 ( )<br />
-<br />
\<br />
i- \<br />
Wool silk<br />
Fber<br />
SE\<br />
Sik 50 sk 1 3<br />
Trcot 160 S. oeri 9<br />
Lgnt Nylon lao Cotton<br />
regulation dIa’<br />
\<br />
Z tension<br />
\<br />
Fabric Thread Needle oresser foot<br />
\ Ptiissure Srtcn ength<br />
\ Pressure of ttns Incica<br />
Lencttr<br />
Please note that me foIl owing list is a guide when sewing different fabrics.<br />
FABRIC THREAD NEEDLE TABLE
— !i5 —<br />
after stopping sewing.<br />
TO START <strong>SEWING</strong><br />
3. Sufficient fabric should be placed under needle before owering<br />
Attention<br />
Imoortant Hints<br />
4. Depress foot and start to se’i’<br />
1. Raise the take-up ever to its highest position before starttnQ na<br />
5. Test the machine stitches n a scrap of faric you clan to use,<br />
1. When turning the balaj,ce wneel manually, always turn t<br />
2.Guide the cloth gently with your hand.<br />
3. To Oreverit breaking needle always raise the needle out of the<br />
toward you.<br />
to your fabric.<br />
aalusttng the machine tar the length of stitch and tension suitaole<br />
presser foot.<br />
two or three stitches.<br />
2. Hold born threads about 10 cms tc the rear of machine to tne first<br />
fabric when you stop sewing.
macnine.<br />
about 3-4 orns.<br />
I .Sew to the eoge of seam.<br />
TO FiNISH SEAM<br />
2Push the reverse button and sew in reverse for<br />
3.Raise needle to its highest posItion<br />
— 17—<br />
5.Cut threads as shown on the threab cutter.<br />
4.Ltt presser foot ano pull ou the faonc to rear of
2 The zig-zag presser foot can be used for both straight arc zig-zag<br />
sewing.<br />
I <strong>This</strong> type of siticning is the one useO most treuentIy.<br />
—<br />
Satin stitching can be used for sewing initiats. patterns, appllque, etc.<br />
1L<br />
E<br />
zIQzaa width t3oStlon<br />
ZIGZAG <strong>SEWING</strong><br />
3.For sewing light fabric, use smaller stitch size. (Refer to cage 15 for diat<br />
setting).<br />
STRAIGHT STITCH
1 .Lower drop teed.<br />
BUTTON <strong>SEWING</strong><br />
4.Manually turn hand whee towards you ensuring that tne needle enters<br />
3.Ptace button between presser foot and fabric and lower resser foot.<br />
2. Place button attaching presser toot n position.<br />
5.Sew about 7 stitches.<br />
6.PuiI both threads to the underside arid tie together.<br />
(Increase or decreise width setting).<br />
into both ho’es of button without obstruction.<br />
— 19—
Select stralgnt stItch.<br />
ZIPPER <strong>SEWING</strong><br />
/<br />
— 20<br />
—<br />
sew as illustrated.<br />
of the needle.<br />
set the zipper loot on the left side<br />
2. To sew the right side of zipper<br />
set the zipper toot on the rigrlt<br />
side of the needle.<br />
1. To sew the left side of zipper<br />
arid place fabric under foot<br />
3. Fold the fabric about 2 cm<br />
arid attach firmly<br />
2. Place zipper foot in position<br />
preventing sewing cr1 zipper<br />
sew close to a raised edge<br />
1. ZIpper foot is designec to
— 21<br />
HEMMING Note. Hemmer foot can be purchased separately.<br />
1. Raise the foot and the needle to its highest position. Replace the foot with the<br />
2. Fold over the fabric edge by about 3mm and place it under the foot. Secure tne<br />
3. Lower the foot and sew the hem.<br />
4. Durning sewing, fold the fadric to the left a little and allow it to run into the<br />
5. Make sure that the facric does not move under the right half or the foot, The<br />
Only suitable materials can be used and some practice may be necessary to acneive<br />
best results.<br />
hemmer foot.<br />
folded edge with a few stitches. Take out the workplece and draw the hem<br />
into the hemmer foot by pulling the threads.<br />
hemmer foot.<br />
fabric must be fed into the scroll of the hemmer sutficently so that the work<br />
piece edge runs freely through the groove under the foot.<br />
—
I<br />
ThVIN NEEDLE<br />
Note: Twin needle can be purchased separately<br />
same oath as for normal sewing. Seøarate threads before last thread guide above the<br />
needle. Insert one thread into the right needle of twin needle.<br />
Insert other thread into the left needle of twiii needle.<br />
cause breaking of needle.<br />
emove regular needle and insert twin needle. Thread both threads througn me<br />
CAUTTON:Do not set stitch width wider than number 2 setting. Exceeding this will<br />
EMBROIDERY<br />
Lower feed dog and move hooped fabric slowly to form the desired effect.<br />
See Page 13 drop teed<br />
—22—
— 23 —<br />
QUILTER Note: Quilt guice can be purcnasei separately.<br />
SEAM GUIDE Note: Seam guide can be purchased separately.<br />
1. Use seam guide wnen sewing tong seam of regular distance from<br />
2. Set guide hole on bed, at right of needle fate, and adjust dis<br />
3.Run macrune with edge of material touching guide.<br />
tance from the needle to the guide for desired seam allowance.<br />
edge ci material.<br />
ISlide arm through hole on top of presser toot holder.<br />
2.Move guioe to regured stitch distance.<br />
-3
— 24 —<br />
4<br />
it<br />
(4)<br />
FIGURE (4).<br />
UNDER THE BUTTONHOLE FOOT.<br />
BU]TONHOLE <strong>SEWING</strong><br />
5. SET ZIGZAG WIDTH KNOB ON 5 THEN SEW 3-5 STITCHES AS FIGURE (3).<br />
6. SET THE STITCH LENGTH KNOB ABOUT 0.5. ZIGZAG WIDTh KNOB ON 2. NEEDLE POSITION KNOB ON<br />
4. SET STITCH LENGTh ABOUT 0.5. ZiGZAG WIDTh KNOB ABOUT 7 NEEDLE POSITION KNOB ON LEFT<br />
CENTER POSITION. THEN SEW 3-5 STITCHES AS FIGURE (1).,<br />
POSITION. THEN SEW AS FIGURE (2) UN11LL YOU REACHES ThE END OF THE MARKING.<br />
2. REMOVE THE REGULAR PRESSER FOOT AND ATTACH ThE BUTTONHOLE FOOT & PUT ThE FABRIC<br />
1.M.ARK WITH A PENCIL OR CHAU( THE EXACT LENGTH OF THE BUTTONHOLE ON THE FABRIC.<br />
7, REMOVE FABRIC FROM THE <strong>MACHINE</strong> AND OPEN ThE BUTTONHOLE WITH A BUTTONHOLE CUTTER<br />
3. SET THE STCH LENGTH KNOB ON 0’, ZIGZAG WIDTh KNOB ON 5 AND NEEDLE posrno KNOB ON<br />
RIGHT POSITION. PUSH ThE R BUTTON SEW UNTILL YOU REACHES THE END OF THE MARKING AS<br />
CR SEAM CUTTER.<br />
Before sewing fit bultonhole tool Cul outtonhole along centre ith<br />
as shown. cutter as shown.<br />
(1) (2)<br />
1r
— 25<br />
C<br />
• 3. Turn latch knob A as illustrated.<br />
2. TaKe OUt bOOOi case.<br />
o 1. Raise needle to its highest position.<br />
Open face cover and oil points<br />
MAINTENANCE (CLEANING AND OILING)<br />
indicated.<br />
Cleaning shuttle race<br />
(A Latcn knob<br />
(B) Shuttle race cover<br />
4. Take off sriuttle race cover.<br />
A 5. Take out snuttle hook.<br />
(C) Shuttle hook<br />
0 6. Clean anc oil snuttle race and hook.<br />
Nt<br />
Cleaning feed dog<br />
4. then replace in the reverse order.<br />
Open top cover and oil points indicatec.<br />
Oil points indicated on underside of bed base.<br />
—
Machine<br />
Stitch<br />
-<br />
-<br />
-<br />
- Incorrect<br />
- Needle<br />
-<br />
Tight<br />
. Needle<br />
. Nicks<br />
- Raise<br />
- ghbei<br />
*<br />
Fit<br />
-<br />
Correct<br />
Re-thread<br />
Ioosen<br />
Fit<br />
Replace<br />
-<br />
-<br />
-<br />
-<br />
CHECKING PER<strong>FOR</strong>MANCE PROBLEMS WHAT TO DO<br />
PROBLEM PROBABLE CAUSE CORRECTION<br />
Fabric not<br />
-<br />
moving<br />
-<br />
Feed dog down.<br />
not moving.<br />
length dial no positicn.<br />
Light pressure on presser loot.<br />
feed dog.<br />
etop mollon.<br />
oving dial to 1-4.<br />
Increase pressure on presser<br />
toot.<br />
Breaking Needle<br />
setting of needle. Reset needle.<br />
bent. .<br />
Pulling fabric.<br />
Incorrect use of needle, thread<br />
-<br />
new needle.<br />
Do not pull fabric.<br />
or fabric. or fabric.<br />
use of needle, thread<br />
Breaking Bobbin<br />
-<br />
Thread<br />
Improper threading.<br />
-<br />
upper thread tension.<br />
.<br />
bent.<br />
.<br />
or burrs on shuttle.<br />
-<br />
machine.<br />
upper thread tension.<br />
new needle.<br />
shuttle, or polish oil<br />
burrs completely.<br />
Machine Jamming<br />
No oil.<br />
Knocking Noise Dust and thread in shuttle.<br />
[leeds oiling<br />
Glean stmutlle.<br />
Tension too tight. -Reset.<br />
Adlust sewing loot pmessure<br />
Puckering Sewing toot pressure too strong<br />
Incorrect use of fabric, and<br />
thread, thread.<br />
Use correct fabric, needle and


